ONNX(Open Neural Network Exchange,开放神经网络交换)是为人工智能模型(深度学习和传统ML)提供的一种开放格式,可使模型在不同框架之间进行转移。详见 https://github.com/onnx/onnx
Alink提供了OnnxModelPredictBatchOp、OnnxModelPredictStreamOp和�OnnxModelPredictor组件,分别处理批式场景、流式场景和进行Pipeline封装。
��
各组件都需要指定 ONNX 模型的modelPath模型路径参数。模型路径可以是以下形式:
- 本地文件:
file://加绝对路径,例如file:///tmp/dnn.py; - Java 包中的资源文件:
res://加路径,例如res:///dnn.py; - http/https 文件:
http://或https://路径; - OSS 文件:
oss://加路径和 Endpoint 和 access key
等信息,例如oss://bucket/xxx/xxx/xxx.py?host=xxx&access_key_id=xxx&access_key_secret=xxx; - HDFS 文件:
hdfs://加路径;
参与模型预测的数据通过参数 selectedCols 设置,需要注意以下几点:
- ONNX 模型使用 input name 来标识模型输入桩的,因此需要设置
inputNames,与selectedCols一一对应,表明某列对应某输入桩。inputNames不填写时,默认与列名一致。 - 仅支持输入桩为
Tensor类型,不支持Sequences和Maps类型。 - 所选择的列的类型需要是
float, double, int, long, byte, string类型及其对应的 AlinkTensor类型。
模型输出信息通过参数 outputSchemaStr 指定,包括输出列名以及名称,需要注意以下几点:
- ONNX 模型使用 output name 来标识模型输出桩的,因此需要设置
outputNames,与outputSchemaStr一一对应,表明某列对应某输入桩。outputNames不填写时,默认与列名一致。 - 仅支持输出桩为
Tensor类型,不支持Sequences和Maps类型。 outputSchemaStr填写的输出类型需要是对应的输出桩类型,例如 输出桩类型 为 Float 类型的 Tensor 时,对应的 Alink 类型可以是TENSOR或者FLOAT_TENSOR,当输出仅包含一个元素时,还可以是FLOAT。
组件使用的是 ONNX 1.11.0 版本,当有 GPU 时,自动使用 GPU 进行推理,否则使用 CPU 进行推理。
25.7.1 批式任务中使用ONNX模型
使用OnnxModelPredictBatchOp组件,可以加载ONNX模型进行批式预测。关于该组件的详细说明参见Alink文档 https://www.yuque.com/pinshu/alink_doc/onnxmodelpredictbatchop .
使用ONNX模型前,还需要将输入数据列的类型转换为Tensor格式,可以使用VectorToTensorBatchOp组件。具体代码如下所示:
AkSourceBatchOp()\.setFilePath(Chap13_DATA_DIR + Chap13_DENSE_TEST_FILE)\.link(VectorToTensorBatchOp()\.setTensorDataType("float")\.setTensorShape([1, 1, 28, 28])\.setSelectedCol("vec")\.setOutputCol("tensor")\.setReservedCols(["label"]))\.link(OnnxModelPredictBatchOp()\.setModelPath("https://alink-release.oss-cn-beijing.aliyuncs.com/data-files/cnn_mnist_pytorch.onnx")\.setSelectedCols(["tensor"])\.setInputNames(["0"])\.setOutputNames(["21"])\.setOutputSchemaStr("probabilities FLOAT_TENSOR"))\.link(UDFBatchOp()\.setFunc(get_max_index)\.setSelectedCols(["probabilities"])\.setOutputCol("pred"))\.lazyPrint(3)\.link(EvalMultiClassBatchOp()\.setLabelCol("label")\.setPredictionCol("pred")\.lazyPrintMetrics())BatchOperator.execute()
这里用到了一个自定义函数,具体定义如下:
import numpy as np@udf(input_types=[AlinkDataTypes.TENSOR()], result_type=AlinkDataTypes.INT())def get_max_index(tensor: np.ndarray):return tensor.argmax().item()
批式任务的运行结果为:
-------------------------------- Metrics: --------------------------------Accuracy:0.9904 Macro F1:0.9904 Micro F1:0.9904 Kappa:0.9893|Pred\Real| 9| 8| 7|...| 2| 1| 0||---------|---|---|----|---|----|----|---|| 9|988| 3| 3|...| 0| 0| 0|| 8| 1|962| 0|...| 1| 0| 1|| 7| 6| 2|1014|...| 3| 0| 1|| ...|...|...| ...|...| ...| ...|...|| 2| 0| 2| 3|...|1021| 0| 0|| 1| 3| 0| 6|...| 3|1134| 0|| 0| 2| 4| 0|...| 1| 0|978|
25.7.2 流式任务中使用ONNX模型
使用OnnxModelPredictStreamOp组件,可以加载ONNX模型进行批式预测。关于该组件的详细说明参见Alink文档 https://www.yuque.com/pinshu/alink_doc/onnxmodelpredictstreamop .
使用ONNX模型前,还需要将输入数据列的类型转换为Tensor格式,可以使用VectorToTensorStreamOp组件。具体代码如下所示:
AkSourceStreamOp()\.setFilePath(Chap13_DATA_DIR + Chap13_DENSE_TEST_FILE)\.link(VectorToTensorStreamOp()\.setTensorDataType("float")\.setTensorShape([1, 1, 28, 28])\.setSelectedCol("vec")\.setOutputCol("tensor")\.setReservedCols(["label"]))\.link(OnnxModelPredictStreamOp()\.setModelPath("https://alink-release.oss-cn-beijing.aliyuncs.com/data-files/cnn_mnist_pytorch.onnx")\.setSelectedCols(["tensor"])\.setInputNames(["0"])\.setOutputNames(["21"])\.setOutputSchemaStr("probabilities FLOAT_TENSOR"))\.link(UDFStreamOp()\.setFunc(get_max_index)\.setSelectedCols(["probabilities"])\.setOutputCol("pred"))\.sample(0.001)\.print()StreamOperator.execute()
运行结果为: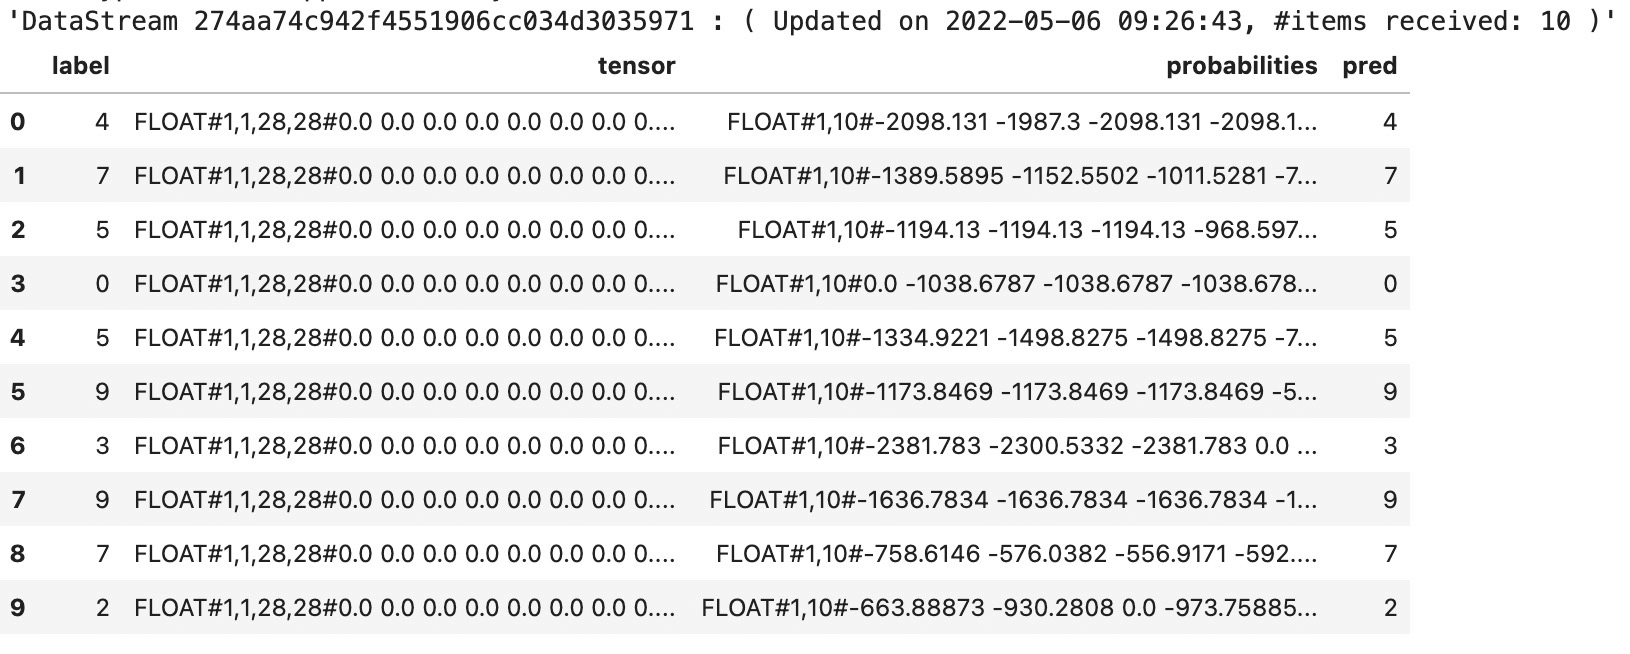
25.7.3 Pipeline中使用ONNX模型
学习了如何在批式任务和流式任务中使用ONNX模型,我们很容易在Pipeline中使用ONNX模型进行预测,只要将其中的批式/流式组件对应到Pipeline组件即可。具体代码如下:
PipelineModel(VectorToTensor()\.setTensorDataType("float")\.setTensorShape([1, 1, 28, 28])\.setSelectedCol("vec")\.setOutputCol("tensor")\.setReservedCols(["label"]),OnnxModelPredictor()\.setModelPath("https://alink-release.oss-cn-beijing.aliyuncs.com/data-files/cnn_mnist_pytorch.onnx")\.setSelectedCols(["tensor"])\.setInputNames(["0"])\.setOutputNames(["21"])\.setOutputSchemaStr("probabilities FLOAT_TENSOR")).save(Chap13_DATA_DIR + PIPELINE_ONNX_MODEL, True)BatchOperator.execute()PipelineModel\.load(Chap13_DATA_DIR + PIPELINE_ONNX_MODEL)\.transform(AkSourceStreamOp()\.setFilePath(Chap13_DATA_DIR + Chap13_DENSE_TEST_FILE))\.link(UDFStreamOp()\.setFunc(get_max_index)\.setSelectedCols(["probabilities"])\.setOutputCol("pred"))\.sample(0.001)\.print()StreamOperator.execute()
运行结果为: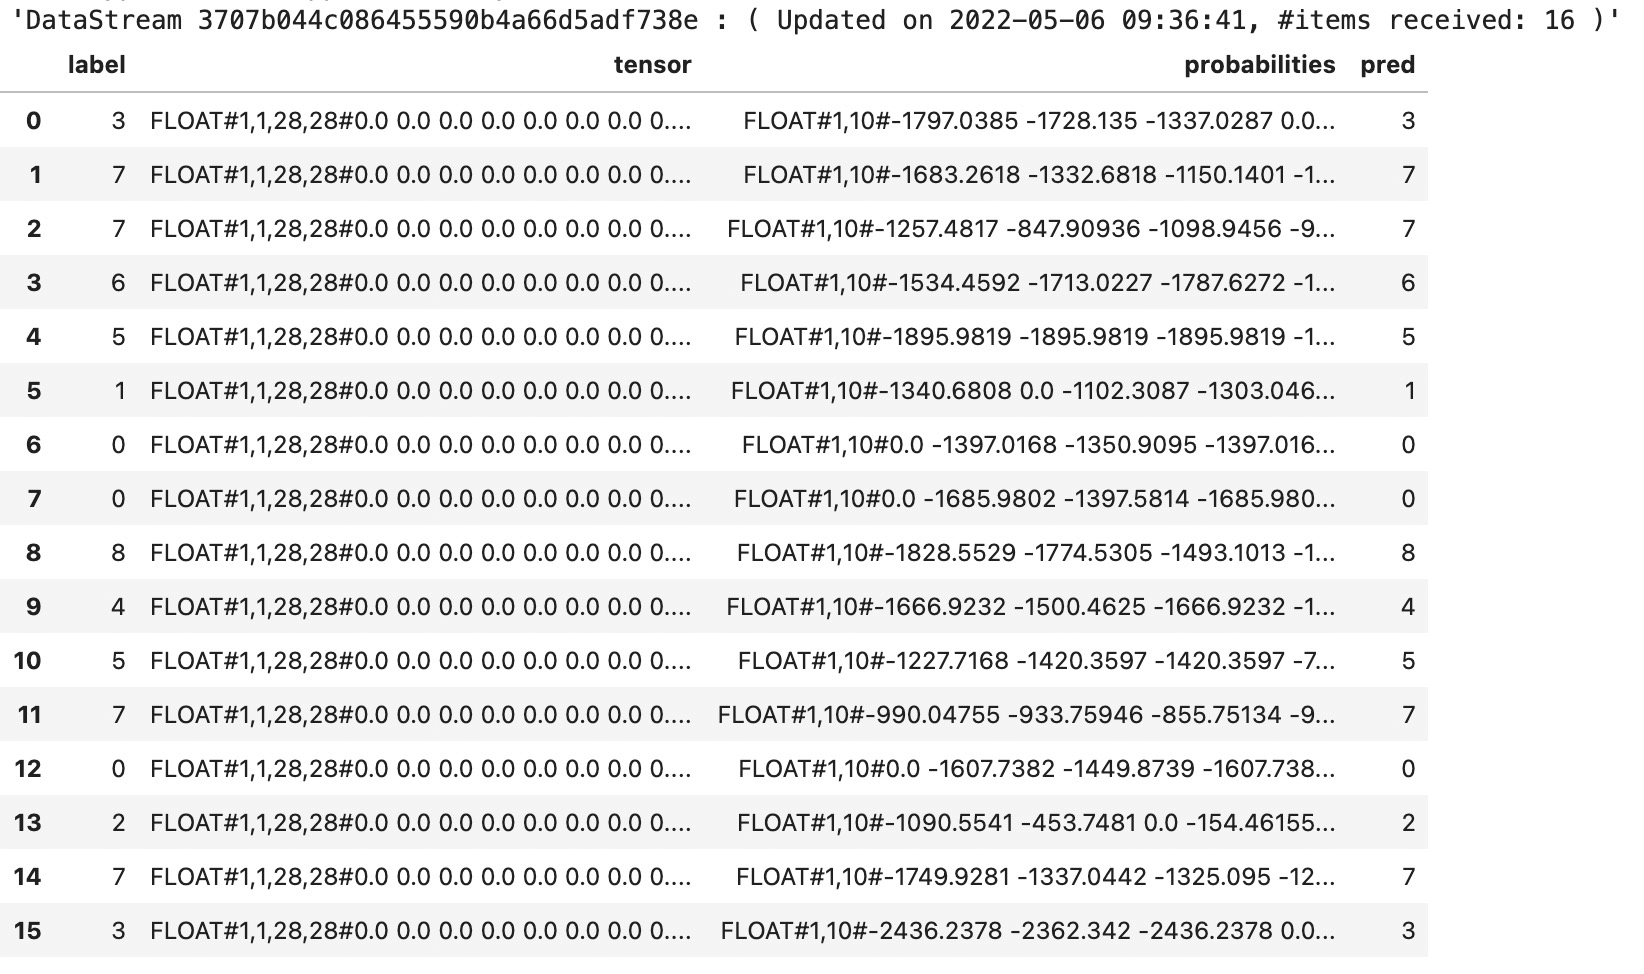
25.7.4 LocalPredictor中使用ONNX模型
除了通过Alink任务使用ONNX模型,也可以使用LocalPredictor进行嵌入式预测。示例代码如下,首先从数据集中抽取一行数据,输入数据的SchemaStr为“vec string, label int”;然后通过导入上一节保存的Pipeline模型,并设置输入数据的SchemaStr,得到LocalPredictor类型的实例localPredictor;如果不确定预测结果各列的含义,可以打印输出localPredictor的OutputSchema;使用localPredictor的map方法获得预测结果。
source = AkSourceBatchOp().setFilePath(Chap13_DATA_DIR + Chap13_DENSE_TEST_FILE)print(source.getSchemaStr())df = source.firstN(1).collectToDataframe()row = [df.iat[0,0], df.iat[0,1].item()]localPredictor = LocalPredictor(Chap13_DATA_DIR + PIPELINE_ONNX_MODEL, "vec string, label int")print(localPredictor.getOutputSchemaStr())r = localPredictor.map(row)print(str(r[0]) + " | " + str(r[2]))
运行结果为:
vec VARCHAR, label INTlabel INT, tensor ANY<com.alibaba.alink.common.linalg.tensor.FloatTensor>, probabilities ANY<com.alibaba.alink.common.linalg.tensor.FloatTensor>2 | FloatTensor(1,10)[[-1397.7644 -999.7633 0.0 ... -1533.649 -1142.1455 -1608.5127]]

若有收获,就点个赞吧
0 人点赞
