单例模式
应用:单例模式
饿汉式单例(线程安全)
特点:线程安全,相对于懒汉式单例,其开销相比高一点
//饿汉式单例class Person{//1.私有化类的构造器,使其在外部不能newprivate Person(){}//2.内部创建类的对象,要求此对象也必须声明为静态的—随着类的创建而创建,从创建到销毁只有一份private static Person instance = new Person();//3.提供公共的静态的方法,返回类的对象public static Person getInstance(){return instance;}}
懒汉式单例(线程不安全版本)
特点:使用的时候才去new;线程不安全,需要改造
class Person {//1.私有化类的构造器private Person(){}//2.声明当前类对象(由于第3步的getInstance也是static,故此对象也必须声明为static)private static Person instance = null;//3.声明public、static的返回当前类对象的方法public static Person getInstance(){if(instance == null){instance = new Person();}return instance;}}
懒汉式单例(线程非绝对安全版本)
class AppServiceProcessor{private AppServiceProcessor(){}private static AppServiceProcessor instance = null;public static AppServiceProcessor getInstance(){if(instance == null){synchronized (AppServiceProcessor.class) {if(instance == null){instance = new AppServiceProcessor();}}}return instance;}}
懒汉式单例(线程安全版本)=>加入volatile关键字
class AppServiceProcessor{private AppServiceProcessor(){}private static volatile AppServiceProcessor instance = null;public static AppServiceProcessor getInstance(){if(instance == null){synchronized (AppServiceProcessor.class) {if(instance == null){instance = new AppServiceProcessor();}}}return instance;}}
生产者/消费者问题
使用synchronized+lockObj.wait()+lockObj.notify()来实现
public class ProducerAndConsumer {static int count = 10;static Lock lock = new ReentrantLock();static Condition condition = lock.newCondition();public static void main(String[] args) {//消费者线程:小于0个就停止消费,否则一直消费Thread tdConsumer = new Thread() {@Overridepublic void run() {super.run();try {lock.lock();while (true) {if (count <= 0) {condition.signal();condition.await();} else {count--;System.out.println(" 消费一个,剩余" + count);}}} catch (InterruptedException e) {e.printStackTrace();} finally {lock.unlock();}}};tdConsumer.start();//生产着线程:大于10个就一直生产Thread tdProducer = new Thread() {@Overridepublic void run() {super.run();try {lock.lock();while (true) {if (count < 10) {count++;System.out.println("生产一个,剩余" + count);} else {condition.signal();condition.await();}}} catch (InterruptedException e) {e.printStackTrace();} finally {lock.unlock();}}};tdProducer.start();}}//效果消费一个,剩余9消费一个,剩余8消费一个,剩余7消费一个,剩余6消费一个,剩余5消费一个,剩余4消费一个,剩余3消费一个,剩余2消费一个,剩余1消费一个,剩余0生产一个,剩余1生产一个,剩余2生产一个,剩余3生产一个,剩余4生产一个,剩余5生产一个,剩余6生产一个,剩余7生产一个,剩余8生产一个,剩余9生产一个,剩余10
使用lock+ lockobj.await+ lockobj.signal来实现
需求:消费者线程小于0个就停止消费,阻塞并唤醒生产者线程生产,否则一直消费;生产者线程大于10个就一直生产,否则阻塞并唤醒消费者线程进行消费。
class Ecoco10ApplicationTests {private Object object = new Object();private int count = 0;@Testvoid TestThread() throws InterruptedException {//生产者线程Thread threadProducer = new Thread() {@SneakyThrows@Overridepublic void run() {while (true) {synchronized (object) {Thread.sleep(3000);if (count == 0) {count++;System.out.println("线程1进行了生产" + count);object.notify();//已经生产完了,通知被阻塞的消费线程}object.wait();//已经生产完了,阻塞当前线程并释放同步监视器}}}};//消费者线程Thread threadConsumer = new Thread() {@SneakyThrows@Overridepublic void run() {while (true) {synchronized (object) {Thread.sleep(3000);if (count > 0) {count--;System.out.println("线程2进行了消费" + count);object.notify();//已经消费完了,通知被阻塞的生产线程}object.wait();//已经消费完了,阻塞当前线程并释放同步监视器}}}};threadProducer.start();threadConsumer.start();Thread.sleep(50000);}}
使用阻塞队列来实现
//实现了生产者-消费者模式的类class MyProductorComsumer {//默认开启,进行生产消费//这里用到了volatile是为了保持数据的可见性,也就是当FLAG修改时,要马上通知其它线程进行修改private volatile boolean IS_PROD = true;//使用原子包装类,而不用number++private AtomicInteger atomicInteger = new AtomicInteger();//这里不能为了满足条件,而实例化一个具体的SynchronousBlockingQueueBlockingQueue<String> blockingQueue = null;//而应该采用依赖注入里面的,构造注入方法传入public MyResource(BlockingQueue<String> blockingQueue) {this.blockingQueue = blockingQueue;//查询出传入的class是什么System.out.println(blockingQueue.getClass().getName());}/*** 生产** @throws Exception*/public void myProd() throws Exception {String data = null;boolean retValue;//多线程环境的判断,一定要使用while进行,防止出现虚假唤醒//当FLAG为true的时候,开始生产while (IS_PROD) {data = atomicInteger.incrementAndGet() + "";//2秒生产一个数据retValue = blockingQueue.offer(data, 2L, TimeUnit.SECONDS);if (retValue) {System.out.println(Thread.currentThread().getName() + "\t 插入队列:" + data + "成功");} else {System.out.println(Thread.currentThread().getName() + "\t 插入队列:" + data + "失败");}try {TimeUnit.SECONDS.sleep(1);} catch (InterruptedException e) {e.printStackTrace();}}System.out.println(Thread.currentThread().getName() + "\t 停止生产,表示FLAG=false,生产介绍");}/*** 消费** @throws Exception*/public void myConsumer() throws Exception {String retValue;//多线程环境的判断,一定要使用while进行,防止出现虚假唤醒//当FLAG为true的时候,开始生产while (IS_PROD) {// 2秒存入1个dataretValue = blockingQueue.poll(2L, TimeUnit.SECONDS);if (retValue != null && retValue != "") {System.out.println(Thread.currentThread().getName() + "\t 消费队列:" + retValue + "成功");} else {IS_PROD = false;System.out.println(Thread.currentThread().getName() + "\t 消费失败,队列中已为空,退出");//退出消费队列return;}}}/*** 停止生产的判断*/public void stop() {this.IS_PROD = false;}}//使用处package com.fly.ecoco10;import java.util.concurrent.ArrayBlockingQueue;import java.util.concurrent.BlockingQueue;import java.util.concurrent.TimeUnit;import java.util.concurrent.atomic.AtomicInteger;public class BlockingQueueDemo {public static void main(String[] args) {//传入具体的实现类, ArrayBlockingQueueMyProductorComsumer myResource = new MyProductorComsumer(new ArrayBlockingQueue<>(10));new Thread(() -> {System.out.println(Thread.currentThread().getName() + "\t 生产线程启动");System.out.println("");System.out.println("");try {myResource.myProd();System.out.println("");System.out.println("");} catch (Exception e) {e.printStackTrace();}}, "prod").start();new Thread(() -> {System.out.println(Thread.currentThread().getName() + "\t 消费线程启动");try {myResource.myConsumer();} catch (Exception e) {e.printStackTrace();}}, "consumer").start();//5秒后,停止生产和消费try {TimeUnit.SECONDS.sleep(5);} catch (InterruptedException e) {e.printStackTrace();}System.out.println("");System.out.println("5秒中后,生产和消费线程停止,线程结束");myResource.stop();}}//效果java.util.concurrent.ArrayBlockingQueueprod 生产线程启动prod 插入队列:1成功consumer 消费线程启动consumer 消费队列:1成功prod 插入队列:2成功consumer 消费队列:2成功prod 插入队列:3成功consumer 消费队列:3成功prod 插入队列:4成功consumer 消费队列:4成功prod 插入队列:5成功consumer 消费队列:5成功prod 插入队列:6成功consumer 消费队列:6成功5秒中后,生产和消费线程停止,线程结束prod 停止生产,表示FLAG=false,生产介绍consumer 消费失败,队列中已为空,退出
集合类的线程安全问题
ArrayList
线程不安全写法
public class ListDemo {static ArrayList<Integer> arrayList = new ArrayList<>();public static void main(String[] args) {for (int i = 0; i < 10000; i++) {new Thread() {@Overridepublic void run() {super.run();arrayList.add(100);System.out.println(arrayList);}}.start();}}}//会出现的错误:Exception in thread "Thread-8605" java.util.ConcurrentModificationExceptionat java.util.ArrayList$Itr.checkForComodification(ArrayList.java:911)at java.util.ArrayList$Itr.next(ArrayList.java:861)at java.util.AbstractCollection.toString(AbstractCollection.java:461)at java.lang.String.valueOf(String.java:2994)at java.io.PrintStream.println(PrintStream.java:821)at ListDemo$1.run(ListDemo.java:17)
解决方案一:Vector
使用线程安全的Vector类,该方法在方法上加了锁。缺点是:方法加了锁,会导致并发性能下降。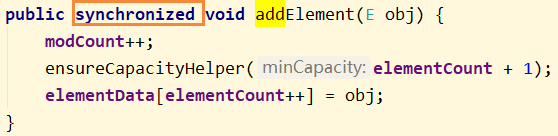
public class ListDemo {//static ArrayList<Integer> arrayList = new ArrayList<>();static Vector<Integer> arrayList = new Vector<>();public static void main(String[] args) {for (int i = 0; i < 10000; i++) {new Thread() {@Overridepublic void run() {super.run();arrayList.add(100);System.out.println(arrayList);}}.start();}}}//正常输出每次的值
解决方案二:使用Collections.synchronized()
public class ListDemo {//static ArrayList<Integer> arrayList = new ArrayList<>();//static Vector<Integer> arrayList = new Vector<>();static List<Integer> arrayList = Collections.synchronizedList(new ArrayList<>());public static void main(String[] args) {for (int i = 0; i < 10000; i++) {new Thread() {@Overridepublic void run() {super.run();arrayList.add(100);System.out.println(arrayList);}}.start();}}}//正常输出每次的值
解决方案三:使用JUC.CopyOnWriteArrayList类
CopyOnWriteArrayList:写时复制,主要是一种读写分离的思想。CopyOnWrite容器即写时复制的容器,往一个容器中添加元素的时候,不直接往当前容器Object[]添加,而是先将Object[]进行copy,复制出一个新的容器object[] newElements,然后新的容器Object[] newElements里添加原始,添加元素完后,在将原容器的引用指向新的容器 setArray(newElements);这样做的好处是可以对copyOnWrite容器进行并发的读 ,而不需要加锁,因为当前容器不需要添加任何元素。所以CopyOnWrite容器也是一种读写分离的思想,读和写使用不同的容器。
//该类底层的添加方法public boolean add(E e) {//首先加锁final ReentrantLock lock = this.lock;lock.lock();try {Object[] elements = getArray();int len = elements.length;//在末尾扩容一个单位Object[] newElements = Arrays.copyOf(elements, len + 1);newElements[len] = e;setArray(newElements);return true;} finally {lock.unlock();}}
改造后的方法
public class ListDemo {//static ArrayList<Integer> arrayList = new ArrayList<>();//static Vector<Integer> arrayList = new Vector<>();//static List<Integer> arrayList = Collections.synchronizedList(new ArrayList<>());static CopyOnWriteArrayList<Integer> arrayList=new CopyOnWriteArrayList();public static void main(String[] args) {for (int i = 0; i < 10000; i++) {new Thread() {@Overridepublic void run() {super.run();arrayList.add(100);System.out.println(arrayList);}}.start();}}}
HashSet
概述:HashSet在多线程情况下是线程不安全的。
解决方案:使用CopyOnWriteArraySet进行实例化,该类底层还是使用CopyOnWriteArrayList
public class ListDemo {static CopyOnWriteArraySet arraySet=new CopyOnWriteArraySet();public static void main(String[] args) {for (int i = 0; i < 10000; i++) {new Thread() {@Overridepublic void run() {super.run();for (int i = 0; i < 30; i++) {new Thread(() -> {arraySet.add(100);}, String.valueOf(i)).start();}}}.start();}}}
扩展:HashSet的底层结构就是HashMap,往HashSet添加数据,key即传入的值,value即object。
public class HashSet<E>{private static final Object PRESENT = new Object();public HashSet() {map = new HashMap<>();}//我们能发现但我们调用add的时候,存储一个值进入map中,只是作为key进行存储,而value存储的是一个Object类型的常量,也就是说HashSet只关心key,而不关心value。value也就是固定的static final new object值public boolean add(E e) {return map.put(e, PRESENT)==null;}}
HashMap
概述:HashMap在多线程环境下,也是不安全的。
public class ListDemo {static Map<String, String> map = new HashMap<>();public static void main(String[] args) {for (int i = 0; i < 10000; i++) {new Thread() {@Overridepublic void run() {super.run();for (int i = 0; i < 30; i++) {new Thread(() -> {map.put(Thread.currentThread().getName(), UUID.randomUUID().toString().substring(0, 8));System.out.println(map);}, String.valueOf(i)).start();}}}.start();}}}
解决方案
1、使用Map<String, String> map = Collections.synchronizedMap(new HashMap<>());
public class ListDemo {static Map<String, String> map = null;public static void main(String[] args) {//实例化线程安全版本的Map<Key,Value>map= Collections.synchronizedMap(new HashMap<>());for (int i = 0; i < 10000; i++) {new Thread() {@Overridepublic void run() {super.run();for (int i = 0; i < 30; i++) {new Thread(() -> {map.put(Thread.currentThread().getName(), UUID.randomUUID().toString().substring(0, 8));System.out.println(map);}, String.valueOf(i)).start();}}}.start();}}}
2、使用 ConcurrentHashMap
public class ListDemo {static ConcurrentHashMap map=new ConcurrentHashMap();public static void main(String[] args) {for (int i = 0; i < 10000; i++) {new Thread() {@Overridepublic void run() {super.run();for (int i = 0; i < 30; i++) {new Thread(() -> {map.put(Thread.currentThread().getName(), UUID.randomUUID().toString().substring(0, 8));System.out.println(map);}, String.valueOf(i)).start();}}}.start();}}}

若有收获,就点个赞吧
0 人点赞
