编写网络应用程序时,因为数据在网络中传输的都是二进制字节码数据,在发送数据时就需要编码,接收数据时就需要解码
codec(编码器)的组成部分有两个:decoder(解码器) 和 encoder(编码器),encoder负责把业务数据转换成字节码数据,decoder负责把字节码数据转换成业务数据
编解码器都实现了ChannelInboundHandler或者ChannelOutboundHandler接口
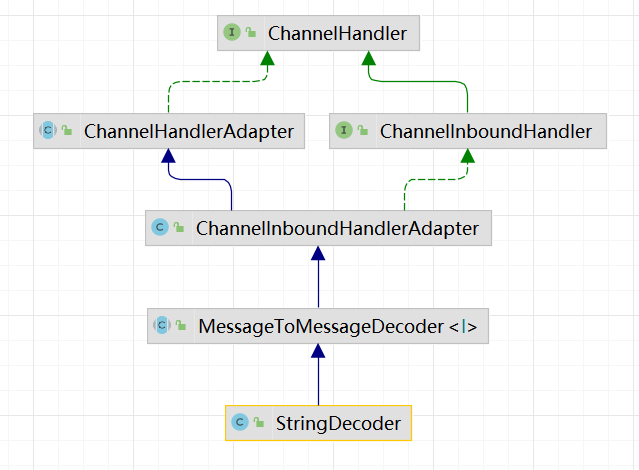
StringDecoder继承关系
编码器与解码器需要放置在自定义业务处理Handler之前,当进行解码操作时(服务端收到数据),对PipeLine相当于入栈操作;进行编码操作时,对PipeLine相当于出栈操作
编码器与解码器顺序一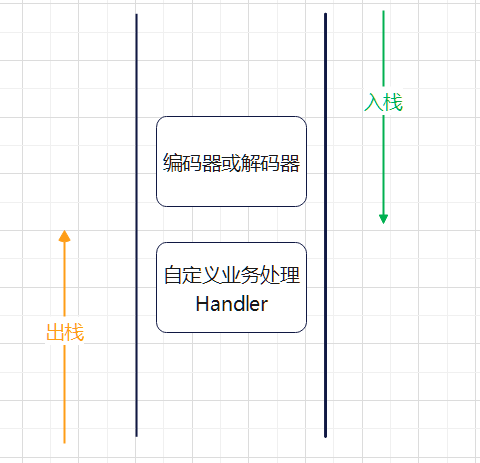
调用顺序二
不论解码器handler还是编码器handler,接收的消息类型必须与待处理的消息类型一致,否则该handler不会被执行;在解码器进行数据解码时,需要判断缓存区(ByteBuf)的数据是否足够,否则接收到的结果会期望结果可能不一致
常用编码器与解码器:
数据编解码器:StringEnvoder 对字符串编码StringDecoder 对字符串解码ObjectEncoder 只能对Java对象进行编码ObjectDecoder 只能对Java对象进行解码HttpServerCodec Http服务编码&解码器(将消息解析为HttpRequest和HttpContent两个部分)特殊编&解码器:LineBasedFrameDecoder 使用行位控制符(\n或者\r\n)作为分割符来解码数据DelimiterBasedFrameDecoder 使用自定义特殊字符作为消息分割符来解码数据LengthFieldBasedFrameDecoder 指定长度来标识整包信息达到自动处理粘包和半包问题数据包较大时:ZlibDecoder 压缩编码器(数据较大时可以在发送时进行压缩,服务端需要指定对应压缩解码器)ZlibEncoder 压缩解码器传输服务编解码器:Protobuf 谷歌编码解码器,支持非Java对象编码解码,适合PRC数据交换服务
HTTP编解码器:
使用 HttpServerCodec 对请求数据进行解析,请求数据将会被 HttpServerCodec 解析为 HttpRequest(请求头)和HttpContent(请求体)两个部分,最后使用 DefaultFullHttpResponse 返回结果,源码地址
package http.coder;import io.netty.bootstrap.ServerBootstrap;import io.netty.buffer.ByteBuf;import io.netty.channel.*;import io.netty.channel.nio.NioEventLoopGroup;import io.netty.channel.socket.SocketChannel;import io.netty.channel.socket.nio.NioServerSocketChannel;import io.netty.handler.codec.FixedLengthFrameDecoder;import io.netty.handler.codec.http.*;import io.netty.util.CharsetUtil;import java.nio.charset.StandardCharsets;import static io.netty.handler.codec.http.HttpHeaderNames.CONTENT_LENGTH;/* Http编解码器使用案例 - 服务端 */public class HttpCoderServer {public static void main(String[] args) throws Exception{EventLoopGroup bossGroup = new NioEventLoopGroup(1);EventLoopGroup workerGroup = new NioEventLoopGroup();try {ServerBootstrap serverBootstrap = new ServerBootstrap();serverBootstrap.group(bossGroup,workerGroup).channel(NioServerSocketChannel.class).childHandler(new ChannelInitializer<SocketChannel>() {@Overrideprotected void initChannel(SocketChannel ch) throws Exception {ChannelPipeline pipeline = ch.pipeline();pipeline.addLast(new HttpServerCodec()); //将消息分为HttpRequest请求头和HttpContent请求体两部分/* 只处理请求头数据 */pipeline.addLast(new SimpleChannelInboundHandler<HttpRequest>() {@Overrideprotected void channelRead0(ChannelHandlerContext ctx, HttpRequest msg) throws Exception {System.out.println("请求头内容为: "+msg);}});/* 只处理请求体数据 */pipeline.addLast(new SimpleChannelInboundHandler<HttpContent>() {@Overrideprotected void channelRead0(ChannelHandlerContext ctx, HttpContent msg) throws Exception {ByteBuf buf = msg.content();String s = buf.toString(CharsetUtil.UTF_8);System.out.println("请求体内容为: "+s);/* 返回响应结果 */DefaultFullHttpResponse response = new DefaultFullHttpResponse(HttpVersion.HTTP_1_0, HttpResponseStatus.OK);byte[] info = "数据已接收".getBytes(StandardCharsets.UTF_8);response.content().writeBytes(info); //设置返回内容response.headers().setInt(CONTENT_LENGTH,info.length); //设置返回内容长度ctx.writeAndFlush(response);}});}});ChannelFuture channelFuture = serverBootstrap.bind(7000).sync();channelFuture.channel().closeFuture().sync();}finally {bossGroup.shutdownGracefully();workerGroup.shutdownGracefully();}}}
使用PostMan进行数据发送测试,服务端成功收到消息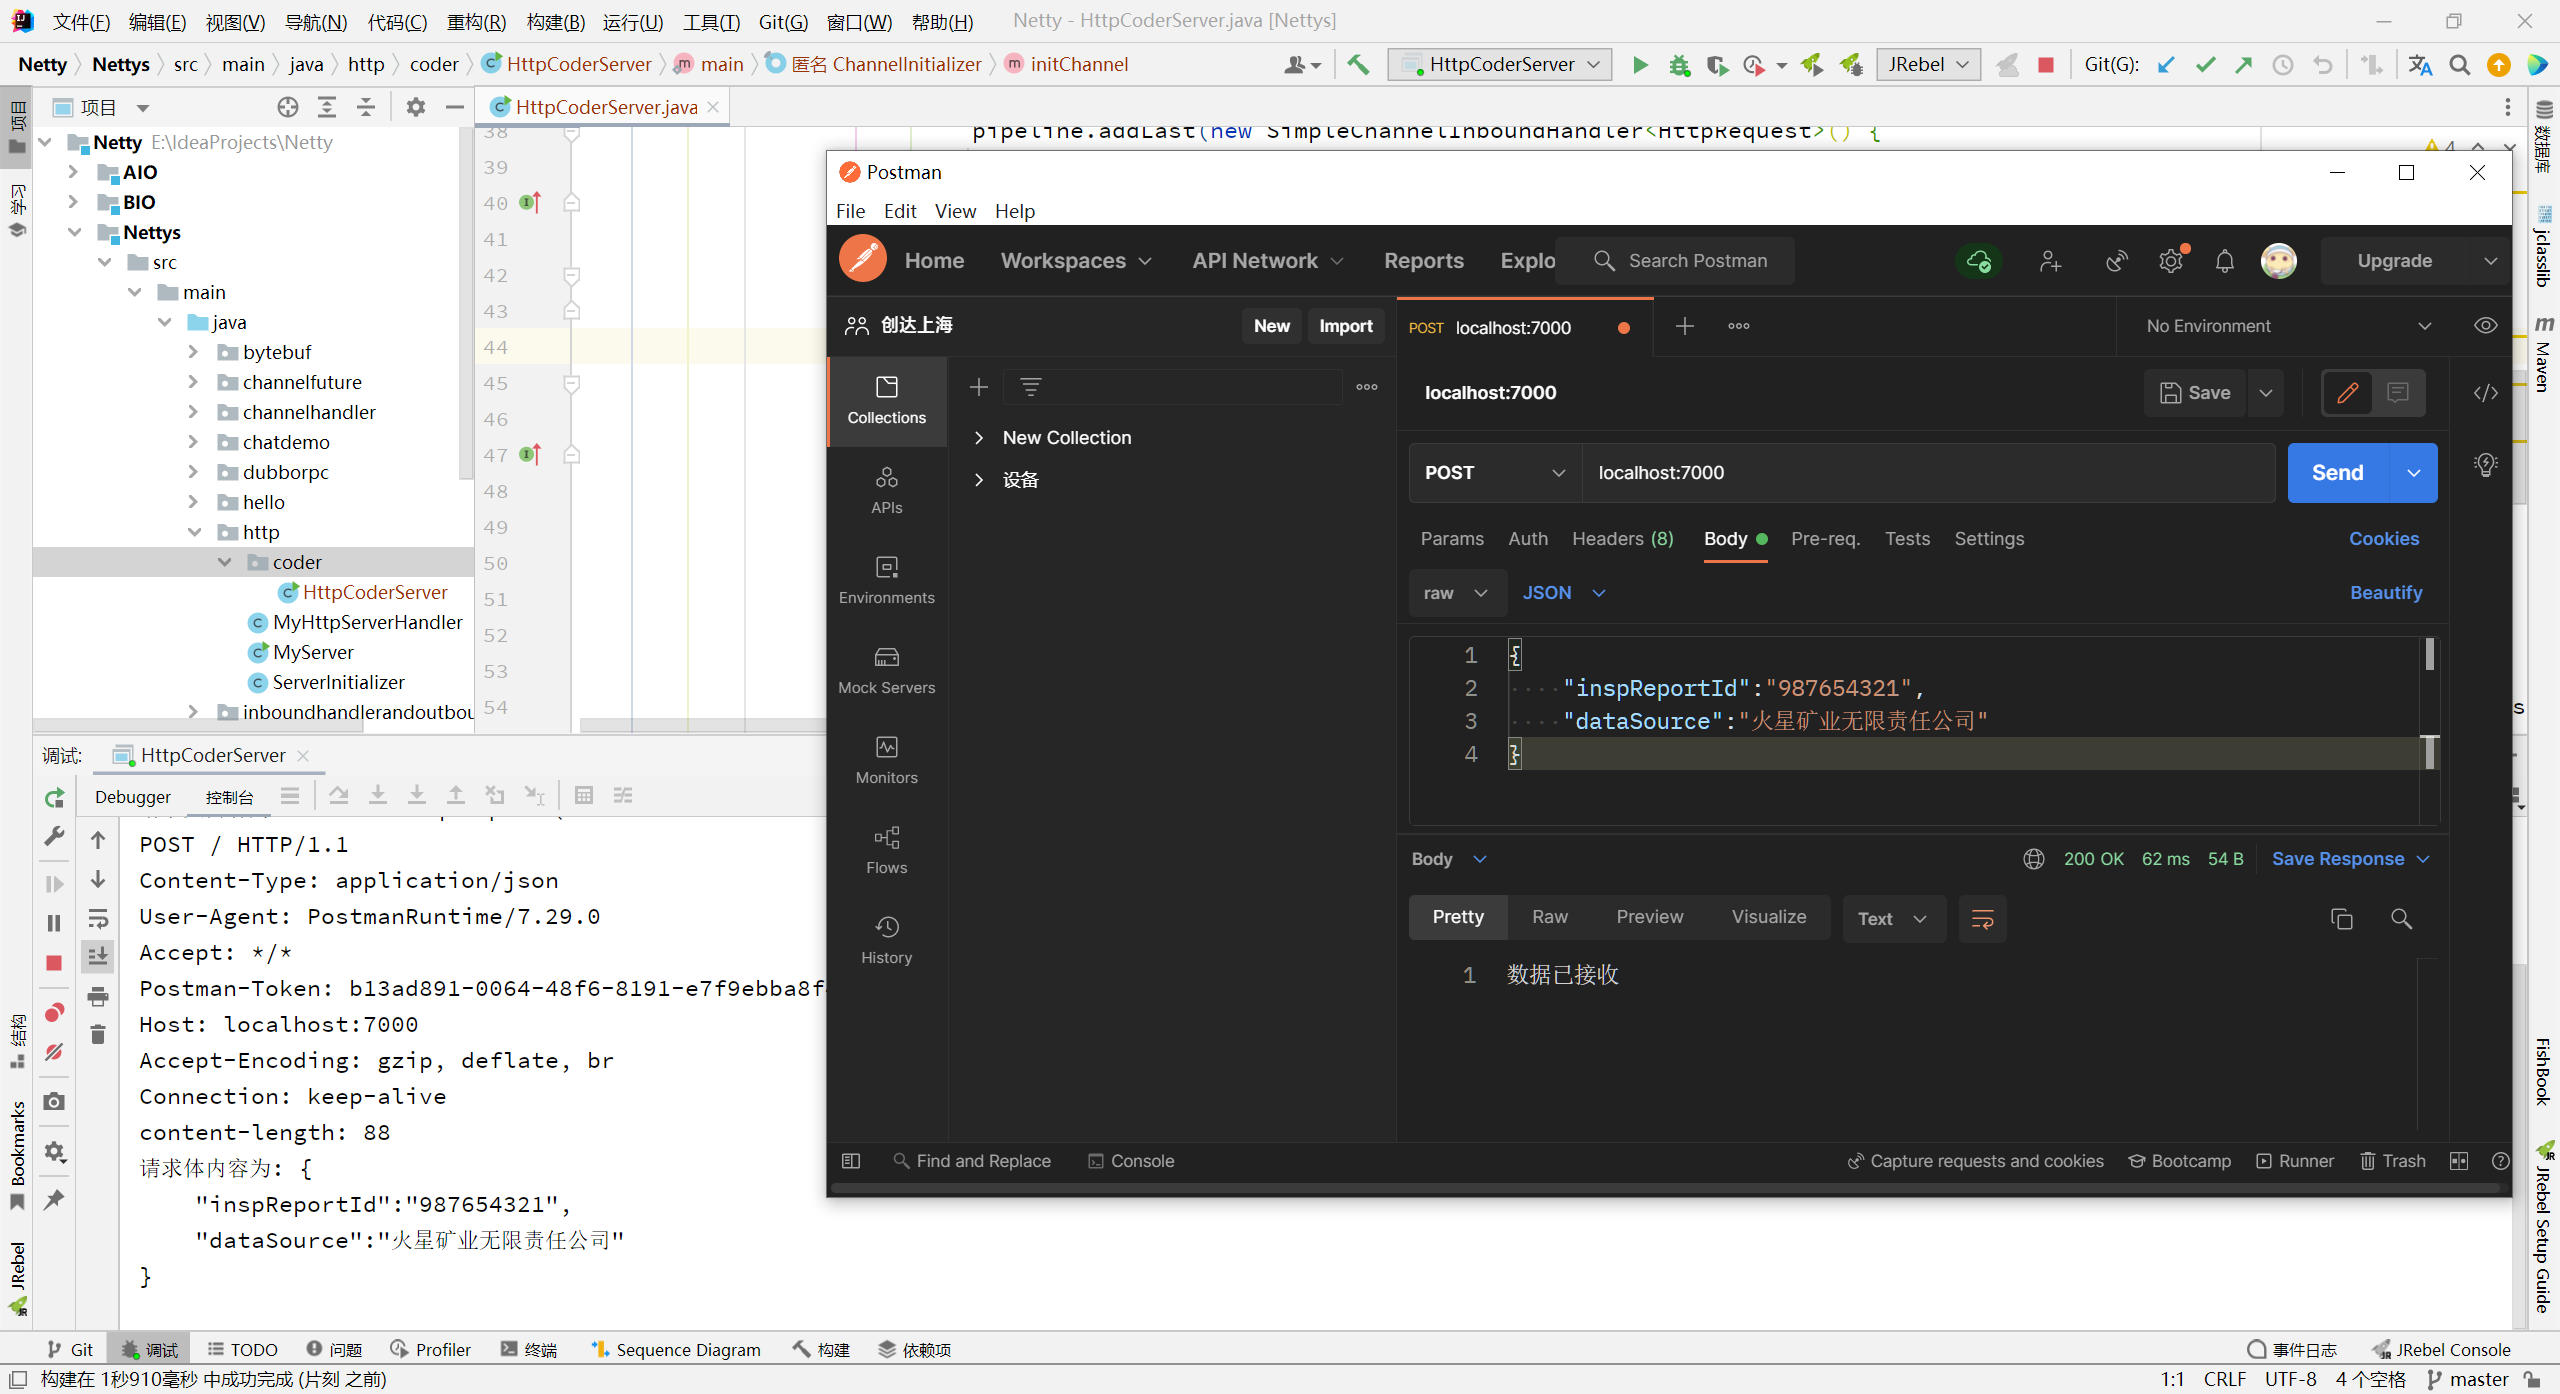
实体类数据传输:
Netty 默认只能使用 byte 类型进行数据传输,当对象为实体类时无法直接通过强转进行解析,需要使用第三方编解码器进行操作后才能使用,常用方案有以下两种:
JBoss编解码器:
引入依赖:
<!-- Netty Java序列化框架marshalling --><dependency><groupId>org.jboss.marshalling</groupId><artifactId>jboss-marshalling</artifactId><version>1.3.0.CR9</version></dependency><dependency><groupId>org.jboss.marshalling</groupId><artifactId>jboss-marshalling-serial</artifactId><version>1.3.0.CR9</version></dependency>
JBoss解码器:
package jboss;import io.netty.handler.codec.marshalling.*;import org.jboss.marshalling.MarshallerFactory;import org.jboss.marshalling.Marshalling;import org.jboss.marshalling.MarshallingConfiguration;/*** Marshalling工厂,Java实体类编解码器*/public final class MarshallingCodeCFactory {/*** 创建Jboss Marshalling解码器MarshallingDecoder* @return MarshallingDecoder*/public static MarshallingDecoder buildMarshallingDecoder() {//首先通过Marshalling工具类的精通方法获取Marshalling实例对象 参数serial标识创建的是java序列化工厂对象。final MarshallerFactory marshallerFactory = Marshalling.getProvidedMarshallerFactory("serial");//创建了MarshallingConfiguration对象,配置了版本号为5final MarshallingConfiguration configuration = new MarshallingConfiguration();configuration.setVersion(5);//根据marshallerFactory和configuration创建providerUnmarshallerProvider provider = new DefaultUnmarshallerProvider(marshallerFactory, configuration);//构建Netty的MarshallingDecoder对象,俩个参数分别为provider和单个消息序列化后的最大长度MarshallingDecoder decoder = new MarshallingDecoder(provider, 1024 * 1024 * 1);return decoder;}/*** 创建Jboss Marshalling编码器MarshallingEncoder* @return MarshallingEncoder*/public static MarshallingEncoder buildMarshallingEncoder() {final MarshallerFactory marshallerFactory = Marshalling.getProvidedMarshallerFactory("serial");final MarshallingConfiguration configuration = new MarshallingConfiguration();configuration.setVersion(5);MarshallerProvider provider = new DefaultMarshallerProvider(marshallerFactory, configuration);//构建Netty的MarshallingEncoder对象,MarshallingEncoder用于实现序列化接口的POJO对象序列化为二进制数组MarshallingEncoder encoder = new MarshallingEncoder(provider);return encoder;}}
实体类:
package jboss;import lombok.Data;import lombok.experimental.Accessors;import java.io.Serializable;/* Netty 传输数据实体类 */@Data@Accessors(chain = true)public class TranslatorData implements Serializable {private String id;private String name;private String message; //传输消息具体内容}
服务端:
package jboss;import io.netty.bootstrap.ServerBootstrap;import io.netty.channel.*;import io.netty.channel.nio.NioEventLoopGroup;import io.netty.channel.socket.SocketChannel;import io.netty.channel.socket.nio.NioServerSocketChannel;import io.netty.handler.codec.string.StringDecoder;/* Jboss解析实体类-Netty服务端 */public class NettyServer {public static void main(String[] args) throws InterruptedException {EventLoopGroup bossGroup = new NioEventLoopGroup();EventLoopGroup workGroup = new NioEventLoopGroup();//启动器,负责组装Netty组件进行启动服务器ServerBootstrap bootstrap = new ServerBootstrap();try {bootstrap.group(bossGroup,workGroup).channel(NioServerSocketChannel.class).option(ChannelOption.SO_BACKLOG,1024).childHandler(new ChannelInitializer<SocketChannel>() {//连接建立后开始执行@Overrideprotected void initChannel(SocketChannel ch) throws Exception {ChannelPipeline pipeline = ch.pipeline();//添加Java实体类编解码器pipeline.addLast(MarshallingCodeCFactory.buildMarshallingEncoder());pipeline.addLast(MarshallingCodeCFactory.buildMarshallingDecoder());//自定义Handler,通常实现子类ChannelInboundHandlerAdapter或SimpleChannelInboundHandler<参数>进行实现pipeline.addLast(new ChannelInboundHandlerAdapter(){//当有读事件时执行@Overridepublic void channelRead(ChannelHandlerContext ctx, Object msg) throws Exception {TranslatorData info = (TranslatorData) msg;System.out.println("ID:"+info.getId()+",名称:"+info.getName()+",消息:"+info.getMessage());//创建新数据TranslatorData response = new TranslatorData();response.setId("resp: " + info.getId());response.setName("resp: " + info.getName());response.setMessage("resp: " + info.getMessage());//返回数据ctx.writeAndFlush(response);}});}});System.out.println("服务器 is ready .....");//启动服务器绑定一个端口并且同步,生成一个 ChannelFuture 对象ChannelFuture future = bootstrap.bind(8765).sync();//对关闭通道进行监听(当有关闭通道的消息时才进行监听)future.channel().closeFuture().sync();}finally {bossGroup.shutdownGracefully();workGroup.shutdownGracefully();}}}
客户端:
package jboss;import io.netty.bootstrap.Bootstrap;import io.netty.channel.*;import io.netty.channel.nio.NioEventLoopGroup;import io.netty.channel.socket.SocketChannel;import io.netty.channel.socket.nio.NioSocketChannel;import io.netty.handler.logging.LogLevel;import io.netty.handler.logging.LoggingHandler;import io.netty.util.ReferenceCountUtil;/* Jboss解析实体类-Netty客户端 */public class NettyClient {public static void main(String[] args) {EventLoopGroup workGroup = new NioEventLoopGroup();Bootstrap bootstrap = new Bootstrap();try {bootstrap.group(workGroup).channel(NioSocketChannel.class)//表示缓存区动态调配(自适应).option(ChannelOption.RCVBUF_ALLOCATOR, AdaptiveRecvByteBufAllocator.DEFAULT).handler(new LoggingHandler(LogLevel.INFO)).handler(new ChannelInitializer<SocketChannel>() {@Overrideprotected void initChannel(SocketChannel sc) throws Exception {ChannelPipeline pipeline = sc.pipeline();//添加Java实体类编解码器pipeline.addLast(MarshallingCodeCFactory.buildMarshallingEncoder());pipeline.addLast(MarshallingCodeCFactory.buildMarshallingDecoder());//添加自定义处理器pipeline.addLast(new ChannelInboundHandlerAdapter(){@Overridepublic void channelRead(ChannelHandlerContext ctx, Object msg) throws Exception {TranslatorData response = (TranslatorData)msg;System.out.println("Client端: id= " + response.getId() + ", name= " + response.getName() + ", message= " + response.getMessage());}});}});//绑定端口,同步等等请求连接ChannelFuture future = bootstrap.connect("127.0.0.1", 8765).sync();Channel channel = future.channel();System.out.println("客户端尝试连接....");/*模拟数据发送*/for(int i =0; i <10; i++){TranslatorData request = new TranslatorData();request.setId("" + i);request.setName("请求消息名称 " + i);request.setMessage("请求消息内容 " + i);channel.writeAndFlush(request);}} catch (InterruptedException e) {e.printStackTrace();}}}
测试:

Protobuf:
传统的数据传输是使用 Http + JSON 的方式,引入Netty后可以使用 TCP + Protobuf 的方式进行数据交互。需要将类定义为 protobuf 的 .proto 格式,protobuf会在编译阶段生成它能识别的Java对象进行传输使用。生成的文件将包含外部类和内部类,实现数据推送的为内部类数据,支持跨平台发送数据
客户端需要添加Proto编码器,服务端需要proto解码器
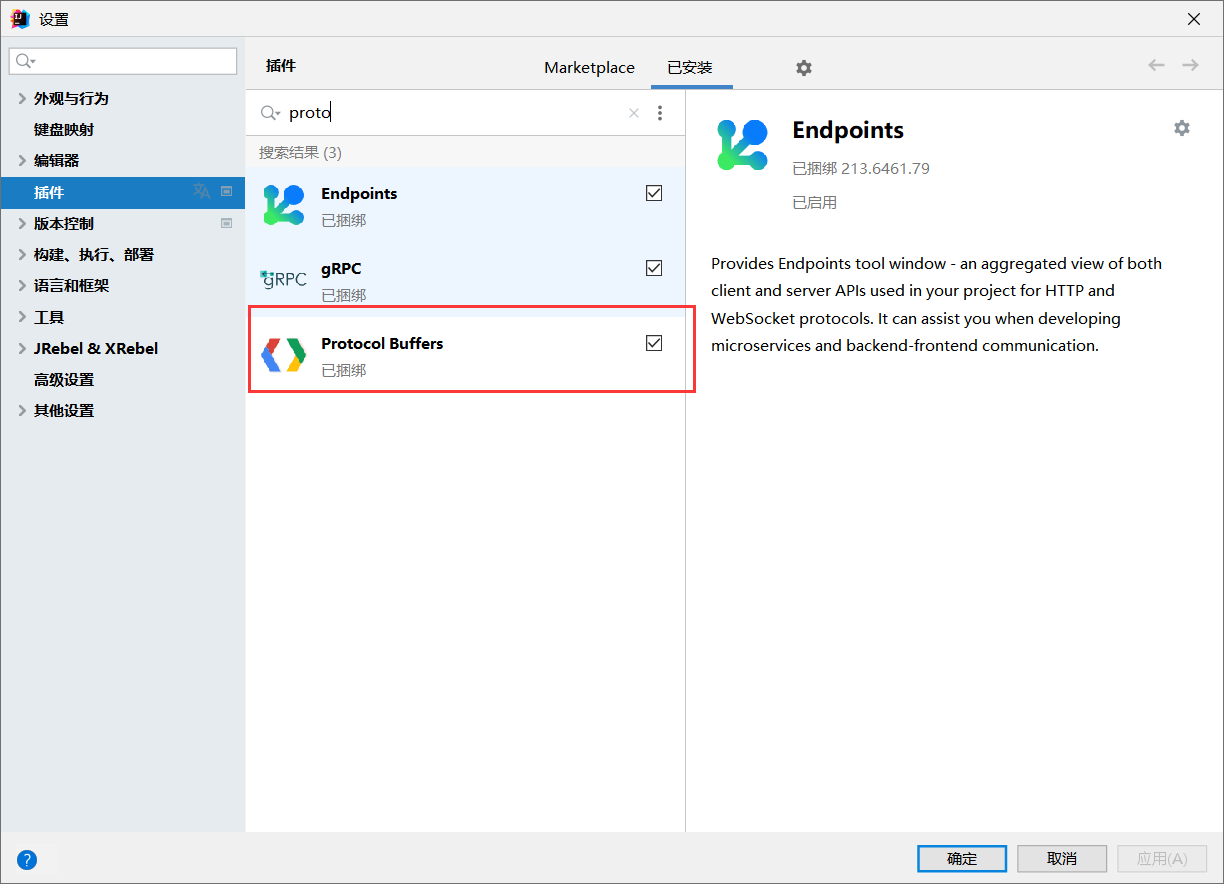
IDEA 对应插件
使用ProtoBuf需要先添加依赖:
<dependency><groupId>com.google.protobuf</groupId><artifactId>protobuf-java</artifactId><version>3.19.3</version></dependency>
单数据类型发送:
客户端与服务端都使用同一个实体类进行交互,源码地址
1、创建Protobuf传输对象
创建一个文件名为 StudentPOJO 的 proto 文件
syntax = "proto3"; //指定Protobuf版本option java_outer_classname = "StudentPOJO"; //文件名,同时也是外部类名//真正发送的实体类对象,内部参数需要参照 protobyf官方语言指南message Student{int32 id = 1; //相当于 private int id ,1相当于属性序号string name = 2;}
2、编译文件
访问 GitHub下载 Proto-3.19.3-win 资源包,解压后对刚才编写的 proto 文件进行编译,编译后放入项目中
protoc.exe --java_out=. 文件名.proto
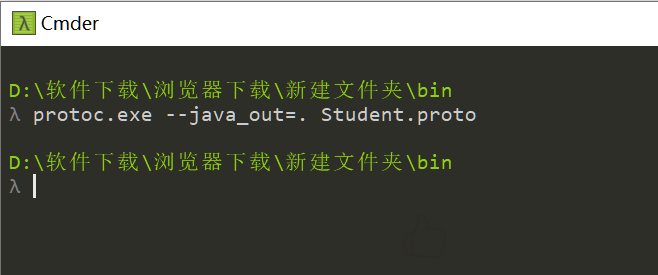<br />** 编译proto文件为Java文件**
3、创建客户端与服务端
客户端添加上 protobuf 的编码器,服务端添加上 protobuf 的解码器即可
客户端:
package protobuf;import io.netty.bootstrap.Bootstrap;import io.netty.channel.ChannelFuture;import io.netty.channel.ChannelInitializer;import io.netty.channel.ChannelPipeline;import io.netty.channel.EventLoopGroup;import io.netty.channel.nio.NioEventLoopGroup;import io.netty.channel.socket.SocketChannel;import io.netty.channel.socket.nio.NioSocketChannel;import io.netty.handler.codec.protobuf.ProtobufEncoder;/* 客户端代码 */public class NettyClient {public static void main(String[] args) throws Exception {//客户端需要一个事件循环组EventLoopGroup group = new NioEventLoopGroup();try {//客户端启动对象,客户端使用的是 Bootstrap 而不是 ServerBootstrapBootstrap bootstrap = new Bootstrap();//设置相关参数bootstrap.group(group) //设置线程组.channel(NioSocketChannel.class) //设置客户端通道的实现类.handler(new ChannelInitializer<SocketChannel>() {@Overrideprotected void initChannel(SocketChannel ch) throws Exception {ChannelPipeline pipeline = ch.pipeline();pipeline.addLast("proEncoder",new ProtobufEncoder()); //自定义处理器pipeline.addLast(new NettyClientHandler()); //自定义处理器}});System.out.println("客户端 ok...");//启动客户端并连接到服务端ChannelFuture channelFuture = bootstrap.connect("127.0.0.1", 6666).sync();//给关闭通道进行监听(关闭通道事件发生后触发)channelFuture.channel().closeFuture().sync();} finally {group.shutdownGracefully();}}}
客户端Handler:
package protobuf;import io.netty.buffer.ByteBuf;import io.netty.buffer.Unpooled;import io.netty.channel.ChannelHandlerContext;import io.netty.channel.ChannelInboundHandlerAdapter;import io.netty.util.CharsetUtil;import java.nio.charset.StandardCharsets;/* 自定义管道 Handler */public class NettyClientHandler extends ChannelInboundHandlerAdapter {/* 当通道就绪就会触发该方法* 利用ProtoBuf发送数据* */@Overridepublic void channelActive(ChannelHandlerContext ctx) throws Exception {StudentPOJO.Student student = StudentPOJO.Student.newBuilder().setId(10).setName("小明同学").build();System.out.println("客户端发送Proto数据");ctx.writeAndFlush(student);}/*当通道有读取数据事件时触发* 参数一: ChannelHandlerContext 上下文对象,含有管道 PipeLine、通道* 参数二: Object 客户端发送的数据,默认是Object需要转换*/@Overridepublic void channelRead(ChannelHandlerContext ctx, Object msg) throws Exception {ByteBuf buf = (ByteBuf) msg;System.out.println("服务器回复的消息: "+buf.toString(CharsetUtil.UTF_8));System.out.println("服务器的地址: "+ctx.channel().remoteAddress());}/* 异常发生时触发 */@Overridepublic void exceptionCaught(ChannelHandlerContext ctx, Throwable cause) throws Exception {cause.printStackTrace();ctx.close();}}
服务端:
package protobuf;import io.netty.bootstrap.ServerBootstrap;import io.netty.channel.*;import io.netty.channel.nio.NioEventLoopGroup;import io.netty.channel.socket.SocketChannel;import io.netty.channel.socket.nio.NioServerSocketChannel;import io.netty.handler.codec.protobuf.ProtobufDecoder;/* 服务端代码 */public class NettyServer {public static void main(String[] args) throws InterruptedException {/* 创建 BossGroup 和 WorkerGroup 线程组* BossGroup 只处理连接请求,真正的和客户端业务处理会交给 WorkGrouop 完成* bossGroup 和 workerGroup 含有的子线程的个数默认为 CPU最大线程数 X 2,可以手动指定*/EventLoopGroup bossGroup = new NioEventLoopGroup(1); //创建子线程的个数为1的 bossGroupEventLoopGroup workerGroup = new NioEventLoopGroup(8); //创建子线程的个数为8的 workerGrouptry {//创建服务器端的启动对象,配置参数ServerBootstrap bootstrap = new ServerBootstrap();//使用链式参数配置启动参数bootstrap.group(bossGroup,workerGroup) //设置两个线程组.channel(NioServerSocketChannel.class) //使用 NioSocketChannel 作为服务器通道实现.option(ChannelOption.SO_BACKLOG,120) //设置线程队列等待连接的个数.childOption(ChannelOption.SO_KEEPALIVE,true) //保持活动连接状态.childHandler(new ChannelInitializer<SocketChannel>() { //创建一个通道初始化对象//给PipeLine设置处理器@Overrideprotected void initChannel(SocketChannel ch) throws Exception {ChannelPipeline pipeline = ch.pipeline();//指定ProtoBuf解码器对哪种对象进行解码pipeline.addLast("proDecoder",new ProtobufDecoder(StudentPOJO.Student.getDefaultInstance()));pipeline.addLast(new NettyServerHandler()); //将自定义处理器加入到PipeLine}}); //给 WorkerGroup 的 EventLoop 对应的管道设置处理器System.out.println("服务器 is ready .....");//启动服务器绑定一个端口并且同步,生成一个 ChannelFuture 对象ChannelFuture cf = bootstrap.bind(6666).sync();//给CF注册监听器,监控关心的事件cf.addListener(new ChannelFutureListener() {@Overridepublic void operationComplete(ChannelFuture channelFuture) throws Exception {if(cf.isSuccess()){System.out.println("监听端口成功");}else{System.out.println("监听端口失败");}}});//对关闭通道进行监听(当有关闭通道的消息时才进行监听)cf.channel().closeFuture().sync();} finally {bossGroup.shutdownGracefully(); //关闭资源workerGroup.shutdownGracefully(); //关闭}}}
服务端Handler:
package protobuf;import io.netty.buffer.Unpooled;import io.netty.channel.ChannelHandlerContext;import io.netty.channel.ChannelInboundHandlerAdapter;import java.nio.charset.StandardCharsets;import java.time.LocalDateTime;import java.util.concurrent.TimeUnit;/** 自定义管道 Handler */public class NettyServerHandler extends ChannelInboundHandlerAdapter {/*当有读取事件时该方法将被触发*/@Overridepublic void channelRead(ChannelHandlerContext ctx, Object msg) throws Exception {//读取从客户端发送的StudentPojo.StudentStudentPOJO.Student student = (StudentPOJO.Student) msg;System.out.println("客户端发送的数据 id="+student.getId()+" 名称: "+student.getName());}/* 数据读取完毕后触发* 参数一: ChannelHandlerContext 上下文对象,含有管道 PipeLine、通道*/@Overridepublic void channelReadComplete(ChannelHandlerContext ctx) throws Exception {//对发送数据进行编码后写入到缓存并刷新ctx.writeAndFlush(Unpooled.copiedBuffer("服务端连接成功,欢迎!"+LocalDateTime.now(),StandardCharsets.UTF_8));}/* 处理异常,一般为关闭通道 */@Overridepublic void exceptionCaught(ChannelHandlerContext ctx, Throwable cause) throws Exception {ctx.close(); //和 ctx.channel().close() 是一个意思}}
测试:
服务端接收并解码客户端发送的Protobuf封装数据
多数据类型发送:
客户端可能发送不同的实体类对象,服务端不同实体类对象的业务操作逻辑也不相同
相较于单数据类型发送,需要再proto文件上添加枚举类来控制具体选择的 Java 对象
源码地址
1、创建ProtoBuf传输对象
创建一个文件名为 StudentPOJO 的 proto 文件
syntax = "proto3";option optimize_for = SPEED; //加快解析option java_package = "protobuf.morepojo"; //指定生成到哪个包下option java_outer_classname = "MyStudentInfo"; //文件名,同时也是外部类名//真正发送的实体类对象,内部参数需要参照 protobyf官方语言指南//protobuf 可以使用 message 管理其他的messagemessage MyMessage{//定义一个枚举类型,根据枚举类型的值来判断取要取哪个对象实例enum DataType{StudentType = 0; //在proto3要求enum内值的编号从0开始TeacherType = 1;}DataType data_type = 1; //将枚举值定义为属性,利用data_type判断实际传的是哪个枚举类型,每个属性的编号在proto中必须是唯一的//oneof表示实际调用dataBody时,只能选择其中的一个进行操作oneof dataBody{Student student = 2;Teacher teacher = 3;}}message Student{int32 id = 1; //相当于 private int id , 1相当于属性序号string name = 2;}message Teacher{string name = 1;int32 age = 2;}
2、编译文件
访问 GitHub下载 Proto-3.19.3-win 资源包,解压后对刚才编写的 proto 文件进行编译,编译后放入项目中
protoc.exe --java_out=. 文件名.proto
<br />** 编译proto文件为Java文件**
3、创建客户端和服务端
客户端代码和服务端代码与单数据类型发送案例中一致,只有Handler不同
客户端Handler:
package protobuf.morepojo;import io.netty.buffer.Unpooled;import io.netty.channel.ChannelHandlerContext;import io.netty.channel.ChannelInboundHandlerAdapter;import io.netty.channel.SimpleChannelInboundHandler;import protobuf.StudentPOJO;import java.nio.charset.StandardCharsets;import java.time.LocalDateTime;/** 自定义管道 Handler* 继承父类ChannelInboundHandlerAdapter的区别就是读取事件发生时的方法中的msg不会被指定成具体的类型* */public class NettyServerHandler extends SimpleChannelInboundHandler<MyStudentInfo.MyMessage> {/*当有读取事件时该方法将被触发*/@Overrideprotected void channelRead0(ChannelHandlerContext ctx, MyStudentInfo.MyMessage msg) throws Exception {//根据dataType来显示不同的信息MyStudentInfo.MyMessage.DataType dataType = msg.getDataType();if(dataType == MyStudentInfo.MyMessage.DataType.StudentType){MyStudentInfo.Student student = msg.getStudent();System.out.println("获取到的学生信息: "+student.getName()+" id: "+student.getId());}else if(dataType == MyStudentInfo.MyMessage.DataType.TeacherType){MyStudentInfo.Teacher teacher = msg.getTeacher();System.out.println("获取到的教师信息: "+teacher.getName()+" 年龄: "+teacher.getAge());}else{System.out.println("传输的类型不正确");}}/* 数据读取完毕后触发* 参数一: ChannelHandlerContext 上下文对象,含有管道 PipeLine、通道*/@Overridepublic void channelReadComplete(ChannelHandlerContext ctx) throws Exception {//对发送数据进行编码后写入到缓存并刷新ctx.writeAndFlush(Unpooled.copiedBuffer("服务端连接成功,欢迎!"+LocalDateTime.now(),StandardCharsets.UTF_8));}/* 处理异常,一般为关闭通道 */@Overridepublic void exceptionCaught(ChannelHandlerContext ctx, Throwable cause) throws Exception {ctx.close(); //和 ctx.channel().close() 是一个意思}}
客户端Handler:
package protobuf.morepojo;import io.netty.buffer.ByteBuf;import io.netty.channel.ChannelHandlerContext;import io.netty.channel.ChannelInboundHandlerAdapter;import io.netty.util.CharsetUtil;import protobuf.StudentPOJO;import java.util.Random;/* 自定义管道 Handler */public class NettyClientHandler extends ChannelInboundHandlerAdapter {/* 当通道就绪就会触发该方法* 利用ProtoBuf发送数据* */@Overridepublic void channelActive(ChannelHandlerContext ctx) throws Exception {/* 随机发送Student或Teacher对象*/int random = new Random().nextInt(3);MyStudentInfo.MyMessage myMessage= null;if(random%2==0){myMessage = MyStudentInfo.MyMessage.newBuilder().setDataType(MyStudentInfo.MyMessage.DataType.StudentType).setStudent(MyStudentInfo.MyMessage.newBuilder().getStudentBuilder().setId(998).setName("马超").build()).build();}else{myMessage = MyStudentInfo.MyMessage.newBuilder().setDataType(MyStudentInfo.MyMessage.DataType.StudentType).setTeacher(MyStudentInfo.MyMessage.newBuilder().getTeacherBuilder().setAge(25).setName("诸葛老师")).build();}ctx.writeAndFlush(myMessage);}/*当通道有读取数据事件时触发* 参数一: ChannelHandlerContext 上下文对象,含有管道 PipeLine、通道* 参数二: Object 客户端发送的数据,默认是Object需要转换*/@Overridepublic void channelRead(ChannelHandlerContext ctx, Object msg) throws Exception {ByteBuf buf = (ByteBuf) msg;System.out.println("服务器回复的消息: "+buf.toString(CharsetUtil.UTF_8));System.out.println("服务器的地址: "+ctx.channel().remoteAddress());}/* 异常发生时触发 */@Overridepublic void exceptionCaught(ChannelHandlerContext ctx, Throwable cause) throws Exception {cause.printStackTrace();ctx.close();}}
测试:
服务端成功获取到客户端随机发送的数据
自定义编码器与解码器:
可以继承 ByteToMessageDecoder 或者 ReplayingDecode 实现自定义解码器。ByteToMessageDecoder 不会对消息进行拆分;ReplayingDecode 会自动对数据进行拆分,但需要指定参数,参数代表用户状态管理的类型,参数为void时代表不需要状态管理
通过继承 MessageToByteEncoder<数据类型> 实现自定义编码器,数据类型为channel中msg数据的类型
通过继承 ByteToMessageCodec<数据类型> 实现自定义编/解码器,数据类型为channel中msg数据的类型
ReplayingDecoder缺点:
1、并不是所有的ByteBuf操作都被支持,如果调用了一个不被支持的方法,将会抛出一个UnsupportedOperationException.
2、ReplayingDecoder在某些情况下可能稍慢于其父类ByteToMessageDecoder,例如网络缓慢并且消息格
式复杂时,消息会被拆成了多个碎片,速度变慢
案例:
使用自定义编码器与解码器对数据进行操作
自定义解码器:
package inboundhandlerandoutboundhandler;import io.netty.buffer.ByteBuf;import io.netty.channel.ChannelHandlerContext;import io.netty.handler.codec.ReplayingDecoder;import java.util.List;/* 自定义解码器,参数代表用户状态管理的类型,其中void代表不需要状态管理 */public class MyByteToLongDecoder extends ReplayingDecoder<Void> {/* decode会根据接收的数据被调用多次,直到确定没有新的元素被泰诺健爱到List或者是ByteBuf没有更多的可读字节为止* @param ctx: 上下文对象* @param in: 入栈的ByteBuf* @param out: List集合,将解码后的数据传给下一个ChannelInboundHandler进行处理,该处理器方法也会被调用多次*/@Overrideprotected void decode(ChannelHandlerContext ctx, ByteBuf in, List<Object> out) throws Exception {System.out.println("MyByteToLongDecoder方法被调用");out.add(in.readLong());}}
自定义编码器:
package inboundhandlerandoutboundhandler;import io.netty.buffer.ByteBuf;import io.netty.channel.ChannelHandlerContext;import io.netty.handler.codec.MessageToByteEncoder;/* 自定义编码器 */public class MyLongToByteEncoder extends MessageToByteEncoder<Long> {//编码方法@Overrideprotected void encode(ChannelHandlerContext ctx, Long msg, ByteBuf out) throws Exception {System.out.println("MyLongToByteEncoder的Encode方法被调用");System.out.println("编码后的Msg=" + msg);out.writeLong(msg);}}
服务端:
package inboundhandlerandoutboundhandler;import io.netty.bootstrap.ServerBootstrap;import io.netty.channel.ChannelFuture;import io.netty.channel.ChannelInitializer;import io.netty.channel.ChannelPipeline;import io.netty.channel.EventLoopGroup;import io.netty.channel.nio.NioEventLoopGroup;import io.netty.channel.socket.SocketChannel;import io.netty.channel.socket.nio.NioServerSocketChannel;public class MyServer {public static void main(String[] args) throws Exception{EventLoopGroup bossGroup = new NioEventLoopGroup(1);EventLoopGroup workerGroup = new NioEventLoopGroup();try {ServerBootstrap serverBootstrap = new ServerBootstrap();serverBootstrap.group(bossGroup,workerGroup).channel(NioServerSocketChannel.class).childHandler(new ChannelInitializer<SocketChannel>() {@Overrideprotected void initChannel(SocketChannel ch) throws Exception {ChannelPipeline pipeline = ch.pipeline();pipeline.addLast(new MyByteToLongDecoder()); //入站的handler进行解码 MyByteToLongDecoderpipeline.addLast(new MyLongToByteEncoder()); //出站的handler进行编码pipeline.addLast(new MyServerHandler()); //自定义的handler 处理业务逻辑}});ChannelFuture channelFuture = serverBootstrap.bind(7000).sync();channelFuture.channel().closeFuture().sync();}finally {bossGroup.shutdownGracefully();workerGroup.shutdownGracefully();}}}
服务端Handler:
package inboundhandlerandoutboundhandler;import io.netty.channel.ChannelHandlerContext;import io.netty.channel.SimpleChannelInboundHandler;/* 自定义服务端Handler */public class MyServerHandler extends SimpleChannelInboundHandler<Long> {@Overrideprotected void channelRead0(ChannelHandlerContext ctx, Long msg) throws Exception {System.out.println("从客户端" + ctx.channel().remoteAddress() + " 读取到long " + msg);}/* 数据读取完毕后触发 */@Overridepublic void channelReadComplete(ChannelHandlerContext ctx) throws Exception {System.out.println("全部接收完毕,开始返回指定数据给客户端");ctx.writeAndFlush(98765L); //给客户端返回数据}/* 当有异常的触发 */@Overridepublic void exceptionCaught(ChannelHandlerContext ctx, Throwable cause) throws Exception {cause.printStackTrace();ctx.close();}}
客户端:
package inboundhandlerandoutboundhandler;import io.netty.bootstrap.Bootstrap;import io.netty.channel.ChannelFuture;import io.netty.channel.ChannelInitializer;import io.netty.channel.ChannelPipeline;import io.netty.channel.EventLoopGroup;import io.netty.channel.nio.NioEventLoopGroup;import io.netty.channel.socket.SocketChannel;import io.netty.channel.socket.nio.NioSocketChannel;public class MyClient {public static void main(String[] args) throws Exception{EventLoopGroup group = new NioEventLoopGroup();try {Bootstrap bootstrap = new Bootstrap();bootstrap.group(group).channel(NioSocketChannel.class).handler(new ChannelInitializer<SocketChannel>() {@Overrideprotected void initChannel(SocketChannel ch) throws Exception {ChannelPipeline pipeline = ch.pipeline();pipeline.addLast(new MyLongToByteEncoder()); //加入一个出站的handler 对数据进行一个编码pipeline.addLast(new MyByteToLongDecoder()); //这时一个入站的解码器(入站handler )pipeline.addLast(new MyClientHandler()); //加入一个自定义的handler处理业务}});ChannelFuture channelFuture = bootstrap.connect("localhost", 7000).sync();channelFuture.channel().closeFuture().sync();}finally {group.shutdownGracefully();}}}
客户端Handler:
package inboundhandlerandoutboundhandler;import io.netty.buffer.Unpooled;import io.netty.channel.ChannelHandlerContext;import io.netty.channel.SimpleChannelInboundHandler;import io.netty.util.CharsetUtil;/* 自定义客户端Handler */public class MyClientHandler extends SimpleChannelInboundHandler<Long> {@Overrideprotected void channelRead0(ChannelHandlerContext ctx, Long msg) throws Exception {System.out.println("收到服务器消息=" + msg);}@Overridepublic void channelActive(ChannelHandlerContext ctx) throws Exception {System.out.println("MyClientHandler 发送数据");//ctx.writeAndFlush(123456L); //发送的是一个longctx.writeAndFlush(Unpooled.copiedBuffer("abcdefghijklmnop", CharsetUtil.UTF_8));}}
测试:
启动客户端与服务端,客户端将消息编码后发送给服务端,服务端收到消息后解码进行输出;服务端收到全部消息后返回数据到编码器,编码器编码后再传递给客户端
客户端与服务端成功使用自定义编码器与解码器

