在Nio中,服务端在创建时通常会有以下操作:
ServerSocketChannel serverSocketChannel = ServerSocketChannel.open();serverSocketChannel.bind(new InetSocketAddress(666)); //绑定端口Selector selector = Selector.open(); //创建选择器serverSocketChannel.configureBlocking(false); //设置非阻塞模式serverSocketChannel.register(selector, SelectionKey.OP_ACCEPT); //注册到选择器,监听连接事件
在Netty中仅需要使用bind命令即可实现之前在Nio中的复杂操作,以HelloService案例为例,其对应代码如下图所示: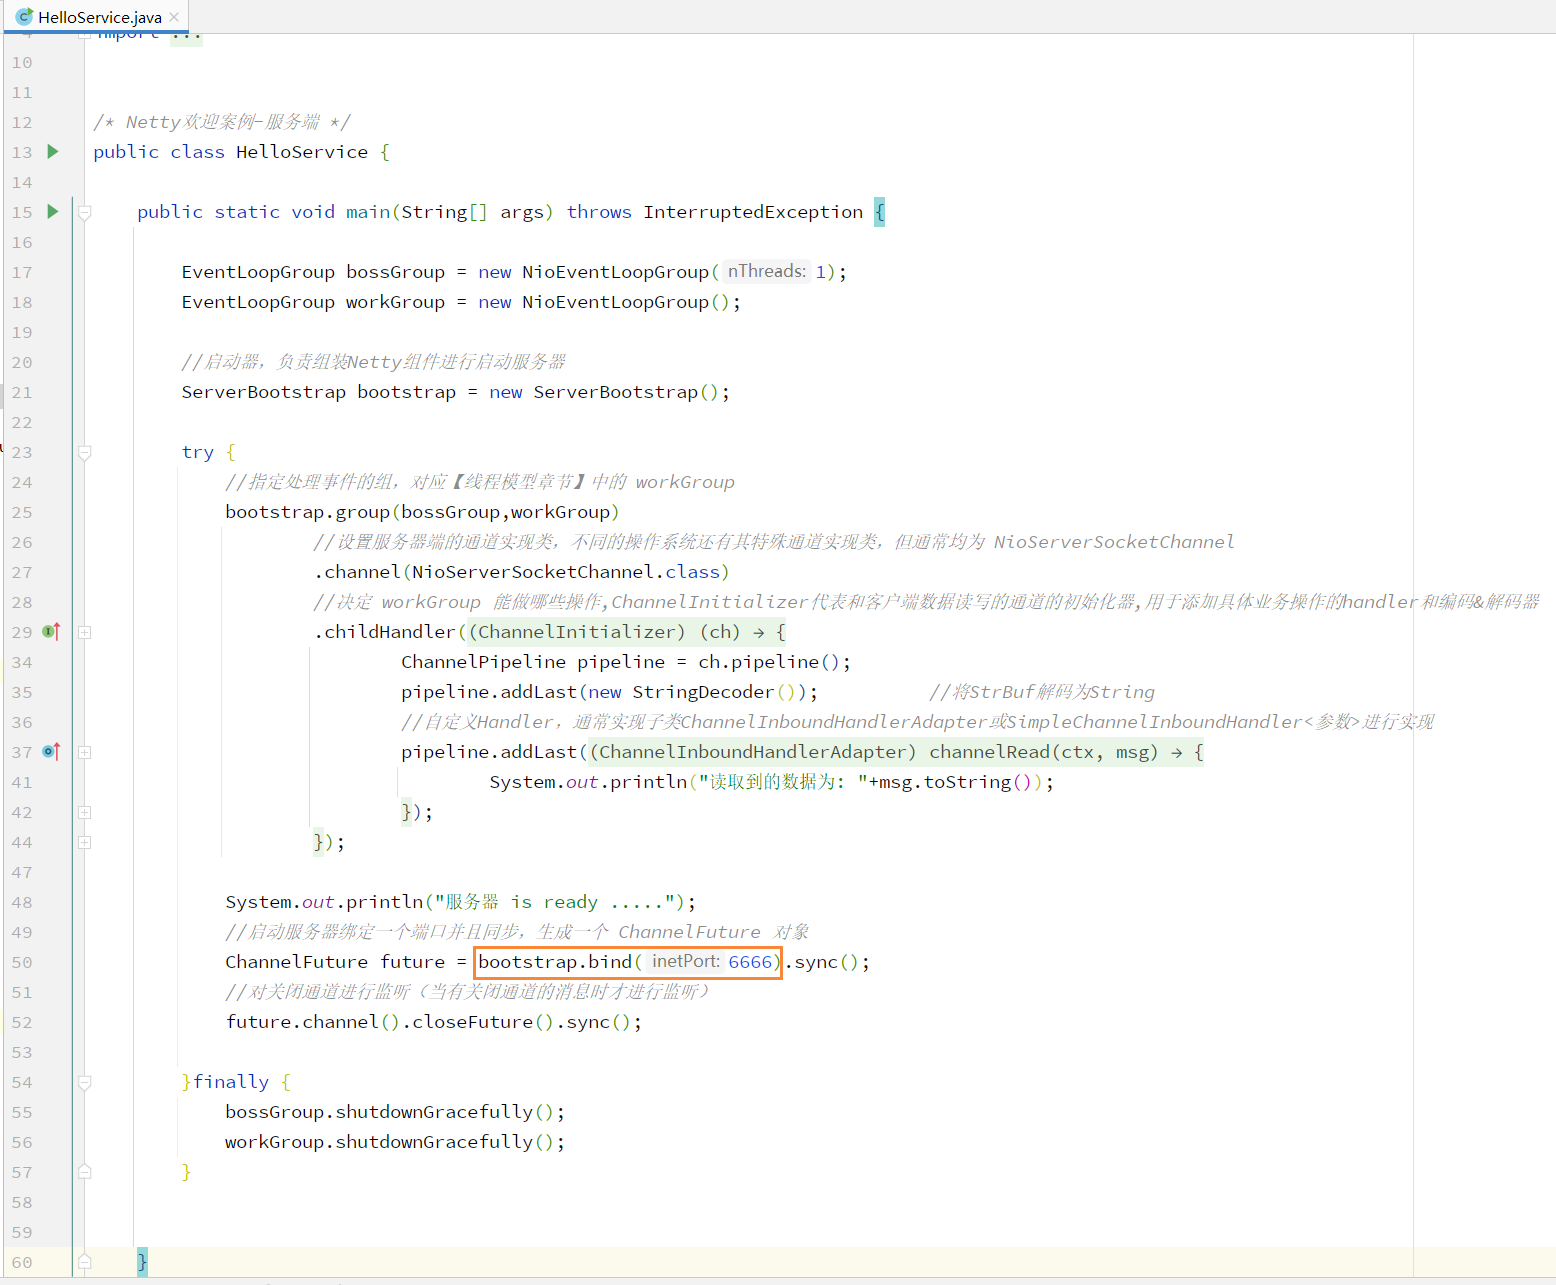
Bind语句代替了以往Nio的复杂设置
追踪源码,其实现逻辑在 doBind 方法中,核心为 initAndRegister 方法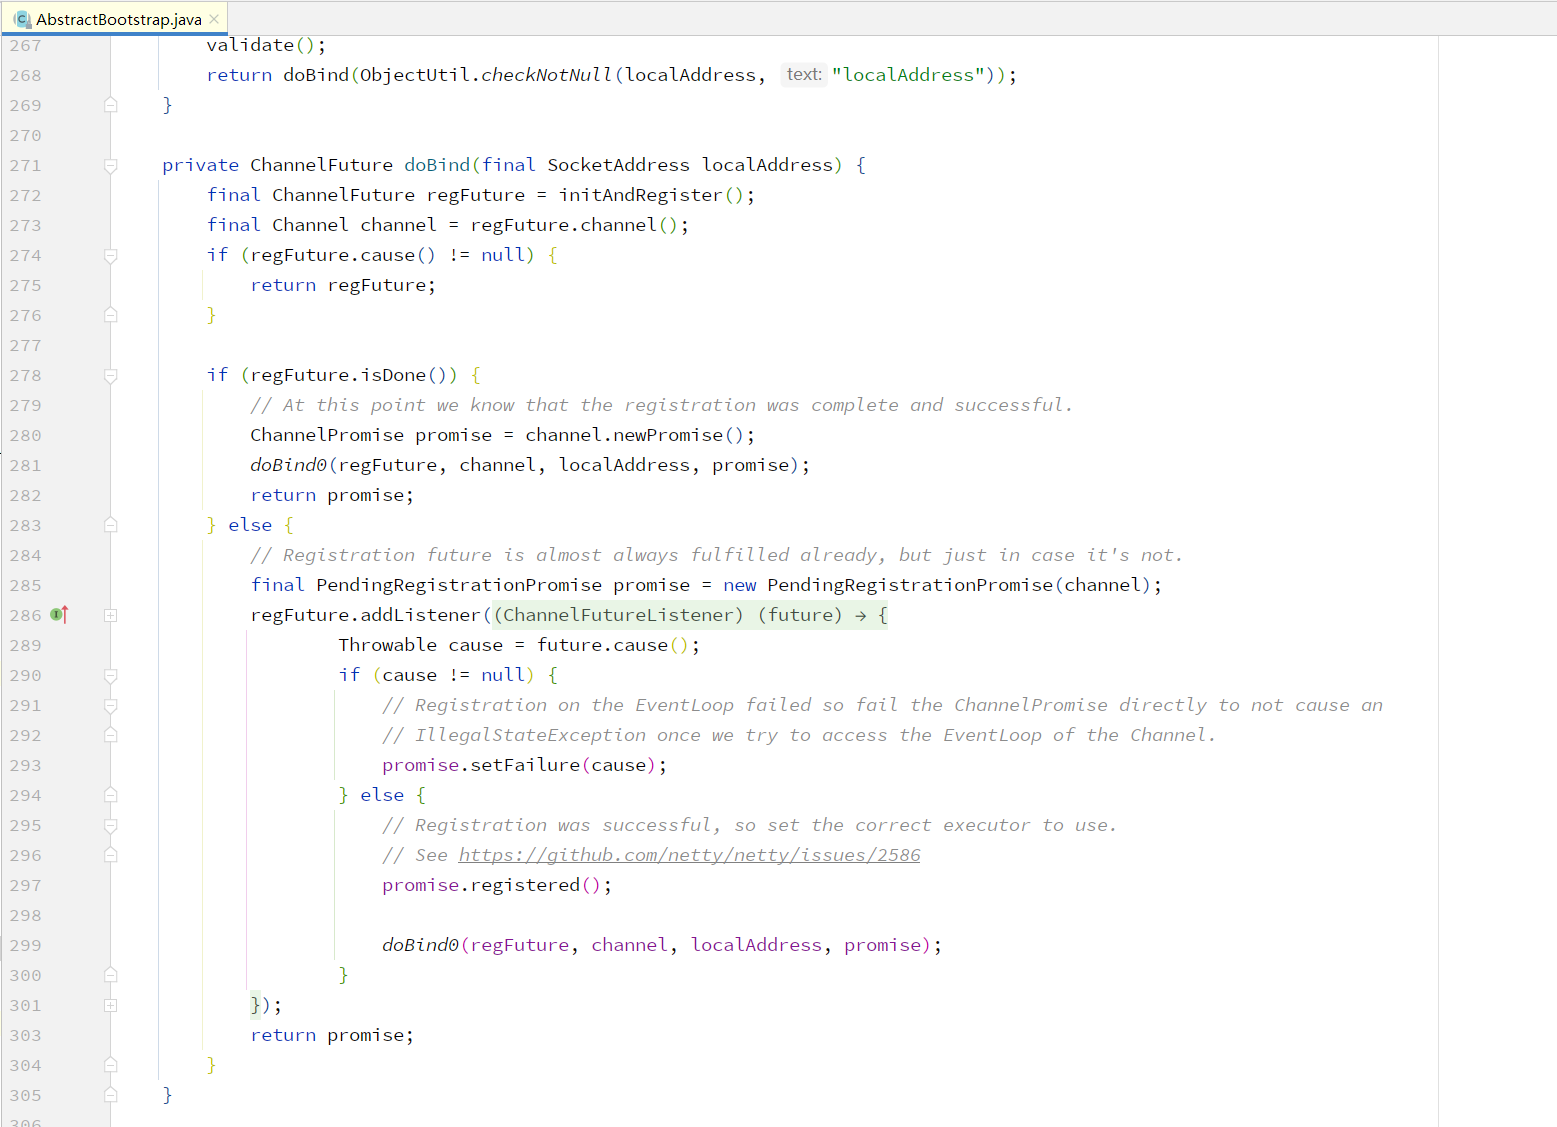
源码位置
解析 initAndRegister:
创建服务端Channel:
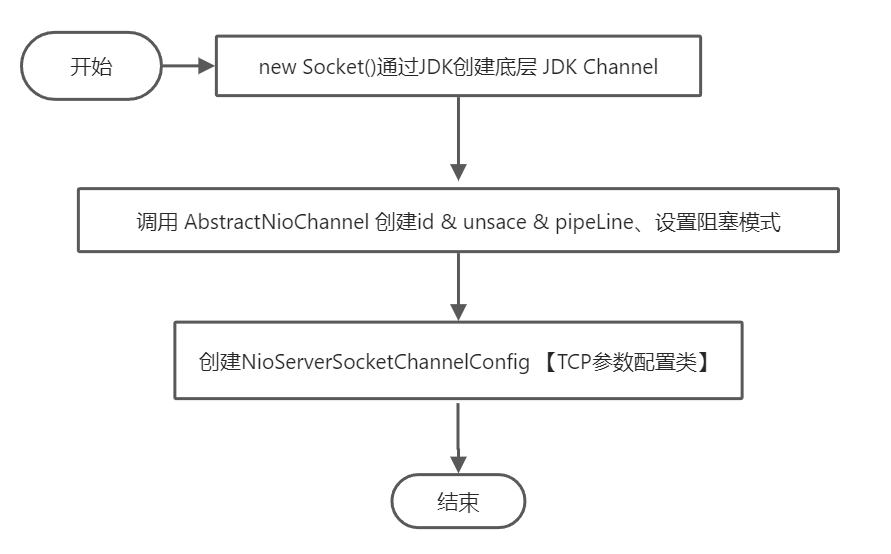
总体流程
ChannelFactory 通过反射创建 Channel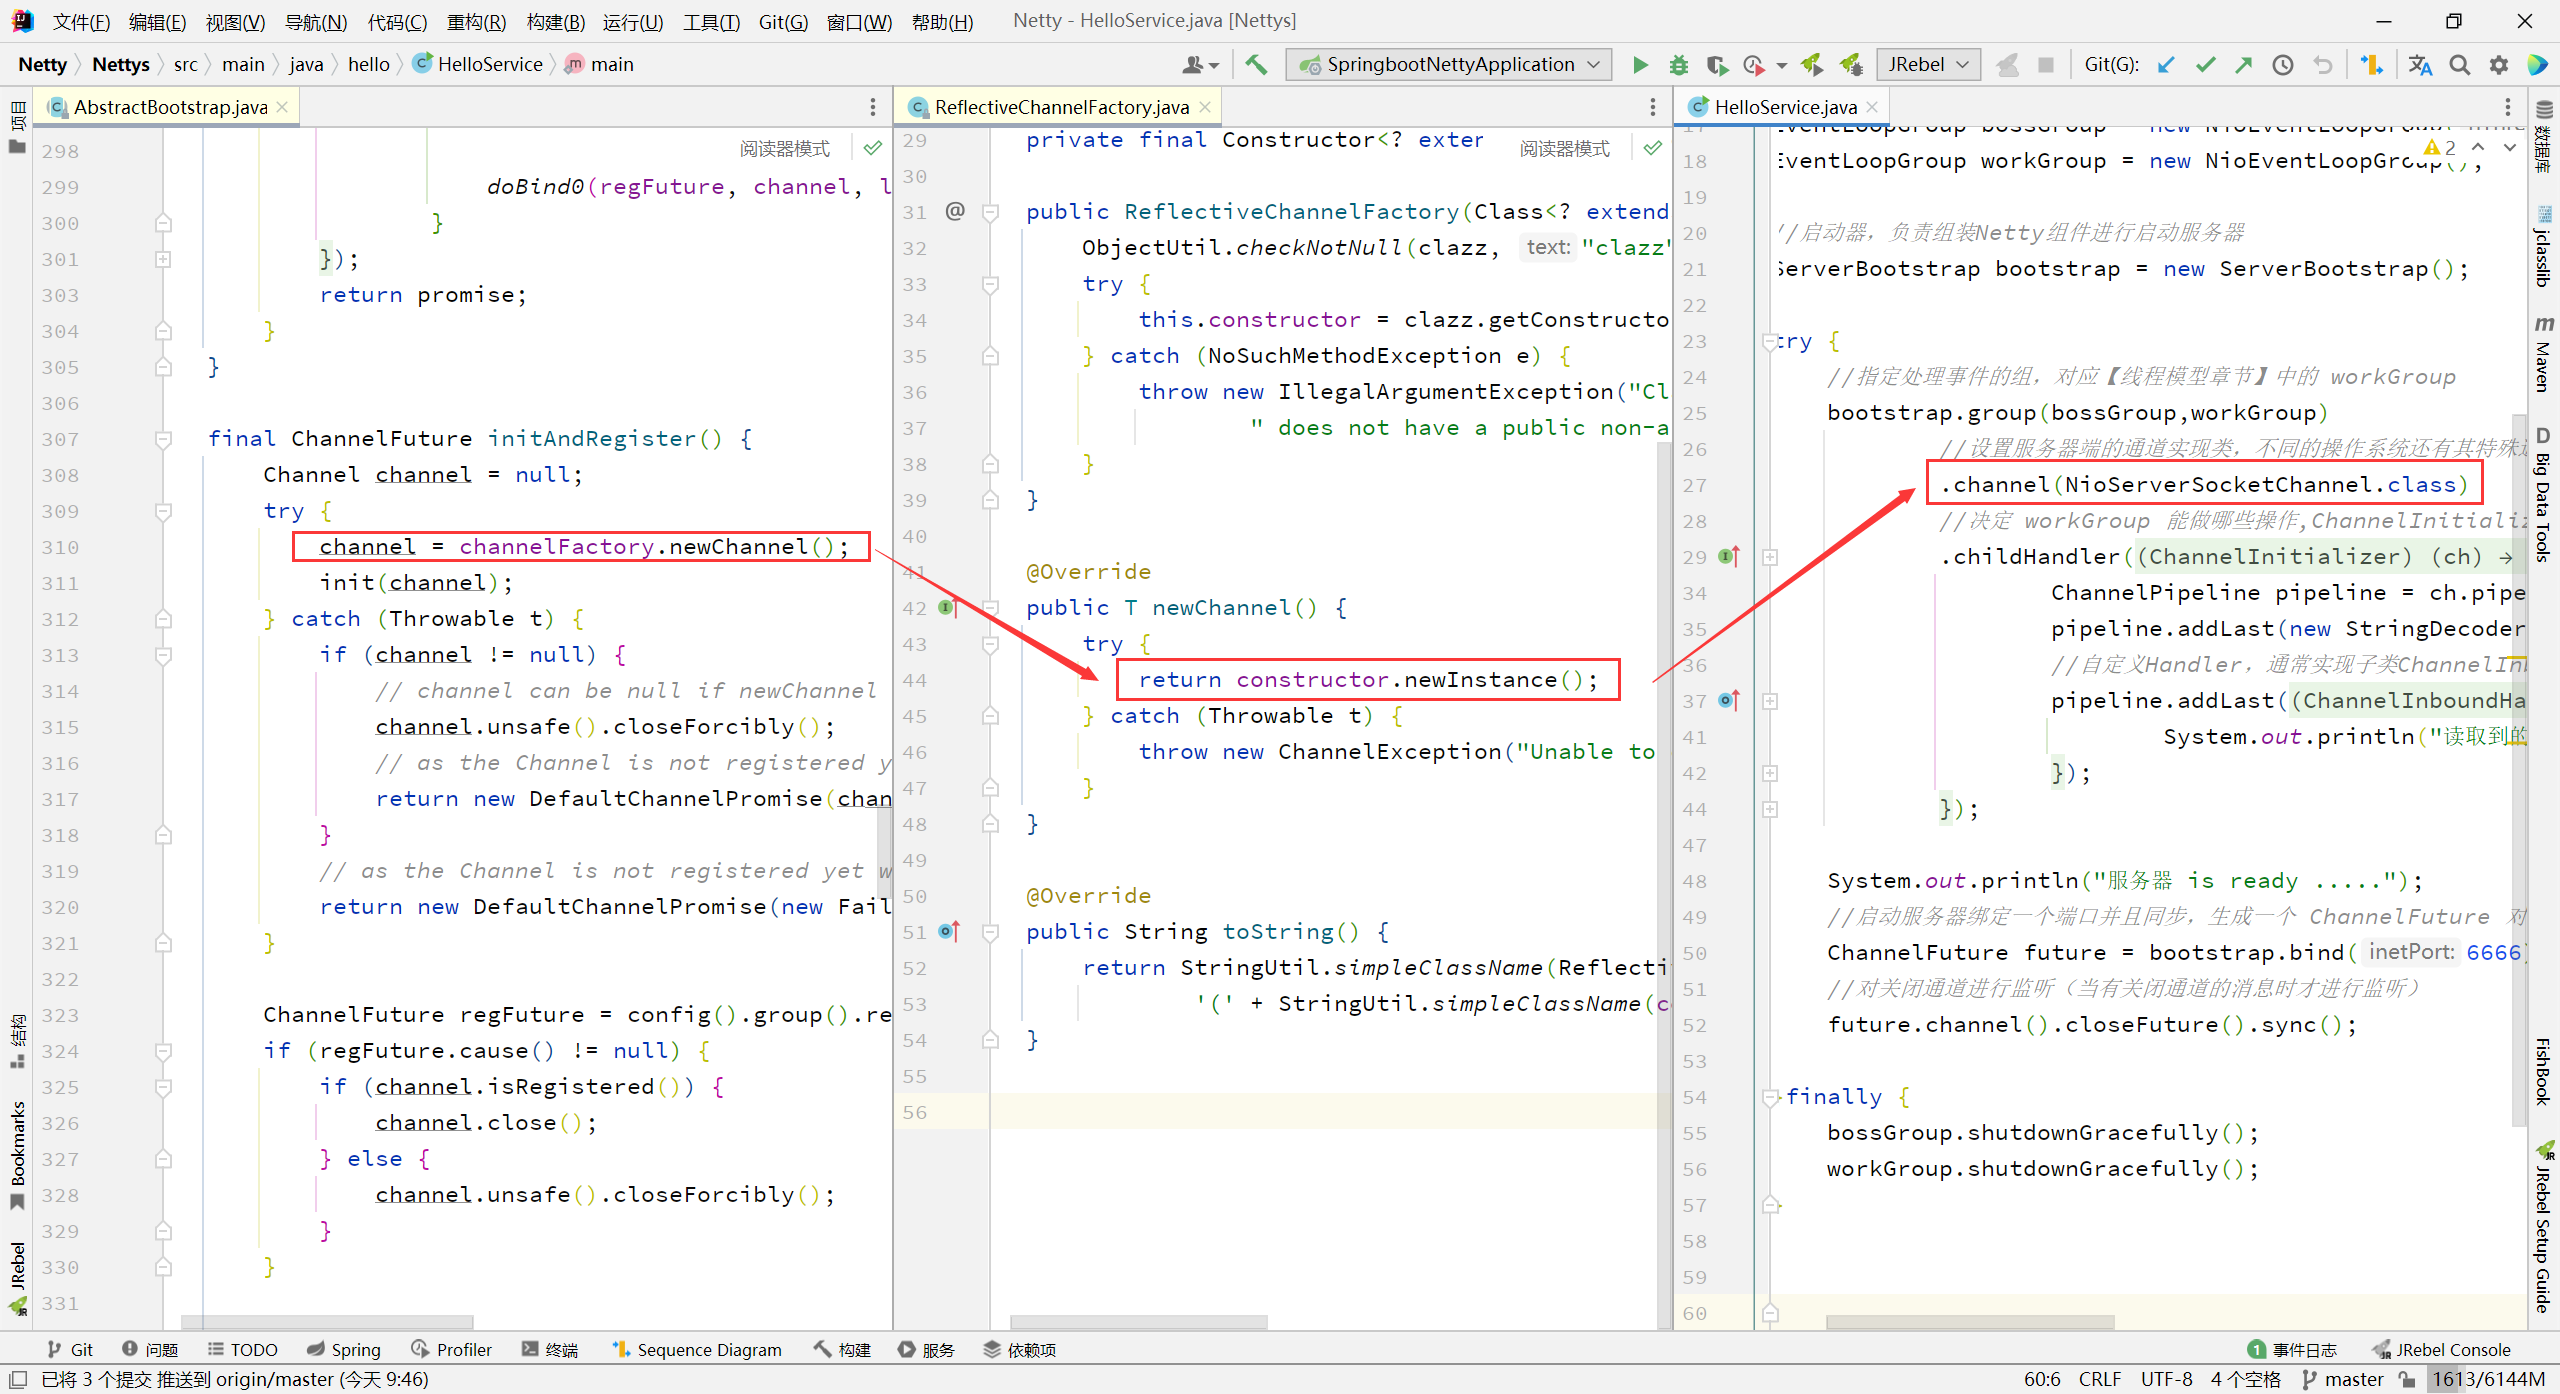
进入 HelloService 中指定的 NioServerSocketChannel 类中查看其源码,在其无参构造方法中通过JDK反射创建出 NIO 的 ServerSocketChannel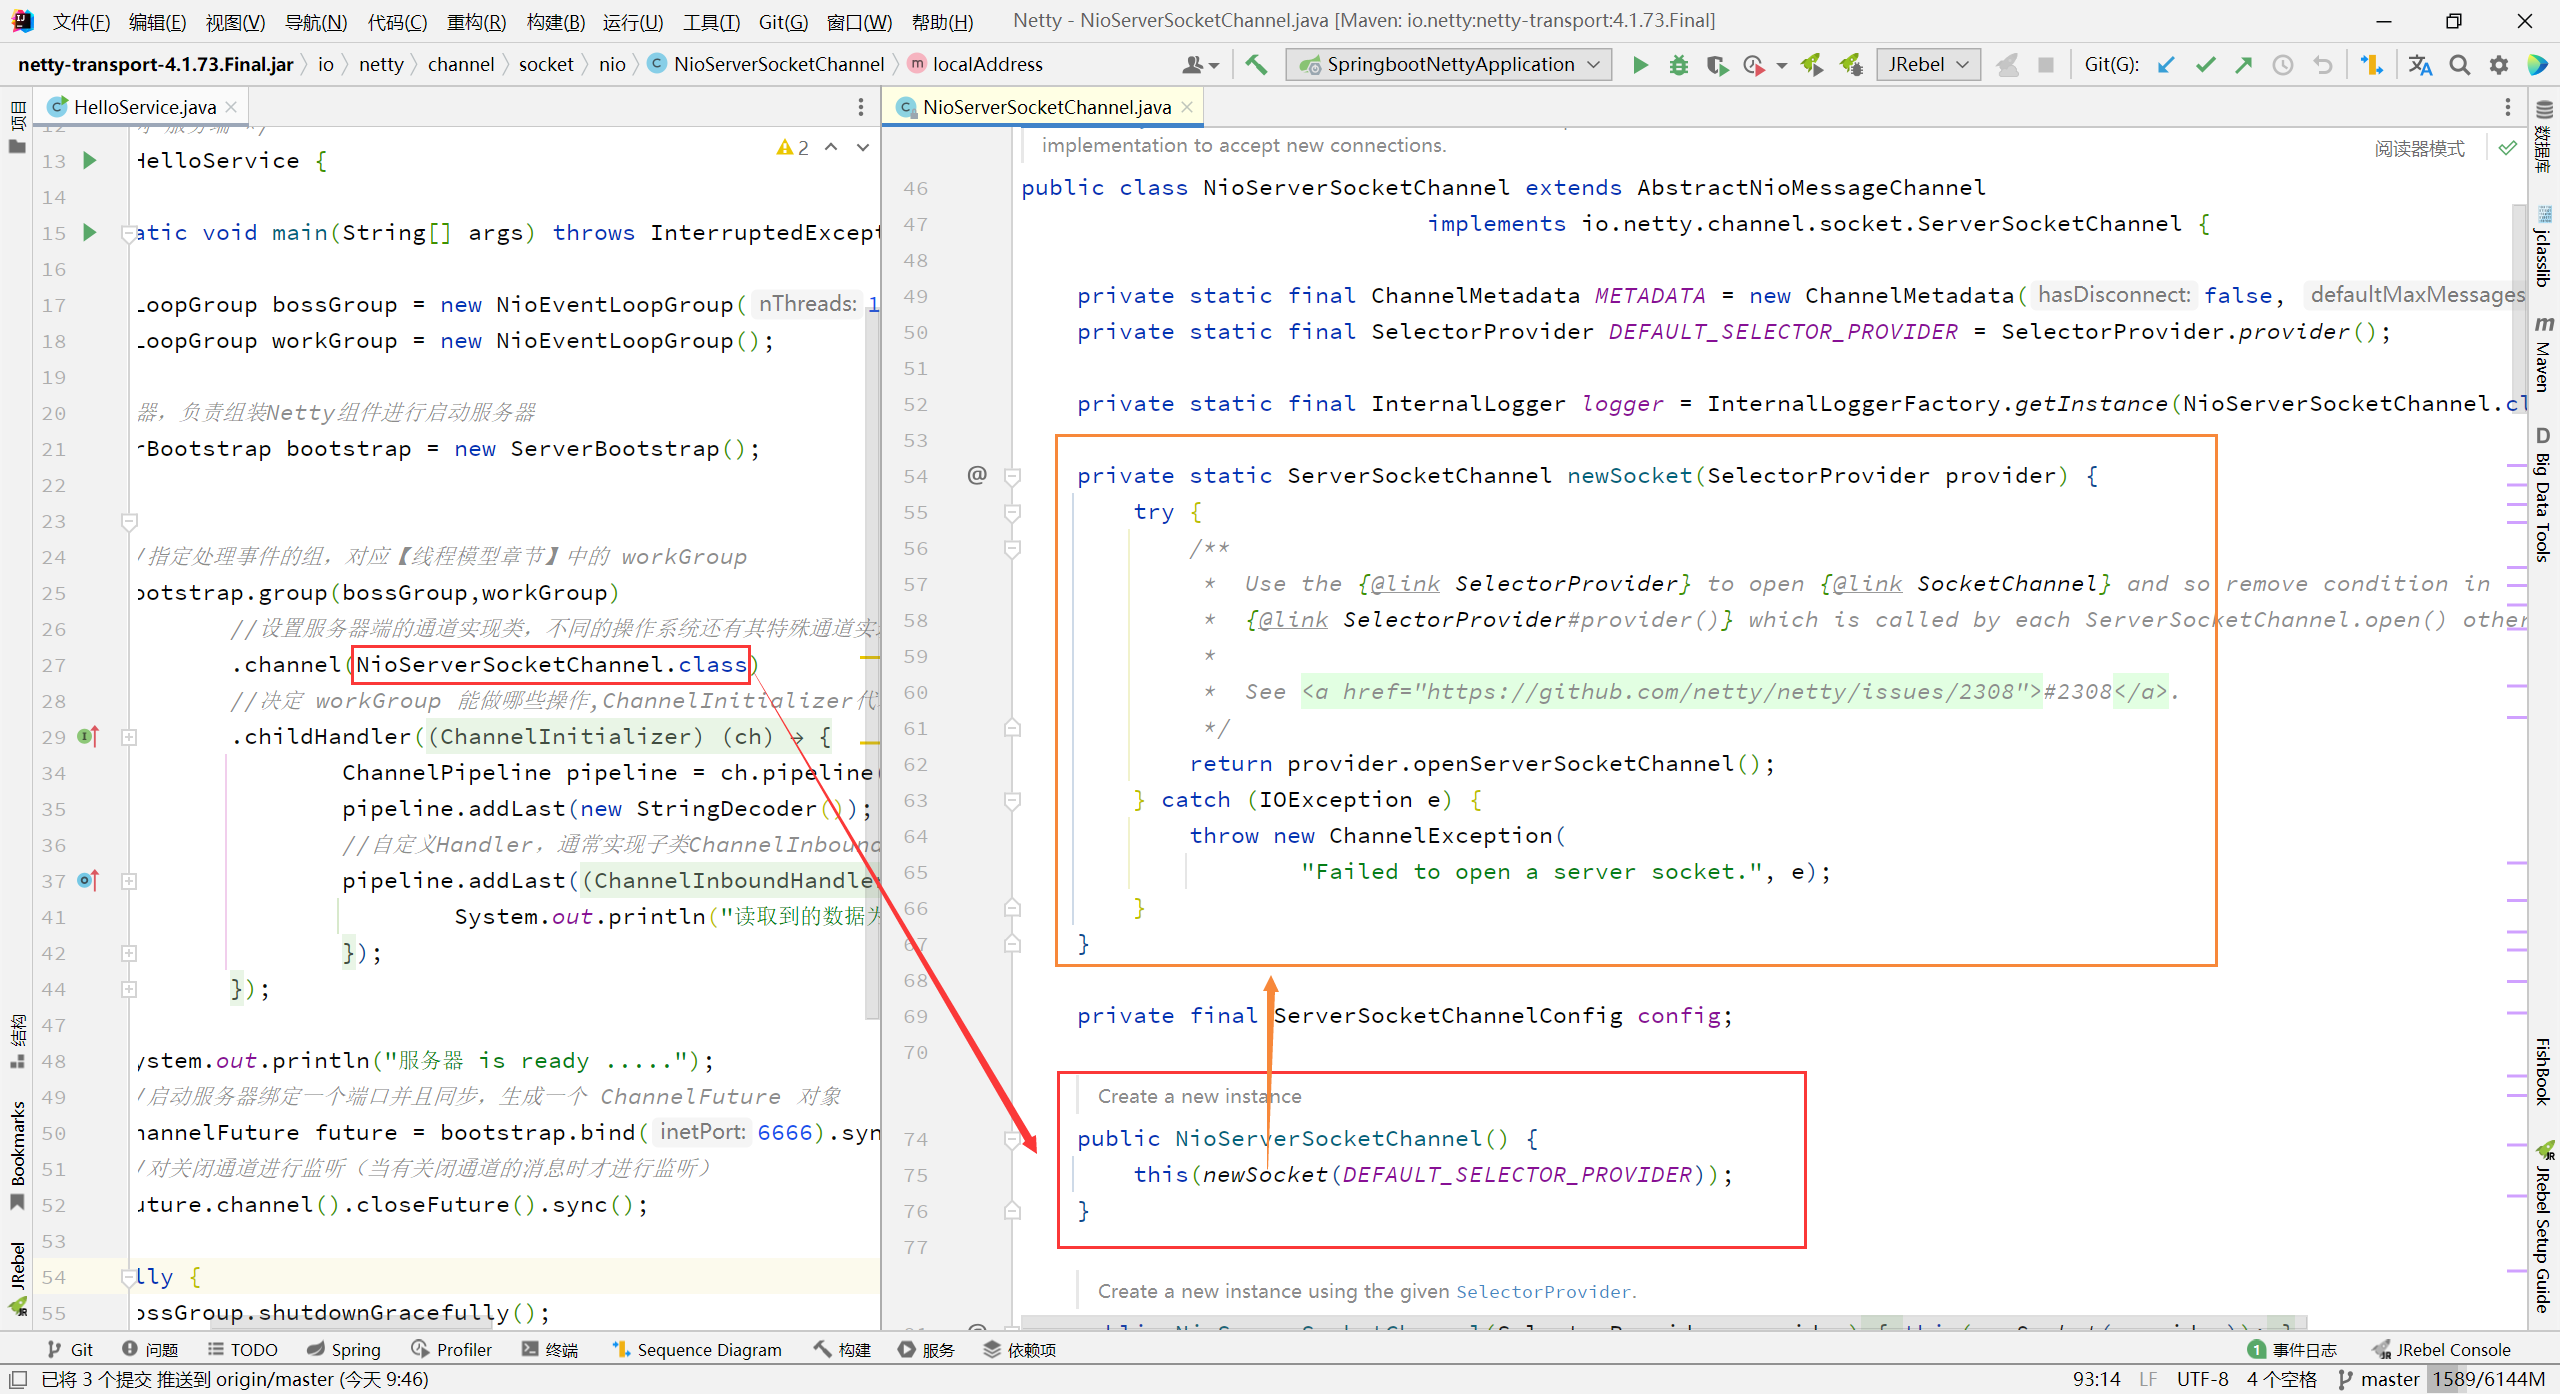
执行完无参构造后,在其有参构造函数中创建TCP参数配置、调用父类构造函数设置阻塞模式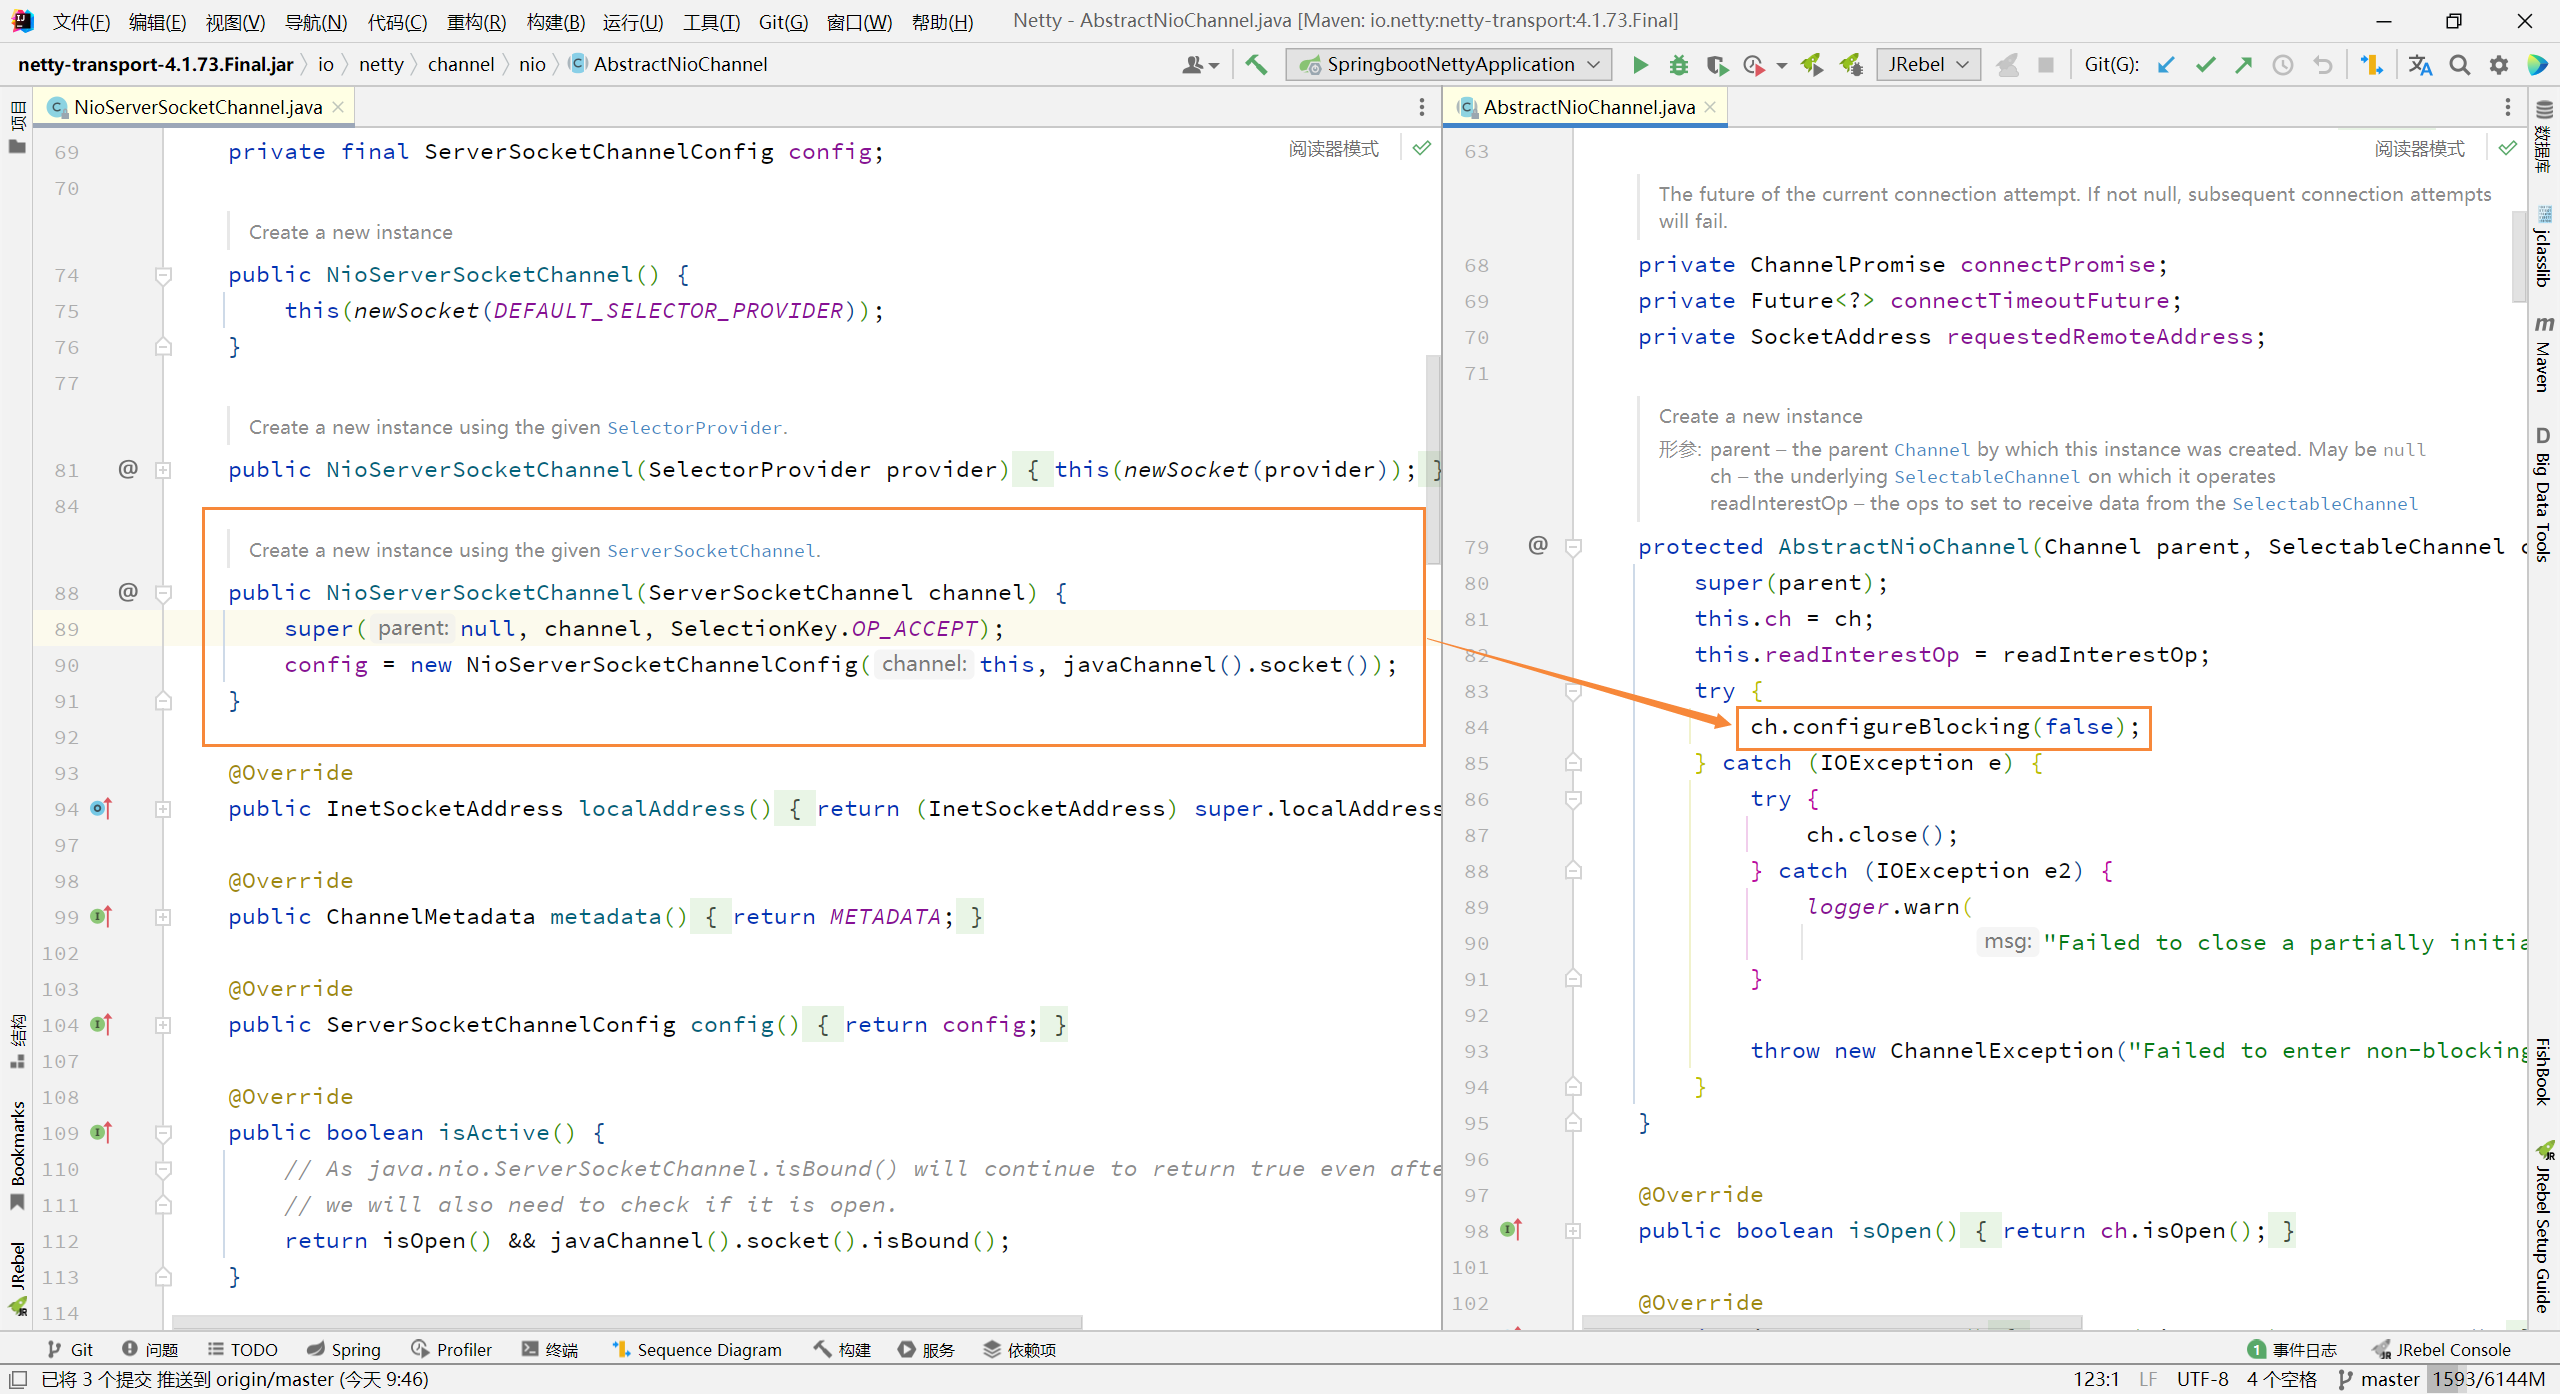
创建 id、unsafe、pipeLine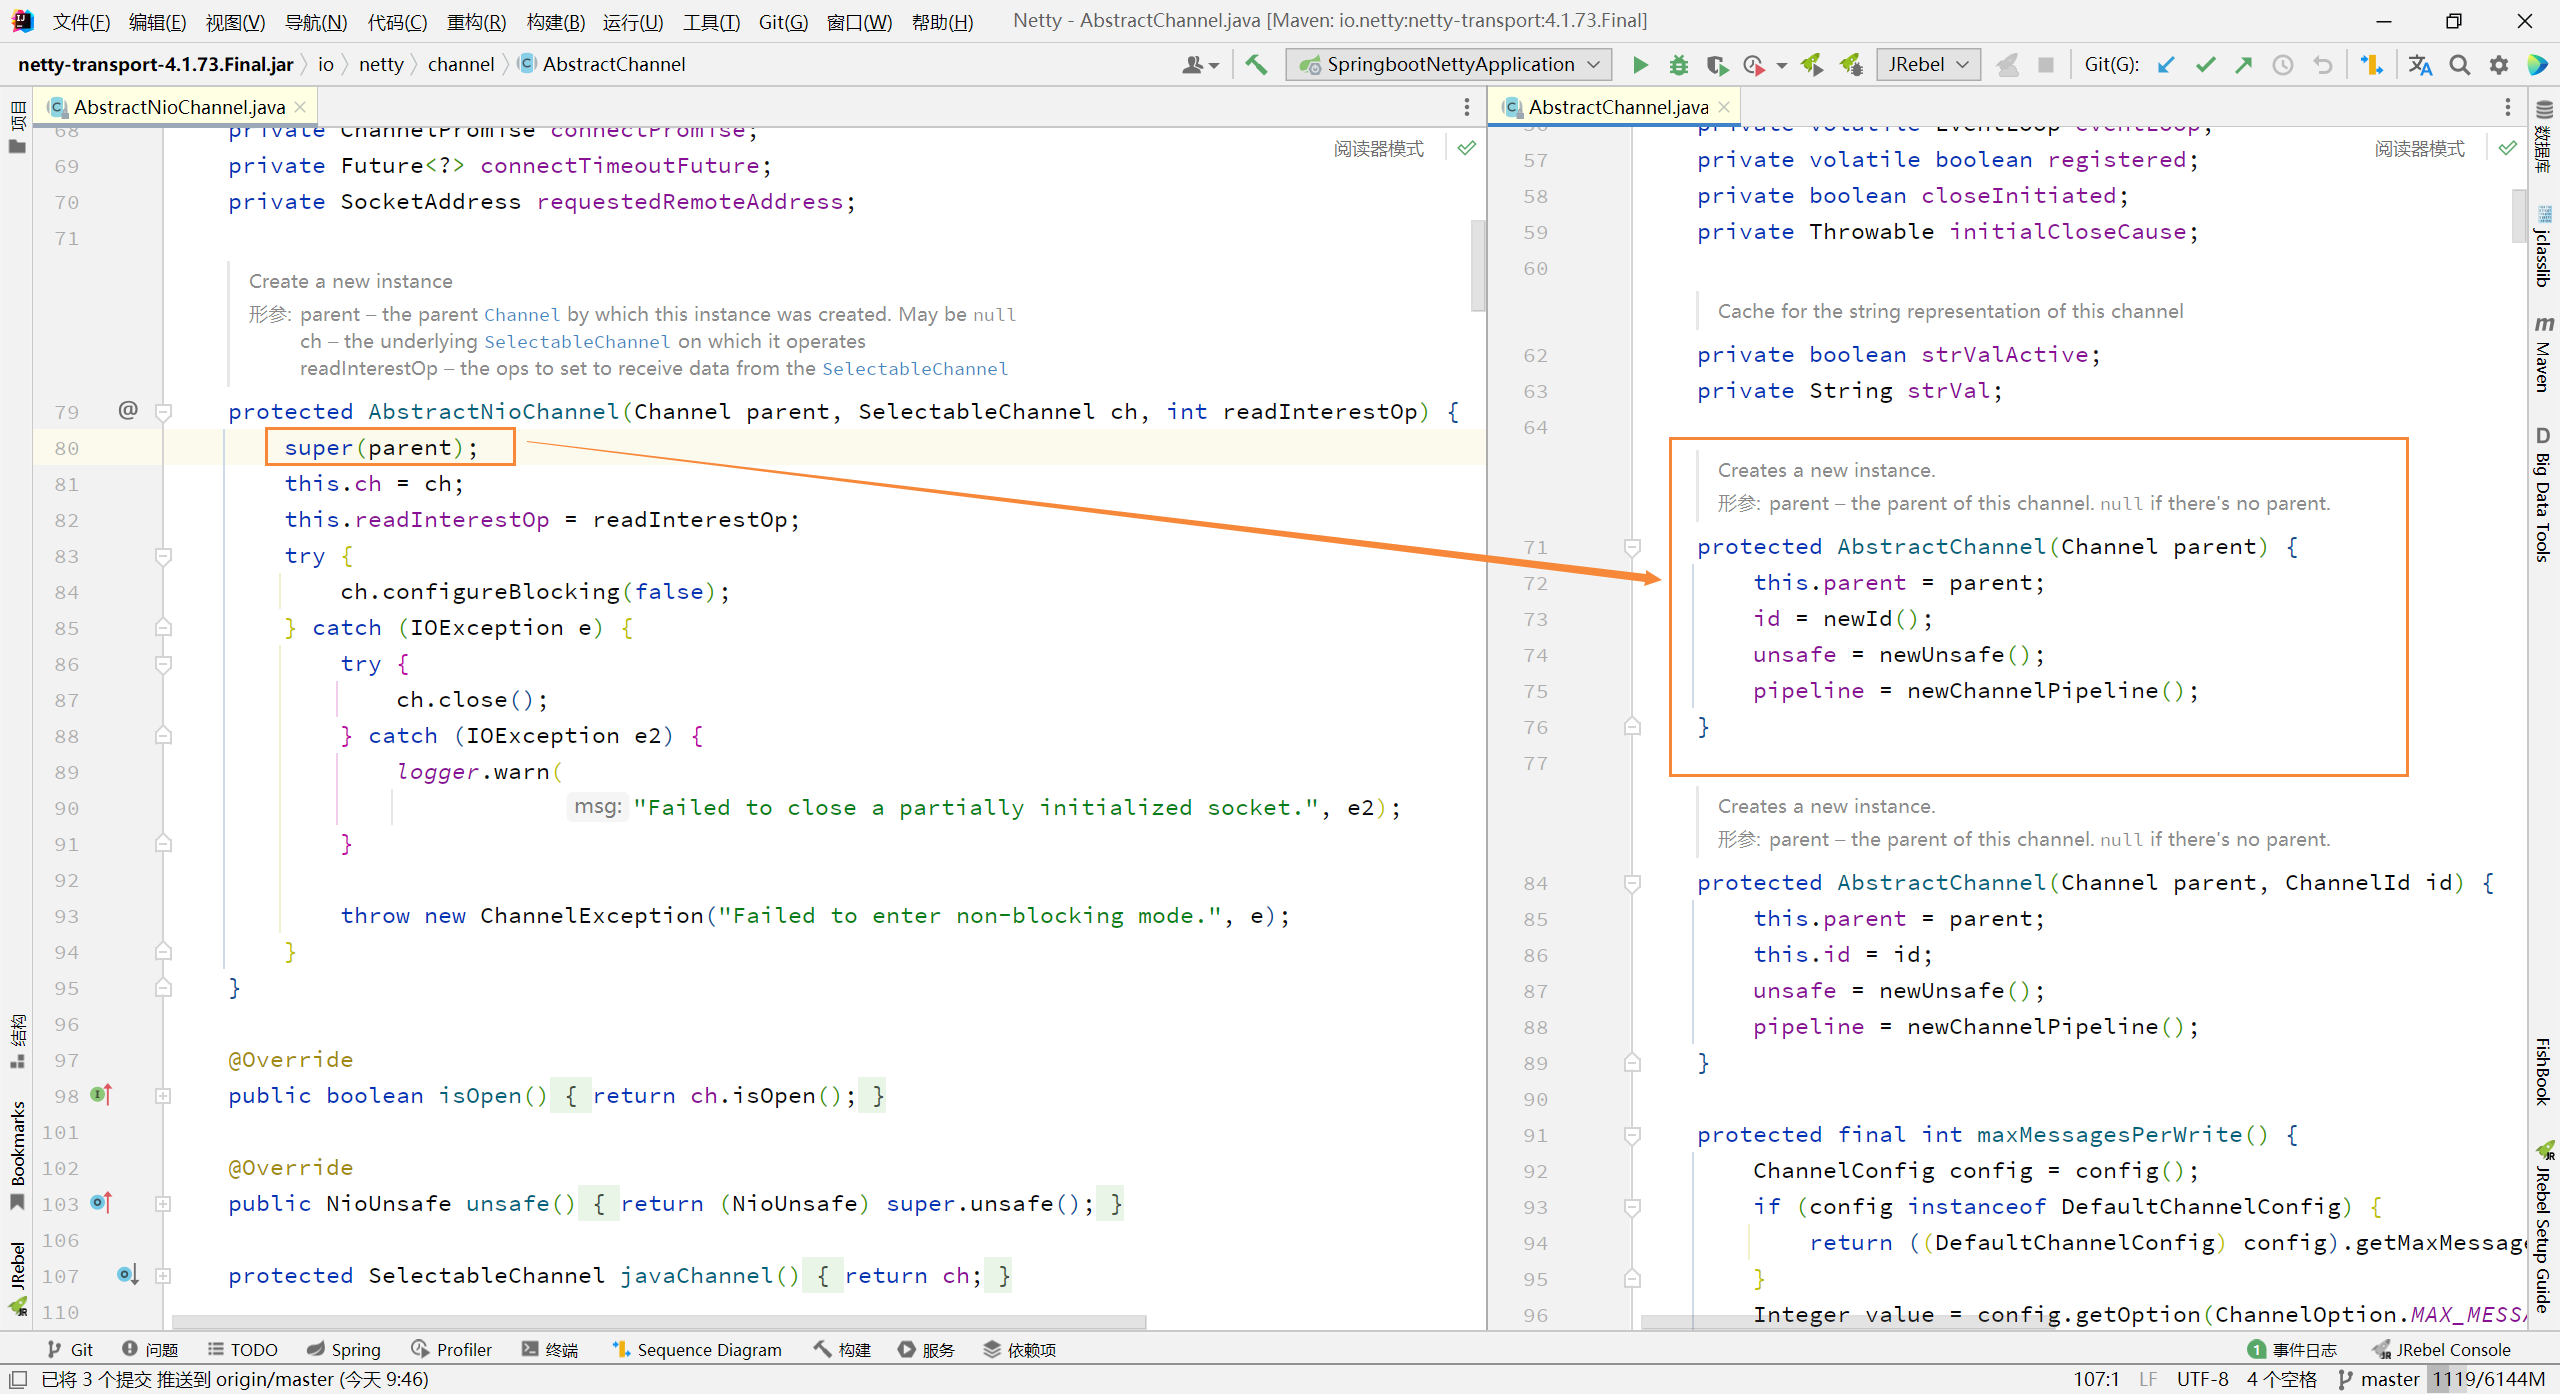
init方法:
主要可分为两部分,前半部分为初始化,后半为注册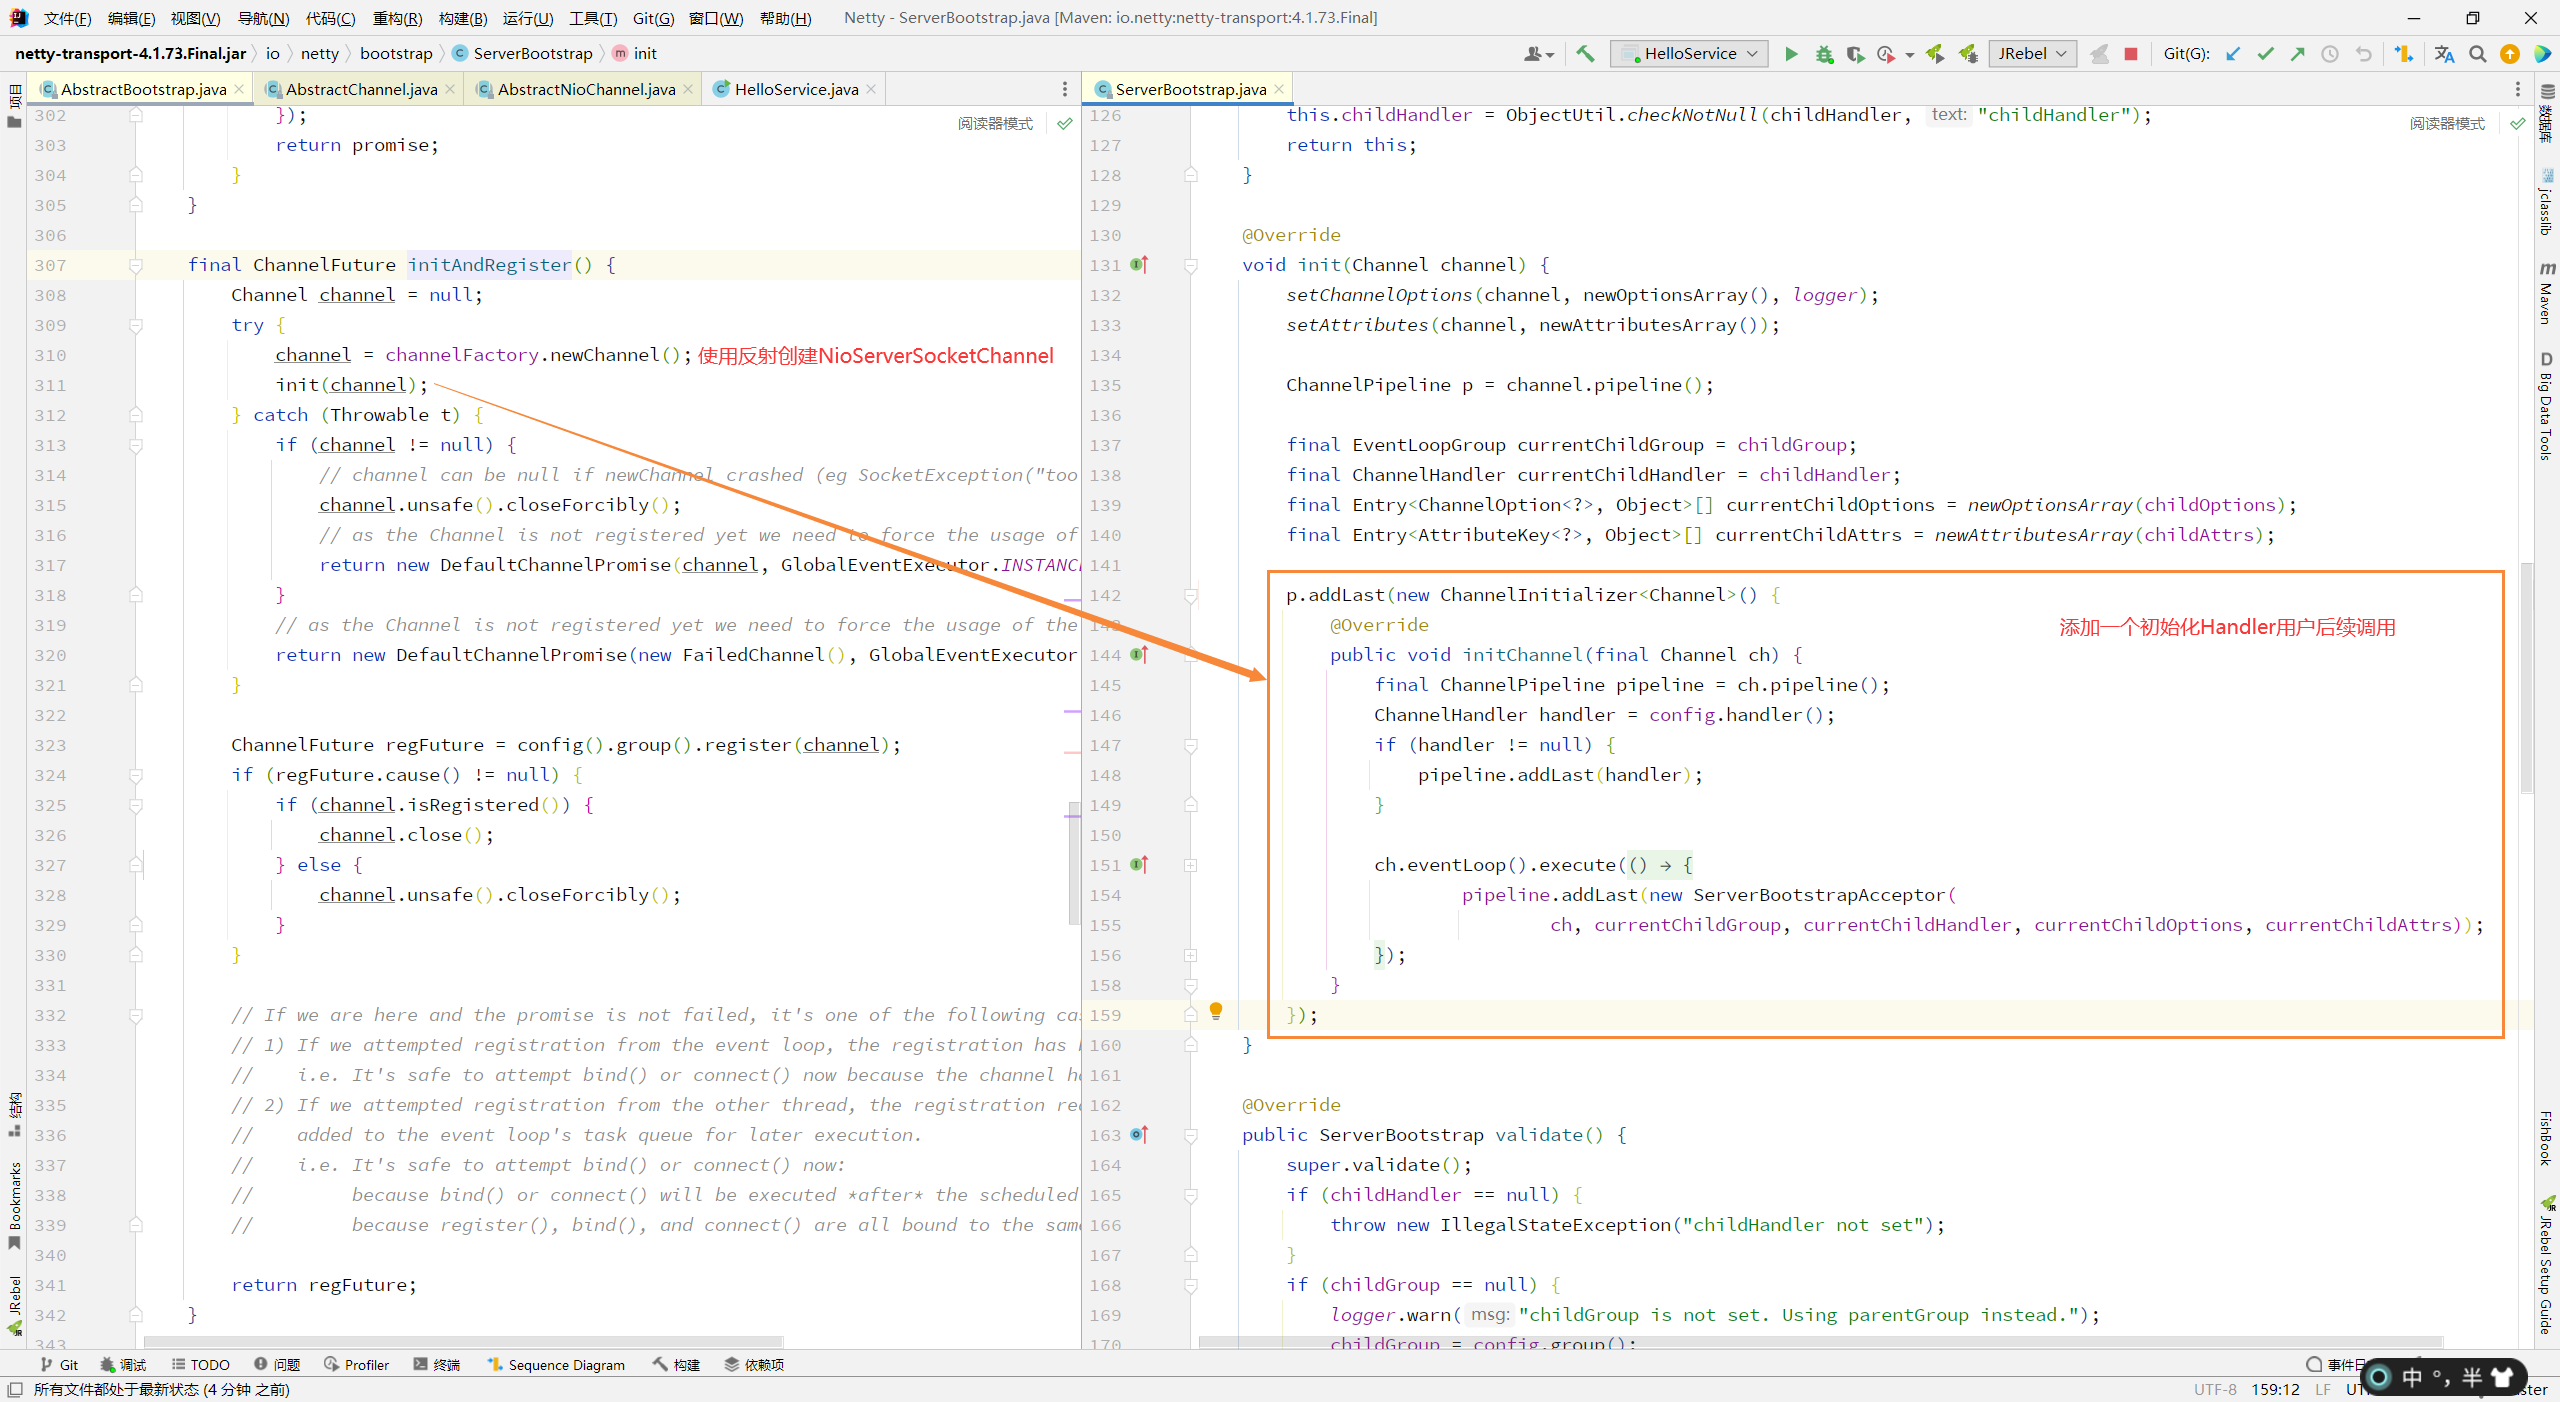
初始化操作
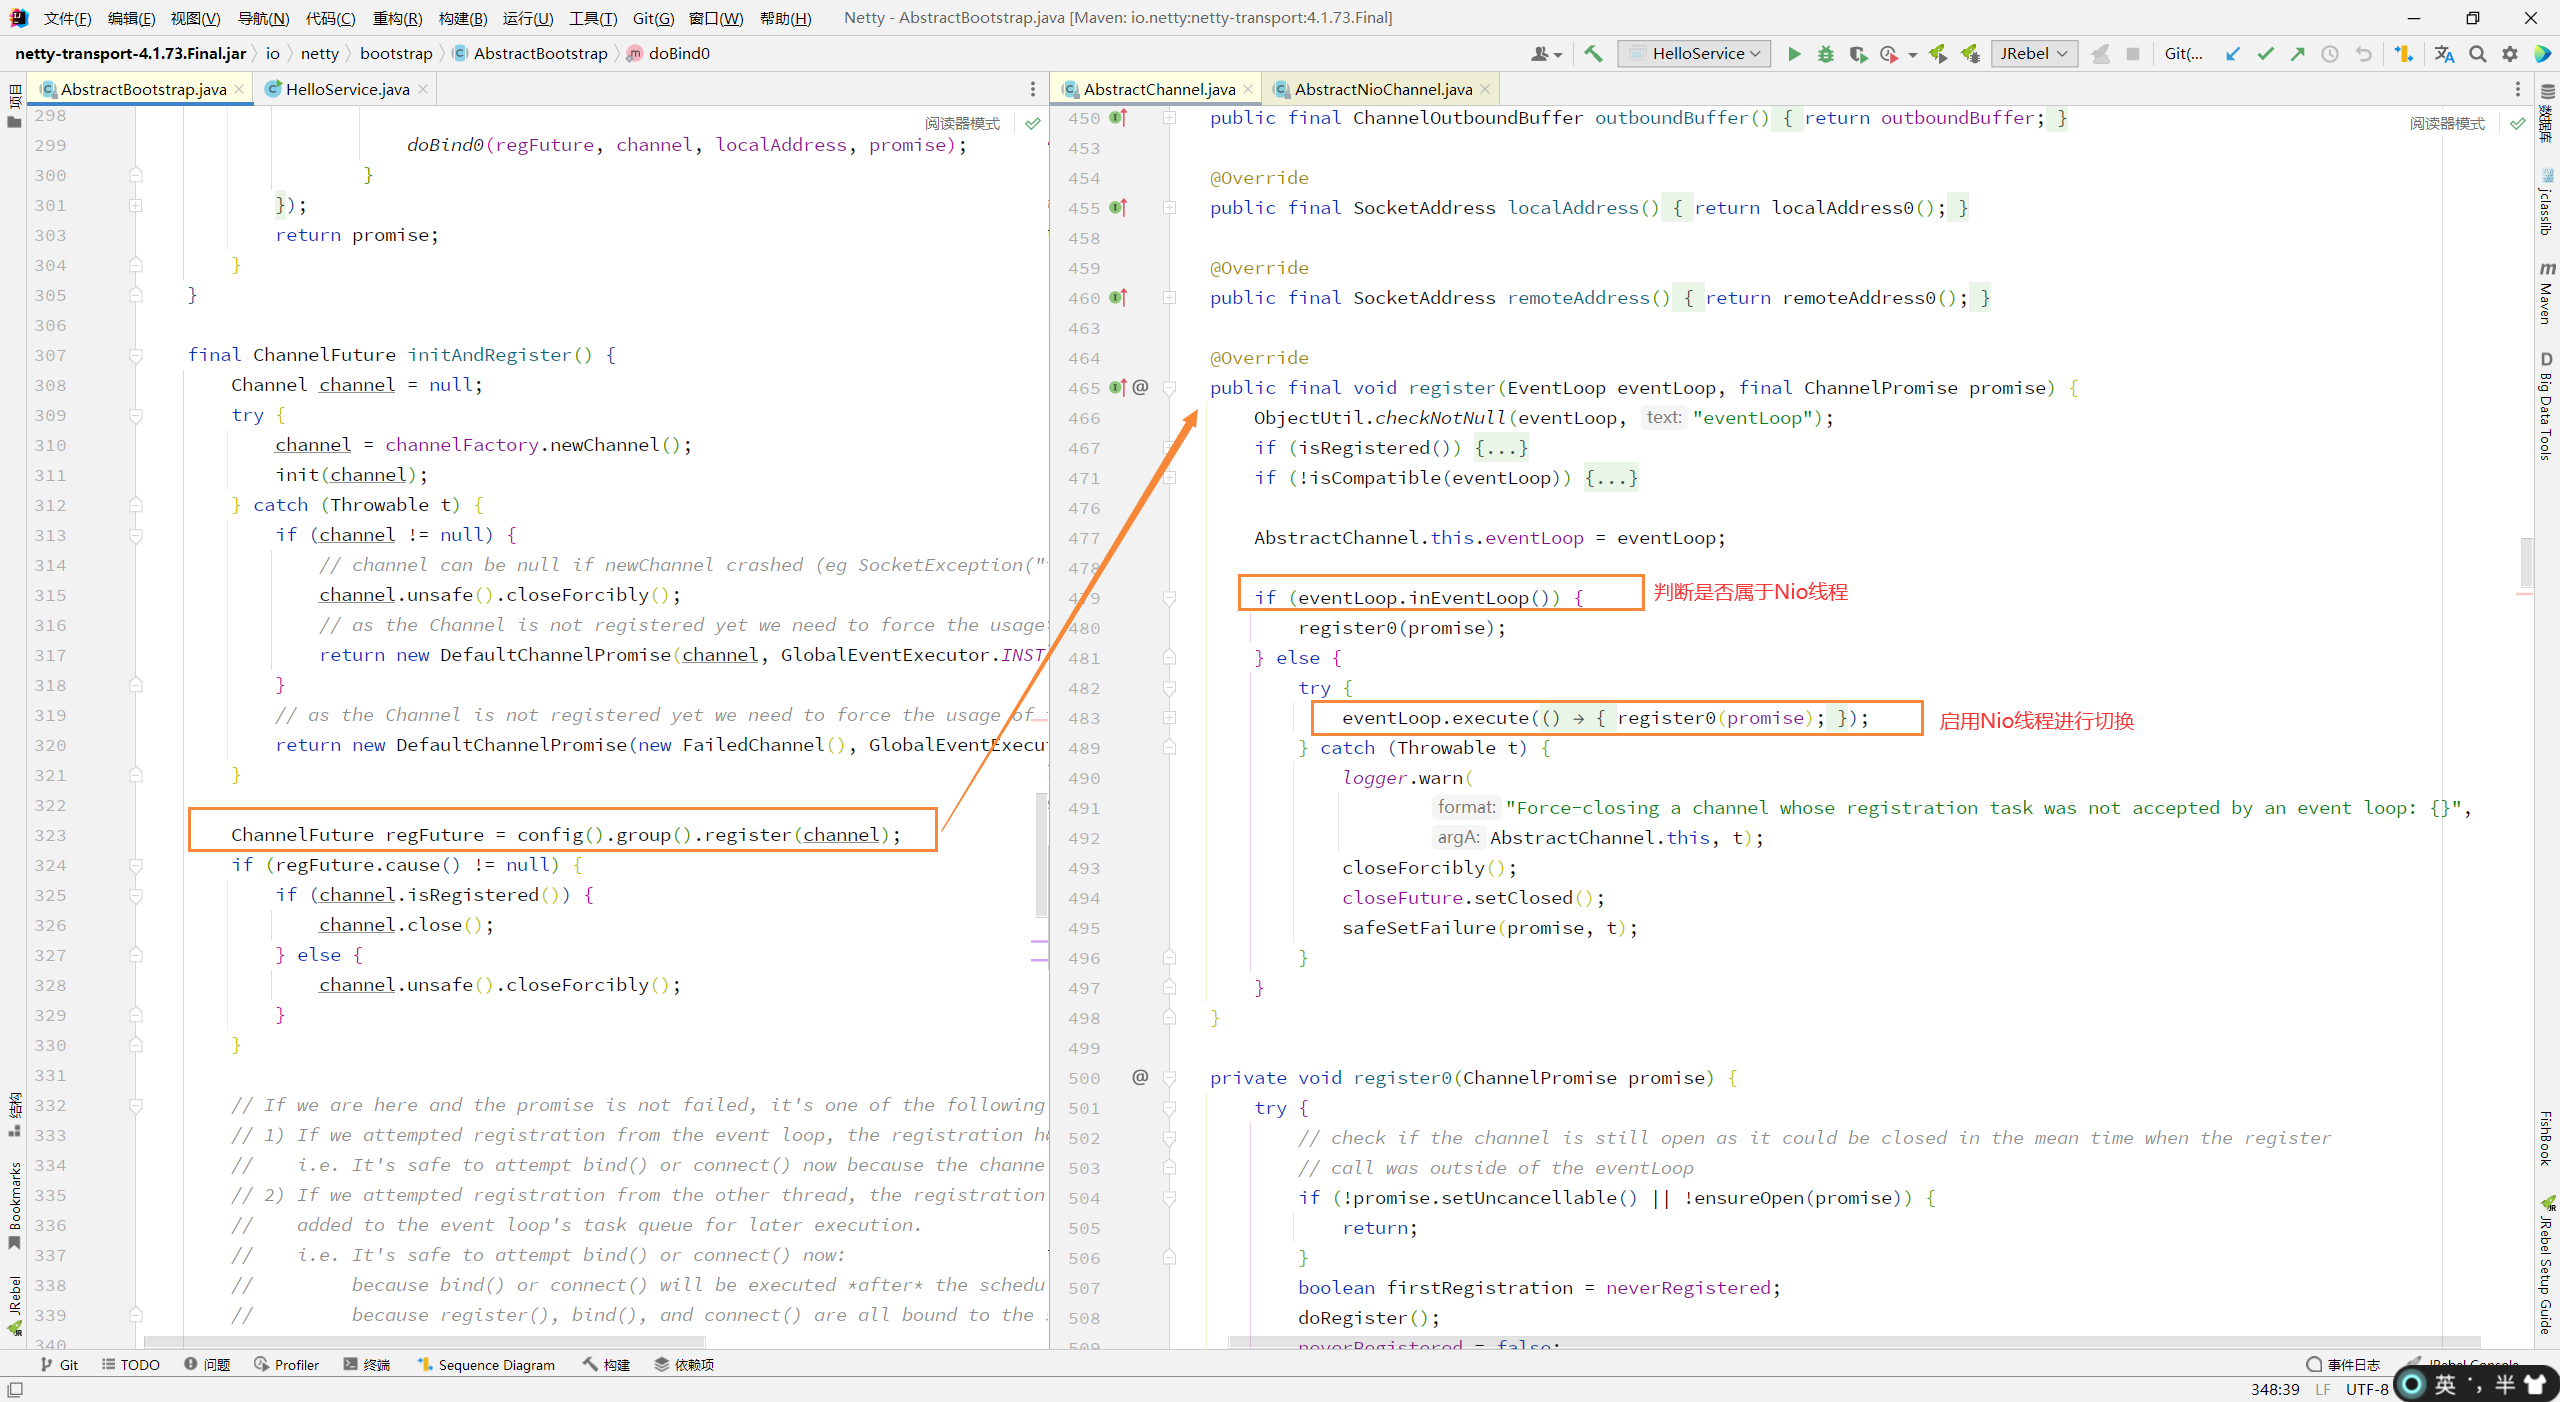
注册操作一
点击 register0 方法,进行获取通道、注册、调用初始化方法的操作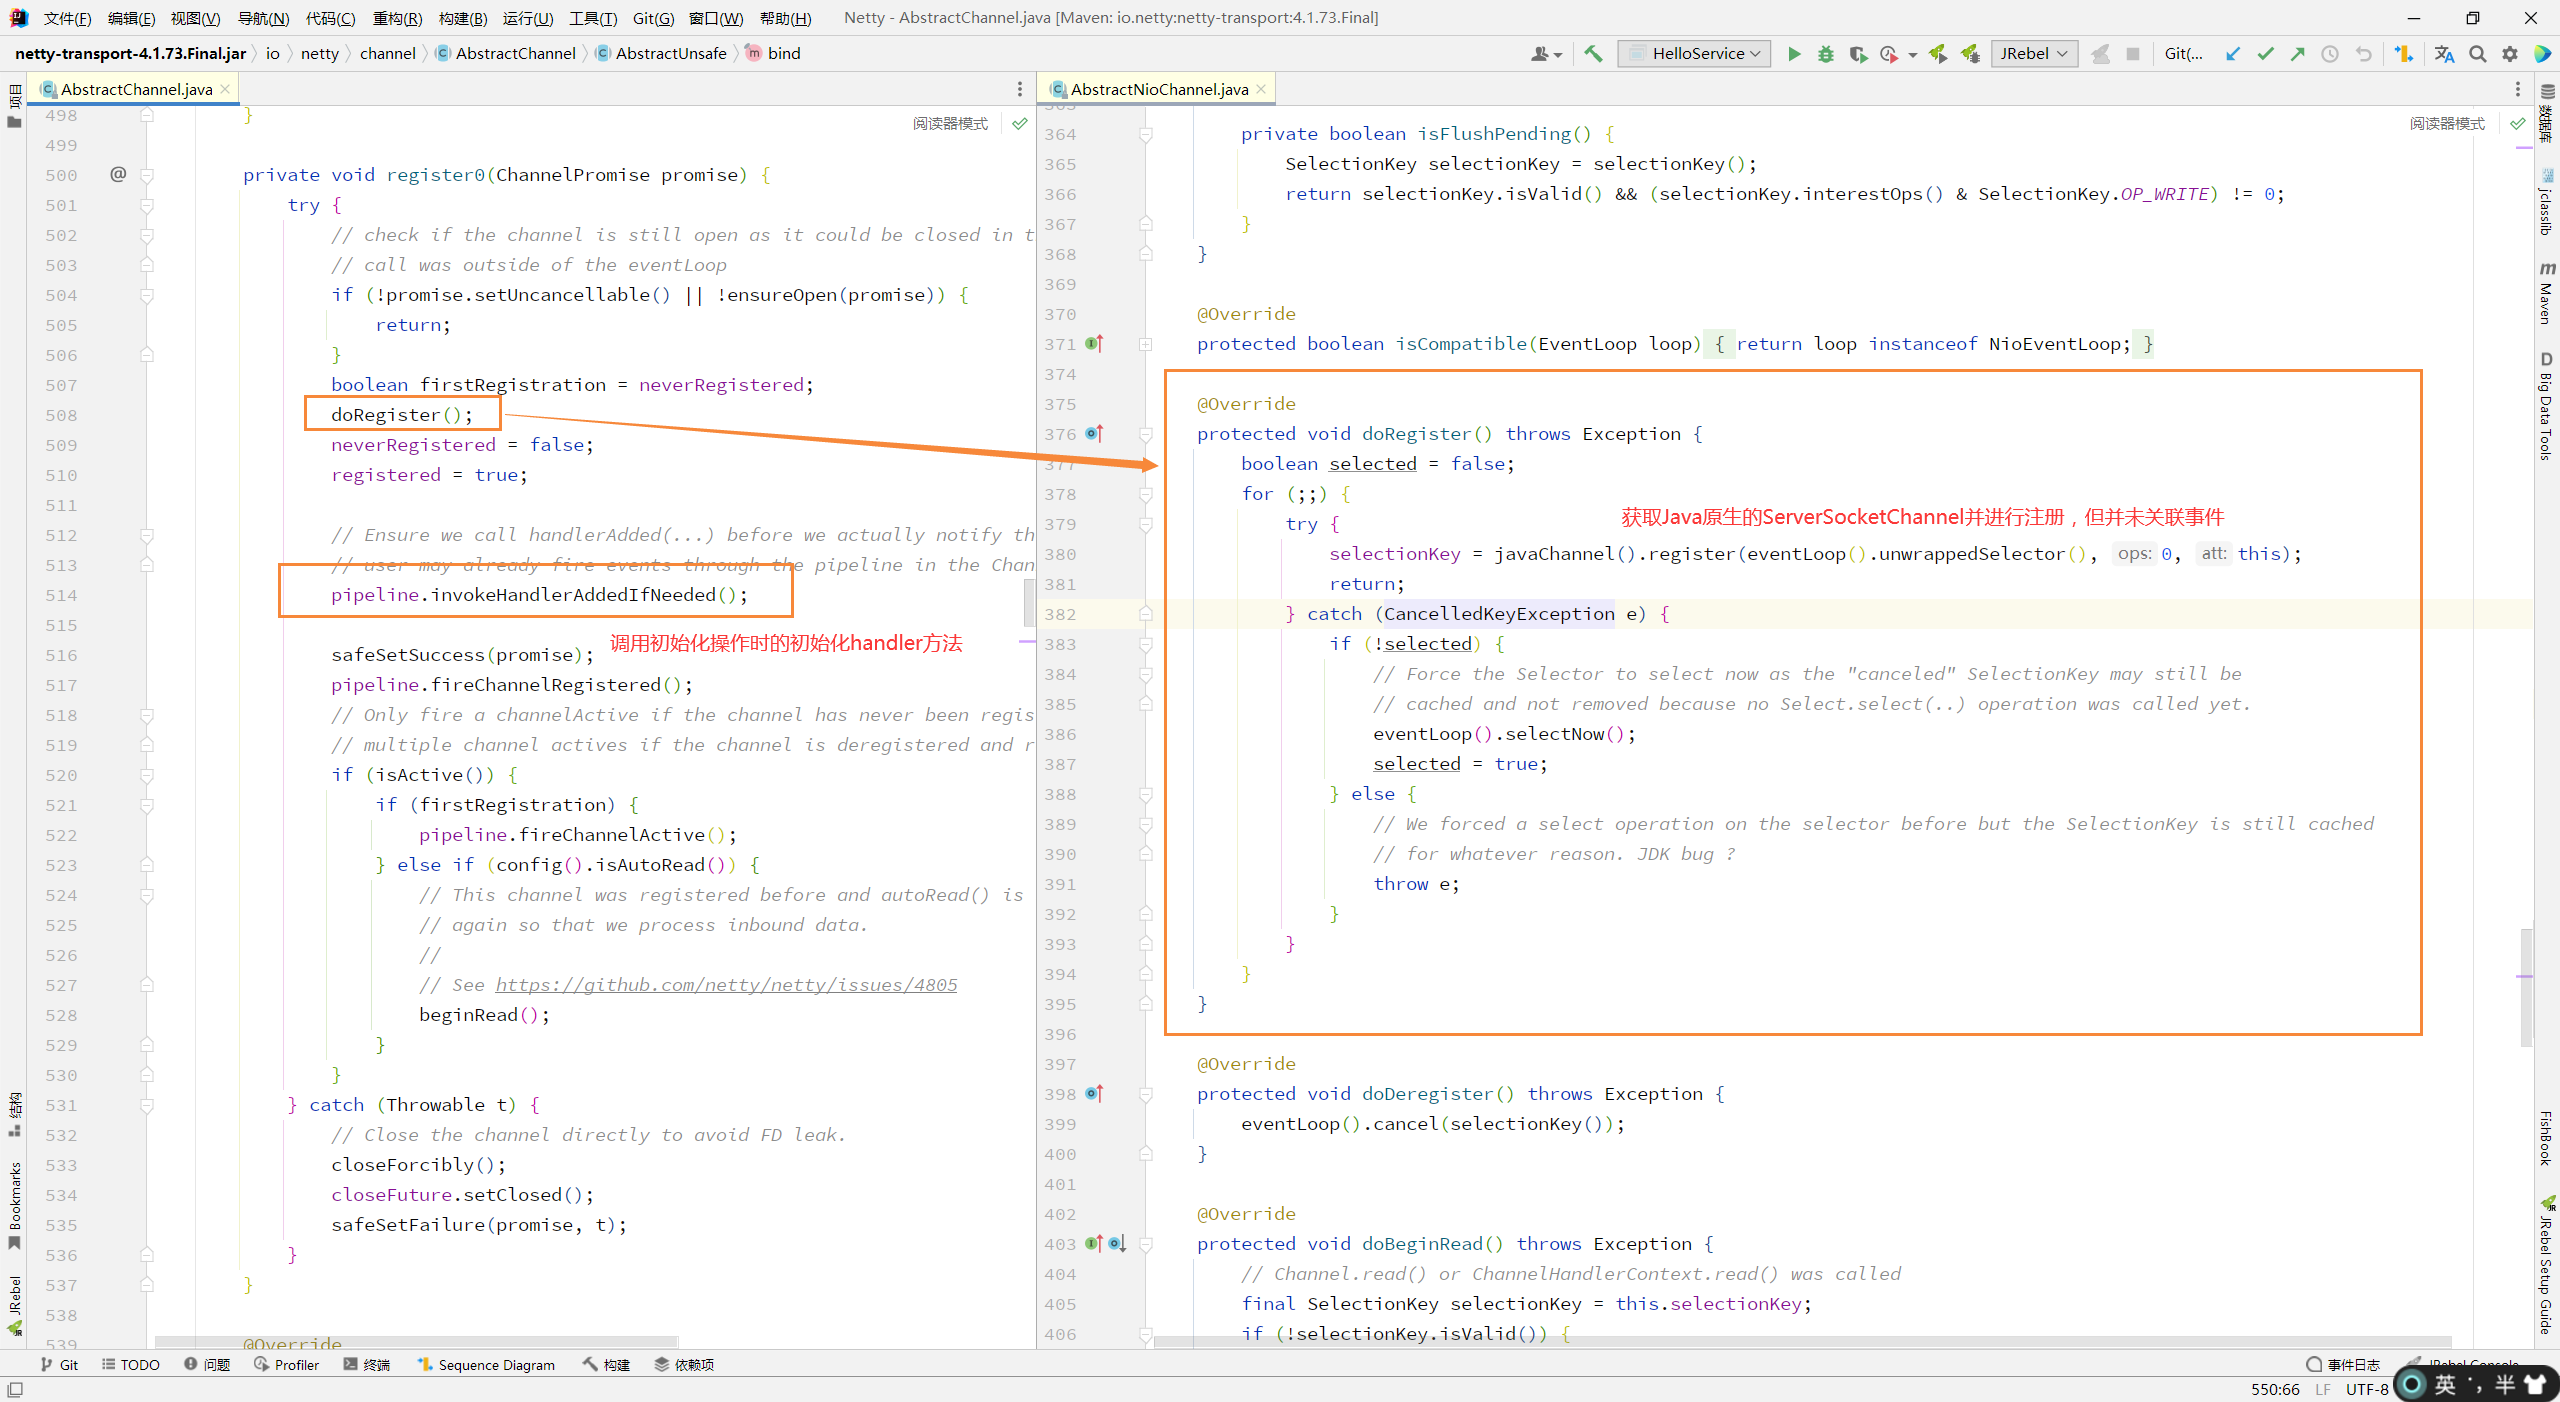
promise 对象即为一开始的 regFuture ,safeSetSuccess 方法返回结果后触发回调方法,最终执行 doBind0 方法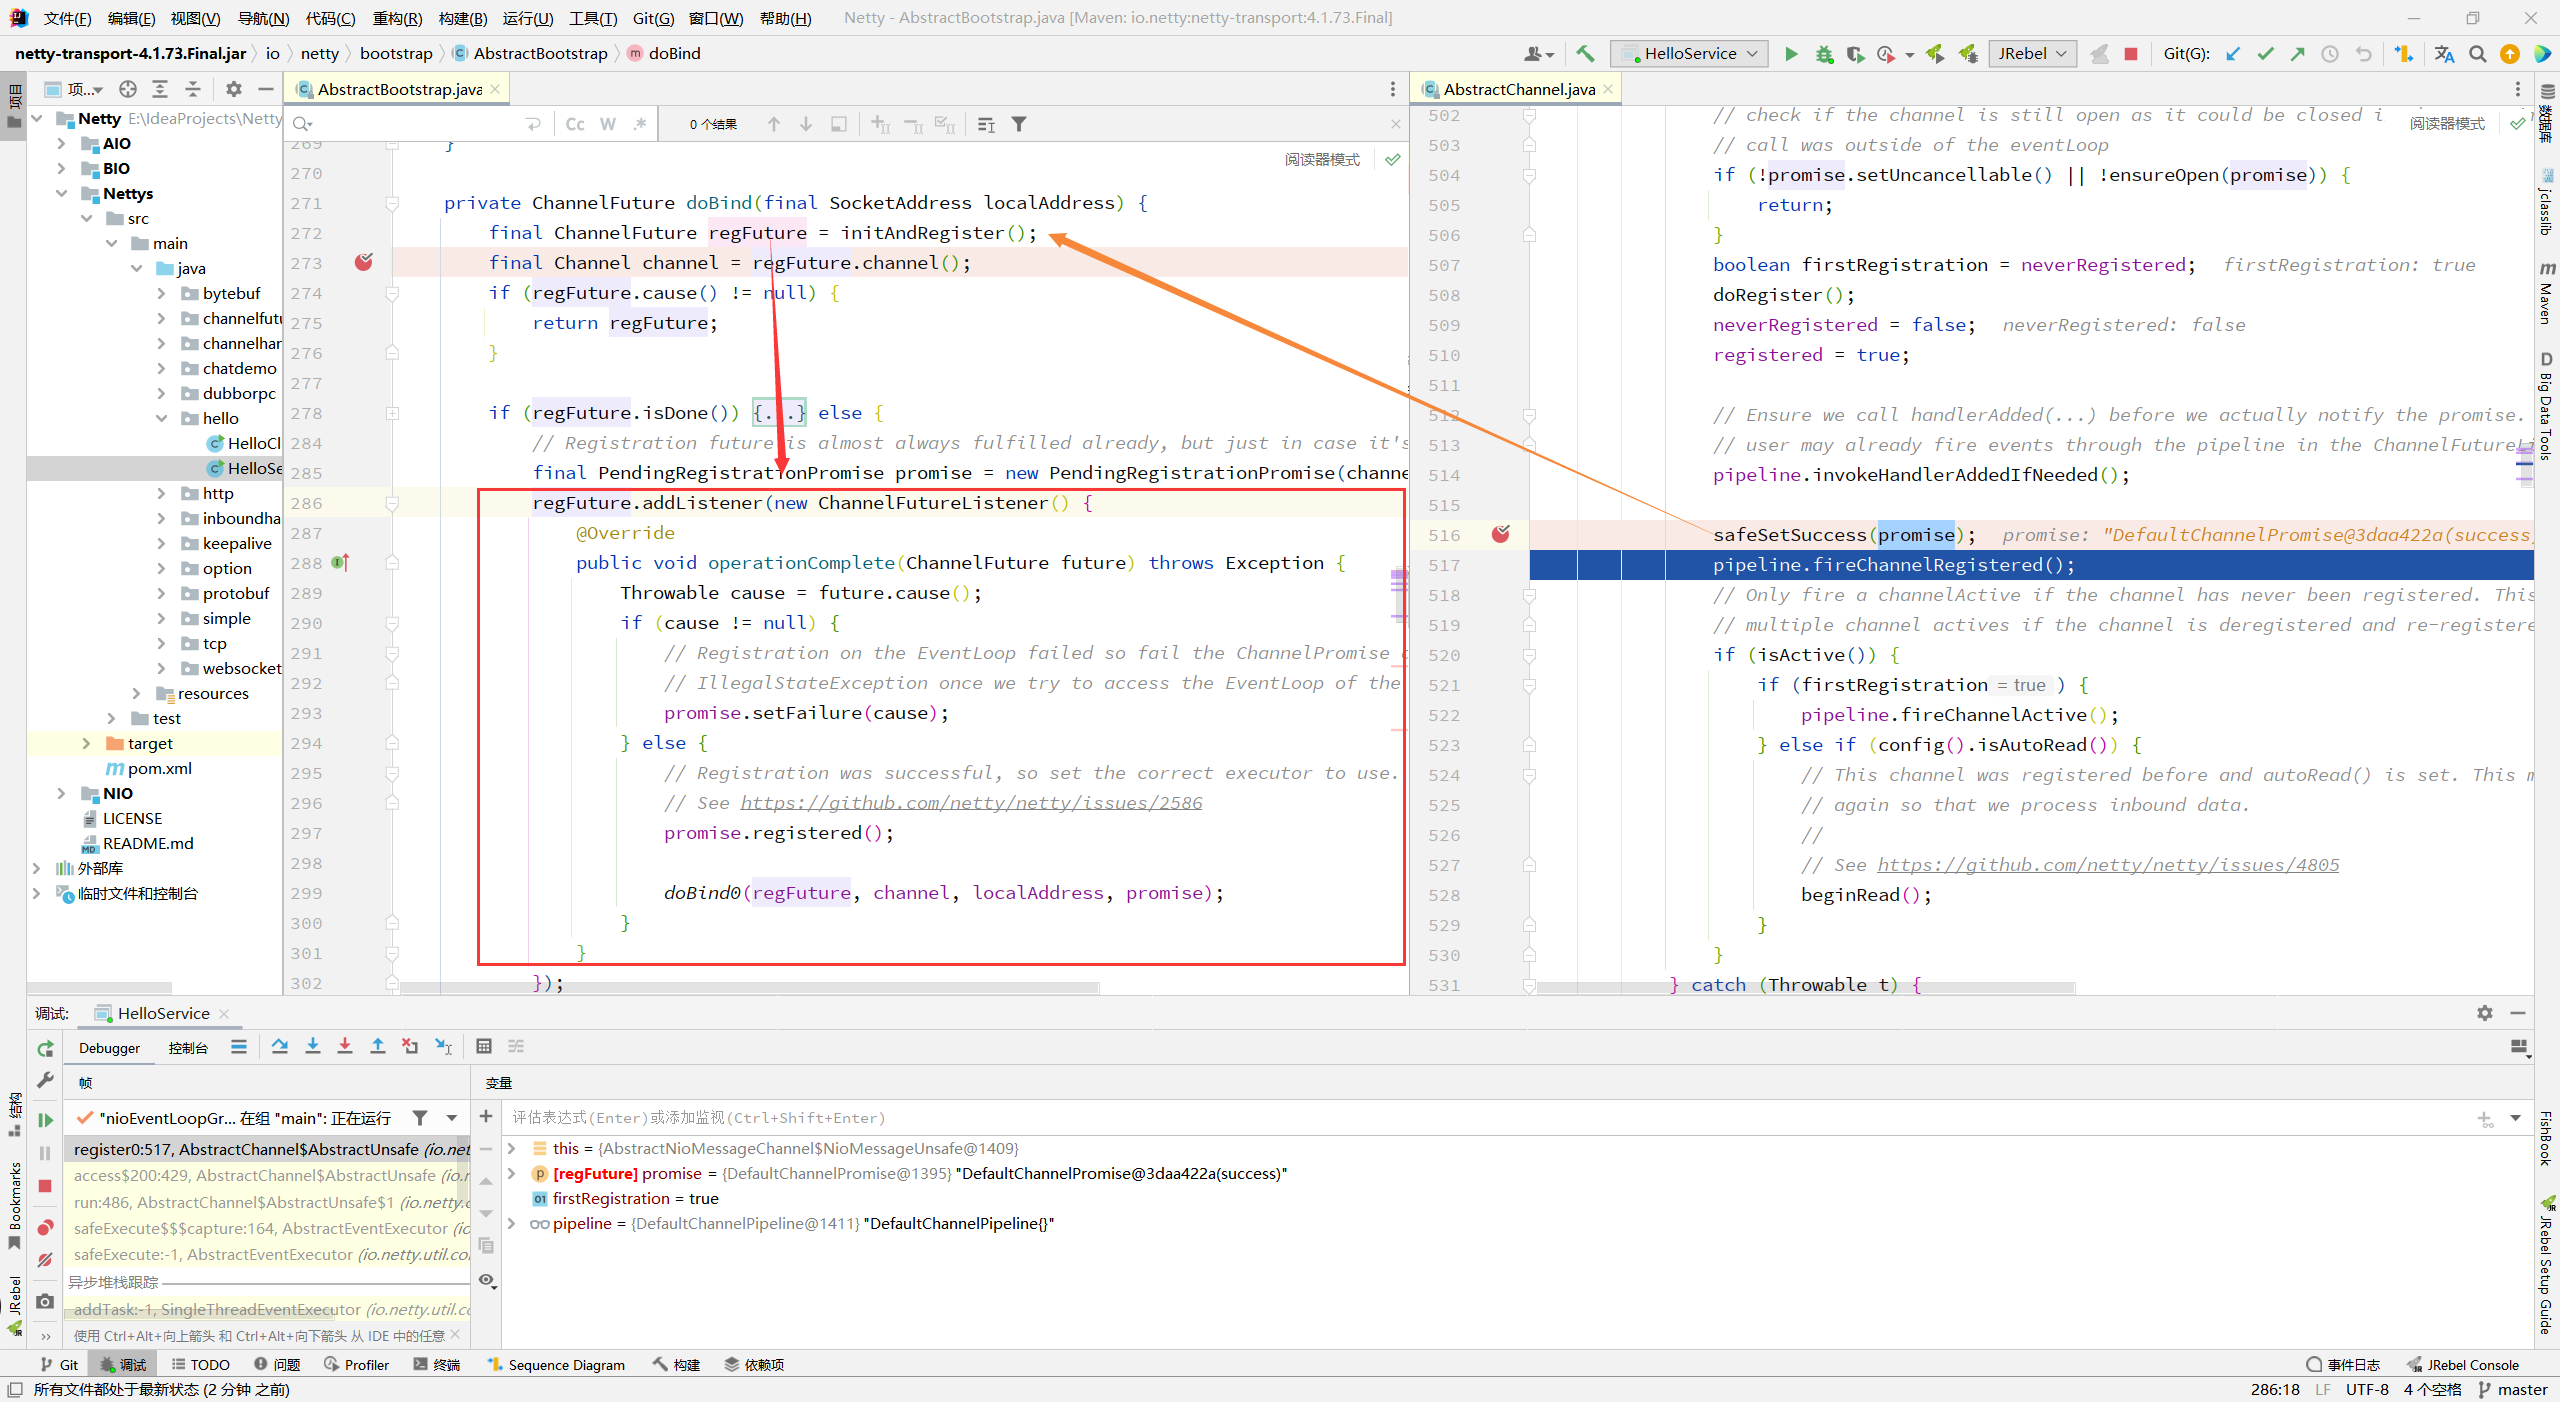
点击doBind0方法,追溯其源码,找到核心方法 invokeBind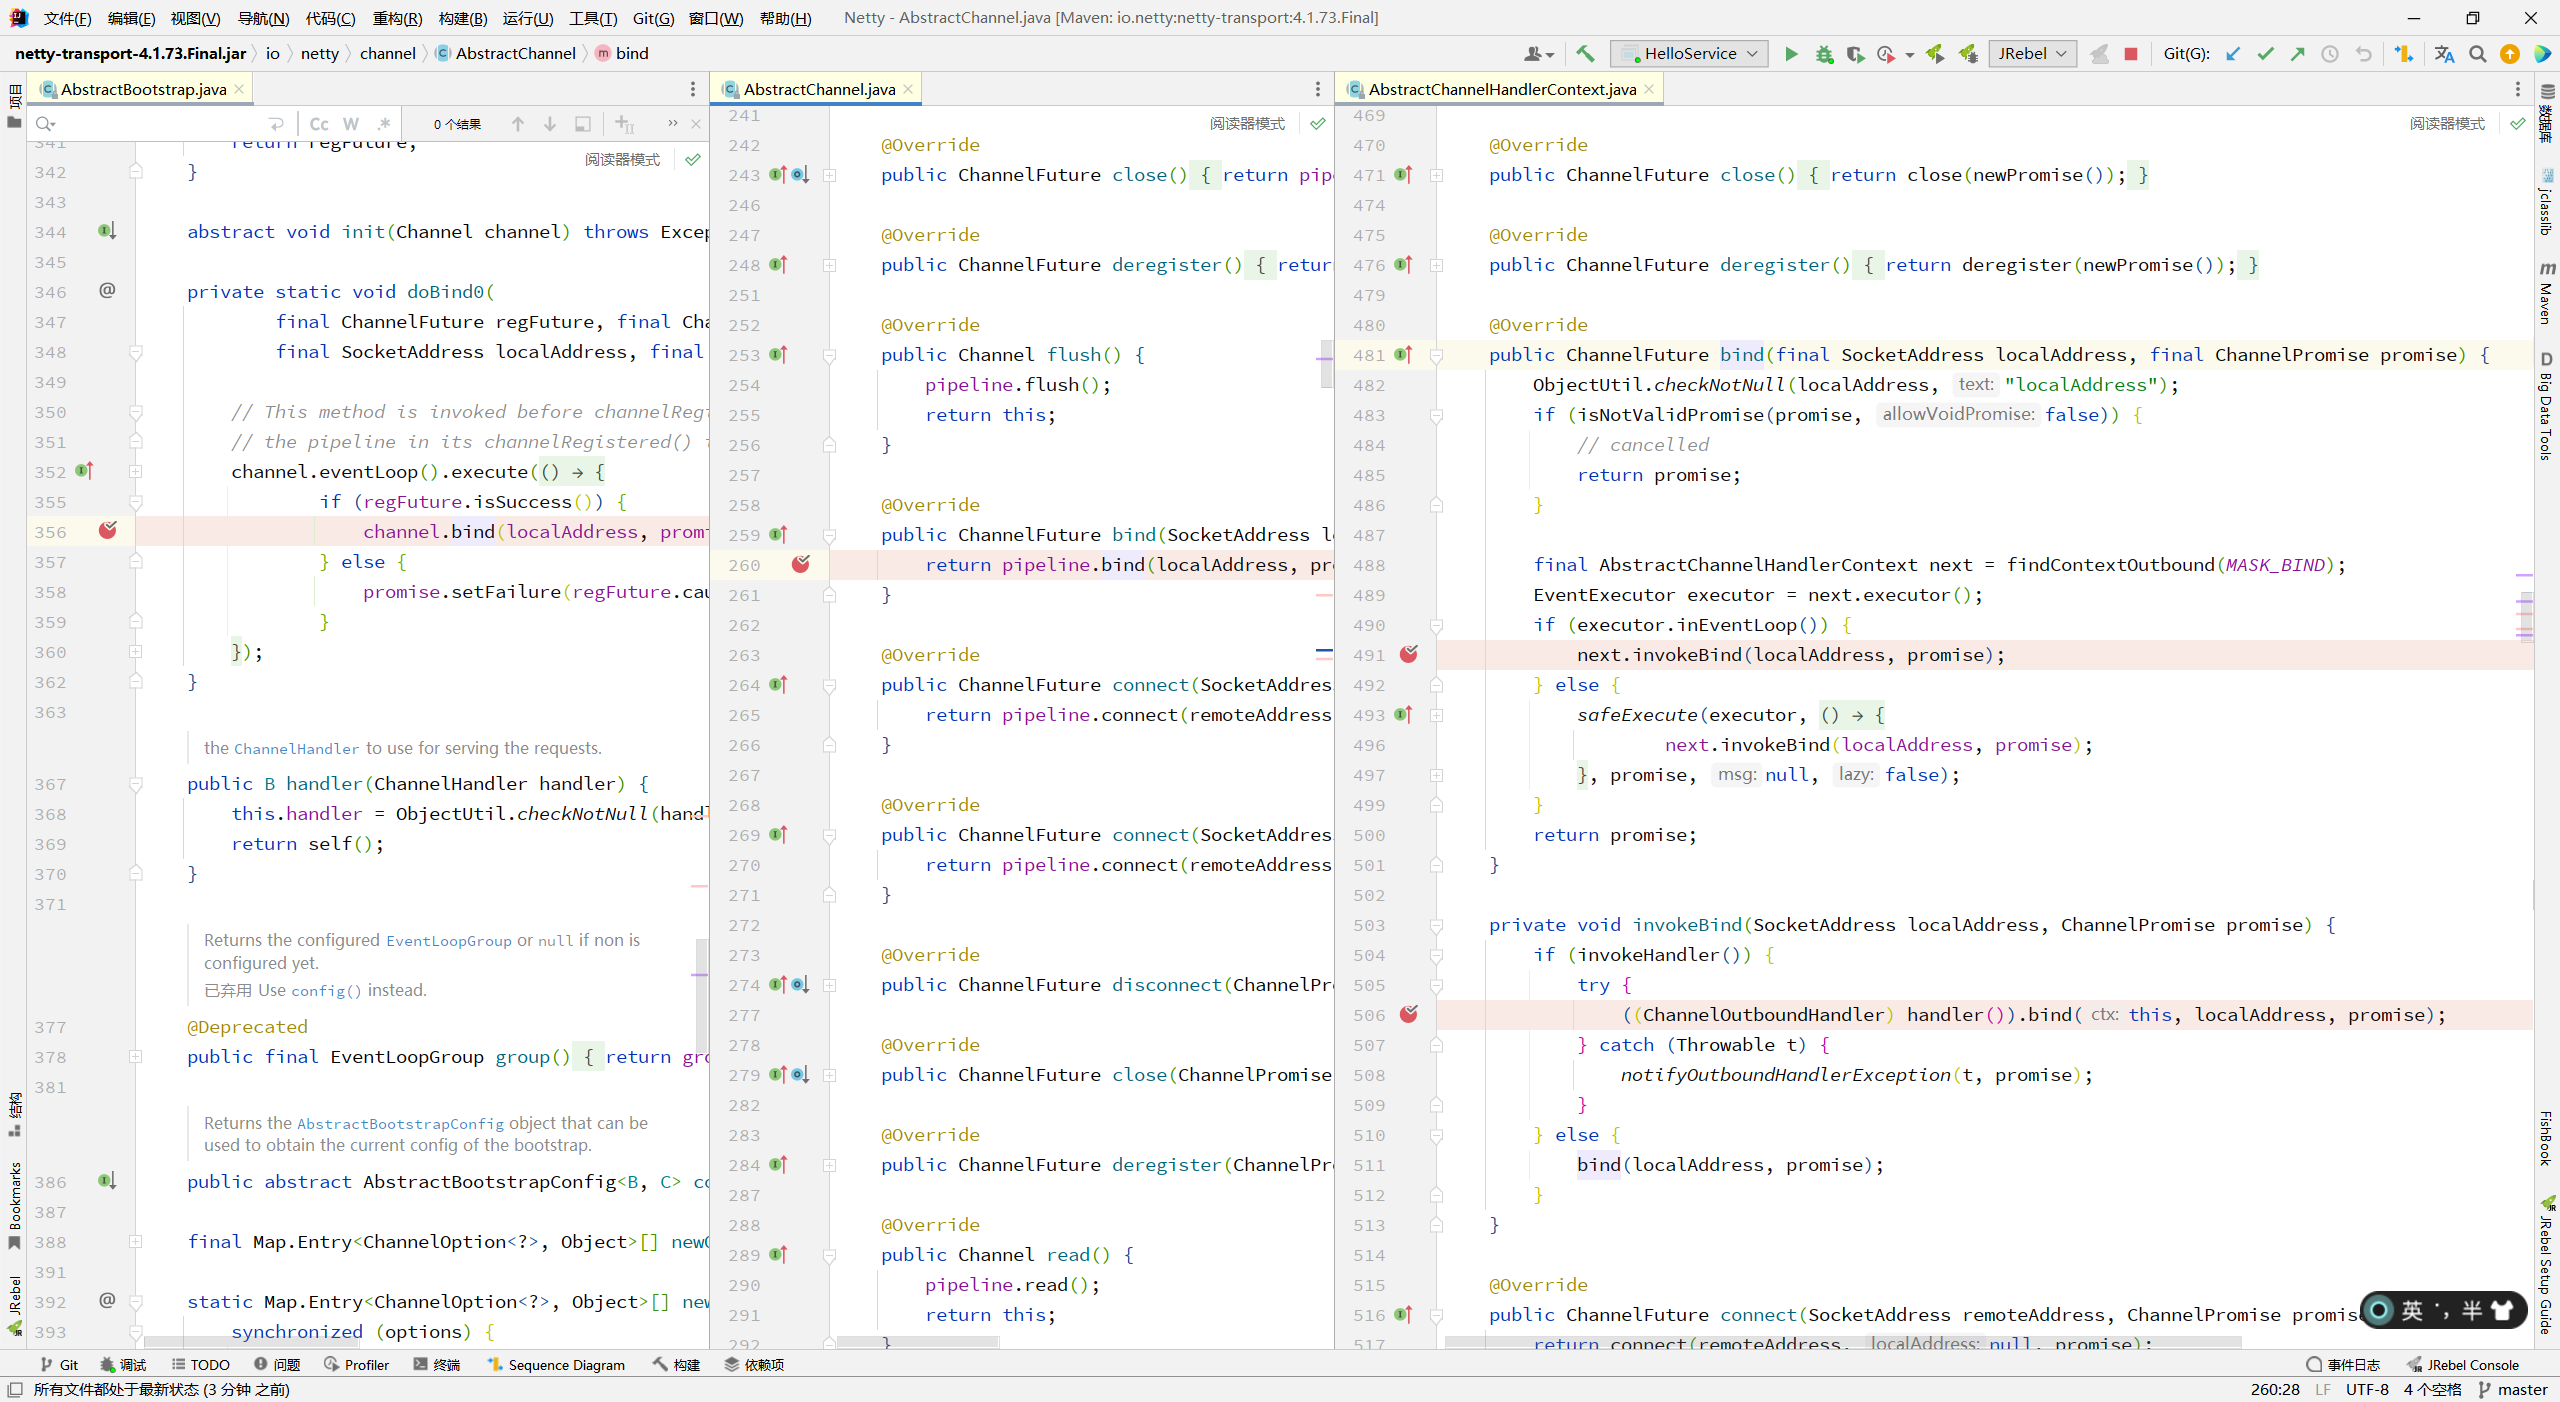
进入 invokeBind,通过判断JDK版本实现 NioServerSocketChannel 的绑定操作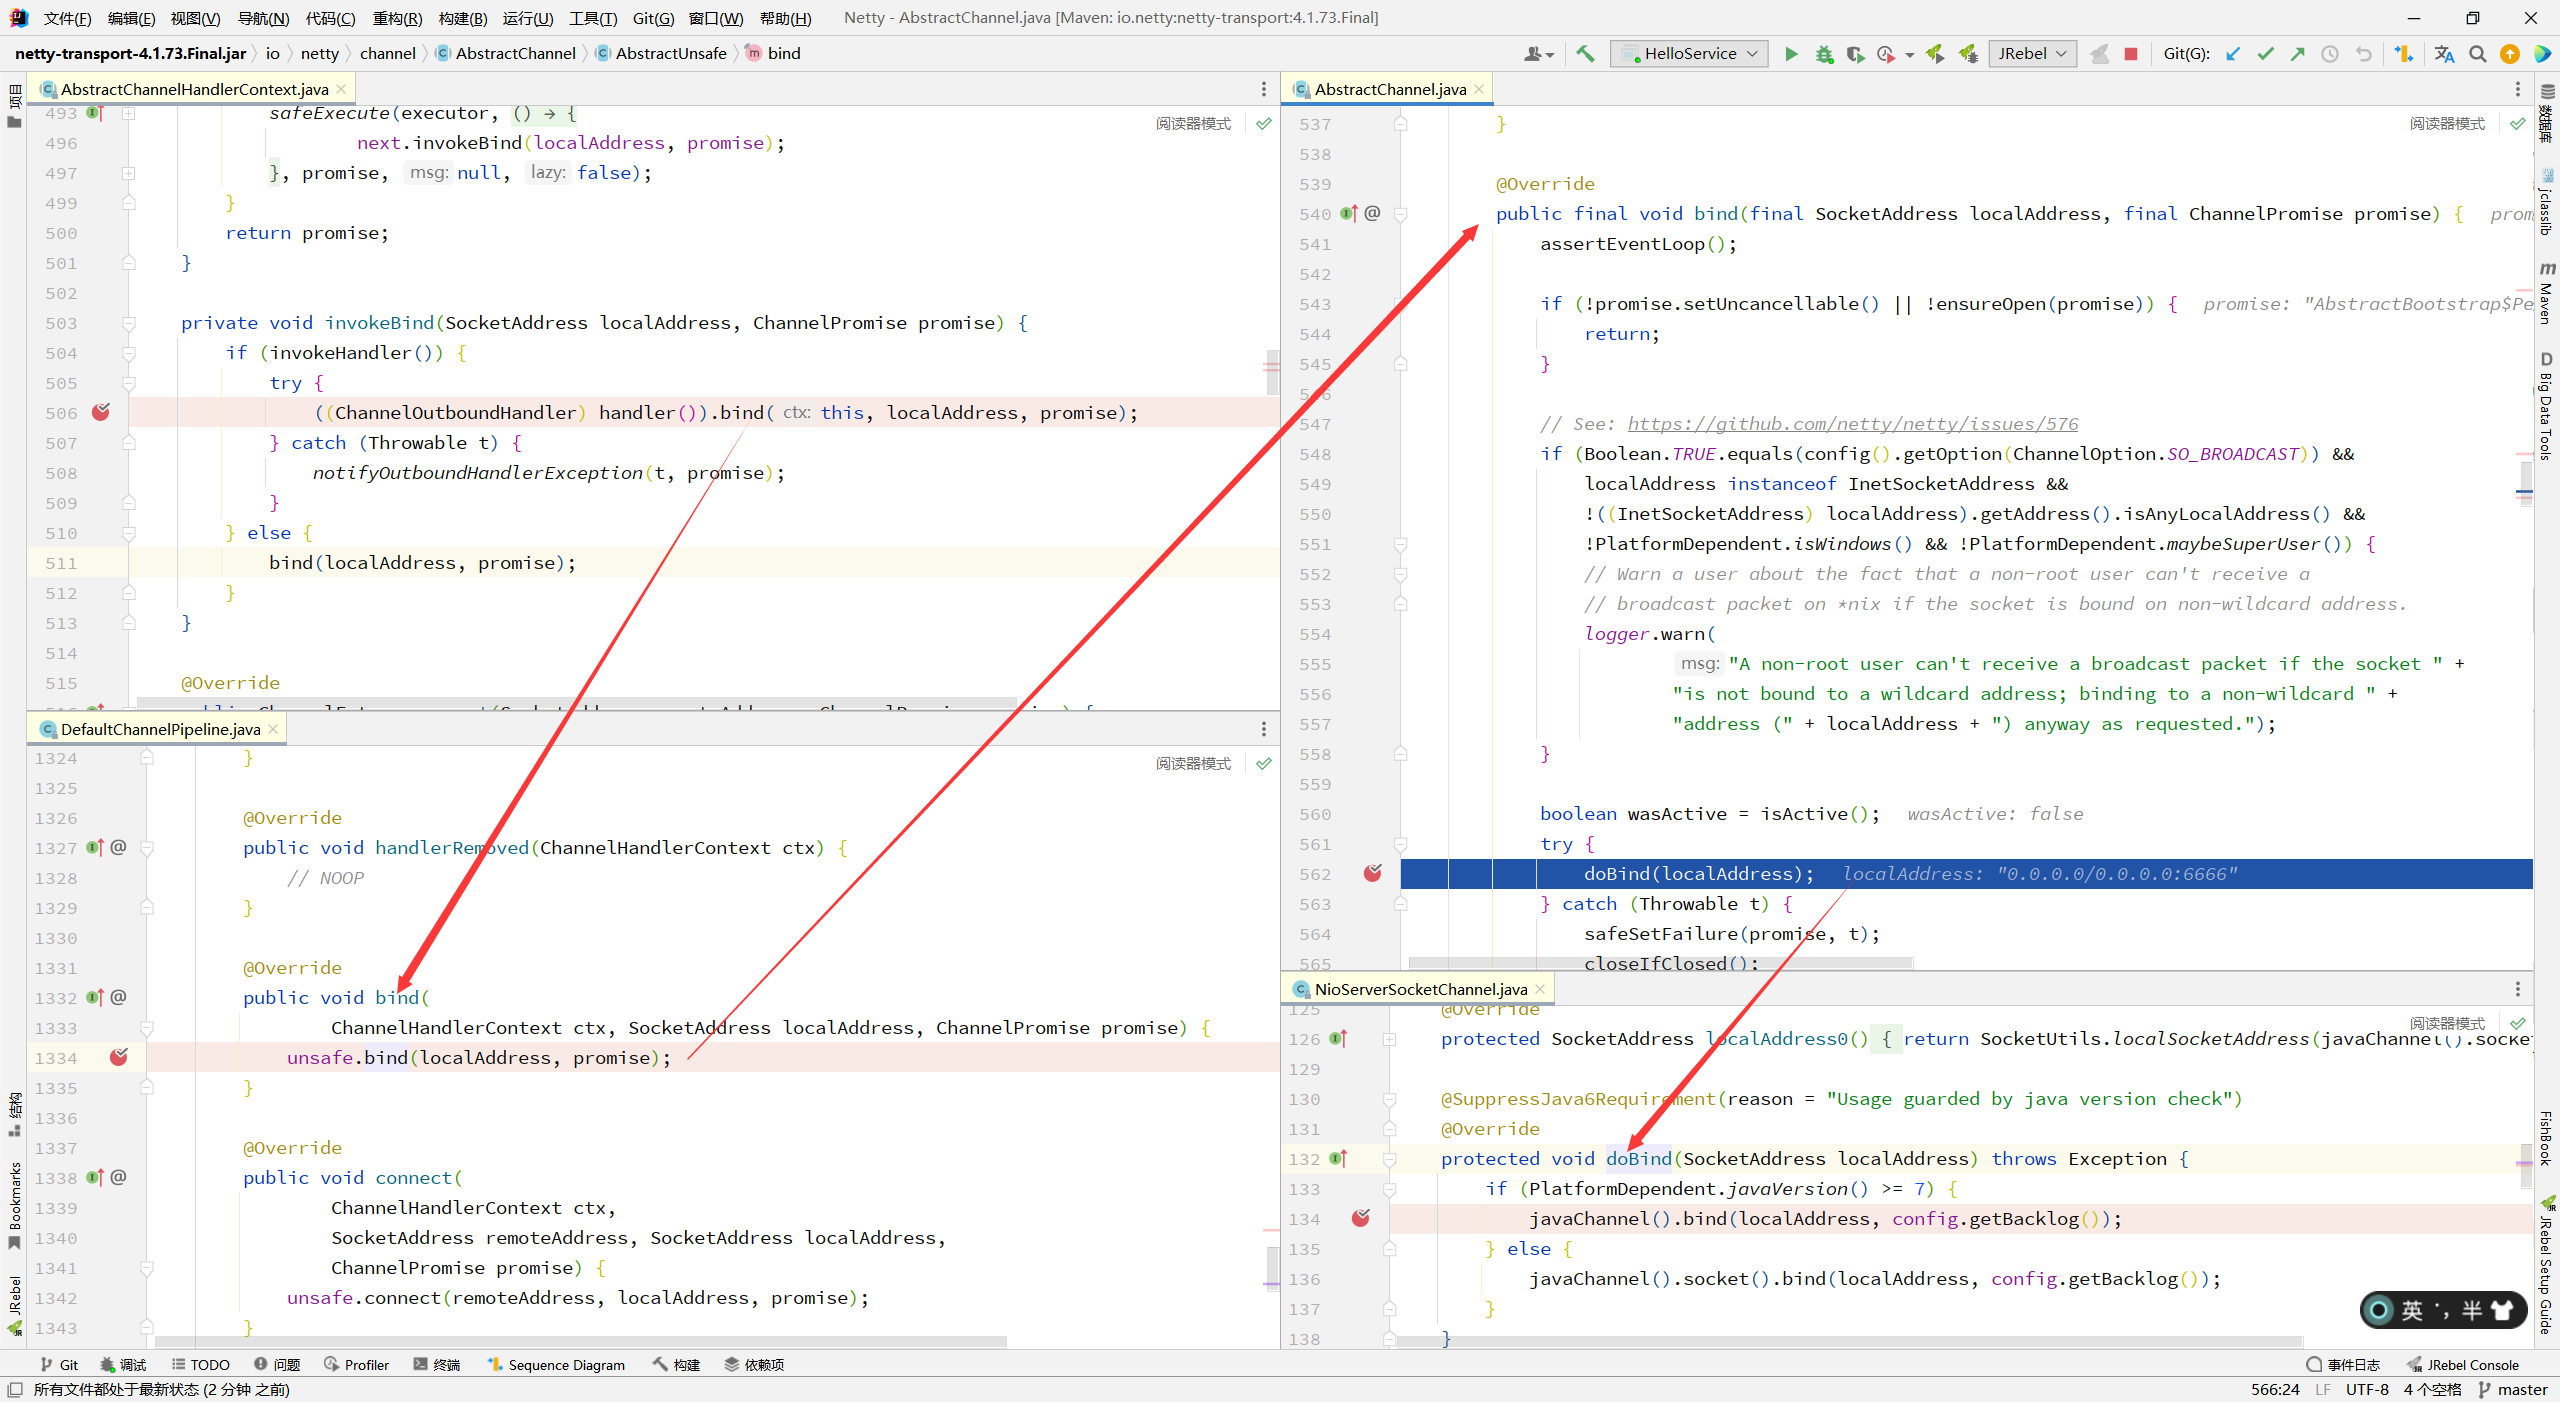
完成绑定后判断 NioServerSocketChannel 是否可用,如果可用则触发当前 channel 中 pipeline 上所有可用 handler 事件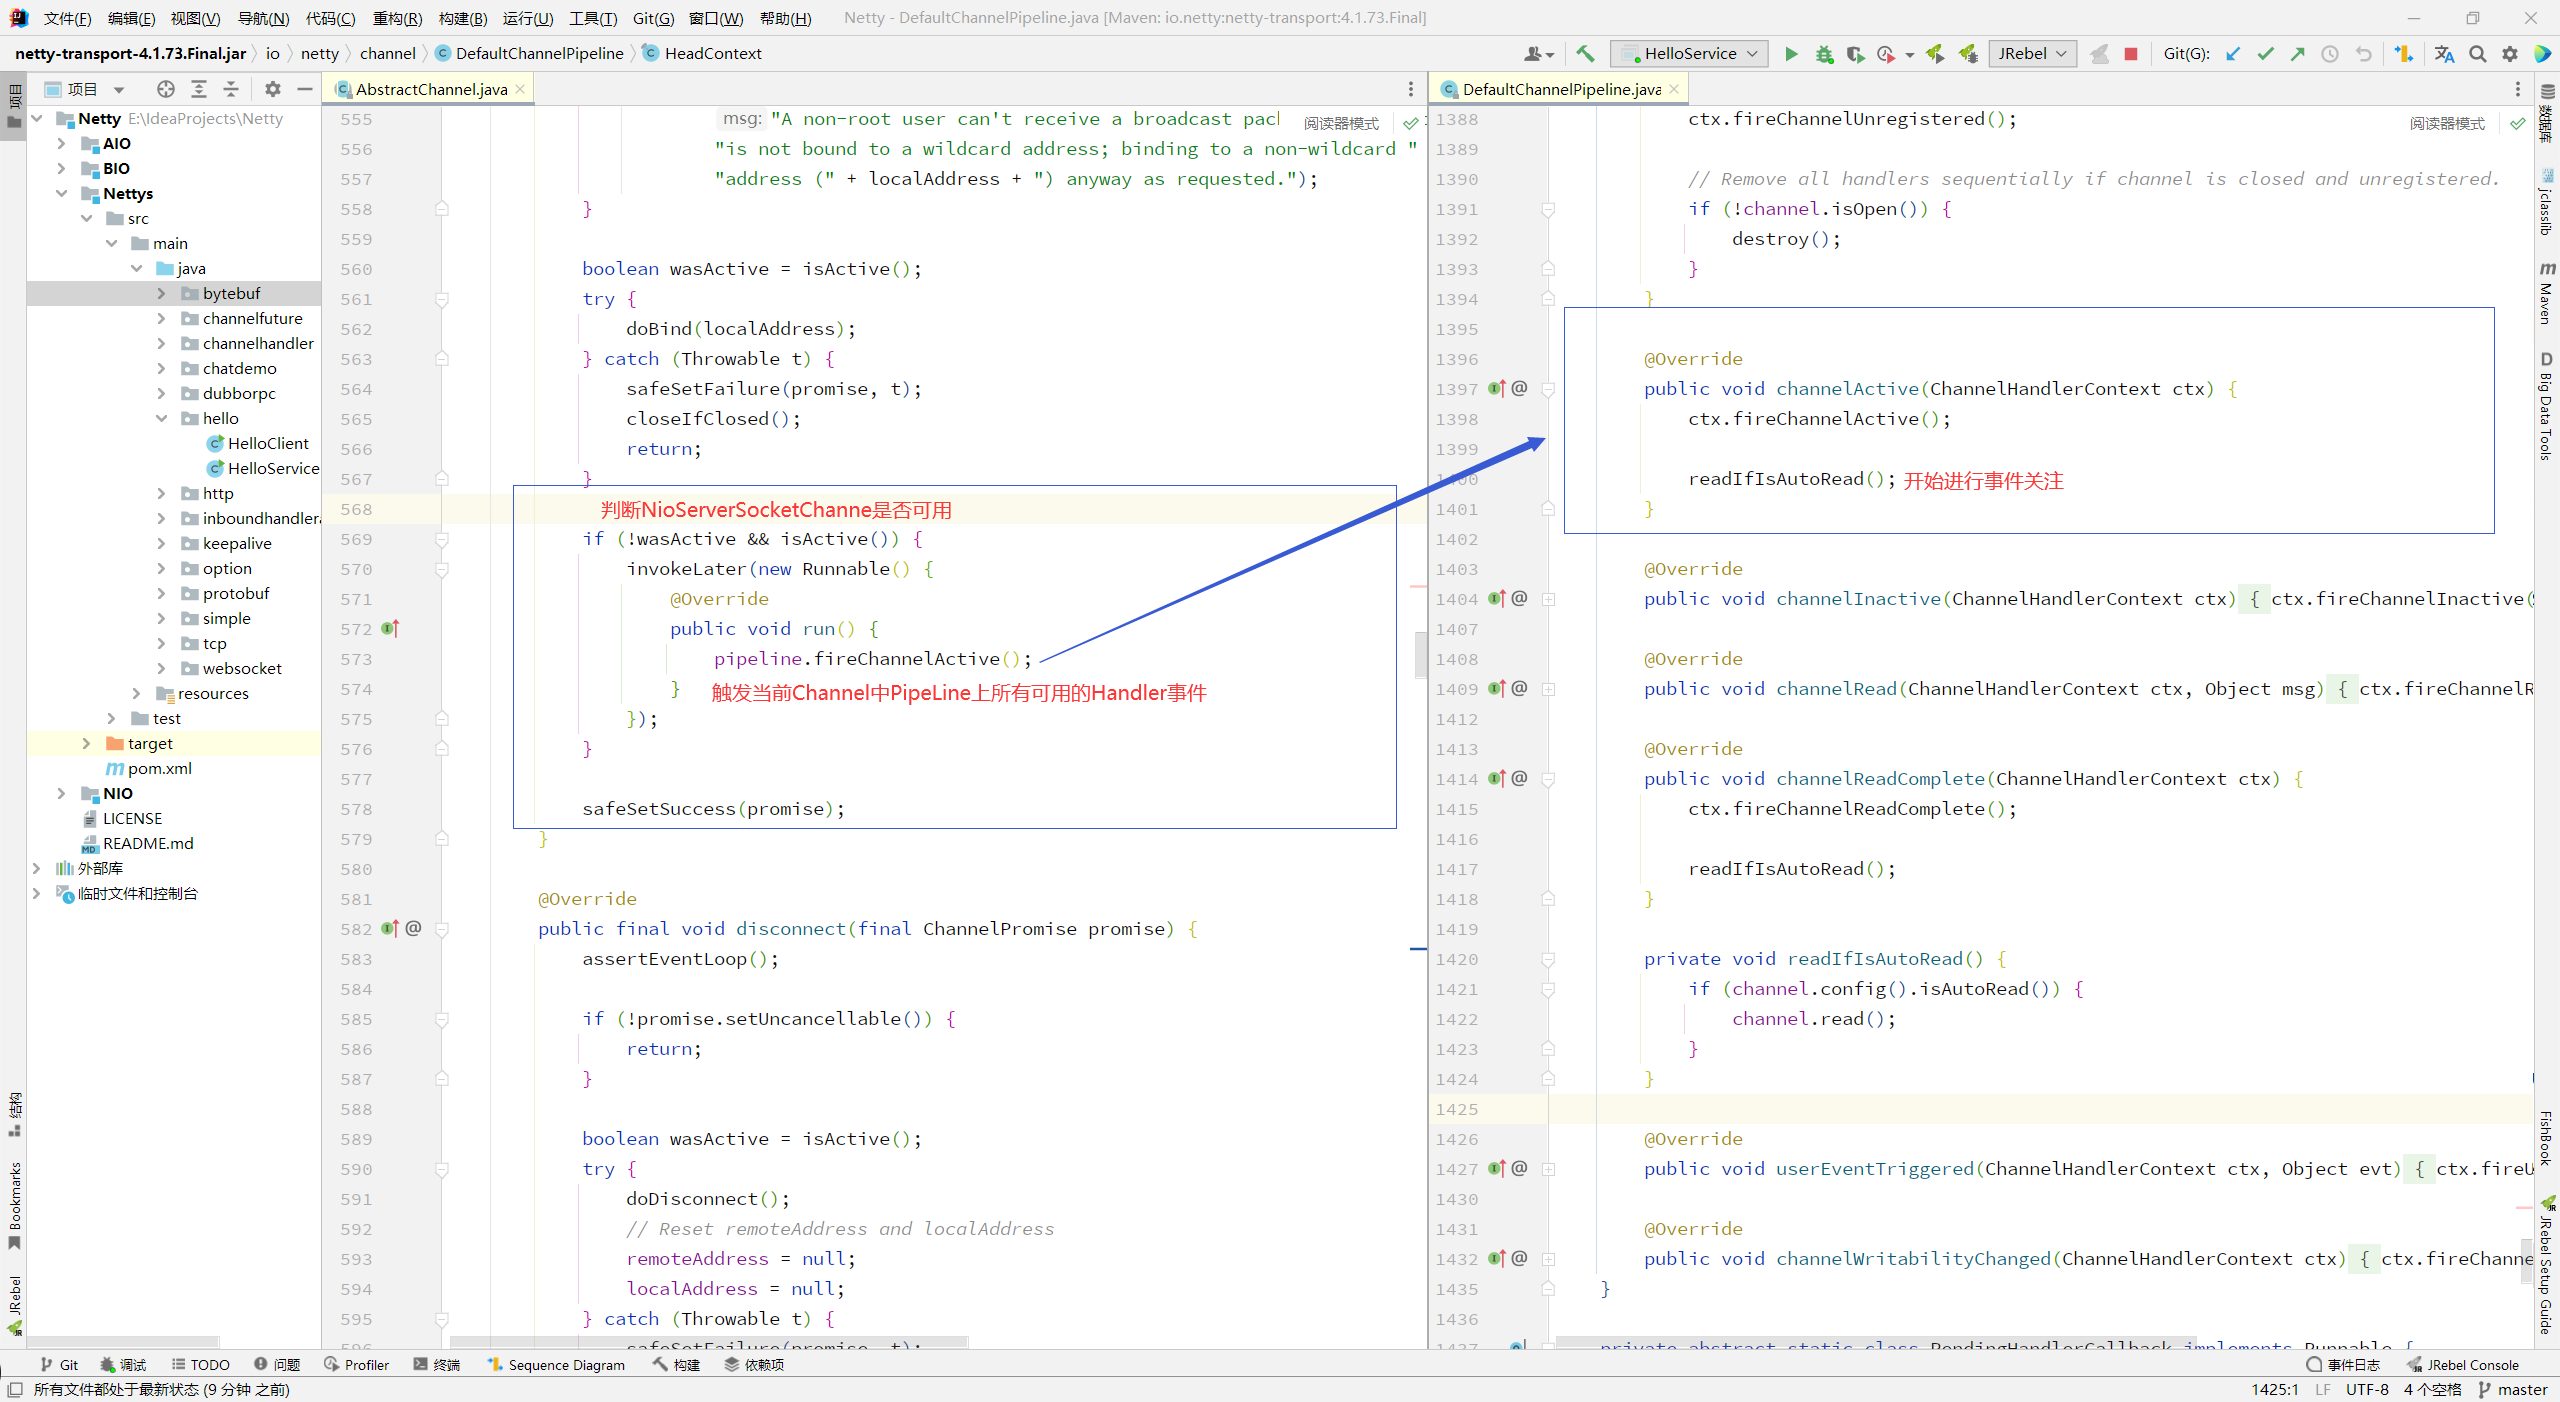
进入 readIfIsAutoRead,通过 debug 溯源到 selectionKey.interestOps(interestOps | readInterestOp) 实现事件的关注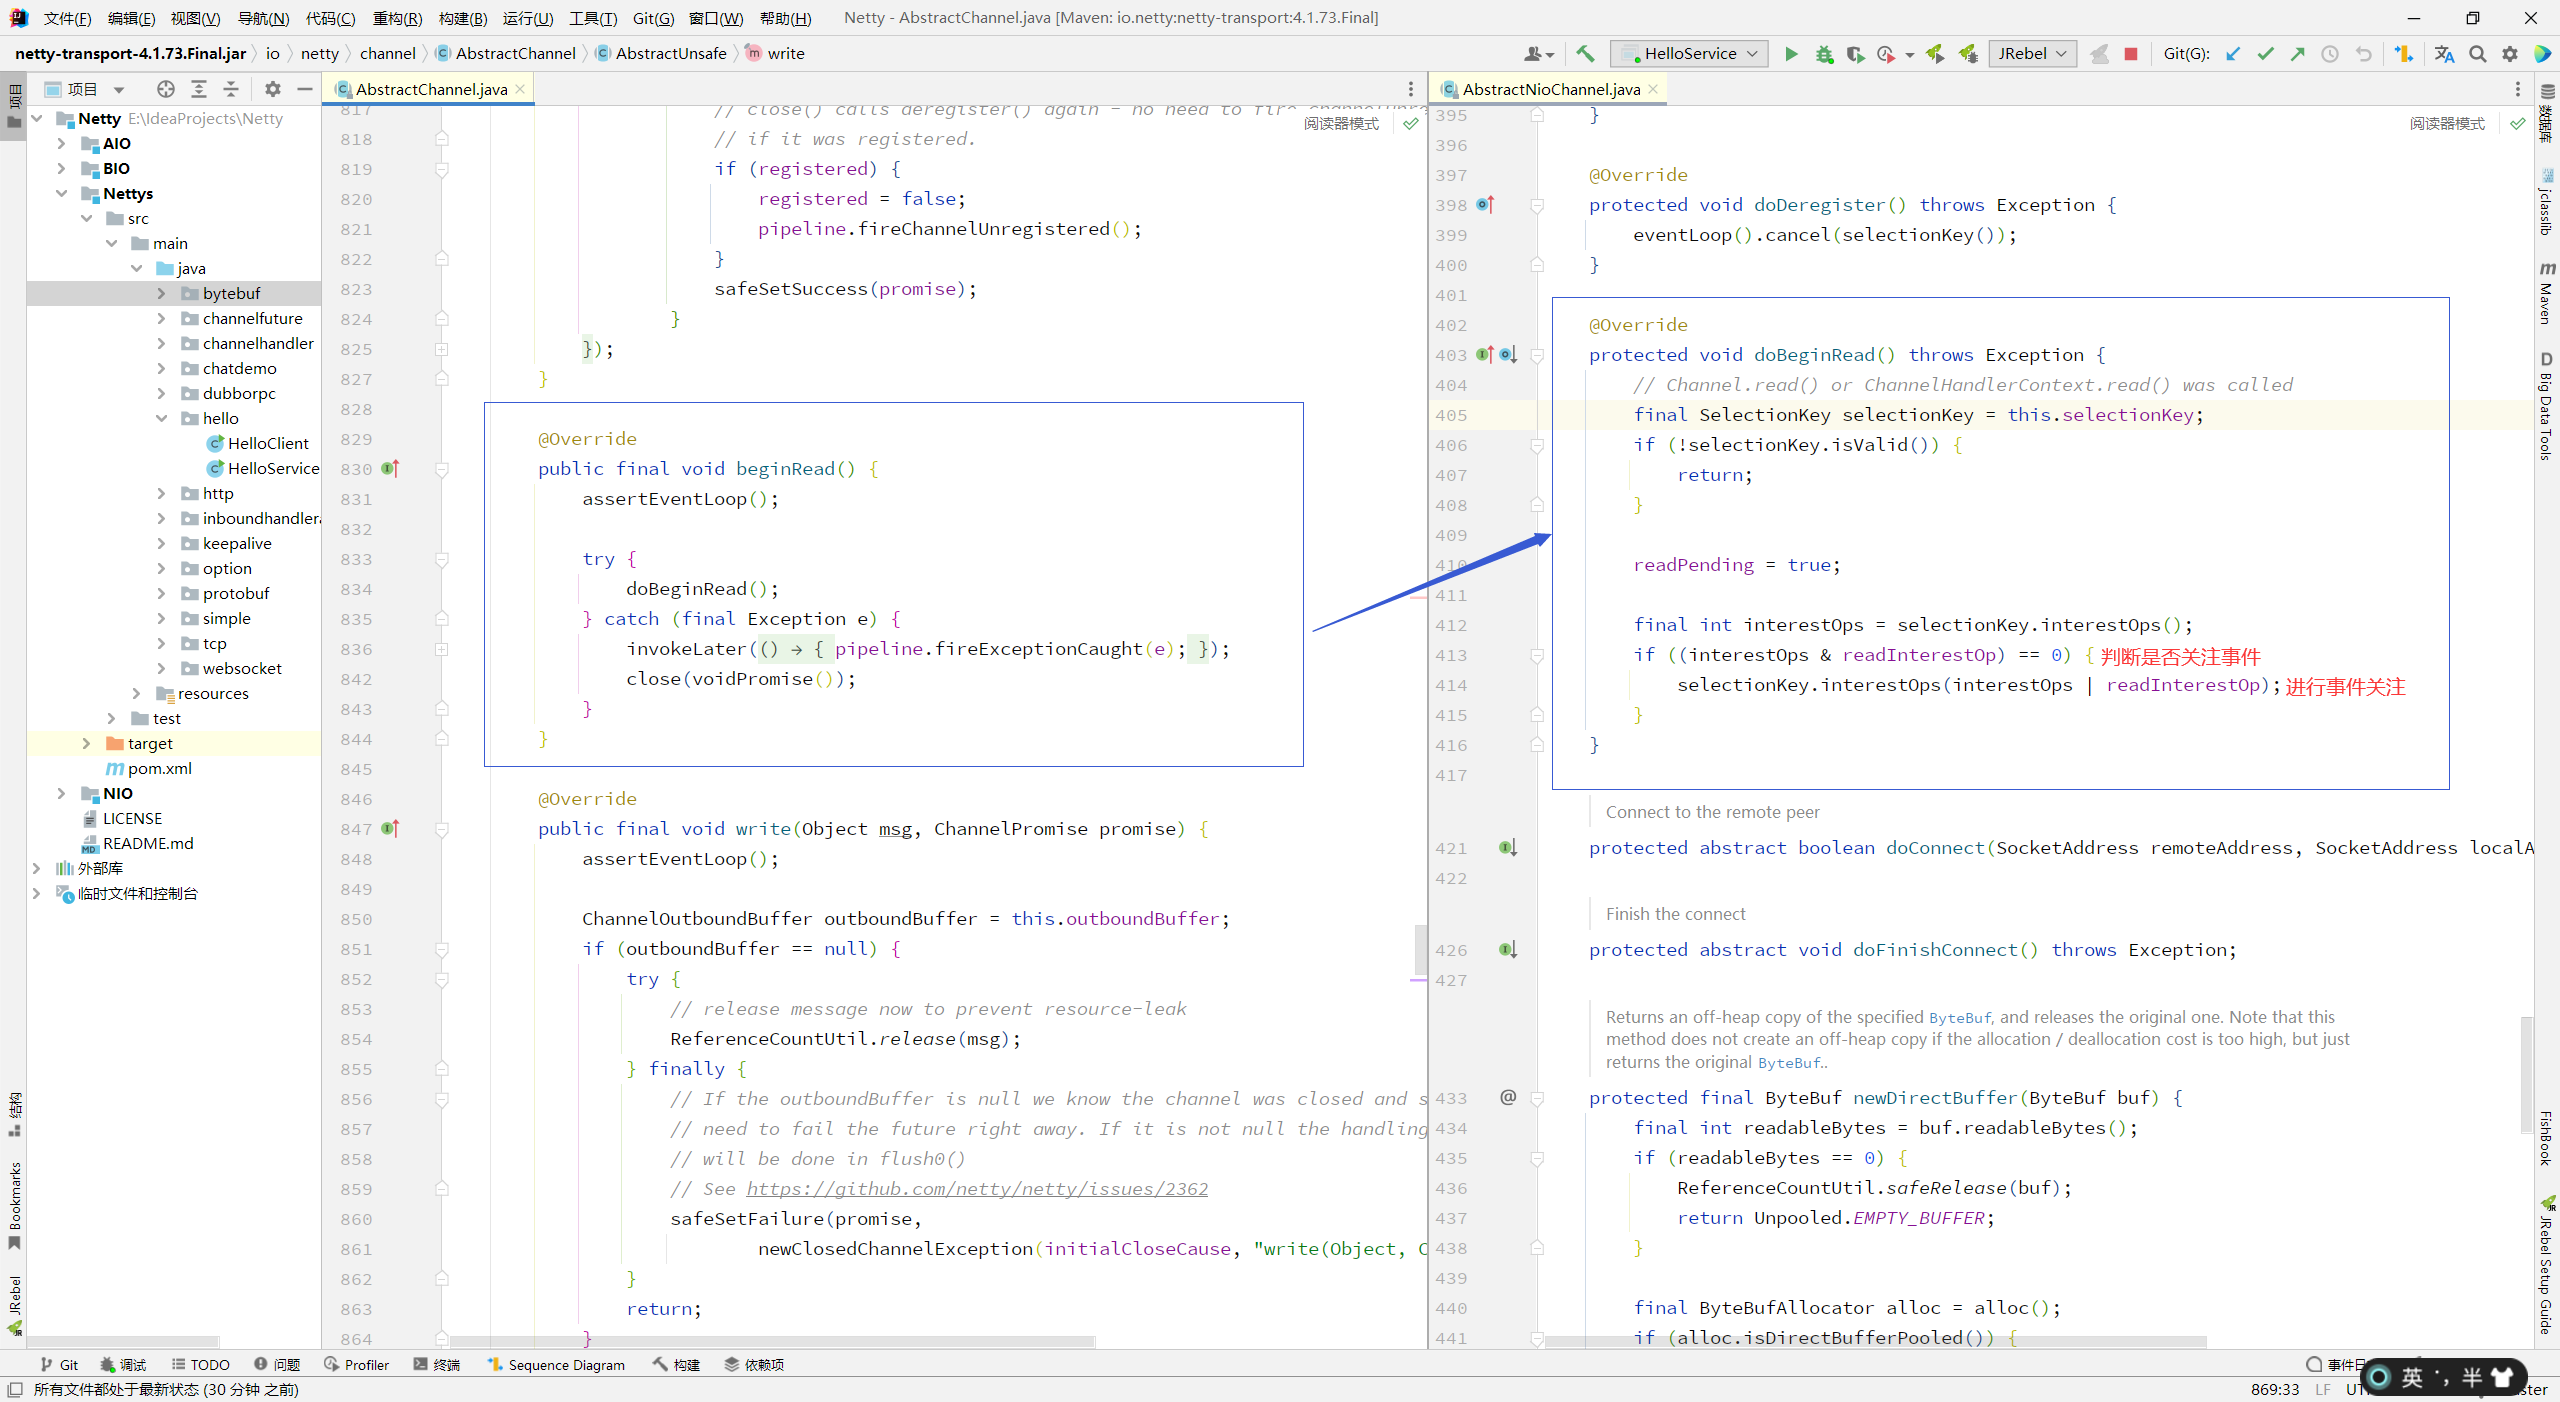
总结:
首先调用 new Channel() 创建服务端的 Channel( 底层为通过 JDK 创建 JDK 的 Channel ),Netty将其包装为一个自己服务端的 Channel,同时会创建一些基本内的组件绑定在此 Channel 上(例如 pipeLine )。然后调用 init () 方法初始化服务端 Channel,该过程最重要的是为服务端Channel添加一个连接处理器。随后调用 register () 方法注册 selector,该过程中 Netty 将JDK底层的Channel注册到事件轮询器上,并将 Netty 的 Channel 作为 Attachment 绑定到对应的 JDK 底层的 Channel 。最后调用 doBind 方法绑定到 JDK 底层的 API,实现对本地端口的监听

