在yaml配置文件中能配置的东西,都存在一个固有的规律:
大量的自动配置类xxxAutoConfiguration里面自动装配了一些默认的属性,然后这些属性是从对应的xxxProperties类中获取的,xxxProperties文件又通过@ConfigurationProperties注解与yaml文件绑定,所有在配置文件(yaml)中能配置的属性都在xxxProperties文件中封装着,所以如果想要自定义属性,只需要按照规则在yaml文件中配置即可。xxxxAutoConfigurartion:自动配置类;给容器中添加组件xxxxProperties:封装配置文件中相关属性;
PS:可以通过debug=true来查看哪些配置生效
ConditionalOn:spring底层注解,根据不同条件,来判断当前配置或类是否生效
springboot Web开发
要解决的问题:
- 导入静态资源…
- 首页
- jsp,模板引擎Thymeleaf
- 装配扩展SpringMVC
- 增删改查
- 拦截器
- 国际化!
静态资源
打开WebMvcAutoConfiguration.class
//添加资源处理器public void addResourceHandlers(ResourceHandlerRegistry registry) {//如果有自定义配置,则默认值失效if (!this.resourceProperties.isAddMappings()) {logger.debug("Default resource handling disabled");} else {Duration cachePeriod = this.resourceProperties.getCache().getPeriod();CacheControl cacheControl = this.resourceProperties.getCache().getCachecontrol().toHttpCacheControl();//webjars下的资源都可以被识别if (!registry.hasMappingForPattern("/webjars/**")) {this.customizeResourceHandlerRegistration(registry.addResourceHandler(new String[]{"/webjars/** 可以等价于"}).addResourceLocations(///webjars/** 可以等价于classpath:/META-INF/resources/webjars/new String[]{"classpath:/META-INF/resources/webjars/"}).setCachePeriod(this.getSeconds(cachePeriod)).setCacheControl(cacheControl));}String staticPathPattern = this.mvcProperties.getStaticPathPattern();if (!registry.hasMappingForPattern(staticPathPattern)) {this.customizeResourceHandlerRegistration(registry.addResourceHandler(new String[]{staticPathPattern}).addResourceLocations(WebMvcAutoConfiguration.getResourceLocations(//getStaticLocations方法获取静态资源路径this.resourceProperties.getStaticLocations())).setCachePeriod(this.getSeconds(cachePeriod)).setCacheControl(cacheControl));}}}
点进getStaticLocations
里面有四个可以存放静态资源的路径
总结:
1.springboot可以用以下方式处理静态资源:
- webjars
localhost:8080/webjars/ - 根目录下:public,static,resource,/** 这四个路径映射到
localhost:8080/ 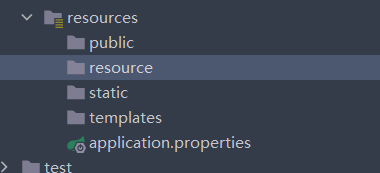
2.优先级 resource>static(默认)>public
首页如何定制
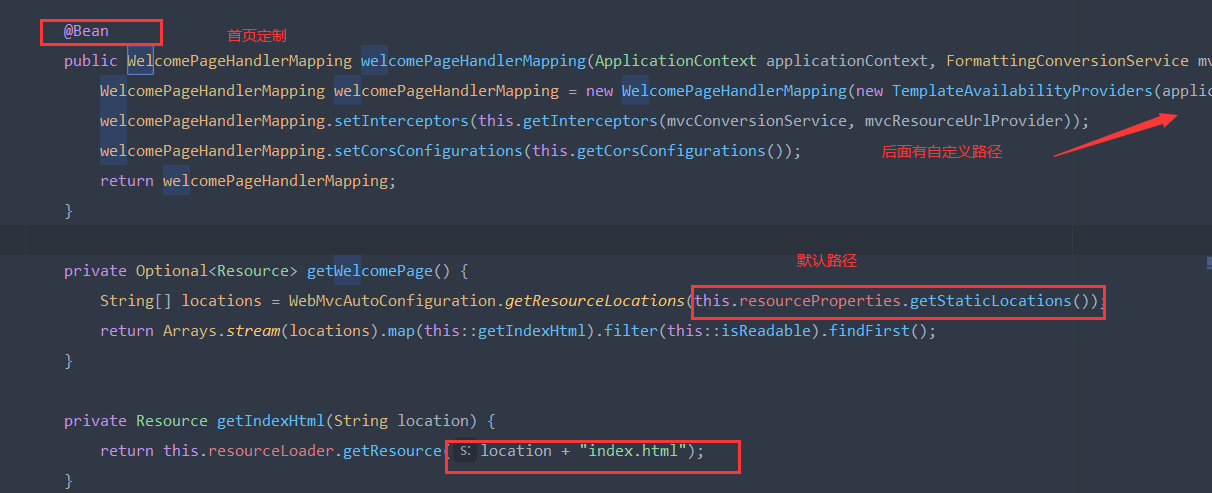
静态资源默认路径下的index.html即首页
模板引擎
PS:在templates目录下的所有页面,只能通过controller来跳转
,这个需要模板引擎的支持 thymeleaf
需要使用thymeleaf时,只需要导入依赖,把html放入templates目录下即可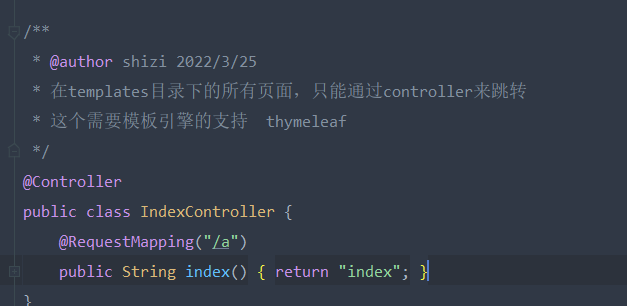
<dependency><groupId>org.thymeleaf</groupId><artifactId>thymeleaf-spring5</artifactId></dependency><dependency><groupId>org.thymeleaf.extras</groupId><artifactId>thymeleaf-extras-java8time</artifactId></dependency>
thymeleaf基本语法
https://fanlychie.github.io/post/thymeleaf.html#5-%E9%81%8D%E5%8E%86
MVC配置原理
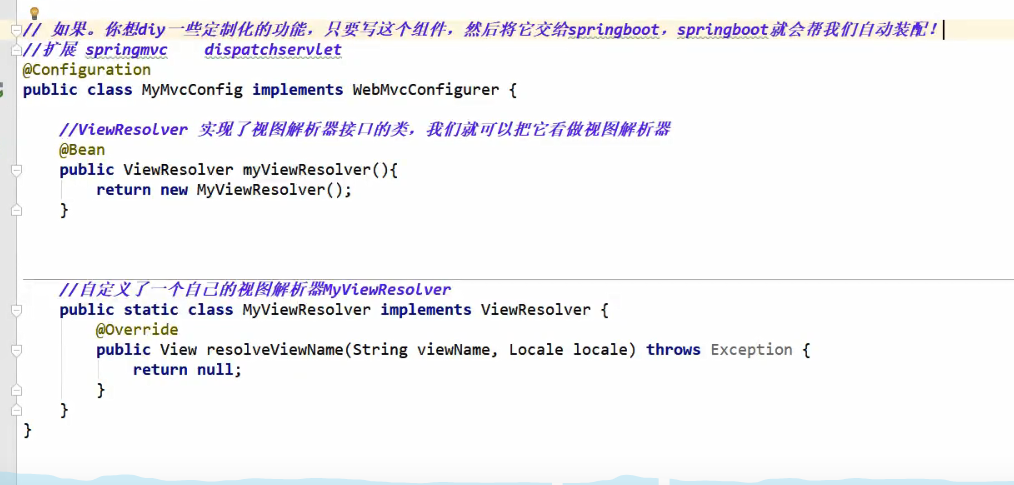
SpringBoot在自动配置很多组件的时候,先看容器中有没有用户自己配置的(如果用户自己配置@bean),如果有就用用户配置的,如果没有就用自动配置的;如果有些组件可以存在多个,比如我们的视图解析器,就将用户配置的和自己默认的组合起来!
如果我们要扩展springmvc,我们要做的就是编写一个@Configuration注解类,并且类型要为WebMvcConfigurer,还不能标注@EnableWebMvc注解;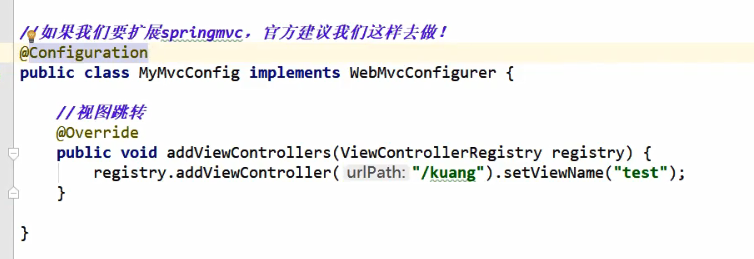
那么为什么不能标注@EnableWebMvc注解?
这个注解就是导入了一个类: DelegatingwebMvcConfiguration:从容器中获取所有的webmvcconfig;
而DelegatingwebMvcConfiguratio继承了WebMvcConfigurationSupport类
而在WebMvc的自动装配类中:
没有WebMvcConfigurationSupport此类时条件成立,自动装配生效,即如果加上@EnableWebMvc注解等于加入了此类,会让自动装配失效。
开始web开发
准备工作:
引入lombok,lombok会自动帮我们生成
getter、setter和equals方法/*** 部门表*/@Data@AllArgsConstructor@NoArgsConstructorpublic class Department {private Integer id;private String departmentName;}
```java /**
员工表 / @Data @NoArgsConstructor public class Employee { private Integer id; private String lastName; private String email; /*
- 0:女 1:男 */ private Integer gender; private Department department; private Date birthday;
public Employee(Integer id, String lastName, String email, Integer gender, Department department) {
this.id = id;this.lastName = lastName;this.email = email;this.gender = gender;this.department = department;//默认的创建日期this.birthday = new Date();
} }
- 模拟数据库中的数据,并给出curd方法```java/*** 员工dao*/@Repositorypublic class EmployeeDao {//模拟数据库中的数据private static Map<Integer, Employee> employeeMap = null;//员工有所属的部门@Autowiredprivate DepartmentDao departmentDao;static {//创建一个部门表employeeMap = new HashMap<Integer, Employee>();employeeMap.put(1001,new Employee(1001,"AA","A123456@qq.com",0,new Department(101,"教学部")));employeeMap.put(1002,new Employee(1002,"BB","B123456@qq.com",1,new Department(102,"市场部")));employeeMap.put(1003,new Employee(1003,"CC","C123456@qq.com",0,new Department(103,"教研部")));employeeMap.put(1004,new Employee(1004,"DD","D123456@qq.com",1,new Department(104,"运营部")));employeeMap.put(1005,new Employee(1005,"EE","E123456@qq.com",0,new Department(105,"后勤部")));}//主键自增private static Integer initId = 1006;//增加一个员工public void save(Employee employee){if(employee.getId()==null){employee.setId(initId);}employee.setDepartment(departmentDao.getDepartmentByID(employee.getDepartment().getId()));employeeMap.put(employee.getId(),employee);}//查询全部员工public Collection<Employee> getAll(){return employeeMap.values();}//通过id查询员工public Employee getEmployeeByID(Integer id){return employeeMap.get(id);}//删除员工根据idpublic void delete(Integer id){employeeMap.remove(id);}}
/*** 部门*/@Repositorypublic class DepartmentDao {//模拟数据库中的数据private static Map<Integer, Department> departmentMap = null;static {//创建一个部门表departmentMap = new HashMap<Integer, Department>();departmentMap.put(101,new Department(101,"教学部"));departmentMap.put(102,new Department(102,"市场部"));departmentMap.put(103,new Department(103,"教研部"));departmentMap.put(104,new Department(104,"运营部"));departmentMap.put(105,new Department(105,"后勤部"));}//获得所有部门信息public Collection<Department> getDepartments(){return departmentMap.values();}//通过id得到部门public Department getDepartmentByID(Integer id){return departmentMap.get(id);}}
控制层:
@Controllerpublic class IndexController {@RequestMapping({"/","/index.html"})public String index(){return "index";}}
这种方式是可以的,但首页在根目录下,不建议使用这种方式访问根目录下的html文件,更建议使用mvc的扩展
@Configurationpublic class MyConfig implements WebMvcConfigurer {@Overridepublic void addViewControllers(ViewControllerRegistry registry) {registry.addViewController("/").setViewName("index");registry.addViewController("/index.html").setViewName("index");}}
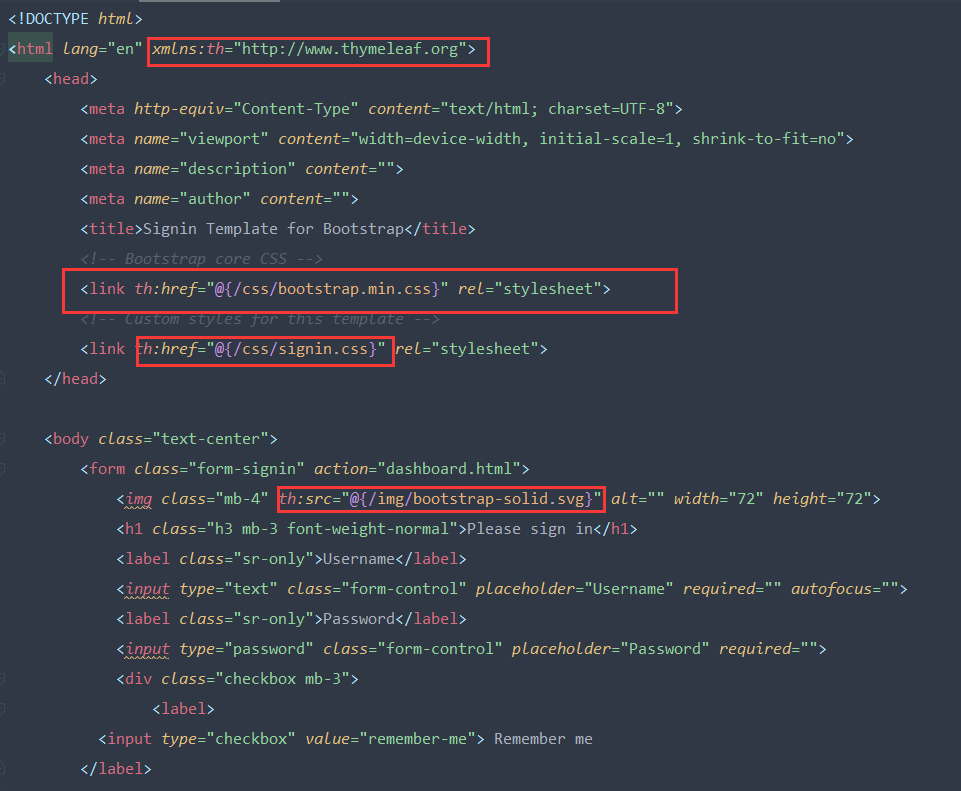
首页配置:注意点:所有静态资源都使用thymeleaf接管
页面国际化
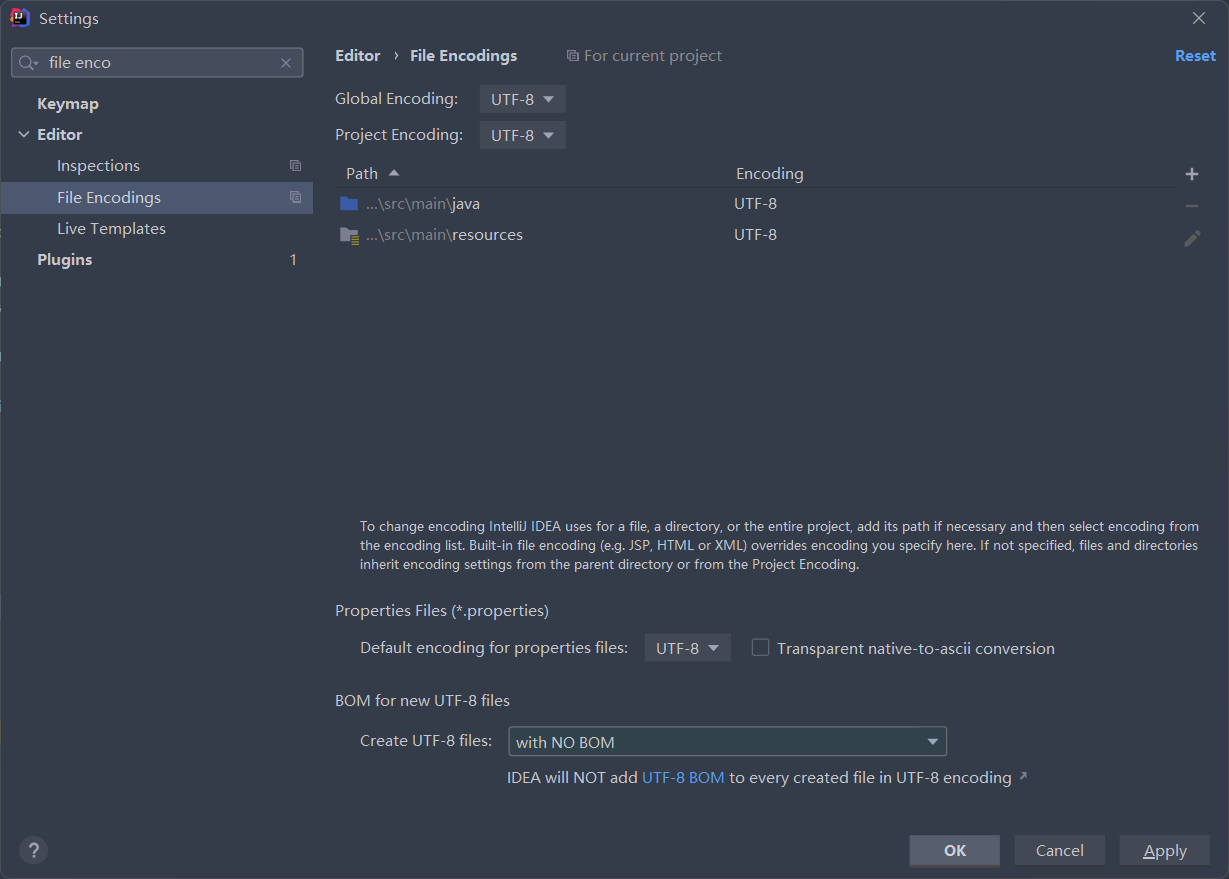
首先,确保file encoding的编码方式都是utf-8
然后创建名为i18n的文件夹
在里面创建login.properties 和login_zh_CN.properties文件,此时idea会自动生成Resource Bundle ‘login’ 文件夹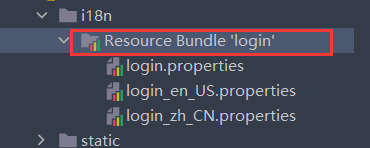
点击idea下方的Resource Bundle,可以进行可视化配置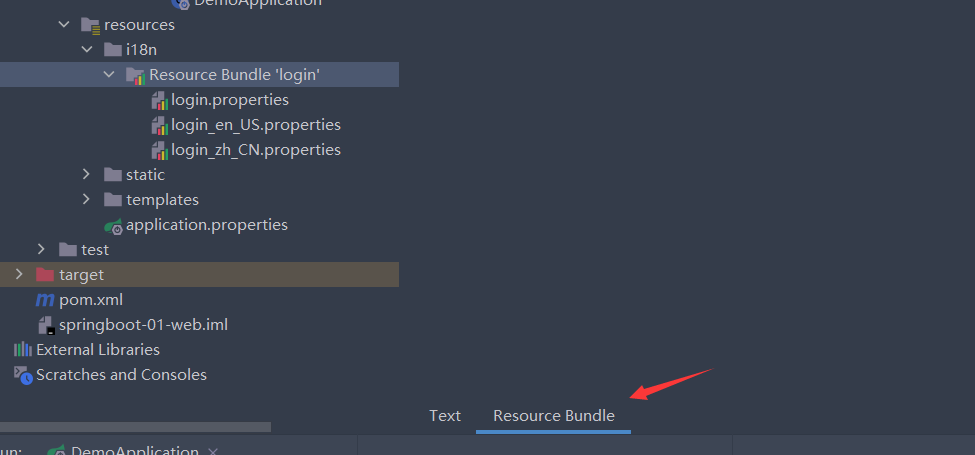
例如: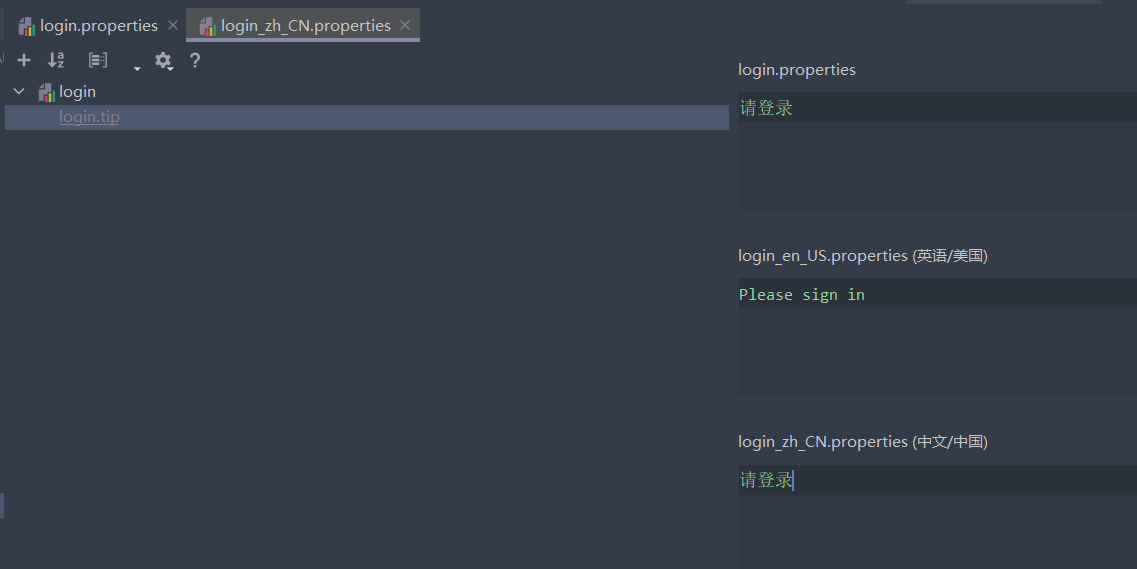
给首页配置完毕(其中的key,比如login.tip之类的名称可以任意)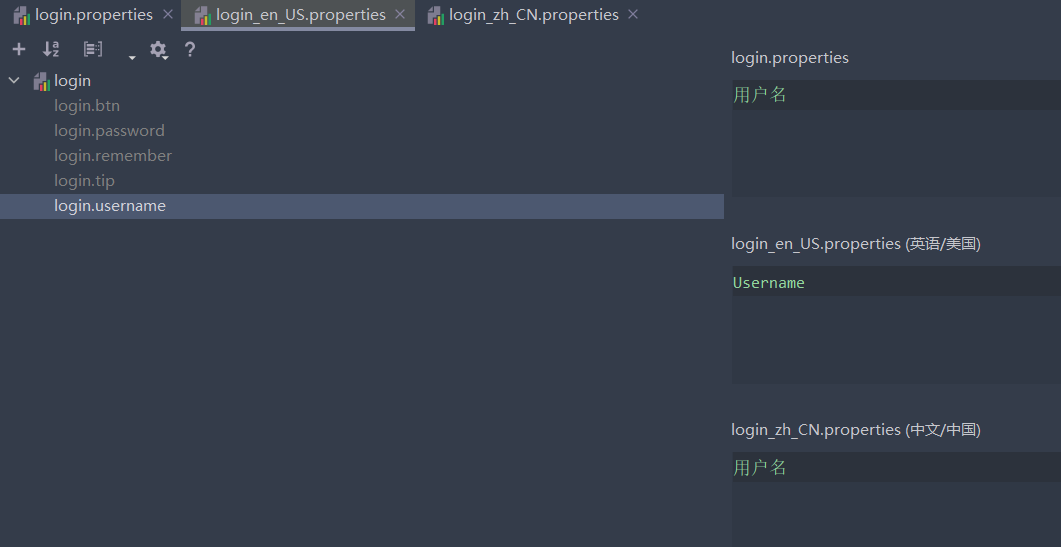
然后配置国际化路径连接

这个修改的是MessageSourceAutoConfiguration中的方法MessageSourceProperties的basename
然后修改index.html,使用消息表达式#{}
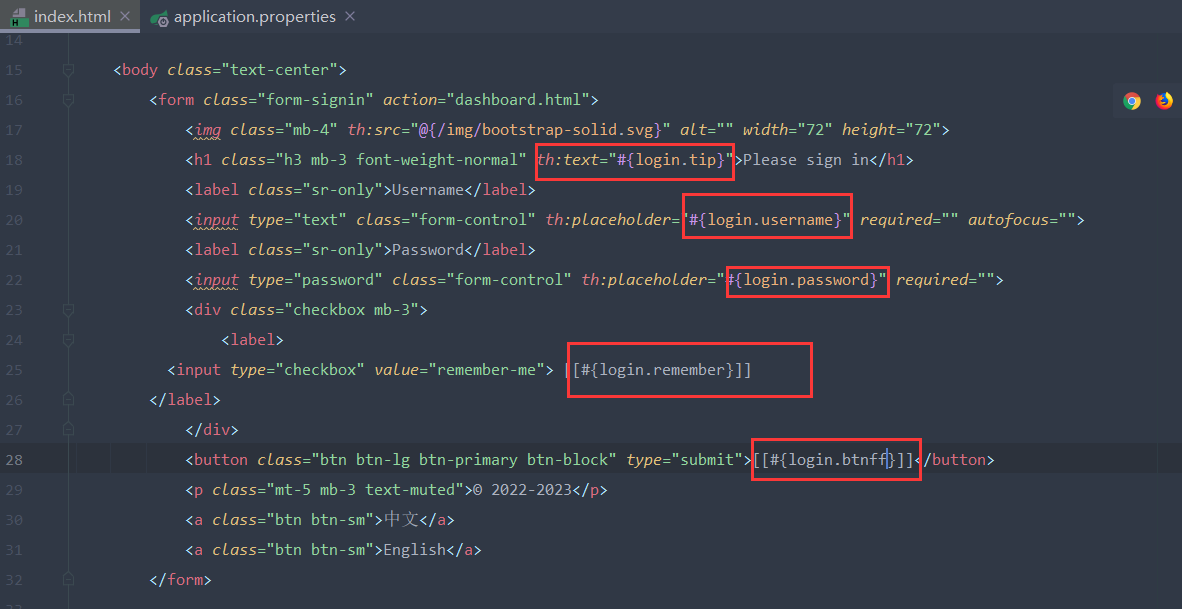
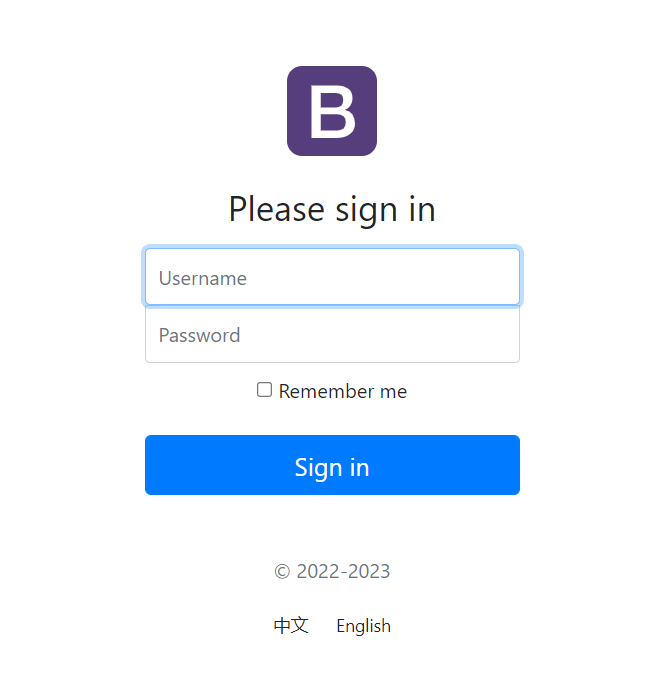
修改后的页面:
我们的需求是点击首页中的中文显示中文,点击English显示英文
在WebMvcAutoConfiguration中,有个解析器叫做localeResolver(区域化解析器),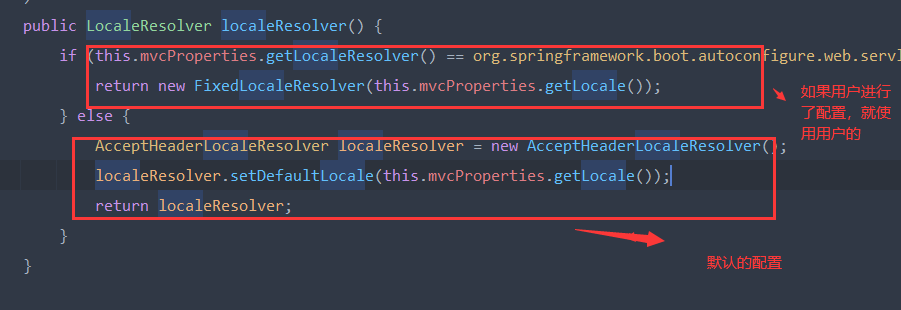
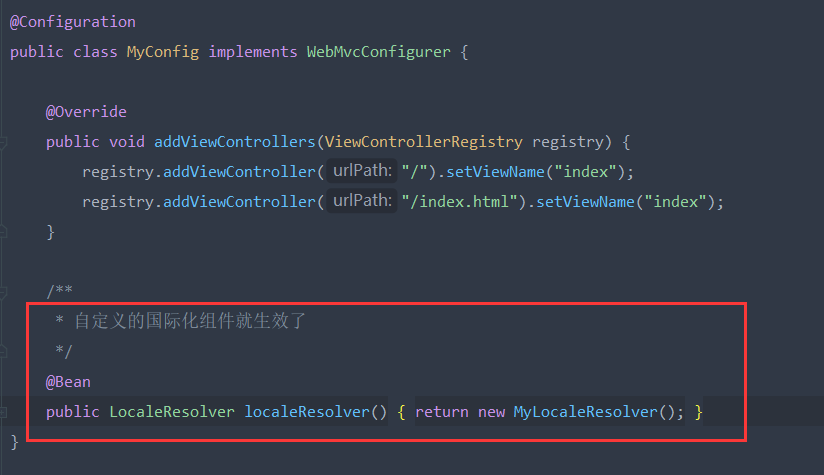
所以我们自定义一个配置
点击中文或English本质就是链接的跳转,所以在index.html中写上链接及语言
接收前端传回来的参数并处理
public class MyLocaleResolver implements LocaleResolver {//解析请求@Overridepublic Locale resolveLocale(HttpServletRequest httpServletRequest) {//获取请求中的语言参数String lang = httpServletRequest.getParameter("l");//如果没有就使用默认的Locale locale = Locale.getDefault();//如果请求的链接携带了国际化的参数if(!StringUtils.isEmpty(lang)){String[] split = lang.split("_");//国家,地区locale = new Locale(split[0],split[1]);}return locale;}@Overridepublic void setLocale(HttpServletRequest httpServletRequest, HttpServletResponse httpServletResponse, Locale locale) {}}
此时,最重要的来了:要将我们自己的配置类装进spring容器,用Bean注解,且方法名一定要是**localeResolver**,不然会失效