1, 使用 IntelliJ 创建springboot 项目
2, 写一个Hello controller测试项目能够启动
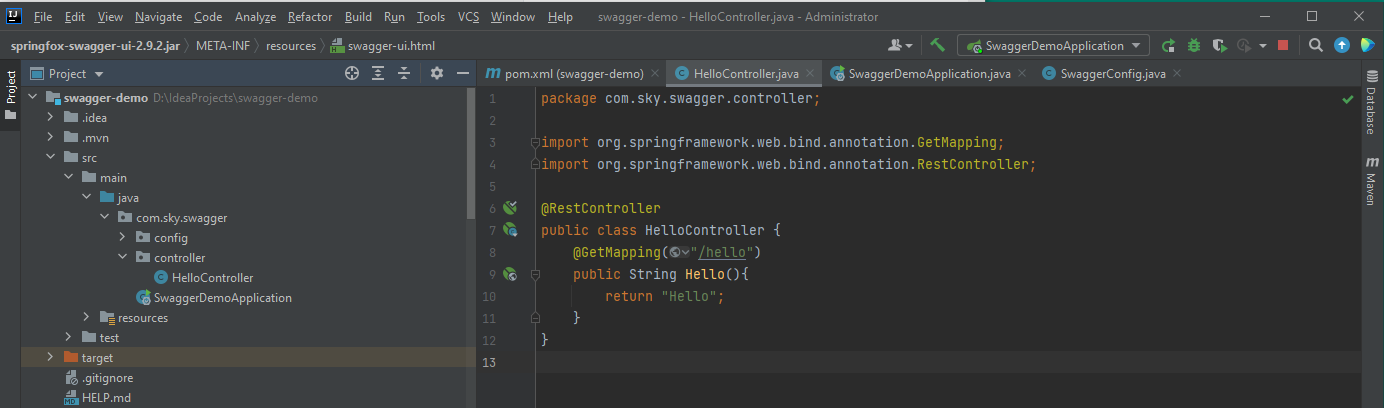
@RestControllerpublic class HelloController {@GetMapping("/hello")public String Hello(){return "Hello";}}
3, 写一个Swagger配置类, 测试swagger ui 页面
添加maven 依赖:
<!-- https://mvnrepository.com/artifact/io.springfox/springfox-swagger2 --><dependency><groupId>io.springfox</groupId><artifactId>springfox-swagger2</artifactId><version>2.9.2</version></dependency><!-- https://mvnrepository.com/artifact/io.springfox/springfox-swagger-ui --><dependency><groupId>io.springfox</groupId><artifactId>springfox-swagger-ui</artifactId><version>2.9.2</version></dependency>
swagger版本 2.9.2,如果使用3.0以上版本Maven引入的jar包可能有所不同。
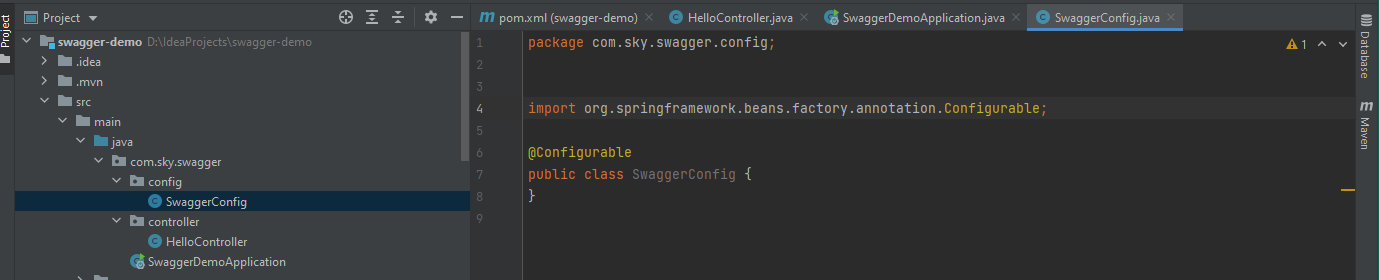
此时, swagger配置类中暂时不添加任何代码。在Springboot Application主类中需要添加@EnableSwagger2.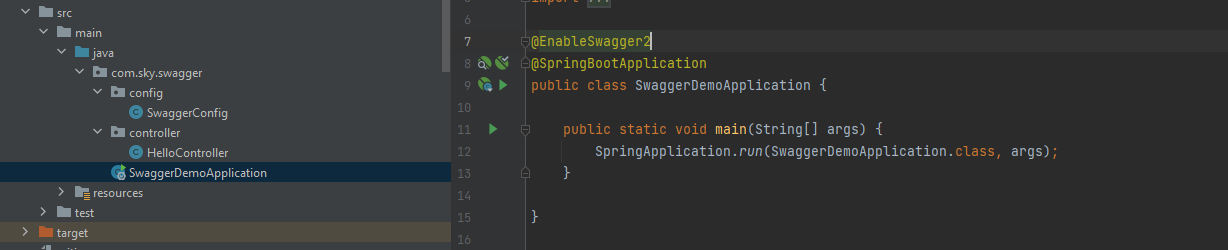
运行springboot, 输入url: http://localhost:8080/swagger-ui.html#/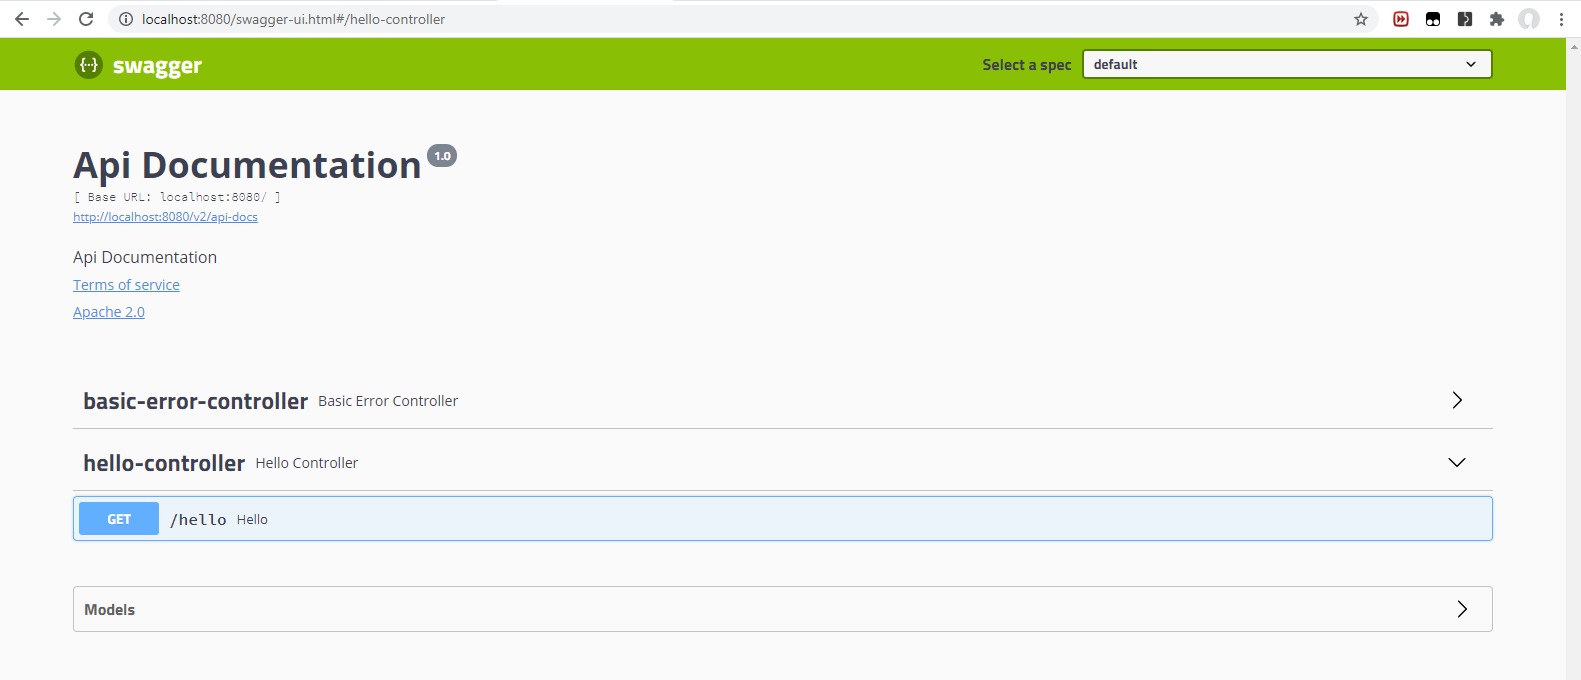
4, 订制Swagger内容
ApiInfo: 介绍文本, 不怎么重要, 可以作为联合开发时的介绍信息。
@Configurablepublic class SwaggerConfig {@Beanpublic Docket apiDocket() {Contact contact = new Contact("Sergey Kargopolov","https://www.appsdeveloperblog.com","developer@appsdeveloperblog.com");List<VendorExtension> vendorExtensions = new ArrayList<>();ApiInfo apiInfo = new ApiInfo("Photo app RESTful Web Service documentation","This pages documents Photo app RESTful Web Service endpoints", "1.0","http://www.appsdeveloperblof.com/service.html", contact,"Apache 2.0", "http://www.apache.org/licenses/LICENSE-2.0",vendorExtensions);Docket docket = new Docket(DocumentationType.SWAGGER_2).apiInfo(apiInfo);return docket;}}
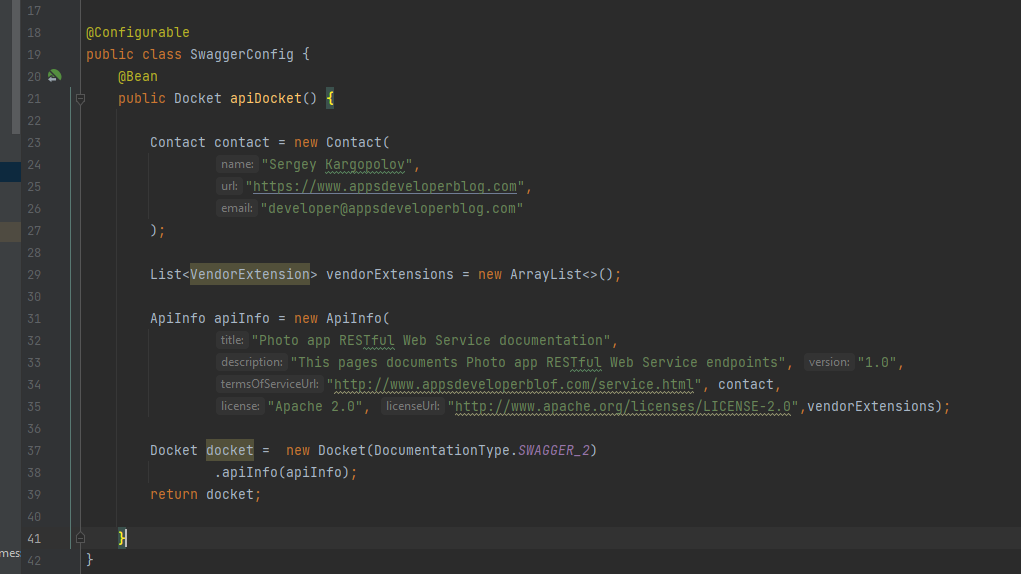
遗憾的是, 本文作者为修改成功,希望读者有成功的案例可以分享。配置扫描包和过滤api url路径:
扫描包地址: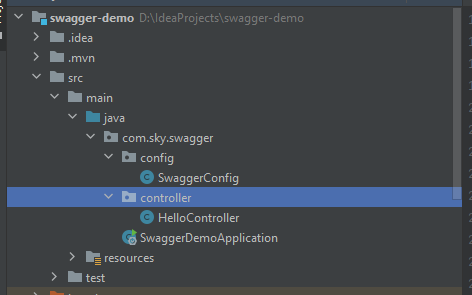
.apis(RequestHandlerSelectors.basePackage("com.sky.swagger.controller"))
本项目controller包目录为com.sky.swagger.controller, 即该路径下所有的controller类都会被扫描。
api url 路径过滤:
.paths(PathSelectors.any())
any() // 任何请求都扫描
none() // 任何请求都不扫描
regex(final String pathRegex) // 通过正则表达式控制
ant(final String antPattern) // 通过ant()控制

若有收获,就点个赞吧
0 人点赞
