- 零、简介">零、简介
- 一、ASP.NET Core 验证功能的支持情况">一、ASP.NET Core 验证功能的支持情况
- 二、主要概念">二、主要概念
- 三、配置(Cookie验证方式)">三、配置(Cookie验证方式)
- 四、验证流程与代码(Cookie验证方式)">四、验证流程与代码(Cookie验证方式)
- 五、自定义验证方式">五、自定义验证方式
- 六、补充一点 IAuthenticationService 与 AuthenticationService">六、补充一点 IAuthenticationService 与 AuthenticationService
- 七、ASP.NET Core Identity">七、ASP.NET Core Identity
零、简介
ASP.NET Core 中的权限“子系统”主要包括两个部分:验证(Autentication)与 授权(Authorization)。在 ASP.NET Core 中它们是相对独立的,这两个概念对应的具体功能如下,
- 验证:指的是确定用户身份的过程。
- 授权:指的是确定用户是否可以执行某个操作的过程。
一、ASP.NET Core 验证功能的支持情况
在 ASP.NET Core 框架(既 Microsoft.AspNetCore.App 包)中,内置有下面两种验证方式:- Microsoft.AspNetCore.Authentication.Cookies
- Microsoft.AspNetCore.Authentication.OAuth
- Microsoft.AspNetCore.Authentication.AzureAD.UI
- Microsoft.AspNetCore.Authentication.AzureADB2C.UI
- Microsoft.AspNetCore.Authentication.Certificate
- Microsoft.AspNetCore.Authentication.Facebook
- Microsoft.AspNetCore.Authentication.Google
- Microsoft.AspNetCore.Authentication.JwtBearer
- Microsoft.AspNetCore.Authentication.Microsoft
- Microsoft.AspNetCore.Authentication.Negotiate
- Microsoft.AspNetCore.Authentication.OpenIdConnect
- Microsoft.AspNetCore.Authentication.Twitter
- Microsoft.AspNetCore.Authentication.WsFederation
二、主要概念
在开发 ASP.NET Core 验证功能的过程中,需要了解下面几个“东西”:1、Autentication 服务与中间件
Autentication 服务是ASP.NET Core 内置验证功能所需的最基础的服务。 使用 IServiceCollection.AddAuthentication 扩展方法可以方便的添加 Authentication 服务,并返回 AuthenticationBuilder 对象,该对象是用于具体验证方式配置的核心对象。需要说明的是在调用 AddAutentication 扩展方法之后并不意味着你的应用就拥有可用的验证功能了,该方法的作用只是为验证功能提供了一个“地基”。具体的验证方式还需要额外的配置。
启用验证功能的第一步就是在 Startup.ConfigureServices 方法中调用 services.AddAuthentication 方法。添加了 Authentication 服务之后,还需要添加 Authentication 中间件来使验证功能工作。在Startup.Configure 方法中调用 app.UseAuthentication() 方法来添加验证中间件。
//该方法返回一个 AuthenticationBuilder 这是配置验证功能的核心类,//上面提到的Cookies和OAuth验证功能都是通过对这个类添加扩展方法来实现的。services.AddAuthentication();
这样整个验证的“基础”就搭建好了。
//添加 Microsoft.AspNetCore.Authentication.AuthenticationMiddlewareapp.UseAuthentication();
2、方案 / Scheme
在一个 ASP.NET Core 应用中你可以配置多种验证方式,而你配置的每种验证方式被称为一个验证方案 / Scheme。比如下面的代码配置了两种验证方式,也就是两个验证方案,每个方案都有一个名称标识被称为方案名称。一个验证方案对应一个验证方式的配置,方案名称会在之后的配置和授权中被使用到。
//调用AddAuthentication时你可以指定一个默认的Scheme名称services.AddAuthentication(JwtBearerDefaults.AuthenticationScheme)//配置一个JwtBearer验证方式,并命名为 JwtBearerDefaults.AuthenticationScheme.AddJwtBearer(JwtBearerDefaults.AuthenticationScheme, options => Configuration.Bind("JwtSettings", options))//配置第二个Cookie验证方式,并命名为 CookieAuthenticationDefaults.AuthenticationScheme.AddCookie(CookieAuthenticationDefaults.AuthenticationScheme, options => Configuration.Bind("CookieSettings", options));
3、用户凭证
在用户通过某种方式登录到系统之后,我们需要给用户一个凭证作为验证用户的依据,这样用户在使用系统的时候只需要提供凭证即可。 在Cookie验证方式中,用户凭证被保存在Cookie中,这样服务器可以在每次用户请求时验证其Cookie中的凭证。4、上下文用户对象 / ClaimsPrincipal
验证的结果需要提供一个包含用户身份信息的对象,在ASP.NET Core 中这个对象为 HttpContex.User,对象类型则为 System.Security.Claims.ClaimsPrincipal。 ClaimsPrincipal 及其相关类型的关系和含义如下:a)继承关系 ClaimsIdentity:IIdentity ; ClaimsPrincipal:IPrincipal
b)IIdentity,Identity 的含义是一个可验证的身份,而接口 IIdentity 代表了一个可验证身份所包含的基本信息。
c)ClaimsIdentity,基于声明(Claim)的Identity,所谓基于声明就是使用声明的方式来描述 Identity 包含的信息,比如:你要为这个 Identity 添加 Name 信息你就为它添加一个声明:
claimsIdentity.AddClaim(new Claim(ClaimTypes.Name, "user_name"));
d)IPrincipal,Principal 单词有主角,委托人的含义,这里它代表了当前运行代码的安全上下文中的用户,包含用户身份(Identity),角色以及其他信息。
e)ClaimsPrincipal,基于声明的安全上下文用户,可以包含一个或多 ClaimsIdentity。
三、配置(Cookie验证方式)
配置包括三个部分:- 第一步,添加 Authentication 服务
- 第二步,添加并配置 Cookie 验证方式
- 第三步,添加 Authentication 中间件
至此,Cookies验证功能配置完毕,下面通过具体代码来了解整个验证的流程。
//(第一步)添加Authentication服务services.AddAuthentication(CookieAuthenticationDefaults.AuthenticationScheme)//(第二步).AddCookie(CookieAuthenticationDefaults.AuthenticationScheme,options =>{options.ExpireTimeSpan = new TimeSpan(72, 0, 0);//cookie的过期时间会72小时options.LoginPath = "/login";//配置登录urloptions.LogoutPath = "/logout";//配置登出urloptions.AccessDeniedPath = "/login/accessDenied";//配置无权访问时跳转的url});//除了在services中添加authentication服务,还需要添加authentication中间件//(第三步)在Startup.Configure方法中添加authentication中间件app.UseAuthentication();
四、验证流程与代码(Cookie验证方式)
->用户登录 ->创建用户信息
在登录时,我们通常需要验证用户提交的用户名和密码(或其他场景所需的登录方式),登录成功后为用户提供一个凭据,代码如下:
//用户登录成功后if(UserLogin()){//创用户信息var claimsIdentity = new ClaimsIdentity("Cookies");//添加用户声明信息claimsIdentity.AddClaim(new Claim(ClaimTypes.Name, "user_name"));claimsIdentity.AddClaim(new Claim(ClaimTypes.Role, "admin"));//创建ClaimsPrincipalvar userClaimPrincipal = new ClaimsPrincipal(claimsIdentity);}
->设置凭证
完成用户信息的创建后,使用用户信息生成凭证并设置到当前上下文中。代码如下SignInAsync 是一个类 AuthenticationHttpContextExtensions 提供的扩展方法,你需要提供方案名称与用户信息,然后它就会给当前请求颁发用户凭证。在Cookie验证中凭证会保存在Cookie中。 可以看到在Cookie中凭证为一个名称为.AspNetCore.{SchemaName}的Cookie,内容是一段加密后的包含用户信息的内容。
//在Http上下文中,使用用户信息设置凭证并指定验证方案await HttpContext.SignInAsync(CookieAuthenticationDefaults.AuthenticationScheme,claimPrincipal);

->在接受请求的时候获取用户凭证
在用户之后的请求中,Authentication 中间件会获取 Cookie 中的用户凭证并进行验证和解密。若验证成功服务器端就可以使用 HttpContext.User 获取用户信息。->凭证的销毁
当用户选择登出系统时候,系统需要销毁凭证,使用下面的代码销毁保存在Cookie凭证。至此,整个验证流程完毕。
//登出并删除Cookie中的用户凭证await HttpContext.SignOutAsync();
五、自定义验证方式
自定义验证方式的关键是实现一个抽象类 AuthenticationHandler实现了 AuthenticationHandler
public class MyAuthenticationHandler : AuthenticationHandler<AuthenticationSchemeOptions>{public MyAuthenticationHandler(IOptionsMonitor<AuthenticationSchemeOptions> options, ILoggerFactory logger, UrlEncoder encoder, ISystemClock clock): base(options, logger, encoder, clock){}//重载执行验证方法,该方法需要提供一个验证结果,若验证成功则还需要提供用户信息。protected override async Task<AuthenticateResult> HandleAuthenticateAsync(){//该自定义验证从http 头信息中获取 token 信息并进行验证var token = Request.Headers["token"];if (token == "valid token"){//验证成功后创建用户信息var claimsIdentity = new ClaimsIdentity(new Claim[]{new Claim(ClaimTypes.Name, "testUser"),new Claim(ClaimTypes.Role, "testRole")}, "MyAuthentication");var principal = new ClaimsPrincipal(claimsIdentity);var ticket = new AuthenticationTicket(principal, this.Scheme.Name);return AuthenticateResult.Success(ticket);}else{return AuthenticateResult.Fail("token is invalid");}}}
如果你的 MyAuthenticationHandler 继承自 IAuthenticationHandler ,则需要使用下面的代码进行添加:
//添加MyAuthenticationHandler:AuthenticationHandler<TOptions> 作为验证方案services.AddAuthentication().AddScheme<MyAuthenticationHandler>(MyAuthenticationHandler.SchemeName,options=>{//这里配置你的AuthenticationHandler});
//添加MyAuthenticationHandler:IAuthenticationHandler 作为验证方案services.AddAuthentication(options=> {options.AddScheme<MyAuthenticationHandler>(MyAuthenticationHandler.SchemeName, "my_scheme");});
六、补充一点 IAuthenticationService 与 AuthenticationService
上面的自定义验证例子中的代码只是实现了请求的验证过程,却没有实现设置凭证(SignInAsync)与 登出(SignOutAsync) 方法,事实上这个两个方法具体是由 AuthenticationService 实现的(你也可以实现 IAuthenticationService 接口并添加到服务中以实现自定义的 SignInAsync 和 SignOutAsync ),这种设计可以使凭证的设置与销毁与验证过程分离,从而更适合目前常见的第三方认证,在这种场景中你的系统并不一定需要参与用户凭证的设置与销毁。七、ASP.NET Core Identity
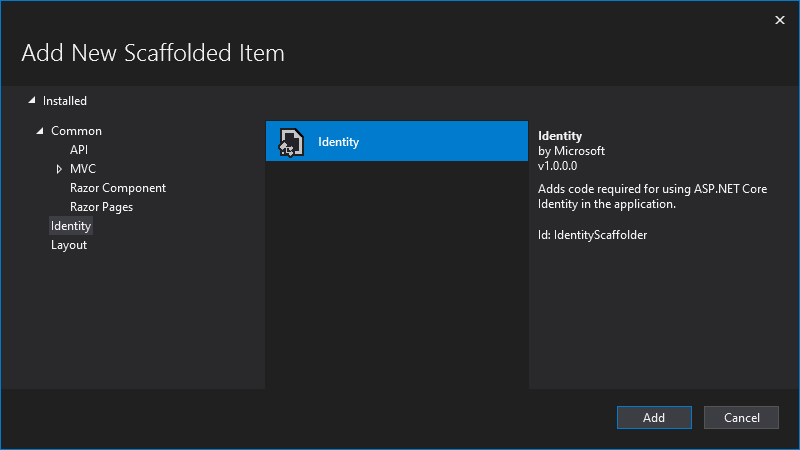
ASP.NET Core Identity 是一套包含了 UI、用户信息,密码、角色、管理以及邮件确认等等功能的脚手架,支持自定义以及各种外部登录,包括Facebook、Google、Microsoft、Twitter等登录方式。
在 VisualStudio 中为项目添加该脚手架十分简单,右键点击你的 ASP.NET Core 项目,选择“New Scaffolded Item…”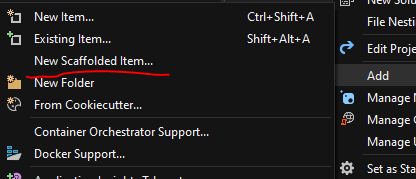

若有收获,就点个赞吧
0 人点赞
