生成自签名证书
$ openssl req -newkey rsa:2048 -nodes -keyout rsa_private.key -x509 -days 365 -out cert.crtGenerating a RSA private key.................................+++++....................................................+++++writing new private key to 'rsa_private.key'-----You are about to be asked to enter information that will be incorporatedinto your certificate request.What you are about to enter is what is called a Distinguished Name or a DN.There are quite a few fields but you can leave some blankFor some fields there will be a default value,If you enter '.', the field will be left blank.-----# 国家代码,两位字母Country Name (2 letter code) [AU]:CN# 名称(全称)[某些州]State or Province Name (full name) [Some-State]:# 地区名称(如城市)Locality Name (eg, city) []:# 机构名称(如公司)Organization Name (eg, company) [Internet Widgits Pty Ltd]:# 组织单位名称(如部门):Organizational Unit Name (eg, section) []:# 常用名称(例如服务器FQDN或您的名称)Common Name (e.g. server FQDN or YOUR name) []:pbx.cn# 电子邮件地址Email Address []:99299684@qq.com# 执行完成后,就会生成以下两个文件cert.crtrsa_private.key
- req 是证书请求的子命令,
- -newkey rsa:2048 -keyout private_key.pem 表示生成私钥(PKCS8 格式),
- -nodes 表示私钥不加密,若不带参数将提示输入密码;
- -x509表示输出证书
- -days365 为有效期,此后根据提示输入证书拥有者信息;
还可以一条命令输入以上流程的信息,使用 -subj 参数
openssl req -newkey rsa:2048 -nodes -keyout rsa_private.key -x509 -days 365 -out cert.crt -subj "/C=CN/ST=GD/L=SZ/O=vihoo/OU=dev/CN=vivo.com/emailAddress=yy@vivo.com"
自签名证书如何安装到系统受信任的根证书颁发机构
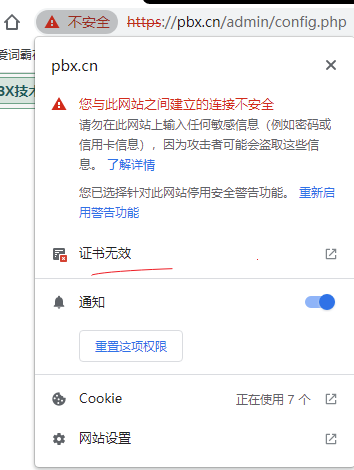
Chrome 标记自签名证书是不安全的
就算导入到受信任的根证书后,还是无法变成安全的
是因为需要增加 -extfile private.ext 参数来生成,使用根证书 生成 子证书。
生成根证书
创建 MyCompanyCA.cnf 文件,这是申请 CA 根证书的配置文件;
[ req ]distinguished_name = req_distinguished_namex509_extensions = root_ca[ req_distinguished_name ]# 以下内容可随意填写countryName = CN (2 letter code)countryName_min = 2countryName_max = 2stateOrProvinceName = ZheJianglocalityName = HangZhouorganizationName = MycompanyorganizationalUnitName = technologycommonName = developcommonName_max = 64emailAddress = xxxxxxxx@gmail.comemailAddress_max = 64[ root_ca ]basicConstraints = critical, CA:true
生成 跟证书
openssl req -x509 -newkey rsa:2048 -out MyCompanyCA.cer -outform PEM -keyout MyCompanyCA.pvk -days 10000 -verbose -config MyCompanyCA.cnf -nodes -sha256 -subj "/CN=MyCompany CA"
生成域名证书
创建 MyCompanyLocalhost.ext ,这是生成服务器证书的扩展配置文件,里面写该证书支持的域名。ip 信息
subjectAltName = @alt_namesextendedKeyUsage = serverAuth[alt_names]# 域名,如有多个用DNS.2,DNS.3…来增加DNS.1 = domain.comDNS.1 = mrcode.cn# IP地址IP.1 = 192.168.2.221IP.2 = 127.0.0.1
生成服务器证书
# CN 后面写颁发给哪个机构的名称,比如 mrcode.cn, 不一定是域名,因为域名信息在 MyCompanyLocalhost.ext 中已经包含了# 生成服务器私钥 MyCompanyLocalhost.pvk 就是私钥文件,也就是平时看见的 rsa_private.key 文件openssl req -newkey rsa:2048 -keyout MyCompanyLocalhost.pvk -out MyCompanyLocalhost.req -subj /CN=localhost -sha256 -nodes# 使用根证书生成服务器证书# MyCompanyLocalhost.cer 是证书文件名openssl x509 -req -CA MyCompanyCA.cer -CAkey MyCompanyCA.pvk -in MyCompanyLocalhost.req -out MyCompanyLocalhost.cer -days 10000 -extfile MyCompanyLocalhost.ext -sha256 -set_serial 0x1111
生成之后,其中:
MyCompanyCA.cer:是导入到客户端,也就是浏览器所在机器的 受信任的根证书上MyCompanyLocalhost.cer、MyCompanyLocalhost.pvk: 这两个就是部署在服务器上的
方式二
这种方式感觉比较简单一点
# 生成 root 私钥openssl genrsa -des3 -out InnovateAsterisk-Root-CA.key 4096# 生成 root ca 证书openssl req -x509 -new -nodes -key InnovateAsterisk-Root-CA.key -sha256 -days 3650 -out InnovateAsterisk-Root-CA.crt
生成服务器证书
# 生成私钥,会叫你设置一个密码,这个私钥密码,后续的操作中可能会用到openssl req -new -sha256 -nodes -out raspberrypi.csr -newkey rsa:2048 -keyout raspberrypi.key# 编写配置文件vim openssl-v3.cnf# 填写下面的内容,同样控制给哪些域名或则 IP 验证authorityKeyIdentifier=keyid,issuerbasicConstraints=CA:FALSEkeyUsage = digitalSignature, nonRepudiation, keyEncipherment, dataEnciphermentsubjectAltName = @alt_names[alt_names]DNS.1 = pbx.cnIP.1 = 192.168.110.20IP.2 = 127.0.0.2# 使用根证书生成服务器证书openssl x509 -req -in raspberrypi.csr -CA InnovateAsterisk-Root-CA.crt -CAkey InnovateAsterisk-Root-CA.key -CAcreateserial -out raspberrypi.crt -days 365 -sha256 -extfile openssl-v3.cnf
:::tips 需要注意的是:由于以上命令没有使用 -subj 参数,弹出来的各种信息,最好都填写下,不影响授权,不填写的话,有时候有些程序会有识别问题 :::

