PV&PVC
概念
PersistentVolume(PV,持久卷):对存储抽象实现,使得存储作为集群中的资源。PV 由管理员进行创建和配置,它和具体的底层共享存储技术的实现方式有关,比如 Ceph、GlusterFS、NFS 等,都是通过插件机制完成与共享存储的对接。PV 作为存储资源,主要包括存储能力、访问模式、存储类型、回收策略等信息。
PersistentVolumeClaim(PVC,持久化卷声明):PVC 是用户存储的一种声明,消费 PV 的资源。PVC 和 Pod 比较类似,Pod 消耗的是节点,PVC 消耗的是 PV 资源,Pod 可以请求 CPU 和内存,而 PVC 可以请求特定的存储空间和访问模式。
工作方式:
Pod申请PVC作为卷来使用,集群通过PVC查找绑定的PV,并Mount给Pod。
状态说明:
一个 PV 的生命周期中,可能会处于4中不同的阶段:
- Available(可用):还未被任何 PVC 绑定的可用状态
- Bound(已绑定):PVC 已经被 PVC 绑定
- Released(已释放):PVC 被删除,PV 进入释放状态,等待回收处理
- Failed(失败): PV 执行自动清理回收策略失败
基于NFS的PV环境实现
NFS 环境实现
#服务端上操作:192.168.10.11$ yum -y install nfs-utils rpcbind$ mkdir -p /nfsdata/k8s && chmod 755 /nfsdata/k8s$ echo '/nfsdata/k8s *(insecure,rw,sync,no_root_squash)'>>/etc/exports$ systemctl enable rpcbind && systemctl start rpcbind$ systemctl enable nfs && systemctl start nfs#客户端挂载使用$ yum -y install nfs-utils rpcbind #所有要使用nfs作为存储资源的机器节点都需要安装$ mkdir /nfsdata$ mount -t nfs 192.168.10.11:/nfsdata/k8s /nfsdata
pv1-demo.yaml
apiVersion: v1
kind: PersistentVolume
metadata:
  name:  pv1
spec:
  capacity:
    storage: 1Gi
  accessModes:
  - ReadWriteOnce
  persistentVolumeReclaimPolicy: Recycle
  nfs:
    path: /nfsdata/k8s
    server: 192.168.10.11
$ kubectl apply -f pv1.yaml

$ kubectl get pv
NAME   CAPACITY   ACCESS MODES   RECLAIM POLICY   STATUS      CLAIM   STORAGECLASS   REASON   AGE
pv1    1Gi        RWO            Recycle          Available                                   5s

# 可以看到 pv1 已经创建成功了,状态是 Available,表示 pv1 就绪,可以被 PVC 申请。
选项配置:
- capacity:存储能力, 存储空间的设置,即 storage=1Gi
- accessModes:访问模式,用于描述用户对存储资源的访问权限,包括:
- ReadWriteOnce(RWO):读写权限,但是只能被单个节点挂载
- ReadOnlyMany(ROX):只读权限,可以被多个节点挂载
- ReadWriteMany(RWX):读写权限,可以被多个节点挂载
- persistentVolumeReclaimPolicy:回收策略,包括:
- Retain(保留)- 保留数据,需要手工清理数据
- Recycle(回收)- 清除 PV 中的数据,效果相当于执行 rm -rf /thevolume/*
- Delete(删除)- 与 PV 相连的后端存储完成 volume 删除操作,常见于云服务商的存储服务
创建 PVC
kind: PersistentVolumeClaim
apiVersion: v1
metadata:
  name: pvc1-nfs
spec:
  accessModes:
    - ReadWriteOnce
  resources:
    requests:
      storage: 1Gi
$ kubectl get pv
NAME   CAPACITY   ACCESS MODES   RECLAIM POLICY   STATUS      CLAIM   STORAGECLASS   REASON   AGE
pv1    1Gi        RWO            Recycle          Available                                   20m

$ kubectl apply -f pvc1.yaml

$ kubectl get pv
NAME   CAPACITY   ACCESS MODES   RECLAIM POLICY   STATUS   CLAIM             STORAGECLASS   REASON   AGE
pv1    1Gi        RWO            Recycle          Bound    default/pvc-nfs                           21m
使用 PVC
根目录挂载
apiVersion: apps/v1
kind: Deployment
metadata:
  name: nfs-pvc
spec:
  replicas: 3
  selector:
    matchLabels:
      app: nfs-pvc
  template:
    metadata:
      labels:
        app: nfs-pvc
    spec:
      containers:
      - name: nginx
        image: nginx:1.7.9
        imagePullPolicy: IfNotPresent
        ports:
        - containerPort: 80
          name: web
        volumeMounts:
        - name: www
          mountPath: /usr/share/nginx/html
      volumes:
      - name: www
        persistentVolumeClaim:
          claimName: pvc1-nfs

---

apiVersion: v1
kind: Service
metadata:
  name: nfs-pvc
  labels:
    app: nfs-pvc
spec:
  type: NodePort
  ports:
  - port: 80
    targetPort: web
  selector:
    app: nfs-pvc
$ kubectl apply -f nfs-pvc-deploy.yaml

$ kubectl get svc
NAME         TYPE        CLUSTER-IP       EXTERNAL-IP   PORT(S)        AGE
kubernetes   ClusterIP   10.96.0.1        <none>        443/TCP        7d1h
nfs-pvc      NodePort    10.101.150.196   <none>        80:32481/TCP   6m58s
访问

分析
根据资源清单内容描述,服务使用 nginx 镜像,将 pvc1-nfs 挂载到容器的 /usr/share/nginx/html 目录,因为 /nfsdata/k8s 目录下没有任何数据,故出现 403。
添加内容后再次访问:
$ echo “
Hello Kubernetes~
“ > /nfsdata/k8s/index.html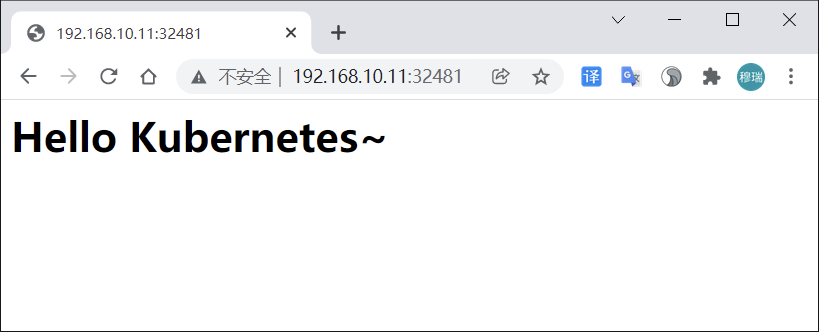
子目录挂载
以上操作容器中的数据是直接放到共享数据目录根目录下面,当有新的 nginx 容器也做数据目录挂载就会有冲突。可以使用 subPath 属性解决。
更新 (nfs-pvc-deploy.yaml) 文件部分内容:
...
volumeMounts:
- name: www
  subPath: nginxpvc-test
  mountPath: /usr/share/nginx/html
...
$ kubectl apply -f nfs-pvc-deploy.yaml

$ ls /nfsdata/k8s/
index.html  ngxpvc-test

#目录ngxpvc-test是自动生成的容器根目录
当把 deploy 资源删除后,所有 ng 容器将被删除,存储目录下数据会保留,实现数据持久化。
StorageClass
概念
StorageClass 可以实现 PVC 自动创建并绑定 PV 。使用 StorageClass,要安装对应的自动配置程序(Provisioner),比如存储后端是 nfs,就要使用到 nfs-client 自动配置程序,这个程序使用已经配置好的 nfs 服务器,来自动创建持久卷,也就是自动创建 PV。
自动创建的 PV 以 ${namespace}-${pvcName}-${pvName} 命名格式创建在 NFS 服务器上的共享数据目录中。当 PV 被回收后会以 archieved-${namespace}-${pvcName}-${pvName} 命名格式存在 NFS 服务器上。
自动分配PV流程:
基于NFS的SC实现
创建StorageClass
配置 Deployment(nfs-client.yaml)
kind: Deployment
apiVersion: apps/v1
metadata:
  name: nfs-client-provisioner
spec:
  replicas: 1
  strategy:
    type: Recreate
  selector:
    matchLabels:
      app: nfs-client-provisioner
  template:
    metadata:
      labels:
        app: nfs-client-provisioner
    spec:
      serviceAccountName: nfs-client-provisioner
      containers:
        - name: nfs-client-provisioner
          image: quay.io/external_storage/nfs-client-provisioner:latest
          volumeMounts:
            - name: nfs-client-root
              mountPath: /persistentvolumes
          env:
            - name: PROVISIONER_NAME
              value: fuseim.pri/ifs
            - name: NFS_SERVER
              value: 192.168.10.11
            - name: NFS_PATH
              value: /nfsdata/k8s
      volumes:
        - name: nfs-client-root
          nfs:
            server: 192.168.10.11
            path: /nfsdata/k8s
创建 sa 并绑定对应权限 (nfs-client-sa.yaml)
apiVersion: v1
kind: ServiceAccount
metadata:
  name: nfs-client-provisioner

---
kind: ClusterRole
apiVersion: rbac.authorization.k8s.io/v1
metadata:
  name: nfs-client-provisioner-runner
rules:
  - apiGroups: [""]
    resources: ["persistentvolumes"]
    verbs: ["get", "list", "watch", "create", "delete"]
  - apiGroups: [""]
    resources: ["persistentvolumeclaims"]
    verbs: ["get", "list", "watch", "update"]
  - apiGroups: ["storage.k8s.io"]
    resources: ["storageclasses"]
    verbs: ["get", "list", "watch"]
  - apiGroups: [""]
    resources: ["events"]
    verbs: ["list", "watch", "create", "update", "patch"]
  - apiGroups: [""]
    resources: ["endpoints"]
    verbs: ["create", "delete", "get", "list", "watch", "patch", "update"]

---
kind: ClusterRoleBinding
apiVersion: rbac.authorization.k8s.io/v1
metadata:
  name: run-nfs-client-provisioner
subjects:
  - kind: ServiceAccount
    name: nfs-client-provisioner
    namespace: default
roleRef:
  kind: ClusterRole
  name: nfs-client-provisioner-runner
  apiGroup: rbac.authorization.k8s.io
创建StorageClass对象(nfs-client-class.yaml)
apiVersion: storage.k8s.io/v1
kind: StorageClass
metadata:
  name: course-nfs-storage
provisioner: fuseim.pri/ifs # or choose another name, must match deployment's env PROVISIONER_NAME'
$ kubectl create -f nfs-client.yaml
$ kubectl create -f nfs-client-sa.yaml
$ kubectl create -f nfs-client-class.yaml

$ kubectl get po
NAME                                    READY   STATUS    RESTARTS   AGE
nfs-client-provisioner-ccf554b8-x2l5p   1/1     Running   0          5m22s

$ kubectl get sc
NAME                 PROVISIONER      RECLAIMPOLICY   VOLUMEBINDINGMODE   ALLOWVOLUMEEXPANSION   AGE
course-nfs-storage   fuseim.pri/ifs   Delete          Immediate           false                  4m49s
动态PV
StorageClass 资源对象已创建成功,现在只需定义 PVC 对象,就会自动产生对应的 PV 。
kind: PersistentVolumeClaim
apiVersion: v1
metadata:
  name: test-pvc
spec:
  accessModes:
  - ReadWriteMany
  resources:
    requests:
      storage: 1Mi
test-pvc.yaml 中声明了一个 PVC 对象,但直接创建 PVC 不能自动绑定上合适的 PV 对象,因为目前是没有合适的 PV。
利用 StorageClass 对象自动创建一个合适的 PV,解决方式有三种:
方式一:在 PVC 对象中用 annotations 属性来声明 StorageClass 对象的标识
apiVersion: v1
kind: PersistentVolumeClaim
metadata:
  name: test-pvc
  annotations:
    volume.beta.kubernetes.io/storage-class: "course-nfs-storage"  # 声明使用
spec:
  accessModes:
  - ReadWriteMany
  resources:
    requests:
      storage: 1Mi
方式二:设置 course-nfs-storage 的 StorageClass 为 Kubernetes 默认存储后端,会影响系统的默认行为,不推荐使用
# 用 kubectl patch 命令来更新
$ kubectl patch storageclass course-nfs-storage -p '{"metadata": {"annotations":{"storageclass.kubernetes.io/is-default-class":"true"}}}'
方式三:在 spec 中声明 storageClassName ,推荐使用
kind: PersistentVolumeClaim
apiVersion: v1
metadata:
  name: test-pvc
spec:
  accessModes:
    - ReadWriteMany
  resources:
    requests:
      storage: 1Mi
  storageClassName: course-nfs-storage  # 声明使用
$ kubectl apply -f test-pvc.yaml

$ kubectl get pvc
NAME       STATUS   VOLUME                                     CAPACITY   ACCESS MODES   STORAGECLASS         AGE                              5h34m
test-pvc   Bound    pvc-a0fe83f0-6122-44d2-801e-cd0f493c5a9c   1Mi        RWX            course-nfs-storage   3s

$ kubectl get pv
NAME                                       CAPACITY   ACCESS MODES   RECLAIM POLICY   STATUS   CLAIM              STORAGECLASS         REASON   AGE
pvc-a0fe83f0-6122-44d2-801e-cd0f493c5a9c   1Mi        RWX            Delete           Bound    default/test-pvc   course-nfs-storage            16s
Pod使用PVC
kind: Pod
apiVersion: v1
metadata:
  name: test-pod
spec:
  containers:
  - name: test-pod
    image: busybox
    imagePullPolicy: IfNotPresent
    command:
    - "/bin/sh"
    args:
    - "-c"
    - "touch /mnt/SUCCESS && exit 0 || exit 1"
    volumeMounts:
    - name: nfs-pvc
      mountPath: "/mnt"
  restartPolicy: "Never"
  volumes:
  - name: nfs-pvc
    persistentVolumeClaim:
      claimName: test-pvc
验证方式:
busybox 容器在 /mnt 目录下面新建一个 SUCCESS 的文件,然后把 /mnt 目录挂载到 test-pvc 上。应用资源文件后去 nfs 服务器的共享数据目录能查看到 SUCCESS 文件,则说明使用成功。
$ kubectl apply -f test-pod.yaml

$ ls /nfsdata/k8s/
default-test-pvc-pvc-a0fe83f0-6122-44d2-801e-cd0f493c5a9c

$ ls /nfsdata/k8s/default-test-pvc-pvc-a0fe83f0-6122-44d2-801e-cd0f493c5a9c/
SUCCESS
StatefulSet使用PVC
实际工作中使用 StorageClass 场景较多的是 StatefulSet 类型的服务。可以通过 volumeClaimTemplates 属性来使用 StorageClass 。volumeClaimTemplates 包含的内容是一个 PVC 对象模板。这种方式在 StatefulSet 类型的服务下使用得非常多。
apiVersion: apps/v1
kind: StatefulSet
metadata:
  name: nfs-web
spec:
  serviceName: "nginx"
  replicas: 3
  selector:
    matchLabels:
      app: nfs-web
  template:
    metadata:
      labels:
        app: nfs-web
    spec:
      terminationGracePeriodSeconds: 10
      containers:
      - name: nginx
        image: nginx:1.7.9
        ports:
        - containerPort: 80
          name: web
        volumeMounts:
        - name: www
          mountPath: /usr/share/nginx/html
  volumeClaimTemplates:
  - metadata:
      name: www
      annotations:
        volume.beta.kubernetes.io/storage-class: course-nfs-storage
    spec:
      accessModes: [ "ReadWriteOnce" ]
      resources:
        requests:
          storage: 1Gi
$ kubectl  apply -f test-statefulset-nfs.yaml

$ kubectl get po
NAME                                    READY   STATUS      RESTARTS   AGE
nfs-client-provisioner-ccf554b8-x2l5p   1/1     Running     0          41m
nfs-web-0                               1/1     Running     0          17s
nfs-web-1                               1/1     Running     0          12s
nfs-web-2                               1/1     Running     0          7s

$ kubectl get pvc
NAME            STATUS   VOLUME                                     CAPACITY   ACCESS MODES   STORAGECLASS         AGE
www-nfs-web-0   Bound    pvc-b22c2756-032d-4c6f-9472-b940a143b100   1Gi        RWO            course-nfs-storage   97s
www-nfs-web-1   Bound    pvc-ab2b4c12-4d97-40ec-9605-8dacfb514d76   1Gi        RWO            course-nfs-storage   92s
www-nfs-web-2   Bound    pvc-35532544-dcbc-46c7-acab-a06c0d287ca1   1Gi        RWO            course-nfs-storage   87s

$ ls /nfsdata/k8s/
...
default-www-nfs-web-2-pvc-35532544-dcbc-46c7-acab-a06c0d287ca1
default-www-nfs-web-0-pvc-b22c2756-032d-4c6f-9472-b940a143b100
default-www-nfs-web-1-pvc-ab2b4c12-4d97-40ec-9605-8dacfb514d76
...
基于CEPH的SC实现
CEPH环境
Ceph 安装及使用参考 http://docs.ceph.org.cn/start/intro/
单点快速安装 https://blog.csdn.net/h106140873/article/details/90201379
# CephFS需要使用两个Pool来分别存储数据和元数据
ceph osd pool create cephfs_data 128
ceph osd pool create cephfs_meta 128
ceph osd lspools

# 创建一个CephFS
ceph fs new cephfs cephfs_meta cephfs_data

# 查看
ceph fs ls

# ceph auth get-key client.admin
client.admin
        key: AQBPTstgc078NBAA78D1/KABglIZHKh7+G2X8w==
# 挂载
$ mount -t ceph 172.21.51.55:6789:/ /mnt/cephfs -o name=admin,secret=AQBPTstgc078NBAA78D1/KABglIZHKh7+G2X8w==
动态PV
apiVersion: v1
kind: ServiceAccount
metadata:
  name: cephfs-provisioner
  namespace: kube-system
---
kind: ClusterRole
apiVersion: rbac.authorization.k8s.io/v1
metadata:
  name: cephfs-provisioner
rules:
  - apiGroups: [""]
    resources: ["persistentvolumes"]
    verbs: ["get", "list", "watch", "create", "delete"]
  - apiGroups: [""]
    resources: ["persistentvolumeclaims"]
    verbs: ["get", "list", "watch", "update"]
  - apiGroups: ["storage.k8s.io"]
    resources: ["storageclasses"]
    verbs: ["get", "list", "watch"]
  - apiGroups: [""]
    resources: ["events"]
    verbs: ["create", "update", "patch"]
  - apiGroups: [""]
    resources: ["endpoints"]
    verbs: ["get", "list", "watch", "create", "update", "patch"]
  - apiGroups: [""]
    resources: ["secrets"]
    verbs: ["create", "get", "delete"]
---
kind: ClusterRoleBinding
apiVersion: rbac.authorization.k8s.io/v1
metadata:
  name: cephfs-provisioner
subjects:
  - kind: ServiceAccount
    name: cephfs-provisioner
    namespace: kube-system
roleRef:
  kind: ClusterRole
  name: cephfs-provisioner
  apiGroup: rbac.authorization.k8s.io

---
apiVersion: rbac.authorization.k8s.io/v1
kind: Role
metadata:
  name: cephfs-provisioner
  namespace: kube-system
rules:
  - apiGroups: [""]
    resources: ["secrets"]
    verbs: ["create", "get", "delete"]
---
apiVersion: rbac.authorization.k8s.io/v1
kind: RoleBinding
metadata:
  name: cephfs-provisioner
  namespace: kube-system
roleRef:
  apiGroup: rbac.authorization.k8s.io
  kind: Role
  name: cephfs-provisioner
subjects:
- kind: ServiceAccount
  name: cephfs-provisioner
  namespace: kube-system

---
apiVersion: apps/v1
kind: Deployment
metadata:
  name: cephfs-provisioner
  namespace: kube-system
spec:
  replicas: 1
  selector:
    matchLabels:
      app: cephfs-provisioner
  strategy:
    type: Recreate
  template:
    metadata:
      labels:
        app: cephfs-provisioner
    spec:
      containers:
      - name: cephfs-provisioner
        image: "quay.io/external_storage/cephfs-provisioner:latest"
        env:
        - name: PROVISIONER_NAME
          value: ceph.com/cephfs
        imagePullPolicy: IfNotPresent
        command:
        - "/usr/local/bin/cephfs-provisioner"
        args:
        - "-id=cephfs-provisioner-1"
        - "-disable-ceph-namespace-isolation=true"
      serviceAccount: cephfs-provisioner
# 在ceph monitor机器中查看admin账户的key
$ ceph auth list
$ ceph auth get-key client.admin
AQBPTstgc078NBAA78D1/KABglIZHKh7+G2X8w==
# 创建secret
$ echo -n AQBPTstgc078NBAA78D1/KABglIZHKh7+G2X8w==|base64
QVFCUFRzdGdjMDc4TkJBQTc4RDEvS0FCZ2xJWkhLaDcrRzJYOHc9PQ==

$ cat ceph-admin-secret.yaml
apiVersion: v1
data:
  key: QVFCUFRzdGdjMDc4TkJBQTc4RDEvS0FCZ2xJWkhLaDcrRzJYOHc9PQ==
kind: Secret
metadata:
  name: ceph-admin-secret
  namespace: kube-system
type: Opaque
kind: StorageClass
apiVersion: storage.k8s.io/v1
metadata:
  name: dynamic-cephfs
provisioner: ceph.com/cephfs
parameters:
    monitors: 172.21.51.55:6789
    adminId: admin
    adminSecretName: ceph-admin-secret
    adminSecretNamespace: "kube-system"
    claimRoot: /volumes/kubernetes
Pod使用PVC
创建pvc
$ cat cephfs-pvc-test.yaml
kind: PersistentVolumeClaim
apiVersion: v1
metadata:
  name: cephfs-claim
spec:
  accessModes:
    - ReadWriteOnce
  storageClassName: dynamic-cephfs
  resources:
    requests:
      storage: 2Gi

$ kubectl create -f cephfs-pvc-test.yaml

$ kubectl get pv
pvc-2abe427e-7568-442d-939f-2c273695c3db   2Gi        RWO            Delete           Bound      default/cephfs-claim   dynamic-cephfs            1s
创建Pod使用pvc
$ cat test-pvc-cephfs.yaml
apiVersion: v1
kind: Pod
metadata:
  name: nginx-pod
  labels:
    name: nginx-pod
spec:
  containers:
  - name: nginx-pod
    image: nginx:alpine
    ports:
    - name: web
      containerPort: 80
    volumeMounts:
    - name: cephfs
      mountPath: /usr/share/nginx/html
  volumes:
  - name: cephfs
    persistentVolumeClaim:
      claimName: cephfs-claim

$ kubectl create -f test-pvc-cephfs.yaml
查看nginx-pod的挂载盘
# Pod 挂载盘通常格式
/var/lib/kubelet/pods/<Pod的ID>/volumes/kubernetes.io~<Volume类型>/<Volume名字>

$ df -TH
/var/lib/kubelet/pods/61ba43c5-d2e9-4274-ac8c-008854e4fa8e/volumes/kubernetes.io~cephfs/pvc-2abe427e-7568-442d-939f-2c273695c3db/

$ findmnt /var/lib/kubelet/pods/61ba43c5-d2e9-4274-ac8c-008854e4fa8e/volumes/kubernetes.io~cephfs/pvc-2abe427e-7568-442d-939f-2c273695c3db/
172.21.51.55:6789:/volumes/kubernetes/kubernetes/kubernetes-dynamic-pvc-ffe3d84d-c433-11ea-b347-6acc3cf3c15f

若有收获,就点个赞吧
0 人点赞
