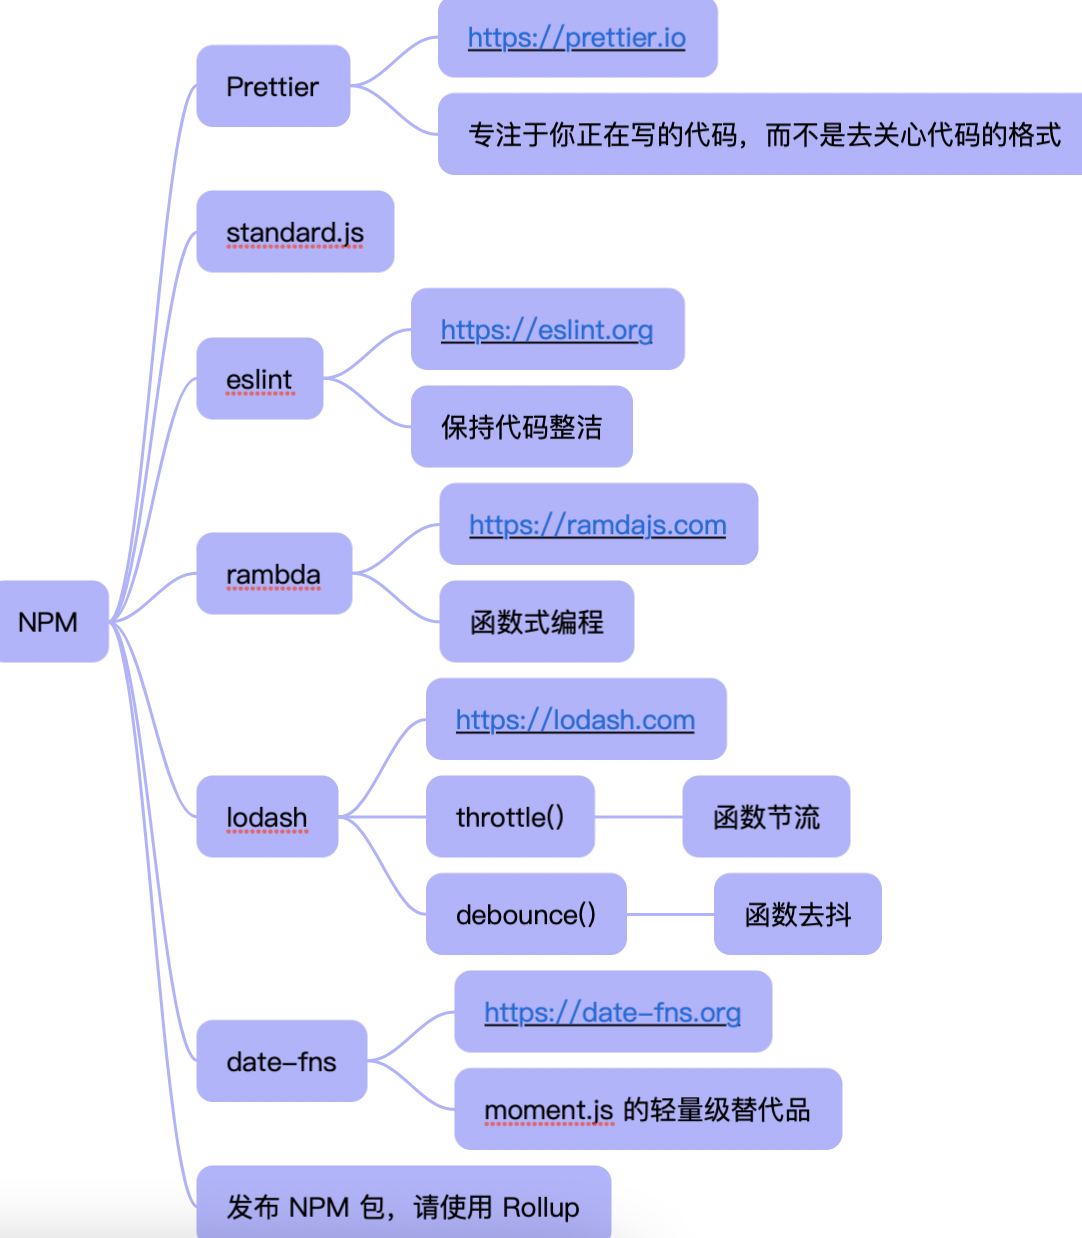
npm node package manager
nodejs的包管理工具
什么是 npm?
就是别人写的 nodejs模块,可以直接拿来使用
npm文档 https://www.npmjs.cn/getting-started/creating-node-modules
- npm, Node Package Manager
- npm包是从哪里下载的?,就是 registry
- npm.com 为企业提供私有的 npm registry 服务和团队合作的 Saas 服务
- npm包就是:一个特定功能的文件夹;包是模块的集合
npm i lodash --registry=https://registry.npm.taobao.orgwhich nodewhich npm
npm常用命令
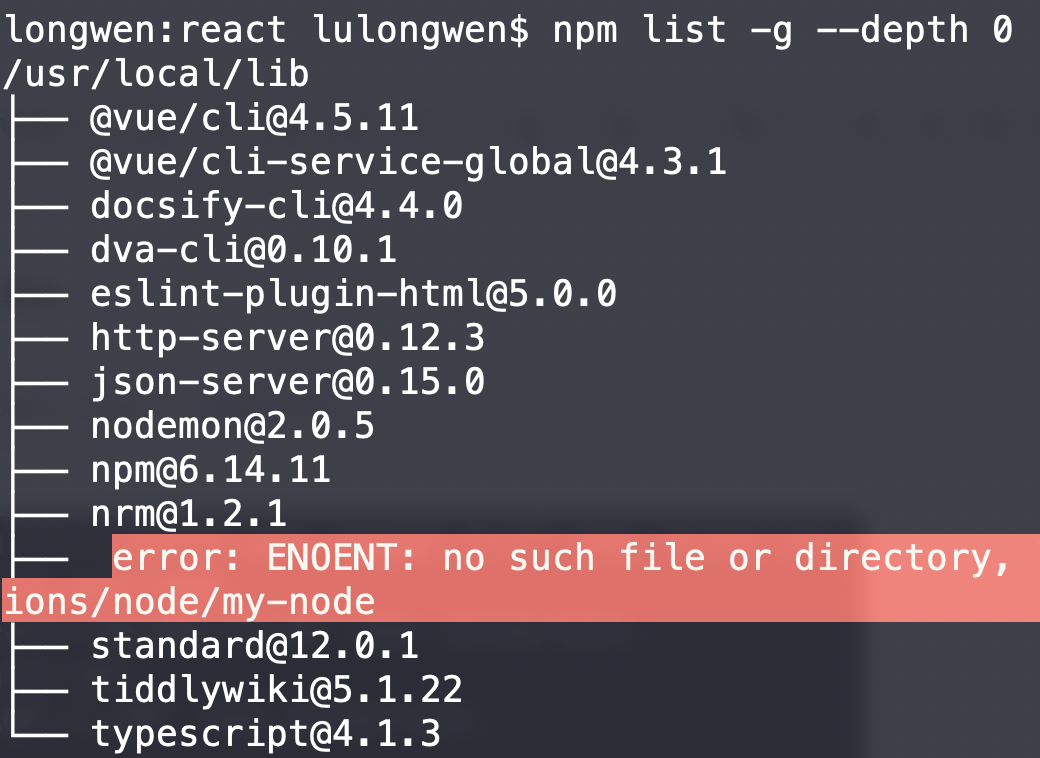
npm initnpm installnpm -hnpm -lnpm list -g --depth=0 // 查看全局安装模块
查看 npm全局安装包
- 开发中,会有意无意的安装了不少全局安装包,有些可能不会再使用了,有些已经太旧
- 查看自己电脑安装过的全局工具包,顺便卸载不需要的
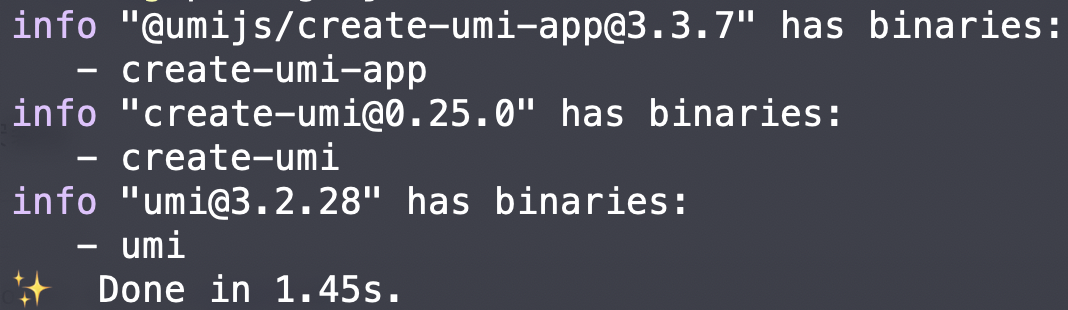
npx 是个不错的选择
推荐使用 npx 的方式代替 npm install -g、yarn global 全局安装
- 有些包我们只会使用一次,或者只想尝试以下,不想安装到全局,也不想作为当前项目的依赖
- 用 npx 的方式来执行
- npx 是 npm 5.2+ 版本之后自带的工具,能够帮助我们更高效的执行 npm 软件仓库里的安装包
```bash
npx 之前
node ./node_modules/.bin/mocha
使用 npx
npx mocha
npx创建 react项目
npx create-react-app my-app
<a name="Uj4XO"></a>### npx原理执行npx命令,会按以下顺序工作:1. 先查看当前项目有没 create-react-app1. 如果当前项目找不到,会去全局查找 create-react-app1. 如果全局还找不到,会帮我们临时从 npm 包仓库安装 create-react-app,不会污染到当前项目,也不会装到全局<a name="PyeBf"></a>### npm查看全局安装包```bashnpm list -g --depth=0
yarn查看全局安装包
yarn global list --depth=0
npm的3个部分
- npm 官网,网址 www.npmjs.com,查询 npm模块的信息
- npm registry,https://registry.npmjs.org/ 模块查询下载的服务 API
- npm cli,命令行下载工具,通过它来从 registry 下载模块
npm init
- 创建一个 package.json;
npm init --yes创建默认值的 package.json - package.json信息:
- 当前模块/项目名称、版本、描述、作者
- 配置了当前项目依赖的模块及版本
- 配置了当前项目是在哪个 git repo 下
- 当前模块的主入口文件 main
npm install
- —save,-S
- 模块安装到 dependencies,运行时依赖的模块
- —save-dev,-D
- devDependencies,本地开发时依赖的模块,上线不依赖
- 安装模块,一定要指定 —save 或者 -S,确保本地模块正确的添加到 package.json
- npm install,简写 npm i
- 项目中已有 package.json,可以直接 npm intall 安装所有依赖项
- 可以把所有的模块全部 tarball 形式从本地上传到服务器,可以保证所有模块代码的绝对一致性
- @ 开头,私有包;scope 通常用于管理私有模块
npm install <git repo url>npm install https://github.com/petkaantonov/bluebird.git // 仓库地址npm install https://github.com/caolan/async/tarball/v2.3.0npm install https://github.com/koajs/koa/archive/2.5.3.tar.gz // tar 包地址来安装// 安装本地的 tar 包npm install /Users/black/Downloads/request-2.88.1.tar.gz// 从本地文件夹安装npm install ../scott/some-module// 私有包npm install @lang/lts// 安装某个范围内的版本npm install lodash@">=2.0.0 <3.0.0"npm install @lang/lts@">=2.0.0 <3.0.0"// 卸载包npm uninstall jquery -S
npx包执行工具
- npx 是 npm 自带的功能,直接执行依赖包里的二进制文件
- 包里的二进制文件会被放到 node_modules/.bin 目录下
npm scripts
脚本能力,在 package.json 里的 scripts 里配置的各种任务
npm startnpm run devnpm run egg:prod
- 复杂的 scripts 会带来非常复杂的依赖队列,不好维护,
- 建议把每个独立的任务都分拆开进行组合,把复杂的任务独立写入到一个本地的脚本中,比如 task.js
"scripts": {// 通过 && 分隔,如果 clean:dist 任务失败,则不会执行后面的构建任务"build:task1": "npm run clean:dist && npm run build:prod"// 通过 ; 分隔,无论 clean:dist 是否成功,运行后都继续执行后面的构建任务"build:task2": "npm run clean:dist;npm run build:prod"// 通过 || 分隔,只有当 clean:dist 失败,才会继续执行后面的构建任务"build:task3": "npm run clean:dist;npm run build:prod""clean:dist": "rimraf ./dist","build:prod": "cross-env NODE_ENV=production webpack",// 对一个命令传配置参数,可以通过 -- --prod// 比如 npm run compile:prod 相当于执行 node ./r.js --prod"compile:prod": "npm run compile -- --prod","compile": "node ./r.js",}
npm publish
- https://www.npmjs.com/ 注册账号
- 本地(或者从 Github 上)创建创建一个空项目,拉到本地
- 增加 .gitignore 忽略文件和 README
- npm init 生成 package.json
- 编写功能代码,增加到目录
/lib - npm install 本地包进行测试
- npm publish 发布包
- npm install 线上包进行验证
- 修改代码发布一个新版本
npm loginnpm publish
在包目录下 npm publish
私有包
- 搭建自己的 registry
- 第三方的 registry
- https://github.com/cnpm/cnpmjs.org
- cnpm cli https://github.com/cnpm/cnpm
- 团队搭建私有 registry,可以参考 cnpmjs.org
- Aliyun Registry
- 把本地的包代码,改成 @scope/lts
- 然后本地 npm registry 切换到这个源,重新 npm login/npm publish 就可以
npm version
- v1.2.0
majorminorpatch,也就是 主版本号.次版本号.修订号- major: breaking changes (做了不兼容的 API 修改)
- minor: feature add(向下兼容的功能性新增)
- patch: bug fix, docs(向下兼容的问题修正)
- 版本管理参考 https://semver.org/
锁定 npm版本
- npm shrinkwrap 把包的版本锁住,保证它的代码每一行每一个字节都恒久不变
- npm5 package-lock.json
- ~ ^ 自动升级较新版本的包
~ 选择一个最近的小版本依赖包~3.9.0 可以匹配到所有的 3.9.x 版本,不会匹配到 3.10.0^ 是匹配最新的大版本^3.9.0 可以匹配到所有的 3.x.x,但是不会匹配到 4.0.0>=*// 完全不依赖锁包功能npm config set package-lock false
全包上传,全包回滚,防止版本不一致带来的错误
package-lock.json
package-lock.json 理解为一个详细描述代码版本的快照文件
{"name": "npm","version": "1.0.0","lockfileVersion": 1,"requires": true,"dependencies": {"async": {"version": "2.6.1","resolved": "http://registry.npm.taobao.org/async/download/async-2.6.1.tgz","integrity": "sha1-skWiPKcZMAROxT+kaqAKPofGphA=","requires": {"lodash": "^4.17.10"}},"lodash": {"version": "4.17.11","resolved": "http://registry.npm.taobao.org/lodash/download/lodash-4.17.11.tgz","integrity": "sha1-s56mIp72B+zYniyN8SU2iRysm40="}}}
- version 就是包的准确版本号
- resolved 则是一个明确 tar 包地址,唯一不变的
- integrity 这个内容 hash 的值,三个就决定了这个包准确身份信息
- requires 字段实现,让这些包向下依赖时保持不变
node_modules
- npm3 里面,安装策略改成了平铺结构,全部平铺到 node_modules
- 每个文件夹都是一个 package(包),每个包都有自己依赖的其他包,每个包也都有自己的名称和版本
实现一个 Node LTS 查看工具
#!/usr/bin/env node
#!定义当前脚本的执行环境是用 Node 执行
目录
/index.js/bin/index.js/lib/update.js/query.jsnpm i axios cli-color cli-table compare-versions -S
package.json
"main": "index.js","bin": { // 安装包,以后像二进制一样来执行"lts": "bin/lts.js"}
/index.js
exports.query = require('./lib/query')exports.update = require('./lib/update')
/lib/update.js
const axios = require('axios')const color = require('cli-color')const terminalLink = require('terminal-link')const compareVersions = require('compare-versions')module.exports = async (v) => {// 拿到所有的 Node 版本const { data } = await axios.get('https://nodejs.org/dist/index.json')// 把目标版本的 LTS 都挑选出来return data.filter(node => {const cp = v? (compareVersions(node.version, 'v' + v + '.0.0') >= 0): truereturn node.lts && cp}).map(it => {// 踢出去 file 这个字段,其他的全部返回const { files, ...rest } = itconst doc = color.yellow(terminalLink('API', `https://nodejs.org/dist/${it.version}/docs/api/documentation.html`))return { ...rest, doc }})}
/lib/query.js
const Table = require('cli-table')function query(dists) {const keys = Object.keys(dists[0])// 建立表头const table = new Table({head: keys})// 拼接出表格的每一行return dists.reduce((res, item) => {table.push(Object.values(item))return res}, table).toString()}module.exports = query
/bin/lts.js
#!/usr/bin/env nodeconst pkg = require('../package')// 从顶层 index.js 里面拿到 lib 下面模块暴露的方法const query = require('..').queryconst update = require('..').update// 输出结果到命令行窗口function printResult(v) {update(v).then(dists => {const results = query(dists, v)console.log(results)process.exit()})}function printVersion() {console.log('ltsn ' + pkg.version)process.exit()}// 一些命令的帮助提示function printHelp(code) {const lines = ['',' Usage:',' lts [8]','',' Options:',' -v, --version print the version of vc',' -h, --help display this message','',' Examples:',' $ lts 8','']console.log(lines.join('\n'))process.exit(code || 0)}// 包的入口函数,里面对参数做剪裁处理,拿到入参并给予// 不同入参的处理逻辑function main(argv) {if (!argv) {printHelp(1)}const getArg = function() {let args = argv.shift()args = args.split('=')if (args.length > 1) {argv.unshift(args.slice(1).join('='))}return args[0]}let argwhile (argv.length) {arg = getArg()switch(arg) {case '-v':case '-V':case '--version':printVersion()breakcase '-h':case '-H':case '--help':printHelp()breakdefault:printResult(arg)break}}}// 启动程序就开始执行主函数main(process.argv.slice(2))module.exports = main
npm无法安装
npm config get proxynpm config get https-proxy如果返回值不为null,继续执行npm config set proxy nullnpm config set https-proxy null
npm run mock & npm run dev 无法同时运行的解决
- 运行mock服务器和项目的命令,只能启动第一个
- 解决方法:
- 开2个命令窗口,先运行 npm run mock,后运行 npm run dev
npm run mock && npm run dev // 无效npm run mock | npm run dev // 无效
- 开2个命令窗口,先运行 npm run mock,后运行 npm run dev
npm config
配置成功
npm config ls -l
设置 npm源
npm config set registry http://registry.npm.taobao.org/# 验证是否成功npm config get registry# 还原为 npm源npm config set registry https://registry.npmjs.org/# 使用 npm而不是默认的 yarn--use-npm
运行多个命令
npm install concurrently --save-dev使用"script": {"start": "concurrently \"react-scripts start\" \"npm run mock\""},"proxy": "http://localhost:3030" // 代理异步请求
检查 npm 包是否被注入恶意代码
- flatmap-stream@0.1.1 代表项目有影响
npm ls event-stream flatmap
Use the `--scripts-prepend-node-path` option to include the path for the node binary npm was executed with.npm config set scripts-prepend-node-path true // 无效

若有收获,就点个赞吧
0 人点赞
