17.1 处理器的选择
Spring对文件上传做了封装,我们可以更加方便的实现文件上传。从 Spring3.1 开始,对于文件上传,提供了两个处理器:
- CommonsMultipartResolver
这个处理器兼容性较好,可以兼容 Servlet3.0 之前的版本,但是它依赖了 commons-fileupload 这个第三方工具。 - StandardServletMultipartResolver
这个处理器只适用于 Servlet3.0 之后的版本,但它不依赖第三方工具,可以直接开发文件上传功能。
本章讨论的功能均使用StandardServletMultipartResolver处理器。
17.2 管理单文个件上传
17.2.1 API设计目标
在本节我们实现Restful风格的APIs并提供以下的功能:
- 在服务端保存客户端上传的单个文
- 限制客户端上传文件的大小
- 获得已上传文件名和下载地址的列表
- 根据地址下载文件
下面是教程所实现的API列表:
| 请求方式 | URL地址 | 说明 |
|---|---|---|
| POST | /api/file/upload | 上传一个文件 |
| GET | /api/file/list | 获取已上传文件列表 |
| GET | /api/file/download/{filename} | 根据地址下载文件 |
本节后文所有的代码都在包 com.longser.union.cloud.service.fileuplad 下。
17.2.2 文件上传管理代码
创建FileStorageService文件管理接口
package com.longser.union.cloud.service.fileuplad;import org.springframework.core.io.Resource;import org.springframework.web.multipart.MultipartFile;import java.nio.file.Path;import java.util.stream.Stream;public interface FileStorageService {void setFilePath(String filePath);void save(MultipartFile multipartFile);void save(MultipartFile multipartFile, String filePath);Resource file(String filename, String filePath);Resource file(String filename);Stream<Path> list(String filePath);Stream<Path> list();}
以及接口的实现类:
package com.longser.union.cloud.service.fileuplad;import org.springframework.core.io.Resource;import org.springframework.core.io.UrlResource;import org.springframework.stereotype.Service;import org.springframework.util.Assert;import org.springframework.web.multipart.MultipartFile;import java.io.IOException;import java.net.MalformedURLException;import java.nio.file.Files;import java.nio.file.Path;import java.nio.file.Paths;import java.util.UUID;import java.util.stream.Stream;@Service("fileStorageService")public class FileStorageServiceImpl implements FileStorageService {private final String defaultPath = "uploadFiles";private Path path = Paths.get(defaultPath);private String makeUniqueName(String originalName) {String fileSuffix = originalName.substring(originalName.lastIndexOf("."));return UUID.randomUUID().toString() + fileSuffix;}@Overridepublic void setFilePath(String filePath) {if(filePath != null && !"".equals(filePath)) {this.path = Paths.get(filePath);}}@Overridepublic void save(MultipartFile file, String filePath) {try {String originalFilename = file.getOriginalFilename();Assert.notNull(originalFilename,"Could not get original filename.");if(filePath == null || "".equals(filePath)) {Files.copy(file.getInputStream(), this.path.resolve(makeUniqueName(originalFilename)));} else {Files.copy(file.getInputStream(), Paths.get(filePath).resolve(makeUniqueName(originalFilename)));}} catch (IOException e) {throw new RuntimeException("无法保存文件,错误:"+e.getMessage());}}@Overridepublic void save(MultipartFile multipartFile) {this.save(multipartFile, "");}@Overridepublic Resource file(String filename, String filePath) {Path file;if(filePath == null || "".equals(filePath)) {file = this.path.resolve(filename);} else {file = Paths.get(filePath).resolve(filename);}try {Resource resource = new UrlResource(file.toUri());if(resource.exists() || resource.isReadable()){return resource;}else{throw new RuntimeException("无法读文件");}} catch (MalformedURLException e) {throw new RuntimeException("错误:"+e.getMessage());}}@Overridepublic Resource file(String filename) {return file(filename, "");}@Overridepublic Stream<Path> list(String filePath) {try {if(filePath == null || "".equals(filePath)) {return Files.walk(this.path,1).filter(path -> !path.equals(this.path)).map(this.path::relativize);} else {Path thePath = Paths.get(filePath);return Files.walk(thePath,1).filter(path -> !path.equals(thePath)).map(thePath::relativize);}} catch (IOException e) {throw new RuntimeException("无法加载文件");}}@Overridepublic Stream<Path> list() {return list("");}}
17.2.3 文件对象及路径配置
文件对象类
package com.longser.union.cloud.service.fileuplad;public class UploadFile {private String fileName;private String url;public UploadFile(String fileName, String url) {this.fileName = fileName;this.url = url;}public String getFileName() {return fileName;}public void setFileName(String fileName) {this.fileName = fileName;}public String getUrl() {return url;}public void setUrl(String url) {this.url = url;}}
对应配置文件的上传文件路径类
package com.longser.union.cloud.service.fileuplad;import org.springframework.beans.factory.annotation.Value;import org.springframework.stereotype.Component;@Componentpublic class FilePath {@Value("${application.file.upload.path}")private String path;public String getPath() {return path;}}
17.2.4 文件上传管理基类
package com.longser.union.cloud.service.fileuplad;import com.longser.restful.result.RestfulResult;import org.springframework.beans.factory.annotation.Autowired;import org.springframework.core.io.Resource;import org.springframework.http.HttpHeaders;import org.springframework.http.ResponseEntity;import org.springframework.web.bind.annotation.RequestParam;import org.springframework.web.multipart.MultipartFile;import java.util.List;import java.util.stream.Collectors;public class FileUploadManager {private final FileStorageService fileStorageService;private FilePath filePath;@Autowiredpublic void setFilePath(FilePath filePath) {this.filePath = filePath;}public FileUploadManager(FileStorageService fileStorageService) {this.fileStorageService = fileStorageService;}public RestfulResult<String> saveFile(@RequestParam("file") MultipartFile file){try {fileStorageService.save(file, filePath.getPath());return RestfulResult.success("上传成功: "+file.getOriginalFilename());}catch (Exception e){e.printStackTrace();return RestfulResult.fail(-1, "上传失败:"+file.getOriginalFilename());}}public List<UploadFile> getLst(String pathUrl){return fileStorageService.list(filePath.getPath()).map(path -> {String fileName = path.getFileName().toString();String url = pathUrl + path.getFileName().toString();return new UploadFile(fileName,url);}).collect(Collectors.toList());}public ResponseEntity<Resource> getFile(String filename){Resource file = fileStorageService.file(filename,filePath.getPath());return ResponseEntity.ok().header(HttpHeaders.CONTENT_DISPOSITION,"attachment;filename=\""+file.getFilename()+"\"").body(file);}}
17.2.5 文件上传管理API
在应用程序根目录下创建目录fileStorage,然后在application.yml中增加如下的配置内容
application:file:upload:path: fileStorage
这时我们会看到在 path 上IDA 标记了一个有其它颜色的背景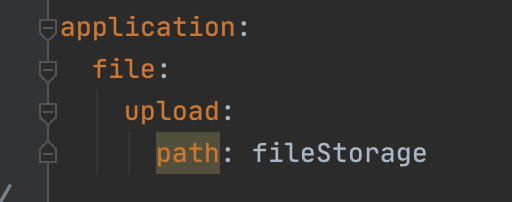
把鼠标放上去,你会看到下面的提示,也就是说IDEA不认识这个配置信息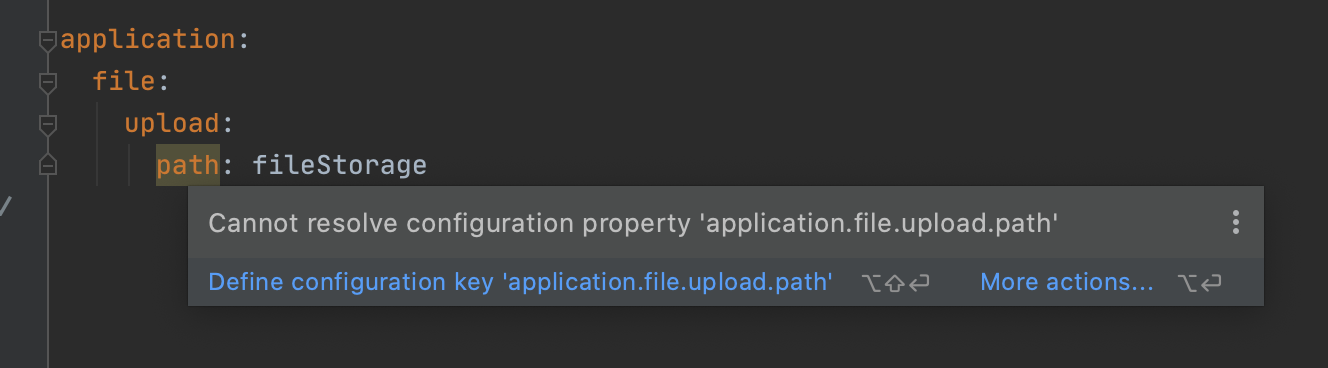
点击 “Define configuration key ‘application.file.upload.pah’”,IDEA可以帮你常见一个下面文件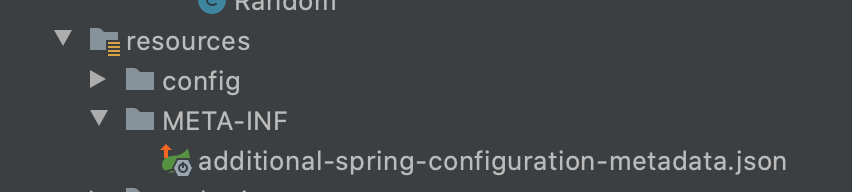
并且会生成下面的内容
{
  "properties": [
    {
      "name": "application.file.upload.path",
      "type": "java.lang.String",
      "description": "Description for application.file.upload.path."
    }
  ] }
把description修改成更有意义的内容
{
  "properties": [
    {
      "name": "application.file.upload.path",
      "type": "java.lang.String",
      "description": "应用程序保存上传文件的目录."
    }
  ] }
注意这里的字符串要求一定以
.结尾(很傻的要求)
保存修改后,在菜单中选择 [Build - Rebuild Project] 去重新创建整个应用,然后IEDA就可以争取识别这个配置了。
尽管不做这个工作的也能让配置的属性工作,但还是这样做比较好,也便于让项目组的其他人(以及后来的人)准确了解这个自定义配置的数据类型和用途。
在com.longser.union.cloud.controller 中创建类 FileUploadController
package com.longser.union.cloud.controller;

import com.longser.restful.annotation.IgnoreRestful;
import com.longser.restful.result.RestfulResult;
import com.longser.union.cloud.service.fileuplad.*;
import org.springframework.core.io.Resource;
import org.springframework.http.ResponseEntity;
import org.springframework.web.bind.annotation.*;
import org.springframework.web.multipart.MultipartFile;
import org.springframework.web.servlet.mvc.method.annotation.MvcUriComponentsBuilder;

import java.util.List;

@RestController
@RequestMapping("/api/file")
public class FileUploadController extends FileUploadManager {

    public FileUploadController(FileStorageService fileStorageService) {
        super(fileStorageService);
    }

    @PostMapping("/upload")
    public RestfulResult<String> upload(@RequestParam("file") MultipartFile file){
        return super.saveFile(file);
    }

    @GetMapping("/list")
    public List<UploadFile> list(){
        String url = MvcUriComponentsBuilder
                .fromMethodName(FileUploadController.class,
                        "getOne",
                        ""
                ).build().toString();
        return super.getLst(url);
    }

    @IgnoreRestful
    @GetMapping("/download/{filename:.+}")
    public ResponseEntity<Resource> getOne(@PathVariable("filename")String filename){
        return getFile(filename);
    }
}
17.2.6 功能测试
运行整体应用程序,然后在Postman中执行如下的测试:
- 测试上传单个文件

- 测试获得文件列表
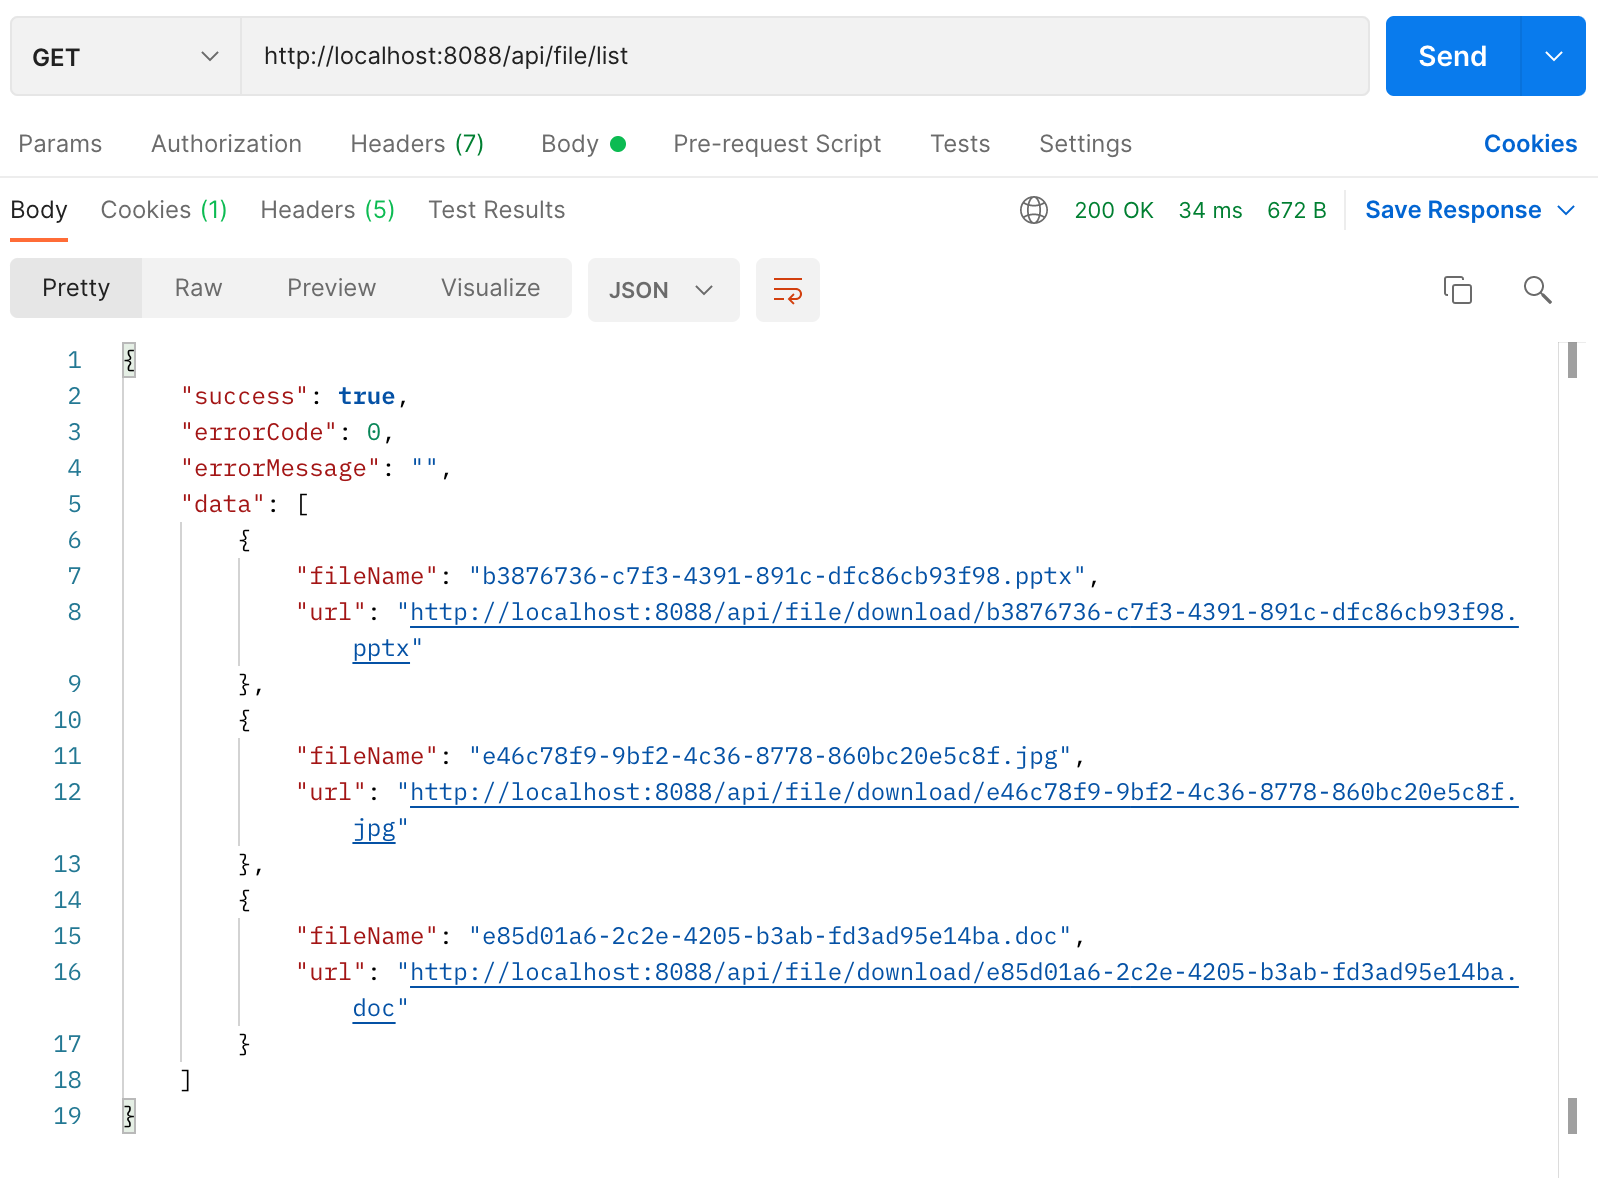
- 测试下载单个文件
把文件列表中某个具体文件的地址复制到浏览器地址栏,执行下载操作。
17.3 管理多个文件上传
多文件上传分为两种,一种是 key 相同的文件,另一种是 key 不同的文件。
17.3.1 key 相同的文件
这种上传,前端页面一般如下:
<form action="/upload2" method="post" enctype="multipart/form-data">
    <input type="file" name="files" multiple>
    <input type="submit" value="上传">
</form>
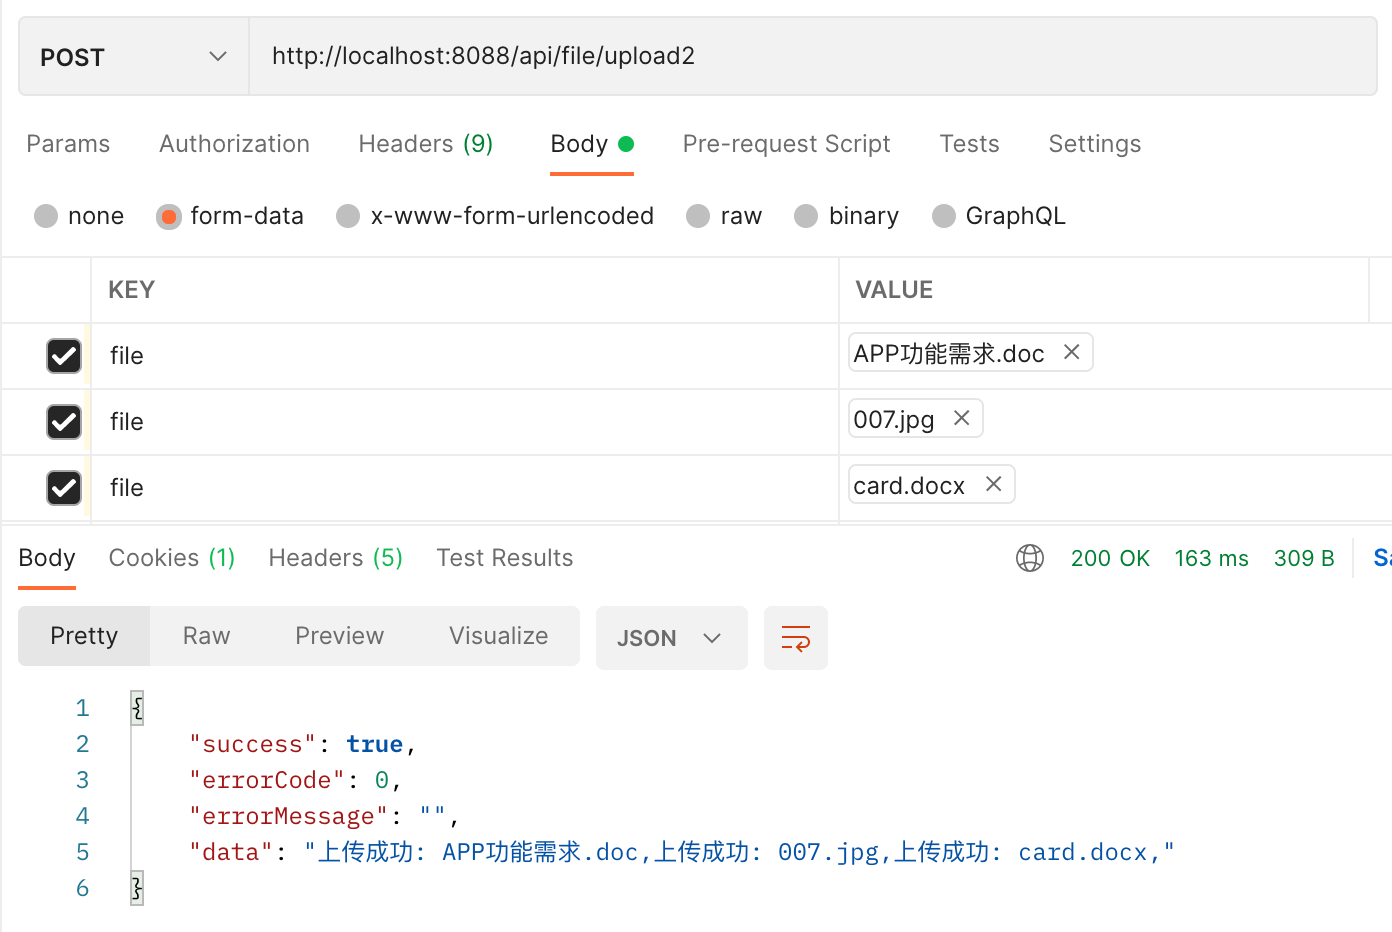
主要是 input 节点中多了 multiple 属性,后端用一个数组来接收文件即可:
    @PostMapping("/upload2")
    public QueryResult upload(@RequestParam("file") MultipartFile[] files){
        StringBuilder message = new StringBuilder();
        for (MultipartFile file : files) {
            message.append(super.saveFile(file).getData()).append(",");
        }
        return new QueryResult(message.toString());
    }
17.3.2 key 不同的文件
如果多个文件的key 不同的,在后端用不同的变量来接收即可。
17.4 编写上传文件的单元测试
我们用前文讨论过的 @AutoConfigureMockMvc 注解自动配置 Mock 环境完成上传文件 API 的测试。具体代码如下:
package com.longser.union.cloud.extended;

import org.junit.jupiter.api.DisplayName;
import org.junit.jupiter.api.Test;
import org.springframework.beans.factory.annotation.Autowired;
import org.springframework.boot.test.autoconfigure.web.servlet.AutoConfigureMockMvc;
import org.springframework.boot.test.context.SpringBootTest;
import org.springframework.http.MediaType;
import org.springframework.mock.web.MockMultipartFile;
import org.springframework.test.web.servlet.MockMvc;
import org.springframework.test.web.servlet.ResultActions;
import org.springframework.test.web.servlet.request.MockMvcRequestBuilders;

import java.io.File;
import java.io.FileInputStream;

import static org.springframework.test.web.servlet.result.MockMvcResultHandlers.print;
import static org.springframework.test.web.servlet.result.MockMvcResultMatchers.status;

@SpringBootTest
@AutoConfigureMockMvc
public class FileUploadTest {

    @Autowired
    private MockMvc mvc;

    @Test
    @DisplayName("File Upload Test")
    public void fileUploadTest() {
        try {
            ClassLoader classLoader = getClass().getClassLoader();
            File file = new File(classLoader.getResource("static/007.JPG").getFile());

            FileInputStream inputStream = new FileInputStream(file);
            MockMultipartFile multipartFile = new MockMultipartFile(
                    "file",
                    "007.JPG",
                    MediaType.IMAGE_JPEG_VALUE,
                    inputStream
            );

            ResultActions resultActions = mvc.perform(
                    MockMvcRequestBuilders
                            .multipart("/api/file/upload")
                            .file(multipartFile));
            resultActions.andReturn().getResponse().setCharacterEncoding("UTF-8");
            resultActions.andDo(print()).andExpect(status().isOk());
        }
        catch (Exception ex) {
            ex.printStackTrace();
        }
    }
}
代码中文件 007.JPG 是用来测试的,他放在src/test/resources/static目录下。
运行测试代码,结果如下:
MockHttpServletRequest:
      HTTP Method = POST
      Request URI = /api/file/upload
       Parameters = {}
          Headers = [Content-Type:"multipart/form-data;charset=UTF-8"]
             Body = null
    Session Attrs = {}

Handler:
             Type = com.longser.union.cloud.controller.FileUploadController
           Method = com.longser.union.cloud.controller.FileUploadController#upload(MultipartFile)

Async:
    Async started = false
     Async result = null

Resolved Exception:
             Type = null

ModelAndView:
        View name = null
             View = null
            Model = null

FlashMap:
       Attributes = null

MockHttpServletResponse:
           Status = 200
    Error message = null
          Headers = [Content-Type:"application/json;charset=UTF-8"]
     Content type = application/json;charset=UTF-8
             Body = {"success":true,"errorCode":0,"errorMessage":"","data":"上传成功: 007.JPG"}
    Forwarded URL = null
   Redirected URL = null
          Cookies = []
17.5 限制文件大小及处理异常
17.5.1 限制上传文件的大小
默认的情况,Spring Boot限制上传文件的大小不能超过 1MB,通过参数配置可以重新定义上传文件的大小限制。
在aplication.yml中做如下设置:
spring:

  servlet:
    multipart:
      max-request-size: 2MB
      max-file-size: 2MB
重启应用程序,再用Postman(或单元测试代码)上传超过2M的文件,会得到状态码为500的信息:
{
    "success": true,
    "errorCode": 0,
    "errorMessage": "",
    "data": {
        "timestamp": "2021-11-09T15:47:45.196+00:00",
        "status": 500,
        "error": "Internal Server Error",
        "path": "/api/file/upload"
    }
}
在控制台窗口可见如下的出错信息
org.apache.tomcat.util.http.fileupload.impl.SizeLimitExceededException: the request was rejected because its size (2217273) exceeds the configured maximum (2097152)
17.5.2 友好地处理异常
在实际的项目中,我们并不希望把后端的500错误直接展示给前端用户,而是通过定义自定义异常处理的方法实现友好的反馈。现在创建如下类:
package com.longser.union.cloud.service.fileuplad;

import com.longser.restful.result.RestfulResult;
import org.springframework.http.ResponseEntity;
import org.springframework.web.bind.annotation.ControllerAdvice;
import org.springframework.web.bind.annotation.ExceptionHandler;
import org.springframework.web.multipart.MaxUploadSizeExceededException;
import org.springframework.web.servlet.mvc.method.annotation.ResponseEntityExceptionHandler;

@ControllerAdvice
public class FileUploadExceptionAdvice extends ResponseEntityExceptionHandler {

    @ExceptionHandler(MaxUploadSizeExceededException.class)
    public ResponseEntity<RestfulResult> handleMaxUploadSizeExceededException(MaxUploadSizeExceededException e){
        return ResponseEntity.badRequest().body(RestfulResult.fail(400,"Upload file too large."));
    }
}
上面的代码通过@ControllerAdvice 注解用来监控是否发生 MaxUploadSizeExceededException 异常,当出现此异常时在前端页面给出提示。利用 @ControllerAdvice 可以做很多东西,比如全局的统一异常处理等,在后面的章节中我会展开讨论。
现在用Postman再次上传大小超过限制的文件,可以看到前端获得了400错误代码,并且获得了后端的提示信息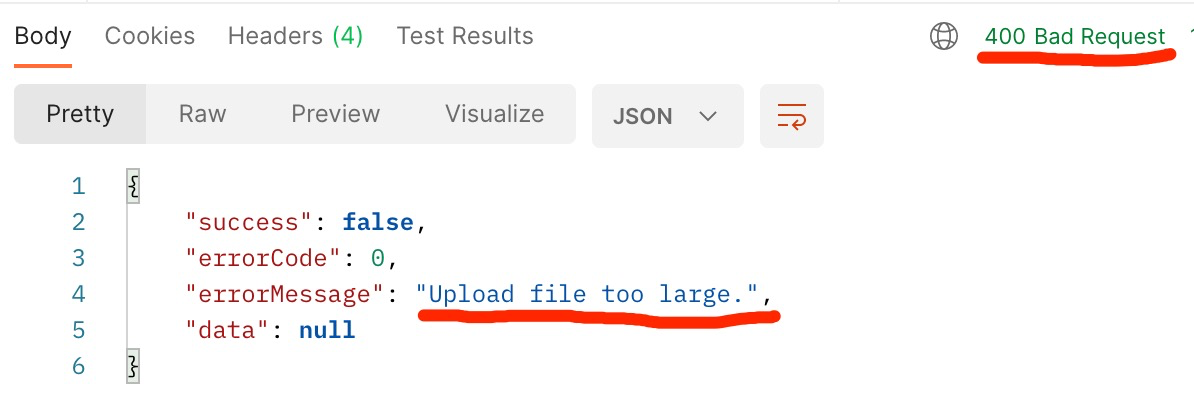
17.6 浏览器中显示特定类型文件
前文与文件下载有关的代码中,所有的文件都统一作为附件而由浏览器直接保存。有时候,我们希望类似图片、PDF等格式的文件直接在浏览器显式,为此可对代码修改如下:
    public ResponseEntity<Resource> getFile(String filename){
        String fileSuffix = filename.substring(filename.lastIndexOf(".") + 1 , filename.length()).toUpperCase();
        Resource file = fileStorageService.file(filename,filePath.getPath());

        String ContentDisposition = "attachment";
        MediaType mediaType;
        if("JPG".equals(fileSuffix) || "JPEG".equals(fileSuffix)) {
            mediaType = MediaType.IMAGE_JPEG;
            ContentDisposition = "inline";
        } else if("PNG".equals(fileSuffix)) {
            mediaType = MediaType.IMAGE_PNG;
            ContentDisposition = "inline";
        } else if("PDF".equals(fileSuffix)) {
            mediaType = MediaType.APPLICATION_PDF;
            ContentDisposition = "inline";
        } else if("GIF".equals(fileSuffix)) {
            mediaType = MediaType.IMAGE_GIF;
            ContentDisposition = "inline";
        } else if("GIF".equals(fileSuffix)) {
            mediaType = MediaType.IMAGE_GIF;
            ContentDisposition = "inline";
        } else {
            mediaType = MediaType.APPLICATION_OCTET_STREAM;
        }

        return ResponseEntity.ok()
                .contentType(mediaType)
                .header(HttpHeaders.CONTENT_DISPOSITION,
                        ContentDisposition + ";filename=\""+file.getFilename()+"\"")
                .body(file);
    }
代码中根据文件的扩展名判断文件类型,把JPG、PNG、GIF、PDF这些格式的文件都直接在浏览器中显示。
17.7 其它功能的讨论
本章主要展示了文件上传的主要流程,在实际项目要开发场景中还有更多内容要考虑,比如限制允许上传的文件类型、在数据库中记录关于文件的信息、限制单个目录中文件的数量、把上传的文件提交CDN服务管理、对上传和下载进行权限控制、在分布式系统中处理文件上传及共享访问等。
版权说明:本文由北京朗思云网科技股份有限公司原创,向互联网开放全部内容但保留所有权力。

若有收获,就点个赞吧
0 人点赞
