vue3的优化
- 源码优化
主要体现在monorepo和typescript。
monorepo最大的特点就是根据功能将不同的模块拆分到packages目录下的不同子目录中。
typescript提供了更好的类型检查,支持复杂的类型推导。
- 性能优化
- 源码体积优化
- 移除了一些冷门的功能:filter等。
- tree-shaking,原理:依赖ES2015模块语法的静态结构(即import和export),通过编译阶段的静态分析,找到没有导入的模块并打上标记,然后在压缩阶段删除已标记的代码。
- 数据劫持优化
- 源码体积优化
vue的数据是响应式的,数据变化后可以自动更新DOM,所以必须要劫持数据的更新,也就是当数据变化后能自动执行一些代码去更新DOM。那么vue如何知道更新哪一个DOM呢?因为在渲染DOM的时候访问了数据,所以可以对它进行访问劫持,这样在内部建立了依赖关系,也就知道数据对应的DOM了。
vue内部使用了名为watcher的数据结构进行依赖管理,vue2用Object.defineProperty()去劫持数据的getter、setter,但有缺陷:它必须预先知道要拦截的key是什么,所以不能监测对象属性的添加和删除,虽然有$set和$delete,但还是增加了一定的心智负担。此外,当对象嵌套层级较深时,vue会递归遍历这个对象,把每一层数据都变成响应式的,这增加了很大的性能负担。vue3使用了proxy,它劫持的是整个对象,所以对象的增加和删除都能检测到,但它并不能侦听内部深层次的对象变化,vue的处理方式是在proxy处理器对象的getter中递归响应,只有在真正访问到内部对象才会变成响应式的,而不是无脑递归。
编译优化
vue能保证触发更新的组件最小化,但在单个组件内部依然需要遍历该组件的整个vnode树,vue2的diff算法会遍历所有节点,这就导致vnode的更新性能跟模板大小正相关,跟动态节点的数量无关,理想状态下应该只遍历动态节点即可;vue3做到了,它通过编译阶段对静态模板的分析,编译生成了Block Tree,它是将模板基于动态节点指令切割的嵌套区块,每个区块内部的节点结构是固定的,而且每个区块只需要一个Array来追踪自身包含的动态节点。
- 语法API优化
- 优化逻辑组织
Composition API
- 优化逻辑复用
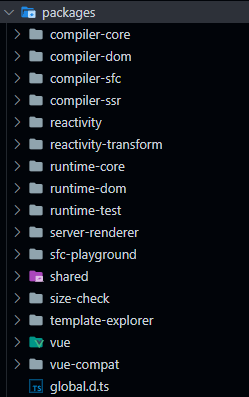
- compiler-core:包含与平台无关的编译器核心代码的实现,包括编译器的基础编译流程:解析模板生成AST—AST的节点转换—根据AST生成代码。所谓编译就是把模板字符串转化为渲染函数。跨平台指既可以在浏览器端也可以在服务端编译。
- compiler-dom:在浏览器端编译会使用compiler-dom提供的编译器,它是在compiler-core基础上进行的封装,包含专门针对浏览器的转换插件。
- compiler-ssr:在服务端编译会使用compiler-ssr提供的编译器,它是在compiler-core基础上进行的封装,也依赖compiler-dom提供的一部分辅助转换函数。包含专门针对服务端渲染的转换插件。
- compiler-sfc:.vue类型的单文件组件是不能直接被浏览器解析的,需要编译。可以借助webpack的vue-loader这样的处理器,他会先解析.vue文件,把template、script、style部分抽离出来,然后各个模块运行各自的解析器。
- runtime-core:包含了与平台无关的运行时核心代码,包括虚拟DOM的渲染器、组件实现和一些全局JS API。
- runtime-dom:基于runtime-core创建的以浏览器为目标的运行时,包括对原生DOM API、属性、样式、事件的管理。
- runtime-test:用于测试runtime-core的轻量级运行时,仅适用于vue内部测试。
- reactivity:数据驱动是vue的核心概念之一,此包包含响应式系统的实现,是runtime-core包的依赖,也可以作为与框架无关的包独立使用。
- template-explorer:用于调试模板编译输出的工具。
- sfc-playground:用于调试SFC单文件组件编译输出的工具,不仅仅包含template,还包含script、style部分的编译。
- shared:包含多个包共享的内部实用工具库。
- size-check:检测tree-shaking后vue运行时的代码体积。
- server-renderer:包含了服务端渲染的核心实现,是用户在使用vue实现服务端渲染时所依赖的包。
- vue:可直接导入单个包,面向用户完整构建,包括运行时版本和带编译器的版本。
- vue-compat:vue3的构建版本,提供可配置的vue2兼容行为。
源码需要编译,会构建出不同版本的vue.js,他们的应用场景各不相同:有的支持CDN直接导入,有的需要配合打包工具使用,有的用于服务端渲染。
在源码编译过程中,会先收集编译目标,然后执行并行编译,最终通过rollup工具完成单个包的编译。
在运行rollup编译单个包时,它会从每个包的package.json中读取相关编译配置,最终编译生成不同的目标文件。
组件
组件的渲染
组件是一棵DO M树的抽象,我们在页面中编写一个组件节点:
<hello-world>
它会在页面渲染成什么取决于我们怎么编写它,比如:
<template><div><p>Hello World</p></div></template>
一个组件要真正渲染成DOM,还需要经历创建vnode—渲染vnode—生成DOM这几个步骤。
什么是vnode
vnode本质上是用来描述DOM的JS对象。
普通元素vnode
普通元素节点,比如:
<button class="btn" style="width: 100px;height: 50px">click me</button>
vnode表示:
const vnode = {type: 'button',props: {'class': 'btn',style: {width: '100px',height: '50px'}},children: 'click me'}
其中,type表示标签类型,props表示附加信息,比如style、class等,children表示子节点,可以是vnode数组。
组件vnode
<custom-component msg="test"></custom-component>
vnode表示:
const CustomComponent = {
  // 在这里定义组件对象
}
const vnode = {
  type: 'CustomComponent',
  props: {
    msg: 'test'
  }
}
除以上两种vnode,还有纯文本vnode、注释vnode等。
vue针对vnode的type做了更详尽的分类,并且对vnode的类型进行了编码,以便在后面vnode的挂载阶段根据不同的类型执行相应的处理逻辑。
vnode的优势
抽象、跨平台。
如何创建vnode
vue3内部使用createBaseVNode函数创建基础的vnode对象:
function createBaseVNode(
  type: VNodeTypes | ClassComponent | typeof NULL_DYNAMIC_COMPONENT,
  props: (Data & VNodeProps) | null = null,
  children: unknown = null,
  patchFlag = 0,
  dynamicProps: string[] | null = null,
  shapeFlag = type === Fragment ? 0 : ShapeFlags.ELEMENT,
  isBlockNode = false,
  needFullChildrenNormalization = false
) {
  const vnode = {
    __v_isVNode: true,
    __v_skip: true,
    type,
    props,
    key: props && normalizeKey(props),
    ref: props && normalizeRef(props),
    scopeId: currentScopeId,
    slotScopeIds: null,
    children,
    component: null,
    suspense: null,
    ssContent: null,
    ssFallback: null,
    dirs: null,
    transition: null,
    el: null,
    anchor: null,
    target: null,
    targetAnchor: null,
    staticCount: 0,
    shapeFlag,
    patchFlag,
    dynamicProps,
    dynamicChildren: null,
    appContext: null
  } as VNode

  if (needFullChildrenNormalization) {
    normalizeChildren(vnode, children)
    // normalize suspense children
    if (__FEATURE_SUSPENSE__ && shapeFlag & ShapeFlags.SUSPENSE) {
      ;(type as typeof SuspenseImpl).normalize(vnode)
    }
  } else if (children) {
    // compiled element vnode - if children is passed, only possible types are
    // string or Array.
    vnode.shapeFlag |= isString(children)
      ? ShapeFlags.TEXT_CHILDREN
      : ShapeFlags.ARRAY_CHILDREN
  }
// ...
// 处理BlockTree
  return vnode
}
此函数根据传入的参数创建一个vnode对象,这个vnode对象可以完整地描述该节点的信息。
此外,如果参数needFullChildrenNormalization为true,还会执行normalization去标准化子节点。
createBaseVNode主要针对普通元素节点创建的vnode。组件vnode是通过createVNode函数创建的:
function _createVNode(
  type: VNodeTypes | ClassComponent | typeof NULL_DYNAMIC_COMPONENT,
  props: (Data & VNodeProps) | null = null,
  children: unknown = null,
  patchFlag: number = 0,
  dynamicProps: string[] | null = null,
  isBlockNode = false
): VNode {
  // 判断type是否为空
  if (!type || type === NULL_DYNAMIC_COMPONENT) {
    if (__DEV__ && !type) {
      warn(`Invalid vnode type when creating vnode: ${type}.`)
    }
    type = Comment
  }
    // 判断type是不是一个vnode节点
  if (isVNode(type)) {
    // createVNode receiving an existing vnode. This happens in cases like
    // <component :is="vnode"/>
    // #2078 make sure to merge refs during the clone instead of overwriting it
    const cloned = cloneVNode(type, props, true /* mergeRef: true */)
    if (children) {
      normalizeChildren(cloned, children)
    }
    return cloned
  }

  // 判断type是不是一个class类型的组件
  // class component normalization.
  if (isClassComponent(type)) {
    type = type.__vccOpts
  }

  // 2.x async/functional component compat
  if (__COMPAT__) {
    type = convertLegacyComponent(type, currentRenderingInstance)
  }

  // class和style标准化
  // class & style normalization.
  if (props) {
    // for reactive or proxy objects, we need to clone it to enable mutation.
    props = guardReactiveProps(props)!
    let { class: klass, style } = props
    if (klass && !isString(klass)) {
      props.class = normalizeClass(klass)
    }
    if (isObject(style)) {
      // reactive state objects need to be cloned since they are likely to be
      // mutated
      if (isProxy(style) && !isArray(style)) {
        style = extend({}, style)
      }
      props.style = normalizeStyle(style)
    }
  }
    // 对vnode的类型信息做了编码
  // encode the vnode type information into a bitmap
  const shapeFlag = isString(type)
    ? ShapeFlags.ELEMENT
    : __FEATURE_SUSPENSE__ && isSuspense(type)
    ? ShapeFlags.SUSPENSE
    : isTeleport(type)
    ? ShapeFlags.TELEPORT
    : isObject(type)
    ? ShapeFlags.STATEFUL_COMPONENT
    : isFunction(type)
    ? ShapeFlags.FUNCTIONAL_COMPONENT
    : 0

  if (__DEV__ && shapeFlag & ShapeFlags.STATEFUL_COMPONENT && isProxy(type)) {
    type = toRaw(type)
    warn(
      `Vue received a Component which was made a reactive object. This can ` +
        `lead to unnecessary performance overhead, and should be avoided by ` +
        `marking the component with \`markRaw\` or using \`shallowRef\` ` +
        `instead of \`ref\`.`,
      `\nComponent that was made reactive: `,
      type
    )
  }

  return createBaseVNode(
    type,
    props,
    children,
    patchFlag,
    dynamicProps,
    shapeFlag,
    isBlockNode,
    true
  )
}
最后执行createBaseVNode创建vnode对象,由于needFullChildrenNormalization参数是true,创建完vnode对象后还会执行normalizeChildren去标准化子节点。
createVNode之所以在创建vnode前做了很多判断,是因为要处理各种各样的情况。然而对于普通vnode则无需这么多逻辑判断,因此使用createBaseVNode即可。
那么,这两个函数是在什么时候执行的呢,其实是在render函数内部。通过父子关系的建立,组件内部的vnode就构成了一棵vnode树,它和模板中的DOM树是一一映射的关系。
那么render函数是如何执行的呢,这要从组件的挂载过程说起。
组件的挂载
组件挂载函数是mountComponent,部分代码:
const mountComponent: MountComponentFn = (
    initialVNode,
    container,
    anchor,
    parentComponent,
    parentSuspense,
    isSVG,
    optimized
  ) => {
    // 创建组件实例
    const instance: ComponentInternalInstance =
      compatMountInstance ||
      (initialVNode.component = createComponentInstance(
        initialVNode,
        parentComponent,
        parentSuspense
      ))
    // 设置组件实例
    setupComponent(instance)

    // 设置并运行带副作用的渲染函数
    setupRenderEffect(
      instance,
      initialVNode,
      container,
      anchor,
      parentSuspense,
      isSVG,
      optimized
    )
  }
mountComponent的initialVNode参数表示组件vnode,container表示组件挂载的父节点,anchor表示挂载的参考锚点,parentComponent表示父组件实例。
mountComponent首先创建组件实例,然后设置组件实例,instance保存了很多与组件相关的数据,维护了组件的上下文,包括对props、插槽以及其他实例的属性的初始化处理。
下面看如何设置并运行带副作用的渲染函数。
设置副作用渲染函数
看setupRenderEffect函数:
const setupRenderEffect: SetupRenderEffectFn = (
  instance,
  initialVNode,
  container,
  anchor,
  parentSuspense,
  isSVG,
  optimized
) => {
  // 组件的渲染和更新函数
  const componentUpdateFn = () => {
    if (!instance.isMounted) {
        // 渲染组件生成子树vnode
        const subTree = (instance.subTree = renderComponentRoot(instance))
        // 把子树vnode挂载到container中
        patch(
          null,
          subTree,
          container,
          anchor,
          instance,
          parentSuspense,
          isSVG
        )
        // 保存渲染生成的子树根DOM节点
        initialVNode.el = subTree.el
        instance.isMounted = true
    } else {
      // 更新组件
    }
  }

  // create reactive effect for rendering
  // 创建组件渲染的副作用响应式对象
  const effect = (instance.effect = new ReactiveEffect(
    componentUpdateFn,
    () => queueJob(instance.update),
    instance.scope // track it in component's effect scope
  ))

  const update = (instance.update = effect.run.bind(effect) as SchedulerJob)
  update.id = instance.uid
  // 允许递归更新自己
  effect.allowRecurse = update.allowRecurse = true
  update()
}
setupRenderEffect内部使用响应式库的ReactiveEffect函数创建了一个副作用实例effect,并且把instance.update函数指向effect.run。
当首次执行instance.update时,内部就会执行componentUpdateFn,触发组件的首次渲染。
当组件的数据发生变化时,组件渲染函数componentUpdateFn会重新执行一遍,从而达到重新渲染的目的。
componentUpdateFn函数内部会判断这是一次初始渲染还是组件的更新渲染。
初始渲染主要做两件事:渲染组件生成subTree,把subTree挂载到container中。
渲染组件生成subTree
渲染组件生成subTree通过执行renderComponentRoot函数完成:
function renderComponentRoot(
  instance: ComponentInternalInstance
): VNode {
  const {
    type: Component,
    vnode,
    proxy,
    withProxy,
    props,
    propsOptions: [propsOptions],
    slots,
    attrs,
    emit,
    render,
    renderCache,
    data,
    setupState,
    ctx,
    inheritAttrs
  } = instance

  let result
  try {
    if (vnode.shapeFlag & ShapeFlags.STATEFUL_COMPONENT) {
      // 有状态的组件渲染
      const proxyToUse = withProxy || proxy
      result = normalizeVNode(
        render!.call(
          proxyToUse,
          proxyToUse!,
          renderCache,
          props,
          setupState,
          data,
          ctx
        )
      )
    } else {
      // 其他逻辑省略
    }
    // 其他逻辑省略
  }
  catch (err) {
    handleError(err, instance, ErrorCodes.RENDER_FUNCTION)
    // 渲染出错则渲染成一个注释节点
    result = createVNode(Comment)
  }
  return result
}
renderComponentRoot拥有单个参数instance,它是组件的实例。从该实例中可以获取与组件渲染相关的上下文数据。我们可以拿到instance.vnode,他就是前面在执行mountComponent时传递的initialVNode,并且可以拿到instance.render,它是组件对应的渲染函数。
如果是一个有状态的组件,则执行render函数渲染组件生成vnode。
这就是render函数的执行时机,而render函数的返回值再经过内部一层标准化,就是该组件渲染生成的vnode树的根节点subTree。
不要把subTree和initialVNode弄混了,虽然他们都是vnode对象,举个例子,在App组件中定义如下模板:
<template>
  <div class="app">
    <p>this is an app.</p>
    <hello></hello>
  </div>
</template>
借助模板导出工具,可以看到它编译后的render函数:
import { createElementVNode as _createElementVNode,
        resolveComponent as _resolveComponent,
        createVNode as _createVNode, openBlock as _openBlock,
        createElementBlock as _createElementBlock } from "vue"

export function render(_ctx, _cache, $props, $setup, $data, $options) {
  const _component_hello = _resolveComponent("hello")

  return (_openBlock(), _createElementBlock("template", null, [
    _createElementVNode("div", { class: "app" }, [
      _createElementVNode("p", null, "this is an app."),
      _createVNode(_component_hello)
    ])
  ]))
}
针对
Hello组件的模板如下:
<template>
  <div class="hello">
    <p>hello, vue3!</p>
  </div>
</template>
借助模板导出工具,看render函数:
import { createElementVNode as _createElementVNode,
        resolveComponent as _resolveComponent,
        createVNode as _createVNode, openBlock as _openBlock,
        createElementBlock as _createElementBlock } from "vue"

export function render(_ctx, _cache, $props, $setup, $data, $options) {
  return (_openBlock(), _createElementBlock("template", null, [
    _createElementVNode("div", { class: "hello" }, [
      _createElementVNode("p", null, "hello, vue3!")
    ])
  ]))
}
render函数返回的vnode会被作为Hello组件的subTree。
因此,在APP组件中,
渲染生成子树vnode后,接下来就是继续调用patch函数把子树vnode挂载到容器container中了。
subTree的挂载
subTree的挂载主要是执行patch函数完成的:
const patch: PatchFn = (
    n1,
    n2,
    container,
    anchor = null,
    parentComponent = null,
    parentSuspense = null,
    isSVG = false,
    slotScopeIds = null,
    optimized = __DEV__ && isHmrUpdating ? false : !!n2.dynamicChildren
  ) => {
    const { type, ref, shapeFlag } = n2
    switch (type) {
        // 处理文本节点
      case Text:
        processText(n1, n2, container, anchor)
        break
      case Comment:
        // 处理注释节点
        processCommentNode(n1, n2, container, anchor)
        break
      case Static:
        // 处理静态节点
        if (n1 == null) {
          mountStaticNode(n2, container, anchor, isSVG)
        } else if (__DEV__) {
          patchStaticNode(n1, n2, container, isSVG)
        }
        break
      case Fragment:
        // 处理fragment元素
        processFragment(
          n1,
          n2,
          container,
          anchor,
          parentComponent,
          parentSuspense,
          isSVG,
          slotScopeIds,
          optimized
        )
        break
      default:
        if (shapeFlag & ShapeFlags.ELEMENT) {
          // 处理普通dom元素
          processElement(
            n1,
            n2,
            container,
            anchor,
            parentComponent,
            parentSuspense,
            isSVG,
            slotScopeIds,
            optimized
          )
        } else if (shapeFlag & ShapeFlags.COMPONENT) {
          // 处理组件
          processComponent(
            n1,
            n2,
            container,
            anchor,
            parentComponent,
            parentSuspense,
            isSVG,
            slotScopeIds,
            optimized
          )
        } else if (shapeFlag & ShapeFlags.TELEPORT) {
          // 处理teleport
          ;(type as typeof TeleportImpl).process(
            n1 as TeleportVNode,
            n2 as TeleportVNode,
            container,
            anchor,
            parentComponent,
            parentSuspense,
            isSVG,
            slotScopeIds,
            optimized,
            internals
          )
        } else if (__FEATURE_SUSPENSE__ && shapeFlag & ShapeFlags.SUSPENSE) {
          // 处理suspense
          ;(type as typeof SuspenseImpl).process(
            n1,
            n2,
            container,
            anchor,
            parentComponent,
            parentSuspense,
            isSVG,
            slotScopeIds,
            optimized,
            internals
          )
        } else if (__DEV__) {
          warn('Invalid VNode type:', type, `(${typeof type})`)
        }
    }

    // set ref
    if (ref != null && parentComponent) {
      setRef(ref, n1 && n1.ref, parentSuspense, n2 || n1, !n2)
    }
  }
patch本意为打补丁,这个函数有两个功能:一是根据vnode挂载DOM,二是根据新vnode更新DOM。这里先分析创建过程。在创建过程中,patch函数接收多个参数,先关注前四个:
- n1表示旧的vnode,当n1为null的时候,表示是一次挂载的过程。
- n2表示新的vnode,后续会根据这个vnode的类型执行不同的处理逻辑。
- container表示DOM容器,也就是vnode在渲染生成DOM后,会挂载到container下面。
- anchor表示挂载参考的锚点,在后续执行DOM挂载操作的时候会以它为参考点。
普通元素的挂载
看一下处理普通元素processElement函数的实现:
const processElement = (
    n1: VNode | null,
    n2: VNode,
    container: RendererElement,
    anchor: RendererNode | null,
    parentComponent: ComponentInternalInstance | null,
    parentSuspense: SuspenseBoundary | null,
    isSVG: boolean,
    slotScopeIds: string[] | null,
    optimized: boolean
  ) => {
    isSVG = isSVG || (n2.type as string) === 'svg'
    if (n1 == null) {
      // 挂载元素节点
      mountElement(
        n2,
        container,
        anchor,
        parentComponent,
        parentSuspense,
        isSVG,
        slotScopeIds,
        optimized
      )
    } else {
      // 更新元素节点
      patchElement(
        n1,
        n2,
        parentComponent,
        parentSuspense,
        isSVG,
        slotScopeIds,
        optimized
      )
    }
  }
如果n1为null,就执行挂载元素节点的逻辑,否则执行更新元素的逻辑。看一下mountElement函数的实现:
const mountElement = (
    vnode: VNode,
    container: RendererElement,
    anchor: RendererNode | null,
    parentComponent: ComponentInternalInstance | null,
    parentSuspense: SuspenseBoundary | null,
    isSVG: boolean,
    slotScopeIds: string[] | null,
    optimized: boolean
  ) => {
    let el: RendererElement
    let vnodeHook: VNodeHook | undefined | null
    const { type, props, shapeFlag, transition, patchFlag, dirs } = vnode
    el = vnode.el = hostCreateElement(vnode.type,isSVG,props&props.is,props)
    if (shapeFlag & ShapeFlags.TEXT_CHILDREN) {
      // 处理子节点vnode是纯文本的情况
      hostSetElementText(el, vnode.children as string)
    } else if (shapeFlag & ShapeFlags.ARRAY_CHILDREN) {
      // 处理子节点vnode是数组的情况
      mountChildren(
        vnode.children as VNodeArrayChildren,
        el,
        null,
        parentComponent,
        parentSuspense,
        isSVG && type !== 'foreignObject',
        slotScopeIds,
        optimized
      )
    }
    if (props) {
      for (const key in props) {
        if (key !== 'value' && !isReservedProp(key)) {
          hostPatchProp(
            el,
            key,
            null,
            props[key],
            isSVG,
            vnode.children as VNode[],
            parentComponent,
            parentSuspense,
            unmountChildren
          )
        }
      }
  // 把创建的DOM节点挂载到container上
  hostInsert(el, container, anchor)
}
mountElement主要是创建DOM元素节点,处理Children,处理props,挂载DOM元素到container上。
首先是创建DOM元素节点。我们通过hostCreateElement函数创建,这是一个与平台相关的函数。看一下它在web环境中的定义:
export const svgNS = 'http://www.w3.org/2000/svg'

const doc = (typeof document !== 'undefined' ? document : null) as Document

createElement: (tag, isSVG, is, props): Element => {
  const el = isSVG
    ? doc.createElementNS(svgNS, tag)
    : doc.createElement(tag, is ? { is } : undefined)
    // 处理select标签多选属性
  if (tag === 'select' && props && props.multiple != null) {
    ;(el as HTMLSelectElement).setAttribute('multiple', props.multiple)
  }

  return el
}
createElement函数有四个参数,tag表示创建的标签,isSVG表示标签是否是svg,is表示用户创建Web Component规范的自定义标签,props表示一些额外属性。
createElement最终还是调用浏览器底层的DOM API document.createElementNS或者document.createElement来创建DOM元素。
另外,其他平台,比如Weex,hostCreateElement函数就不再操作DOM了,而是操作与平台相关的API。这些API是在创建渲染器阶段作为参数传入的。
创建完DOM节点,就要对子节点进行处理了。我们知道DOM是一棵树,vnode同样是一棵树,并且和DOM结构是一一映射的。因此每个vnode都可能会有子节点,并且子节点需要优先处理。
如果子节点是纯文本vnode,则执行hostSetElementText函数,它通过在Web环境下设置DOM元素的textContent属性设置文本:
function setElementText(el, text) {
  el.textContent = text
}
除了纯文本,子节点还有可能是vnode数组,要执行mountChildren函数:
const mountChildren: MountChildrenFn = (
    children,
    container,
    anchor,
    parentComponent,
    parentSuspense,
    isSVG,
    slotScopeIds,
    optimized,
    start = 0
  ) => {
    for (let i = start; i < children.length; i++) {
      const child = (children[i] = optimized
        ? cloneIfMounted(children[i] as VNode)
        : normalizeVNode(children[i]))
      patch(
        null,
        child,
        container,
        anchor,
        parentComponent,
        parentSuspense,
        isSVG,
        slotScopeIds,
        optimized
      )
    }
  }
mountChildren会遍历children,获取每一个child,然后递归执行patch函数,挂载每一个child。
第二个参数container是在调用mountElement时创建的DOM节点el,建立了父子关系。
递归patch这种深度优先的方式可以构造完整的DOM树,完成组件的渲染。
处理完所有子节点回到当前节点,接下来就要判断是否有props,如果有则给这个DOM节点添加相关的class、style、event等属性并做相关处理。这些逻辑都在hostPatchProp函数内部就不展开了。
最后执行hostInsert函数把创建的DOM元素节点挂载到container上:
function insert(child, parent, anchor) {
  parent.insertBefore(child, anchor || null)
}
insert是hostInsert的别名,会操作DOM把child插入到anchor的前面,如果为null,会把child插入parent子节点的末尾。
执行insert后,mountElement中创建的DOM元素el就挂载到父容器container上了。由于insert是在处理子节点后执行的,整个DOM的挂载顺序是先子节点、后父节点,并且最终挂载到最外层的容器上。
组件的嵌套挂载
patch过程中遇到组件vnode会执行processComponent来处理组件vnode的挂载:
const processComponent = (
    n1: VNode | null,
    n2: VNode,
    container: RendererElement,
    anchor: RendererNode | null,
    parentComponent: ComponentInternalInstance | null,
    parentSuspense: SuspenseBoundary | null,
    isSVG: boolean,
    slotScopeIds: string[] | null,
    optimized: boolean
  ) => {
    if (n1 == null) {
      // 挂载组件
      mountComponent(
        n2,
        container,
        anchor,
        parentComponent,
        parentSuspense,
        isSVG,
        optimized
      )
    } else {
      // 更新组件
      updateComponent(n1, n2, optimized)
    }
  }
n1为null就挂载组件,否则更新组件,挂载通过mountComponent实现。前面已经讲过,所以嵌套组件的挂载就是一个递归的过程。
至此,我们知道了组件的挂载是通过mountComponent函数完成的。在组件挂载过程中如果遇到嵌套的子组件还会递归执行mountComponent。那么,最外层的组件是什么时机执行mountComponent的呢,这要从应用程序初始化流程说起。
应用程序初始化
在vue3中初始化一个应用的方式如下:
import { createApp } from 'vue'
import App from '/app'
const app = createApp(App)
app.mount('#app')
首先分析createApp的流程:
export const createApp = ((...args) => {
  // 创建app对象
  const app = ensureRenderer().createApp(...args)
  const { mount } = app
  // 重写mount函数
  app.mount = (containerOrSelector: Element | ShadowRoot | string): any => {
   // ...
  }

  return app
}) as CreateAppFunction<Element>
创建app对象
首先使用ensureRender().createApp()来创建app对象,ensureRender用来创建一个渲染器对象。可以简单理解为包含平台渲染核心逻辑的JS对象,内部代码大概是这样的:
// 与平台渲染相关的一些配置,比如更新属性,操作DOM的函数等
const rendererOptions = /*#__PURE__*/ extend({ patchProp }, nodeOps)
let renderer: Renderer<Element | ShadowRoot> | HydrationRenderer
// 延时创建渲染器,当用户只依赖响应式包的时候,可以通过tree-shaking移除与核心渲染逻辑相关的代码
function ensureRenderer() {
  return (
    renderer ||
    (renderer = createRenderer<Node, Element | ShadowRoot>(rendererOptions))
  )
}
渲染器renderer只在ensureRenderer执行的时候才会被创建,这是一种延时创建渲染器的方式,这样的好处是当用户只依赖响应式包的时候,并不会创建渲染器,可通过tree-shaking移除。
分析createRenderer的实现:
export function createRenderer<
  HostNode = RendererNode,
  HostElement = RendererElement
>(options: RendererOptions<HostNode, HostElement>) {
  return baseCreateRenderer<HostNode, HostElement>(options)
}

function baseCreateRenderer(options) {
  function render(vnode, container) {
    // 组件渲染核心逻辑
  }
  return {
    render,
    createApp: createAppAPI(render)
  }
}

export function createAppAPI<HostElement>(
  render: RootRenderFunction,
  hydrate?: RootHydrateFunction
): CreateAppFunction<HostElement> {
  // createApp接收两个参数:根组件的对象和根props
  return function createApp(rootComponent, rootProps = null) {
    const app: App = {
      _component: rootComponent,
      _props:rootProps,
      mount(rootContainer) {
        // 创建根组件的vnode
        const vnode = createVNode(rootComponent, rootProps)
        // 利用渲染器渲染vnode
        render(vnode, rootContainer)
        app._container = rootContainer
        return vnode.component.proxy
      }
    }
    return app
  }
}
createRenderer内部通过执行baseCreateRenderer创建一个渲染器,。这个渲染器内部有一个render函数,包含渲染的核心逻辑;还有一个createApp函数,它是执行createAppAPI函数返回的函数,可接收rootComponent和rootProps两个参数。
当我们在应用层面执行createApp(App)函数时,会把App组件对象作为根组件传递给rootComponent。这样,createApp内部就创建了一个app对象,它会提供mount函数用于挂载组件。
在app对象的整个创建过程中,vue利用闭包和函数柯里化的技巧很好地实现了参数保留,比如在执行app.mount时并不需要传入核心渲染函数render、根组件对象和根props。这是因为在执行createAppAPI的时候,render函数已经被保留下来了,而在执行createAPP的时候,rootComponent和rootProps两个参数也被保留下来了。
重写app.mount函数
根据前面分析,我们知道createApp返回的app对象已经拥有了mount函数,但在入口函数中,接下来的逻辑却是对函数的重写,这是因为vue不仅仅是为web平台服务,它的目标是支持跨平台渲染,而createApp函数内部的app.mount函数是一个标准的可跨平台的组件渲染流程:
mount(
  rootContainer: HostElement,
  isHydrate?: boolean,
  isSVG?: boolean
): any {
  // 创建根组件的vnode
  const vnode = createVNode(
    rootComponent as ConcreteComponent,
    rootProps
  )
  // 执行核心渲染函数渲染vnode
  render(vnode, rootContainer)
  app._container = rootContainer
  return vnode.component!.proxy
},
标准的跨平台渲染流程是先创建 vnode在渲染vnode。此外,参数rootcontainer也可以是不同类型的值。比如在web平台上它是一个DOM对象;而在其他平台可以是其他类型的值。所以这里的代码不应该包含任何与特定平台相关的逻辑。因此我们要重写这个函数来完善web平台下的渲染逻辑。
接下来,再来看看对app.mount的重写都做了哪些事情:
app.mount = (containerOrSelector: Element | ShadowRoot | string): any => {
  // 标准化容器
  const container = normalizeContainer(containerOrSelector)
  if (!container) return

  const component = app._component
  // 如果组件对象没有定义render函数和template模板,则取容器的innerHTML作为组件的模板内容
  if (!isFunction(component) && !component.render && !component.template) {
    // __UNSAFE__
    // Reason: potential execution of JS expressions in in-DOM template.
    // The user must make sure the in-DOM template is trusted. If it's
    // rendered by the server, the template should not contain any user data.
    component.template = container.innerHTML
  }
  // 挂载前清空容器内容
  // clear content before mounting
  container.innerHTML = ''
  // 真正的挂载
  return mount(container)
}
重写之后的app.mount函数首先通过normalizeContainer使容器标准化,这里可以传入字符串选择器或者DOM对象,但如果是字符串选择器就需要把它转换成DOM对象,作为最终挂载的容器,然后做一个if判断:如果组件对象没有定义render函数和模板,则取容器innerHTML作为组件模板内容。接着挂载前清空容器内容,最终调用app.mount函数,执行标准的组件渲染流程。
在这里,重写的逻辑都是与web平台相关的。此外,这么做也能让用户在使用API时更加灵活,比如app.mount的第一个参数就同时支持字符串选择器和DOM对象两种类型。
从app.mount开始才算真正进入组件渲染流程。接下来重点看一下要在核心渲染流程中做的两件事:创建vnode、渲染vnode。
执行mount函数渲染应用
创建vnode是通过执行createVNode函数并传入根组件对象rootComponent来完成的。根据前面的分析,这里会生成一个组件vnode。接着会执行render核心渲染函数来渲染vnode:
const render: RootRenderFunction = (vnode, container, isSVG) => {
  if (vnode == null) {
    // 销毁组件
    if (container._vnode) {
      unmount(container._vnode, null, null, true)
    }
  } else {
    // 创建或更新组件
    patch(container._vnode || null, vnode, container, null, null, null, isSVG)
  }
  // 缓存vnode节点,表示已经渲染
  container._vnode = vnode
}
vnode是要渲染的vnode节点,container是挂载的容器。
如果第一个参数为空就销毁组件,否则执行patch创建或更新组件。
由于我们对根组件的vnode执行了render,patch函数内部会执行processComponent逻辑,进而执行mountComponent去挂载组件到根容器rootContainer上。
组件的更新
上一章讲了组件渲染的过程,本质上就是把各种类型的vnode渲染成真实DOM。组件是由模板、组件描述对象和数据构成的。组件在渲染过程中创建了一个带副作用的渲染函数,当数据变化的时候就会执行这个函数来触发组件的更新。
渲染函数更新组件的过程
回顾带副作用的渲染函数setupRenderEffect的实现,这次重点关注更新部分的逻辑:
const setupRenderEffect: SetupRenderEffectFn = (
    instance,
    initialVNode,
    container,
    anchor,
    parentSuspense,
    isSVG,
    optimized
  ) => {
    // 组件的渲染和更新函数
    const componentUpdateFn = () => {
      if (!instance.isMounted) {
        // 渲染组件
      } else {
        // updateComponent
        let { next, bu, u, parent, vnode } = instance
        // next表示新的组件vnode
        if (next) {
          next.el = vnode.el
          // 更新组件vnode节点信息
          updateComponentPreRender(instance, next, optimized)
        } else {
          next = vnode
        }
        // 渲染新的子树vnode
        const nextTree = renderComponentRoot(instance)
        // 缓存旧的子树vnode
        const prevTree = instance.subTree
        // 更新子树vnode
        instance.subTree = nextTree
          // 组件更新核心逻辑,根据新旧子树vnode执行patch
        patch(
          prevTree,
          nextTree,
          // 父节点在teleport组件中可能已经改变,所以容器直接查找旧树DOM的父节点。
          // parent may have changed if it's in a teleport
          hostParentNode(prevTree.el!)!,
          // 参考节点在fragment组件中可能已经改变,所以直接查找旧树DOM的下一个节点。
          // anchor may have changed if it's in a fragment
          getNextHostNode(prevTree),
          instance,
          parentSuspense,
          isSVG
        )
        // 缓存更新后的DOM节点
        next.el = nextTree.el
      }
    }

    // create reactive effect for rendering
    // 创建组件渲染的副作用响应式对象
    const effect = (instance.effect = new ReactiveEffect(
      componentUpdateFn,
      () => queueJob(instance.update),
      instance.scope // track it in component's effect scope
    ))

    const update = (instance.update = effect.run.bind(effect) as SchedulerJob)
    update.id = instance.uid
    // allowRecurse
    // #1801, #2043 component render effects should allow recursive updates
    toggleRecurse(instance, true)
    update()
  }
可以看到更新组件主要做了三件事:更新组件vnode节点,渲染新的子树vnode,根据新旧子树vnode执行patch逻辑。
首先是更新组件vnode节点。这里有一个判断,判断组件实例中是否有新的组件vnode(用next表示):有则更新组件vnode,没有则将next指向之前的组件vnode。为啥需要判断,这里涉及一个组件更新策略,稍后分析。
接着是渲染新的子树vnode。因为数据发生了变化,模板又和数据相关,所以渲染生成的子树vnode也会发生变化。
最后就是核心patch逻辑,用来找出新旧子树vnode的不同,并找到一种合适的方式更新DOM。
patch流程
patch流程实现:
const patch: PatchFn = (
  n1,
  n2,
  container,
  anchor = null,
  parentComponent = null,
  parentSuspense = null,
  isSVG = false,
  slotScopeIds = null,
  optimized = __DEV__ && isHmrUpdating ? false : !!n2.dynamicChildren
) => {
  if (n1 === n2) {
    return
  }

  // 如果存在新旧节点且类型不同,则销毁旧节点
  if (n1 && !isSameVNodeType(n1, n2)) {
    anchor = getNextHostNode(n1)
    unmount(n1, parentComponent, parentSuspense, true)
    // 将n1设为null,保证后续执行mount逻辑
    n1 = null
  }

  const { type, ref, shapeFlag } = n2
  switch (type) {
    case Text:
      // 处理文本节点
      processText(n1, n2, container, anchor)
      break
    case Comment:
      // 处理注释节点
      processCommentNode(n1, n2, container, anchor)
      break
    case Static:
      // 处理静态节点
      if (n1 == null) {
        mountStaticNode(n2, container, anchor, isSVG)
      } else if (__DEV__) {
        patchStaticNode(n1, n2, container, isSVG)
      }
      break
    case Fragment:
      // 处理fragment元素
      processFragment(
        n1,
        n2,
        container,
        anchor,
        parentComponent,
        parentSuspense,
        isSVG,
        slotScopeIds,
        optimized
      )
      break
    default:
      if (shapeFlag & ShapeFlags.ELEMENT) {
        // 处理普通DOM元素
        processElement(
          n1,
          n2,
          container,
          anchor,
          parentComponent,
          parentSuspense,
          isSVG,
          slotScopeIds,
          optimized
        )
      } else if (shapeFlag & ShapeFlags.COMPONENT) {
        // 处理组件
        processComponent(
          n1,
          n2,
          container,
          anchor,
          parentComponent,
          parentSuspense,
          isSVG,
          slotScopeIds,
          optimized
        )
      } else if (shapeFlag & ShapeFlags.TELEPORT) {
        // 处理TELEPORT
        ;(type as typeof TeleportImpl).process(
          n1 as TeleportVNode,
          n2 as TeleportVNode,
          container,
          anchor,
          parentComponent,
          parentSuspense,
          isSVG,
          slotScopeIds,
          optimized,
          internals
        )
      } else if (__FEATURE_SUSPENSE__ && shapeFlag & ShapeFlags.SUSPENSE) {
        // 处理SUSPENSE
        ;(type as typeof SuspenseImpl).process(
          n1,
          n2,
          container,
          anchor,
          parentComponent,
          parentSuspense,
          isSVG,
          slotScopeIds,
          optimized,
          internals
        )
      } else if (__DEV__) {
        warn('Invalid VNode type:', type, `(${typeof type})`)
      }
  }

  // set ref
  if (ref != null && parentComponent) {
    setRef(ref, n1 && n1.ref, parentSuspense, n2 || n1, !n2)
  }
}

function isSameVNodeType(n1: VNode, n2: VNode): boolean {
  // 只有n1和n2节点的type和key都相同才是相同的节点
  return n1.type === n2.type && n1.key === n2.key
}
patch过程在首次渲染组件的时候执行过,这里添加了一些与更新相关的代码。
函数首先判断新旧节点是否是相同的vnode类型,如果不同则删除旧节点再创建新节点。比如想将一个div更新成一个ul,就删除div再去挂载新的ul节点。
如果是相同的vnode类型,就需要进入diff更新流程了,接着会根据不同的vnode类型执行不同的处理逻辑。这里只分析普通元素类型和组件类型的处理过程。
处理组件
用一个例子分析:
<template>
  <div class="app">
    <p>this is an app</p>
    <hello :msg="msg"></hello>
    <button @click="toggle">toggle msg</button>
  </div>
</template>
<script>
  export default {
    data() {
      return {
        msg: 'Vue'
      }
    }
    ,
    methods: {
      toggle() {
        this.msg = this.msg === 'Vue' ? 'World' : 'Vue'
      }
    }
  }
</script>
在父组件中引入Hello组件,定义如下:
<template>
  <div class="hello">
    <p>hello, {{ msg }}</p>
  </div>
</template>
<script>
  export default {
    props: {
      msg: String
    }
  }
</script>
点击按钮时会修改msg并且触发App组件的重新渲染。
结合前面对渲染函数的分析,这里App组件的根节点是div标签,重新渲染的子树vnode节点是一个普通元素的vnode,所以应该先执行processElement逻辑。这是因为组件的更新最终还是要转换为内部真实DOM的更新,而实际上,普通元素的处理才是真正的DOM更新。
和渲染过程类似,更新过程也是树的深度优先遍历的过程。当更新当前节点后,就会遍历更新它的子节点,因此在遍历过程中会遇到组件vnode节点hello,执行processComponent逻辑。这里关注组件更新的相关逻辑:
const processComponent = (
  n1: VNode | null,
  n2: VNode,
  container: RendererElement,
  anchor: RendererNode | null,
  parentComponent: ComponentInternalInstance | null,
  parentSuspense: SuspenseBoundary | null,
  isSVG: boolean,
  slotScopeIds: string[] | null,
  optimized: boolean
) => {
  n2.slotScopeIds = slotScopeIds
  if (n1 == null) {
    // 挂载组件
  } else {
    // 更新子组件
    updateComponent(n1, n2, optimized)
  }
}

const updateComponent = (n1: VNode, n2: VNode, optimized: boolean) => {
  const instance = (n2.component = n1.component)!
  // 根据新旧子组件vnode判断是否需要更新子组件
  if (shouldUpdateComponent(n1, n2, optimized)) {
    // 省略异步组件逻辑,只保留普通更新逻辑
    // 将新的子组件vnode赋值给instance.next
    instance.next = n2
    // 子组件可能因为数据变化而被添加到更新队列里,移除它们以防对子组件重复更新
    invalidateJob(instance.update)
    // 执行子组件的副作用渲染函数
    instance.update()
  } else {
    // 不需要更新,只复制属性
    n2.component = n1.component
    n2.el = n1.el
    // 在子组件实例的vnode属性中保存新的组件vnode n2
    instance.vnode = n2
  }
}
processComponent主要通过执行updateComponent来更新子组件。updateComponent会先执行shouldUpdateComponent函数,根据新旧子组件vnode来判断是否需要更新子组件。
shouldUpdateComponent通过检测并对比组件vnode中的props、children、dirs、transition等属性来决定子组件是否要更新。如果返回true,那么在它的最后会执行invalidateJob和instance.update()主动触发子组件的更新。
再回到副作用渲染函数:
// updateComponent
let { next, bu, u, parent, vnode } = instance
// next表示新的组件vnode
if (next) {
  next.el = vnode.el
  // 更新组件vnode节点信息
  updateComponentPreRender(instance, next, optimized)
} else {
  next = vnode
}

const updateComponentPreRender = (
  instance: ComponentInternalInstance,
  nextVNode: VNode,
  optimized: boolean
) => {
  // 新组件vnode的component属性指向组件实例
  nextVNode.component = instance
  // 旧组件vnode的props属性
  const prevProps = instance.vnode.props
  // 组件实例的vnode属性指向新的组件vnode
  instance.vnode = nextVNode
  // 清空next属性,为重新渲染做准备
  instance.next = null
  // 更新props
  updateProps(instance, nextVNode.props, prevProps, optimized)
  // 更新slots
  updateSlots(instance, nextVNode.children, optimized)
    ...
}
结合上面代码,我们在更新组件的DOM之前,需要更新组件vnode节点的信息,包括更该组件实例的vnode指针、更新props、插槽等。因为组件在稍后执行renderComponentRoot时会重新渲染新的子树vnode,所以他需要依赖更新后组件实例instance中的props和slot等数据。
组件的渲染可能有两种场景:组件本身的数据变化,此时next是null;父组件在更新的过程中遇到子组件节点,先判断子组件是否需要更新,需要则主动执行子组件的重新渲染函数,此时next就是新的子组件vnode。
processComponent处理组件vnode在本质上就是判断子组件是否需要更新:如果需要就递归执行子组件的副作用函数来更新,否则仅更新vnode的一些属性,并让子组件实例保存对组件vnode的引用,以便在子组件自身数据的变化引起组件重新渲染的时候,在渲染函数内部拿到新的组件vnode。
处理普通元素
<template>
  <div class="app">
    <p>this is an {{msg}}</p>
    <button @click="toggle">toggle msg</button>
  </div>
</template>
<script>
  export default {
    data() {
      return {
        msg: 'Vue'
      }
    }
    ,
    methods: {
      toggle() {
        this.msg = this.msg === 'Vue' ? 'World' : 'Vue'
      }
    }
  }
</script>
点击按钮修改msg,触发App组件重新渲染。App组件的根节点是div标签,重新渲染的子树vnode节点是一个普通元素的vnode,所以应该先执行processElement逻辑:
const processElement = (
  n1: VNode | null,
  n2: VNode,
  container: RendererElement,
  anchor: RendererNode | null,
  parentComponent: ComponentInternalInstance | null,
  parentSuspense: SuspenseBoundary | null,
  isSVG: boolean,
  slotScopeIds: string[] | null,
  optimized: boolean
) => {
  isSVG = isSVG || (n2.type as string) === 'svg'
  if (n1 == null) {
    // 挂载元素节点
    mountElement(
      n2,
      container,
      anchor,
      parentComponent,
      parentSuspense,
      isSVG,
      slotScopeIds,
      optimized
    )
  } else {
    // 更新元素节点
    patchElement(
      n1,
      n2,
      parentComponent,
      parentSuspense,
      isSVG,
      slotScopeIds,
      optimized
    )
  }
}
const patchElement = (
    n1: VNode,
    n2: VNode,
    parentComponent: ComponentInternalInstance | null,
    parentSuspense: SuspenseBoundary | null,
    isSVG: boolean,
    slotScopeIds: string[] | null,
    optimized: boolean
  ) => {
    const el = (n2.el = n1.el!)
    const oldProps = n1.props || EMPTY_OBJ
    const newProps = n2.props || EMPTY_OBJ
    // 更新props
    patchProps(
      el,
      n2,
      oldProps,
      newProps,
      parentComponent,
      parentSuspense,
      isSVG
    )
    const areChildrenSVG = isSVG && n2.type !== 'foreignObject'
    // 更新子节点
    patchChildren(
      n1,
      n2,
      el,
      null,
      parentComponent,
      parentSuspense,
      areChildrenSVG,
      slotScopeIds,
      false
    )
  }
更新元素主要做了两件事:更新props、更新子节点。因为一个DOM元素就是由它自身的属性和子节点构成。
首先更新props。这里的patchProps函数会更新DOM节点的class、style、event等属性。
然后更新子节点。vue3做了大量优化,这里先分析非优化版本的实现,也就是完整地用diff算法处理所有的子节点。patchChildren函数:
const patchChildren: PatchChildrenFn = (
  n1,
  n2,
  container,
  anchor,
  parentComponent,
  parentSuspense,
  isSVG,
  slotScopeIds,
  optimized = false
) => {
  const c1 = n1 && n1.children
  const prevShapeFlag = n1 ? n1.shapeFlag : 0
  const c2 = n2.children

  const { patchFlag, shapeFlag } = n2

  // children has 3 possibilities: text, array or no children.
  // 子节点可能是文本、数组、空
  if (shapeFlag & ShapeFlags.TEXT_CHILDREN) {
    // text children fast path
    if (prevShapeFlag & ShapeFlags.ARRAY_CHILDREN) {
      // 数组=>文本,就删除之前的子节点
      unmountChildren(c1 as VNode[], parentComponent, parentSuspense)
    }
    if (c2 !== c1) {
      // 经过对比,如果文本不同,就替换为新文本
      hostSetElementText(container, c2 as string)
    }
  } else {
    if (prevShapeFlag & ShapeFlags.ARRAY_CHILDREN) {
      // prev children was array
      // 之前的子节点是数组
      if (shapeFlag & ShapeFlags.ARRAY_CHILDREN) {
        // two arrays, cannot assume anything, do full diff
        // 新的子节点仍然是数组,则完整地运用diff算法
        patchKeyedChildren(
          c1 as VNode[],
          c2 as VNodeArrayChildren,
          container,
          anchor,
          parentComponent,
          parentSuspense,
          isSVG,
          slotScopeIds,
          optimized
        )
      } else {
        // no new children, just unmount old
        // 数组->空,则仅仅删除之前的子节点
        unmountChildren(c1 as VNode[], parentComponent, parentSuspense, true)
      }
    } else {
      // prev children was text OR null
      // new children is array OR null
      // 之前的子节点是文本节点或者为空
      // 新的子节点是数组或者为空
      if (prevShapeFlag & ShapeFlags.TEXT_CHILDREN) {
        // 如果之前的子节点是文本,则把它清空
        hostSetElementText(container, '')
      }
      // mount new if array
      if (shapeFlag & ShapeFlags.ARRAY_CHILDREN) {
        // 如果新的子节点是数组,则挂载新子节点
        mountChildren(
          c2 as VNodeArrayChildren,
          container,
          anchor,
          parentComponent,
          parentSuspense,
          isSVG,
          slotScopeIds,
          optimized
        )
      }
    }
  }
}
一个元素的子节点vnode可能有三种情况:纯文本、vnode数组、空。那么根据排列组合,对于新旧子节点来说就有九种情况。
旧子节点是纯文本的情况:
- 如果新子节点也是纯文本,那么简单地替换文本即可
- 如果新子节点为空,那么删除旧子节点即可
- 如果新子节点是vnode数组,那么先把旧子节点的文本清空,再在旧子节点的父容器下添加多个新子节点
旧子节点为空的情况:
- 新子节点为纯文本,那么在旧子节点的父容器下添加新文本节点即可
- 新子节点为空,那么啥也不做
- 新子节点是vnode数组,那么直接在旧子节点的父容器下添加多个子节点即可
旧子节点是vnode的情况:
- 新子节点是纯文本,那么先删除旧子节点,再在旧子节点的父容器下添加新的文本节点
- 新节点为空,删除旧子节点即可
新节点也是vnode数组,那么就需要完整地运用diff算法处理新旧节点了
核心diff算法
新子节点数组相对于旧子节点数组的变化,无非是通过更新、删除、添加、移动节点来完成的,而核心的diff算法,就是在已知旧子节点的DOM结构和vnode的情况下,以低成本完成子节点的更新为目的,求解生成新子节点DOM的一系列操作。
假如有这样一个列表:<ul> <li key="a">a</li> <li key="b">b</li> <li key="c">c</li> <li key="d">d</li> </ul>然后在中间插入一行,得到一个新列表:
<ul>
<li key="a">a</li>
<li key="b">b</li>
<li key="e">e</li>
<li key="c">c</li>
<li key="d">d</li>
</ul>
或者在最后添加一个e节点,然后删除中间一项:
<ul>
<li key="a">a</li>
<li key="b">b</li>
<li key="d">d</li>
<li key="e">e</li>
</ul>
我们容易发现新旧children拥有相同的头尾结点。对于相同的节点,我们只需做对比更新即可,所以diff算法的第一步是从头部开始同步。
同步头部节点
const patchKeyedChildren = (
c1: VNode[],
c2: VNodeArrayChildren,
container: RendererElement,
parentAnchor: RendererNode | null,
parentComponent: ComponentInternalInstance | null,
parentSuspense: SuspenseBoundary | null,
isSVG: boolean,
slotScopeIds: string[] | null,
optimized: boolean
) => {
let i = 0
const l2 = c2.length
// 旧子节点的尾部索引
let e1 = c1.length - 1 // prev ending index
// 新子节点的尾部索引
let e2 = l2 - 1 // next ending index

// 从头部开始同步
// 1. sync from start
// i = 0, e1 = 3, e2 = 4
// (a b) c d
// (a b) e c d
while (i <= e1 && i <= e2) {
  const n1 = c1[i]
  const n2 = c2[i]
  if (isSameVNodeType(n1, n2)) {
    // 相同的节点,递归执行patch更新节点
    patch(
      n1,
      n2,
      container,
      null,
      parentComponent,
      parentSuspense,
      isSVG,
      slotScopeIds,
      optimized
    )
  } else {
    // 跳出了循环
    break
  }
  i++
}
}
在整个过程中需要维护几个变量:头部索引i、旧子节点的尾部索引e1和新子节点的尾部索引e2。
同步头部节点就是从头部开始,依次对比新节点和旧节点:如果他们相同,则执行patch更新节点;如果不同或者索引i大于索引e1或e2,则同步过程结束。同步尾部节点
// 2. sync from end
// i = 2, e1 = 3, e2 = 4
// (a b) (c d)
// (a b) e (c d)
while (i <= e1 && i <= e2) {
const n1 = c1[e1]
const n2 = c2[e2]
if (isSameVNodeType(n1, n2)) {
  patch(
    n1,
    n2,
    container,
    null,
    parentComponent,
    parentSuspense,
    isSVG,
    slotScopeIds,
    optimized
  )
} else {
  break
}
e1--
e2--
}
同步尾部节点就是从尾部开始,依次对比新节点和旧节点:如果相同,则执行patch更新节点;如果不同或者索引i大于e1或e2,则同步过程结束。
同步后i=2,e1=1,e2=2
接下来只有三种情况要处理:新子节点有剩余,要添加新节点
- 旧子节点有剩余,要删除多余节点
- 未知子序列
添加新节点
首先判断新子节点是否有剩余。如果有则添加新子节点:
如果索引i大于尾部索引e1且小于e2,那么直接挂载新子树从索引i开始到索引e2部分的节点。// 3. common sequence + mount // (a b) (c d) // (a b) e (c d) // 挂载剩余的新节点 // i = 2, e1 = 1, e2 = 2 if (i > e1) { if (i <= e2) { const nextPos = e2 + 1 const anchor = nextPos < l2 ? (c2[nextPos] as VNode).el : parentAnchor while (i <= e2) { // 挂载新节点 patch( null, c2[i], container, anchor, parentComponent, parentSuspense, isSVG, slotScopeIds, optimized ) i++ } } }
对于我们的例子来说,同步尾部节点完成后i=2,e1=1,e2=2,满足添加新节点的条件。删除多余节点
如果不满足添加新节点的条件,就要接着判断旧子节点是否有剩余。如果有就删除旧子节点:
如果索引i大于尾部索引e2,那么直接删除旧子树从索引i到e1部分的节点。// 4. common sequence + unmount // 普通序列删除多余的旧节点 // i = 2, e1 = 2, e2 = 1 else if (i > e2) { while (i <= e1) { unmount(c1[i], parentComponent, parentSuspense, true) i++ } }
例子:旧子节点:a b c d e;新子节点:a b d e。
首先同步头节点:(a b) c d e;(a b) d e;此时结果为i=2,e1=4,e2=3。
然后同步尾结点:(a b) c (d e);(a b) (d e);此时结果为i=2,e1=2,e2=1。满足删除条件,所以删除子节点中的多余节点。处理未知子序列
单纯地添加或删除节点都是比较理想的情况下,但是有时候会遇到比较复杂的未知子序列,比如:
打乱之前的顺序:<ul> <li key="a">a</li> <li key="b">b</li> <li key="c">c</li> <li key="d">d</li> <li key="e">e</li> <li key="f">f</li> <li key="g">g</li> <li key="h">h</li> </ul><ul> <li key="a">a</li> <li key="b">b</li> <li key="e">e</li> <li key="d">d</li> <li key="c">c</li> <li key="i">i</li> <li key="g">g</li> <li key="h">h</li> </ul>
- 首先从头部开始同步:(a b) c d e f g h ,(a b) e d c i g h;同步完i=2,e1=7,e2=7。
- 然后从尾部开始同步:(a b) c d e f (g h) ,(a b) e d c i (g h);同步完i=2,e1=5,e2=5。
可以看到它不满足添加新节点和删除旧节点的条件。那么应该如何处理呢?其实,无论多复杂的情况,根本上就是增删改移动等动作来操作节点,我们要做的是找到最优解。
当两个节点类型相同时,执行更新操作;当新子节点中没有旧子节点中的某些节点时,执行删除操作;当新子节点中多了旧子节点中没有的节点时,执行添加操作。这些操作已经讲过了,最麻烦的是移动操作,我们既要判断哪些节点需要移动,也要清楚应该如何移动。
移动子节点
什么时候需要移动,就是当子节点的排列顺序发生变化的时候,举个例子:
let prev = [1,2,3,4,5,6]
let next = [1,3,2,6,4,5]
现在的问题是如何用最少的移动次数将prev变成next,一种思路是在next中找到一个递增子序列,比如[1,3,6],[1,2,4,5]。之后对next数组进行倒序遍历,移动所有不在递增序列中的元素即可。
如果选择了[1,3,6]作为递增子序列,那么在倒序遍历过程中,遇到6、3、1不动,遇到5、4、2移动即可。
如果选择了[1,2,4,5]作为递增子序列,那么在倒序遍历过程中,遇到5,4,2,1不动,遇到6,3移动即可。
可以看到情况一移动了3次,情况2移动了2次。递增子序列越长,需要移动的元素越少,所以如何移动的问题变成了求解最长递增子序列的问题。稍后分析,先回到如何对未知子序列进行处理。
我们现在要做的是在新旧子节点序列中找出相同的节点并更新,找出多余的节点并删除,找出新的节点并添加,找出是否有需要移动的节点,以及确定它们该如何移动。
在查找过程中需要对比新旧子序列,如果要在遍历旧子序列的过程中判断某个节点是否在新子序列中存在,就需要双重循环。时间复杂度是O(n2)。为进行优化,我们可以用空间换时间的思路,建立索引图,把时间复杂度降到O(n)。
建立索引图
在开发过程中,通常会给v-for的每一项添加唯一key作为其唯一id,这个key在diff过程中起到关键作用。对于新旧子序列中的节点,我们认为key相同,那么它们就是同一个节点,直接patch即可。
根据key建立新子序列的索引图:
// 5. unknown sequence
// [i ... e1 + 1]: (a b) c d e f (g h)
// [i ... e2 + 1]: (a b) e c d i (g h)
// i = 2, e1 = 5, e2 = 5
else {
  // 旧子序列开始索引,从i开始
  const s1 = i // prev starting index
  // 新子序列开始索引,从i开始
  const s2 = i // next starting index

  // 5.1 build key:index map for newChildren
  // 根据key建立新子序列的索引图
  const keyToNewIndexMap: Map<string | number | symbol, number> = new Map()
  for (i = s2; i <= e2; i++) {
    const nextChild = c2[i]
    if (nextChild.key != null) {
      keyToNewIndexMap.set(nextChild.key, i)
    }
  }
新旧子序列都是从i开始的,建立一个keyToNewIndexMap的Map,遍历新子序列,并且把节点的key和index添加到这个Map中。注意,这里假设所有节点都是有key标识的。
Map中存储的是新子序列每个节点在新子序列中的索引,例子中是 { e:2,c:3,d:4,i:5 }。
更新和移除旧节点
接下来就需要遍历旧子序列了:通过patch更新相同的节点,移除那些不在新子序列中的节点,并且找出是否有需要移动的节点:
// 5.2 loop through old children left to be patched and try to patch
// matching nodes & remove nodes that are no longer present
// 正序遍历旧子序列,更新匹配的节点,删除不在新子序列中的节点,并且判断是否有需要移动的节点
let j
// 新子序列已更新的节点数量
let patched = 0
// 新子序列待更新的节点数量
const toBePatched = e2 - s2 + 1
// 是否存在要移动的节点
let moved = false
// used to track whether any node has moved
// 用于跟踪判断是否有节点需要移动
let maxNewIndexSoFar = 0
// works as Map<newIndex, oldIndex>
// Note that oldIndex is offset by +1
// and oldIndex = 0 is a special value indicating the new node has
// no corresponding old node.
// used for determining longest stable subsequence
// 这个数组存储新子序列中的元素在旧子序列节点处的索引,用于确定最长递增子序列
const newIndexToOldIndexMap = new Array(toBePatched)
// 初始化数组,每个元素都是0
// 0是一个特殊值,如果遍历之后仍有元素的值为0,则说明这个新节点没有对应的旧节点
for (i = 0; i < toBePatched; i++) newIndexToOldIndexMap[i] = 0
// 正序遍历旧子序列
for (i = s1; i <= e1; i++) {
  // 获取每一个旧子序列节点
  const prevChild = c1[i]
  if (patched >= toBePatched) {
    // all new children have been patched so this can only be a removal
    // 所有新的子序列节点都已经更新,删除剩余的旧子序列节点
    unmount(prevChild, parentComponent, parentSuspense, true)
    continue
  }
  // 查找旧子序列中的节点在新子序列中的索引
  let newIndex = keyToNewIndexMap.get(prevChild.key)
  if (newIndex === undefined) {
    // 找不到则说明旧子序列已经不存在于新子序列中,删除该节点
    unmount(prevChild, parentComponent, parentSuspense, true)
  } else {
    // 更新新子序列中的元素在旧子序列中的索引,这里加1偏移是为了避免i为0的特殊情况
    // 影响后续最长递增子序列的求解
    newIndexToOldIndexMap[newIndex - s2] = i + 1
    // maxNewIndexSoFar存储的始终是上次求值的newIndex,如果不是一直递增,则说明有移动
    if (newIndex >= maxNewIndexSoFar) {
      maxNewIndexSoFar = newIndex
    } else {
      moved = true
    }
    // 更新新旧子序列中匹配的节点
    patch(
      prevChild,
      c2[newIndex] as VNode,
      container,
      null,
      parentComponent,
      parentSuspense,
      isSVG,
      slotScopeIds,
      optimized
    )
    patched++
  }
}
我们建立了newIndexToOldIndexMap数组,存储新子序列节点的索引和旧子序列节点的索引之间的映射关系,用于确定最长递增子序列。这个数组的长度为新子序列的长度,每个元素的初始值为0、这是一个特殊的值,如果遍历之后仍有元素的值为0,则说明在遍历旧子序列的过程中没有处理过这个节点,这个节点是新添加的。
下面来看具体的操作过程:正序遍历旧子序列,根据前面建立的keyToNewIndexMap查找旧子序列中的节点在新子序列中的索引:如果找不到,就说明新子序列中没有该节点,删除它;如果找到了,则将它在旧子序列中的索引更新到newIndexToOldIndexMap中。
注意,这里长度加1是为了i为0的特殊情况。如果不这样处理会影响后续对最长递增子序列的求解。
在遍历过程中,我们用变量maxNewIndexSoFar判断节点是否有移动,maxNewIndexSoFar存储的始终是上次求值的newIndex,一旦本次求值的newIndex小于maxNewIndexSoFar,就说明顺序遍历旧子序列的节点在新子序列中的索引并不是一直递增的,也就说明存在移动的情况,比如说元素e。
除此之外,我们也会在此过程中更新新旧子序列中匹配的节点。如果所有新的子序列节点都已经更新,而对旧子序列的遍历还未结束,就说明剩余的节点是多余的,删除即可。
至此,我们完成了新旧子序列节点的更新、多余旧节点的删除,建立了newIndexToOldIndexMap来存储新子序列节点的索引和旧子序列节点的索引之间的映射关系,并确定了是否有移动。
keyToNewIndexMap: { e:2,c:3,d:4,i:5 }
newIndexToOldIndexMap:[ 5,3,4,0 ]
移动和挂载新节点
接下来就到了处理未知子序列的最后一个流程:移动和挂载新节点:
// 5.3 move and mount
// generate longest stable subsequence only when nodes have moved
// 移动和挂载新节点  仅当节点移动时生成最长递增子序列
const increasingNewIndexSequence = moved
  ? getSequence(newIndexToOldIndexMap)
  : EMPTY_ARR
j = increasingNewIndexSequence.length - 1
// looping backwards so that we can use last patched node as anchor
// 倒序遍历,以便使用最后更新的节点作为锚点
for (i = toBePatched - 1; i >= 0; i--) {
  const nextIndex = s2 + i
  const nextChild = c2[nextIndex] as VNode
  // 锚点指向上一个更新的节点,如果nextIndex超过新子节点的长度,则指向parentAnchor
  const anchor =
    nextIndex + 1 < l2 ? (c2[nextIndex + 1] as VNode).el : parentAnchor
  if (newIndexToOldIndexMap[i] === 0) {
    // mount new
    // 挂载新的子节点
    patch(
      null,
      nextChild,
      container,
      anchor,
      parentComponent,
      parentSuspense,
      isSVG,
      slotScopeIds,
      optimized
    )
  } else if (moved) {
    // move if:
    // There is no stable subsequence (e.g. a reverse)
    // OR current node is not among the stable sequence
    // 没有最长递增子序列(reverse的场景)或者当前的节点索引不在最长递增子序列中,需要移动
    if (j < 0 || i !== increasingNewIndexSequence[j]) {
      move(nextChild, container, anchor, MoveType.REORDER)
    } else {
      // 倒序递增子序列
      j--
    }
  }
}
我们前面已经判断了是否移动,如果moved为true就通过getSequence(newIndexToOldIndexMap)计算最长递增子序列。
接着采用倒序遍历的方式遍历新子序列,因为倒序遍历可以方便我们使用最后更新的节点作为锚点。在倒序过程中,锚点指向上一个更新的节点,然后判断newIndexToOldIndexMap[i]是否为0,如果是则表示这是新节点,需要挂载它;接着判断是否存在节点移动的情况,如果存在则看节点的索引是不是在最长递增子序列中,如果在则倒序最长递增子序列,否则把它移动到锚点的前面。
用前面的例子,此时toBePatched的值为4,j的值为1,最长递增子序列increasingNewIndexSequence的值是[1,2]。在倒序新子序列的过程中,首先遇到节点i,发现它在newIndexToOldIndexMap中的值是0,则说明它是新节点,我们需要挂载它;然后继续遍历遇到节点d,因为moved为true,且d的索引存在于最长递增子序列中,则执行j—倒序最长递增子序列,j此时为0;接着遍历遇到节点c,它和d一样,索引也存在于最长递增子序列中,则执行j—,j此时为-1;接着遍历遇到节点e,此时j是-1并且索引也不在最长递增子序列中,所以做一次移动操作,把e节点移到上一个更新的节点,也就是c节点的前面。
新子序列倒序完成,即完成了新节点的插入和旧节点的移动,也就完成了整个核心diff算法。
最长递增子序列
vue求解使用的是贪心+二分查找的算法。贪心的时间复杂度是O(n),二分是O(log2n),所以它的时间复杂度是O(nlogn)
算法主要思路:遍历数组,依次求解在长度为i时的最长递增子序列,当i元素大于i-1元素时,添加i元素并更新最长子序列;否则往前找,直到找到一个比i小的元素,然后将其插在该元素后面并更新对应的最长递增子序列。
这种做法的主要目的是让递增序列的差尽可能小,从而获得更长的递增子序列,是一种贪心思想。
function getSequence(arr: number[]): number[] {
  const p = arr.slice()
  const result = [0]
  let i, j, u, v, c
  const len = arr.length
  for (i = 0; i < len; i++) {
    // 当前顺序取出的元素
    const arrI = arr[i]
    // 排除0的情况
    if (arrI !== 0) {
      // result存储的是长度为i的递增子序列最小末尾值的索引
      j = result[result.length - 1]
      // arr[j]为末尾值,如果满足arr[j]<arrI,那么直接在当前递增子序列后面添加
      if (arr[j] < arrI) {
        // 存储result更新前的最后一个索引的值
        p[i] = j
        // 存储元素对应的索引值
        result.push(i)
        continue
      }
      // 不满足则执行二分搜索
      u = 0
      v = result.length - 1
      // 查找第一个比arrI小的节点,更新result的值
      while (u < v) {
        // c记录中间的位置
        c = (u + v) >> 1
        if (arr[result[c]] < arrI) {
          // 若中间的值小于arrI,则在右边
          u = c + 1
        } else {
          // 更新上沿
          v = c
        }
      }
      // 找到一个比arrI小的位置u,插入它
      if (arrI < arr[result[u]]) {
        if (u > 0) {
          p[i] = result[u - 1]
        }
        // 存储插入的位置i
        result[u] = i
      }
    }
  }
  u = result.length
  v = result[u - 1]
  // 回溯数组p,找到最终的索引
  while (u-- > 0) {
    result[u] = v
    v = p[v]
  }
  return result
}
组件的实例
前面分析了组件的渲染原理:创建vnode、渲染vnode、生成DOM。渲染vnode和生成vnode主要是通过执行mountComponent函数完成的:
const mountComponent: MountComponentFn = (
  initialVNode,
  container,
  anchor,
  parentComponent,
  parentSuspense,
  isSVG,
  optimized
) => {
  // 创建组件实例
  const instance: ComponentInternalInstance =
    compatMountInstance ||
    (initialVNode.component = createComponentInstance(
      initialVNode,
      parentComponent,
      parentSuspense
    ))
  // 设置组件实例
  setupComponent(instance)

  // 设置并运行带副作用的渲染函数
  setupRenderEffect(
    instance,
    initialVNode,
    container,
    anchor,
    parentSuspense,
    isSVG,
    optimized
  )
}
创建组件实例
为啥要组件实例,因为在整个渲染过程中,我们要维护组件的上下文数据,比如组件渲染需要的props、data、组件vnode节点、render函数、生命周期钩子等。我们把这些数据和函数都挂载到一个对象上,这样就可以通过对象访问他们了。这个对象就是组件实例。createComponentInstance函数:
export function createComponentInstance(
  vnode: VNode,
  parent: ComponentInternalInstance | null,
  suspense: SuspenseBoundary | null
) {
  const type = vnode.type as ConcreteComponent
  // inherit parent app context - or - if root, adopt from root vnode
  // 继承父组件实例上的appContext:如果是根组件,则直接从根vnode中获取
  const appContext =
    (parent ? parent.appContext : vnode.appContext) || emptyAppContext

  const instance: ComponentInternalInstance = {
    // 组件唯一id
    uid: uid++,
    // 组件vnode
    vnode,
    // 组件节点类型
    type,
    // 父组件实例
    parent,
    // app上下文
    appContext,
    // 根组件实例
    root: null!, // to be immediately set
    // 新的组件vnode
    next: null,
    // 子节点vnode
    subTree: null!, // will be set synchronously right after creation
    // 响应式相关对象
    effect: null!,
    // 带副作用更新函数
    update: null!, // will be set synchronously right after creation
    // effect作用域
    scope: new EffectScope(true /* detached */),
    // 渲染函数
    render: null,
    // 渲染上下文代理
    proxy: null,
    // 通过exposed方法暴露的属性
    exposed: null,
    // 暴露属性的代理
    exposeProxy: null,
    // 带有with区块的渲染上下文代理
    withProxy: null,
    // 依赖注入相关
    provides: parent ? parent.provides : Object.create(appContext.provides),
    // 渲染代理的属性访问缓存
    accessCache: null!,
    // 渲染缓存
    renderCache: [],

    // 注册的组件
    // local resovled assets
    components: null,
    // 注册的指令
    directives: null,

    // resolved props and emits options
    // 标准化属性和emits配置
    propsOptions: normalizePropsOptions(type, appContext),
    emitsOptions: normalizeEmitsOptions(type, appContext),

    // emit
    // 派发事件方法
    emit: null!, // to be set immediately
    emitted: null,

    // props default value
    // props默认值
    propsDefaults: EMPTY_OBJ,

    // inheritAttrs
    // 继承属性
    inheritAttrs: type.inheritAttrs,

    // state
    // 渲染上下文
    ctx: EMPTY_OBJ,
    // data数据
    data: EMPTY_OBJ,
    props: EMPTY_OBJ,
    // 普通属性
    attrs: EMPTY_OBJ,
    slots: EMPTY_OBJ,
    // 组件或者DOM的ref引用
    refs: EMPTY_OBJ,
    // setup函数返回的响应式结果
    setupState: EMPTY_OBJ,
    // setup函数上下文数据
    setupContext: null,

    // suspense related
    // suspense相关
    suspense,
    suspenseId: suspense ? suspense.pendingId : 0,
    asyncDep: null,
    asyncResolved: false,

    // lifecycle hooks
    // not using enums here because it results in computed properties
    // 是否挂载
    isMounted: false,
    // 是否卸载
    isUnmounted: false,
    // 是否激活
    isDeactivated: false,
    // 各种钩子
    bc: null,
    c: null,
    bm: null,
    m: null,
    bu: null,
    u: null,
    um: null,
    bum: null,
    da: null,
    a: null,
    rtg: null,
    rtc: null,
    ec: null,
    sp: null
  }
  // 初始化渲染上下文
  instance.ctx = { _: instance }
  // 初始化根组件指针
  instance.root = parent ? parent.root : instance
  // 初始化派发事件方法
  instance.emit = emit.bind(null, instance)

  // apply custom element special handling
  // 执行自定义元素特殊的处理器
  if (vnode.ce) {
    vnode.ce(instance)
  }

  return instance
}
createComponentInstance接收三个参数,vnode代表组件vnode,parent表示父组件实例。
vue2用new Vue初始化组件的实例,vue3直接创建对象来创建组件实例。都是引用一个对象,在整个组件的生命周期中维护组件的状态数据和上下文环境。
创建好instance接下来就要设置他的一些属性了。目前已完成了组件的渲染上下文ctx、根组件指针root以及派发事件方法emit的配置。
设置组件实例
下面介绍组件实例的设置流程,对setup函数的处理就在这里完成。setupComponent方法:
export function setupComponent(
  instance: ComponentInternalInstance,
  isSSR = false
) {
  isInSSRComponentSetup = isSSR
  const { props, children } = instance.vnode
  // 判断是否是一个有状态的组件
  const isStateful = isStatefulComponent(instance)
  // 初始化props
  initProps(instance, props, isStateful, isSSR)
  // 初始化插槽
  initSlots(instance, children)
  // 设置有状态的组件实例
  const setupResult = isStateful
    ? setupStatefulComponent(instance, isSSR)
    : undefined
  isInSSRComponentSetup = false
  return setupResult
}
setupComponent有两个参数,instance是前面创建的组件实例对象,isSSR表示是否是服务端渲染,在浏览器端渲染时值为false。
函数首先从组件vnode中获取了props、children、shapeFlag等属性,然后分别对props和插槽进行初始化,以后会讲。接着根据shapeFlag的值判断是不是一个有状态组件。如果是,则要进一步设置有状态组件的实例。
通常,我们写的组件是一个有状态组件。所谓有状态,指的是组件会在渲染过程中把一些状态挂载到组件实例对应的属性上。分析setupStatefulComponent函数:
function setupStatefulComponent(
  instance: ComponentInternalInstance,
  isSSR: boolean
) {
  const Component = instance.type as ComponentOptions

  // 0. create render proxy property access cache
  // 创建渲染代理的属性访问缓存
  instance.accessCache = Object.create(null)
  // 1. create public instance / render proxy
  // also mark it raw so it's never observed
  // 创建渲染上下文代理
  instance.proxy = markRaw(new Proxy(instance.ctx, PublicInstanceProxyHandlers))
  // 2. call setup()
  // 判断处理setup函数
  const { setup } = Component
  if (setup) {
    // 如果setup函数带参数,则创建一个setupContext
    const setupContext = (instance.setupContext =
      setup.length > 1 ? createSetupContext(instance) : null)

    setCurrentInstance(instance)
    pauseTracking()
    // 执行setup函数,获取返回值
    const setupResult = callWithErrorHandling(
      setup,
      instance,
      ErrorCodes.SETUP_FUNCTION,
      [__DEV__ ? shallowReadonly(instance.props) : instance.props, setupContext]
    )
    resetTracking()
    unsetCurrentInstance()
      // 处理setup返回值
    handleSetupResult(instance, setupResult, isSSR)

  } else {
    // 完成组件实例设置
    finishComponentSetup(instance, isSSR)
  }
}
setupStatefulComponent主要做了三件事:创建渲染上下文代理,判断处理setup函数,完成组件实例设置。
创建渲染上下文代理
首先是创建渲染上下文代理,主要是对instance.ctx做代理。为什么需要做代理呢?其实在vue2也有类似的数据代理逻辑,比如props求值后的数据实际上存储在this._props上,,而data中定义的数据存储在this._data上。举个例子:
<template>
  <p>{{ msg }}</p>
</template>
<script>
export default {
  data() {
    msg: 'hello'
  }
}
</script>
在初始化组件的时候,data中定义的msg在组件内部是存储在this._data上的,而在渲染模板的时候访问this.msg,实际上访问的是this._data.msg,这是因为vue2在初始化data的时候做了一层代理。
到了vue3,为了方便维护,我们把组件中不同状态的数据存储到不同的属性中,比如setupState、ctx、data、props。但是在执行组件渲染函数的时候,为了方便用户使用,render函数内部会直接访问渲染上下文instance.ctx的属性,所以我们也要加一层代理,对渲染上下文instance.ctx的属性进行访问和修改,以代理对setupState、ctx、data、props中数据的访问和修改。
明确了代理需求后,接下来分析proxy的几个方法:get、set、has。
当我们访问instance.ctx渲染上下文的属性时,就会进入get函数:
export const PublicInstanceProxyHandlers: ProxyHandler<any> = {
  get({ _: instance }: ComponentRenderContext, key: string) {
    const { ctx, setupState, data, props, accessCache, type, appContext } =
      instance

    // data / props / ctx
    // This getter gets called for every property access on the render context
    // during render and is a major hotspot. The most expensive part of this
    // is the multiple hasOwn() calls. It's much faster to do a simple property
    // access on a plain object, so we use an accessCache object (with null
    // prototype) to memoize what access type a key corresponds to.
    let normalizedProps
    if (key[0] !== '$') {
      // setupState、data、props、ctx
      const n = accessCache![key]
      if (n !== undefined) {
        // 从缓存中取出
        switch (n) {
          case AccessTypes.SETUP:
            return setupState[key]
          case AccessTypes.DATA:
            return data[key]
          case AccessTypes.CONTEXT:
            return ctx[key]
          case AccessTypes.PROPS:
            return props![key]
          // default: just fallthrough
        }
      } else if (setupState !== EMPTY_OBJ && hasOwn(setupState, key)) {
        accessCache![key] = AccessTypes.SETUP
        // 从setupState中获取数据
        return setupState[key]
      } else if (data !== EMPTY_OBJ && hasOwn(data, key)) {
        accessCache![key] = AccessTypes.DATA
        // 从data中获取数据
        return data[key]
      } else if (
        // only cache other properties when instance has declared (thus stable)
        // props
        (normalizedProps = instance.propsOptions[0]) &&
        hasOwn(normalizedProps, key)
      ) {
        accessCache![key] = AccessTypes.PROPS
        // 从props中获取数据
        return props![key]
      } else if (ctx !== EMPTY_OBJ && hasOwn(ctx, key)) {
        accessCache![key] = AccessTypes.CONTEXT
        // 从ctx中获取数据
        return ctx[key]
      } else if (!__FEATURE_OPTIONS_API__ || shouldCacheAccess) {
        // 都获取不到
        accessCache![key] = AccessTypes.OTHER
      }
    }

    const publicGetter = publicPropertiesMap[key]
    let cssModule, globalProperties
    // public $xxx properties
    // 公开的$xxx属性或方法
    if (publicGetter) {
      return publicGetter(instance)
    } else if (
      // css module (injected by vue-loader)
      // css模块,在vue-loader编译的时候注入
      (cssModule = type.__cssModules) &&
      (cssModule = cssModule[key])
    ) {
      return cssModule
    } else if (ctx !== EMPTY_OBJ && hasOwn(ctx, key)) {
      // user may set custom properties to `this` that start with `$`
      // 用户自定义的属性,也以$开头
      accessCache![key] = AccessTypes.CONTEXT
      return ctx[key]
    } else if (
      // global properties
      // 全局定义的属性
      ((globalProperties = appContext.config.globalProperties),
      hasOwn(globalProperties, key))
    ) {
      if (__COMPAT__) {
        const desc = Object.getOwnPropertyDescriptor(globalProperties, key)!
        if (desc.get) {
          return desc.get.call(instance.proxy)
        } else {
          const val = globalProperties[key]
          return isFunction(val)
            ? Object.assign(val.bind(instance.proxy), val)
            : val
        }
      } else {
        return globalProperties[key]
      }
    } else if (
      __DEV__ &&
      currentRenderingInstance &&
      (!isString(key) ||
        // #1091 avoid internal isRef/isVNode checks on component instance leading
        // to infinite warning loop
        key.indexOf('__v') !== 0)
    ) {
      if (
        data !== EMPTY_OBJ &&
        (key[0] === '$' || key[0] === '_') &&
        hasOwn(data, key)
      ) {
        // 如果在data中定义的数据以$或_开头,会发出警告,原因是$和_是保留字符,不会做代理
        warn(
          `Property ${JSON.stringify(
            key
          )} must be accessed via $data because it starts with a reserved ` +
            `character ("$" or "_") and is not proxied on the render context.`
        )
      } else if (instance === currentRenderingInstance) {
        // 如果没有定义模板中使用的变量发出警告
        warn(
          `Property ${JSON.stringify(key)} was accessed during render ` +
            `but is not defined on instance.`
        )
      }
    }
  },

  set(
    { _: instance }: ComponentRenderContext,
    key: string,
    value: any
  ): boolean {
    const { data, setupState, ctx } = instance
    if (setupState !== EMPTY_OBJ && hasOwn(setupState, key)) {
      setupState[key] = value
      return true
    } else if (data !== EMPTY_OBJ && hasOwn(data, key)) {
      data[key] = value
      return true
    } else if (hasOwn(instance.props, key)) {
      __DEV__ &&
        warn(
          `Attempting to mutate prop "${key}". Props are readonly.`,
          instance
        )
      return false
    }
    if (key[0] === '$' && key.slice(1) in instance) {
      __DEV__ &&
        warn(
          `Attempting to mutate public property "${key}". ` +
            `Properties starting with $ are reserved and readonly.`,
          instance
        )
      return false
    } else {
      if (__DEV__ && key in instance.appContext.config.globalProperties) {
        Object.defineProperty(ctx, key, {
          enumerable: true,
          configurable: true,
          value
        })
      } else {
        ctx[key] = value
      }
    }
    return true
  },

  has(
    {
      _: { data, setupState, accessCache, ctx, appContext, propsOptions }
    }: ComponentRenderContext,
    key: string
  ) {
    let normalizedProps
    return (
      !!accessCache![key] ||
      (data !== EMPTY_OBJ && hasOwn(data, key)) ||
      (setupState !== EMPTY_OBJ && hasOwn(setupState, key)) ||
      ((normalizedProps = propsOptions[0]) && hasOwn(normalizedProps, key)) ||
      hasOwn(ctx, key) ||
      hasOwn(publicPropertiesMap, key) ||
      hasOwn(appContext.config.globalProperties, key)
    )
  },

  defineProperty(
    target: ComponentRenderContext,
    key: string,
    descriptor: PropertyDescriptor
  ) {
    if (descriptor.get != null) {
      // invalidate key cache of a getter based property #5417
      target._.accessCache![key] = 0
    } else if (hasOwn(descriptor, 'value')) {
      this.set!(target, key, descriptor.value, null)
    }
    return Reflect.defineProperty(target, key, descriptor)
  }
}
get函数首先处理访问的key不以$开头的情况。这部分数据可能是setupState、data、props、ctx中的一种,,setupState就是setup函数返回的数据;ctx包括OptionsAPI中的methods、computed、inject定义的数据以及一些用户自定义数据。
如果key不以$开头,那么就依次判断setupState、data、props、ctx中是否包含了这个key,如果包含就返回对应值。这里的判断是基于accessCache做出的,那么它具体做了什么呢?
组件在渲染时会经常访问数据进而触发get函数,其中开销最大的部分就是调用hasOwn判断key在不在某个类型的数据中。但是,在普通对象上执行简单的属性访问要快得多。因此在第一次获取key对应的数据后,我们利用accessCache[key]去缓存这个数据的来源:setupState、data、props还是ctx。下一次再次根据key查找数据,就可以直接通过accessCache[key]找到它的数据来源,直接拿到它对应的值了,不需要再次调用hasOwn判断。
如果key以$开头:首先判断它是不是vue内部公开的$xxx属性或方法;然后判断它是不是vue-loader编译注入的css模块内部的key;接着判断它是不是ctx中以$开头的key;最后判断它是不是全局属性。如果都不是,就只剩两种情况,即在非生产环境下会发出的两种类型警告。
接下来是set代理过程,当我们修改instance.ctx渲染上下文中的属性时,就会进入set函数。PublicInstanceProxyHandlers函数做的主要事情是对渲染上下文instance.ctx中的属性赋值,它实际上是代理到对应的数据类型中去完成赋值操作的。这里仍然要注意顺序问题:和get一样,优先判断setupState,然后data,接着是props,最后是用户自定义数据ctx。
注意,如果在非生产环境下直接对props中的数据赋值,会收到一条警告。这是因为直接修改props不符合单向数据流动的设计思想。如果对vue内部以$开头的保留属性赋值,同样会收到警告。
如果是用户自定义数据,比如在created生命周期内定义的数据,则它仅用于组件上下文的共享,如下所示:
export default {
  created() {
    this.userMsg = 'msg from user'
  }
}
当执行this.userMsg赋值的时候,会触发set函数,最终userMsg会被保存到ctx中。
最后是has代理过程。当我们判断属性是否存在与instance.ctx渲染上下文中时,就会进入has函数,它在平时项目中用的较少,举个例子:
export default {
  created() {
    console.log('msg' in this)
  }
}
has函数依次判断key是否存在于accessCache、data、setupState、props、ctx、公开属性以及全局属性中,然后返回结果。
上下文代理的优化
前面提到,之所以对渲染上下文ctx做代理,是因为虽然数据可能定义在setupState、props、data中,但是在模板中对这些数据进行访问都是基于ctx中的数据访问。举个例子:
<template>
  <div id="app">
    {{ msg }}
    {{ propsData }}
  </div>
</template>
<script>
  export default {
    props: {
      propData: String
    },
    data() {
      return {
        msg: 'hello'
      }
    }
  }
</script>
模板编译结果:
import { toDisplayString as _toDisplayString, createElementVNode as _createElementVNode, openBlock as _openBlock, createElementBlock as _createElementBlock } from "vue"

export function render(_ctx, _cache, $props, $setup, $data, $options) {
  return (_openBlock(), _createElementBlock("template", null, [
    _createElementVNode("div", { id: "app" }, _toDisplayString(_ctx.msg) + " " + _toDisplayString(_ctx.propsData), 1 /* TEXT */)
  ]))
}
其中,render函数对应的第一个参数_ctx就是我们创建的上下文代理instance.proxy,所以在执行render函数的时候,访问_ctx.msg和_ctx.propsData就能触发get函数,然后在他定义的地方获取真实数据。
虽然我们通过accessCache在get函数内部做了一定的优化,但是仍慢于直接访问。模板中的数据越多,通过代理访问和直接访问在性能上的差异就会越明显。
作者优化:在解析SFC的时候额外做一些处理,来分析组件中返回的绑定数据,然后模板编译器就可以捕获这个消息,并自动转换成适当的绑定以直接访问。
我们平时使用单文件开发组件的方式,在离线阶段通过一些工具,如vue-loader就实现了对SFC的编译和转换,编译的结果和纯模板编译不同,还包括对script部分的代码分析。用$props和$data、$setup直接访问props、data、setup中定义的数据,用_ctx访问选项API中的method、computed、inject和用户自定义数据。
处理setup函数
setup启动函数是组合式API逻辑组织的入口:
<template>
  <button @click="increment">
    Count is: {{ state.count }},  double is: {{ state.double }}
  </button>
  <div id="app">
    {{ msg }}
    {{ propsData }}
  </div>
</template>
<script>
  import { reactive, computed } from 'vue'
  export default {
    setup() {
      const state = reactive({
        count: 0,
        double: computed(() => state.count * 2)
      })
      function increment() {
          state.count++
      }
      return {
        state,
        increment
      }
    }
  }
</script>
模板中引用的变量包含在setup函数的返回对象中。他们是如何建立联系的呢?回到setupStatefulComponent函数。分析第二个流程——判断处理setup函数:
function setupStatefulComponent(
  instance: ComponentInternalInstance,
  isSSR: boolean
) {
  // ...
  // 2. call setup()
  // 判断处理setup函数
  const { setup } = Component
  if (setup) {
    // 如果setup函数带参数,则创建一个setupContext
    const setupContext = (instance.setupContext =
      setup.length > 1 ? createSetupContext(instance) : null)
    setCurrentInstance(instance)
    pauseTracking()
    // 执行setup函数,获取返回值
    const setupResult = callWithErrorHandling(
      setup,
      instance,
      ErrorCodes.SETUP_FUNCTION,
      [__DEV__ ? shallowReadonly(instance.props) : instance.props, setupContext]
    )
    resetTracking()
    unsetCurrentInstance()
      // 处理setup返回值
    handleSetupResult(instance, setupResult, isSSR)

  } else {
    // 完成组件实例设置
    finishComponentSetup(instance, isSSR)
  }
}
首先判断setup函数的参数长度,大于1就创建setupContext上下文,看createSetupContext的实现:
export function createSetupContext(
  instance: ComponentInternalInstance
): SetupContext {
  const expose: SetupContext['expose'] = exposed => {
    if (__DEV__ && instance.exposed) {
      warn(`expose() should be called only once per setup().`)
    }
    instance.exposed = exposed || {}
  }

  let attrs: Data
  if (__DEV__) {
    // We use getters in dev in case libs like test-utils overwrite instance
    // properties (overwrites should not be done in prod)
    return Object.freeze({
      get attrs() {
        return attrs || (attrs = createAttrsProxy(instance))
      },
      get slots() {
        return shallowReadonly(instance.slots)
      },
      get emit() {
        return (event: string, ...args: any[]) => instance.emit(event, ...args)
      },
      expose
    })
  } else {
    return {
      get attrs() {
        return attrs || (attrs = createAttrsProxy(instance))
      },
      slots: instance.slots,
      emit: instance.emit,
      expose
    }
  }
}
createSetupContext函数有单个参数instance,即组件的实例。该函数返回一个对象,包括attrs、slots、emit三个属性以及expose函数。目的就是让我们可以在setup函数内部访问上面四个。
再看一下setup函数具体如何实现:
const setupResult = callWithErrorHandling(
  setup,
  instance,
  ErrorCodes.SETUP_FUNCTION,
  [__DEV__ ? shallowReadonly(instance.props) : instance.props, setupContext]
)

export function callWithErrorHandling(
  fn: Function,
  instance: ComponentInternalInstance | null,
  type: ErrorTypes,
  args?: unknown[]
) {
  let res
  try {
    res = args ? fn(...args) : fn()
  } catch (err) {
    handleError(err, instance, type)
  }
  return res
}
setup函数是通过callWithErrorHandling函数执行的,它是一个经常被用到的函数,作用是执行某函数,并捕获和处理函数执行期间的错误。他有四个参数,要执行的函数、组件实例对象、错误的类型、执行fn传入的参数。
对于setup函数的执行,第一个参数是instance.props,第二个参数是setupContext。函数执行过程中如果有错误就会执行handleError。执行setup函数并拿到返回的结果之后,接下来就要用handleSetupResult(instance, setupResult, isSSR)处理结果了:
export function handleSetupResult(
  instance: ComponentInternalInstance,
  setupResult: unknown,
  isSSR: boolean
) {
  if (isFunction(setupResult)) {
    // 对setup返回渲染函数
    instance.render = setupResult as InternalRenderFunction
  } else if (isObject(setupResult)) {
    // 对setup返回结果做一层代理
    instance.setupState = proxyRefs(setupResult)
  }
  finishComponentSetup(instance, isSSR)
}
setupResult是执行setup函数的返回值,不仅支持返回一个对象,还支持返回一个函数作为组件的渲染函数,赋值给instance.render。我们改写前面的实例:
<script>
  import { h } from 'vue'
  export default {
    props: { String },
    setup(props, {emit}) {
      function onClick() {
        emit('toggle')
      }
      return (ctx) => {
        return [
          h('p',null,ctx.msg),
          h('button',{ onClick: onClick }, 'Toggle')
        ]
      }
    }
  }
</script>
修改后组件删除了template部分,并把setup函数的返回结果改成了函数作为渲染函数。如果setupResult是一个对象,那么对其返回结果做一层代理,把结果赋值给instance.setupState。这样在模板渲染的时候,它会被作为render函数的第四个参数$setup传入,从而在setup函数与模板渲染之间建立了联系。
完成组件实例设置
finishComponentSetup():
export function finishComponentSetup(
  instance: ComponentInternalInstance,
  isSSR: boolean,
  skipOptions?: boolean
) {
  const Component = instance.type as ComponentOptions
    // 对模板或者渲染函数的标准化
  if (!instance.render) {
    // only do on-the-fly compile if not in SSR - SSR on-the-fly compilation
    // is done by server-renderer
    if (!isSSR && compile && !Component.render) {
      const template =
        (__COMPAT__ &&
          instance.vnode.props &&
          instance.vnode.props['inline-template']) ||
        Component.template
      if (template) {
        if (__DEV__) {
          startMeasure(instance, `compile`)
        }
        const { isCustomElement, compilerOptions } = instance.appContext.config
        const { delimiters, compilerOptions: componentCompilerOptions } =
          Component
        const finalCompilerOptions: CompilerOptions = extend(
          extend(
            {
              isCustomElement,
              delimiters
            },
            compilerOptions
          ),
          componentCompilerOptions
        )
        if (__COMPAT__) {
          // pass runtime compat config into the compiler
          finalCompilerOptions.compatConfig = Object.create(globalCompatConfig)
          if (Component.compatConfig) {
            extend(finalCompilerOptions.compatConfig, Component.compatConfig)
          }
        }
        Component.render = compile(template, finalCompilerOptions)
        if (__DEV__) {
          endMeasure(instance, `compile`)
        }
      }
    }
      // 把组件对象的render函数赋值给instance.render属性
    instance.render = (Component.render || NOOP) as InternalRenderFunction

    // for runtime-compiled render functions using `with` blocks, the render
    // proxy used needs a different `has` handler which is more performant and
    // also only allows a whitelist of globals to fallthrough.
    if (installWithProxy) {
      installWithProxy(instance)
    }
  }

  // support for 2.x options
  // 兼容optionsAPI
  if (__FEATURE_OPTIONS_API__ && !(__COMPAT__ && skipOptions)) {
    setCurrentInstance(instance)
    pauseTracking()
    applyOptions(instance)
    resetTracking()
    unsetCurrentInstance()
  }

  // warn missing template/render
  // the runtime compilation of template in SSR is done by server-render
  if (__DEV__ && !Component.render && instance.render === NOOP && !isSSR) {
    /* istanbul ignore if */
    if (!compile && Component.template) {
      // 只编写了template但使用Runtime-only的版本
      warn(
        `Component provided template option but ` +
          `runtime compilation is not supported in this build of Vue.` +
          (__ESM_BUNDLER__
            ? ` Configure your bundler to alias "vue" to "vue/dist/vue.esm-bundler.js".`
            : __ESM_BROWSER__
            ? ` Use "vue.esm-browser.js" instead.`
            : __GLOBAL__
            ? ` Use "vue.global.js" instead.`
            : ``) /* should not happen */
      )
    } else {
      // 既没有写render函数,也没有写template模板
      warn(`Component is missing template or render function.`)
    }
  }
}
finishComponentSetup()函数拥有单个参数instance,主要做两件事:标准化模板或者渲染函数,以及兼容选项式API。
回顾组件渲染流程:组件最终通过运行render函数生成子树vnode。但是我们很少直接编写render函数,通常使用两种方式开发组件:
- 一种是使用SFC,即编写组件的template模板去描述组件的DOM结构。在webpack的编译阶段会通过vue-loader编译生成组件的js和css代码,以及将template部分转换成render函数并添加到组件对象的属性中。
- 另一种是直接引入vue,在组件对象的template属性中编写模板,在运行阶段编译生成render函数。
因此vue在web端有两个版本:Runtime-only和Runtime+Compiler。推荐用前者,因为体积较小,并且在运行时不用编译,耗时少且性能优秀。两者主要区别在于是否注册了compile,它是通过外部注册的:
let compile: CompileFunction | undefined
let installWithProxy: (i: ComponentInternalInstance) => void

/**
 * For runtime-dom to register the compiler.
 * Note the exported method uses any to avoid d.ts relying on the compiler types.
 */
export function registerRuntimeCompiler(_compile: any) {
  compile = _compile
  installWithProxy = i => {
    if (i.render!._rc) {
      i.withProxy = new Proxy(i.ctx, RuntimeCompiledPublicInstanceProxyHandlers)
    }
  }
}
回到标准化模板或者渲染函数逻辑。先看instance.render是否存在,如果不存在则开始标准化,主要处理三种情况:
compile和组件template属性存在,render方法不存在。此时,Runtime+Compiler版本会在JS运行时进行模板编译,生成render函数。
compile和render方法不存在,组件template属性存在。由于没有compile且用的Runtime-only版本,没法在运行时编译模板。因此要发出警告。
组件没有render也没有template。发出警告。
如果是第一种正常情况,就要把组件的render函数赋值给instance.render。到了组件渲染的时候,就可以运行instance.render函数生成组件的子树vnode了。
组件的props
props允许组件的使用者在外部传递props,然后组件内部就可以根据这些props实现各种功能了。
props配置的标准化
props配置指的是在定义组件时编写的props配置,用来描述一个组件的props是什么样的;props数据是父组件在调用子组件的时候传递的。
最简单的props编写方式是字符串数组:
export default {
  props: ['title','like','isPublished','commentIds','author']
}
但是我们通常希望每个prop都有指定的值类型。这时可以用对象的形式列出prop,这些属性的名称和值分别是prop各自的名称和类型:
export default {
  props: {
    title: String,
    likes: Number
  }
}
框架通常允许用户以灵活的方式输入。但是背后要对输入做统一处理,就需要对灵活输入做标准化。因此在执行createComponentInstance创建组件实例时,首先需要对props配置对象做一层标准化:
const instance = {
  //...
  propsOptions: normalizePropsOptions(type, appContext)
}
normalizePropsOptions函数:
export function normalizePropsOptions(
  comp: ConcreteComponent,
  appContext: AppContext,
  asMixin = false
): NormalizedPropsOptions {
  const cache = appContext.propsCache
  const cached = cache.get(comp)
  // 有缓存的标准化结果就直接返回
  if (cached) {
    return cached
  }

  const raw = comp.props
  const normalized: NormalizedPropsOptions[0] = {}
  const needCastKeys: NormalizedPropsOptions[1] = []

  // apply mixin/extends props
  // 处理mixins和extends这些props
  let hasExtends = false
  if (__FEATURE_OPTIONS_API__ && !isFunction(comp)) {
    const extendProps = (raw: ComponentOptions) => {
      if (__COMPAT__ && isFunction(raw)) {
        raw = raw.options
      }
      hasExtends = true
      const [props, keys] = normalizePropsOptions(raw, appContext, true)
      extend(normalized, props)
      if (keys) needCastKeys.push(...keys)
    }
    // 处理全局的mixins
    if (!asMixin && appContext.mixins.length) {
      appContext.mixins.forEach(extendProps)
    }
    if (comp.extends) {
      extendProps(comp.extends)
    }
    if (comp.mixins) {
      comp.mixins.forEach(extendProps)
    }
  }

  if (!raw && !hasExtends) {
    cache.set(comp, EMPTY_ARR as any)
    return EMPTY_ARR as any
  }

  // 数组形式的props定义
  if (isArray(raw)) {
    for (let i = 0; i < raw.length; i++) {
      if (__DEV__ && !isString(raw[i])) {
        warn(`props must be strings when using array syntax.`, raw[i])
      }
      const normalizedKey = camelize(raw[i])
      if (validatePropName(normalizedKey)) {
        normalized[normalizedKey] = EMPTY_OBJ
      }
    }
  } else if (raw) {
    if (__DEV__ && !isObject(raw)) {
      warn(`invalid props options`, raw)
    }
    for (const key in raw) {
      const normalizedKey = camelize(key)
      if (validatePropName(normalizedKey)) {
        const opt = raw[key]
        // 标准化prop的定义格式
        const prop: NormalizedProp = (normalized[normalizedKey] =
          isArray(opt) || isFunction(opt) ? { type: opt } : opt)
        if (prop) {
          const booleanIndex = getTypeIndex(Boolean, prop.type)
          const stringIndex = getTypeIndex(String, prop.type)
          prop[BooleanFlags.shouldCast] = booleanIndex > -1
          prop[BooleanFlags.shouldCastTrue] =
            stringIndex < 0 || booleanIndex < stringIndex
          // if the prop needs boolean casting or default value
          // 布尔类型和有默认值的prop都需要转换
          if (booleanIndex > -1 || hasOwn(prop, 'default')) {
            needCastKeys.push(normalizedKey)
          }
        }
      }
    }
  }

  const res: NormalizedPropsOptions = [normalized, needCastKeys]
  cache.set(comp, res)
  return res
}
normalizePropsOptions函数有三个参数,comp表示定义组件的对象,appContext表示全局上下文,asmixin表示当前是否处于mixins的处理环境。首先会处理mixins和extends这两个特殊的属性,因为他们都是扩展组件的定义,所以需要对其定义中的props递归执行normalizePropsOptions。
接着函数会处理数组形式的props定义,例如:
export default {
  props: ['a','b']
}
如果props被定义成数组,那么数组的每个元素必须是一个字符串。然后把字符串都变成驼峰形式作为key,并为标准化后的key对应的每一个值创建一个空对象。变成如下形式:
export default {
  props: {
    a:{},
    b:{}
  }
}
如果props被定义成对象形式,就要标准化其每个prop属性的定义,把数组或者函数形式的prop标准化成对象形式,例如:
export default {
  props: {
    a: String,
    b: [String, Boolean]
  }
}
标准化后:
export default {
  props: {
    a: {
      type: String
    },
    b: {
      type: [String, Boolean]
    }
  }
}
接下来判断一些prop属性是否需要转换,其中含有布尔类型的prop和有默认值的prop需要转换,它们的key保存在needCastKeys中。注意,这里会给prop添加两个特殊的key,即prop[0]和prop[1],稍后介绍。
最后返回标准化结果,包含标准化后的props定义normalized,以及需要转换的props名称needCastKeys。此外会缓存这个结果。如果对同一组件重复执行normalizePropsOptions,直接返回这个结果即可。
把props配置标准化成统一的对象格式后,使用instance.propsOptions存储标准化结果,以便后续统一处理。
props值的初始化
有了标准化的props配置,我们还需要根据配置对父组件传递的props数据做一些求值和验证操作,然后把结果赋值到组件的实例上。这就是初始化过程。在执行setupComponent时会初始化props:
export function setupComponent(
  instance: ComponentInternalInstance,
  isSSR = false
) {
  isInSSRComponentSetup = isSSR

  const { props, children } = instance.vnode
  // 判断是否是一个有状态的组件
  const isStateful = isStatefulComponent(instance)
  // 初始化props
  initProps(instance, props, isStateful, isSSR)
  // 初始化插槽
  initSlots(instance, children)
    // 设置有状态的组件实例
  const setupResult = isStateful
    ? setupStatefulComponent(instance, isSSR)
    : undefined
  isInSSRComponentSetup = false
  return setupResult
}
其中props的初始化通过initProps函数完成:
export function initProps(
  instance: ComponentInternalInstance,
  rawProps: Data | null,
  isStateful: number, // result of bitwise flag comparison
  isSSR = false
) {
  const props: Data = {}
  const attrs: Data = {}
  def(attrs, InternalObjectKey, 1)
    // props的默认值缓存对象
  instance.propsDefaults = Object.create(null)
    // 设置props的值
  setFullProps(instance, rawProps, props, attrs)
  // 确保所有在props中声明的key都存在
  // ensure all declared prop keys are present
  for (const key in instance.propsOptions[0]) {
    if (!(key in props)) {
      props[key] = undefined
    }
  }
    // 验证合法性
  // validation
  if (__DEV__) {
    validateProps(rawProps || {}, props, instance)
  }

  if (isStateful) {
    // stateful
    // 有状态组件,响应式处理
    instance.props = isSSR ? props : shallowReactive(props)
  } else {
    if (!instance.type.props) {
      // functional w/ optional props, props === attrs
      // 函数式组件处理
      instance.props = attrs
    } else {
      // functional w/ declared props
      instance.props = props
    }
  }
  // 普通属性赋值
  instance.attrs = attrs
}
initProps有四个参数,instance表示组件实例,rawProps表示原始的props值,也就是创建组件vnode过程中传入的props数据,isStateful表示组件是否是有状态的,isSSR表示是否是服务端渲染。
initProps主要做了四件事:设置props的值,验证props是否合法,把props变成响应式的,以及将其添加到实例instance.props上。这里只分析有状态的组件的props初始化过程,接下来看设置props流程。
设置props
先看setFullProps的实现:
function setFullProps(
  instance: ComponentInternalInstance,
  rawProps: Data | null,
  props: Data,
  attrs: Data
) {
  // 获取标准化props的配置
  const [options, needCastKeys] = instance.propsOptions
  // 判断普通属性是否改变了的标志位
  let hasAttrsChanged = false
  let rawCastValues: Data | undefined
  if (rawProps) {
    for (let key in rawProps) {
      // key, ref are reserved and never passed down
      // 一些保留的prop(比如ref和key)是不会传递的
      if (isReservedProp(key)) {
        continue
      }

      if (__COMPAT__) {
        if (key.startsWith('onHook:')) {
          softAssertCompatEnabled(
            DeprecationTypes.INSTANCE_EVENT_HOOKS,
            instance,
            key.slice(2).toLowerCase()
          )
        }
        if (key === 'inline-template') {
          continue
        }
      }

      const value = rawProps[key]
      // prop option names are camelized during normalization, so to support
      // kebab -> camel conversion here we need to camelize the key.
      // 把连字符形式的props也转成驼峰形式
      let camelKey
      if (options && hasOwn(options, (camelKey = camelize(key)))) {
        if (!needCastKeys || !needCastKeys.includes(camelKey)) {
          props[camelKey] = value
        } else {
          ;(rawCastValues || (rawCastValues = {}))[camelKey] = value
        }
      } else if (!isEmitListener(instance.emitsOptions, key)) {
        // Any non-declared (either as a prop or an emitted event) props are put
        // into a separate `attrs` object for spreading. Make sure to preserve
        // original key casing
        if (__COMPAT__) {
          if (isOn(key) && key.endsWith('Native')) {
            key = key.slice(0, -6) // remove Native postfix
          } else if (shouldSkipAttr(key, instance)) {
            continue
          }
        }
        if (!(key in attrs) || value !== attrs[key]) {
          attrs[key] = value
          hasAttrsChanged = true
        }
      }
    }
  }

  if (needCastKeys) {
    // 需要转换的props
    const rawCurrentProps = toRaw(props)
    const castValues = rawCastValues || EMPTY_OBJ
    for (let i = 0; i < needCastKeys.length; i++) {
      const key = needCastKeys[i]
      props[key] = resolvePropValue(
        options!,
        rawCurrentProps,
        key,
        castValues[key],
        instance,
        !hasOwn(castValues, key)
      )
    }
  }

  return hasAttrsChanged
}
setFullProps有四个参数,props用于存储解析后的prop属性数据,attrs用于存储解析后的普通属性数据。此函数主要目的是遍历props数据求值,以及对需要转换的props求值。过程主要就是遍历rawProps,获取每个key对应的值并赋值给props或者attrs。因为在标准化props配置的过程中已经把props定义的key转换成了驼峰形式,所以也需要把rawProps的key转换成驼峰形式,然后对比查看传递的prop数据是否已经在配置中定义。如果过rawProps中的prop已经在配置中定义了,那么把它的值赋值到props对象中。如果没有,那么判断这个key是否为非事件派发相关:若是,则把它的值赋到attrs对象中作为普通属性。另外,在遍历过程中,如果遇到key或ref这种保留的key,则直接跳过后续的处理。
接下来分析对需要转换的props进行求值的过程。
在执行normalizePropsOptions的时候,我们获取了需要转换的props的key。接下来遍历needCastKeys,依次执行resolvePropValue函数来求值:
function resolvePropValue(
  options: NormalizedProps,
  props: Data,
  key: string,
  value: unknown,
  instance: ComponentInternalInstance,
  isAbsent: boolean
) {
  const opt = options[key]
  if (opt != null) {
    const hasDefault = hasOwn(opt, 'default')
    // default values
    // 默认值处理
    if (hasDefault && value === undefined) {
      const defaultValue = opt.default
      if (opt.type !== Function && isFunction(defaultValue)) {
        const { propsDefaults } = instance
        if (key in propsDefaults) {
          value = propsDefaults[key]
        } else {
          setCurrentInstance(instance)
          value = propsDefaults[key] = defaultValue.call(
            __COMPAT__ &&
              isCompatEnabled(DeprecationTypes.PROPS_DEFAULT_THIS, instance)
              ? createPropsDefaultThis(instance, props, key)
              : null,
            props
          )
          unsetCurrentInstance()
        }
      } else {
        value = defaultValue
      }
    }
    // boolean casting
    // 布尔类型转换
    if (opt[BooleanFlags.shouldCast]) {
      if (isAbsent && !hasDefault) {
        value = false
      } else if (
        opt[BooleanFlags.shouldCastTrue] &&
        (value === '' || value === hyphenate(key))
      ) {
        value = true
      }
    }
  }
  return value
}
resolvePropValue有六个参数,options表示标准化后的props配置,props表示原始传递的props数据,key表示待转换的prop属性的名称,value表示key对应的prop数据值,instance表示组件实例,isAbsent表示该prop的值是缺省的。
resolvePropValue主要针对两种情况的转换,分别是默认值和布尔类型的值。对于默认值的情况,即我们在prop配置中定义了默认值并且父组件没有传递数据,prop的值要从的default中获取。如果prop是非函数类型,且default是函数类型,要执行default函数并把函数返回的值作为默认值;否则直接获取default的值。
注意,这里会使用instance.propsDefaults缓存default函数的执行结果。为啥需要缓存呢,举个例子:
export default {
  props:{
    foo:{
      type: Object,
      default: () => {
        return { val: 1 }
      }
    }
  }
}
如果default函数的返回值是一个对象字面量,那么default函数每次执行返回的值都是不同的(因为指向的是不同的引用),相当于造成了props.foo值不必要的更新。
为了解决这个问题,我们只需把default函数的返回值缓存下来,下一次直接从缓存中获取默认值即可,不需要再次执行函数。
另外还需注意一点:vue不允许在default函数中访问组件实例this的,它在执行的时候通过defaultValue.call(null,props)把this指向null。
除了默认值的转换逻辑,还需要针对布尔类型的值转换。前面在执行normalizePropsOptions的时候已经给prop属性的定义添加了两个特殊的key,其中opt[0]为true表示这是一个含有布尔类型的prop。然后判断是否传入了对应的值,如果没有且无默认值,就直接将其转换成false。举个例子:
export default {
  props: {
    author: Boolean
  }
}
如果父组件调用子组件的时候没有给author这个prop传值,那么它转换后的值就是false。
接着分析opt[1]为true,且传递的props值为空字符串或key字符串的情况,命中这个逻辑表示这是一个含有Boolean和String类型的prop,且Boolean在String的前面。举个例子:
export default {
  props: {
    author: [Boolean, String]
  }
}
如果传递的值是空字符串或author字符串,则prop的值会被转换成true。
验证props
回到initProps函数,分析第二个流程,验证props是否合法。
export function initProps(
  instance: ComponentInternalInstance,
  rawProps: Data | null,
  isStateful: number, // result of bitwise flag comparison
  isSSR = false
) {
  const props: Data = {}
    // 设置props的值
  // ...
    // 验证合法性
  // validation
  if (__DEV__) {
    validateProps(rawProps || {}, props, instance)
  }

  if (isStateful) {
    // stateful
    // 有状态组件,响应式处理
    instance.props = isSSR ? props : shallowReactive(props)
  } else {
    if (!instance.type.props) {
      // functional w/ optional props, props === attrs
      // 函数式组件处理
      instance.props = attrs
    } else {
      // functional w/ declared props
      instance.props = props
    }
  }
  // 普通属性赋值
  instance.attrs = attrs
}
验证过程是在非生产环境下执行的,看一下validateProps的实现:
function validateProps(
  rawProps: Data,
  props: Data,
  instance: ComponentInternalInstance
) {
  const resolvedValues = toRaw(props)
  const options = instance.propsOptions[0]
  for (const key in options) {
    let opt = options[key]
    if (opt == null) continue
    validateProp(
      key,
      resolvedValues[key],
      opt,
      !hasOwn(rawProps, key) && !hasOwn(rawProps, hyphenate(key))
    )
  }
}


function validateProp(
  name: string,
  value: unknown,
  prop: PropOptions,
  isAbsent: boolean
) {
  const { type, required, validator } = prop
  // required!
  // 检测required
  if (required && isAbsent) {
    warn('Missing required prop: "' + name + '"')
    return
  }
  // 没有值,也没有配置require,直接返回
  // missing but optional
  if (value == null && !prop.required) {
    return
  }
  // type check
  // 类型检测
  if (type != null && type !== true) {
    let isValid = false
    const types = isArray(type) ? type : [type]
    const expectedTypes = []
    // value is valid as long as one of the specified types match
    // 只要指定的类型之一匹配,值就有效
    for (let i = 0; i < types.length && !isValid; i++) {
      const { valid, expectedType } = assertType(value, types[i])
      expectedTypes.push(expectedType || '')
      isValid = valid
    }
    if (!isValid) {
      warn(getInvalidTypeMessage(name, value, expectedTypes))
      return
    }
  }
  // custom validator
  // 自定义校验器
  if (validator && !validator(value)) {
    warn('Invalid prop: custom validator check failed for prop "' + name + '".')
  }
}
validateProps函数有三个参数,rawProps表示前面求得的props值,comp表示组件定义的对象,instance表示组件的实例。
validateProps遍历标准化后的props配置对象,获取每一个配置opt,然后执行validateProp进行验证。如果在验证过程中发现某个prop值与它的配置描述不匹配,则发出警告。validateProp有四个参数,name表示单个prop属性的名称,value表示该prop属性对应的值,prop表示该prop属性对应的配置对象,isAbsent表示该prop属性对象的值是否缺失。对于单个prop属性的配置,我们除了配置它的type,还可以配置required来表明它的必要性,以及validtor自定义校验器。举个例子:
export default {
  props: {
    value: {
      type: Number,
      required: true,
      validator(val) {
        return val >= 0
      }
    }
  }
}
validateProp首先验证required的情况,一旦prop配置required为true,就必须给它传值,否则会发出警告。
响应式处理
回到initProps看最后一个流程:把props变成响应式的,并添加到实例instance.props上。
export function initProps(
  instance: ComponentInternalInstance,
  rawProps: Data | null,
  isStateful: number, // result of bitwise flag comparison
  isSSR = false
) {
  const props: Data = {}
    // 设置props的值
  // ...
    // 验证合法性
  // ...
  if (isStateful) {
    // stateful
    // 有状态组件,响应式处理
    instance.props = isSSR ? props : shallowReactive(props)
  } else {
    if (!instance.type.props) {
      // functional w/ optional props, props === attrs
      // 函数式组件处理
      instance.props = attrs
    } else {
      // functional w/ declared props
      instance.props = props
    }
  }
  // 普通属性赋值
  instance.attrs = attrs
}
在前两个流程,我们通过setFullProps求值并赋值给props变量,还对props进行了验证。接下来要把props变成响应式的,并且赋值到组件的实例上。为什么要把instance.props变成响应式的?为什么要用shallowReactiveAPI呢?在props的更新流程中会解答。
props的更新
props的更新主要是指props数据的更新,它最直接的反应是会触发组件的重新渲染。比如在父组件修改prop值,子组件会重新渲染。
触发子组件重新渲染
组件的重新渲染会触发patch过程。然后遍历子节点,递归patch,在遇到组件节点时,会执行updateComponent函数:
const updateComponent = (n1: VNode, n2: VNode, optimized: boolean) => {
  const instance = (n2.component = n1.component)!
  // 根据新旧子节点判断是否需要更新子组件
  if (shouldUpdateComponent(n1, n2, optimized)) {
    // normal update
    // 把新的子组件vnode赋值给instance.next
    instance.next = n2
    // in case the child component is also queued, remove it to avoid
    // double updating the same child component in the same flush.
    // 子组件也可能因为数据变化而被添加到更新队列里,移除它们,防止重复更新
    invalidateJob(instance.update)
    // instance.update is the reactive effect.
    // 执行子组件的副作用渲染函数
    instance.update()
  } else {
    // no update needed. just copy over properties
    // 不需要更新,只复制属性
    n2.component = n1.component
    n2.el = n1.el
    // 把新的组件vnode n2保存到子组件实例的vnode属性中
    instance.vnode = n2
  }
}
在这个过程中会执行shouldUpdateComponent函数判断是否需要更新子组件。该函数内部会对props进行对比。假如我们的prop数据值变了就会更新子组件,不然还是会渲染之前的数据。那么,如何更新instance.props呢?
更新instance.props
执行子组件的instance.update(),实际上是执行componentUpdateFn组件副作用渲染函数。回顾它更新部分的逻辑:
const setupRenderEffect: SetupRenderEffectFn = (
  instance,
  initialVNode,
  container,
  anchor,
  parentSuspense,
  isSVG,
  optimized
) => {
  // 组件的渲染和更新函数
  const componentUpdateFn = () => {
    if (!instance.isMounted) {
      // 渲染组件
    } else {
      // updateComponent
      // This is triggered by mutation of component's own state (next: null)
      // OR parent calling processComponent (next: VNode)
      // 更新组件
      let { next, bu, u, parent, vnode } = instance
      // next表示新的组件vnode
      if (next) {
        // 更新组件vnode节点信息
        next.el = vnode.el
        updateComponentPreRender(instance, next, optimized)
      } else {
        next = vnode
      }

      // 渲染新的子树vnode
      const nextTree = renderComponentRoot(instance)
      // 缓存旧的子树vnode
      const prevTree = instance.subTree
      // 更新子树vnode
      instance.subTree = nextTree

      // 组件更新核心逻辑,根据新旧子树vnode执行patch
      patch(
        prevTree,
        nextTree,
        // parent may have changed if it's in a teleport
        hostParentNode(prevTree.el!)!,
        // anchor may have changed if it's in a fragment
        getNextHostNode(prevTree),
        instance,
        parentSuspense,
        isSVG
      )
      next.el = nextTree.el
    }
  }

  // create reactive effect for rendering
  // 创建组件渲染的副作用响应式对象
  const effect = (instance.effect = new ReactiveEffect(
    componentUpdateFn,
    () => queueJob(instance.update),
    instance.scope // track it in component's effect scope
  ))

  const update = (instance.update = effect.run.bind(effect) as SchedulerJob)
  update.id = instance.uid
  // allowRecurse
  // #1801, #2043 component render effects should allow recursive updates
  toggleRecurse(instance, true)
  update()
}
在更新组件的时候会判断是否有instance.next,它代表新的组件vnode。根据前面的逻辑可知next不为空,所以会执行updateComponentPreRender,更新组件vnode节点信息:
const updateComponentPreRender = (
  instance: ComponentInternalInstance,
  nextVNode: VNode,
  optimized: boolean
) => {
  nextVNode.component = instance
  const prevProps = instance.vnode.props
  instance.vnode = nextVNode
  instance.next = null
  updateProps(instance, nextVNode.props, prevProps, optimized)
  updateSlots(instance, nextVNode.children, optimized)
  // ...
}
其中会执行updateProps,更新props数据:
export function updateProps(
  instance: ComponentInternalInstance,
  rawProps: Data | null,
  rawPrevProps: Data | null,
  optimized: boolean
) {
  const {
    props,
    attrs,
    vnode: { patchFlag }
  } = instance
  const rawCurrentProps = toRaw(props)
  const [options] = instance.propsOptions
  let hasAttrsChanged = false

  if (
    // always force full diff in dev
    // - #1942 if hmr is enabled with sfc component
    // - vite#872 non-sfc component used by sfc component
    !(
      __DEV__ &&
      (instance.type.__hmrId ||
        (instance.parent && instance.parent.type.__hmrId))
    ) &&
    (optimized || patchFlag > 0) &&
    !(patchFlag & PatchFlags.FULL_PROPS)
  ) {
    if (patchFlag & PatchFlags.PROPS) {
      // Compiler-generated props & no keys change, just set the updated
      // the props.
      // 只更新动态props节点
      const propsToUpdate = instance.vnode.dynamicProps!
      for (let i = 0; i < propsToUpdate.length; i++) {
        let key = propsToUpdate[i]
        // skip if the prop key is a declared emit event listener
        if (isEmitListener(instance.emitsOptions, key)){
          continue
        }
        // PROPS flag guarantees rawProps to be non-null
        const value = rawProps![key]
        if (options) {
          // attr / props separation was done on init and will be consistent
          // in this code path, so just check if attrs have it.
          if (hasOwn(attrs, key)) {
            if (value !== attrs[key]) {
              attrs[key] = value
              hasAttrsChanged = true
            }
          } else {
            const camelizedKey = camelize(key)
            props[camelizedKey] = resolvePropValue(
              options,
              rawCurrentProps,
              camelizedKey,
              value,
              instance,
              false /* isAbsent */
            )
          }
        } else {
          if (__COMPAT__) {
            if (isOn(key) && key.endsWith('Native')) {
              key = key.slice(0, -6) // remove Native postfix
            } else if (shouldSkipAttr(key, instance)) {
              continue
            }
          }
          if (value !== attrs[key]) {
            attrs[key] = value
            hasAttrsChanged = true
          }
        }
      }
    }
  } else {
    // full props update.
    // 全量props更新
    if (setFullProps(instance, rawProps, props, attrs)) {
      hasAttrsChanged = true
    }
    // in case of dynamic props, check if we need to delete keys from
    // the props object
    // 因为props数据可能是动态的,所以把不在新props中但存在于旧props中的值设置为undefined
    let kebabKey: string
    for (const key in rawCurrentProps) {
      if (
        !rawProps ||
        // for camelCase
        (!hasOwn(rawProps, key) &&
          // it's possible the original props was passed in as kebab-case
          // and converted to camelCase (#955)
          ((kebabKey = hyphenate(key)) === key || !hasOwn(rawProps, kebabKey)))
      ) {
        if (options) {
          if (
            rawPrevProps &&
            // for camelCase
            (rawPrevProps[key] !== undefined ||
              // for kebab-case
              rawPrevProps[kebabKey!] !== undefined)
          ) {
            props[key] = resolvePropValue(
              options,
              rawCurrentProps,
              key,
              undefined,
              instance,
              true /* isAbsent */
            )
          }
        } else {
          delete props[key]
        }
      }
    }
    // in the case of functional component w/o props declaration, props and
    // attrs point to the same object so it should already have been updated.
    if (attrs !== rawCurrentProps) {
      for (const key in attrs) {
        if (
          !rawProps ||
          (!hasOwn(rawProps, key) &&
            (!__COMPAT__ || !hasOwn(rawProps, key + 'Native')))
        ) {
          delete attrs[key]
          hasAttrsChanged = true
        }
      }
    }
  }

  // trigger updates for $attrs in case it's used in component slots
  if (hasAttrsChanged) {
    trigger(instance, TriggerOpTypes.SET, '$attrs')
  }

  if (__DEV__) {
    validateProps(rawProps || {}, props, instance)
  }
}
updateProps拥有四个参数,其中instance表示组件的实例,rawProps表示新的props原始数据,rawPrevProps表示更新前props的原始数据,optimized表示是否开启编译优化。updateProps的主要目标就是把父组件渲染时求得的props新值更新到子组件实例的instance.props中。
在编译阶段,由于vue3对模板编译的优化,我们除了捕获一些动态vnode,也捕获了动态的props,所以可以只比对动态的props数据更新。当然,如果没有开启编译优化,也可以通过setFullProps全量比对并更新props。此外,由于props数据可能是动态的,会把那些不在新props中但存在于旧props中的值设置为undefined。
把instance.props变成响应式的
为什么要把instance.props变成响应式的呢?这其实是一种需求,因为我们也希望在子组件中侦听props值的变化,从而做一些事情。为什么要用shallowReactive而不用reactive呢?这两者都是将对象数据变成响应式的,区别是前面不会递归执行reactive,只劫持最外一层对象的属性,性能更好,而且在props的整个更新过程中,只会修改最外层属性,所以用shallowReactive就够了。
对象类型props数据的更新
如果定义的prop是对象数据类型,它的数据变化会触发子组件的更新么?
举例,在HelloWorld子组件中定义info prop:
<template>
  <div>
    <p> {{ msg }} </p>
    <p> {{ info.name }} </p>
    <p> {{ info.age }} </p>
    <button @click="reduce">Reduce Age</button>
  </div>
</template>
<script>
  export default {
    props: {
      msg: String,
      info: Object
    }
  }
</script>
然后给组件App.vue的data添加info变量,并且增加修改info数据的按钮。
<template>
  <hello-world :msg="msg" :info="info"></hello-world>
  <button @click="addAge">Add Age</button>
  <button @click="toggleMsg">Toggle Msg</button>
</template>
<script>
  import HelloWorld from './components/HelloWorld'
  export default {
    components: { HelloWorld },
    data() {
      return {
        info: {
          name: 'Tom',
          age: 18
          },
        msg: 'Hello world'
      }
    },
    methods: {
      addAge() {
        this.info.age++
      },
      toggleMsg() {
        this.msg = this.msg === 'Hello world' ? 'hello Vue' : 'Hello world'
      }
    }
  }
</script>
当我们点击Addage按钮修改this.info.age的时候,触发子组件props的变化。注意,父组件模板中没有引用age,所以他不会重新渲染。为什么子组件会重新渲染呢?前面分析了在props的初始化过程,其中会设置props的值,这其实就是一个求值过程。在这个过程中我们会求得子组件props中的info的值,并最终赋给instance.info。它们是对同一个对象的引用,所以在父组件中修改info.age,也就触发了子组件对应的prop的变化。由于在子组件的渲染过程中访问了info.age,就相当于子组件的渲染副作用函数rendereffect订阅了这个数据的变化。因此,当在父组件中对info.age的值进行修改的时候,就会触发这个render effect再次执行,进而执行子组件的重新渲染。
正因为对象类型的prop和父组件中定义的响应式数据指向的是同一个对象引用,如果在子组件中修改也会影响到父组件定义的数据。技术上可行但并不推荐,因为它不符合数据单向流动的设计思想。
组件的生命周期
vue组件的生命周期包括创建、更新、销毁等阶段。在vue3中用setup函数替代了vue2的beforeCreate和created两个钩子。我们可以在setup中做一些初始化工作,比如发送请求获取数据。
注册钩子函数
首先我们从使用者的角度分析,看看这些钩子函数是如何注册的:
export const onBeforeMount = createHook(LifecycleHooks.BEFORE_MOUNT)
export const onMounted = createHook(LifecycleHooks.MOUNTED)
export const onBeforeUpdate = createHook(LifecycleHooks.BEFORE_UPDATE)
export const onUpdated = createHook(LifecycleHooks.UPDATED)
export const onBeforeUnmount = createHook(LifecycleHooks.BEFORE_UNMOUNT)
export const onUnmounted = createHook(LifecycleHooks.UNMOUNTED)
export const onServerPrefetch = createHook(LifecycleHooks.SERVER_PREFETCH)
export const onRenderTriggered = createHook<DebuggerHook>(
  LifecycleHooks.RENDER_TRIGGERED
)
export const onRenderTracked = createHook<DebuggerHook>(
  LifecycleHooks.RENDER_TRACKED
)
export function onErrorCaptured<TError = Error>(
  hook: ErrorCapturedHook<TError>,
  target: ComponentInternalInstance | null = currentInstance
) {
  injectHook(LifecycleHooks.ERROR_CAPTURED, hook, target)
}
分析createHook函数:
// 这里用到了函数柯里化的技巧
export const createHook = (lifecycle) =>
  (hook: T, target=currentInstance) =>
    injectHook(lifecycle, hook, target)
它会返回一个函数,内部通过injectHook注册钩子函数。这里为什么要用createHook做一层封装,而不直接使用injectHook API呢?比如:
const onBeforeMount = function(hook, target=currentInstance) {
  injectHook('bm', hook, target)
}
这样实现当然也是可以,不过发现,这些钩子函数的内部逻辑很类似,都是执行injectHook,唯一区别是第一个参数字符串不同。因此,这样的代码是可以直接封装的。
在调用createHook返回的函数时就不需要再传lifecycle字符串了,因为它在createHook函数时就已经保存了该参数,这就是函数柯里化的技巧。
因此,当我们通过onMounted(hook)注册一个钩子时,内部就使用了injectHook(‘m’, hook)。接下来分析injectHook函数:
export function injectHook(
  type: LifecycleHooks,
  hook: Function & { __weh?: Function },
  target: ComponentInternalInstance | null = currentInstance,
  prepend: boolean = false
): Function | undefined {
  if (target) {
    const hooks = target[type] || (target[type] = [])
    // cache the error handling wrapper for injected hooks so the same hook
    // can be properly deduped by the scheduler. "__weh" stands for "with error
    // handling".
    // 封装钩子函数并缓存
    const wrappedHook =
      hook.__weh ||
      (hook.__weh = (...args: unknown[]) => {
        if (target.isUnmounted) {
          return
        }
        // disable tracking inside all lifecycle hooks
        // since they can potentially be called inside effects.
        // 停止依赖收集
        pauseTracking()
        // Set currentInstance during hook invocation.
        // This assumes the hook does not synchronously trigger other hooks, which
        // can only be false when the user does something really funky.
        // 设置target为当前运行的组件实例
        setCurrentInstance(target)
        // 执行钩子函数
        const res = callWithAsyncErrorHandling(hook, target, type, args)
        unsetCurrentInstance()
        // 恢复依赖收集
        resetTracking()
        return res
      })
    if (prepend) {
      hooks.unshift(wrappedHook)
    } else {
      hooks.push(wrappedHook)
    }
    return wrappedHook
  }
}
inject函数有四个参数,type表示钩子函数的类型,hook表示用户注册的钩子函数,target表示钩子函数执行时对应的组件实例(默认值时当前运行的组件实例),prepend表示在当前已有的钩子函数前面插入(默认值是false)。injectHook对用户注册的钩子函数hook做了一层封装,然后添加到一个数组中,并把数组保存在当前组件实例target中。不同类型的钩子函数会被保存到组件实例的不同属性上。例如,onMounted注册的钩子函数对应的type是m,在组件实例上就是通过instance.m保存的。这样的设计其实很好理解,因为生命周期的钩子函数是在组件生命周期的各个阶段执行的,所以钩子函数必须保存在当前的组件实例上,这样后面就可以在组件实例上通过不同的字符串type找到对应的钩子函数数组并执行。
由于函数把封装的wrappedHook钩子函数缓存到hook.weh中,所以对于相同的钩子函数hook反复执行injectHook,它们封装后的wrappedHook都指向了同一个引用hook.weh。这样后续通过scheduler方式执行的钩子函数就会被去重,避免同一个钩子函数多次注册且重复执行。在后续执行wrappedHook函数时,会先停止依赖,因为钩子函数内部访问的响应式对象通常已经执行过依赖收集,所以钩子函数执行的时候没有必要再次收集依赖,毕竟这个过程也有一定的性能损耗。接着是设置target为当前组件实例。在vue内部,会一直维护当前运行的组件实例currentInstance。在注册钩子函数的过程中,我们可以拿到当前运行的组件实例currentInstance,并用target保存,然后在钩子函数执行时,为了确保此时的currentInstance和注册钩子函数时一致,会通过setCurrentInstance(target)设置target为当前组件实例。
接下来就是通过callwithAsyncErrorHanding函数执行用于注册的hook函数。函数执行完毕后设置当前组件实例为null,并恢复依赖收集。
onBeforeMount和onMounted
onBeforeMount注册的beforeMount钩子函数会在组件挂载之前执行,onMounted注册的mounted钩子函数则会在组件挂载之后执行。回顾组件副作用函数对于组件挂载部分的实现:
const setupRenderEffect: SetupRenderEffectFn = (
  instance,
  initialVNode,
  container,
  anchor,
  parentSuspense,
  isSVG,
  optimized
) => {
  // 组件的渲染和更新函数
  const componentUpdateFn = () => {
    if (!instance.isMounted) {
      const { bm,m } = instance
      // 执行beforeMount钩子函数
      if(bm) {
        invokeArrayFns(bm)
      }
      // 渲染组件生成子树vnode
      const subTree = (instance.subTree = renderComponentRoot(instance))
      // 把子树vnode挂载到container中
      patch(
        null,
        subTree,
        container,
        anchor,
        instance,
        parentSuspense,
        isSVG
      )
      // 保存渲染生成的子树根DOM节点
      initialVNode.el = subTree.el
      instance.isMounted = true
      // 执行mounted钩子函数
      if(m) {
        queuePostRenderEffect(m,parentSuspense)
      }
    } else {
      // 更新组件
    }
  }

  // create reactive effect for rendering
  // 创建组件渲染的副作用响应式对象
  const effect = (instance.effect = new ReactiveEffect(
    componentUpdateFn,
    () => queueJob(instance.update),
    instance.scope // track it in component's effect scope
  ))

  const update = (instance.update = effect.run.bind(effect) as SchedulerJob)
  update.id = instance.uid
  // 允许递归更新自己
  effect.allowRecurse = update.allowRecurse = true
  update()
}
在执行patch挂载组件之前,会检测组件实例上是否有已注册的beforeMount钩子函数bm,如果有,则通过invokeArrayFns执行它。因为用户可以通过多次执行onBeforeMount函数来注册多个beforeMount钩子函数,所以这里的instance.bm是一个数组,通过遍历这个数组可以依次执行beforeMount钩子函数。在patch挂载组件之后,会检查组件实例上是否有已注册的mounted钩子函数m,如果有,则通过queuePostRenderEffect来执行它,该函数会先把mounted钩子函数推入一个队列,然后在整个应用渲染完毕后,同步遍历这个队列,调用mounted函数。为啥这样设计,因为对于嵌套组件,父组件会先执行patch。在这个过程中,如果遇到子节点是组件的情况,会递归执行子组件的mount,然后把自身的DOM节点插入。组件在执行与挂载相关的生命周期钩子函数时,会依次执行父组件的beforeMount、子组件的beforeMount、子组件的mounted和父组件的mounted。
如果不使用queuePostRenderEffect,那么在子组件在执行mounted钩子函数时,若父组件的DOM还没有被插入,会导致访问不到父组件的DOM节点。在整个应用渲染完毕后再依次执行mounted钩子函数,就能保证每个组件的DOM元素都是可访问的。
在组件初始化阶段发送Ajax请求获取组件数据的逻辑是放在created还是mounted,其实都可以,他们执行的顺序虽然有先后,但都会在同一个事件循环内执行完毕。异步请求是有网络耗时的:首先,它是异步的;其次,其耗时远远多于一个事件循环执行的时间。所以,无论在created还是在mounted里发请求,都要等待请求的响应,然后更新数据,再触发组件的重新渲染。
onBeforeUpdate和onUpdated
onBeforeUpdate注册的beforeUpdate钩子函数会在组件更新之前执行,onUpdated注册的updated钩子函数则会在组件更新之后执行。回顾组件副作用渲染函数对组件更新的实现:
const setupRenderEffect: SetupRenderEffectFn = (
  instance,
  initialVNode,
  container,
  anchor,
  parentSuspense,
  isSVG,
  optimized
) => {
  // 组件的渲染和更新函数
  const componentUpdateFn = () => {
    if (!instance.isMounted) {
      // 渲染组件
    } else {
      // 更新组件
      let { next, bu, u, parent, vnode } = instance
      if (next) {
          next.el = vnode.el
          updateComponentPreRender(instance, next, optimized)
      } else {
        next = vnode
      }
      // 执行beforeUpdate钩子函数
      // beforeUpdate hook
      if (bu) {
        invokeArrayFns(bu)
      }
      // 渲染新的子树vnode
      const nextTree = renderComponentRoot(instance)
      // 缓存旧的子树vnode
      const prevTree = instance.subTree
      // 更新子树vnode
      instance.subTree = nextTree
      patch(
        prevTree,
        nextTree,
        // parent may have changed if it's in a teleport
        hostParentNode(prevTree.el!)!,
        // anchor may have changed if it's in a fragment
        getNextHostNode(prevTree),
        instance,
        parentSuspense,
        isSVG
      )
      // 缓存更新后的DOM节点
      next.el = nextTree.el
      // 执行updated钩子函数
      if(u) {
        queuePostRenderEffect(u, parentSuspense)
      }
    }
  }

  // create reactive effect for rendering
  // 创建组件渲染的副作用响应式对象
  const effect = (instance.effect = new ReactiveEffect(
    componentUpdateFn,
    () => queueJob(instance.update),
    instance.scope // track it in component's effect scope
  ))

  const update = (instance.update = effect.run.bind(effect) as SchedulerJob)
  update.id = instance.uid
  // 允许递归更新自己
  effect.allowRecurse = update.allowRecurse = true
  update()
}
在执行patch更新组件之前,会检测组件实例上是否有已注册的beforeUpdate钩子函数bu。如果有,则通过invokeArrayFns执行它。在执行patch更新组件之后,会检查组件实例上是否有已注册的updated钩子函数u,如果有,则通过queuePostRenderEffect执行它。因为组件的更新本身就是在nextTick之后执行的,所以此时再次执行用queuePostRenderEffect推入队列的任务,会等待当前任务执行完毕,然后在同一个事件循环内执行所有的updated钩子函数。
在beforeUpdate钩子函数执行时,组件的DOM还未更新。如果你想在组件更新前访问DOM,比如手动移除已添加的事件侦听器,可以注册这个钩子函数。
在updated钩子函数执行时,组件DOM已经更新,所以可以执行依赖于DOM的操作。如果要侦听数据的改变并执行某些逻辑,最好不要使用updated钩子函数,而是使用计算属性或watcher,因为数据变化触发的任何组件更新都会导致updated钩子函数的执行。
onBeforeUnmount和onUnmounted
onBeforeUnmount注册的beforeUnMount钩子函数会在组件销毁之前执行,onUnmounted注册的unmounted钩子函数会在组件销毁之后执行。
const unmountComponent = (
  instance: ComponentInternalInstance,
  parentSuspense: SuspenseBoundary | null,
  doRemove?: boolean
) => {
  const { bum, scope, update, subTree, um } = instance
    // 执行beforeUnmount钩子函数
  // beforeUnmount hook
  if (bum) {
    invokeArrayFns(bum)
  }
    // 清理组件引用的effects副作用函数
  // stop effects in component scope
  scope.stop()

  // update may be null if a component is unmounted before its async
  // setup has resolved.
  // 如果一个异步组件在加载前就被销毁了,则不会注册副作用渲染函数
  if (update) {
    // so that scheduler will no longer invoke it
    update.active = false
    // 调用unmount销毁子树
    unmount(subTree, instance, parentSuspense, doRemove)
  }
  // unmounted hook
  // 执行unmounted钩子函数
  if (um) {
    queuePostRenderEffect(um, parentSuspense)
  }
}
组件销毁的整体逻辑主要就是清理组件实例上绑定的effects副作用函数和注册的副作用渲染函数update,并且调用unmount销毁子树。
unmount遍历子树,通过递归的方式来销毁子节点:在遇到组件节点时执行unmountComponent,在遇到普通节点时则删除DOM元素。
在销毁组件之前,会检测组件实例上是否有已注册的beforeUnmount钩子函数bum,如果有,则通过invokeArrayFns执行。
在销毁组件后会检测组件实例上是否有已注册的unmounted钩子函数um,如果有,则通过queuePostRenderEffect把它推入数组。因为组件的销毁就是组件更新的一个分值逻辑,所以它也是在nextTick之后执行的,因此此时再次执行用queuePostRenderEffect推入队列的任务,会等待当前任务执行完毕,然后在同一个事件循环内执行的所有的unmounted钩子函数。
虽然组件会在销毁阶段清理一些已定义的effects函数,删除组件内部的DOM元素,但是对于一些需要清理的对象,组件并不能自动完成清理。例如在组件内部创建了一个定时器,就应该在这两个钩子中清除它。如果不清除,就会发现在组件被销毁后,虽然DOM被移除了,但是计时器仍然存在,并且会一直计时,这就造成了不必要的内存泄漏。
onErrorCaptured
异步组件
在大型应用中,我们可能需要将应用分割成小一些的代码块,并且只在需要的时候才从服务器加载某个组件模块,这类组件就称为异步组件。
import { createApp, defineAsyncComponent } from 'vue'

const app = createApp({})
const AsyncComp = defineAsyncComponent(
  () =>
    new Promise((resolve, reject) => {
      loadFromServer('domain/path/AsyncComponent', (err, comp) => {
        if(!err) {
          resolve(comp)
        } else {
          reject(comp)
        }
      })
    })
  )
app.component('async-example',AsyncComp)
defineAsyncComponent接收返回Promise的工厂函数。从服务器成功加载异步组件之后,应执行resolve回调函数;如果加载失败,则应执行reject回调函数。
此外,把webpack 2+和ES6结合,还可以这样动态导入异步组件:
import { createApp, defineAsyncComponent } from 'vue'

const app = createApp({})
const AsyncComp = defineAsyncComponent(() =>
  import('./A.vue')
)
app.component('async-example',AsyncComp)
当采用局部注册时,也可以直接提供一个返回promise的函数
defineAsyncComponent
export function defineAsyncComponent<
  T extends Component = { new (): ComponentPublicInstance }
>(source: AsyncComponentLoader<T> | AsyncComponentOptions<T>): T {
  // 标准化参数,如果是source函数,就转成一个对象
  if (isFunction(source)) {
    source = { loader: source }
  }

  const {
    loader,
    loadingComponent,
    errorComponent,
    delay = 200,
    timeout, // undefined = never times out
    suspensible = true,
    onError: userOnError
  } = source

  let pendingRequest: Promise<ConcreteComponent> | null = null
  let resolvedComp: ConcreteComponent | undefined

  let retries = 0
  // 定义重试函数
  const retry = () => {
    retries++
    pendingRequest = null
    return load()
  }

  const load = (): Promise<ConcreteComponent> => {
    // 加载异步组件的代码,获取组件模板的定义对象
  }

  return defineComponent({
    name: 'AsyncComponentWrapper',

    __asyncLoader: load,

    get __asyncResolved() {
      return resolvedComp
    },

    setup() {
      const instance = currentInstance!

      // already resolved
      // 已经加载了
      if (resolvedComp) {
        return () => createInnerComp(resolvedComp!, instance)
      }
        // 定义错误回调函数
      const onError = (err: Error) => {
        pendingRequest = null
        handleError(
          err,
          instance,
          ErrorCodes.ASYNC_COMPONENT_LOADER,
          !errorComponent /* do not throw in dev if user provided error component */
        )
      }
        // 定义响应式变量,当他们改变的时候,会触发组件的重新渲染
      const loaded = ref(false)
      const error = ref()
      const delayed = ref(!!delay)
        // 处理延时
      if (delay) {
        setTimeout(() => {
          delayed.value = false
        }, delay)
      }

      if (timeout != null) {
        setTimeout(() => {
          // 加载超时,执行错误回调
          if (!loaded.value && !error.value) {
            const err = new Error(
              `Async component timed out after ${timeout}ms.`
            )
            onError(err)
            error.value = err
          }
        }, timeout)
      }

      load()
        .then(() => {
          loaded.value = true
          if (instance.parent && isKeepAlive(instance.parent.vnode)) {
            // parent is keep-alive, force update so the loaded component's
            // name is taken into account
            queueJob(instance.parent.update)
          }
        })
        .catch(err => {
          onError(err)
          error.value = err
        })

      return () => {
        if (loaded.value && resolvedComp) {
          return createInnerComp(resolvedComp, instance)
        } else if (error.value && errorComponent) {
          return createVNode(errorComponent as ConcreteComponent, {
            error: error.value
          })
        } else if (loadingComponent && !delayed.value) {
          return createVNode(loadingComponent as ConcreteComponent)
        }
      }
    }
  }) as T
}
defineAsyncComponent只有单个参数source,它可以是一个工厂函数也可以是一个对象。如果传入的是一个函数,会将其标准化成一个对象,并且把loader属性指向这个函数。
defineAsyncComponent做了三件事:渲染占位节点,加载异步JS模块以获取组件对象,重新渲染组件。
渲染占位节点
defineAsyncComponent函数返回的是defineComponent函数执行的结果。defineComponent本身也很简单:
function defineComponent(options) {
  return isFunction(options) ? { setup: options, name: options.name } : options
}
defineComponent函数做的也是标准化工作:如果传递的options是函数,那么返回一个对象,并让options函数指向其setup属性。因此defineAsyncComponent函数的返回值是一个带setup属性的对象,他其实就是一个组件对象。
接下来我们看这个组件会被渲染成什么。由于setup函数返回的是一个函数,这个函数就是该组件的渲染函数。先不考虑异步组件的高级用法,因此对应的loaded.value、error.value、和loadingComponent都为假值。渲染函数命中不了任何条件,直接返回undefined。
组件的render函数返回的是组件的渲染子树vnode,而undefined类型的vnode会被标准化成一个注释节点。因此,普通的异步组件初次会被渲染成一个注释节点。
加载异步JS模块
setup内部还调用了load函数来加载异步js模块:
const load = (): Promise<ConcreteComponent> => {
  let thisRequest: Promise<ConcreteComponent>
  // 多个异步组件同时加载,多次调用load,只请求一次
  return (
    pendingRequest ||
    (thisRequest = pendingRequest =
      loader()
        .catch(err => {
          // 失败处理逻辑
        })
        .then((comp: any) => {
          if (thisRequest !== pendingRequest && pendingRequest) {
            return pendingRequest
          }
          if (__DEV__ && !comp) {
            warn(
              `Async component loader resolved to undefined. ` +
                `If you are using retry(), make sure to return its return value.`
            )
          }
          // interop module default
          // export default导出组件的方式
          if (
            comp &&
            (comp.__esModule || comp[Symbol.toStringTag] === 'Module')
          ) {
            comp = comp.default
          }
          if (__DEV__ && comp && !isObject(comp) && !isFunction(comp)) {
            throw new Error(`Invalid async component load result: ${comp}`)
          }
          resolvedComp = comp
          return comp
        }))
  )
}
load函数内部主要是通过执行用户定义的工厂函数loader来发送请求。例如:
// loader
() => import('./a.vue')
该工厂函数返回一个Promise对象。加载成功之后,会在then函数中获得组件的模块comp。如果组件最终是通过export default的方式导出的,那么可以通过comp.deafult获取他真实的组件对象,然后赋值给resolvedComp变量。
获取真实的组件对象模块后,将其渲染到页面上。
重新渲染组件
在调用load之后,会修改响应式对象loaded来触发异步组件的重新渲染:
load()
  .then(() => {
    loaded.value = true
    if (instance.parent && isKeepAlive(instance.parent.vnode)) {
      // parent is keep-alive, force update so the loaded component's
      // name is taken into account
      queueJob(instance.parent.update)
    }
  })
  .catch(err => {
    onError(err)
    error.value = err
  })
当异步组件重新渲染后,就会再次执行组件的render函数:
return () => {
  // 已加载,则渲染真实的组件
  if (loaded.value && resolvedComp) {
    return createInnerComp(resolvedComp, instance)
  }
  // ...
}
这个时候,load的值已为true且resolvedComp的值是组件的对象,所以调用createInnerComp函数创建一个组件vnode对象。这样就能渲染生成真实的组件节点了。
响应式原理
响应式的内部实现原理
除了组件化,vue的另一个设计思想是数据驱动,在本质上就是在数据变化后自动执行某个函数。如果映射到组件的实现,就是当数据变化后,自动触发组件的重新渲染。我们可以将这类数据称作响应式数据。vue2的响应式实现是通过Object.defineProperty()劫持数据的变化,在数据被访问的时候收集依赖,在数据被修改的时候通知依赖更新。在vue2中,watcher就是依赖,有专门针对组件渲染的render watcher。注意,这里有两个流程:首先是依赖收集流程,组件在渲染的时候会访问模板中的数据,触发getter把render watcher作为依赖收集起来,并和数据建立联系;然后是派发通知流程,当这些数据被修改的时候会触发setter,通知render watcher更新,进而触发组件的重新渲染。
不过Object.defineProperty有一定缺陷:不能侦听对象属性的添加和删除。另外,vue2的数据初始化阶段,对于嵌套较深的对象递归执行Object.defineProperty会带来一定的性能负担。vue3用了Proxy重写了响应式部分。
响应式对象的实现差异
在vue2中构建组件时,只要在data、props、computed中定义数据,那么它就是响应式的。如果把数据的定义放在created钩子中,并不是响应式对象。因为vue内部在组件初始化时会把data中定义的数据变成响应式的。这是一个相对黑盒的过程,用户通常感知不到。到了vue3,使用组合式API,它更推荐用户主动定义响应式对象,而非内部的黑盒处理。这样用户可以更加明确哪些数据是响应式的。如果不想让数据变成响应式的,就将其定义成它的原始数据类型即可。
reactive()
export function reactive(target: object) {
  // if trying to observe a readonly proxy, return the readonly version.
  // 如果尝试把一个readonly proxy变成响应式的,就直接返回这个readonly proxy。
  if (isReadonly(target)) {
    return target
  }
  return createReactiveObject(
    target,
    false,
    mutableHandlers,
    mutableCollectionHandlers,
    reactiveMap
  )
}
function createReactiveObject(
  target: Target,
  isReadonly: boolean,
  baseHandlers: ProxyHandler<any>,
  collectionHandlers: ProxyHandler<any>,
  proxyMap: WeakMap<Target, any>
) {
  if (!isObject(target)) {
    // 目标必须是对象或数组类型
    if (__DEV__) {
      console.warn(`value cannot be made reactive: ${String(target)}`)
    }
    return target
  }
  // target is already a Proxy, return it.
  // exception: calling readonly() on a reactive object
  // target已经是proxy类型的对象,直接返回
  // 有个例外: 如果是readonly作用于一个响应式对象,则继续
  if (
    target[ReactiveFlags.RAW] &&
    !(isReadonly && target[ReactiveFlags.IS_REACTIVE])
  ) {
    return target
  }
  // target already has corresponding Proxy
  // 如果target已经有对应的Proxy,返回对应的proxy
  const existingProxy = proxyMap.get(target)
  if (existingProxy) {
    return existingProxy
  }
  // only a whitelist of value types can be observed.
  // 只有白名单里的类型数据才可以变成响应式的
  const targetType = getTargetType(target)
  if (targetType === TargetType.INVALID) {
    return target
  }

  // 利用proxy创建响应式对象
  const proxy = new Proxy(
    target,
    targetType === TargetType.COLLECTION ? collectionHandlers : baseHandlers
  )
  // 缓存已经代理的对象
  proxyMap.set(target, proxy)
  return proxy
}
reactive函数有单个参数target,它必须是对象或数组类型。reactive内部通过执行createReactiveObject把target变成一个响应式对象。它有五个参数,target表示待变成响应式对象的目标对象,isReadonly表示是否创建只读的响应式对象,baseHandlers表示普通对象和数组类型数据的响应式处理器,collectionHandlers表示集合类型数据的响应式处理器,proxyMap表示原始对象和响应式对象的缓存映射图。
createReactiveObject主要做了如下几件事:
- 首先判断target是不是数组或对象类型,如果不是则直接返回。所以原始数据target必须是对象或数组类型。
如果对一个已经是响应式的对象再次执行reactive,还应该返回这个响应式对象。举个例子:
const original = { foo: 1 } const observed = reactive(original) const observed2 = reactive(observed) observed === observed2 // truecreateReactiveObject内部会通过是否存在target.v_raw属性来判断target是否已经是一个响应式对象(因为响应式对象的v_raw属性指向它的原始对象),如果是,则直接返回响应式对象。
如果对同一个原始数据多次执行reactive,会返回相同的响应式对象。在每次创建响应式对象之前,会判断proxyMap中是否已经存在target对应的响应式对象,存在则直接返回。
- 对原始对象的类型作进一步限制。虽然已经限制了target是数组或对象,但并非所有对象都可以变成响应式。会通过getTargetType判断对象的数据类型: ```typescript function getTargetType(value: Target) { return value[ReactiveFlags.SKIP] || !Object.isExtensible(value) ? TargetType.INVALID : targetTypeMap(toRawType(value)) }
function targetTypeMap(rawType: string) { switch (rawType) { case ‘Object’: case ‘Array’: return TargetType.COMMON case ‘Map’: case ‘Set’: case ‘WeakMap’: case ‘WeakSet’: return TargetType.COLLECTION default: return TargetType.INVALID } }
getTargetType会先监测对象是否有__v_skip属性,以及对象是否不可扩展:满足其中之一则返回0,表示该对象不合法;都不满足则进一步通过targetTypeMap函数来判断——对于普通对象或者数组返回1,对于集合类型的对象返回2,其他返回0。比如Date类型、RegExp、Promise类型都会返回0,返回0表示target的类型不在白名单内,不合法,不会变成响应式对象。

5. 通过Proxy劫持target对象,把它变成响应式的。我们把new Proxy创建的proxy实例称作响应式对象,这里proxy对应的处理器对象会根据getTargetType获取到的目标数据类型的不同而不同:如果是集合类型的数据,使用collectionHandlers;是对象和数组类型,使用baseHandlers。
6. 把原始对象target作为key、响应式对象proxy作为value存储到Map类型的对象proxyMap中,这就是对同一个原始对象多次执行reactive却返回同一个响应式对象的原因。

其实响应式的实现无非就是劫持数据。proxy劫持了整个对象,所以我们可以检测到对对象的任何修改。<br />接下来分析proxy处理器对象mutableHandlers的实现:
```typescript
const mutableHandlers = {
  get,
  set,
  deleteProperty,
  has,
  ownKeys
}
它其实劫持了我们对proxy对象的一些操作,比如访问对象属性会触发get、设置对象属性会触发set、删除对象属性会触发deleteProperty、in操作符会触发has、通过Object.getOwnPropertyNames访问对象属性名会触发ownKeys函数。
不论命中哪个处理器函数,它都会做依赖收集和派发通知这两件事的其中之一。接下来分析get、set函数的实现。
依赖收集
依赖收集发生在数据访问阶段。看一下get函数的实现,它是createGetter函数的返回值:
function createGetter(isReadonly = false, shallow = false) {
  return function get(target: Target, key: string | symbol, receiver: object) {
    if (key === ReactiveFlags.IS_REACTIVE) {
      return !isReadonly
    } else if (key === ReactiveFlags.IS_READONLY) {
      return isReadonly
    } else if (key === ReactiveFlags.IS_SHALLOW) {
      return shallow
    } else if (
      key === ReactiveFlags.RAW &&
      receiver ===
        (isReadonly
          ? shallow
            ? shallowReadonlyMap
            : readonlyMap
          : shallow
          ? shallowReactiveMap
          : reactiveMap
        ).get(target)
    ) {
      return target
    }

    const targetIsArray = isArray(target)
      // arrayInstrumentations包含对数组一些方法的修改
    if (!isReadonly && targetIsArray && hasOwn(arrayInstrumentations, key)) {
      return Reflect.get(arrayInstrumentations, key, receiver)
    }
      // 求值
    const res = Reflect.get(target, key, receiver)
      // 内置Symbol key,不需要依赖收集
    if (isSymbol(key) ? builtInSymbols.has(key) : isNonTrackableKeys(key)) {
      return res
    }
      // 依赖收集
    if (!isReadonly) {
      track(target, TrackOpTypes.GET, key)
    }

    if (shallow) {
      return res
    }

    if (isRef(res)) {
      // ref unwrapping - does not apply for Array + integer key.
      const shouldUnwrap = !targetIsArray || !isIntegerKey(key)
      return shouldUnwrap ? res.value : res
    }

    if (isObject(res)) {
      // Convert returned value into a proxy as well. we do the isObject check
      // here to avoid invalid value warning. Also need to lazy access readonly
      // and reactive here to avoid circular dependency.
      return isReadonly ? readonly(res) : reactive(res)
    }

    return res
  }
}
get函数做了四件事,首先对特殊的key做了代理,比如遇到key是v_raw,则直接返回原始对象target。这就是我们在createReactiveObject函数中判断响应式对象是否存在v_raw属性,并在其存在时返回该对象对应的原始对象的原因。
接着,如果target是数组且key命中了arrayInstrumentations,则执行其内部对应的函数。看一下arrayInstrumentations的实现:
function createArrayInstrumentations() {
  const instrumentations: Record<string, Function> = {}
  // instrument identity-sensitive Array methods to account for possible reactive
  // values
  ;(['includes', 'indexOf', 'lastIndexOf'] as const).forEach(key => {
    instrumentations[key] = function (this: unknown[], ...args: unknown[]) {
      const arr = toRaw(this) as any
      for (let i = 0, l = this.length; i < l; i++) {
        track(arr, TrackOpTypes.GET, i + '')
      }
      // we run the method using the original args first (which may be reactive)
      const res = arr[key](...args)
      if (res === -1 || res === false) {
        // if that didn't work, run it again using raw values.
        return arr[key](...args.map(toRaw))
      } else {
        return res
      }
    }
  })
  // instrument length-altering mutation methods to avoid length being tracked
  // which leads to infinite loops in some cases (#2137)
  ;(['push', 'pop', 'shift', 'unshift', 'splice'] as const).forEach(key => {
    instrumentations[key] = function (this: unknown[], ...args: unknown[]) {
      pauseTracking()
      const res = (toRaw(this) as any)[key].apply(this, args)
      resetTracking()
      return res
    }
  })
  return instrumentations
}
arrayInstrumentations是createArrayInstrumentations的返回值,重写了数组的一些方法。除了调用数组本身的函数求值,还会对数组的每个元素做依赖收集。
然后回到get函数,通过Reflect.get函数求值,并执行track函数收集依赖。
函数最后会对计算出的值res进行判断。如果它是数组或对象,则递归执行reactive把res变成响应式对象。这么做是因为Proxy劫持的是对象本身,并不能劫持子对象的变化。
在vue2中,把数据变成响应式时,遇到子属性仍然是对象会递归执行Object.defineProperty;而在vue3中,只有在对象属性被访问的时候才会判断子属性的类型,来决定要不要递归执行reactive。
接下来看track函数:
// 是否应该依赖收集
let shouldTrack = true
// 当前激活的effect
let activeEffect
// 原始数据对象map
const targetMap = new WaekMap()

function track(target: object, type: TrackOpTypes, key: unknown) {
  if (shouldTrack && activeEffect) {
    let depsMap = targetMap.get(target)
    if (!depsMap) {
      // 每个target对应一个depsMap
      targetMap.set(target, (depsMap = new Map()))
    }
    let dep = depsMap.get(key)
    if (!dep) {
      // 每个key对应一个dep集合
      depsMap.set(key, (dep = createDep()))
    }
    if(!dep.has(activeEffect)) {
      // 收集当前激活的effect作为依赖
      dep.add(activeEffect)
      // 当前激活的effect收集dep集合作为依赖
      activeEffect.deps.push(dep)
    }
  }
}
track有三个参数,target表示原始数据,type表示这次依赖收集的类型,key表示访问的属性。
track函数外部创建了全局的targetMap作为原始数据对象的Map,它的键是target,值是depsMap,用来作为依赖的map。这个depsMap的键是target的key,值是dep集合,dep中存储了依赖的副作用函数。每次执行track函数,就会把当前激活的副作用函数activeEffect作为依赖,将其收集到与target相关的depsMap所对应key下的依赖集合dep中。
派发通知
派发通知发生在数据更新阶段。因为proxy劫持了数据对象,所以当这个响应式对象的属性值更新的时候,就会执行set函数,set函数是createSetter函数的返回值:
function createSetter(shallow = false) {
  return function set(
    target: object,
    key: string | symbol,
    value: unknown,
    receiver: object
  ): boolean {
    let oldValue = (target as any)[key]
    if (isReadonly(oldValue) && isRef(oldValue) && !isRef(value)) {
      return false
    }
    if (!shallow && !isReadonly(value)) {
      if (!isShallow(value)) {
        value = toRaw(value)
        oldValue = toRaw(oldValue)
      }
      if (!isArray(target) && isRef(oldValue) && !isRef(value)) {
        oldValue.value = value
        return true
      }
    } else {
      // in shallow mode, objects are set as-is regardless of reactive or not
    }

    const hadKey =
      isArray(target) && isIntegerKey(key)
        ? Number(key) < target.length
        : hasOwn(target, key)
    const result = Reflect.set(target, key, value, receiver)
    // don't trigger if target is something up in the prototype chain of original
    // 如果目标是原型链的某个属性,通过Reflect.set修改它会再次触发setter,
    // 在这种情况下就没必要触发两次trigger了
    if (target === toRaw(receiver)) {
      if (!hadKey) {
        trigger(target, TriggerOpTypes.ADD, key, value)
      } else if (hasChanged(value, oldValue)) {
        trigger(target, TriggerOpTypes.SET, key, value, oldValue)
      }
    }
    return result
  }
}
set函数主要做两件事:首先通过Reflect.set求值;然后通过trigger函数派发通知,并依据key是否存在于target上来确定通知类型,即新增还是修改。
看trigger函数的实现:
export function trigger(
  target: object,
  type: TriggerOpTypes,
  key?: unknown,
  newValue?: unknown,
  oldValue?: unknown,
  oldTarget?: Map<unknown, unknown> | Set<unknown>
) {
  const depsMap = targetMap.get(target)
  if (!depsMap) {
    // never been tracked
    // 没有依赖直接返回
    return
  }

  let deps: (Dep | undefined)[] = []
  if (type === TriggerOpTypes.CLEAR) {
    // collection being cleared
    // trigger all effects for target
    deps = [...depsMap.values()]
  } else if (key === 'length' && isArray(target)) {
    depsMap.forEach((dep, key) => {
      if (key === 'length' || key >= (newValue as number)) {
        deps.push(dep)
      }
    })
  } else {
    // schedule runs for SET | ADD | DELETE
    // SET、ADD、DELETE操作之一,添加对应的effects
    if (key !== void 0) {
      deps.push(depsMap.get(key))
    }

    // also run for iteration key on ADD | DELETE | Map.SET
    switch (type) {
      case TriggerOpTypes.ADD:
        if (!isArray(target)) {
          deps.push(depsMap.get(ITERATE_KEY))
          if (isMap(target)) {
            deps.push(depsMap.get(MAP_KEY_ITERATE_KEY))
          }
        } else if (isIntegerKey(key)) {
          // new index added to array -> length changes
          deps.push(depsMap.get('length'))
        }
        break
      case TriggerOpTypes.DELETE:
        if (!isArray(target)) {
          deps.push(depsMap.get(ITERATE_KEY))
          if (isMap(target)) {
            deps.push(depsMap.get(MAP_KEY_ITERATE_KEY))
          }
        }
        break
      case TriggerOpTypes.SET:
        if (isMap(target)) {
          deps.push(depsMap.get(ITERATE_KEY))
        }
        break
    }
  }

  const eventInfo = __DEV__
    ? { target, type, key, newValue, oldValue, oldTarget }
    : undefined

  if (deps.length === 1) {
    if (deps[0]) {
      if (__DEV__) {
        triggerEffects(deps[0], eventInfo)
      } else {
        triggerEffects(deps[0])
      }
    }
  } else {
    const effects: ReactiveEffect[] = []
    for (const dep of deps) {
      if (dep) {
        effects.push(...dep)
      }
    }
    if (__DEV__) {
      triggerEffects(createDep(effects), eventInfo)
    } else {
      triggerEffects(createDep(effects))
    }
  }
}
trigger函数从targetMap中获取target对应的依赖集合depsMap;创建运行的effects集合;根据key从depsMap中找到对应的effects并添加到effects集合中;遍历effects,执行相关的副作用函数。
副作用函数
响应式的原始需求:修改数据就能自动执行某个函数。举个例子:
const counter = reactive({ num: 0 })
function logCount() { console.log(counter.num) }
function count() { counter.num++ }
logCount()
count()
定义响应式对象counter,然后在logCount中访问counter.num,希望在执行count函数修改counter.num的时候,自动执行logCount函数。
按照之前对依赖收集过程的分析,如果logCount是activeEffect,就可以实现该需求。但这显然是不可能的,因为代码在执行到console.log(counter.num)这一行的时候,对自己在logCount函数中的运行是一无所知的。
所以,只要在运行logCount函数之前,把logCount赋值给activeEffect就好了:
activeEffect = logCount
logCount()
我们可以利用高阶函数的思想,对logCount做一层包装:
function wrapper(fn) {
  const wrapped = function(...args) {
    activeEffect = fn
    fn(...args)
  }
  return wrapped
}
const wrappedLog = wrapper(logCount)
wrappedLog()
wrapper本身也是一个函数,它接收fn作为参数,返回一个新的函数wrapped,然后维护一个全局变量activeEffect。当需要执行wrapped的时候,把activeEffect设置为fn,然后执行fn即可。这样,如果在执行wrappedLog之后修改counter.num,就会自动执行logCount函数了。
vue3用了类似的做法,其内部有一个effect副作用函数:
// 全局effect栈
const effectStack = []
// 当前激活的副作用函数
let activeEffect

function effect(fn, options) {
  // 如果fn已经是一个effect函数了,则指向原始函数
  if(isEffect(fn)) {
    fn = fn.raw
  }
    // 创建一个响应式的副作用函数
  const effect = createReactiveEffect(fn, options)
  if(!options.lazy) {
    // lazy配置,计算属性会用到; 非lazy直接执行一次
    effect()
  }
  return effect
}
function createReactiveEffect(fn, options) {
  const effect = function reactiveEffect() {
    if(!effect.active) {
      // 如果处于非激活状态,则判断是否为调度执行;若不是,直接执行原始函数
      return options.scheduler ? undefined : fn()
    }
    if(!effectStack.includes(effect)) {
      // 清空effect引用的依赖
      cleanup(effect)
      try {
        // 开启全局shouldTrack,允许依赖收集
        enalbeTracking()
        // 入栈
        effectStack.push(effect)
        activeEffect = effect
        // 执行原函数
        return fn()
      }
      finally {
        // 出栈
        effectStaack.pop()
        // 恢复shouldTrack开启之前的状态
        resetTracking()
        // 指向栈的最后一个effect
        activeEffect = effectStack[effectStack.length-1]
      }
    }
  }
  effect.id = uid++
  // 标识是一个effect函数
  effect._isEffect = true
  // effect自身的状态
  effect.active = true
  // 包装的原始函数
  effect.raw = fn
  // effect对应的依赖,这是一个双向指针:依赖包含对effect的引用,effect也包含对依赖的引用
  effect.deps = []
  effect.options = options
  return effect
}
effect内部通过createReactiveEffect创建一个新的effect函数。为了和外部区分,把它叫reactiveEffect函数,并且给它添加了一些额外的属性。reactiveEffect函数就是响应式的副作用函数。当执行trigger过程派发通知的时候,执行的effect就是它。
reactiveEffect只需做两件事:让全局的activeEffect指向它,然后执行被包装的原始函数fn。
实际上它的实现比较复杂:首先判断effect的状态是否为active,这其实是一种控制手段,允许在非active状态且非调度执行的情况下,直接执行原始函数fn并返回;接着判断effectStack中是否包含effect,如果没有就effect压入栈内。
嵌套effect的场景
import { effect } from '@vue/reactivity'
const counter = reactive({ num: 0, num2: 0 })
funciton logCount() {
  effect(logCount2)
  console.log('num:', counter.num)
}
function count() {
  counter.num++
}
funciton logCount2() {
  console.log('num2:', counter.num2)
}
effect(logCount)
count()
如果在执行effect函数时,仅仅把reactiveEffect函数赋值给activeEffect,那么针对这种嵌套场景,在执行effect(logCount2)之后,activeEffect还是effect(logCount2)返回的reactiveEffect函数。这样,在后续访问counter.num的时候,依赖收集对应的activeEffect就不对了。此时,在外部执行count函数修改counter.num之后执行的就不是logCount函数,而是logCount2函数了。
针对嵌套effect的场景,不能简单赋值activeEffect,而是应该考虑函数的执行本身就是一种入栈出栈操作。因此可以设计一个effectStack,在每次进入reactiveEffect函数时先让它入栈,然后让activeEffect指向这个reactiveEffect函数,并在fn执行完毕后让它出栈,再让activeEffect指向effectStack的最后一个元素,也就是外层effect函数对应的reactiveEffect。
cleanup的设计
在入栈前会执行cleanup清空reactiveEffect函数对应的依赖。在执行track函数的时候,除了收集当前激活的effect作为依赖,还通过activeEffect.deps.push(dep)把dep作为activeEffect的依赖。这样在执行cleanup的时候就可以找到effect对应的dep了,然后把effect从这些dep中删除。cleanup函数代码如下:
function cleanup(effect: ReactiveEffect) {
  const { deps } = effect
  if (deps.length) {
    for (let i = 0; i < deps.length; i++) {
      deps[i].delete(effect)
    }
    deps.length = 0
  }
}
响应式实现的优化
依赖收集的优化
目前,每次执行副作用函数都需要先执行cleanup清除依赖,然后在副作用函数执行的过程中重新收集依赖。这个过程涉及大量对集合Set的添加和删除操作。在许多场景下,依赖关系是很少改变的,因此存在一定优化空间。
trackOpBit
refAPI
reactiveAPI对传入的target类型有限制(必须是对象或数组类型),不支持一些基础类型。在某些时候,虽然我们可能只希望把一个字符串变成响应式的,却不得不将其封装成一个对象。这样很不方便,于是出现了ref。
const msg = ref('a')
msg.value = 'b'
vue3.2对ref也做了优化,先看之前版本:
function ref(value?: unknown) {
  return createRef(value, false)
}

const convert = (val) => isObject(val) ? reactive(val) : val

function createRef(rawValue: unknown, shallow: boolean) {
  if (isRef(rawValue)) {
    // 如果传的是一个ref,返回其自身即可,处理嵌套ref的情况
    return rawValue
  }
  return new RefImpl(rawValue, shallow)
}

class RefImpl<T> {
  constructor(_rawValue, _Shallow=false) {
    this._rawValue = _rawValue
    this._shallow = _shallow
    this.__v_isRef = true
    // 非shallow时,执行原始值的转换
    this._value = _Shallow ? _rawValue : convert(_rawValue)
  }

  get value() {
    // 给value属性添加getter并做依赖收集
    track(toRaw(this),'get','value')
    return this._value
  }

  set value(newVal) {
    // 给value属性添加setter
    if (hasChanged(toRaw(newVal), this._rawValue)) {
      this._rawValue = newVal
      this._value = this._Shallow ? newVal : convert(newVal)
      // 派发通知
      trigger(toRaw(this), 'set', 'value', newVal)
    }
  }
}
首先处理嵌套的情况,然后劫持其实例value属性的getter、setter。当访问一个ref对象的value属性时触发getter,执行track函数做依赖收集然后返回它的值;当修改ref对象的value值时会触发setter,设置新值并且执行trigger函数派发通知:如果新值newVal是对象或数组,那么把它转换成一个reactive对象。
shallowReactiveAPI
会对对象做一层浅的响应式处理:
export function shallowReactive<T extends object>(
  target: T
): ShallowReactive<T> {
  return createReactiveObject(
    target,
    false,
    shallowReactiveHandlers,
    shallowCollectionHandlers,
    shallowReactiveMap
  )
}
reactive和shallowReactive函数的主要区别是相当于baseHandlers和collectionHandlers的区别。对于普通对象和数组类型数据的proxy处理器对象,shallowReactive函数传入的baseHandlers的值是shallowReactiveHandlers。
shallowReactiveHandlers的实现:
const shallowReactiveHandlers = /*#__PURE__*/ extend(
  {},
  mutableHandlers,
  {
    get: shallowGet,
    set: shallowSet
  }
)
可以看到,shallowReactiveHandlers就是在mutableHandlers的基础上进行扩展,修改了get和set函数的实现。
我们重点关注shallowGet的实现。它其实也是通过createGetter函数创建的getter,只不过第二个参数shallow设置为true:
const shallowGet = /*#__PURE__*/ createGetter(false, true)

function createGetter(isReadonly = false, shallow = false) {
  return function get(target: Target, key: string | symbol, receiver: object) {
    // ...

    // 如果shallow为true,直接返回
    if (shallow) {
      return res
    }

    if (isRef(res)) {
      // ref unwrapping - does not apply for Array + integer key.
      const shouldUnwrap = !targetIsArray || !isIntegerKey(key)
      return shouldUnwrap ? res.value : res
    }

    if (isObject(res)) {
      // Convert returned value into a proxy as well. we do the isObject check
      // here to avoid invalid value warning. Also need to lazy access readonly
      // and reactive here to avoid circular dependency.
      // 如果res是对象或者数组类型的,则递归执行reactive函数把res变成响应式的
      return isReadonly ? readonly(res) : reactive(res)
    }

    return res
  }
}
一旦把shallow设置为true,即使res值是对象类型的,也不会通过递归把它变成响应式的。
在初始化props的过程中,即在对instance.props求值后,应用shallowReactive把它变成响应式的:
instance.props = isSSR ? props : shallowReactive(props)
readonly API
如果用const声明一个对象变量,虽然不能直接对这个变量赋值,但是可以修改它的属性。因此我们希望创建只读对象,既不能修改它的属性,也不能为其添加或删除属性。
const original = {
    foo: 1
}
const wrapped = readonly(original)
// 警告:对键foo的设置操作失败--目标是只读的
wrapped.foo = 2
想实现上述需求就需要劫持对象:
function readonly<T extends object>(
  target: T
): DeepReadonly<UnwrapNestedRefs<T>> {
  return createReactiveObject(
    target,
    true,
    readonlyHandlers,
    readonlyCollectionHandlers,
    readonlyMap
  )
}
readonly和reactive函数的主要区别:首先是执行createReactiveObject函数时的参数isReadonly不同;其次就在于baseHandlers和collectionHandlers的区别,对于普通对象和数组类型数据的proxy处理器对象,readonly函数传入的baseHandlers的值是readonlyHandlers。
另外,在执行createReactiveObject的时候,如果isReadonly为true,且传递的参数target已经是响应式对象,那么仍然可以把这个响应式对象变成一个只读对象:
if(target.__v_raw && !(isReadonly && target.__v_isReactive)) {
  // target已经是proxy类型的对象,直接返回
  // 有个例外,如果是readonly作用于一个响应式对象,则继续
  return target
}
看一下readonlyHandlers的实现:
const readonlyHandlers: ProxyHandler<object> = {
  get: readonlyGet,
  set(target, key) {
    if (__DEV__) {
      warn(
        `Set operation on key "${String(key)}" failed: target is readonly.`,
        target
      )
    }
    return true
  },
  deleteProperty(target, key) {
    if (__DEV__) {
      warn(
        `Delete operation on key "${String(key)}" failed: target is readonly.`,
        target
      )
    }
    return true
  }
}
readonlyHandlers和mutableHandles的区别主要在于get、set和deleteProperty这三个函数。显然,只读的响应式对象是不允许修改或删除属性的,所以在非生产环境下,set和deleteProperty函数的实现都会发出警告,提示用户对象是只读的。
看readonlyGet函数的实现,他其实就是createGetter(true)的返回值:
function createGetter(isReadonly = false, shallow = false) {
  return function get(target: Target, key: string | symbol, receiver: object) {
    // ...

    //isReadonly为true则不需要依赖收集
    if(!isReadonly) {
      track(target,'get',key)
    }

    if (isObject(res)) {
      // Convert returned value into a proxy as well. we do the isObject check
      // here to avoid invalid value warning. Also need to lazy access readonly
      // and reactive here to avoid circular dependency.
      // 如果res是对象或者数组类型的,则递归执行reactive函数把res变成响应式的
      return isReadonly ? readonly(res) : reactive(res)
    }

    return res
  }
}
可以看到,readonly不用做依赖收集,因为对象属性不会被修改。
总结
响应式的核心就是通过数据劫持,在访问数据的时候执行依赖收集,在修改数据的时候派发通知。收集的依赖是副作用函数,数据改变后就会触发副作用函数的自动执行。
把数据变成响应式的,是为了在数据变化之后自动执行一些逻辑。在组件的渲染中,就是让组件访问的数据一旦被修改,就自动触发组件的重新渲染,实现数据驱动。
计算属性
// 第一种使用方式
const count = ref(1)
const plusOne = computed(() => count.value + 1)
console.log(plusOne.value)  // 2
plusOne++  // error
count.value++
console.log(plusOne.value)  // 3
报错是因为我们传递的是一个函数,那么它就是一个getter函数,我们只能获取它的值,不能直接修改。在getter函数中,我们会根据响应式对象重新计算出新的值,这个新的值就是计算属性,而这个响应式对象就是计算属性的依赖。
当然,有时候我们希望能够直接修改computed的返回值,那么可以给computed传入一个对象:
// 第二种实现方式
const count = ref(1)
const plusOne = computed({
  get: () => count.value+1,
  set: val => { count.value = val - 1 }
})
plusOne.value = 1
console.log(count.value) // 0
源码:
function computed<T>(
  getterOrOptions: ComputedGetter<T> | WritableComputedOptions<T>,
  debugOptions?: DebuggerOptions,
  isSSR = false
) {
  let getter: ComputedGetter<T>
  let setter: ComputedSetter<T>

  const onlyGetter = isFunction(getterOrOptions)
  // 标准化参数
  if (onlyGetter) {
    // 表面传入的是getter函数,不能修改计算属性的值
    getter = getterOrOptions
    setter = __DEV__
      ? () => {
          console.warn('Write operation failed: computed value is readonly')
        }
      : NOOP
  } else {
    getter = getterOrOptions.get
    setter = getterOrOptions.set
  }

  const cRef = new ComputedRefImpl(getter, setter, onlyGetter || !setter, isSSR)

  if (__DEV__ && debugOptions && !isSSR) {
    cRef.effect.onTrack = debugOptions.onTrack
    cRef.effect.onTrigger = debugOptions.onTrigger
  }

  return cRef as any
}

class ComputedRefImpl<T> {
  public dep?: Dep = undefined

  private _value!: T
  public readonly effect: ReactiveEffect<T>

  public readonly __v_isRef = true
  public readonly [ReactiveFlags.IS_READONLY]: boolean
    // 标记数据是脏的
  public _dirty = true
  public _cacheable: boolean

  constructor(
    getter: ComputedGetter<T>,
    private readonly _setter: ComputedSetter<T>,
    isReadonly: boolean,
    isSSR: boolean
  ) {
    // 创建副作用实例
    this.effect = new ReactiveEffect(getter, () => {
      if (!this._dirty) {
        this._dirty = true
        triggerRefValue(this)
      }
    })
    this.effect.computed = this
    this.effect.active = this._cacheable = !isSSR
    this[ReactiveFlags.IS_READONLY] = isReadonly
  }

  get value() {
    // the computed ref may get wrapped by other proxies e.g. readonly() #3376
    // 对value属性设置getter
    const self = toRaw(this)
    trackRefValue(self)
    if (self._dirty || !self._cacheable) {
      // 只有数据为脏的时候才会重新计算
      self._dirty = false
      self._value = self.effect.run()!
    }
    return self._value
  }

  set value(newValue: T) {
    // 对value属性设置setter
    this._setter(newValue)
  }
}
computed参数getterOrOptions可以是一个getter函数也可以是一个对象,因此computed首先要做的就是标准化参数,拿到计算属性对应的getter函数和setter函数。如果参数仅仅是getter函数,那么在开发环境下,一旦修改了计算属性的值,就会执行对应的setter函数,提醒你该计算属性是只读的。接着返回了ComputedRefImpl的实例,在它的构造器内部,通过new ReactiveEffect创建了副作用实例effect。ReactiveEffect构造函数第一个参数是一个fn函数,在后续执行effect.run的时候,会执行这个fn函数;第二个参数是一个scheduler函数,在后续执行派发通知的时候,会通知这个effect依赖对象执行对应的scheduler函数。
在ComputedRefImpl内部,还会对实例的value属性创建了getter和setter,当computed对象的value属性被访问的时候会触发getter,对计算属性本身进行依赖收集,然后会判断是否_dirty,如果是就执行effect.run函数,并重置_dirty的值;当我们直接设置computed对象的value属性时会触发setter,即执行computed函数内部定义的setter函数。
计算属性的运行机制
computed内部有两个重要的变量,第一个是_dirty,它表示一个计算属性的值是否是脏的,用来判断需不需要重新计算;第二个是_value,它表示计算属性每次计算的结果。
例子:
<template>
  <div>{{ plusOne }}</div>
  <button @click="plus">plus</button>
</template>
<script>
  import { ref, computed } from 'vue'
  export default {
    setup() {
      const count = ref(0)
      const plusOne = computed(() => {
        return count.value + 1
      })

      function plus() {
        count.value++
      }
      return {
        plusOne,
        plus
      }
    }
  }
</script>
创建了计算属性对象plusOne,它传入的是一个getter函数,为了和后面计算属性对象的getter函数区分,把它称作computed getter。在组件渲染阶段,会访问plusOne,触发了plusOne对象的getter函数:
get value() {
  // the computed ref may get wrapped by other proxies e.g. readonly() #3376
  // 对value属性设置getter
  const self = toRaw(this)
  trackRefValue(self)
  if (self._dirty || !self._cacheable) {
    // 只有数据为脏的时候才会重新计算
    self._dirty = false
    self._value = self.effect.run()!
  }
  return self._value
}
首先会执行trackRefValue,对计算属性本身做依赖收集,这个时候activeEffect是组件副作用渲染函数对应的effect对象。然后会判断dirty属性,由于_dirty默认是true,所以这个时候会把_dirty设置为false,接着执行计算属性内部effect对象的run函数,并进一步执行computed getter,也就是count.value+1。因为访问了count的值,且count也是一个响应式对象,所以也会触发count对象的依赖收集过程。
请注意,由于是在effect.run函数执行时访问count,所以这个时候的activeEffect指向计算属性内部的effect对象。因此要特别注意,这是两个依赖收集过程:对于plusOne来说,它收集的依赖是组件副作用渲染函数对应的effect对象;对于count来说,它收集的依赖是计算属性plusOne内部的effect对象。
当我们点击按钮时会执行plus函数。函数内部修改count的值并派发通知。由于count收集的依赖是pulsOne内部的effect对象,所以会通知effect对象。这里并不会直接调用effect.run,而是会执行effect.scheduler函数:它并没有对计算属性求新值,而仅仅是在_dirty为false的时候把_dirty设置为true,再执行triggerRefValue,去通知执行plusOne依赖的组件副作用渲染函数对应的effect对象,即触发组件的重新渲染。
在组件重新渲染的时候会再次访问plusOne,这个时候_dirty为true,然后会再次执行computed getter,此时才会执行count.value+1求得新值。这就是组件没有直接访问count,却在我们修改count的值时,仍然重新渲染的原因。
computed计算属性有两个特点:
- 延时计算。只有当我们访问计算属性的时候,它才会真正执行computed getter函数进行计算。
缓存。它的内部会缓存上次的计算结果_value,而且只有_dirty为true时才会重新计算。如果访问计算属性时_dirty为false,那么直接返回这个_value。
嵌套计算属性
计算属性也支持嵌套:
const count = ref(0)
const plusOne = computed(() => {
return count.value + 1
})
const plusTwo = computed(() => {
return plusOne.value + 1
})
当我们访问plusTwo的时候,过程和前面差不多,同样也是两个依赖收集的过程。对于plusOne来说,它收集的依赖是plusTwo内部的effect对象;对于count来说,它收集的依赖是plusOne内部的effect对象。
当我们修改count的值时,它会派发通知,先运行plusOne内部的scheduler函数,把plusOne内部的_dirty变为true,然后执行trigger函数再次派发通知,接着运行plusTwo内部的scheduler函数,把plusTwo内部的_dirty设置为true。
当我们再次访问plusTwo的值时,发现_dirty为true,就会执行plusTwo的computed getter函数,即plusOne.value+1,进而执行plusOne的computed getter函数,即count.value+1+1,求得最终值2。依赖注入
vue2的依赖注入是在祖先组件中提供一个provide选项:
export default {
provide: function() {
  return {
    foo: this.foo
  }
}
}
这就相当于祖先组件提供了变量数据foo,我们可以在任意子孙组件中注入这个变量数据:
export default {
inject: ['foo']
}
这样,我们就可以在子孙组件中通过this.foo访问祖先组件提供的数据了。
vue3的依赖注入:import { provide, ref } from 'vue' export default { setup() { const theme = ref('dark') provide('theme', theme) } }import { inject } fro 'vue' export default { setup() { setup() { const theme = inject('theme', 'light') return { theme } } } }inject函数接收第二个参数作为默认值,如果祖先组件的上下文没有提供theme,则使用这个默认值。
祖先组件不需要知道哪些后代组件在使用它的数据,后代组件也不需要知道注入的数据来自哪里。provide API
function provide<T>(key: InjectionKey<T> | string | number, value: T) {
if (!currentInstance) {
  if (__DEV__) {
    warn(`provide() can only be used inside setup().`)
  }
} else {
  let provides = currentInstance.provides
  // by default an instance inherits its parent's provides object
  // but when it needs to provide values of its own, it creates its
  // own provides object using parent provides object as prototype.
  // this way in `inject` we can simply look up injections from direct
  // parent and let the prototype chain do the work.
  const parentProvides =
    currentInstance.parent && currentInstance.parent.provides
  if (parentProvides === provides) {
    // 由直接引用改为继承
    provides = currentInstance.provides = Object.create(parentProvides)
  }
  // TS doesn't allow symbol as index type
  provides[key as string] = value
}
}
provide函数提供的数据主要保存在组件实例的provides对象上。而在创建组件实例的时候,组件实例的provides对象直接指向父组件实例的provides对象:
const instance = {
// 与依赖注入相关的属性
provides: parent ? parent.provides : Object.create(appContext.provides),
// 其他属性
}
所以在默认情况下,组件实例的provides直接指向其父组件的provides对象。
但是当组件实例需要提供自己的值时,也就是调用provide函数时,它会使用父级provides对象作为原型对象创建自己的provides对象,然后再给自己的provides添加新的属性值。
通过这种关系,不仅仅可以提供新的数据,还可以保证在inject阶段,我们可以通过原型链来查找来自其父级的数据。injectAPI
function inject(
key: InjectionKey<any> | string,
defaultValue?: unknown,
treatDefaultAsFactory = false
) {
// fallback to `currentRenderingInstance` so that this can be called in
// a functional component
const instance = currentInstance || currentRenderingInstance
if (instance) {
  // #2400
  // to support `app.use` plugins,
  // fallback to appContext's `provides` if the instance is at root
  // 从它的父组件的provides开始查找
  const provides =
    instance.parent == null
      ? instance.vnode.appContext && instance.vnode.appContext.provides
      : instance.parent.provides

  if (provides && (key as string | symbol) in provides) {
    // TS doesn't allow symbol as index type
    return provides[key as string]
  } else if (arguments.length > 1) {
    // 默认值也支持参数
    return treatDefaultAsFactory && isFunction(defaultValue)
      ? defaultValue.call(instance.proxy)
      : defaultValue
  } else if (__DEV__) {
    warn(`injection "${String(key)}" not found.`)
  }
} else if (__DEV__) {
  warn(`inject() can only be used inside setup() or functional components.`)
}
}
inject通过注入的key,来访问其祖先组件实例中的provides对象对应的值。如果某个祖先组件中执行了provide(key, value),那么在inject(key)的过程中,我们先从其父组件的provides对象本身去查找这个key,如果找到则返回对应的数据,找不到则通过provides的原型查找这个key,而provides的原型指向的是它的父级provides对象。
可以看到,inject非常巧妙地利用了js原型链查找的方式,实现了层层查找祖先提供的同一个key所对应的数据。正因为这种查找方式,如果组件实例提供的数据和父级相同,则可以覆盖。对比模块化共享数据的方式
为啥不直接使用export/import数据来共享数据?
来看模块化共享数据的示例,首先在根组件创建一个共享的数据sharedDate:export const sharedData = ref('') export default { name: 'Root', setup() { // ... } }然后在子组件中使用:
import { sharedData } from './Root.js'
export default {
setup() {
  // 这里直接使用sharedData
}
}
和依赖注入的不同:
作用域不同:对于依赖注入,它的作用域是局部范围,所以只能把数据注入以这个节点为根的后代组件中,不是这棵子树上的组件是不能访问到该数据的;而对于模块化的方式,它的作用域是全局范围,可以在任何地方引用它导出的数据。
- 数据来源不同:对于依赖注入,后代组件不需要知道注入的数据来自哪里,对于模块化的方式,用户必须明确知道这个数据来自哪个模块,从而引用它。
- 上下文不同:对于依赖注入,提供数据的组件的上下文就是组件实例,而且同一个组件定义是可以有多个组件实例的,我们可以根据不同的组件上下文为后代组件提供不同的数据;而对于模块化,他是没有任何上下文的,仅仅是这个模块定义的数据。
依赖注入的缺陷和应用场景
正因为依赖注入是上下文相关的,所以它会将应用程序中的组件与他们当前的组织方式耦合起来,这使得重构变得困难。如果在一次重构中我们不小心挪动了有依赖注入的后代组件的位置,或者挪动了提供数据的祖先组件的位置,就有可能导致后代组件丢失注入的数据,进而导致应用程序异常。所以不推荐在普通应用程序代码中使用依赖注入。但是推荐在组件库的开发中使用依赖注入,因为对于一个特定组件,它和其嵌套的子组件上下文联系得很紧密。插槽
插槽的用法
子组件todobutton:
父组件:<button class="todo-button"> <slot></slot> </button>
其实就是在todo-button标签内部去编写插槽中的DOM内容。<todo-button> <i class="icon"></i> </todo-button>
希望子组件有多个插槽可以使用具名插槽:
然后在父组件中用……这样的方式定义内容。在父组件插槽中引入的数据,其作用域与父组件相同。<div class="layout"> <header> <slot name="header"></slot> </header> <main> <!-- 默认名称为default --> <slot></slot> </main> <footer> <slot name="footer"></slot> </footer> </div>
有时候,我们希望父组件填充插槽内容的时候,使用子组件中的一些数据。要用到作用域插槽:
注意,这里给slot加上了item属性,目的就是传递子组件中的item数据,然后就可以在父组件中使用TodoList组件了:<template> <ul> <li v-for="(item, index) in items"> <slot :item="item"></slot> </li> </ul </template> <script> export default { data() { return { items: ['feed a cat', 'buy milk'] } } } </script>
v-slot指令的值为slotProps,它是一个对象,包含了子组件往slot标签中添加的props。<todo-list> <template v-slot:default="slotProps"> <i class="icon"></i> <span>{{ slotProps.item }}</span> </template> </todo-list>插槽的实现
插槽的特点就是在父组件中去编写子组件插槽部分的模板,然后在子组件渲染的时候,把这部分模板内容填充到子组件的插槽中。所以在父组件渲染阶段,子组件插槽部分的DOM是不能渲染的,需要通过某种方式保留下来,等到子组件渲染的时候再渲染。父组件的渲染
父组件模板:
编译后的render函数: ```javascript import { toDisplayString as _toDisplayString, createElementVNode as _createElementVNode, resolveComponent as _resolveComponent, withCtx as _withCtx, openBlock as _openBlock, createBlock as _createBlock } from “vue”<layout> <template v-slot:header> <h1>{{ header }}</h1> </template> <template v-slot:default> <p>{{ main }}</p> </template> <template v-slot:footer> <p>{{ footer }}</p> </template> </layout>
export function render(_ctx, _cache, $props, $setup, $data, $options) { const _component_layout = _resolveComponent(“layout”)
return (openBlock(), _createBlock(_component_layout, null, { header: _withCtx(() => [ _createElementVNode(“h1”, null, _toDisplayString(_ctx.header), 1 / TEXT /) ]), default: _withCtx(() => [ _createElementVNode(“p”, null, _toDisplayString(_ctx.main), 1 / TEXT /) ]), footer: _withCtx(() => [ _createElementVNode(“p”, null, _toDisplayString(_ctx.footer), 1 / TEXT /) ]), : 1 / STABLE / })) }
前面我们分析过createBlock,它的内部通过执行createVNode创建了vnode。注意createBlock函数的第三个参数,它表示创建的vnode子节点,在上述示例中它是一个对象。通常,创建vnode传入的子节点是一个数组,那么对于对象类型的子节点来说,它在内部做了哪些处理呢?回顾createVNode的实现:
```typescript
function _createVNode(
type: VNodeTypes | ClassComponent | typeof NULL_DYNAMIC_COMPONENT,
props: (Data & VNodeProps) | null = null,
children: unknown = null,
patchFlag: number = 0,
dynamicProps: string[] | null = null,
isBlockNode = false
): VNode {
// 判断type是否为空
// 判断type是不是一个vnode节点
// 判断type是不是一个class类型的组件
// class和style标准化
// 对vnode的类型信息做了编码
return createBaseVNode(
type,
props,
children,
patchFlag,
dynamicProps,
shapeFlag,
isBlockNode,
true
)
}
function createBaseVNode(
type: VNodeTypes | ClassComponent | typeof NULL_DYNAMIC_COMPONENT,
props: (Data & VNodeProps) | null = null,
children: unknown = null,
patchFlag = 0,
dynamicProps: string[] | null = null,
shapeFlag = type === Fragment ? 0 : ShapeFlags.ELEMENT,
isBlockNode = false,
needFullChildrenNormalization = false
) {
// 创建vnode对象
const vnode = {
__v_isVNode: true,
__v_skip: true,
type,
props,
key: props && normalizeKey(props),
ref: props && normalizeRef(props),
scopeId: currentScopeId,
slotScopeIds: null,
children,
component: null,
suspense: null,
ssContent: null,
ssFallback: null,
dirs: null,
transition: null,
el: null,
anchor: null,
target: null,
targetAnchor: null,
staticCount: 0,
shapeFlag,
patchFlag,
dynamicProps,
dynamicChildren: null,
appContext: null
} as VNode
if (needFullChildrenNormalization) {
normalizeChildren(vnode, children)
// normalize suspense children
if (__FEATURE_SUSPENSE__ && shapeFlag & ShapeFlags.SUSPENSE) {
;(type as typeof SuspenseImpl).normalize(vnode)
}
} else if (children) {
// compiled element vnode - if children is passed, only possible types are
// string or Array.
vnode.shapeFlag |= isString(children)
? ShapeFlags.TEXT_CHILDREN
: ShapeFlags.ARRAY_CHILDREN
}
// validate key
if (__DEV__ && vnode.key !== vnode.key) {
warn(`VNode created with invalid key (NaN). VNode type:`, vnode.type)
}
// track vnode for block tree
// 处理blockTree
return vnode
}
可以看到在createVNode函数的最后,执行了createBaseVNode函数来创建vnode对象,并且最后一个参数needFullChildrenNormalization为true。在createBaseVNode函数内部会进行判断,如果needFullChildrenNormalization的值为true,则执行normalizeChildren函数,标准化传入的参数children:
export function normalizeChildren(vnode: VNode, children: unknown) {
// 子节点类型
let type = 0
const { shapeFlag } = vnode
if (children == null) {
children = null
} else if (isArray(children)) {
type = ShapeFlags.ARRAY_CHILDREN
} else if (typeof children === 'object') {
// 标准化slot子节点
if (shapeFlag & (ShapeFlags.ELEMENT | ShapeFlags.TELEPORT)) {
// 普通元素和Teleport处理
// Normalize slot to plain children for plain element and Teleport
const slot = (children as any).default
if (slot) {
// _c marker is added by withCtx() indicating this is a compiled slot
slot._c && (slot._d = false)
normalizeChildren(vnode, slot())
slot._c && (slot._d = true)
}
return
} else {
// 确定vnode子节点类型为slot子节点
type = ShapeFlags.SLOTS_CHILDREN
const slotFlag = (children as RawSlots)._
if (!slotFlag && !(InternalObjectKey in children!)) {
// if slots are not normalized, attach context instance
// (compiled / normalized slots already have context)
;(children as RawSlots)._ctx = currentRenderingInstance
} else if (slotFlag === SlotFlags.FORWARDED && currentRenderingInstance) {
// 处理类型为forwarded的情况
// a child component receives forwarded slots from the parent.
// its slot type is determined by its parent's slot type.
if (
(currentRenderingInstance.slots as RawSlots)._ === SlotFlags.STABLE
) {
;(children as RawSlots)._ = SlotFlags.STABLE
} else {
;(children as RawSlots)._ = SlotFlags.DYNAMIC
vnode.patchFlag |= PatchFlags.DYNAMIC_SLOTS
}
}
}
} else if (isFunction(children)) {
// 处理children是函数的场景,当做插槽
children = { default: children, _ctx: currentRenderingInstance }
type = ShapeFlags.SLOTS_CHILDREN
} else {
children = String(children)
// force teleport children to array so it can be moved around
if (shapeFlag & ShapeFlags.TELEPORT) {
type = ShapeFlags.ARRAY_CHILDREN
children = [createTextVNode(children as string)]
} else {
type = ShapeFlags.TEXT_CHILDREN
}
}
vnode.children = children as VNodeNormalizedChildren
vnode.shapeFlag |= type
}
normalizeChildren函数的主要作用就是标准化children以及更新vnode的节点类型shapeFlag。我们重点关注插槽的相关逻辑,此时children是object类型,经过处理,vnode.children是插槽对象,而vnode.shapeFlag会与slot子节点类型SLOT_CHILDREN进行或运算,由于当前vnode本身的shapeFlag是STATEFUL_COMPONENT,所以运算后的shapeFlag是SLOT_CHILDREN | STATEFUL_COMPONENT。
确定了shapeFlag后会影响后续的patch过程,在patch中,一般根据vnode的type和shapeFlag来决定后续的执行逻辑。由于type是组件对象,shapeFlag满足shapeFlag & 6/COMPONENT/的情况,所以会运行processComponent逻辑,递归渲染子组件。到目前为止,带有子节点插槽的组件渲染与普通的组件渲染并无区别,还是通过递归的方式进行,而插槽对象则保留在组件vnode的children属性中。
子组件的渲染
在组件渲染过程中,有一个setupComponent的流程:
function setupComponent(
instance: ComponentInternalInstance,
isSSR = false
) {
isInSSRComponentSetup = isSSR
const { props, children } = instance.vnode
// 判断是否是一个有状态的组件
const isStateful = isStatefulComponent(instance)
// 初始化props
initProps(instance, props, isStateful, isSSR)
// 初始化插槽
initSlots(instance, children)
// 设置有状态的组件实例
const setupResult = isStateful
? setupStatefulComponent(instance, isSSR)
: undefined
isInSSRComponentSetup = false
return setupResult
}
这里的instance.vnode就是组件vnode,可以从中拿到子组件的实例、props、children等数据,其中children就是插槽对象。然后通过initSlots函数去初始化插槽:
export const initSlots = (
instance: ComponentInternalInstance,
children: VNodeNormalizedChildren
) => {
if (instance.vnode.shapeFlag & ShapeFlags.SLOTS_CHILDREN) {
const type = (children as RawSlots)._
if (type) {
// users can get the shallow readonly version of the slots object through `this.$slots`,
// we should avoid the proxy object polluting the slots of the internal instance
instance.slots = toRaw(children as InternalSlots)
// make compiler marker non-enumerable
def(children as InternalSlots, '_', type)
} else {
normalizeObjectSlots(
children as RawSlots,
(instance.slots = {}),
instance
)
}
} else {
instance.slots = {}
if (children) {
normalizeVNodeSlots(instance, children)
}
}
def(instance.slots, InternalObjectKey, 1)
}
由于组件vnode的shapeFlag满足instance.vnode.shapeFlag & ShapeFlags.SLOTS_CHILDREN,所以我们可以把插槽对象保留到instance.slots对象中,后续的程序就可以从instance.slots拿到插槽对象了。
到目前为止,子组件拿到了父组件传入的插槽对象,那么它是如何把插槽对象渲染到页面上的呢?
看子组件模板:
<div class="layout">
<header>
  <slot name="header"></slot>
</header>
  <main>
<!--     默认名称为default -->
  <slot></slot>
</main>
<footer>
  <slot name="footer"></slot>
</footer>
</div>
render函数:
import { renderSlot as _renderSlot, createElementVNode as _createElementVNode, openBlock as _openBlock, createElementBlock as _createElementBlock } from "vue"

export function render(_ctx, _cache, $props, $setup, $data, $options) {
  return (_openBlock(), _createElementBlock("div", { class: "layout" }, [
    _createElementVNode("header", null, [
      _renderSlot(_ctx.$slots, "header")
    ]),
    _createElementVNode("main", null, [
      _renderSlot(_ctx.$slots, "default")
    ]),
    _createElementVNode("footer", null, [
      _renderSlot(_ctx.$slots, "footer")
    ])
  ]))
}
可以看出,子组件插槽部分的DOM主要是通过renderSlot函数渲染生成的:
function renderSlot(
  slots: Slots,
  name: string,
  props: Data = {},
  // this is not a user-facing function, so the fallback is always generated by
  // the compiler and guaranteed to be a function returning an array
  fallback?: () => VNodeArrayChildren,
  noSlotted?: boolean
): VNode {
  if (
    currentRenderingInstance!.isCE ||
    (currentRenderingInstance!.parent &&
      isAsyncWrapper(currentRenderingInstance!.parent) &&
      currentRenderingInstance!.parent.isCE)
  ) {
    return createVNode(
      'slot',
      name === 'default' ? null : { name },
      fallback && fallback()
    )
  }

  let slot = slots[name]

  if (__DEV__ && slot && slot.length > 1) {
    warn(
      `SSR-optimized slot function detected in a non-SSR-optimized render ` +
        `function. You need to mark this component with $dynamic-slots in the ` +
        `parent template.`
    )
    slot = () => []
  }

  // a compiled slot disables block tracking by default to avoid manual
  // invocation interfering with template-based block tracking, but in
  // `renderSlot` we can be sure that it's template-based so we can force
  // enable it.
  if (slot && (slot as ContextualRenderFn)._c) {
    // 基于模板的编译,开启Block tracking
    ;(slot as ContextualRenderFn)._d = false
  }
  openBlock()

  // 如果slot内部全是注释节点,则不是一个合法的插槽
  const validSlotContent = slot && ensureValidVNode(slot(props))
  const rendered = createBlock(
    Fragment,
    { key: props.key || `_${name}` },
    validSlotContent || (fallback ? fallback() : []),
    validSlotContent && (slots as RawSlots)._ === SlotFlags.STABLE
      ? PatchFlags.STABLE_FRAGMENT
      : PatchFlags.BAIL
  )
  if (!noSlotted && rendered.scopeId) {
    rendered.slotScopeIds = [rendered.scopeId + '-s']
  }
  if (slot && (slot as ContextualRenderFn)._c) {
    // 恢复关闭Block tracking
    ;(slot as ContextualRenderFn)._d = true
  }
  return rendered
}
renderSlot函数拥有五个参数,这里只关注前三个参数,其中slots是子组件初始化时获取的插槽对象;name表示插槽的名称;props是插槽的数据,主要用于作用域插槽。
首先根据第二个参数name获取对应的插槽函数slot。然后执行slot函数获取插槽的内容,注意这里会执行ensureValidVNode进行判断,如果插槽中全是注释节点,则不是一个合法的插槽内容。最后通过createBlock创建了Fragment类型的vnode节点并返回,其中children是validSlotContent。也就是说,在子组件执行renderSlot的时候,创建了与插槽内容对应的vnode节点,后续在patch的过程中就可以渲染它并生成对应的DOM了。那么slot函数函数具体执行了什么逻辑?来看一下示例中的instance.slots的值:
{
  header: _withCtx(() => [
    _createElementVNode("h1", null, _toDisplayString(_ctx.header), 1 /*TEXT*/)
  ]),
  default: _withCtx(() => [
    _createElementVNode("p", null, _toDisplayString(_ctx.main), 1 /*TEXT*/)
  ]),
  footer: _withCtx(() => [
    _createElementVNode("p", null, _toDisplayString(_ctx.footer), 1 /*TEXT*/)
  ]),
  _: 1 /* STABLE */
}
_withCtx函数
function withCtx(fn, ctx = currentRenderingInstance) {
  if (!ctx) return fn
  if(fn._n) {
    // 已被标准化,直接返回
    return fn
  }
  const renderFnWithContext = (...args) => {
    // 阻止Block tracking
    if(renderFnWithContext._d) {
      setBlockTracking(-1)
    }
    const prevInstance = setCurrentRenderingInstance(ctx)
    const res = fn(...args)
    setCurrentRenderingInstance(prevInstance)
    // 恢复Block tracking
    if(renderFnWithContext._d) {
      setBlockTracking(1)
    }
    return res
  }
  // 标记已被标准化,避免重复执行该过程
  renderFnWithContext._n = true
  // 标记它是一个编译的插槽
  renderFnWithContext._c = true
  // 默认阻止Block tracking
  renderFnWithContext._d = true
  return renderFnWithContext
}
withCtx的主要作用就是给待执行的函数fn做一层封装,使fn执行时当前组件实例指向上下文变量ctx。ctx的默认值是currentRenderingInstance,也就是执行render函数时的组件实例。
对于withCtx返回新的函数renderFnWithContext来说,当它执行的时候,会先执行setCurrentRenderingInstance,把ctx设置为当前渲染组件实例,并返回之前的渲染组件实例prevInstance。接着执行fn,执行完毕后,再把之前的prevInstance设置为当前渲染组件实例。
通过withCtx的封装,保证了在子组件中渲染具体插槽内容时,渲染组件实例仍然是父组件实例,这样就保证了数据作用域来源于父组件。
回到renderSlot函数,最终插槽对应的vnode就变成了如下结果:
createBlock(Fragment, { key: props.key }, [_createElementVNode("h1", null, _toDisplayString(_ctx.header), 1 /* TEXT */)], 64 /* STABLE_FRAGMENT */)
createBlock内部会执行createVNode创建vnode,vnode创建完成后,仍然会通过patch把vnode挂载到页面上,那么对于插槽的渲染而言,patch过程有什么不同呢?
注意,这里vnode的type是Fragment,所以在执行patch时,会走processFragment的处理逻辑:
const processFragment = (
  n1: VNode | null,
  n2: VNode,
  container: RendererElement,
  anchor: RendererNode | null,
  parentComponent: ComponentInternalInstance | null,
  parentSuspense: SuspenseBoundary | null,
  isSVG: boolean,
  slotScopeIds: string[] | null,
  optimized: boolean
) => {
  const fragmentStartAnchor = (n2.el = n1 ? n1.el : hostCreateText(''))!
  const fragmentEndAnchor = (n2.anchor = n1 ? n1.anchor : hostCreateText(''))!

  // ...
  if (n1 == null) {
    // 插入节点
    // 先在前后插入两个空文本节点
    hostInsert(fragmentStartAnchor, container, anchor)
    hostInsert(fragmentEndAnchor, container, anchor)
    // a fragment can only have array children
    // since they are either generated by the compiler, or implicitly created
    // from arrays.
    // 再挂载子节点
    mountChildren(
      n2.children as VNodeArrayChildren,
      container,
      fragmentEndAnchor,
      parentComponent,
      parentSuspense,
      isSVG,
      slotScopeIds,
      optimized
    )
  } else {
    // 更新节点
  }
}
这里只分析挂载子节点的过程,所以n1的值为null,n2就是我们前面创建的vnode节点,它的children是一个数组。
首先通过hostInsert在容器的前后插入两个空文本节点,然后再以尾部的文本节点作为参考锚点,通过mountChildren把children挂载到container容器中。
作用域插槽
父组件模板:
<todo-item>
  <template v-slot:default="slotProps">
    <i class="icon"></i>
    <span class="green">{{ slotProps.item }}</span>
  </template>
</todo-item>
render函数:
import { createElementVNode as _createElementVNode, toDisplayString as _toDisplayString, resolveComponent as _resolveComponent, withCtx as _withCtx, openBlock as _openBlock, createBlock as _createBlock } from "vue"

export function render(_ctx, _cache, $props, $setup, $data, $options) {
  const _component_todo_item = _resolveComponent("todo-item")

  return (_openBlock(), _createBlock(_component_todo_item, null, {
    default: _withCtx((slotProps) => [
      _createElementVNode("i", { class: "icon" }),
      _createElementVNode("span", { class: "green" }, _toDisplayString(slotProps.item), 1 /* TEXT */)
    ]),
    _: 1 /* STABLE */
  }))
}
和普通插槽相比,作用域插槽编译生成的render函数中的插槽对象稍有不同:使用withCtx封装的插槽函数多了一个参数slotProps,这样函数内部就可以从slotProps中获取数据了。
那么slotProps是如何传入的呢?看子组件模板:
<div class="todo-item">
  <slot :item="item"></slot>
</div>
render函数:
import { renderSlot as _renderSlot, openBlock as _openBlock, createElementBlock as _createElementBlock } from "vue"

export function render(_ctx, _cache, $props, $setup, $data, $options) {
  return (_openBlock(), _createElementBlock("div", { class: "todo-item" }, [
    _renderSlot(_ctx.$slots, "default", { item: _ctx.item })
  ]))
}
也是通过renderSlot函数去渲染插槽节点内容,唯一不同的是,renderSlot多了第三个参数,这就是子组件提供的数据。

若有收获,就点个赞吧
0 人点赞
