什么是事务
事务一般特指数据库事务(Database Transaction),是指作为一个程序执行单元执行的一系列操作,要么完全执行,要么完全不执行. 事务特性:
- 原子性(atomicity):一个事务是一个不可分割的工作单位.
- 一致性(consistency):事务必须是使数据库从一个一致性状态变到另一个一致性状态.
- 业务的一致性,例如以商品订单为例:订单表中插入一条记录.购买了10件编号为1的商品,结果在update里给编号为1的商品修改了数量减1,这样的不符合业务规则,SQL语句执行没有问题原子性是符合的.所以一致性是从业务角度来分析的.
- 隔离性(isolation):一个事务的执行不能被其他事务干扰.
- 例如:并发的情况,其中一个事务生成订单,在订单表里面插入一条记录编号01的商品购买了10个.第二个修改库存数的时候还没有改,结果另一个事务也生成了一个订单,也是购买了01的商品,把库存数量改为0了.两个事务互相干扰了.如何防止干扰呢? 其实就是加锁,当一个事务操作01号商品,其他事务不能进行操作.
- 持久性(durability):一个事务一旦提交,它对数据库中数据的改变就应该是永久性的.
MySQL 事务处理
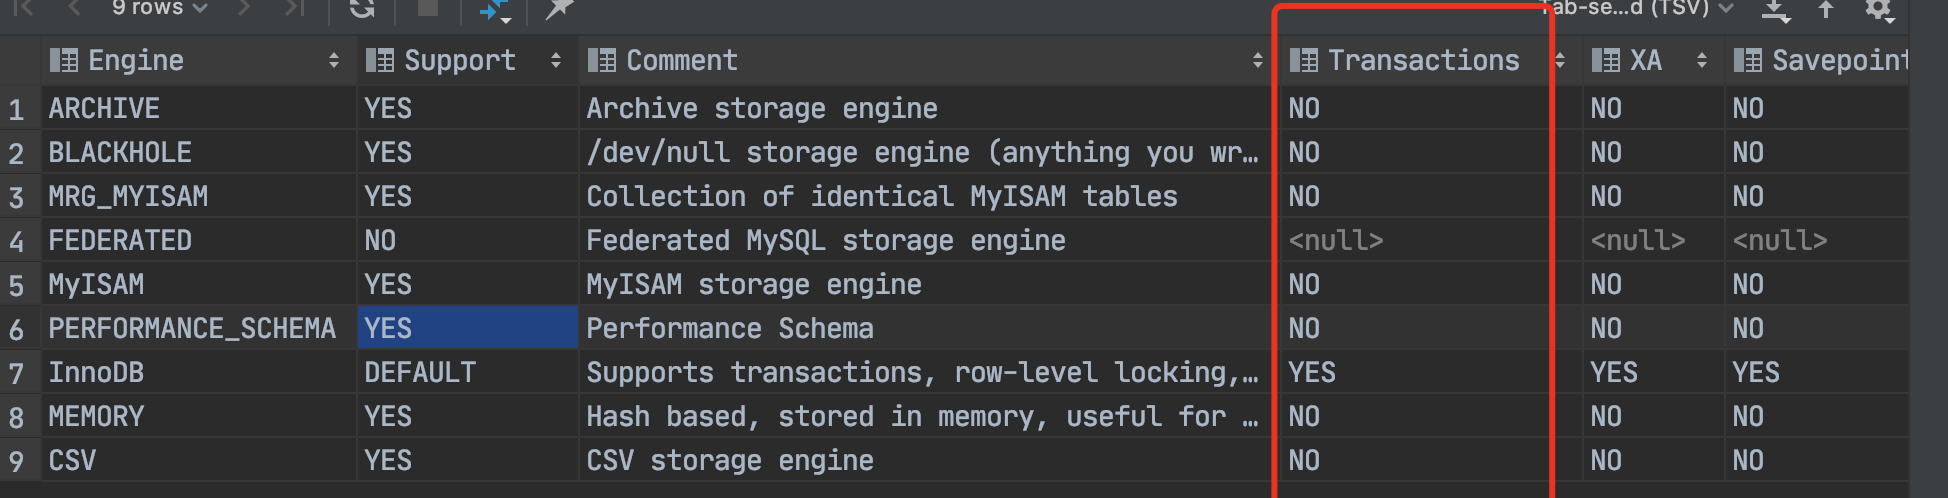
MySQL中只有使用Innodb数据引擎的数据库或表才支持事务. MySQL默认以自动提交(autocommit)模式运行
使用show engines;—查看服务器支持的引擎
当然也可以修改默认引擎:default-storage-engin=Innodb —my.ini 修改默认引擎.
BEGIN(START TRANSACTION) - 显示开启一个事务COMMIT 提交事务,并使已对数据库进行的所有修改变为永久性的ROLLBACK 回滚事务,并撤销正在进行的所有未提交的修改.begin;update productset stock = 90where id='10001';commit;//ROLLBACK;
事务并发问题
多个事务交互执行,这个过程中间就会出现问题.
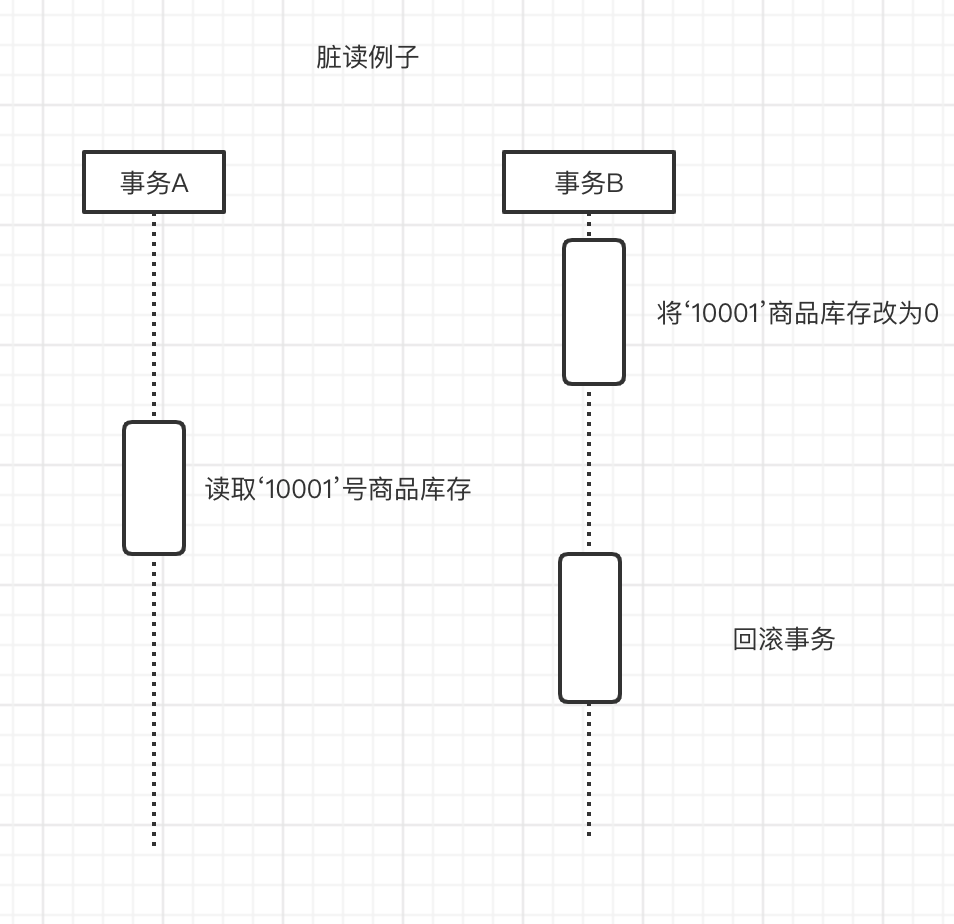
- 脏读
如下图所示: 事务A读取到到‘10001’商品库存为0,而事务B又将事务进行了回滚.事务A读取到商品库存肯定是不对的,这就是脏读.
每个session的只能够读取永久性的数据,而不能读取内存中的数据,不去读取没有提交的事务.
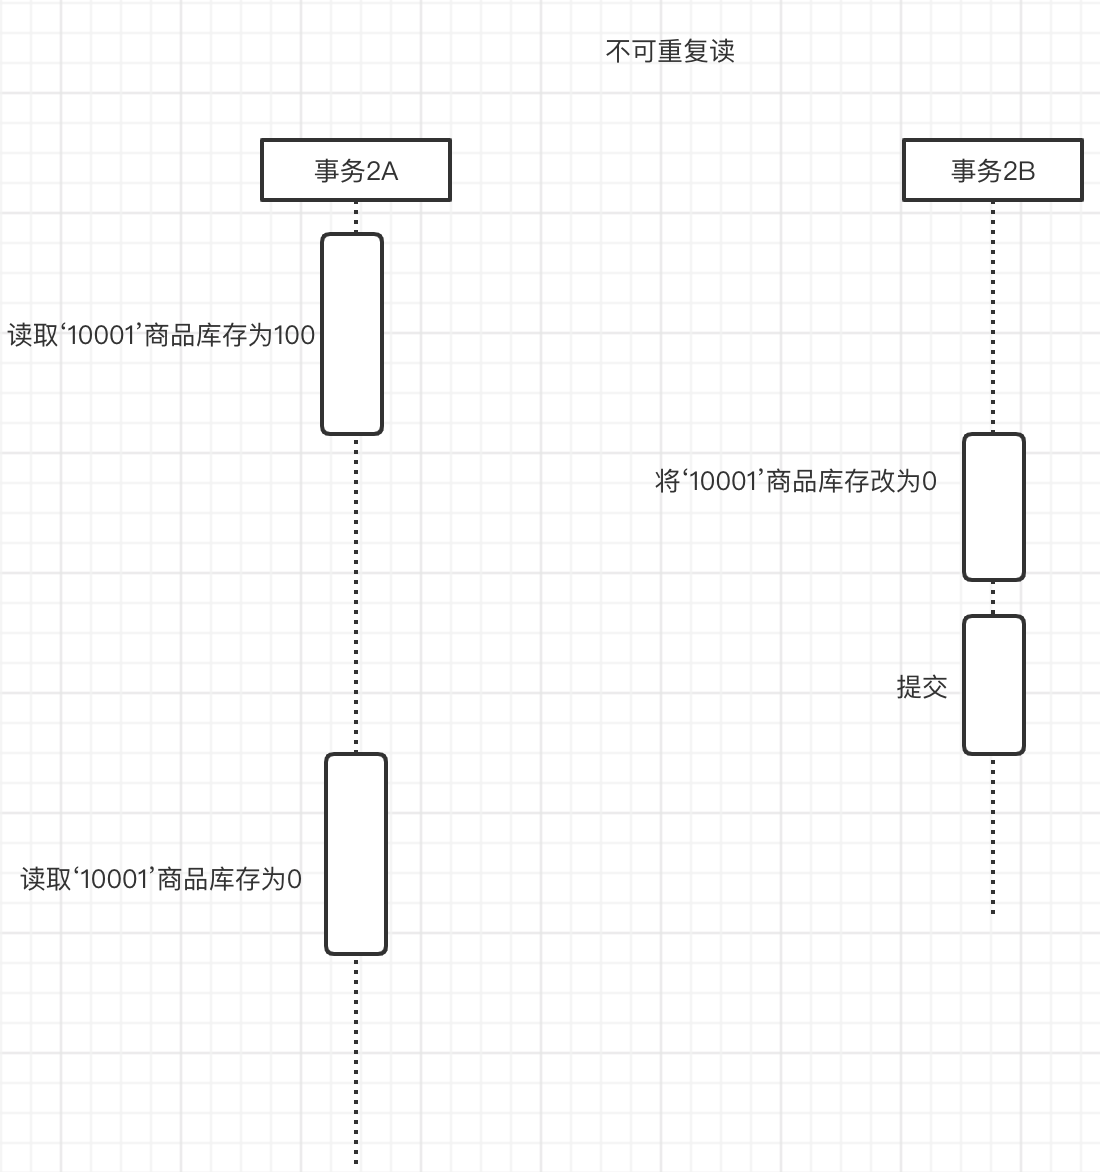
- 不可重复读
不可重复读:意思就是两次读取数据不一致,如下图所示,比如事务2A读取到‘10001’商品库存为100,这时候事务2B修改了商品‘10001’的库存改为0,并且提交了事务,而这时事务2A有读取‘10001’商品结果库存为0.
锁住事务2A,事务2B不能进行操作. 其实就是锁行,锁住商品表中的‘10001’这条记录,不允许其他的事务操作这一行.
- 幻读
如下图所示:事务3A将所有商品库存改为0,这时候事务3B又去插入一个商品的库存,并提交了事务.而事务3A去查看修改结果,发现商品库存中仍然还有商品,就像是出现幻觉一样,这就是幻读.
如果使用锁行的操作,是不能解决幻读的问题的,因为事务3B是新插入一行,要解决幻读就必须锁表. 解决幻读:锁表,在事务3A没有操作完成前,其他事务不允许操作商品表.这样就解决了幻读的问题.

MySQL事务隔离级别
| 事务隔离级别 | 脏读 | 不可重复读 | 幻读 |
|---|---|---|---|
| 读未提交(read-uncommitted) | 是 | 是 | 是 |
| 读已提交(read-committed) | 否 | 是 | 是 |
| 可重复读(repeatable-read) | 否 | 否 | 是 |
| 串行化(serializable) | 否 | 否 | 否 |
//mysql 5.x版本查看隔离级别
select @@tx_isolation;
//mysql 8.0版本
select @@transaction_isolation;
运行命令,隔离级别如下: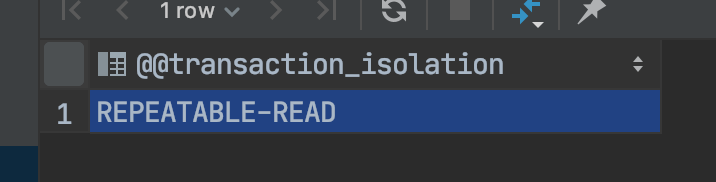
设置当前会话隔离级别
set session transaction isolation level read uncommitted;//设置读未提交级别
-- 模拟脏读
-- 事务A
begin;
select stock from produce where id = '10001';
rollback;

-- 事务B
begin;
update product set stock=0 where id = '10001';
rollback;
如上述,我们来模拟一下脏读,首先这是事务隔离级别为 read uncommitted
事务B操作: 并没有提交事务
事务A操作:
读取到的结果: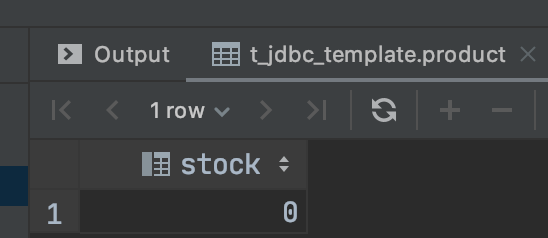
模拟不可重复读
--模拟不可重复读
-- 事务A
begin;
select stock from produce where id = '10001';
select stock from produce where id = '10001';
rollback;

-- 事务B
begin;
update product set stock=0 where id = '10001';
rollback;
事务A先进行查询操作: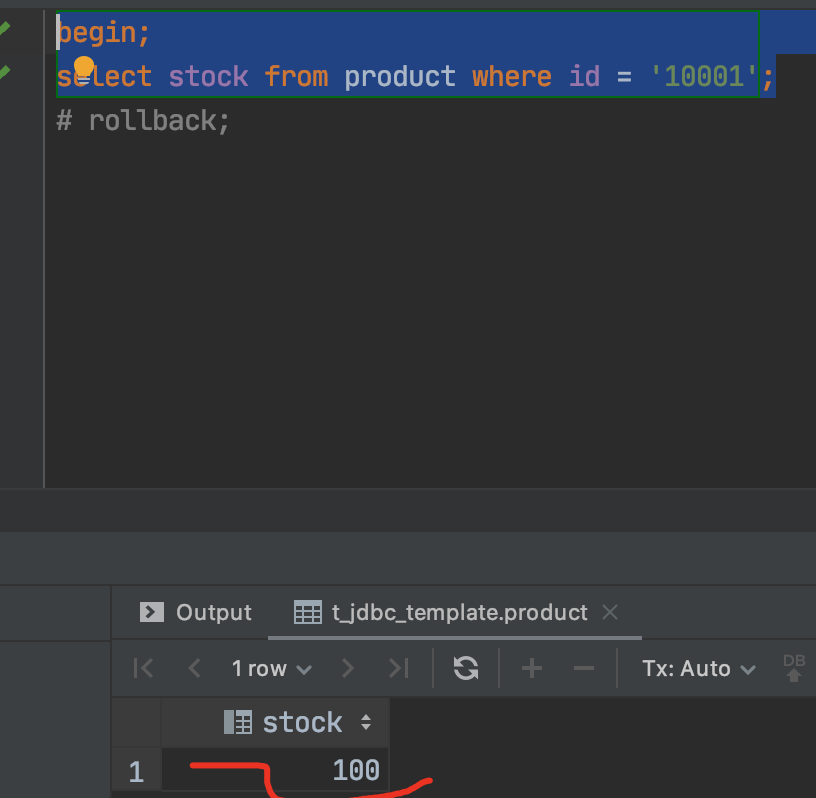
事务B将库存清0,不提交事务:
事务A再去查询该商品: 查询到的库存是0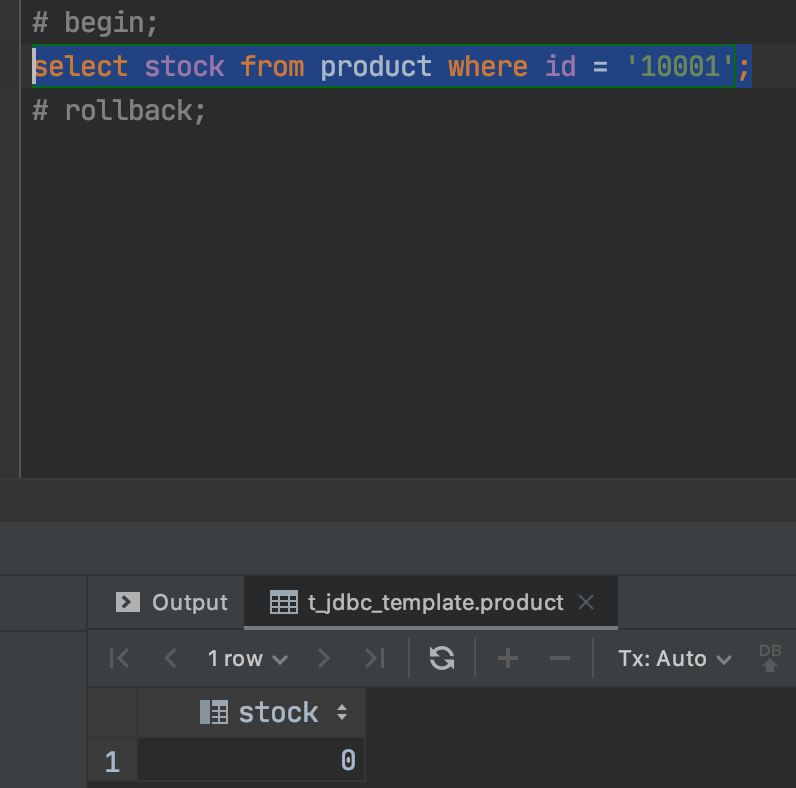
事务B进行事务回滚:
事务A再次查询,事务回滚: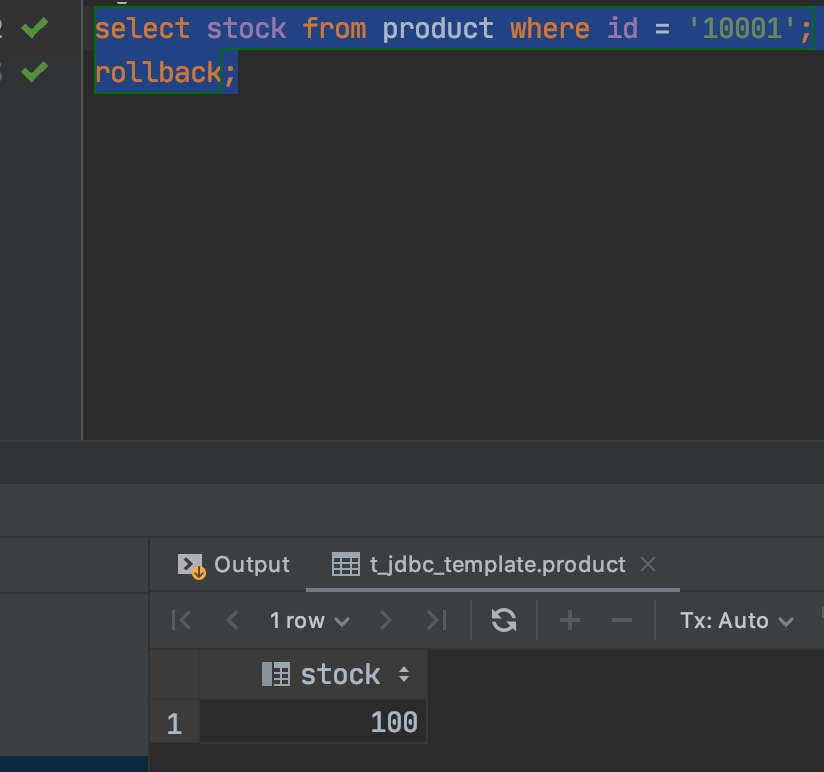
模拟幻读操作
-- 事务A
begin;
update product set stock=0;
select * from product;
rollback;

-- 事务B
begin;
insert into product values('10005','123',199,100,'正常');
rollback;
首先执行,事务A:
begin; update product set stock=0;
然后执行事务B:
begin; insert into product values(‘10005’,’123’,199,100,’正常’);
事务A执行查询操作:如下可以看到新插入的商品发生了幻读.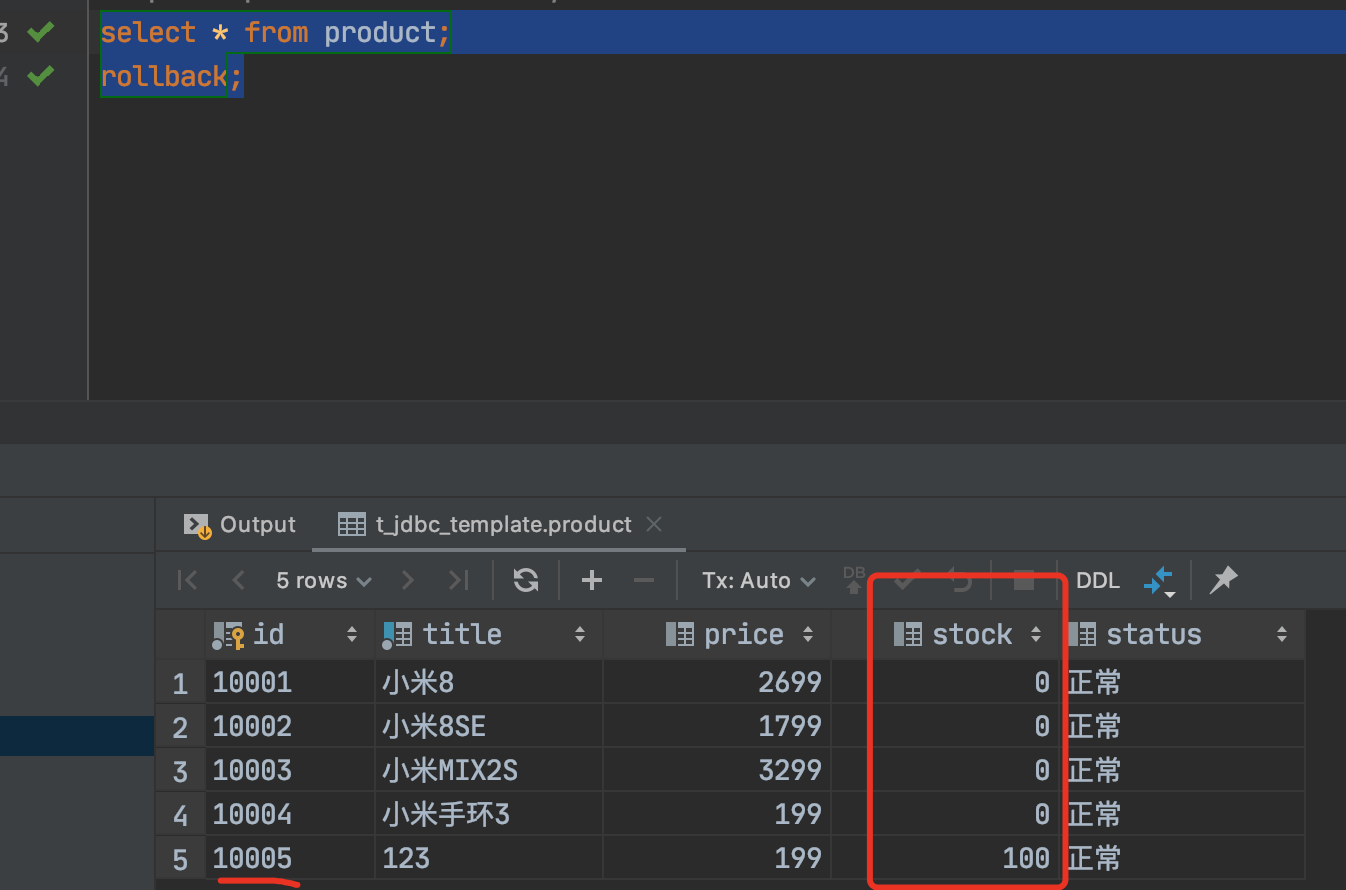
//测试其他隔离级别
JDBC 事务处理
- Connection接口
- JDBC事务处理是基于Connection的,JDBC通过Connection对象进行事务管理.
- JDBC默认事务处理行为是自动提交.
- 事务相关方法
- setAutoCommit 设置自动提交
- commit 提交事务
- rollback 回滚事务
JDBC 事务处理如下:
public void addOrder() {
        Connection connection = null;
        Statement statement = null;
        try {
            Class.forName(driver);//加载驱动
            connection = DriverManager.getConnection(url, name, password);
            connection.setAutoCommit(false);//手动提交事务
            statement = connection.createStatement();
            statement.execute("insert into `order` values('10002','10001',2,2499,now(),null,null,'王某','110','北京王府井','待发货')");
            statement.execute("update product set stock = stock-2 where id='10001'");
            connection.commit();
        } catch (Exception e) {
            try {
                if (connection != null) {
                    connection.rollback();
                }
            } catch (SQLException ex) {
                ex.printStackTrace();
            }
            e.printStackTrace();
        } finally {
            try {
                if (statement != null) {
                    statement.close();
                }
                if (connection != null) {
                    connection.close();
                }
            } catch (SQLException e) {
                e.printStackTrace();
            }
        }
    }
JDBC 事务的隔离级别
TRANSACTION_NONE( 不支持事务)TRANSACTION_READ_UNCOMMITTEDTRANSACTION_READ_COMMITTEDTRANSACTION_REPEATABLE_READTRANSACTION_SERIALIZABLE
事务隔离级别设置
getTransactionIsolation获取当前隔离级别setTransactionIsolation设置隔离级别
简单了解即可.
Spring事务处理
API 图
TransationDefinition 接口
- 隔离级别
- ISOLATION_DEFAULT(使用数据库默认)…其他都是与上述一样的.
- …..
Spring 事务传播行为:
- PROPAGATION_REQUIRED : 支持当前事务,如果当前没有事务,就新建一个事务
- PROPAGATION_SUPPORTS: 支持当前事务,如果当前没有事务.就以非事务方式执行.
- PROPAGATION_MANDATORY:支持当前事务,如果当前没有事务,就抛出异常
- PROPAGATION_REQUIRES_NEW:新建事务,如果当前存在事务,把当前事务挂起
- PROPAGATION_NOT_SUPPORTED:以非事务方式执行操作,如果当前存在事务,就把当前事务挂起
- PROPAGETION_NEVER:以非事务方式执行,如果当前事务存在,则抛出异常
- PROPAGATION_NESTED:如果当前存在事务,则在嵌套事务内执行,如果当前没有事务,就新建一个事务.
方法调用,调用其他方法怎么去处理的方式.
public void a(){
        //begin
        //基本步骤
        b();
        //commit
    }

    public void b(){
        //begin
        //基本步骤
        //commit
    }
Spring 事务的具体实现
首先带入依赖,使用Spring jdbcTemplate的方式去实现数据的操作,这里就不再写代码了非常简单.
        <dependency>
            <groupId>org.springframework</groupId>
            <artifactId>spring-jdbc</artifactId>
            <version>4.2.4.RELEASE</version>
        </dependency>
然后需要配置最基本的applicationContext.xml
<?xml version="1.0" encoding="UTF-8"?>
<beans xmlns="http://www.springframework.org/schema/beans"
       xmlns:xsi="http://www.w3.org/2001/XMLSchema-instance"
       xmlns:context="http://www.springframework.org/schema/context"
       xmlns:aop="http://www.springframework.org/schema/aop"
       xmlns:tx="http://www.springframework.org/schema/tx"
       xsi:schemaLocation="http://www.springframework.org/schema/beans
       http://www.springframework.org/schema/beans/spring-beans.xsd
       http://www.springframework.org/schema/context
       http://www.springframework.org/schema/context/spring-context.xsd
       http://www.springframework.org/schema/aop
       http://www.springframework.org/schema/aop/spring-aop.xsd
       http://www.springframework.org/schema/tx
       http://www.springframework.org/schema/tx/spring-tx.xsd">

    <!-- 配置dataSource -->
    <bean id="dataSource" class="org.springframework.jdbc.datasource.DriverManagerDataSource">
        <property name="driverClassName" value="com.mysql.jdbc.Driver"/>
        <property name="url" value="jdbc:mysql://localhost:3306/t_jdbc_template"/>
        <property name="username" value="root"/>
        <property name="password" value="root"/>
    </bean>

    <!-- 配置jdbc template -->
    <bean id="jdbcTemplate" class="org.springframework.jdbc.core.JdbcTemplate">
        <property name="dataSource" ref="dataSource"/>
    </bean>
    <!-- 开启Spring IOC 注解自动扫描 -->
    <context:component-scan base-package="com.prim.dao"/>
</beans>
- 基于底层API的编程式事务管理
- PlatformTransactionManager
- TransactionDefinition
- TransactionStatus
下面我们来看如何使用最基本的底层API实现事务管理,新建一个spring-service1.xml.
首先要定义事务管理器以及配置事务定义,这个配置文件是在applicationContext.xml配置文件的基础上配置的.
使用Spring IOC 注解
<?xml version="1.0" encoding="UTF-8"?>
<beans xmlns="http://www.springframework.org/schema/beans"
       xmlns:xsi="http://www.w3.org/2001/XMLSchema-instance"
       xmlns:context="http://www.springframework.org/schema/context"
       xmlns:aop="http://www.springframework.org/schema/aop"
       xmlns:tx="http://www.springframework.org/schema/tx"
       xsi:schemaLocation="http://www.springframework.org/schema/beans
       http://www.springframework.org/schema/beans/spring-beans.xsd
       http://www.springframework.org/schema/context
       http://www.springframework.org/schema/context/spring-context.xsd
       http://www.springframework.org/schema/aop
       http://www.springframework.org/schema/aop/spring-aop.xsd
       http://www.springframework.org/schema/tx
       http://www.springframework.org/schema/tx/spring-tx.xsd">

    <!-- 引入配置文件 -->
    <import resource="applicationContext.xml"/>
    <!-- 开启Spring IOC 注解自动扫描 -->
    <context:component-scan base-package="com.prim.service.impl1"/>

    <!-- 配置事务管理器 -->
    <bean id="transactionManager" class="org.springframework.jdbc.datasource.DataSourceTransactionManager">
        <!-- 配置数据源 -->
        <property name="dataSource" ref="dataSource"/>
    </bean>

    <!-- 配置事务定义 -->
    <bean id="transactionDefinition" class="org.springframework.transaction.support.DefaultTransactionDefinition">
        <!-- 设置事务传播行为 -->
        <property name="propagationBehaviorName" value="PROPAGATION_REQUIRED"/>
        <!-- 也可以配置隔离级别等行为 -->
    </bean>
</beans>
具体的使用方式如下: 使用的方式和我们之前使用JDBC的方式没有什么区别,开启事务 提交事务 回滚事务.那么Spring 有没有提供更简单的事务管理方式呢?答案当然是有的.
@Service("orderService")
public class OrderServiceImpl implements OrderService {

    @Autowired
    private OrderDao orderDao;

    @Autowired
    private ProductDao productDao;

    @Autowired
    private PlatformTransactionManager transactionManager;

    @Autowired
    private TransactionDefinition transactionDefinition;

    public void addOrder(Order order) {
        //设置业务规则
        order.setCreateTime(new Date());
        order.setStatus("待付款");
        //开启一个事务
        TransactionStatus transactionStatus = transactionManager.getTransaction(transactionDefinition);
        try {
            //插入订单表
            orderDao.insert(order);
            Product product = productDao.findOne(order.getPid());
            //修改库存数
            product.setStock(product.getStock() - order.getNumber());
            productDao.update(product);
            //提交事务
            transactionManager.commit(transactionStatus);
        } catch (Exception e) {
            transactionManager.rollback(transactionStatus);
            e.printStackTrace();
        }

    }
}
- 基于TransactionTemplate的编程式事务管理
- TransactionTemplate
TransactionTemplate 简化了事务开启和事务提交,来看如下代码.
首先配置配置文件:
<?xml version="1.0" encoding="UTF-8"?>
<beans xmlns="http://www.springframework.org/schema/beans"
       xmlns:xsi="http://www.w3.org/2001/XMLSchema-instance"
       xmlns:context="http://www.springframework.org/schema/context"
       xmlns:aop="http://www.springframework.org/schema/aop"
       xmlns:tx="http://www.springframework.org/schema/tx"
       xsi:schemaLocation="http://www.springframework.org/schema/beans
       http://www.springframework.org/schema/beans/spring-beans.xsd
       http://www.springframework.org/schema/context
       http://www.springframework.org/schema/context/spring-context.xsd
       http://www.springframework.org/schema/aop
       http://www.springframework.org/schema/aop/spring-aop.xsd
       http://www.springframework.org/schema/tx
       http://www.springframework.org/schema/tx/spring-tx.xsd">

    <!-- 引入配置文件 -->
    <import resource="applicationContext.xml"/>
    <!-- 开启Spring IOC 注解自动扫描 -->
    <context:component-scan base-package="com.prim.service.impl2"/>

    <!-- 配置事务管理器 -->
    <bean id="transactionManager" class="org.springframework.jdbc.datasource.DataSourceTransactionManager">
        <!-- 配置数据源 -->
        <property name="dataSource" ref="dataSource"/>
    </bean>

    <!-- 配置事务定义 -->
    <bean id="transactionTemplate" class="org.springframework.transaction.support.TransactionTemplate">
        <!-- 配置事务管理器 -->
        <property name="transactionManager" ref="transactionManager"/>
        <!-- 设置事务传播行为 -->
        <property name="propagationBehaviorName" value="PROPAGATION_REQUIRED"/>
        <!-- 也可以配置隔离级别等行为 -->
    </bean>
</beans>
调用方式如下:
transactionTemplate 提供了一个回调,只需要在回调中处理业务逻辑,它帮助我们开启事务和提交事务.
transactionStatus.setRollbackOnly();//设置回滚
java@Service("orderService")
public class OrderServiceImpl implements OrderService {

    @Autowired
    private OrderDao orderDao;

    @Autowired
    private ProductDao productDao;

    //不需要在自己开启事务和提交事务 只需要明确回滚即可
    @Autowired
    private TransactionTemplate transactionTemplate;


    public void addOrder(final Order order) {
        //设置业务规则
        order.setCreateTime(new Date());
        order.setStatus("待付款");
        //自动帮助提交
        transactionTemplate.execute(new TransactionCallback<Object>() {
            public Object doInTransaction(TransactionStatus transactionStatus) {
                //开启一个事务
                try {
                    //插入订单表
                    orderDao.insert(order);
                    Product product = productDao.findOne(order.getPid());
                    //修改库存数
                    product.setStock(product.getStock() - order.getNumber());
                    productDao.update(product);
                    //提交事务
                } catch (Exception e) {
                    e.printStackTrace();
                    transactionStatus.setRollbackOnly();//设置回滚
                }
                return null;
            }
        });
    }
}
上述两种事务处理的方式都是比较麻烦的,但是Spring 还提供了更加便捷的事务处理方式,就是声明式事务处理
Spring 声明式事务处理
Spring的声明式事务处理是建立在AOP的基础上的.其本质是对方法前后进行拦截,然后在目标方法开始之前创建或者加入一个事务,在执行完目标方法之后根据执行情况提交或者回滚事务. 建议在开发中使用声明式事务,是因为这样可以使得业务代码纯粹干净,方便后期的代码维护.
- 基于TransactionInterceptor的声明式事务处理
定义好业务bean类
@Service("orderService")
public class OrderServiceImpl implements OrderService {

    @Autowired
    private OrderDao orderDao;

    @Autowired
    private ProductDao productDao;


    public void addOrder(final Order order) {
        //设置业务规则
        order.setCreateTime(new Date());
        order.setStatus("待付款");
        //插入订单表
        orderDao.insert(order);
        Product product = productDao.findOne(order.getPid());
        //修改库存数
        product.setStock(product.getStock() - order.getNumber());
        productDao.update(product);
    }
}
然后进行配置.需要注意:Spring事务处理都需要配置事务管理器,不管使用哪种方式,这样配置事务拦截器,当管理以及维护的bean多了起来很难进行维护.
<?xml version="1.0" encoding="UTF-8"?>
<beans xmlns="http://www.springframework.org/schema/beans"
       xmlns:xsi="http://www.w3.org/2001/XMLSchema-instance"
       xmlns:context="http://www.springframework.org/schema/context"
       xmlns:aop="http://www.springframework.org/schema/aop"
       xmlns:tx="http://www.springframework.org/schema/tx"
       xsi:schemaLocation="http://www.springframework.org/schema/beans
       http://www.springframework.org/schema/beans/spring-beans.xsd
       http://www.springframework.org/schema/context
       http://www.springframework.org/schema/context/spring-context.xsd
       http://www.springframework.org/schema/aop
       http://www.springframework.org/schema/aop/spring-aop.xsd
       http://www.springframework.org/schema/tx
       http://www.springframework.org/schema/tx/spring-tx.xsd">

    <!-- 引入配置文件 -->
    <import resource="applicationContext.xml"/>

    <!-- 配置事务管理器 -->
    <bean id="transactionManager" class="org.springframework.jdbc.datasource.DataSourceTransactionManager">
        <!-- 配置数据源 -->
        <property name="dataSource" ref="dataSource"/>
    </bean>

    <bean id="orderServiceTarget" class="com.prim.service.impl.OrderServiceImpl"/>

    <!-- 事务拦截配置-->
    <bean id="transactionInterceptor" class="org.springframework.transaction.interceptor.TransactionInterceptor">
        <!-- 配置事务管理器 -->
        <property name="transactionManager" ref="transactionManager"/>
        <property name="transactionAttributes">
            <props>
                <!-- 目标对象的方法名 查询数据都设置为只读事务-->
                <prop key="get*">PROPAGATION_REQUIRED,readOnly</prop>
                <prop key="find*">PROPAGATION_REQUIRED,readOnly</prop>
                <prop key="search*">PROPAGATION_REQUIRED,readOnly</prop>
                <!-- 其他都是以事务的方式 -->
                <prop key="*">PROPAGATION_REQUIRED</prop>
            </props>
        </property>
    </bean>

    <bean id="orderService" class="org.springframework.aop.framework.ProxyFactoryBean">
        <property name="target" ref="orderServiceTarget"/>
        <property name="interceptorNames">
            <list>
                <idref bean="transactionInterceptor"/>
            </list>
        </property>
    </bean>

</beans>
- 基于TransactionProxyFactoryBean的声明式事务处理
TransactionProxyFactoryBean 配置方式和 TransactionInterceptor 配置方式是非常类似的,是和每个bean单独的依赖的.
<?xml version="1.0" encoding="UTF-8"?>
<beans xmlns="http://www.springframework.org/schema/beans"
       xmlns:xsi="http://www.w3.org/2001/XMLSchema-instance"
       xmlns:context="http://www.springframework.org/schema/context"
       xmlns:aop="http://www.springframework.org/schema/aop"
       xmlns:tx="http://www.springframework.org/schema/tx"
       xsi:schemaLocation="http://www.springframework.org/schema/beans
       http://www.springframework.org/schema/beans/spring-beans.xsd
       http://www.springframework.org/schema/context
       http://www.springframework.org/schema/context/spring-context.xsd
       http://www.springframework.org/schema/aop
       http://www.springframework.org/schema/aop/spring-aop.xsd
       http://www.springframework.org/schema/tx
       http://www.springframework.org/schema/tx/spring-tx.xsd">

    <!-- 引入配置文件 -->
    <import resource="applicationContext.xml"/>

    <!-- 配置事务管理器 -->
    <bean id="transactionManager" class="org.springframework.jdbc.datasource.DataSourceTransactionManager">
        <!-- 配置数据源 -->
        <property name="dataSource" ref="dataSource"/>
    </bean>

    <!-- 事务拦截配置 太麻烦了 -->
    <bean id="orderServiceTarget" class="com.prim.service.impl.OrderServiceImpl"/>

    <!-- TransactionProxyFactoryBean 和 上述本质上一致的 -->
    <bean id="orderService" class="org.springframework.transaction.interceptor.TransactionProxyFactoryBean">
        <!-- 配置事务管理器 -->
        <property name="transactionManager" ref="transactionManager"/>
        <!-- 配置事务的属性 -->
        <property name="transactionAttributes">
            <props>
                <!-- 目标对象的方法名 查询数据都设置为只读事务-->
                <prop key="get*">PROPAGATION_REQUIRED,readOnly</prop>
                <prop key="find*">PROPAGATION_REQUIRED,readOnly</prop>
                <prop key="search*">PROPAGATION_REQUIRED,readOnly</prop>
                <!-- 其他都是以事务的方式 -->
                <prop key="*">PROPAGATION_REQUIRED</prop>
            </props>
        </property>
        <!-- 配置目标对象 -->
        <property name="target" ref="orderServiceTarget"/>
    </bean>

</beans>
- 基于
命名空间的声明式事务管理
在实际开发中会用到,推荐使用
<?xml version="1.0" encoding="UTF-8"?>
<beans xmlns="http://www.springframework.org/schema/beans"
       xmlns:xsi="http://www.w3.org/2001/XMLSchema-instance"
       xmlns:context="http://www.springframework.org/schema/context"
       xmlns:aop="http://www.springframework.org/schema/aop"
       xmlns:tx="http://www.springframework.org/schema/tx"
       xsi:schemaLocation="http://www.springframework.org/schema/beans
       http://www.springframework.org/schema/beans/spring-beans.xsd
       http://www.springframework.org/schema/context
       http://www.springframework.org/schema/context/spring-context.xsd
       http://www.springframework.org/schema/aop
       http://www.springframework.org/schema/aop/spring-aop.xsd
       http://www.springframework.org/schema/tx
       http://www.springframework.org/schema/tx/spring-tx.xsd">

    <!-- 引入配置文件 -->
    <import resource="applicationContext.xml"/>

    <context:component-scan base-package="com.prim.service.impl"/>

    <!-- 配置事务管理器 所有的方式都必须配置事务管理器 -->
    <bean id="transactionManager" class="org.springframework.jdbc.datasource.DataSourceTransactionManager">
        <!-- 配置数据源 -->
        <property name="dataSource" ref="dataSource"/>
    </bean>

    <!-- 配置通知增强的功能 -->
    <tx:advice id="txAdvice" transaction-manager="transactionManager">
        <tx:attributes>
            <!-- 配置增强的方法 -->
            <tx:method name="get*" propagation="REQUIRED" read-only="true"/>
            <tx:method name="find*" propagation="REQUIRED" read-only="true"/>
            <tx:method name="search*" propagation="REQUIRED" read-only="true"/>
            <tx:method name="*" propagation="REQUIRED"/>
        </tx:attributes>
    </tx:advice>


    <aop:config>
        <!-- 配置切入点 -->
        <aop:pointcut id="pointcut" expression="execution(* com.prim.service.impl.*.*(..))"/>
        <!-- 配置通知和切入点 -->
        <aop:advisor advice-ref="txAdvice" pointcut-ref="pointcut"/>
    </aop:config>

</beans>
- 基于@Transactional的声明式事务管理
在实际开发中会用到,目前更为流行的方式
@Transactional 使用更加简单,可以显著的提高开发效率
<?xml version="1.0" encoding="UTF-8"?>
<beans xmlns="http://www.springframework.org/schema/beans"
       xmlns:xsi="http://www.w3.org/2001/XMLSchema-instance"
       xmlns:context="http://www.springframework.org/schema/context"
       xmlns:aop="http://www.springframework.org/schema/aop"
       xmlns:tx="http://www.springframework.org/schema/tx"
       xsi:schemaLocation="http://www.springframework.org/schema/beans
       http://www.springframework.org/schema/beans/spring-beans.xsd
       http://www.springframework.org/schema/context
       http://www.springframework.org/schema/context/spring-context.xsd
       http://www.springframework.org/schema/aop
       http://www.springframework.org/schema/aop/spring-aop.xsd
       http://www.springframework.org/schema/tx
       http://www.springframework.org/schema/tx/spring-tx.xsd">

    <!-- 引入配置文件 -->
    <import resource="applicationContext.xml"/>

    <context:component-scan base-package="com.prim.service.impl6"/>

    <!-- 配置事务管理器 所有的方式都必须配置事务管理器 -->
    <bean id="transactionManager" class="org.springframework.jdbc.datasource.DataSourceTransactionManager">
        <!-- 配置数据源 -->
        <property name="dataSource" ref="dataSource"/>
    </bean>

    <tx:annotation-driven transaction-manager="transactionManager"/>
</beans>
rollbackFor用于指定能够触发事务回滚的异常类型,可以指定多个,用逗号分隔。rollbackFor默认值为UncheckedException,包括了RuntimeException和Error.
当我们直接使用@Transactional不指定rollbackFor时,Exception及其子类都不会触发回滚
@Service("orderService")
public class OrderServiceImpl implements OrderService {

    @Autowired
    private OrderDao orderDao;

    @Autowired
    private ProductDao productDao;

    /**
     * rollbackFor 异常回滚
     * @param order
     */
    @Transactional(propagation = Propagation.REQUIRED, rollbackFor = Exception.class)
    public void addOrder(final Order order) {
        //设置业务规则
        order.setCreateTime(new Date());
        order.setStatus("待付款");
        //插入订单表
        orderDao.insert(order);
        Product product = productDao.findOne(order.getPid());
        //修改库存数
        product.setStock(product.getStock() - order.getNumber());
        productDao.update(product);
    }
}

若有收获,就点个赞吧
0 人点赞
