1、添加相关依赖
<!-- https://mvnrepository.com/artifact/io.springfox/springfox-swagger2 --><dependency><groupId>io.springfox</groupId><artifactId>springfox-swagger2</artifactId><version>2.9.2</version></dependency><dependency><groupId>io.springfox</groupId><artifactId>springfox-swagger-ui</artifactId><version>2.9.2</version></dependency>
2、创建Swagger自动配置类
import org.springframework.context.annotation.Bean;import org.springframework.context.annotation.Configuration;import springfox.documentation.builders.ApiInfoBuilder;import springfox.documentation.builders.PathSelectors;import springfox.documentation.builders.RequestHandlerSelectors;import springfox.documentation.service.ApiInfo;import springfox.documentation.spi.DocumentationType;import springfox.documentation.spring.web.plugins.Docket;import springfox.documentation.swagger2.annotations.EnableSwagger2;@Configuration@EnableSwagger2public class Swagger {@Beanpublic Docket createRestApi() {return new Docket(DocumentationType.SWAGGER_2).apiInfo(apiInfo()).select().apis(RequestHandlerSelectors.basePackage("com.ck.demo")).paths(PathSelectors.any()).build();}private ApiInfo apiInfo() {return new ApiInfoBuilder().title("Spring Boot中使用Swagger2构建RESTful APIs").description("更多Spring Boot相关文章请关注:https://www.yuque.com/chaohen").termsOfServiceUrl("https://www.yuque.com/chaohen").contact("chaohen").version("1.0.0").build();}}
- 首先通过
@Configuration注解,让Spring来加载该类配置。再通过@EnableSwagger2注解来启用Swagger2。 - 其次通过
createRestApi函数创建Docket的Bean之后,使用apiInfo()用来创建该Api的基本信息(这些基本信息会展现在文档页面中)。- - 再次通过
select()函数返回一个ApiSelectorBuilder实例用来控制哪些接口暴露给Swagger来展现,本例采用指定扫描的包路径来定义,Swagger会扫描该包下所有Controller定义的API,并产生文档内容,这里除了被@ApiIgnore指定的请求。
实际使用:
import com.ck.demo.bean.BlogsUserInfo;import com.ck.demo.service.UserInfoService;import io.swagger.annotations.ApiImplicitParam;import io.swagger.annotations.ApiOperation;import org.springframework.beans.factory.annotation.Autowired;import org.springframework.jdbc.core.BeanPropertyRowMapper;import org.springframework.jdbc.core.JdbcTemplate;import org.springframework.jdbc.core.RowMapper;import org.springframework.web.bind.annotation.PathVariable;import org.springframework.web.bind.annotation.RequestMapping;import org.springframework.web.bind.annotation.RequestMethod;import org.springframework.web.bind.annotation.RestController;import org.springframework.web.context.request.RequestContextHolder;import org.springframework.web.context.request.ServletRequestAttributes;import javax.annotation.Resource;import javax.servlet.http.HttpServletRequest;import java.util.List;@RestController@RequestMapping("user")public class UsreInfoController {@Resourceprivate JdbcTemplate jdbcTemplate;@Autowiredprivate UserInfoService userInfoService;@ApiOperation(value = "获取用户列表",notes = "")@RequestMapping(value = "/getusers",method = RequestMethod.GET)public Object getDbType() {String sql = "select * from blogs_user_info";RowMapper<BlogsUserInfo> rowMapper = new BeanPropertyRowMapper<BlogsUserInfo>(BlogsUserInfo.class);List<BlogsUserInfo> list = jdbcTemplate.query(sql, rowMapper);ServletRequestAttributes servletRequestAttributes = (ServletRequestAttributes) RequestContextHolder.getRequestAttributes();HttpServletRequest request = servletRequestAttributes.getRequest();Integer times = (Integer) request.getSession().getAttribute("times");;if (times == null) {times = new Integer(1);} else {times = new Integer(times.intValue() + 1);}request.getSession().setAttribute("times", times);System.out.println("***********************" + times);return list;}@ApiOperation(value = "根据用户ID获取用户信息",notes = "")@ApiImplicitParam(name = "id", value = "用户ID", required = true, dataType = "Long")@RequestMapping("/getId/{id}")public Object getUserInfoByParmityKey(@PathVariable String id) {BlogsUserInfo blogsUserInfo = userInfoService.getUserInfoByParmityKeyService(id);return blogsUserInfo;}}
注解语法用例:
@Api:用在请求的类上,表示对类的说明tags="说明该类的作用,可以在UI界面上看到的注解"value="该参数没什么意义,在UI界面上也看到,所以不需要配置"eg: @Api(tags = "用户信息Controller")@ApiOperation:用在请求的方法上,说明方法的用途、作用value="说明方法的用途、作用"notes="方法的备注说明"eg: @ApiOperation(value="用户登录",notes="手机号、密码都是必填!")@ApiImplicitParams:用在请求的方法上,表示一组参数说明@ApiImplicitParam:用在@ApiImplicitParams注解中,指定一个请求参数的各个方面name:参数名value:参数的汉字说明、解释required:参数是否必须传paramType:参数放在哪个地方· header --> 请求参数的获取:@RequestHeader· query --> 请求参数的获取:@RequestParam· path(用于restful接口)--> 请求参数的获取:@PathVariable· body(不常用)· form(不常用)dataType:参数类型,默认String,其它值dataType="Integer"defaultValue:参数的默认值eg: @ApiImplicitParams({@ApiImplicitParam(name="username",value="用户名",required=true,paramType="String"),@ApiImplicitParam(name="password",value="密码",required=true,paramType="form"),@ApiImplicitParam(name="vcode",value="验证码",required=true,paramType="form",dataType="Integer")})@ApiResponses:用在请求的方法上,表示一组响应@ApiResponse:用在@ApiResponses中,一般用于表达一个错误的响应信息code:数字,例如400message:信息,例如"请求参数没填好"response:抛出异常的类eg:@ApiOperation(value = "select1请求",notes = "多个参数,多种的查询参数类型")@ApiResponses({@ApiResponse(code=400,message="请求参数没填好"),@ApiResponse(code=404,message="请求路径没有或页面跳转路径不对")})@ApiModel:用于响应类上,表示一个返回响应数据的信息(这种一般用在post创建的时候,使用@RequestBody这样的场景,请求参数无法使用@ApiImplicitParam注解进行描述的时候)@ApiModelProperty:用在属性上,描述响应类的属性eg:import io.swagger.annotations.ApiModel;import io.swagger.annotations.ApiModelProperty;import java.io.Serializable;@ApiModel(description= "返回响应数据")public class RestMessage implements Serializable{@ApiModelProperty(value = "是否成功")private boolean success=true;@ApiModelProperty(value = "返回对象")private Object data;@ApiModelProperty(value = "错误编号")private Integer errCode;@ApiModelProperty(value = "错误信息")private String message;/* getter/setter */}
3、在Swagger可视化界面展示
在浏览器输入 http://localhost:8080/user/getusers 结果如下:
{"uuid":"d882f714-c015-4c46-a92e-5d7e2a8b3380","name":"丫丫","age":12,"address":"浙江省","phone":"1898*****63","company":"alibaba"}
在浏览器打开:http://localhost:8080/swagger-ui.html
页面如下: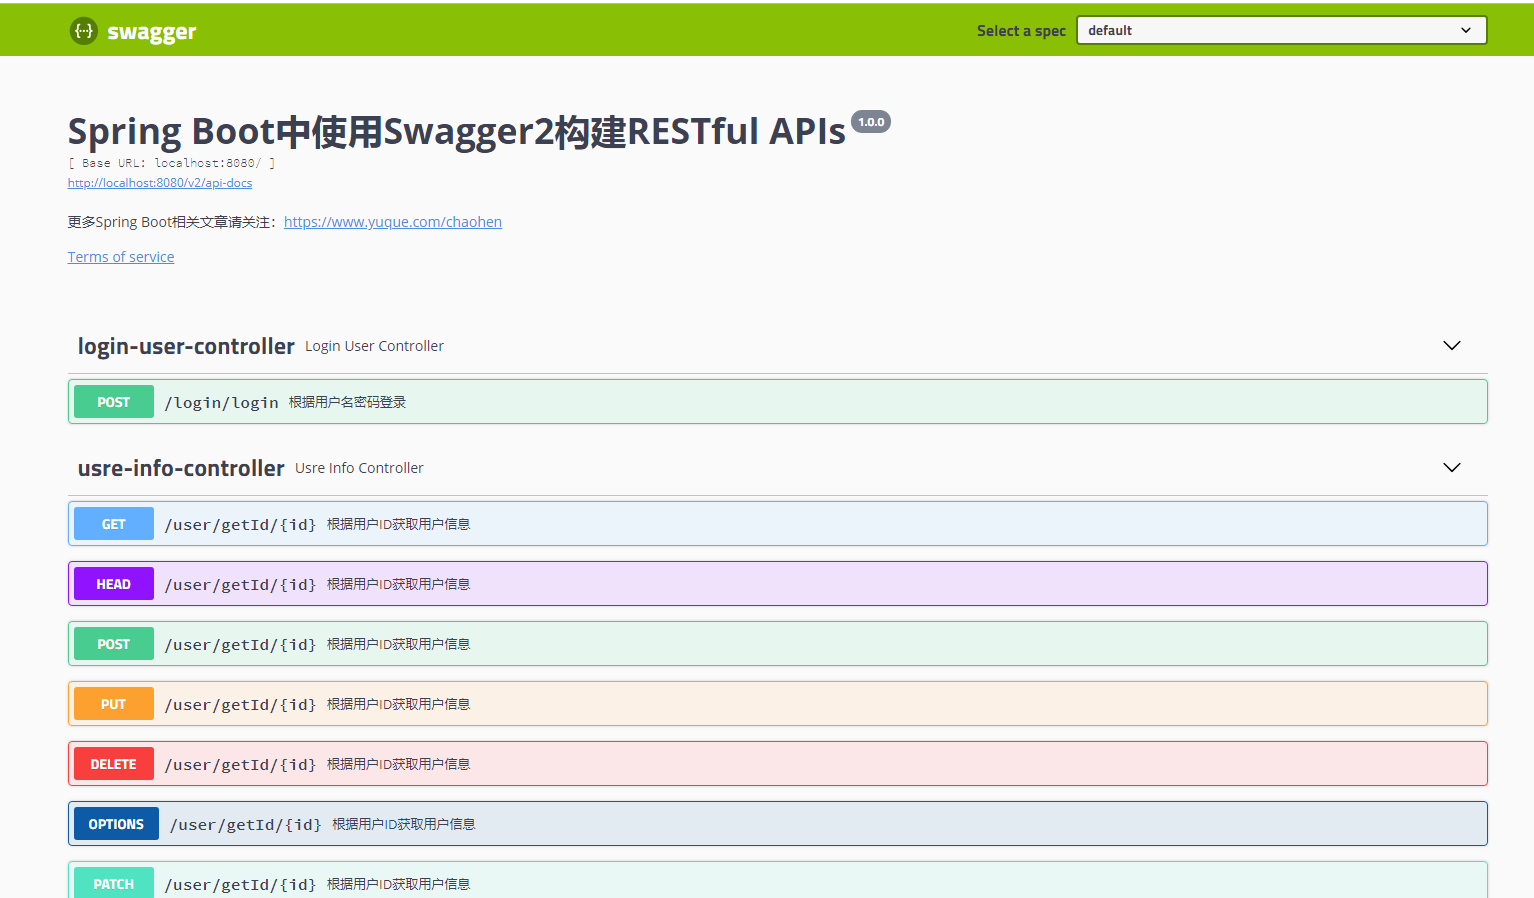
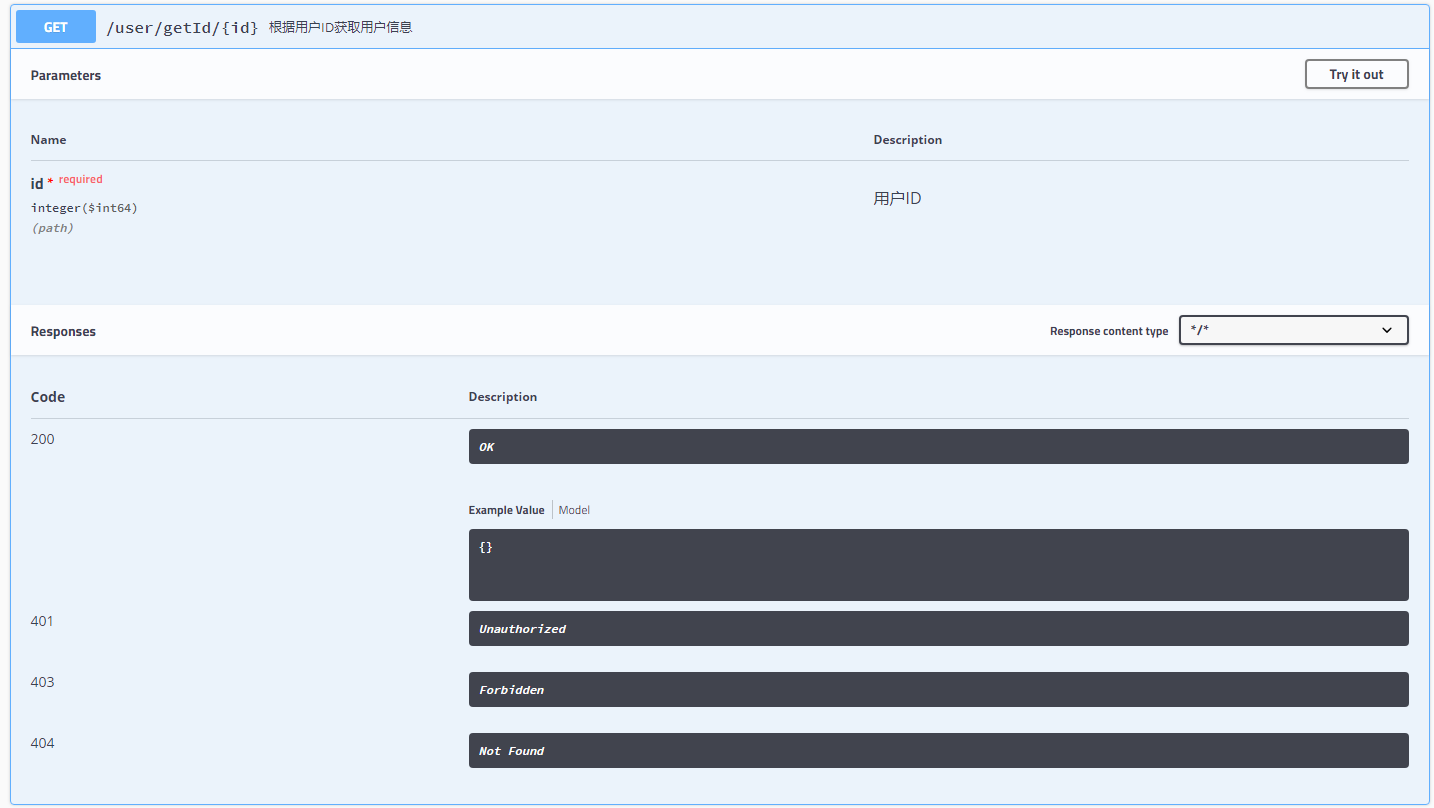
get请求
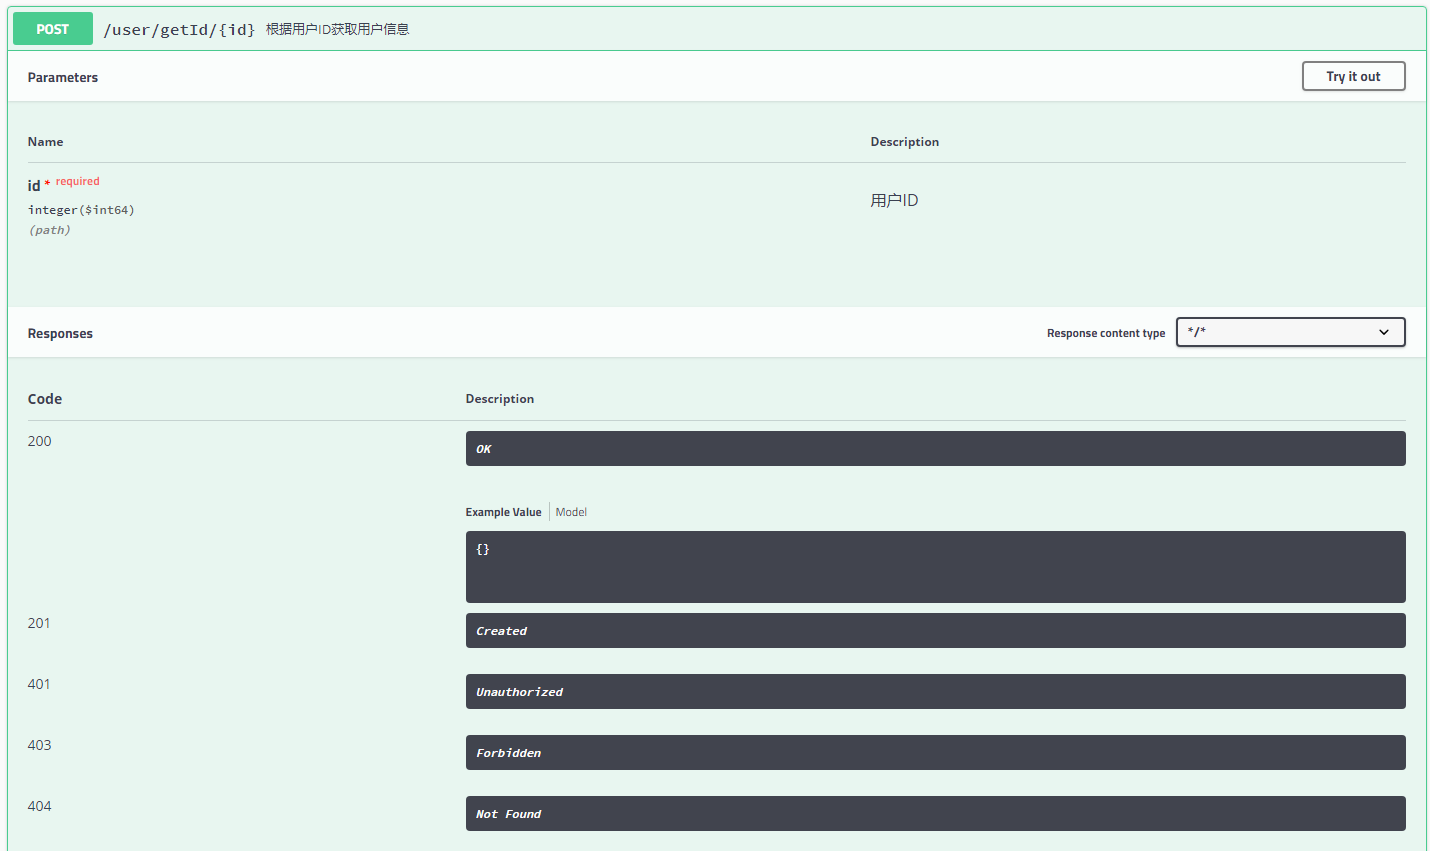
post请求
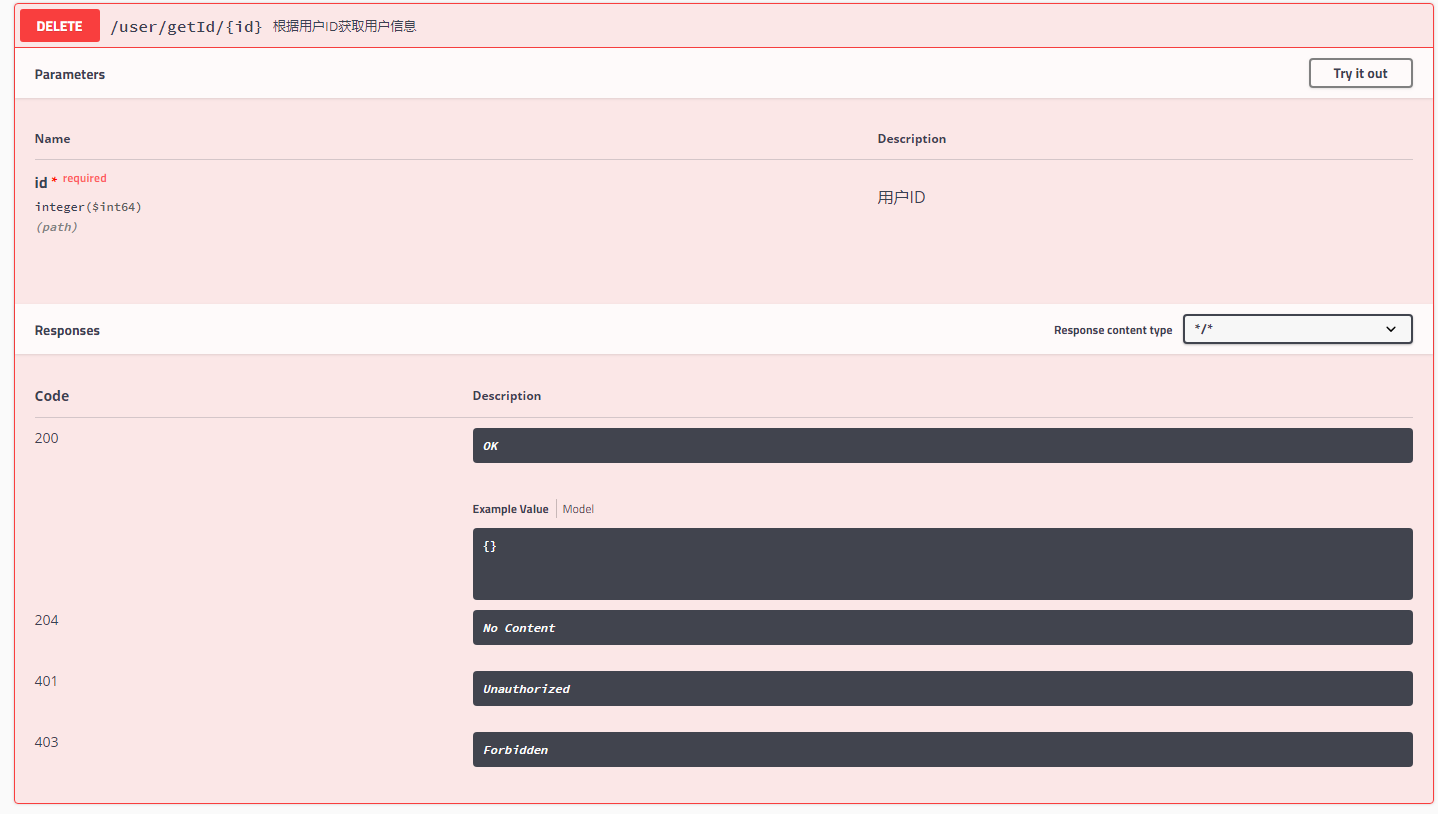
delete请求
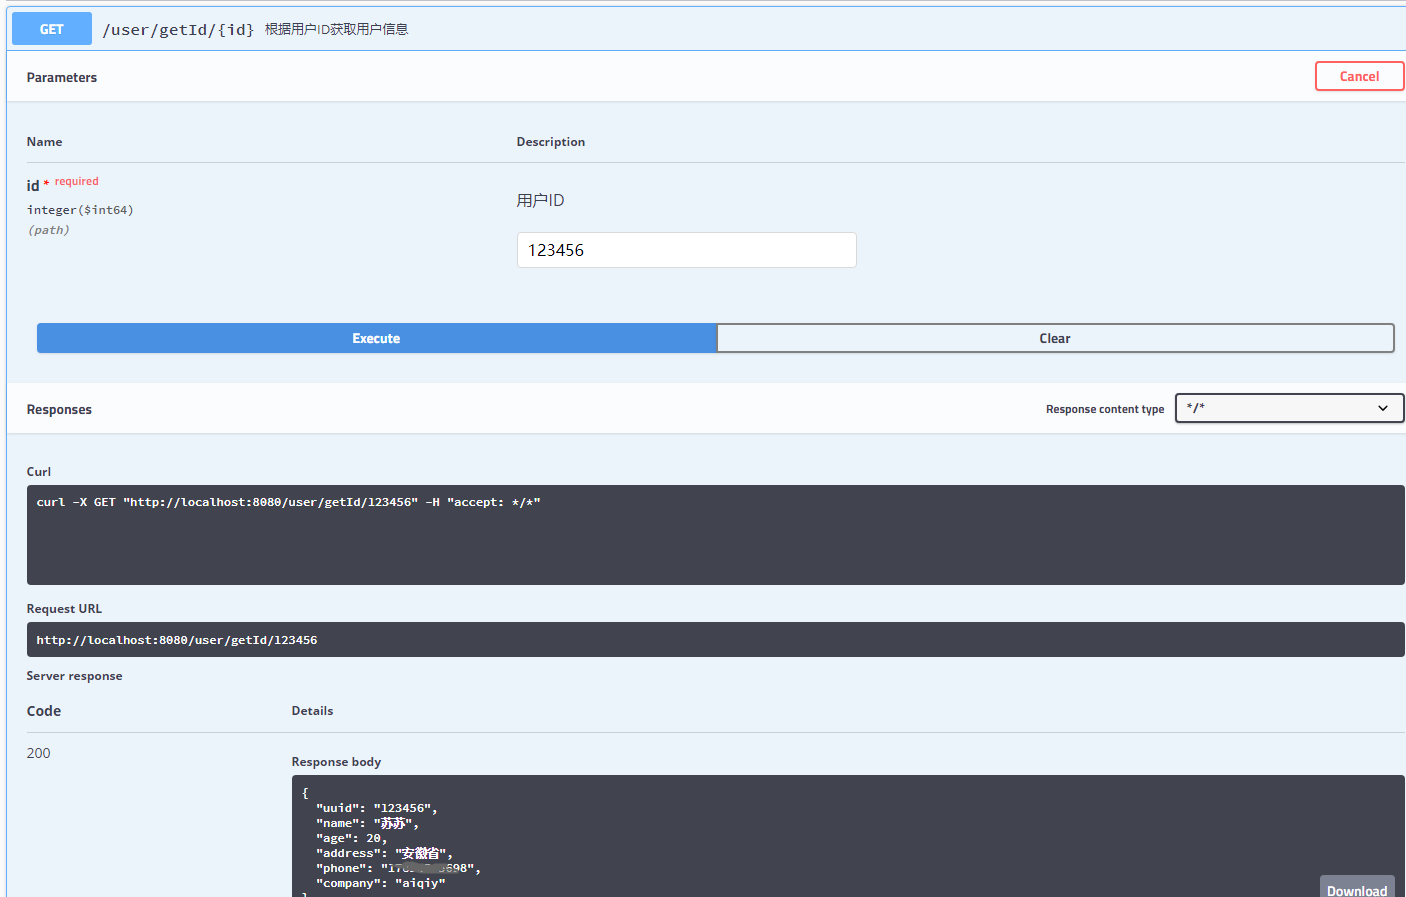
4、详情测试
get请求测试:
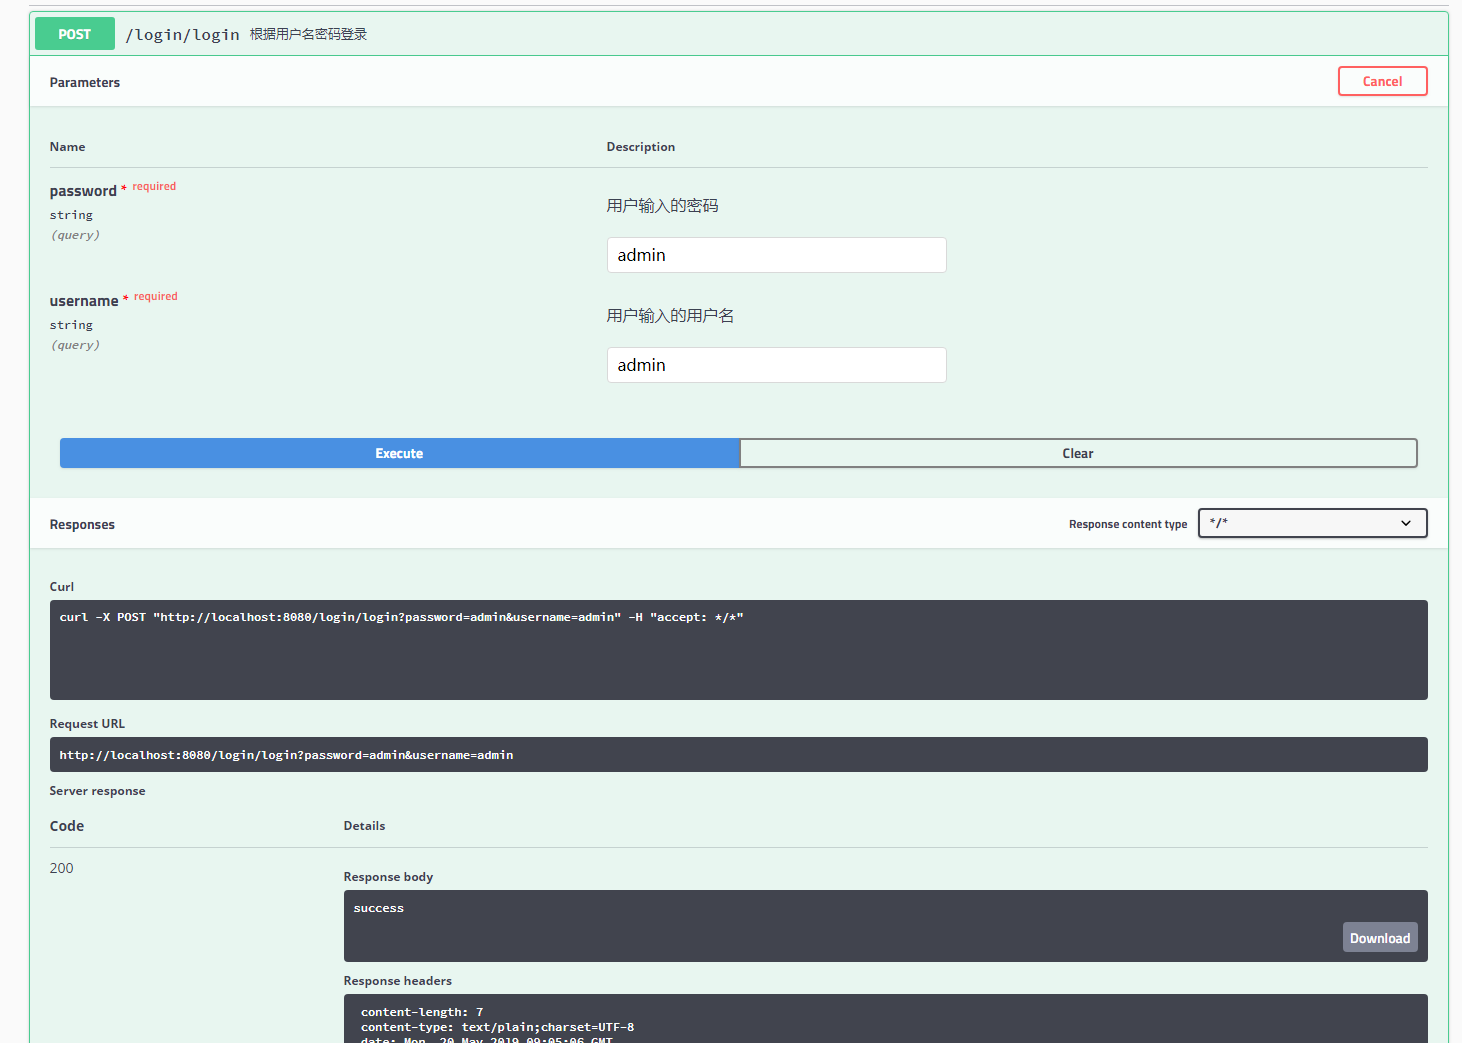
post请求测试
5、问题解决
问题原因
java.lang.NumberFormatException: For input string: ""at java.lang.NumberFormatException.forInputString(NumberFormatException.java:65) ~[na:1.8.0_162]at java.lang.Long.parseLong(Long.java:601) ~[na:1.8.0_162]at java.lang.Long.valueOf(Long.java:803) ~[na:1.8.0_162]at io.swagger.models.parameters.AbstractSerializableParameter.getExample(AbstractSerializableParameter.java:412) ~[swagger-models-1.5.20.jar:1.5.20]at sun.reflect.NativeMethodAccessorImpl.invoke0(Native Method) ~[na:1.8.0_162]at sun.reflect.NativeMethodAccessorImpl.invoke(NativeMethodAccessorImpl.java:62) ~[na:1.8.0_162]at sun.reflect.DelegatingMethodAccessorImpl.invoke(DelegatingMethodAccessorImpl.java:43) ~[na:1.8.0_162]at java.lang.reflect.Method.invoke(Method.java:498) ~[na:1.8.0_162]at com.fasterxml.jackson.databind.ser.BeanPropertyWriter.serializeAsField(BeanPropertyWriter.java:688) [jackson-databind-2.9.8.jar:2.9.8]at com.fasterxml.jackson.databind.ser.std.BeanSerializerBase.serializeFields(BeanSerializerBase.java:719) [jackson-databind-2.9.8.jar:2.9.8]at com.fasterxml.jackson.databind.ser.BeanSerializer.serialize(BeanSerializer.java:155) [jackson-databind-2.9.8.jar:2.9.8]at com.fasterxml.jackson.databind.ser.impl.IndexedListSerializer.serializeContents(IndexedListSerializer.java:119) [jackson-databind-2.9.8.jar:2.9.8]
项目中使用Swagger作为文档工具,每次打开文档时,控制台都会打印以上异常。
解决办法
这是由于实体类使用@ApiModelProperty时,example属性没有赋值导致的,在AbstractSerializableParameter的getExample方法中会将数值属性的example的转换数值类返回,example的默认值是””,因此当example没有赋值时,会出现上面的异常。getExample方法如下
@JsonProperty("x-example")public Object getExample() {if (example == null) {return null;}try {if (BaseIntegerProperty.TYPE.equals(type)) {return Long.valueOf(example);} else if (DecimalProperty.TYPE.equals(type)) {return Double.valueOf(example);} else if (BooleanProperty.TYPE.equals(type)) {if ("true".equalsIgnoreCase(example) || "false".equalsIgnoreCase(defaultValue)) {return Boolean.valueOf(example);}}} catch (NumberFormatException e) {LOGGER.warn(String.format("Illegal DefaultValue %s for parameter type %s", defaultValue, type), e);}return example;}
只要将每一个数值类型上@ApiModelProperty的example都赋值数字字符串即可。
但是这个解决方法比较麻烦,若将源码中的if (example == null)改为if (example == null || example.isEmpty())就可以解决问题。我下载并修改了源码,将其打包后覆盖了maven仓库的jar包,这样项目代码不需要任何修改就可以解决问题。
同时,我又查看了v1.5.21的代码 ,源码的修改是一样的。其实也可以排除1.5.20版本的swagger-models.jar,引入1.5.21版本的swagger-models.jar。但是考虑到可能由于代码改动较大引发其他问题,因此个人感觉还是在1.5.20版本代码微调最好。
最后把修复过的jar包下载链接放在这里,下载后替换本地仓库对应的文件,然后项目重新导入jar包即可。
例如,我的电脑,通过命令行进入如下目录cd /Users/ly/.m2/repository/io/swagger/swagger-models/1.5.20/
然后将两个文件复制进去覆盖原文件。
https://github.com/ly641921791/knowledge/raw/master/swagger/fix-jar/swagger-models-1.5.20.jar
https://github.com/ly641921791/knowledge/raw/master/swagger/fix-jar/swagger-models-1.5.20-sources.jar
此时执行成功,已经达到所需的目标,End。
refer:https://blog.csdn.net/weixin_38229356/article/details/83353347

若有收获,就点个赞吧
0 人点赞
