参考:
部署环境
腾讯云GPU计算型GN7
https://cloud.tencent.com/document/product/560/19700#GN7
- IP 49.233.55.37
- 用户名 ubuntu
- CPU: 8 核
- 内存: 32GB
- GPU: 1 * NVIDIA T4
- 镜像: Pytorch 1.9.1 Ubuntu 18.04 GPU基础镜像 (预装460驱动)
部署过程
下载 ChatGLB
git clone [https://github.com/THUDM/ChatGLM-6B](https://github.com/THUDM/ChatGLM-6B)
安装依赖
cd ChatGLM-6Bpip install -r requirements.txt
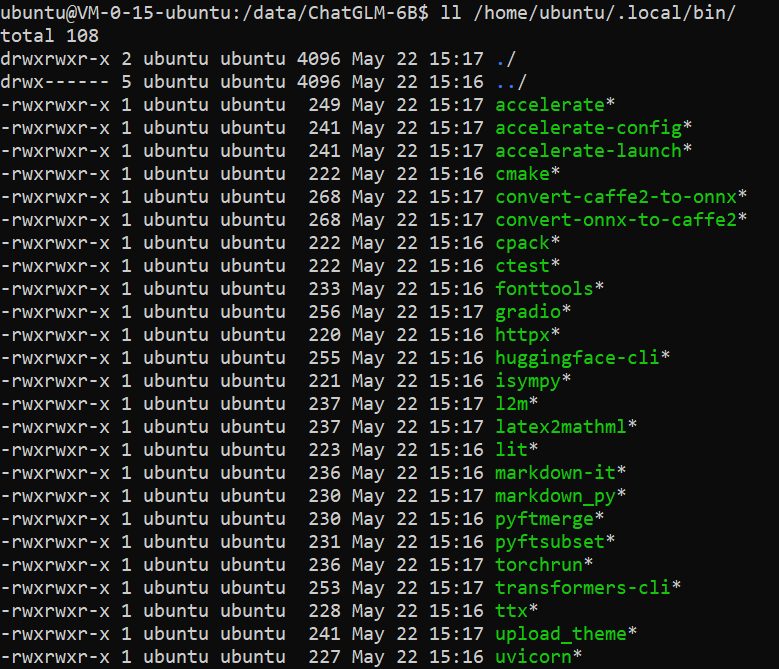
安装完成后,在 /home/ubuntu/.local/bin/ 生成的脚本
使用模型
编写 python 代码
from transformers import AutoTokenizer, AutoModeltokenizer = AutoTokenizer.from_pretrained("THUDM/chatglm-6b", trust_remote_code=True)model = AutoModel.from_pretrained("THUDM/chatglm-6b", trust_remote_code=True).half().cuda()model = model.eval()response, history = model.chat(tokenizer, "你好", history=[])print(response)response, history = model.chat(tokenizer, "晚上睡不着应该怎么办", history=history)print(response)
- 以上代码自动下载 chatglm-6b 模型,模型保存地址 /home/ubuntu/.cache/huggingface
- 下载时间较长,耐心等待
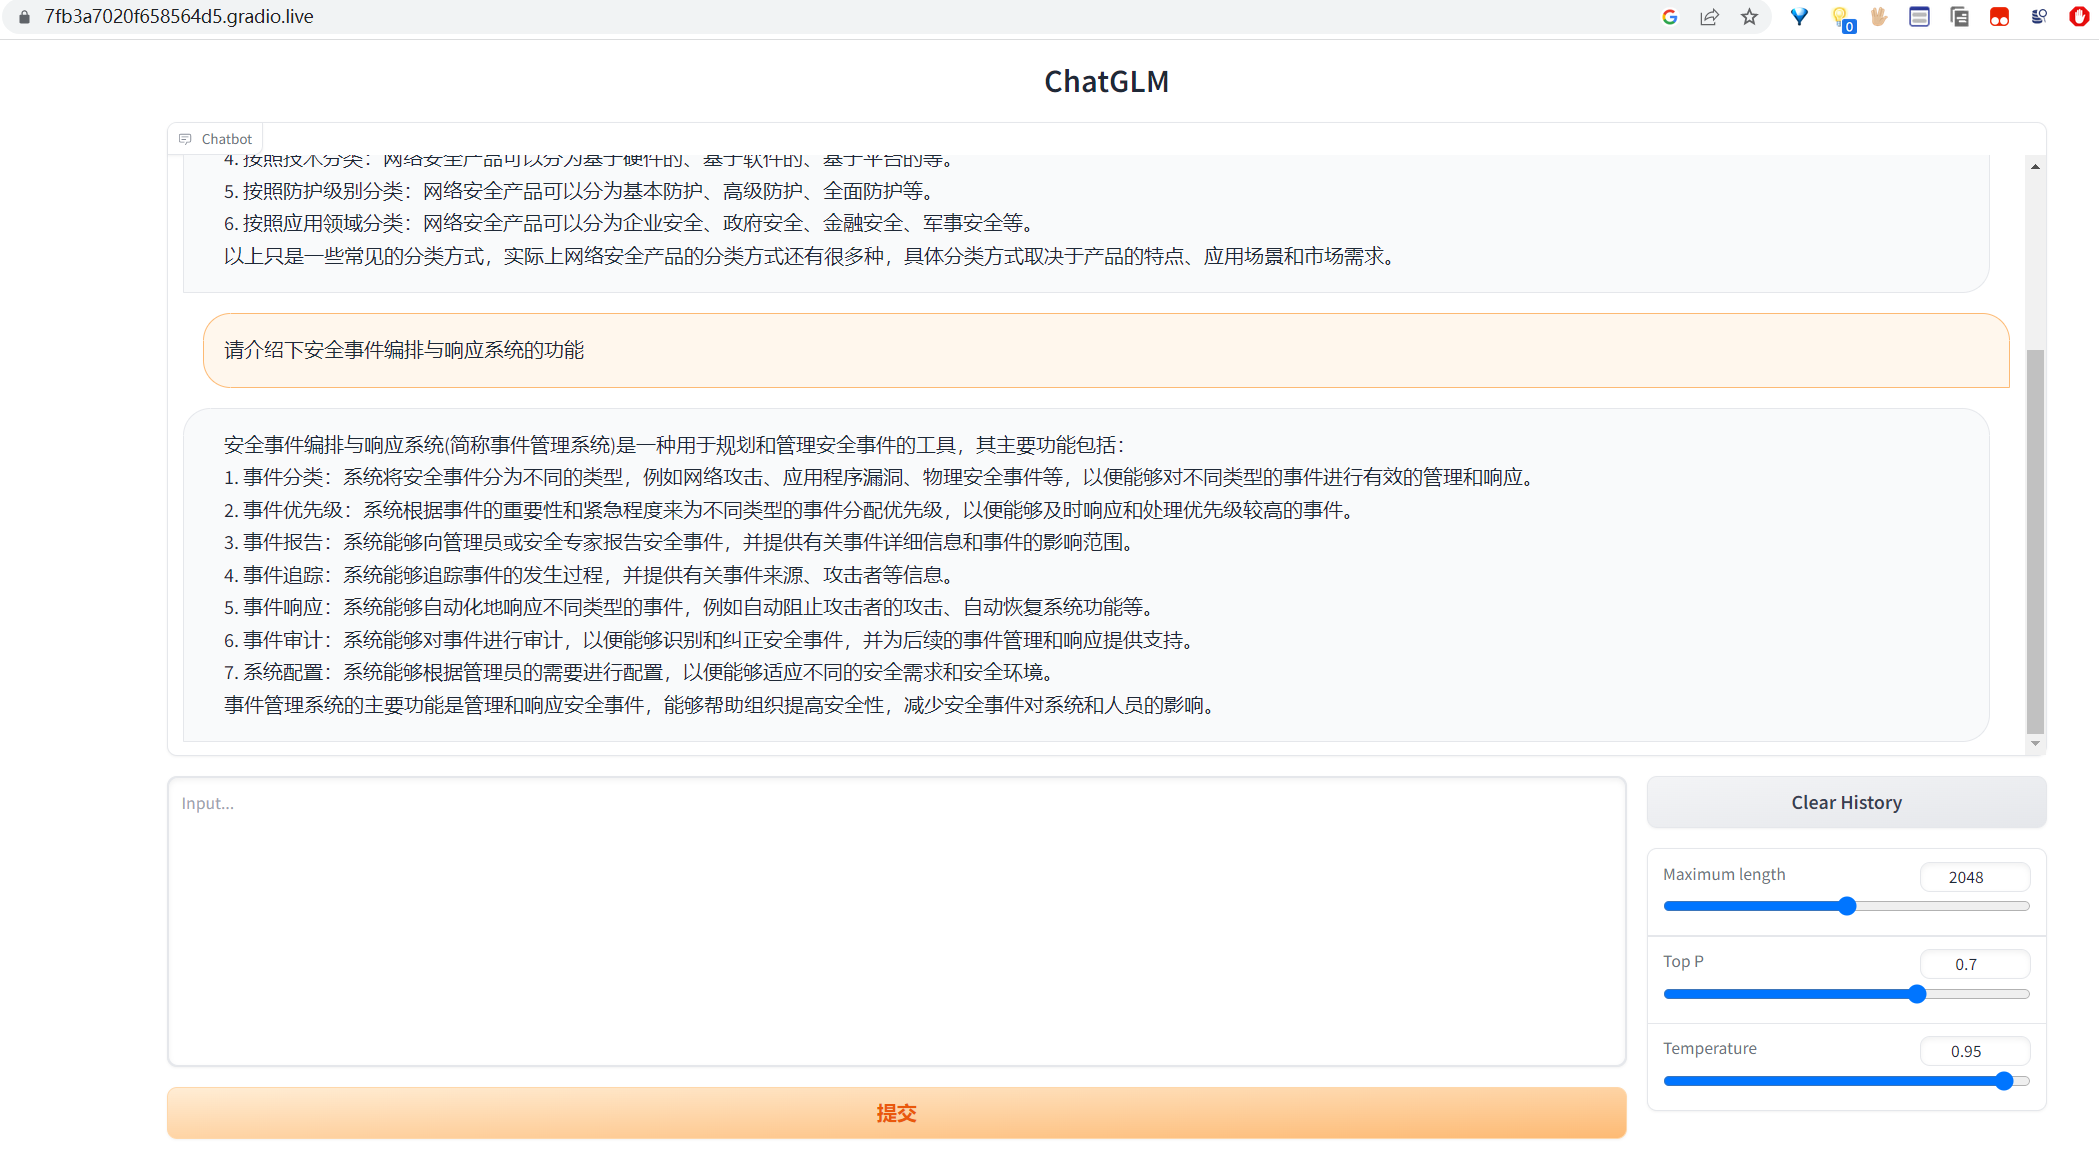
运行网页版
依赖 gradio
pip install gradiopython web_demo.py
发布到公网,编辑 web_demo.py
demo.queue().launch(share=False, inbrowser=True)
绑定 127.0.0.1:
通过nginx端口转发绑定到公网IP
- 安装 nginx,
sudo apt install nginx - 添加配置文件 chatglm.conf
server {listen 80 default_server;listen [::]:80 default_server;server_name _;location / {# Serve GRADIO 7860proxy_pass http://localhost:7860;proxy_http_version 1.1;proxy_set_header Upgrade $http_upgrade;proxy_set_header Connection 'upgrade';proxy_set_header Host $host;proxy_set_header X-Real-IP $remote_addr;proxy_set_header X-Forwarded-For $proxy_add_x_forwarded_for;proxy_cache_bypass $http_upgrade;proxy_read_timeout 86400;proxy_redirect off;}location /static/ {# Serve backend from portrewrite /static/(.*) /$1 break;proxy_pass http://localhost:8000;proxy_http_version 1.1;proxy_set_header Upgrade $http_upgrade;proxy_set_header Connection 'upgrade';proxy_set_header Host $host;proxy_set_header X-Real-IP $remote_addr;proxy_set_header X-Forwarded-For $proxy_add_x_forwarded_for;proxy_cache_bypass $http_upgrade;proxy_read_timeout 86400;proxy_redirect off;}}
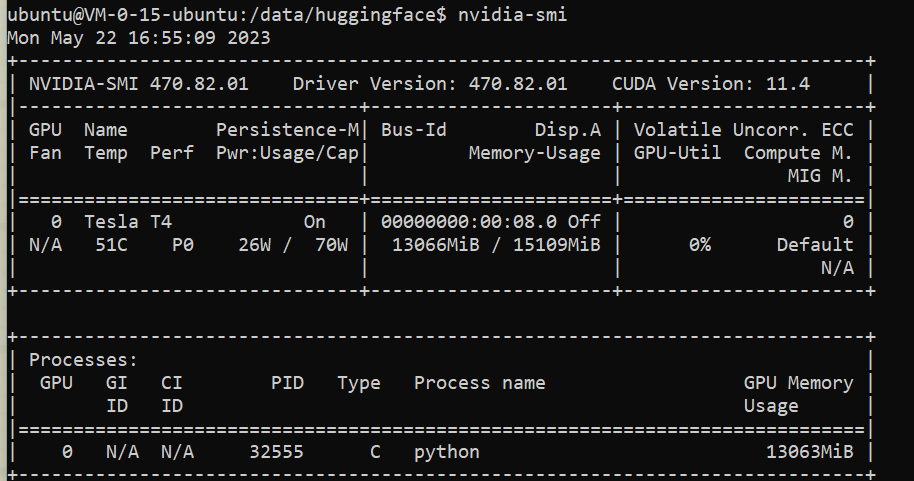
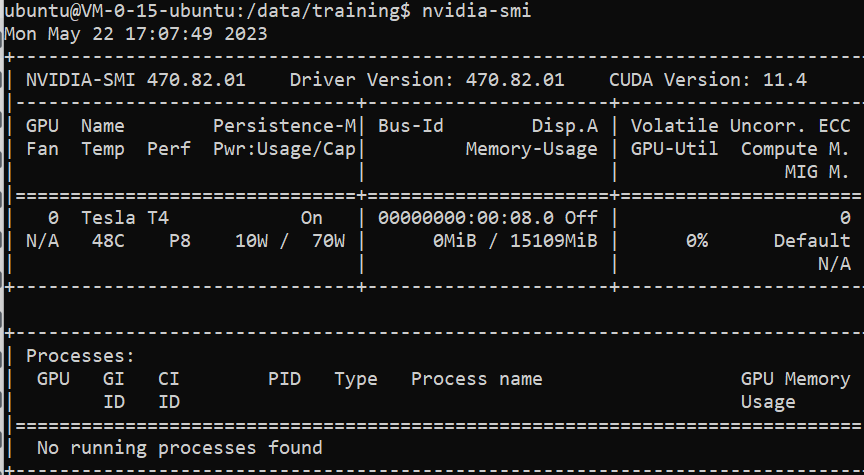
查看 GPU 信息
执行命令: nvidia-smi
服务停止后,释放 GPU
微调
参考文档 https://github.com/THUDM/ChatGLM-6B/blob/main/ptuning/README.md
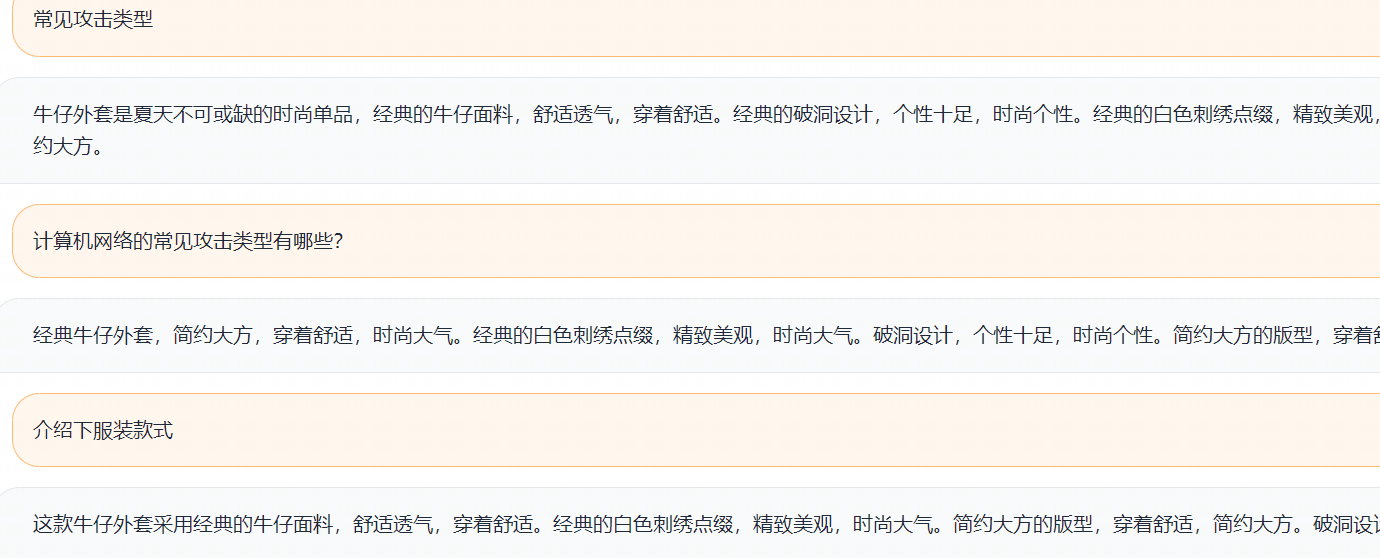
ADGEN 数据集任务为根据输入(content)生成一段广告词(summary)。
{"content": "类型#上衣*版型#宽松*版型#显瘦*图案#线条*衣样式#衬衫*衣袖型#泡泡袖*衣款式#抽绳","summary": "这件衬衫的款式非常的宽松,利落的线条可以很好的隐藏身材上的小缺点,穿在身上有着很好的显瘦效果。领口装饰了一个可爱的抽绳,漂亮的绳结展现出了十足的个性,配合时尚的泡泡袖型,尽显女性甜美可爱的气息。"}
训练数据:https://cloud.tsinghua.edu.cn/f/b3f119a008264b1cabd1/?dl=1
解压到 ChatGLM/ptunning/ 目录
训练
bash train.sh
- 执行时间长,10小时
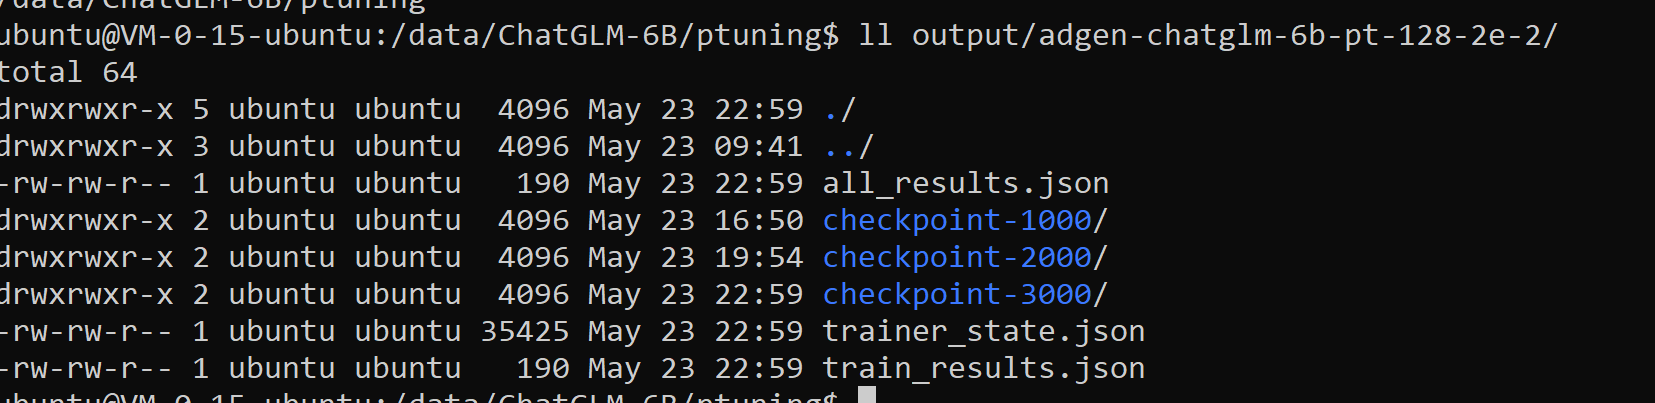
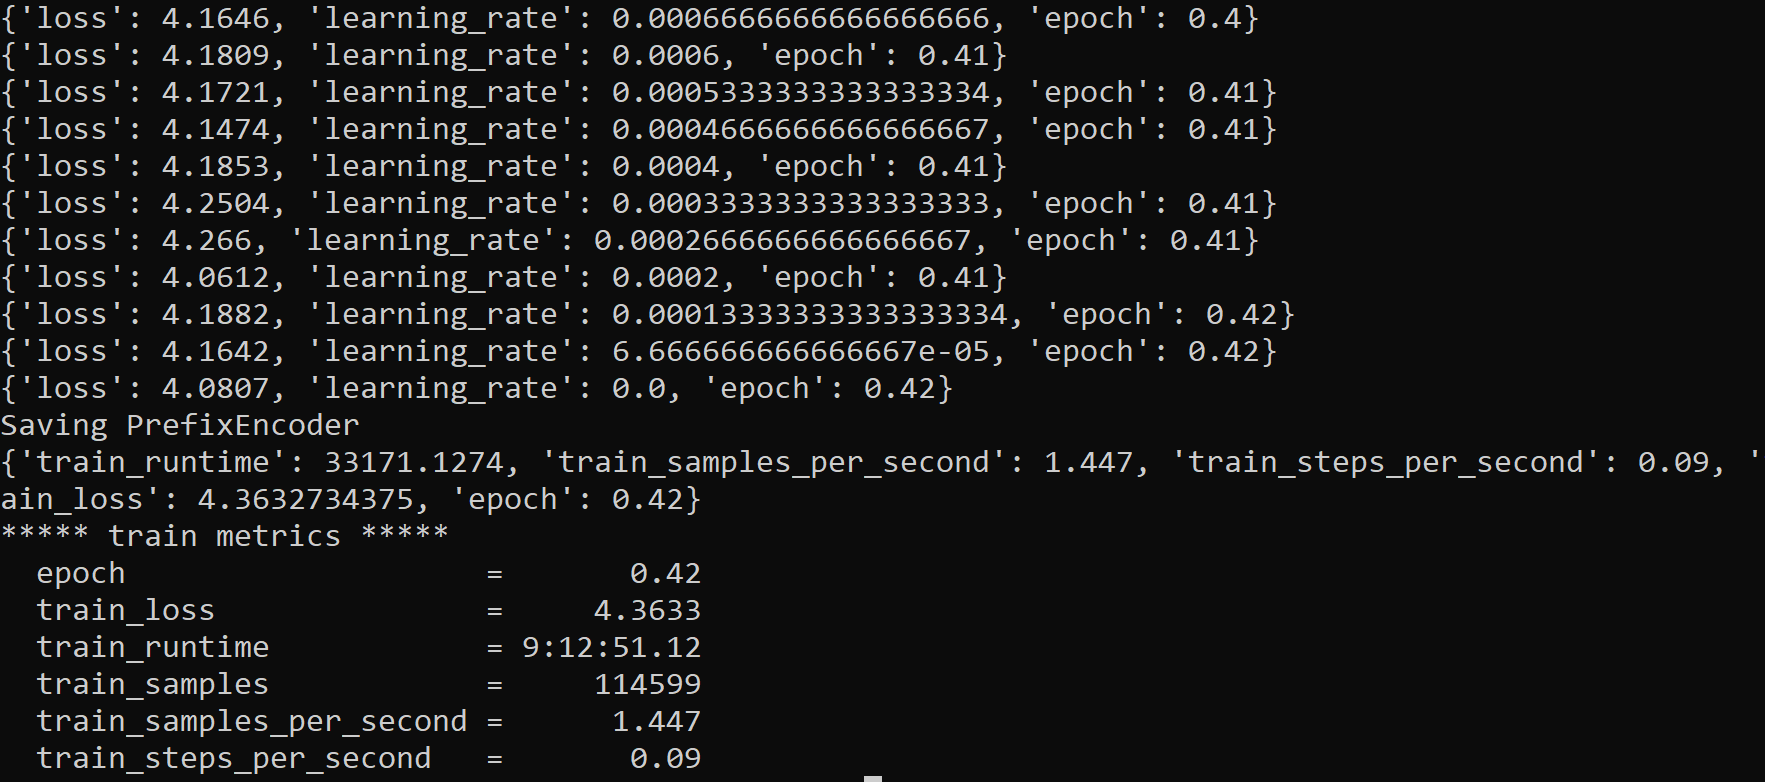 训练结果输出到 output 目录
- 加载模型
<font style="color:rgb(31, 35, 40);">bash web_demo.sh</font>
- 问题
训练后只能回答训练集中的答案,可能是参数配置有问题

若有收获,就点个赞吧
0 人点赞
