这里主要通过Koa官方文档推荐的一个项目来学 Koa
—— Koa文档)
—— Koa官方文档推荐的学习项目
这个项目还是比较老旧的教程,它里面使用的还是Koa1.0(2014年)时代的东西。
不过我这里用新的语法来完成它的课程。
找了下网上,没有发现有它的题目答案,是太简单了,都不屑做吗?官网竟然也不提供个答案的分支。。。
首先来讲解一下它的教学思路:
生成性学习!
不得不说,西方的这种教学方式确实是好。与《认知天性》的学习方式不谋而合。 想起我们初高中的早读课,大多是一些有意义但是作用较小的复读。 我写这片文档,也是想用一种,生成性笔记的方式,来巩固我学习的知识。
Koa简介
- Koa是流式操作的(这样的类型有很多了,我们能想到gulp的打包也是流式的,jQuery的链式思想也很像,linux命令中的grep)
- 只有通用的方法被集成到Koa项目里(它想表达Koa是小的)
- Koa没有绑定中间件(它想表达Koa是纯粹的,不像Express那样打包了一堆东西)

其他的几个项目也该好好地看下
Koa推荐项目学习(https://github.com/koajs/workshop)
该项目每一章会有一个介绍,然后出题。 每一章都会有一个写好的测试js,通过Mocha实现。 生成性学习——自己写代码,完成题目,它是没有给出答案的,答案需要由你来完成。
看懂下面的每一题、每个答案,你首先还需要知道Mocha(前端-单元测试)是怎么使用的。
以下是你必须要知道的,也是本文档的一些用法。
- npm安装mocha和koa以及文档其他特殊用到的一些包。
- 考卷代码创建 test.js,用 mocha . 就能跑起来了测试了。
- 答案代码创建 index.js,然后写下你的答案。

01 - 关于co
介绍
想要完整地理解koa,你需要理解co的工作方式。 co使用ES6的generator特性。
考卷(测试用例,测试驱动开发):实现函数满足以下要求的函数
- 获取当前文件的文件大小
- 读取不存在的文件的时候,需要报错
- 校验一个文件是否存在
- 校验一个文件是否不存在 ```
var co = require(‘co’); var assert = require(‘assert’);
var fs = require(‘./index.js’);
describe(‘.stats()’, function () { it(‘should stat this file’, co(function* () { var stats = yield fs.stat(__filename); assert.ok(stats.size); }))
it(‘should throw on a nonexistent file’, co(function* () { try { yield fs.stat(__filename + ‘lkjaslkdjflaksdfasdf’); // the above expression should throw, // so this error will never be thrown throw new Error(‘nope’); } catch (err) { assert(err.message !== ‘nope’); } })) })
describe(‘.exists()’, function () { it(‘should find this file’, co(function* () { assert.equal(true, yield fs.exists(__filename)) }))
it(‘should return false for a nonexistent file’, co(function* () { assert.equal(false, yield fs.exists(__filename + ‘kljalskjdfklajsdf’)) })) })
- 答案先来学习下fs.stat [Node-fs]([http://nodejs.cn/api/fs.html](http://nodejs.cn/api/fs.html))<br /><br />明白了 stat 的用法就好写了,同时我们还要理解 co (ES6-generator的用法,这里我本人确实没细学generator,我直接把他看做 async/await了)
var fs = require(‘fs’); exports.stat = function (filename) { return new Promise((resolve) => { fs.stat(filename, (err, res) => { resolve(res) }) }) };
然后是第二个测试用例,我们需要把异常抛出去!!<br />这里我体会到单元测试mocha的好处了(不过前端的单元测试就不知道是否必要了,后端这类接口确实是经常需要单元测试)
var fs = require(‘fs’); exports.stat = function (filename) { return new Promise((resolve, reject) => { fs.stat(filename, (err, res) => { if (err) { reject(err) } else { resolve(res) } }) }) };
第三、四题我们还是可以用 fs.stat 实现,据说 fs.exist已经被弃用了(写文时间2021-03-13)
var fs = require(‘fs’); exports.stat = function (filename) { return new Promise((resolve, reject) => { fs.stat(filename, (err, res) => { if (err) { reject(err) } else { resolve(res) } }) }) };
exports.exists = function (filename) { return new Promise((resolve, reject) => { fs.stat(filename, (err, res) => { if (err) { resolve(false) } else { resolve(true) } }) }) };
<a name="OFhHe"></a>#### 02 - koa的hello,world- 简介> Koa使用 getter/setter 的方式书写。> app.use(function* () {> this.response.body = 'hello world';> })- 考卷- 接口返回内容长度为 11- 接口返回指定的编码格式为 text/plain; charset=utf-8
var request = require(‘supertest’); var testKoa = require(‘./index.js’);
describe(‘Hello World’, function () { it(‘should return hello world’, function (done) { request(testKoa.listen()) .get(‘/‘) .expect(200) .expect(‘Content-Length’, ‘11’) .expect(‘Content-Type’, ‘text/plain; charset=utf-8’) .end(done) }) })
- 答案
var Koa = require(‘koa’); var app = new Koa()
app.use(async (ctx) => { ctx.status = 200 ctx.body = ‘hello world’ });
module.exports = app
这里我们主要是要理解Koa的书写方式(getter/setter),不用像Express那样,res.send('我是返回内容'),而是直接 ctx.body = '我是返回内容'.<a name="3VO2x"></a>#### 03 - routing- 简介> Koa不像Express,使用了router类的第三方插件,express写法 router.get('/path'),koa是淳朴的(我想也许这不太方便!不过这给了我们灵活的自由度,我们可以自己用第三方的,可选的第三方)。- 考卷- 对 / 路由,返回 hello,world- 对 404 路由, 返回 page not found- 对 500 路由,返回 internal server error
var request = require(‘supertest’); var app = require(‘./index.js’);
describe(‘Routing’, function () { it(‘GET / should return “hello world”‘, function (done) { request(app.listen()) .get(‘/‘) .expect(‘hello world’, done); })
it(‘GET /404 should return “page not found”‘, function (done) { request(app.listen()) .get(‘/404’) .expect(‘page not found’, done); })
it(‘get /500 should return “internal server error”‘, function (done) { request(app.listen()) .get(‘/500’) .expect(‘internal server error’, done); }) })
- 答案
const koa = require(‘koa’); var app = module.exports = new koa();
app.use(async ctx => { if (ctx.request.url === ‘/‘) { ctx.body = ‘hello world’ } else if (ctx.request.url === ‘/404’) { ctx.body = ‘page not found’ } else if (ctx.request.url === ‘/500’) { ctx.body = ‘internal server error’ } });
可以看到,koa的这种写法确实是很淳朴。<br />也确实使用 getter/setter 方式来写的。<br />对于以前写 Express 的写法还是很不相同的。<br />不过我感觉项目一大,该用 router 还是要用 router。<a name="qO7Mq"></a>#### 04 - bodies- 简介> 很久以前,我们使用“字符串”作为返回体,Koa支持以下的格式:字符串、Buffers、Streams、JSON Object。> 如果没有指定具体内容,Koa默认会使用 JSON。关于Buffers和Streams更多的学习,摘自网络。他们是相关的!!<br />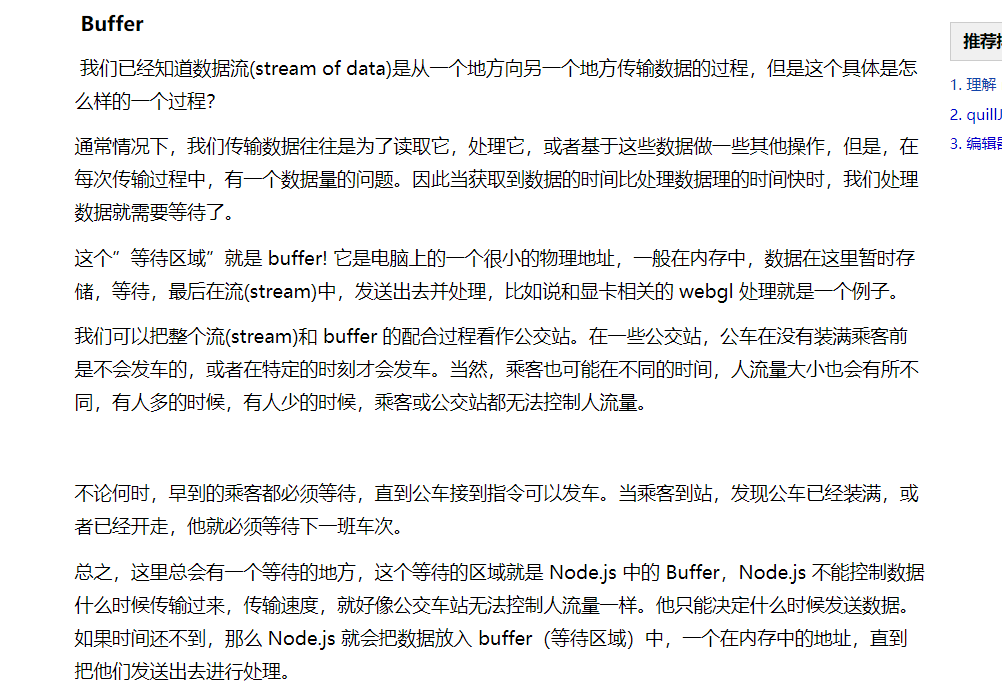<br />- 考卷- 对于 /stream 路由,接口返回一个stream流响应- 对于 /json 路由,接口返回一个body响应
var fs = require(‘fs’); var path = require(‘path’); var assert = require(‘assert’); var request = require(‘supertest’);
var app = require(‘./index.js’);
describe(‘Bodies’, function () { it(‘GET /stream should return a stream’, function (done) { var body = fs.readFileSync(path.join(__dirname, ‘index.js’), ‘utf8’);
request(app.listen()).get('/stream').expect('Content-Type', /application\/javascript/).expect(body, done);
})
it(‘GET /json should return a JSON body’, function (done) { request(app.listen()) .get(‘/json’) .expect(‘Content-Type’, /application\/json/) .end(function (err, res) { if (err) return done(err);
assert.equal(res.body.message, 'hello world');done();})
}) })
- 答案
var fs = require(‘fs’); var koa = require(‘koa’); const path = require(‘path’)
var app = module.exports = new koa();
/**
- Create the
GET /streamroute that streams this file. - In node.js, the current file is available as a variable
__filename. */
app.use(async (ctx, next) => { if (ctx.request.path === ‘/stream’) { ctx.body = fs.readFileSync(path.join(__dirname, ‘index.js’), ‘utf8’); ctx.set(‘Content-Type’, ‘application/javascript’) } else { next() } });
/**
- Create the
GET /jsonroute that sends{message:'hello world'}. */
app.use(async (ctx, next) => { if (ctx.request.path === ‘/json’) { ctx.body = { message: ‘hello world’ } } else { next() } });
<a name="0ijao"></a>#### 05 - error handing- 简介> koa的错误处理大多使用 try-catch 来完成(除了event emitters)- 考卷- 对于 / 路由,接口返回状态为 500- 对于 / 路由,抛出一个异常
var request = require(‘supertest’);
var app = require(‘./index.js’);
describe(‘Error Handling’, function () { it(‘should return “internal server error”‘, function (done) { request(app.listen()) .get(‘/‘) .expect(500) .expect(‘internal server error’, done); })
it(‘should emit an error event’, function (done) { app.once(‘error’, function () { done(); });
request(app.listen()).get('/').end(function noop(){});
}) })
- 答案首先这里我学到了他们的执行顺序,也是所谓的“洋葱模型”的入门开始<br />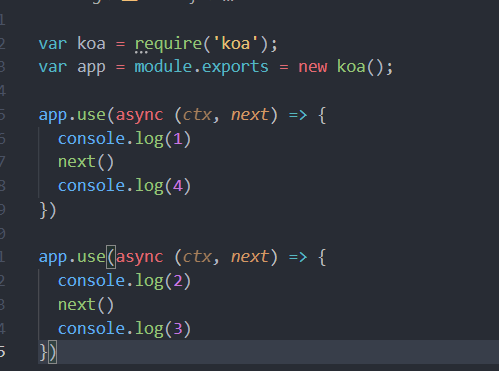<br />顺序为 1 -> 2 -> 3 -> 4<br />这题我用了2小时。<br />这里非常坑爹的是:500的默认错误是 'Internal Server Error',它是首字母大写的,而这里的要求是返回小写的。我就一直琢磨为啥会这样,同时又要求把错误上报。<br />最后得知了 app.emit 函数是可以强制上报的。<br />同时!!它的第三个参数为此时的返回 Body,是可以自定状态、和错误信息的!
var koa = require(‘koa’); var app = module.exports = new koa();
app.use(async (ctx, next) => { try { await next() } catch (error) { ctx.status = 500 ctx.message = ‘internal server error’ app.emit(‘error’, error, ctx) } })
app.use(async (ctx) => {
ctx.throw(500)
})
如果不对返回body特殊处理,它会为 'Internal Server Error',注意,大写的这个并不符合我们题目的要求。<a name="tucXQ"></a>#### 06 - content-negotiation- 简介> 内容协商是http重要的内容,Accept-Encoding、Content-Encoding协商是否、如何来压缩返回体的内容- 考卷- 当请求gzip,则返回gzip压缩方式的内容,内容为 hello world- 当为identity,则不压缩
var assert = require(‘assert’); var request = require(‘supertest’);
var app = require(‘./index.js’);
describe(‘Content Negotiation’, function () { it(‘when “Accept: gzip” it should return gzip’, function (done) { request(app.listen()) .get(‘/‘) .set(‘Accept-Encoding’, ‘gzip’) .expect(200) .expect(‘Content-Encoding’, ‘gzip’) .expect(‘hello world’, done); })
it(‘when “Accept: identity” it should not compress’, function (done) { request(app.listen()) .get(‘/‘) .set(‘Accept-Encoding’, ‘identity’) .expect(200) .expect(‘hello world’, function (err, res) { if (err) return done(err);
assert.equal(res.headers['content-encoding'] || 'identity', 'identity');done();});
}) })
- 答案耗时间 1.5 小时,<br />!!!和上题一样,网上完全找不到答案。。。果然真正用 Koa 写服务器的也太少了,都用了统一封装的第三方,纯粹的简单压缩反而没有人使用了(特别是到了 koa2,旧的方案没用了)
const koa = require(‘koa’); const zlib = require(‘zlib’) const app = module.exports = new koa();
app.use(async (ctx, next) => { if (ctx.request.path === ‘/‘) { if (ctx.acceptsEncodings(‘gzip’)) { ctx.status = 200 ctx.set(‘content-encoding’, ‘gzip’) ctx.body = ‘hello world’ ctx.gzip = true } else if (ctx.acceptsEncodings(‘identity’)) { ctx.status = 200 ctx.set(‘Content-Encoding’, ‘identity’) ctx.body = ‘hello world’ } } await next()
})
app.use(gzip = async (ctx) => { if (ctx.gzip) { await (async () => { return new Promise(resolve => { zlib.deflate(new Buffer(ctx.body), (err, buffer) => { ctx.body = buffer resolve(buffer) }) }) })() } })
本题精髓,关于 zlib 的应用,其压缩 gzip 有两种方案- 1、用一个步骤完成。输入流文件(new Buffer()),输出gzip压缩后的结果,我使用的是第一种!!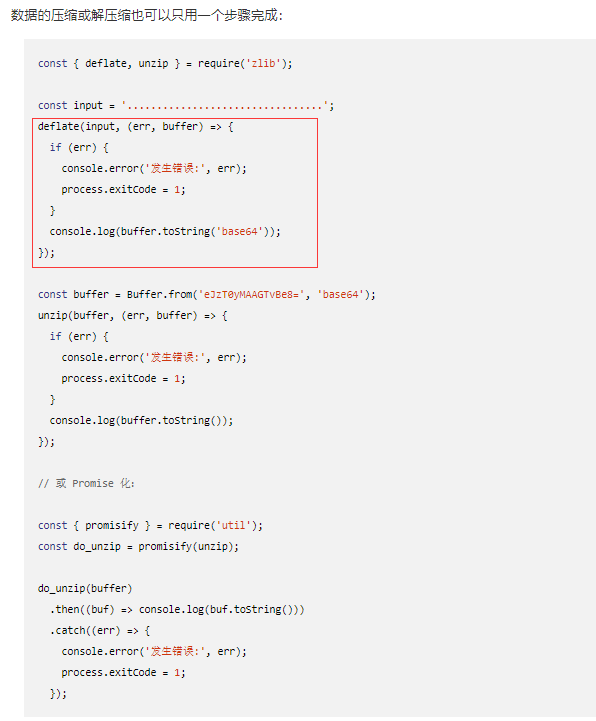- 2、压缩或者解压流(例如一个文件)通过 `zlib` `Transform` 流将源数据流传输到目标流中来完成。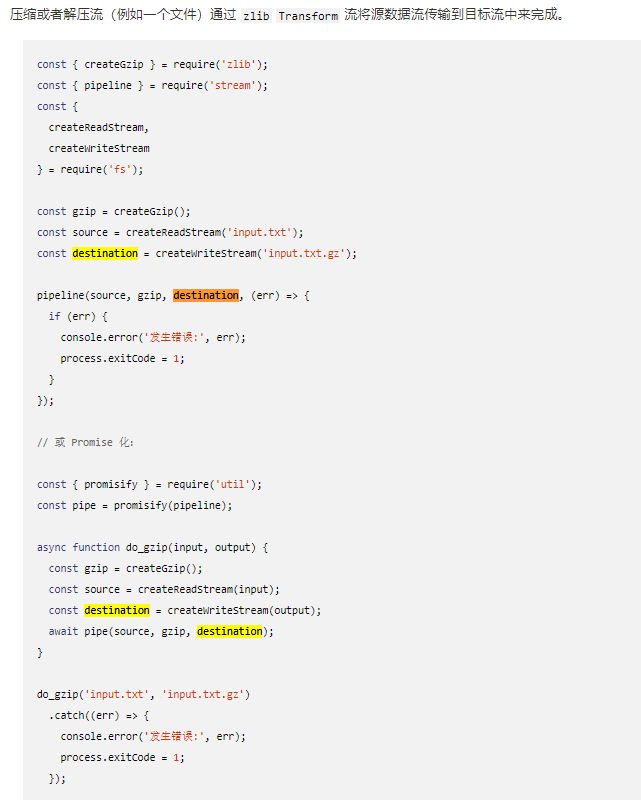<a name="C64oj"></a>#### 07 - content-headers- 简介> 请求头、响应头都有很多参数。包括不限于content-type/content-length/content-encoding。学习使用this.request.is()。- 考卷
var assert = require(‘assert’); var request = require(‘supertest’);
var app = require(‘./index.js’);
describe(‘Content Headers’, function () { describe(‘when sending plain text’, function () { it(‘should return “ok”‘, function (done) { request(app.listen()) .get(‘/‘) .set(‘Content-Type’, ‘text/plain’) .set(‘Content-Length’, ‘3’) .send(‘lol’) .expect(200) .expect(‘ok’, done); }) })
describe(‘when sending JSON’, function () { it(‘should return that JSON’, function (done) { // just a random JSON body. don’t bother parsing this. var body = JSON.stringify({});
request(app.listen()).get('/').set('Content-Type', 'application/json; charset=utf-8').set('Content-Length', Buffer.byteLength(body)).send(body).expect(200).expect('Content-Type', /application\/json/).expect('Content-Length', '17').end(function (err, res) {if (err) return done(err);assert.equal('hi!', res.body.message);done();})})
}) })
- 答案
const koa = require(‘koa’); const app = module.exports = new koa();
app.use(async (ctx) => { if (ctx.request.is(‘text/plain’)) { ctx.status = 200 ctx.body = ‘ok’ } else if (ctx.request.is(‘application/json’)) { ctx.body = { message: ‘hi!’ } ctx.status = 200 ctx.length = 17 } })
这题还算简单。<br />需要注意的是:<br />如果返回体是application/json,我们的 ctx.length = 17 实际上是没有意义的。源码里会删掉你强行定义的(如果你是 json 格式返回的话)<br /><br /><a name="wSzPq"></a>#### 08 - decorators- 简介> 所有的中间件都是下一个中间件的装饰器- 考卷
var request = require(‘supertest’);
var app = require(‘./index.js’);
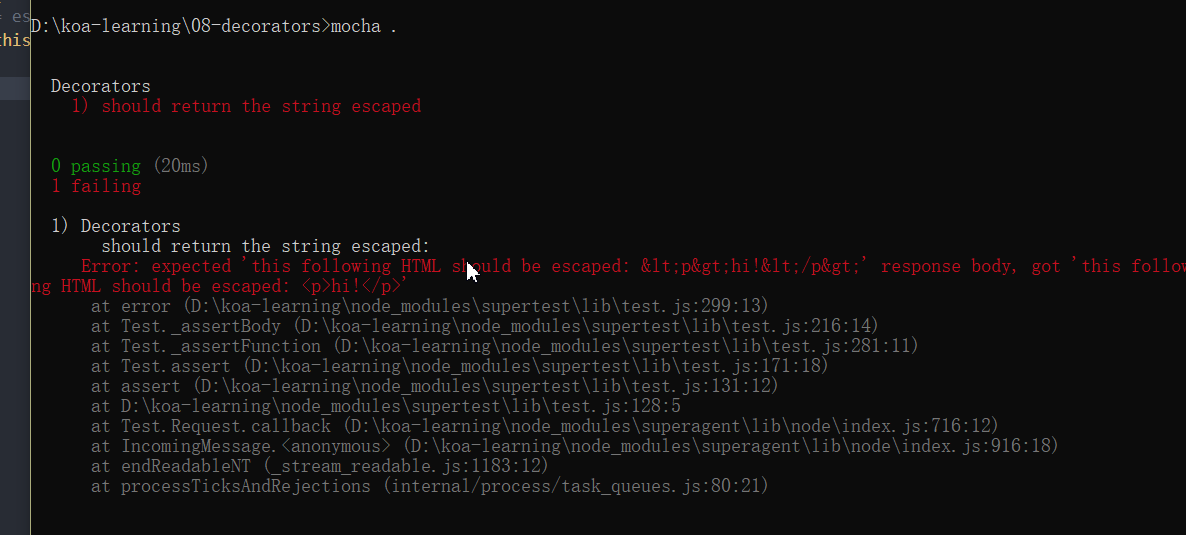
describe(‘Decorators’, function () { it(‘should return the string escaped’, function (done) { request(app.listen()) .get(‘/‘) .expect(200) .expect(‘this following HTML should be escaped: <p>hi!</p>’, done); }) })
- 答案
var koa = require(‘koa’); var escape = require(‘escape-html’); var app = module.exports = new koa();
app.use(async (ctx, next) => { await next() })
app.use(async (ctx) => { ctx.response.body = escape(‘this following HTML should be escaped:
hi!
‘) });
<a name="8Gp2v"></a>#### 09 - templating- 简介> 使用jade搭配koa,用于返回静态页面。- 考卷
var request = require(‘supertest’);
var app = require(‘./index.js’);
describe(‘Templating’, function () { it(‘should return the template’, function (done) { var html = ‘<!DOCTYPE html>
Hello!
‘;
request(app.listen()).get('/').expect(200).expect('Content-Type', /text\/html/).expect(html, done);
}) })
- 答案
var koa = require(‘koa’); var jade = require(‘jade’); var path = require(‘path’); var app = module.exports = new koa();
app.use(async (ctx) => { jade.renderFile(path.join(__dirname, ‘homepage.jade’), { options: ‘here’ }, function(err, html) { ctx.body = html }); });
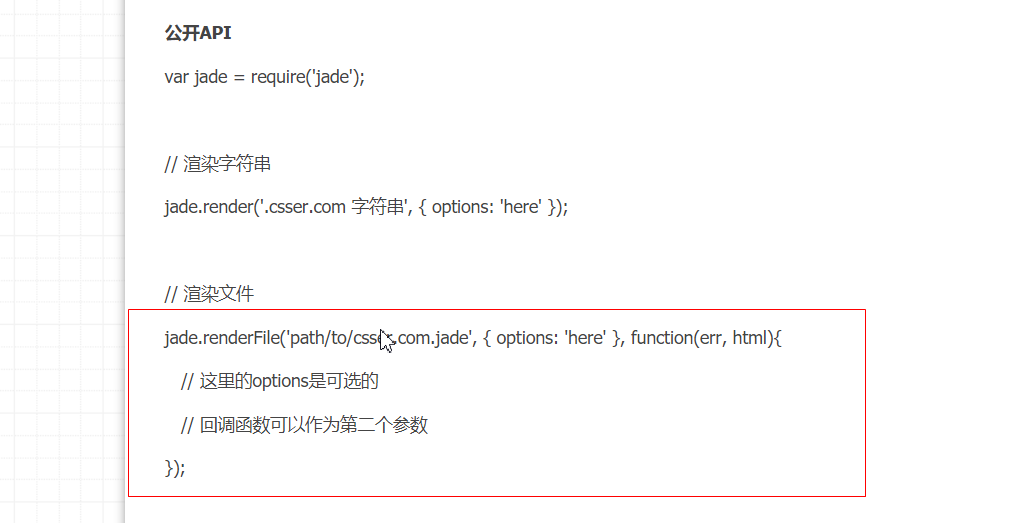<br />这题难度较低,查一下api马上就能实现,jade是很早的东西了,现在改名叫 pug,曾经网上有个 node.js 视频的教程还是用它做的(2014-2018年了,现在大概过时了)<a name="qjkON"></a>#### 10 - authentication- 简介鉴权内容,是大多数前端应该比较需要了解。- 考卷- /:无权限-401- /login:登录页面-200- /logout:状态-303
var assert = require(‘assert’); var request = require(‘supertest’);
var app = require(‘./index.js’); var server = app.listen();
request = request.agent(server);
describe(‘Authentication’, function () { describe(‘when not authenticated’, function () { it(‘GET / should 401’, function (done) { request.get(‘/‘).expect(401, done); })
it('GET /login should 200', function (done) {request.get('/login').expect('Content-Type', /text\/html/).expect(/^<form/, done);})it('GET /logout should 303', function (done) {request.get('/logout').expect(303, done);})
})
describe(‘logging in’, function () { it(‘GET /login should render a CSRF token’, function (done) { request.get(‘/login’) .expect(‘Content-Type’, /text\/html/) .expect(200, function (err, res) { if (err) return done(err);
var html = res.text;csrf = /name="_csrf" value="([^"]+)"/.exec(html)[1];done();})})it('POST /login should 403 without a CSRF token', function (done) {request.post('/login').send({username: 'username',password: 'password'}).expect(403, done);})it('POST /login should 403 with an invalid CSRF token', function (done) {request.post('/login').send({username: 'username',password: 'password',_csrf: 'lkjalksdjfasdf'}).expect(403, done);})it('POST /login should 400 with bad auth details', function (done) {request.post('/login').send({_csrf: csrf,username: 'klajklsdjfasdf',password: 'lkjlakjsdlkfja'}).expect(400, done);})it('POST /login should 303 with good auth details', function (done) {request.post('/login').send({_csrf: csrf,username: 'username',password: 'password'}).expect(303).expect('Location', '/', done);})it('GET / should return hello world', function (done) {request.get('/').expect(200).expect('hello world', done);})
})
describe(‘logging out’, function () { it(‘GET /logout should 303 to /login’, function (done) { request.get(‘/logout’) .expect(303) .expect(‘Location’, ‘/login’, done); })
it('GET / should 401', function (done) {request.get('/').expect(401, done);})
}) })
```
- 答案
总结和一些想法
- Koa确实很纯粹。
- Koa和Express除了写法的区别外,最大区别就是纯粹程度了。
- Koa缺点:事实上,做题的过程中,能够发现,很多koa的框架,还停留在 koa v1的版本。比如 koa-gzip/koa-session 这种非常必要的、常用的。第三方的支持是不靠谱的,作为个人长期维护的项目,你不能保证它的稳定更新。
- Koa缺点:它太纯粹了,导致很多功能它没有自己去实现(比如gzip需要引入koa-gzip,session需要引入koa-session,body-parser也经常要引入,还有很多…)。对于一个像我这样的新人来说,不太可能架构出一个好的体系。所有会有egg.js这类东西诞生(继承了koa社区的最佳实践)。

事实证明,一个纯粹的东西,扩展性是很强的,但是功能的完备性肯定是受到限制的。

