title: 基于Centos快速搭建ELK
categories:
- 安全运营
tags: - ELK
cover: >-
https://timgsa.baidu.com/timg?image&quality=80&size=b9999_10000&sec=1588876239117&di=b4d1003190291d3da14c10004a58c036&imgtype=0&src=http%3A%2F%2Fp4.ssl.qhimg.com%2Ft0187295c3528fa925f.png
abbrlink: 44004
date: 2020-05-07 23:44:24
基于Centos快速搭建ELK
ELK是一个成熟的日志系统,主要功能有收集、分析、检索,详细见 elastic官网。 本文主要介绍如何在CentOS7下安装最新版本的ELK,当然现在docker已经有完全配置成功的elk容器,安装配置非常方便.
环境准备
- centos-7-x86_64
- java8
- elasticsearch-7.6.2
- kibana-7.6.2
- logstash-7.6.2
安装过程
关闭防火墙和Selinux
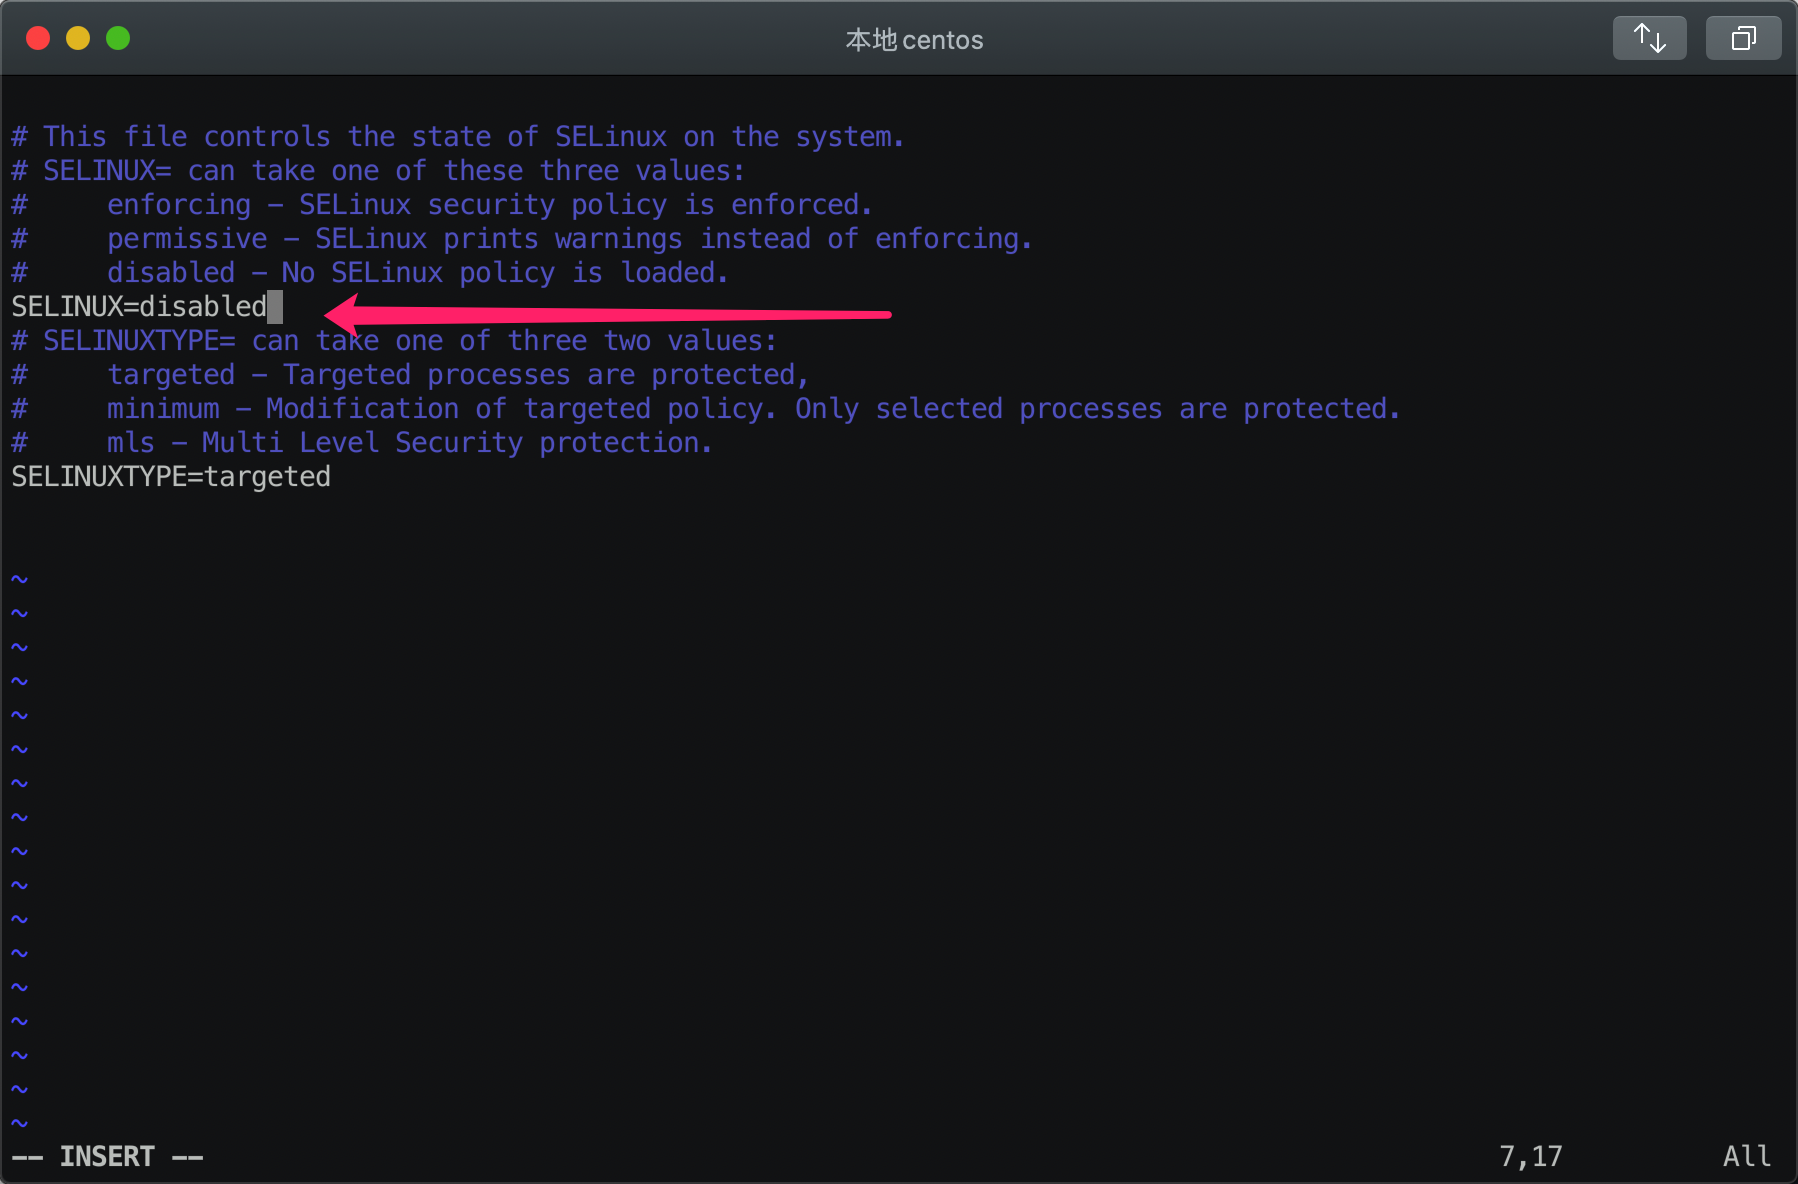
关闭Selinuxvim /etc/sysconfig/selinux
SELINUX=disabled #需重启永久生效wq #保存退出setenforce 0 #临时生效
关闭Firewalldsystemctl stop firewalld #关闭防火墙systemctl disable firewalld #禁止开机自启

安装JDK
先是确认环境rpm -qa|grep Java
如果有其他版本的请删除
rpm–e —nodeps java-*
检查是否删除
java –version安装Elasticsearch
导入密钥
rpm --import https://artifacts.elastic.co/GPG-KEY-elasticsearch
下载最新的安装包
wget https://artifacts.elastic.co/downloads/elasticsearch/elasticsearch-7.6.2-x86_64.rpm
下载较慢的话建议科学下载
安装
rpm -ivh elasticsearch-7.6.2-x86_64.rpm

配置
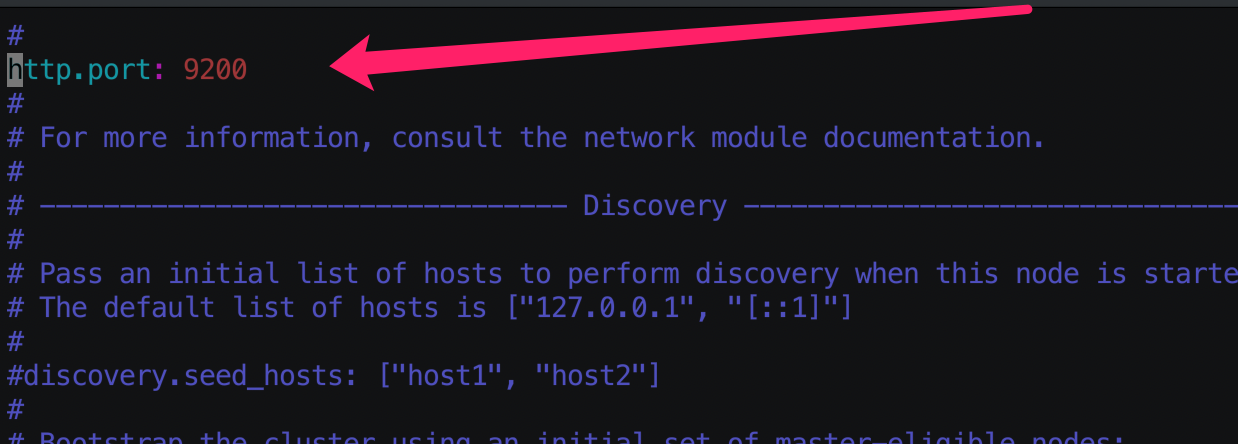
vim /etc/elasticsearch/elasticsearch.yml
取消以下两行的注释

启动
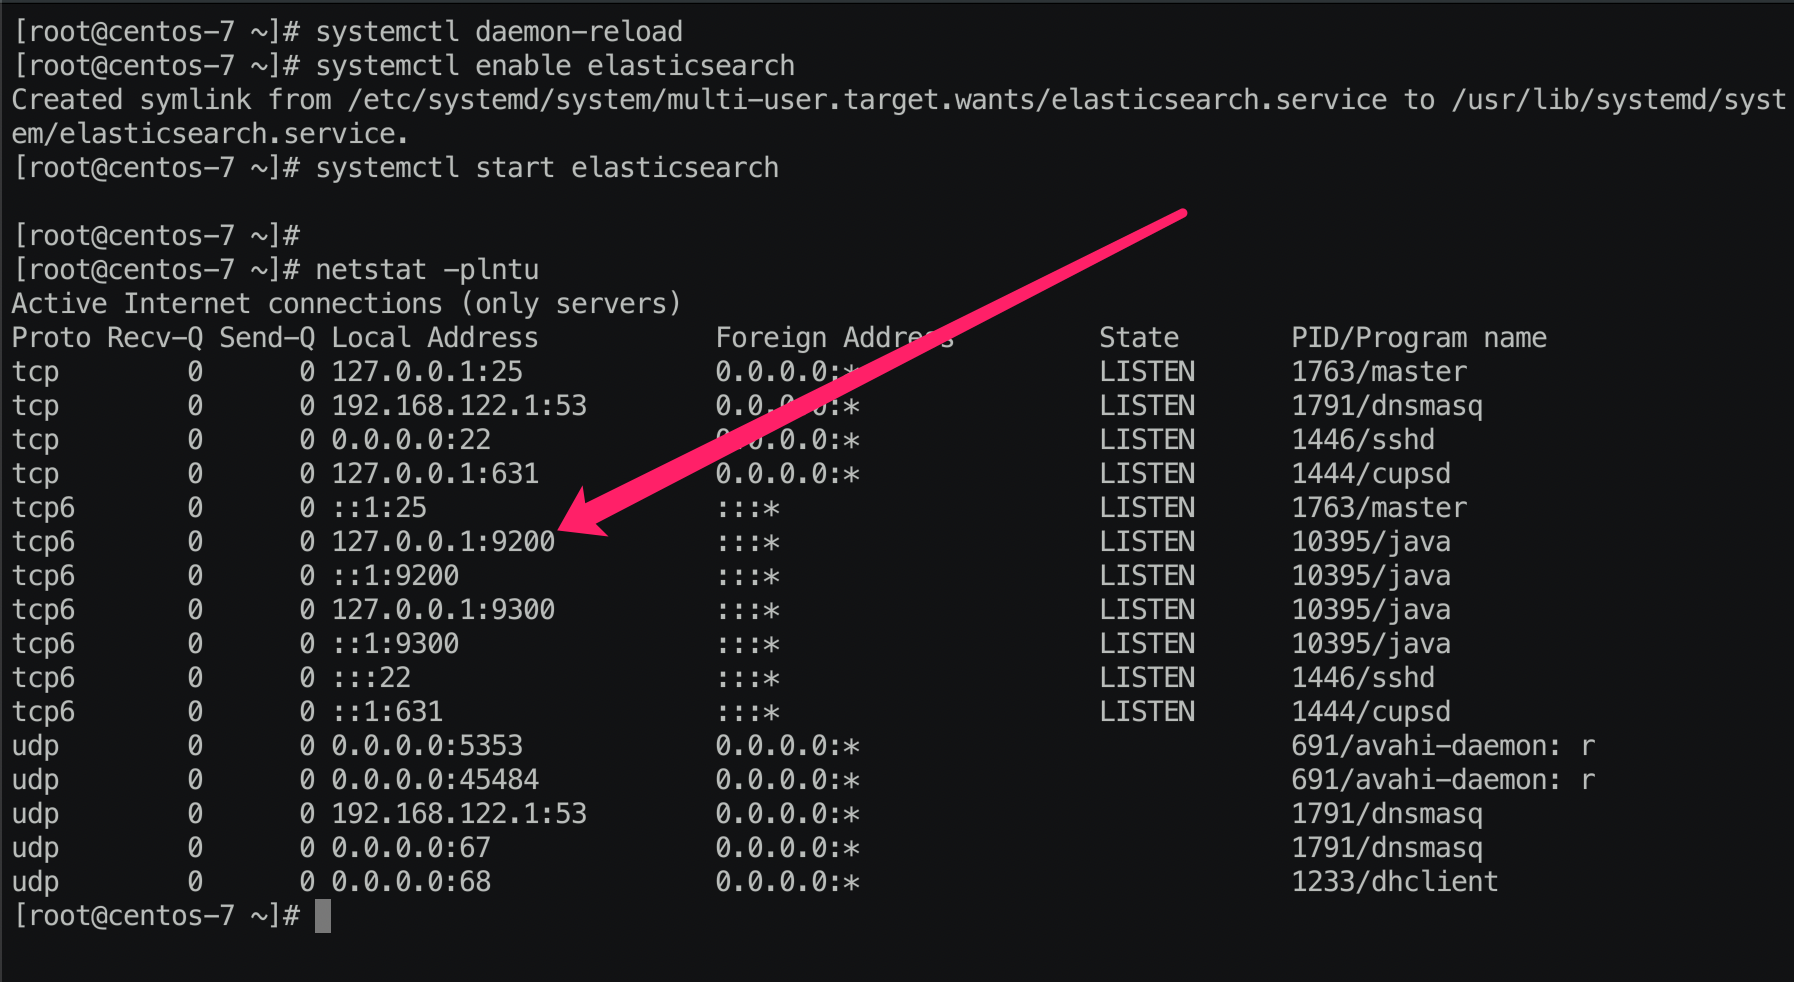
[root@localhost ~]# systemctl daemon-reload[root@localhost ~]# systemctl enable elasticsearch[root@localhost ~]# systemctl start elasticsearch[root@localhost ~]# netstat -plntu
安装Nginx
安装
[root@localhost ~]# yum install epel-release -y[root@localhost ~]# yum install nginx httpd-tools -y
安装Nginx之前要先安装epel源
配置
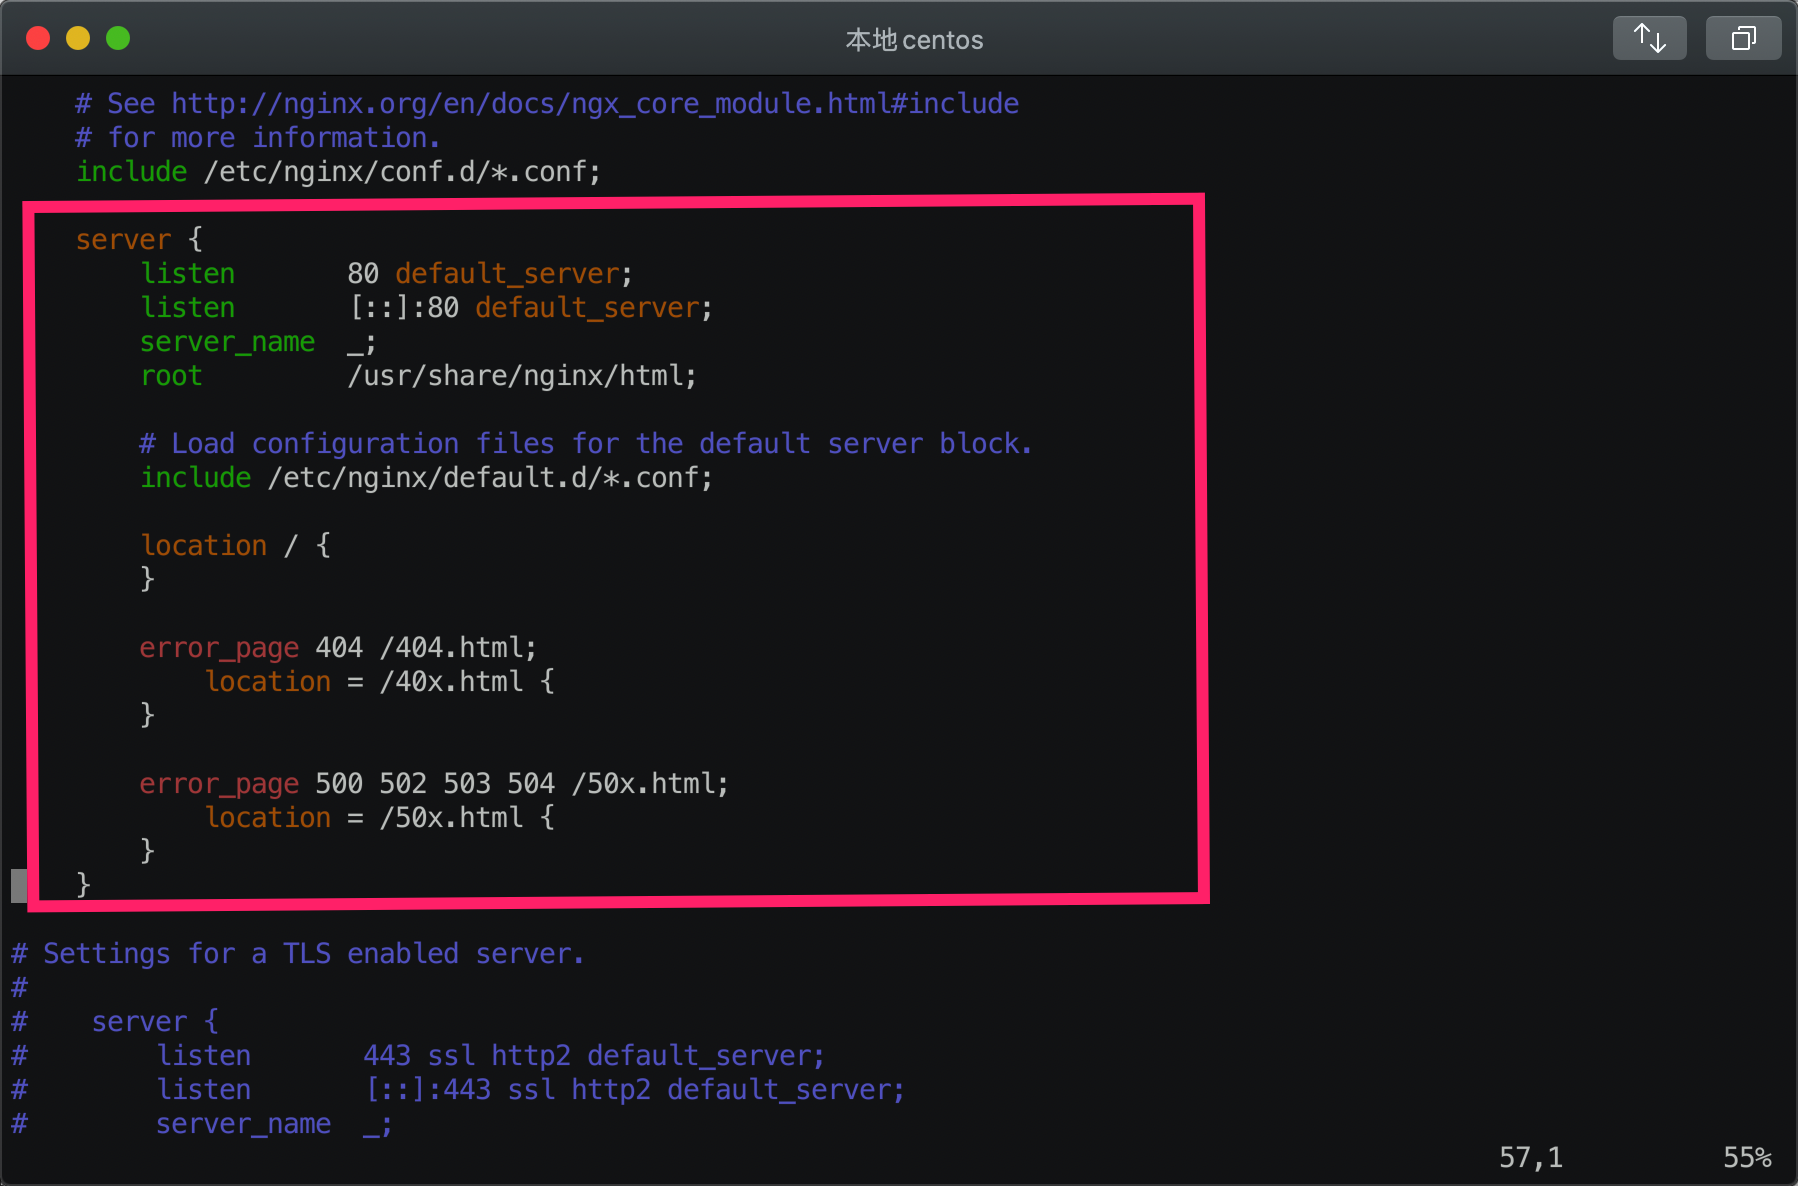
vim /etc/nginx/nginx.conf
这里把位于36、59行之间的Server块删掉,更多的配置项在 /etc/nginx/conf.d/*.conf中
36 include /etc/nginx/conf.d/*.conf;Server { }59# Settings for a TLS enabled server.
Kibanna添加代理
vim /etc/nginx/conf.d/kibana.conf
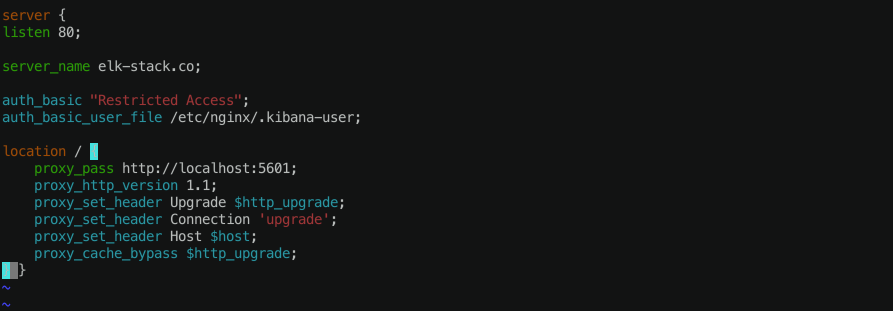
这里域名为 elk-stack.co,然后使用http协议的basic认证,密码稍后添加,然后看location块,当Nginx监听到域名为elk-stack.co,端口为80的请求时,就会转发给本地监听端口5601的进程,这个进程就是kibana,下一步安装它,内容如下:
server {listen 80;server_name elk-stack.co;auth_basic "Restricted Access";auth_basic_user_file /etc/nginx/.kibana-user;location / {proxy_pass http://localhost:5601;proxy_http_version 1.1;proxy_set_header Upgrade $http_upgrade;proxy_set_header Connection 'upgrade';proxy_set_header Host $host;proxy_cache_bypass $http_upgrade;} }
Elasticsearch添加代理
vim /etc/nginx/conf.d/elasticsearch.conf
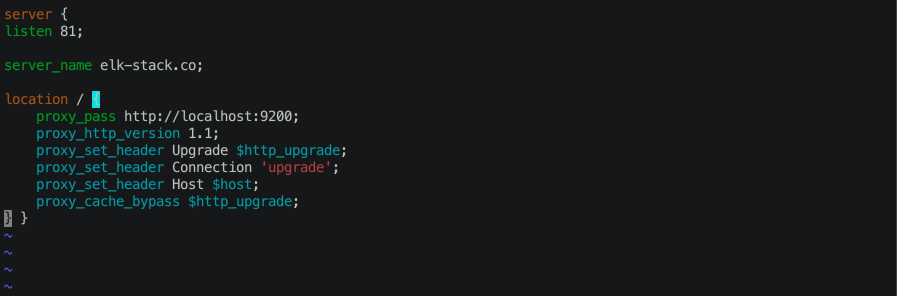
当Nginx监听到域名为elk-stack.co,端口为81的请求时,就会转发给本地监听端口9200的进程,这个进程就是Elasticsearch
server {listen 81;server_name elk-stack.co;location / {proxy_pass http://localhost:9200;proxy_http_version 1.1;proxy_set_header Upgrade $http_upgrade;proxy_set_header Connection 'upgrade';proxy_set_header Host $host;proxy_cache_bypass $http_upgrade;} }
添加basic认证
htpasswd -c /etc/nginx/.kibana-user admin
然后输入你的密码,记住最后要通过这个来登录kibana的
测试Nginx配置
nginx -t
出现如下证明Nginx成功
如果出现 test failed,就回过头检查/etc/nginx/conf.d/kibana.conf和/etc/nginx/nginx.conf这两个文件,肯定是不小心弄错了。 如果输出 test is successful,那么就可以启动 nginx 了
systemctl enable nginxsystemctl start nginx
安装Kibana
下载好对应的rpm包
rpm -ivh kibana-7.6.2-x86_64.rpm

修改Kibana配置
vim /etc/kibana/kibana.yml
取消2、7、28行的注释,行号不一定准确,但一定是下面这几项(各个版本行号可能有出入)
server.port: 5601server.host: "localhost"elasticsearch.url: "http://localhost:9200"


启动Kibana
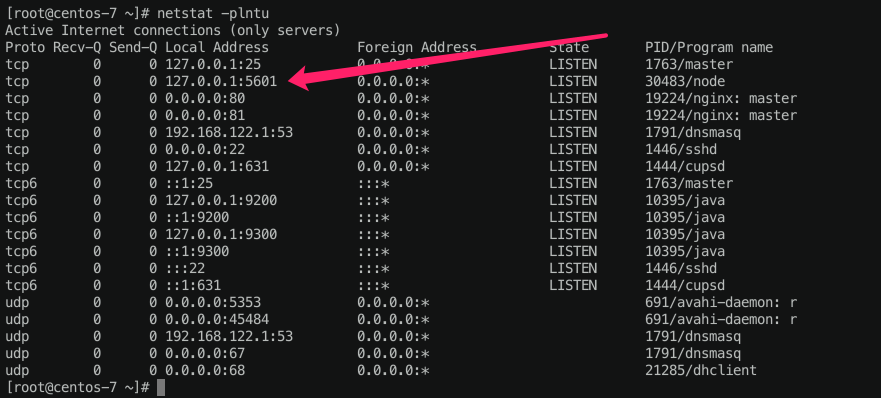
systemctl enable kibanasystemctl start kibananetstat -plntu
安装Logstash
下载对应的rpm包
安装
rpm -ivh logstash-7.6.2.rpm

启动
systemctl enable logstashsystemctl start logstash
安装成功
访问对应ip的80端口

如需用上面的域名访问,添加一条hosts就行后面ELK优化敬请期待下一篇文章~

若有收获,就点个赞吧
0 人点赞
