- 1、从Docker镜像仓库拉取Oracle镜像
- 2、创建Oracle容器的数据目录
- 3、运行一个Oracle实例
- 4、通过查看容器启动日志查看容器路径
- 5、系统环境变量配置Oracle容器的路径
- 6、通过SQLPlus进入Oracle
- 在oracle用户下找不到sqlplus命令
- 切换到root用户-默认密码是helowin
- root用户下可以执行sqlplus,此时需要退出sqlplus切换到oracle用户对数据库进行操作
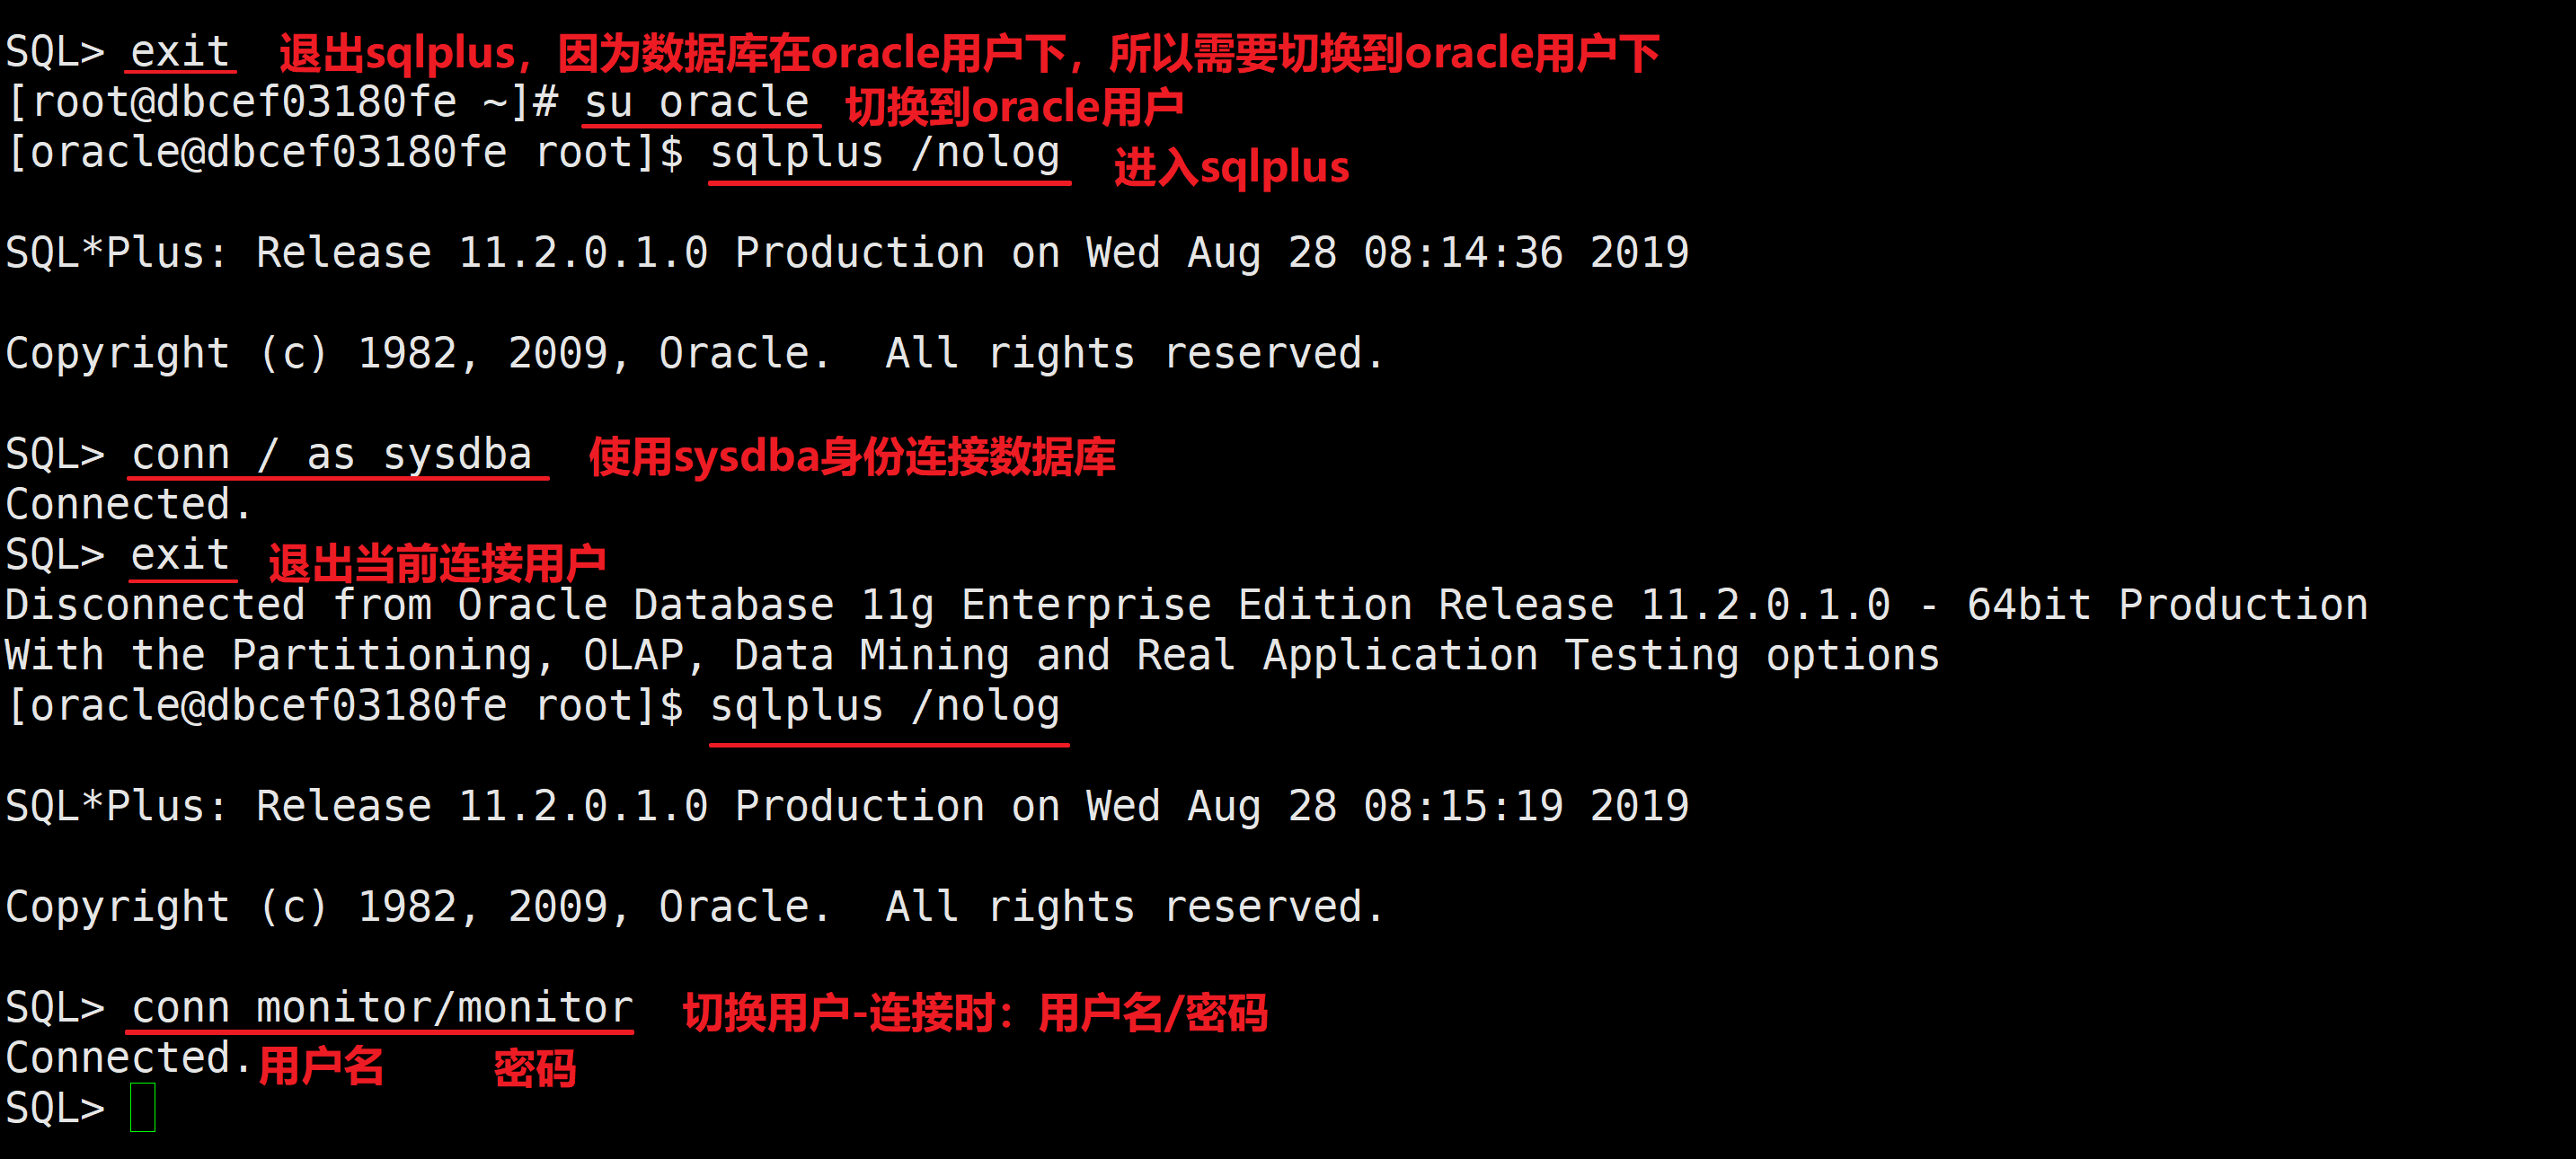
- 退出sqlplus
- 切换到oracle用户
- 再次执行就可以找到sqlplus命令了
- 使用sysdba权限连接数据库
- 在oracle用户下找不到sqlplus命令
- 切换到root用户-默认密码是helowin
- root用户下可以执行sqlplus,此时需要退出sqlplus切换到oracle用户对数据库进行操作
- 退出sqlplus
- 切换到oracle用户-因为数据库在oracle用户下
- 再次执行就可以找到sqlplus命令了
- 使用sysdba权限连接数据库
1、从Docker镜像仓库拉取Oracle镜像
以下仓库镜像选择一个即可-一般选择第一个
docker pull registry.cn-hangzhou.aliyuncs.com/helowin/oracle_11gdocker pull wnameless/oracle-xe-11g
2、创建Oracle容器的数据目录
[root@fcant-hadoop001 ~]# cd ..[root@fcant-hadoop001 /]# mkdir /my/oracle/data -pvmkdir: created directory ‘/my’mkdir: created directory ‘/my/oracle’mkdir: created directory ‘/my/oracle/data’
3、运行一个Oracle实例
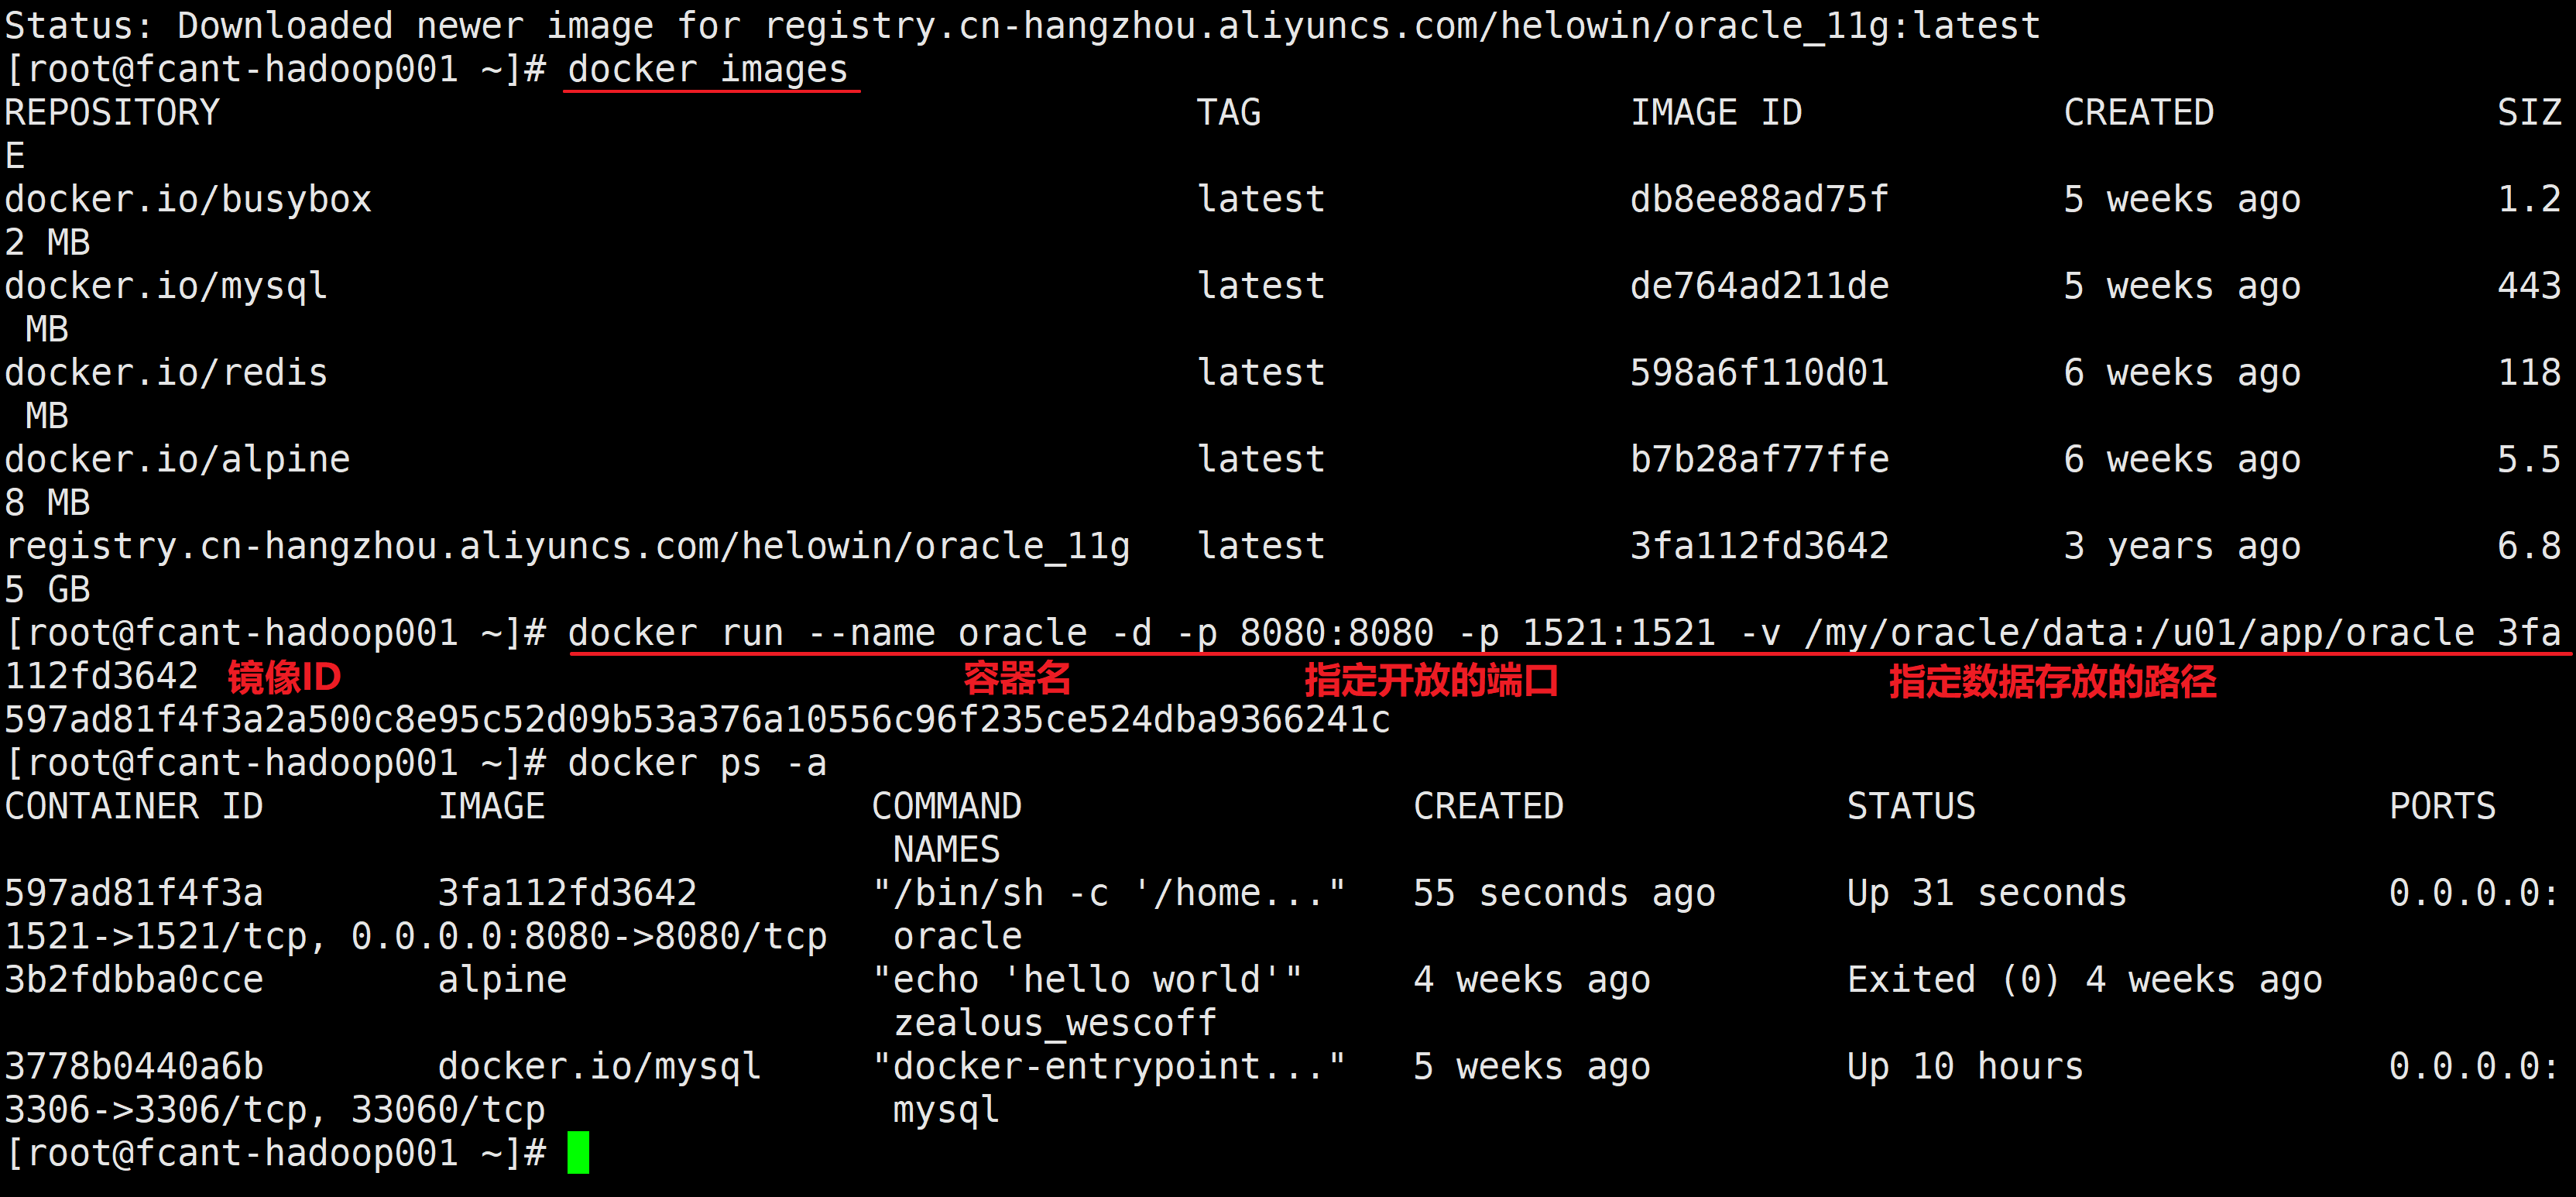
[root@fcant-hadoop001 ~]# docker imagesREPOSITORY TAG IMAGE ID CREATED SIZEdocker.io/busybox latest db8ee88ad75f 5 weeks ago 1.22 MBdocker.io/mysql latest de764ad211de 5 weeks ago 443 MBdocker.io/redis latest 598a6f110d01 6 weeks ago 118 MBdocker.io/alpine latest b7b28af77ffe 6 weeks ago 5.58 MBregistry.cn-hangzhou.aliyuncs.com/helowin/oracle_11g latest 3fa112fd3642 3 years ago 6.85 GB[root@fcant-hadoop001 ~]# docker run --name oracle -d -p 8080:8080 -p 1521:1521 -v /my/oracle/data:/u01/app/oracle 3fa112fd3642597ad81f4f3a2a500c8e95c52d09b53a376a10556c96f235ce524dba9366241c[root@fcant-hadoop001 ~]# docker ps -aCONTAINER ID IMAGE COMMAND CREATED STATUS PORTS NAMES597ad81f4f3a 3fa112fd3642 "/bin/sh -c '/home..." 55 seconds ago Up 31 seconds 0.0.0.0:1521->1521/tcp, 0.0.0.0:8080->8080/tcp oracle3b2fdbba0cce alpine "echo 'hello world'" 4 weeks ago Exited (0) 4 weeks ago zealous_wescoff3778b0440a6b docker.io/mysql "docker-entrypoint..." 5 weeks ago Up 10 hours 0.0.0.0:3306->3306/tcp, 33060/tcp mysql[root@fcant-hadoop001 ~]#
4、通过查看容器启动日志查看容器路径
[root@fcant-hadoop001 home]# docker logs -f oracle/home/oracle/app/oracle/product/11.2.0/dbhome_2Processing Database instance "helowin": log file /home/oracle/app/oracle/product/11.2.0/dbhome_2/startup.logtail: unrecognized file system type 0x794c7630 for `/home/oracle/app/oracle/product/11.2.0/dbhome_2/startup.log'. Reverting to polling.Fixed Size 2213776 bytesVariable Size 402655344 bytesDatabase Buffers 1191182336 bytesRedo Buffers 7360512 bytesDatabase mounted.Database opened.SQL> Disconnected from Oracle Database 11g Enterprise Edition Release 11.2.0.1.0 - 64bit ProductionWith the Partitioning, OLAP, Data Mining and Real Application Testing options/home/oracle/app/oracle/product/11.2.0/dbhome_2/bin/dbstart: Database instance "helowin" warm started.
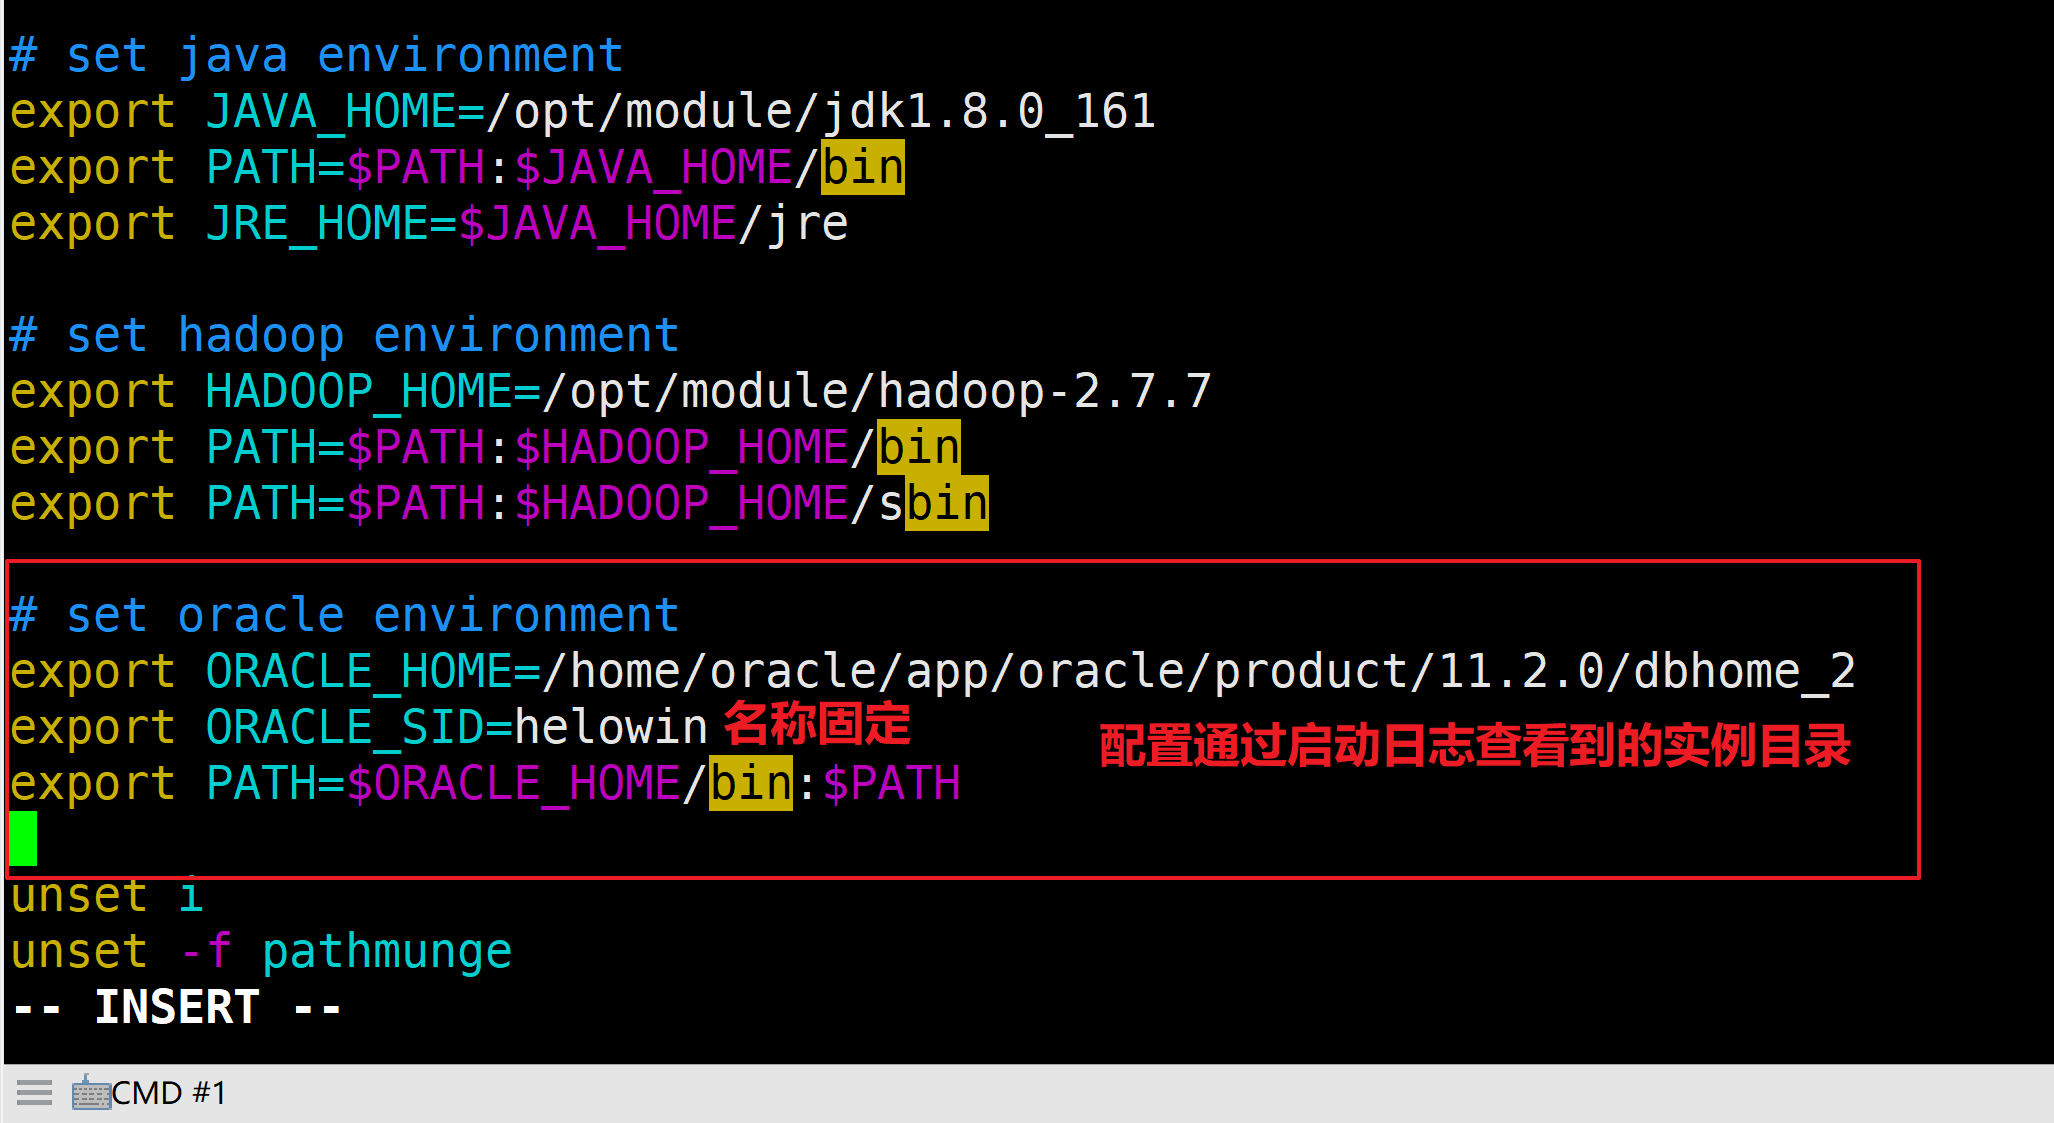
5、系统环境变量配置Oracle容器的路径
A、编辑配置文件
vim /etc/profile
B、添加Oracle容器的环境变量
# set oracle environmentexport ORACLE_HOME=/home/oracle/app/oracle/product/11.2.0/dbhome_2export ORACLE_SID=helowinexport PATH=$ORACLE_HOME/bin:$PATH
6、通过SQLPlus进入Oracle
A、进入sqlplus的步骤分析
通过sqlplus进入数据库操作的步骤:
- 执行
**docker exec -it oracle bash**进入容器的Bash操作 - 此时进入的是oracle用户,没有sqlplus命令的执行权限
- 切换到root用户,默认密码是helowin
- 执行
**sqlplus /nolog** - 再切换到oracle用户,默认密码是oracle
- 执行
**sqlplus /nolog**可以运行 - 使用sysdba身份进入数据库
B、执行步骤
```sql在oracle用户下找不到sqlplus命令
[oracle@dbcef03180fe /]$ sqlplus /nolog bash: sqlplus: command not found
切换到root用户-默认密码是helowin
[oracle@dbcef03180fe /]$ su - root Password:
root用户下可以执行sqlplus,此时需要退出sqlplus切换到oracle用户对数据库进行操作
[root@dbcef03180fe ~]# sqlplus /nolog
SQL*Plus: Release 11.2.0.1.0 Production on Wed Aug 28 08:10:22 2019
Copyright (c) 1982, 2009, Oracle. All rights reserved.
退出sqlplus
SQL> exit
切换到oracle用户
[root@dbcef03180fe ~]# su oracle
再次执行就可以找到sqlplus命令了
[oracle@dbcef03180fe root]$ sqlplus /nolog
SQL*Plus: Release 11.2.0.1.0 Production on Wed Aug 28 08:14:36 2019
Copyright (c) 1982, 2009, Oracle. All rights reserved.
使用sysdba权限连接数据库
SQL> conn / as sysdba Connected. SQL> exit Disconnected from Oracle Database 11g Enterprise Edition Release 11.2.0.1.0 - 64bit Production With the Partitioning, OLAP, Data Mining and Real Application Testing options [oracle@dbcef03180fe root]$ sqlplus /nolog
SQL*Plus: Release 11.2.0.1.0 Production on Wed Aug 28 08:15:19 2019
Copyright (c) 1982, 2009, Oracle. All rights reserved.
SQL>
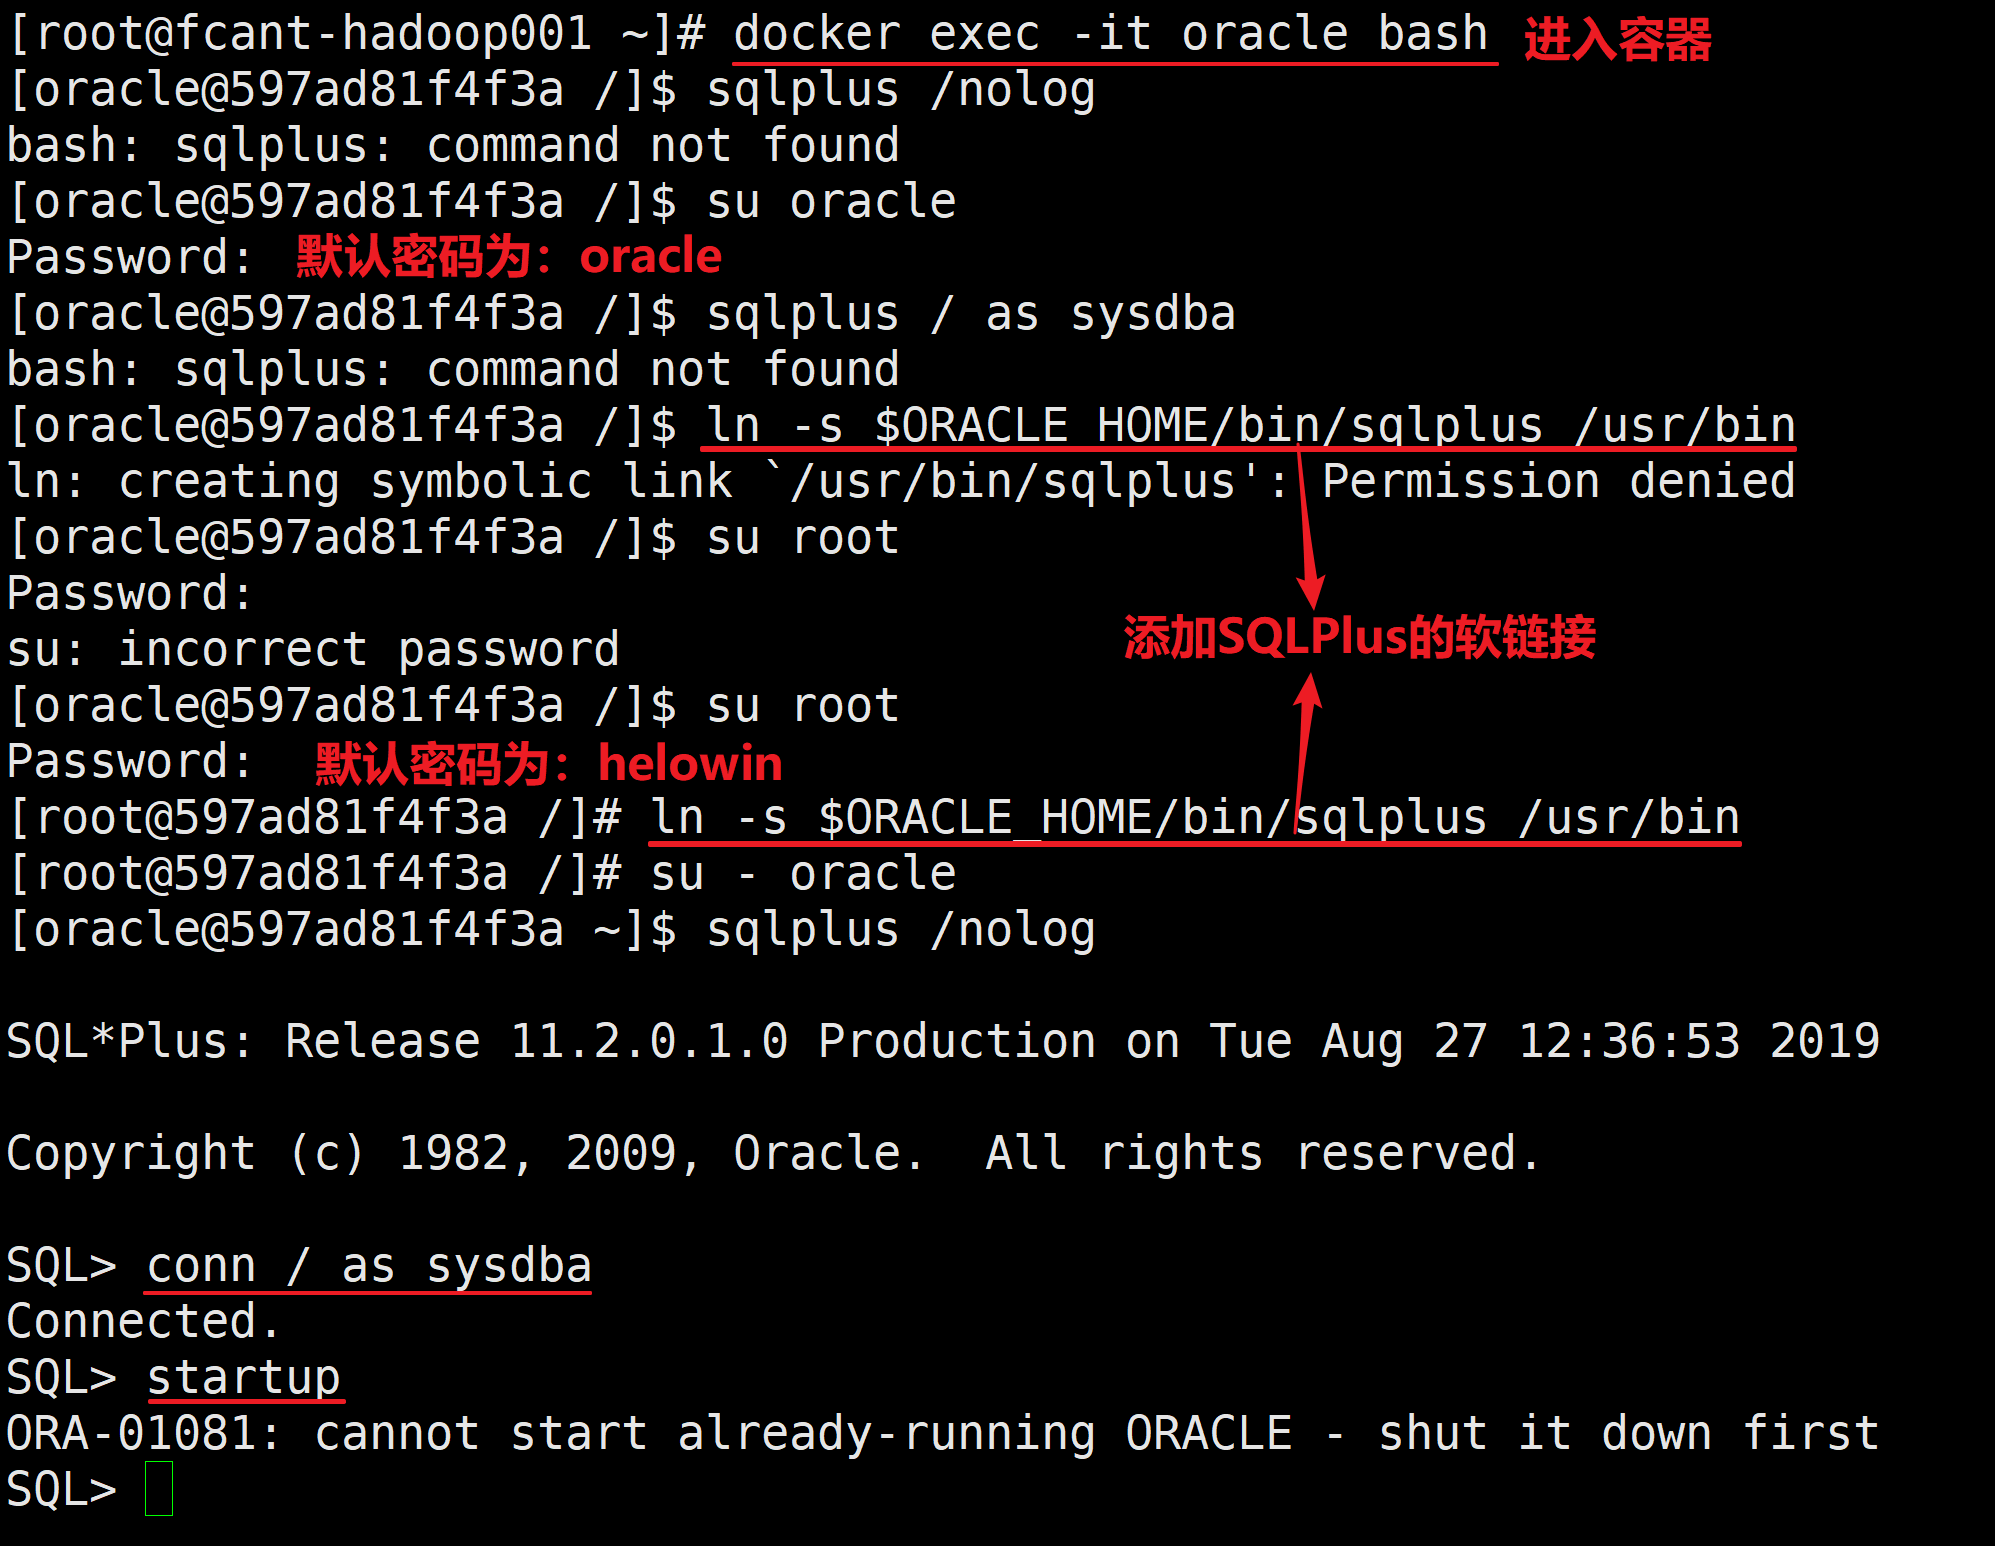
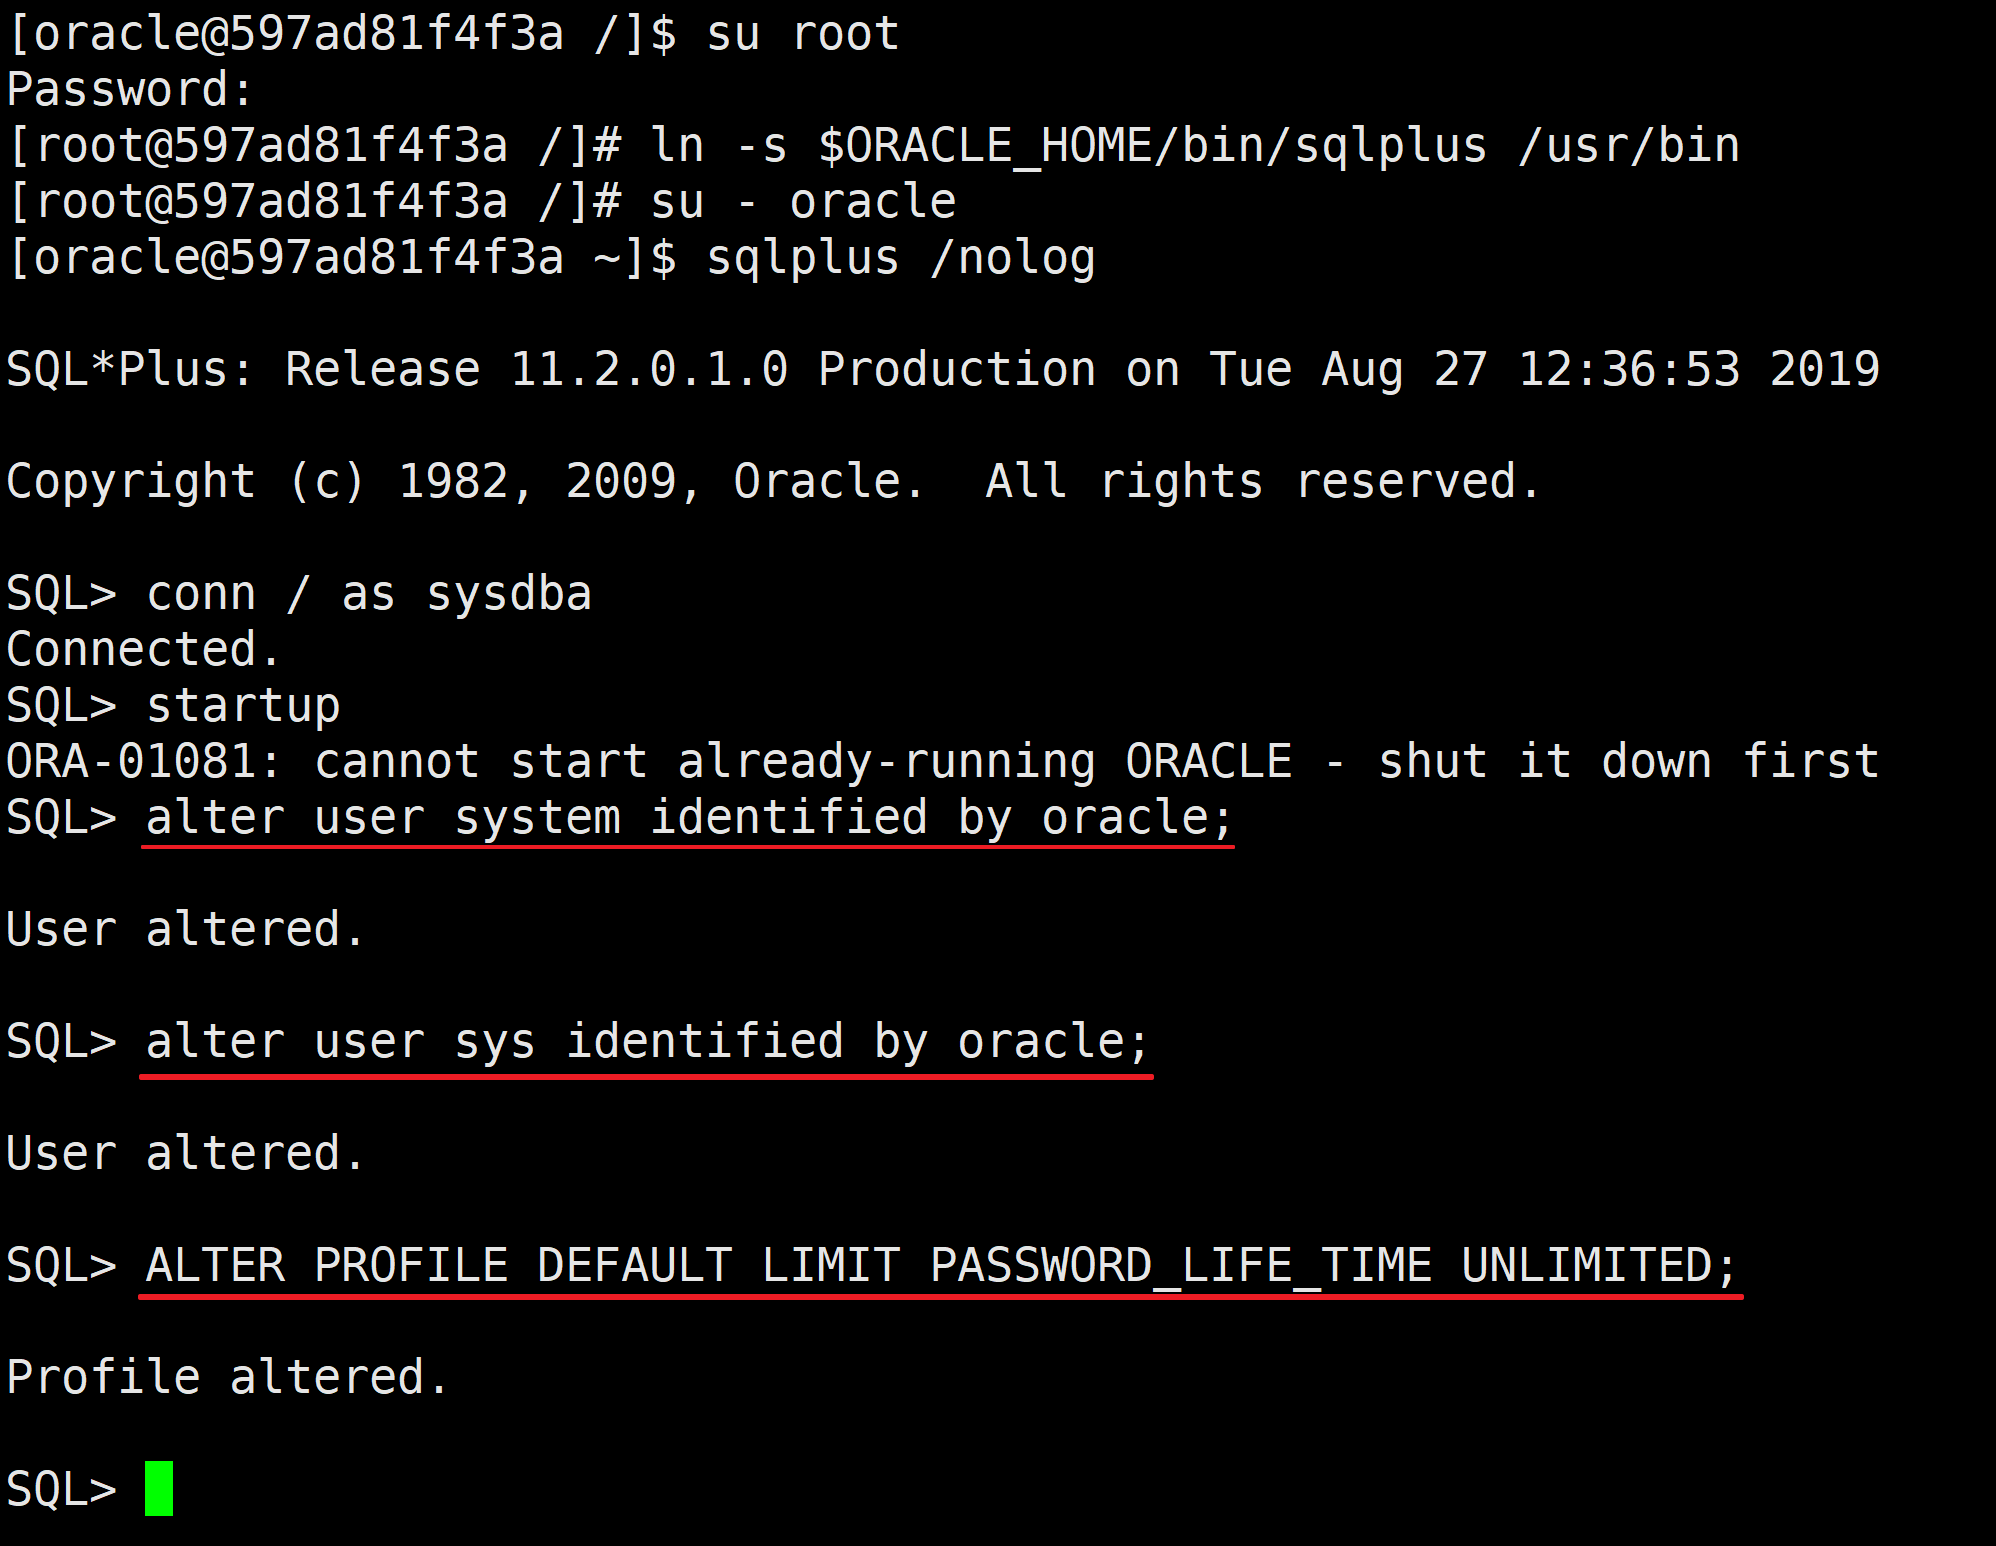
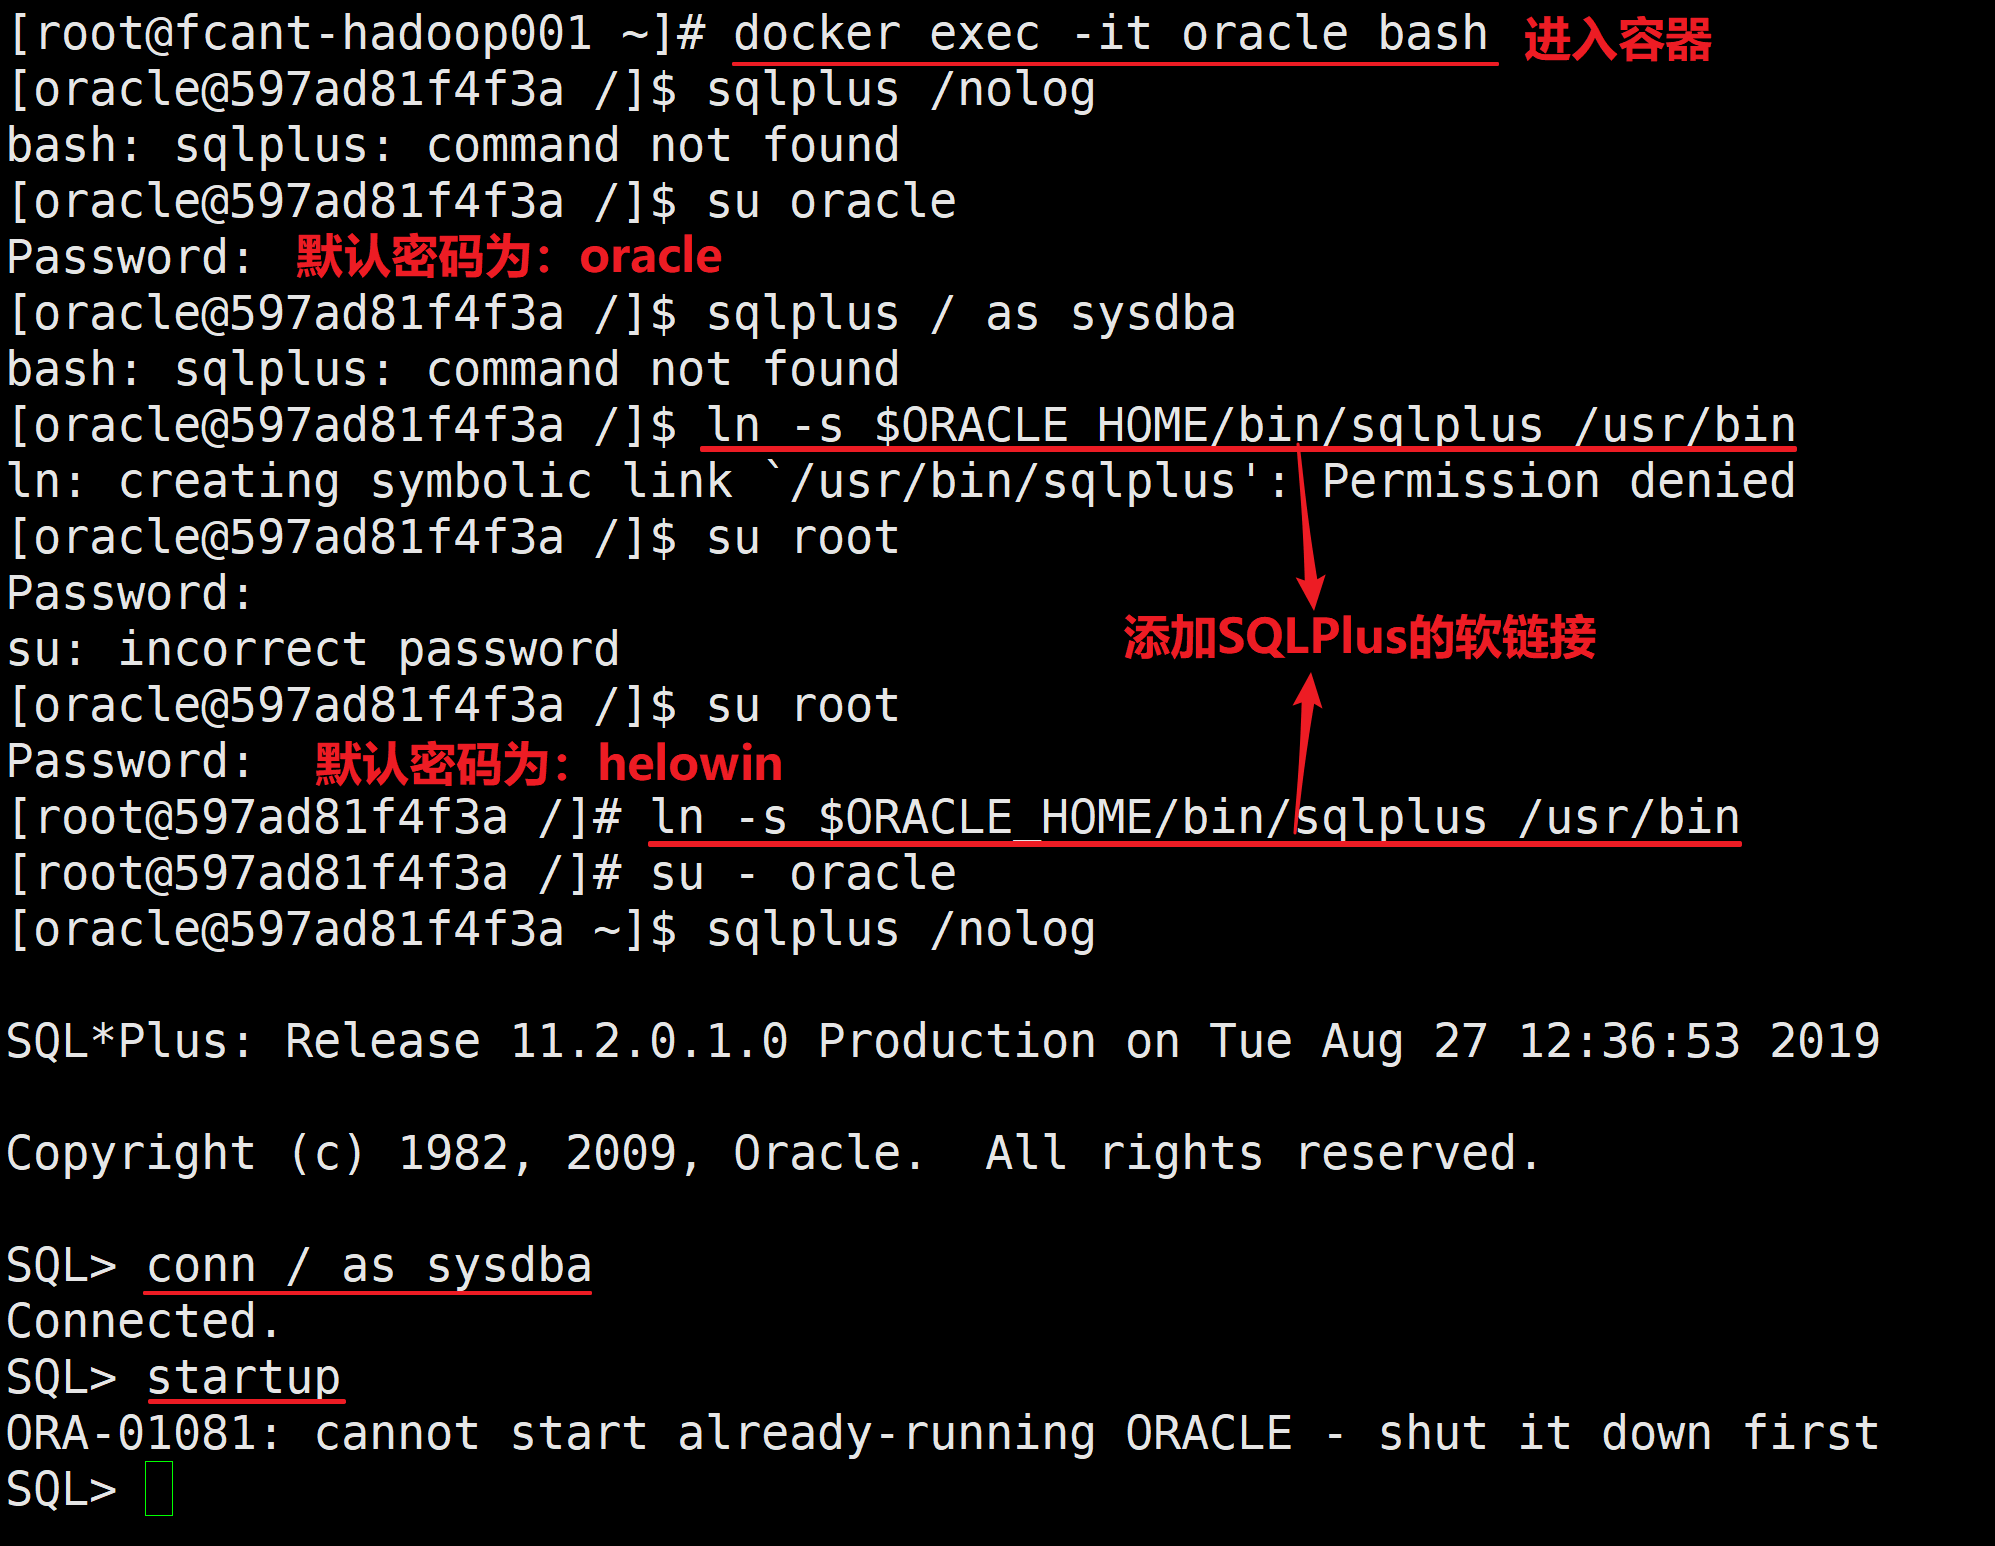
<br />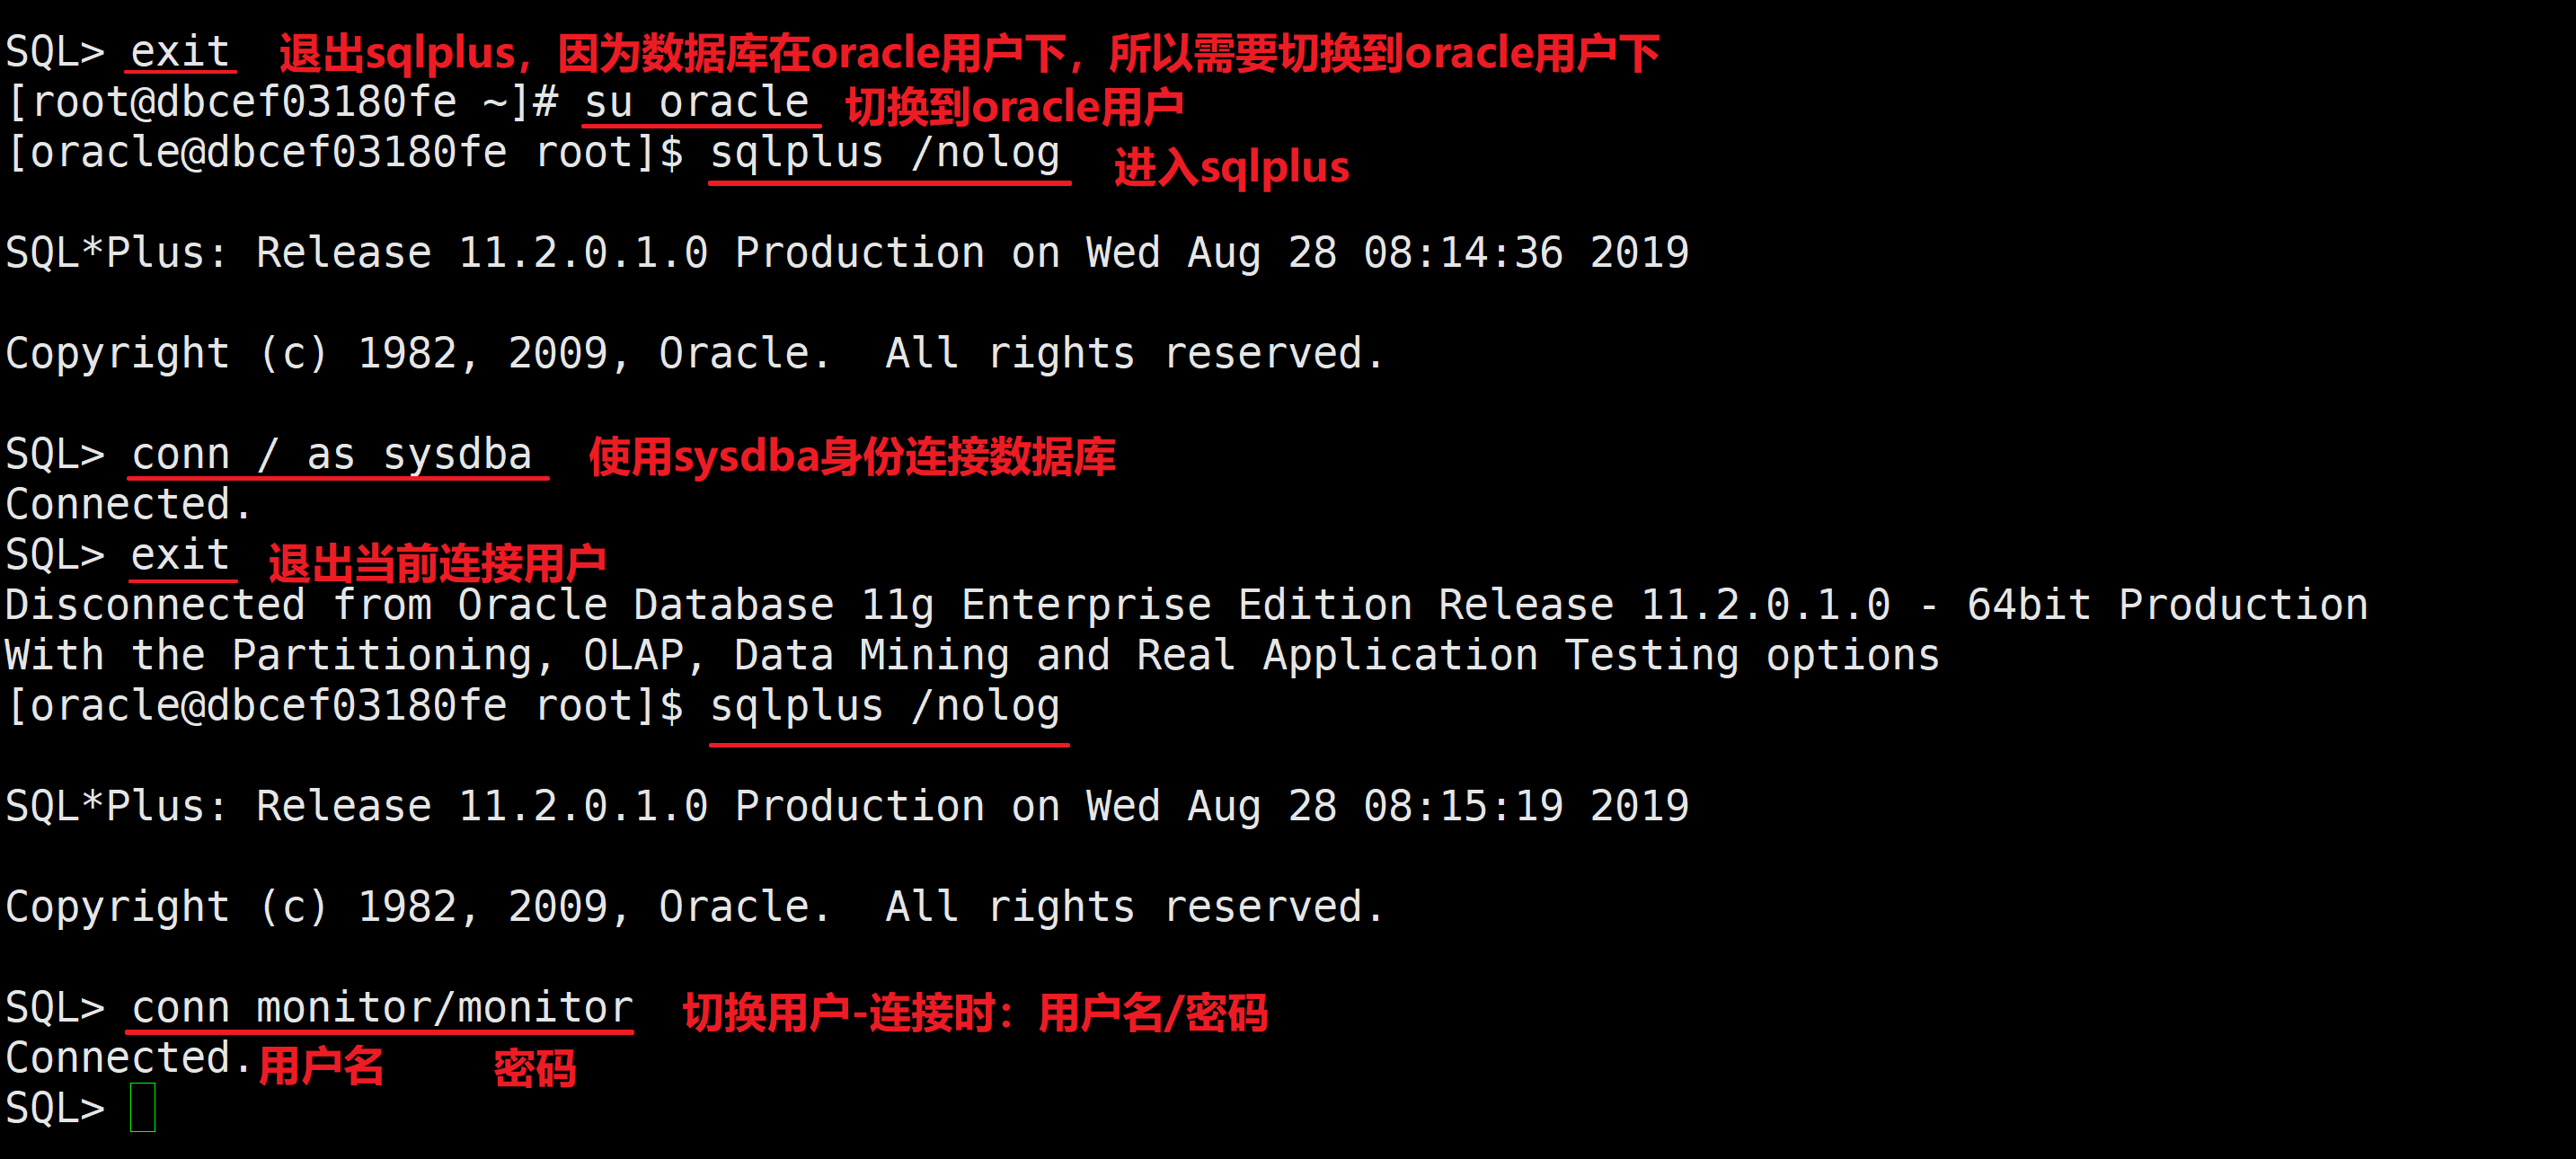<br />**进入容器,切换到root用户添加软链接,否则没有权限-如果以前添加过SQLPlus的软链接,进入/usr/bin目录下删除重新添加**```bash[root@fcant-hadoop001 ~]# docker exec -it oracle bash[oracle@597ad81f4f3a /]$ sqlplus /nologbash: sqlplus: command not found[oracle@597ad81f4f3a /]$ su oraclePassword:[oracle@597ad81f4f3a /]$ sqlplus / as sysdbabash: sqlplus: command not found[oracle@597ad81f4f3a /]$ ln -s $ORACLE_HOME/bin/sqlplus /usr/binln: creating symbolic link `/usr/bin/sqlplus': Permission denied[oracle@597ad81f4f3a /]$ su rootPassword:su: incorrect password[oracle@597ad81f4f3a /]$ su rootPassword:[root@597ad81f4f3a /]# ln -s $ORACLE_HOME/bin/sqlplus /usr/bin[root@597ad81f4f3a /]# su - oracle[oracle@597ad81f4f3a ~]$ sqlplus /nologSQL*Plus: Release 11.2.0.1.0 Production on Tue Aug 27 12:36:53 2019Copyright (c) 1982, 2009, Oracle. All rights reserved.SQL> conn / as sysdbaConnected.SQL> startupORA-01081: cannot start already-running ORACLE - shut it down firstSQL>
7、修改sys和system的密码并修改密码的有效时间为无限
SQL> alter user system identified by oracle;User altered.SQL> alter user sys identified by oracle;User altered.SQL> ALTER PROFILE DEFAULT LIMIT PASSWORD_LIFE_TIME UNLIMITED;Profile altered.SQL>
8、查看数据库用户和权限
SQL> show parameter passwordNAME TYPE VALUE------------------------------------ ----------- ------------------------------remote_login_passwordfile string EXCLUSIVESQL> select * from v$pwfile_users;USERNAME SYSDB SYSOP SYSAS------------------------------ ----- ----- -----SYS TRUE TRUE FALSESQL>
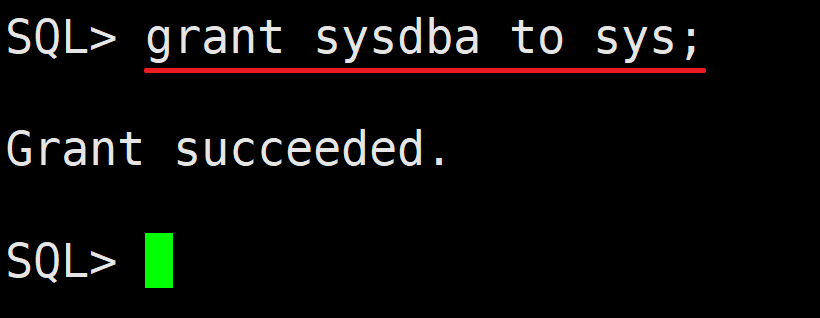
9、为sys用户添加sysdba权限
SQL> grant sysdba to sys;Grant succeeded.SQL>
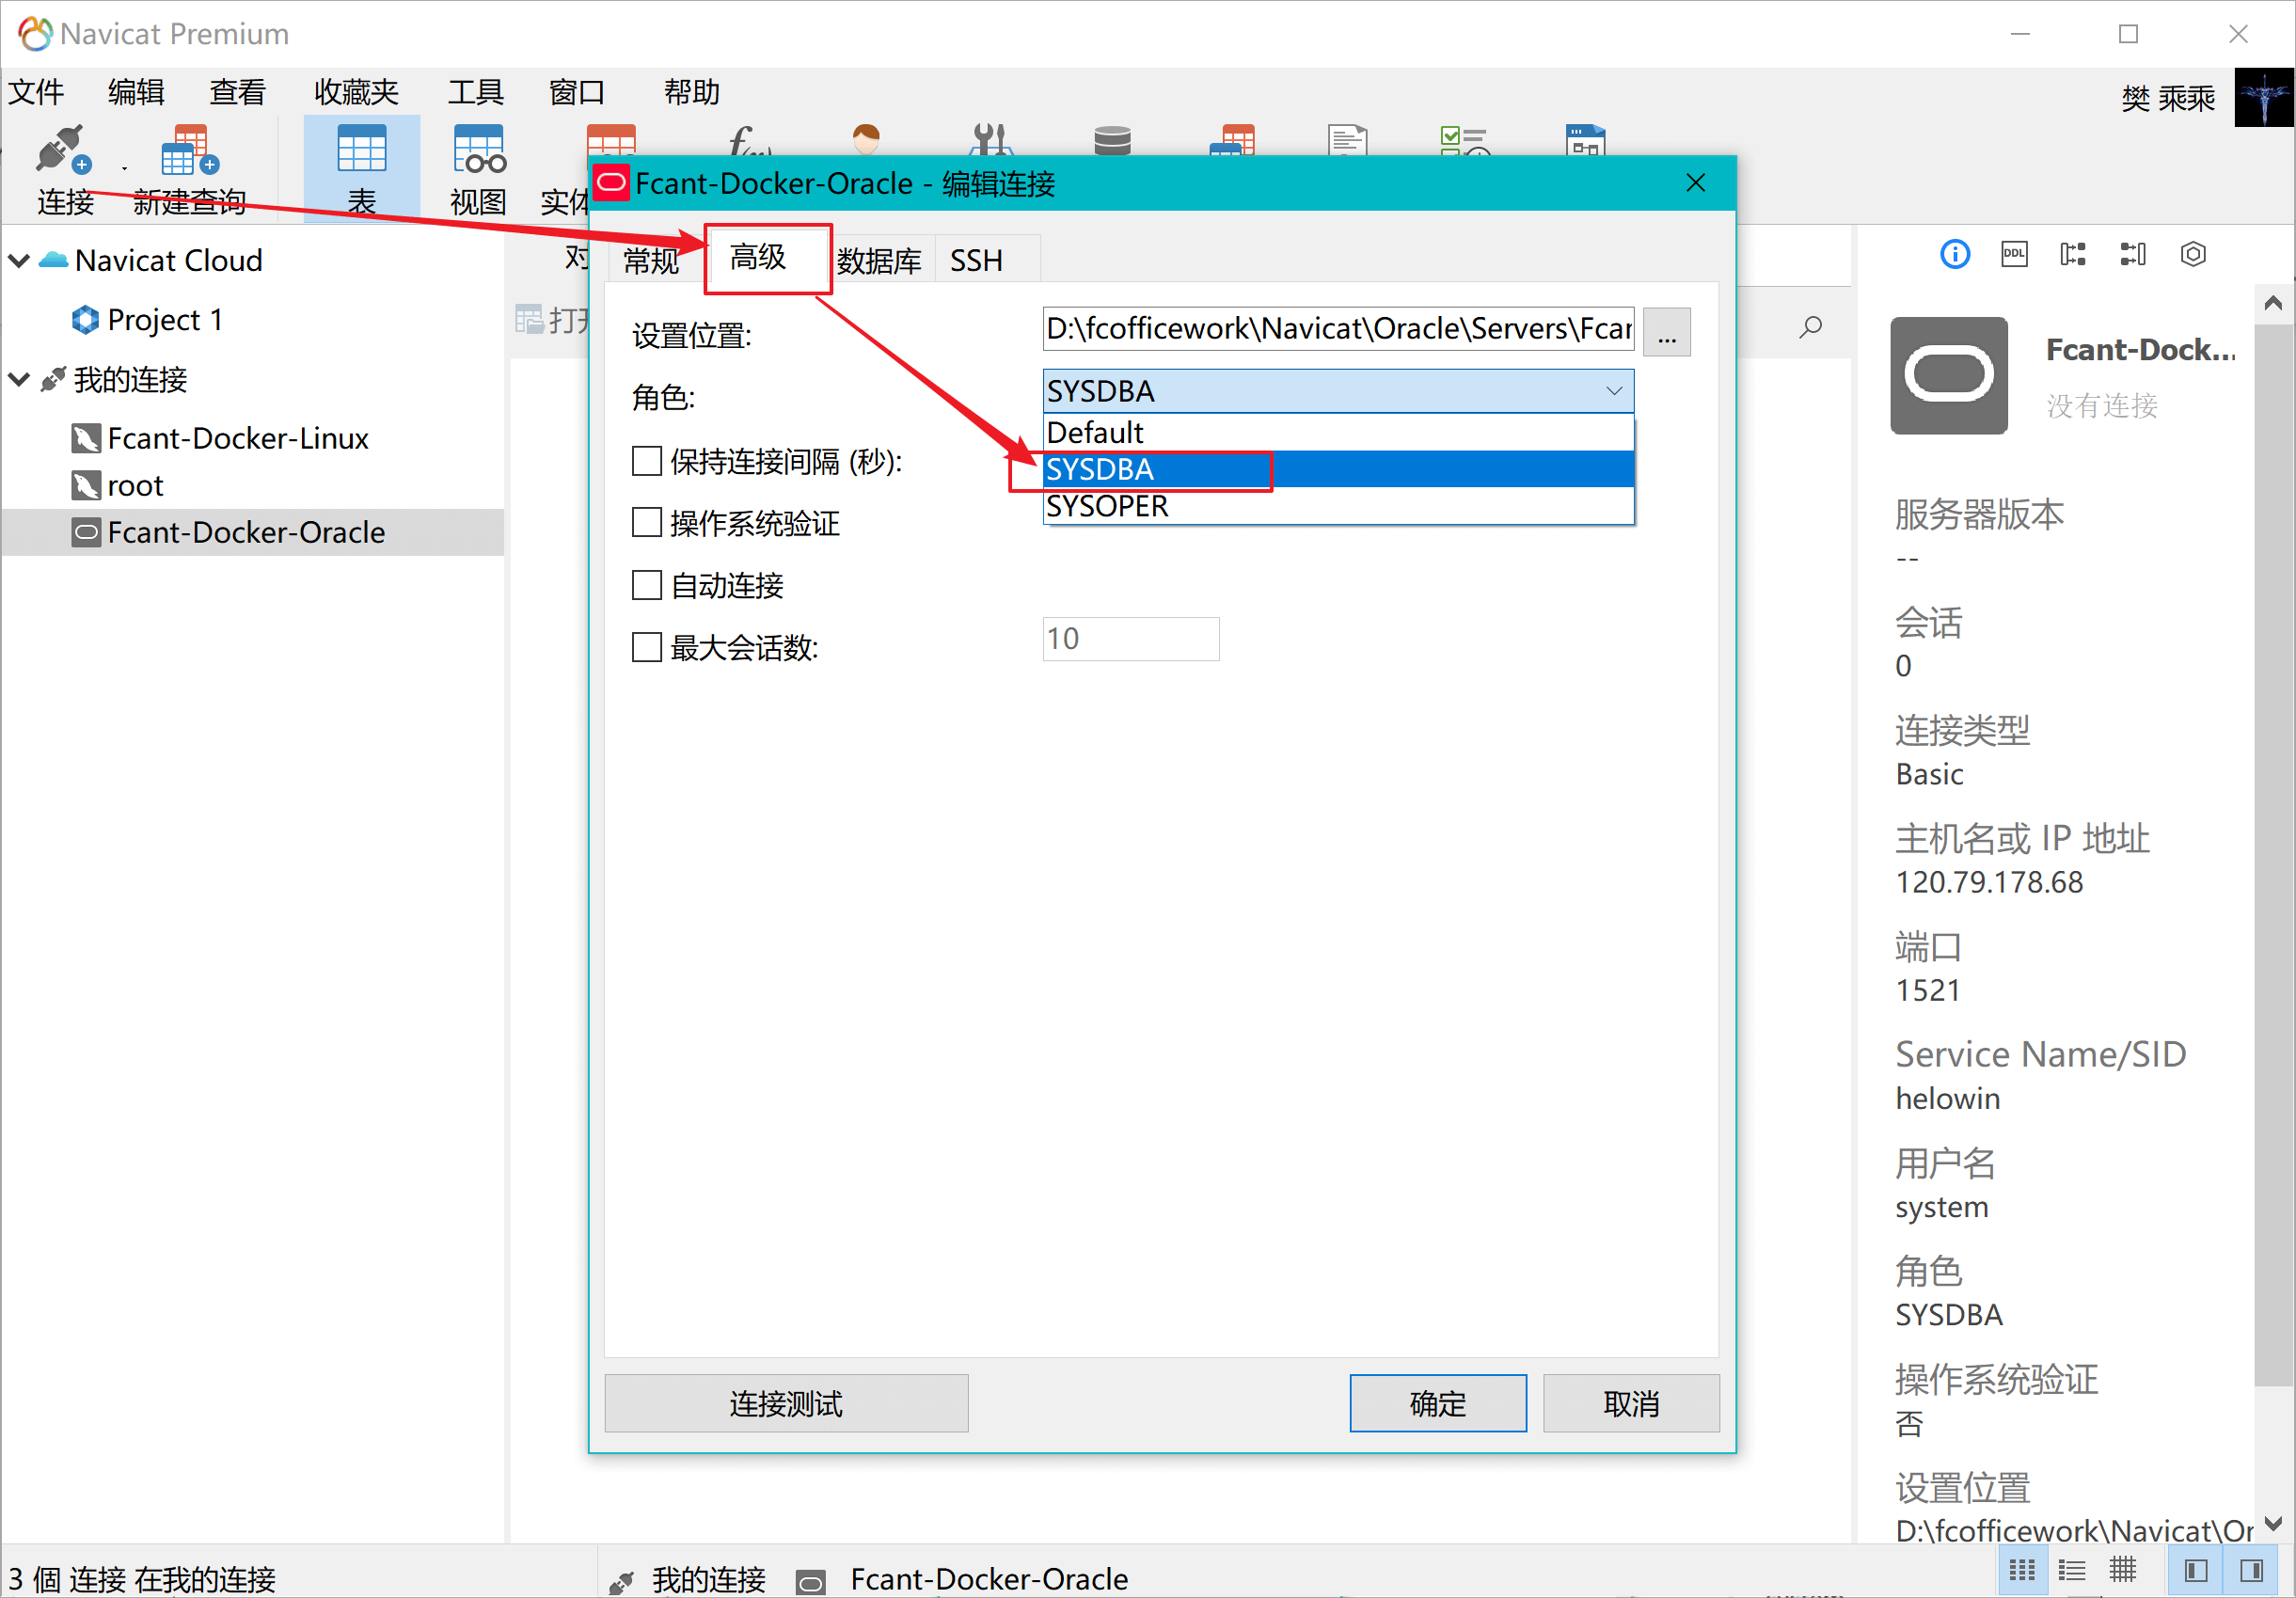
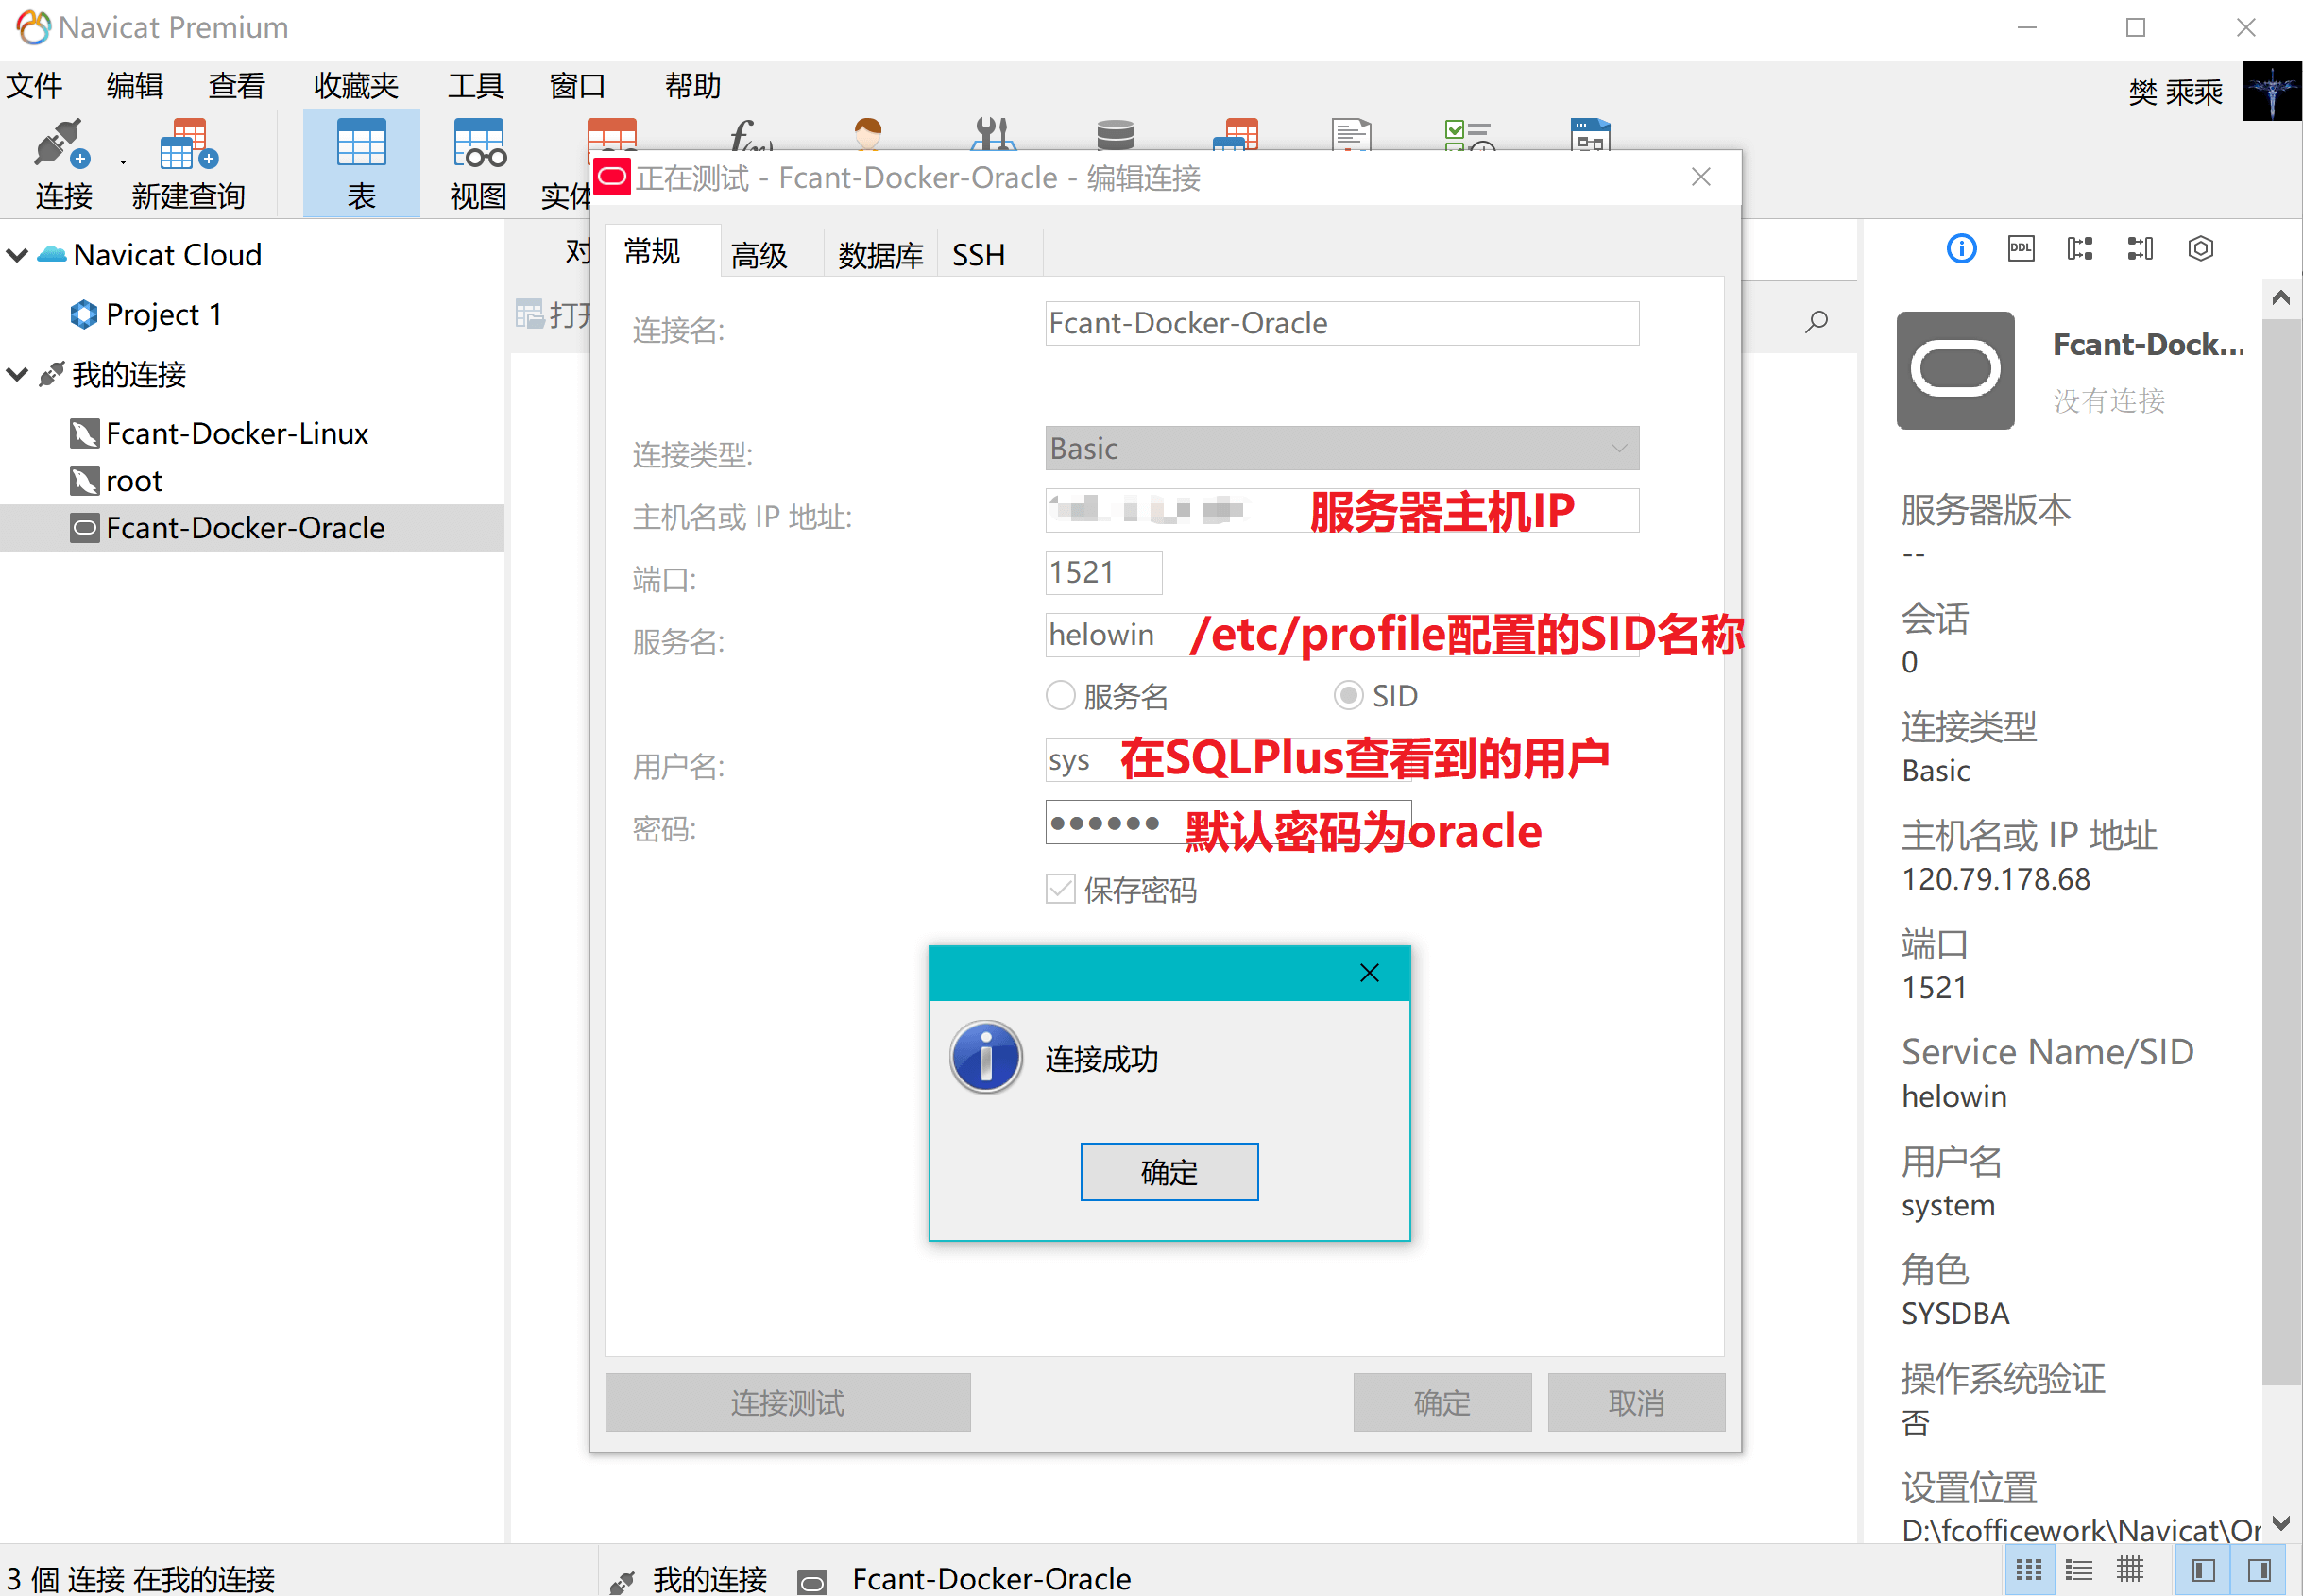
10、使用Navicat连接数据库
A、配置连接的角色
B、配置连接信息
11、连接参数
IP:本机 ip
端口:1521
SID:helowin
账号:system
密码:oracle
12、常见的问题解决
A、设置Oracle数据库用户
数据库用户一般在建立数据库表空间时,创建用户和该表空间进行绑定,创建的用户进行授权后可以对该表空间进登录管理
1.Oracle创建数据库(数据库表空间)、表和用户 · 语雀
B、数据库编码问题
1.查看数据库编码
SQL> select userenv('language') from dual;USERENV('LANGUAGE')----------------------------------------------------AMERICAN_AMERICA.AL32UTF8SQL>
2.编码更改和介绍
C、bash: sqlplus: command not found
1.为root用户添加SQLPlus软链接
进入容器,切换到root用户添加软链接,否则没有权限-如果以前添加过SQLPlus的软链接,进入/usr/bin目录下删除重新添加
[oracle@597ad81f4f3a /]$ sqlplus / as sysdbabash: sqlplus: command not found[oracle@597ad81f4f3a /]$ ln -s $ORACLE_HOME/bin/sqlplus /usr/binln: creating symbolic link `/usr/bin/sqlplus': Permission denied[oracle@597ad81f4f3a /]$ su rootPassword:su: incorrect password[oracle@597ad81f4f3a /]$ su rootPassword:[root@597ad81f4f3a /]# ln -s $ORACLE_HOME/bin/sqlplus /usr/bin[root@597ad81f4f3a /]# su - oracle[oracle@597ad81f4f3a ~]$ sqlplus /nologSQL*Plus: Release 11.2.0.1.0 Production on Tue Aug 27 12:36:53 2019Copyright (c) 1982, 2009, Oracle. All rights reserved.SQL> conn / as sysdbaConnected.SQL> startupORA-01081: cannot start already-running ORACLE - shut it down firstSQL>
2.因为权限而无法执行sqlplus
A.执行sqlplus的步骤分析
通过sqlplus进入数据库操作的步骤:
- 执行
**docker exec -it oracle bash**进入容器的Bash操作 - 此时进入的是oracle用户,没有sqlplus命令的执行权限
- 切换到root用户,默认密码是helowin
- 执行
**sqlplus /nolog** - 再切换到oracle用户,默认密码是oracle
- 执行
**sqlplus /nolog**可以运行 - 使用sysdba身份进入数据库
B.执行步骤
```sql在oracle用户下找不到sqlplus命令
[oracle@dbcef03180fe /]$ sqlplus /nolog bash: sqlplus: command not found
切换到root用户-默认密码是helowin
[oracle@dbcef03180fe /]$ su - root Password:
root用户下可以执行sqlplus,此时需要退出sqlplus切换到oracle用户对数据库进行操作
[root@dbcef03180fe ~]# sqlplus /nolog
SQL*Plus: Release 11.2.0.1.0 Production on Wed Aug 28 08:10:22 2019
Copyright (c) 1982, 2009, Oracle. All rights reserved.
退出sqlplus
SQL> exit
切换到oracle用户-因为数据库在oracle用户下
[root@dbcef03180fe ~]# su oracle
再次执行就可以找到sqlplus命令了
[oracle@dbcef03180fe root]$ sqlplus /nolog
SQL*Plus: Release 11.2.0.1.0 Production on Wed Aug 28 08:14:36 2019
Copyright (c) 1982, 2009, Oracle. All rights reserved.
使用sysdba权限连接数据库
SQL> conn / as sysdba Connected. SQL> exit Disconnected from Oracle Database 11g Enterprise Edition Release 11.2.0.1.0 - 64bit Production With the Partitioning, OLAP, Data Mining and Real Application Testing options [oracle@dbcef03180fe root]$ sqlplus /nolog
SQL*Plus: Release 11.2.0.1.0 Production on Wed Aug 28 08:15:19 2019
Copyright (c) 1982, 2009, Oracle. All rights reserved.
SQL>
```

