- 布局汇总
- 常用css技巧
- 1. 解决inline-block元素设置overflow:hidden属性导致相邻行内元素向下偏移
- 2. 超出部分显示省略号 / 点点点
- 3. css实现不换行、自动换行、强制换行
- 4. CSS实现文本两端对齐
- 5. 实现文字竖向排版
- 6. 使元素鼠标事件失效
- 7. 禁止用户选择
- 8. cursor属性
- 9. 使用硬件加速
- 10. 图片宽度自适应
- 11. Text-transform和Font Variant
- 12. 消除transtration闪屏
- 14. 自定义滚动条
- 15. 让 HTML 识别 string 里的 ‘\n’ 并换行
- 16. 使用CSS显示链接之后的URL
- 17. 修改input输入框中光标的颜色不改变字体的颜色
- 18. 修改input 输入框中 placeholder 默认字体样式
- 19. 让div里的图片和文字同时上下居中
- 20. 实现宽高等比例自适应矩形
- 21. 边框字体同色
- 常用命名规范
布局汇总
居中布局
1. 绝对定位布局
.parent {position: relative;}.child {width: 200px;height: 200px;position: absolute;left: 0;top: 0;bottom: 0;right: 0;margin: auto;}
2. margin 负间距
.child{width:200px;height: 200px;position: absolute;left:50%;top:50%;margin-left:-100px;margin-top:-100px;}
3. Transforms 变形 (常用)
.child {width: 200px;height: 200px;position:absolute;left:50%;top:50%;transform: translate(-50%,-50%);}
4. flex布局居中 (常用)
.parent {display: flex;justify-content:center;align-items:center;}
5. flex布局居中2
.parent {display: flex;}.child {margin: auto}
6. table布局
父元素设置teable-cell元素,利用三层结构模拟父子结构
.parent {display: table;width: 200px;height: 200px;}.child {display: table-cell;text-align: center;vertical-align: middle;}.box {display: inline-block;}
7. grid布局居中
.parent {display: grid;}.child {justify-self: center;align-self: center;}
8. grid布局居中 child:auto
.parent {display: grid;}.child {margin: auto;}
左右布局
1. float布局实现方式 (常用)
实现步骤:利用bfc原理
左侧浮动固定宽度, 右侧overflow: hidden
<div class="container"><div class="left"></div><div class="right"></div></div>
.container {
 height: 300px;
width: 100%;
.left {
 float: left;
   width: 100px;
}
.right {
   overflow: hidden;
}
}
2. flex实现方式:
父元素设置display: flex,给left元素设置固定宽度
- 给right元素设置flex:1使其填充其余空间 ```css .container { display: flex; }
.left { height: 200px; width: 100px; }
.right { height: 200px; flex: 1; overflow: hidden; }
<a name="vYbKw"></a>
#### 3.  calc计算布局 (常用)
```css
.left {
  height: 200px;
  width: 100px;
}

.right {
  height: 200px;
  width: calc(100% - 100px);
  overflow: hidden;
}
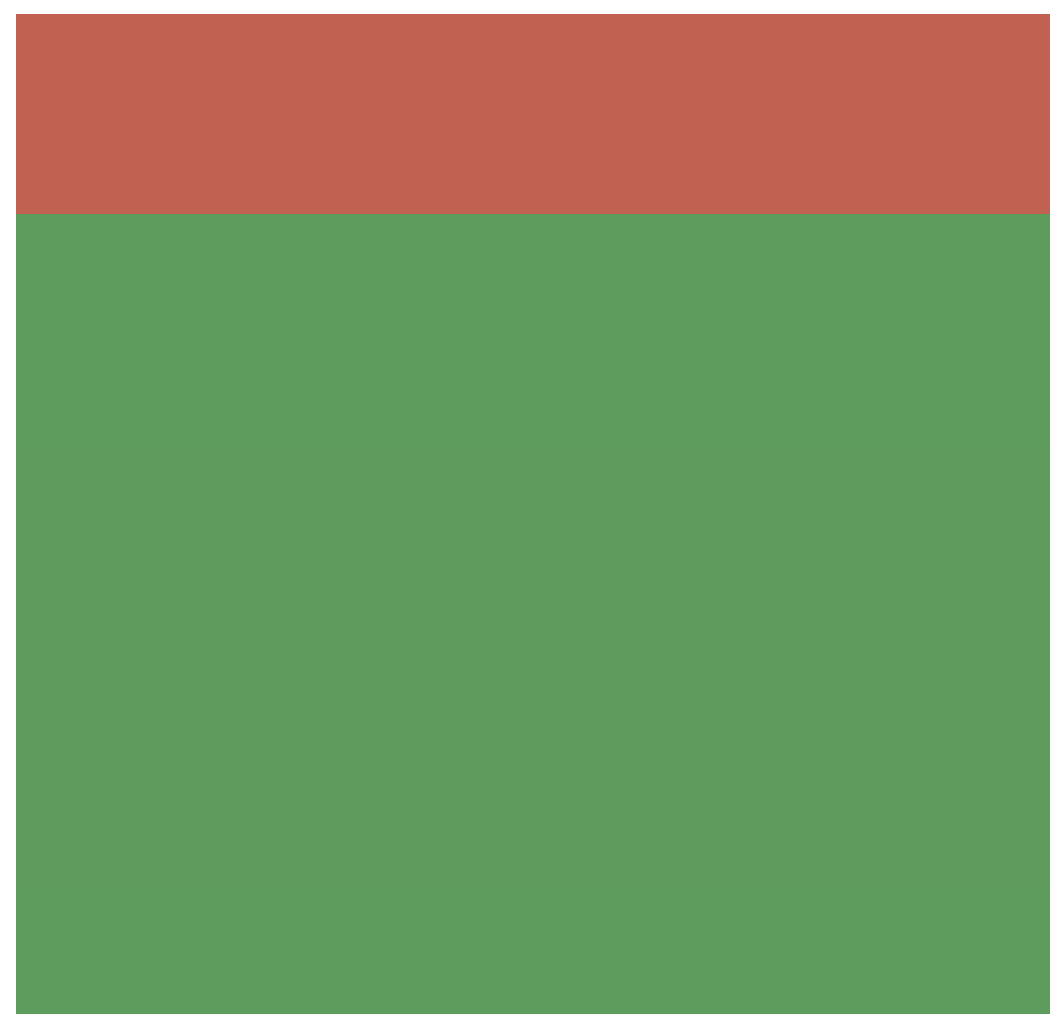
上下布局
1. 绝对定位预占位方式 (常用)
- 设置container元素高度与box-sizing属性,使padding计算入container元素中
- 设置top元素高度,并使用绝对定位将其放置在container头部
- 设置container元素内边距padding-top为top元素的高度,设置bottom元素高度为100%
```javascript .container { height: 100%; padding: 100px 0 0; box-sizing: border-box; position: relative; }<div class="container"> <div class="top"></div> <div class="bottom"></div> </div>
.top { height: 100px; background: #ce5a4b; position: absolute; top: 0; left: 0; width: 100%; }
.bottom { height: 100%; background: #499e56; }
<a name="doBaU"></a>
#### 2. 普通布局实现

1. 设置container元素高度与box-sizing属性,使padding计算入container元素中
1. 设置top元素高度,使用margin移动元素位置到container元素顶部
1. 设置container元素内边距padding-top为top元素的高度,设置bottom元素高度为100%
```css

.container {
  height: 500px;
  padding-top: 100px;
  box-sizing: border-box;
}

.top {
  height: 100px;
  background: #ce5a4b;
  margin: -100px 0 0;
}

.bottom {
  height: 100%;
  background: #499e56;
}
三栏式布局
三栏式布局的七种布局方式:float布局、绝对定位布局、圣杯布局、双飞翼布局、Flex布局、表格布局、网格布局
1. float布局
实现步骤:
1.左右两栏设置float属性使其脱离文档流左边栏设置 float:left, 右边栏设置float: right
2.给中间元素设置margin-left、和margin-right,设置margin的原因是当中间元素高度超出左右两边时,中间元素会被覆盖
3.为了不影响其他元素,给父元素清除浮动
<template>
    <div class="container">
    <div class="left"></div>
    <div class="right"></div>
    <div class="main"></div>
  </div>
</template>

<style>
  .left {
    float: left;
    width: 100px;
    height: 200px;
    background: #ce5a4b;
  }

  .right {
    float: right;
    width: 200px;
    height: 200px;
    background: #499e56;
  }

  .main {
    margin-left: 120px;
    margin-right: 220px;
    height: 200px;
    background: #f8cf5f;
  }

  .container::after {
    content: '';
    display: block;
    clear: both;
  }
</style>
缺点:使用的时候只需要注意一定要清除浮动
2. position布局
实现步骤
- 给 container 设置position: relative,因为绝对定位的元素的参照物为第一个postion不为static的父元素。
- left 向左定位,right 向右定位。
- main 使用绝对定位,通过设置left和right并把两边撑开。
```javascript
> 缺点:绝对定位是脱离文档流的,意味着下面的所有子元素也会脱离文档流,导致了这种方法的有效性和可使用性是比较差的


<a name="YtqeY"></a>
#### 3. float和BFC配合圣杯布局
实现步骤

1. 使左、中、右三栏都通过float进行浮动。
1. 将left的margin-left设置为-100%,此时左栏会移动到第一行的首部。然后再将right的margin-left设置为其宽度的负值:-200px,则右栏也会移动到和左、中栏一行中
1. 给container一个padding,该padding应该正好等于左、右栏的宽度
1. 给左、右两栏加上相对布局,然后再通过设置left和right值向外移动。
```html
<style>
  .container {
    overflow: hidden;
    padding: 0 220px 0 120px;
  }

.container>div {
  position: relative;
  float: left;
  height: 300px;
}

.main {
  width: 100%;
  background-color: #f8cf5f;
}

.left {
  width: 100px;
  margin-left: -100%;
  left: -120px;
  background-color: #ce5a4b;
}

.right {
  width: 200px;
  background-color: #499e56;
  margin-left: -200px;
  right: -220px;
}
</style>

<div class="container">
  <div class="main"></div>
    <div class="left"></div>
    <div class="right"></div>
</div>
3. 双飞翼布局
实现步骤
- 使左、中、右三栏都通过float进行浮动。
- 将left的margin-left设置为-100%,此时左栏会移动到第一行的首部。然后再将right的margin-left设置为其宽度的负值:-200px,则右栏也会移动到和左、中栏一行中
- 给 main 的子元素content设置margin: 0 220px 0 120px;,同时设置overflow: hidden使其成为一个BFC
为了不影响其他元素,给main清除浮动
<style>
    .container {
        overflow: hidden;
    }

    .container>div {
        position: relative;
        float: left;
        height: 300px;
    }

    .main {
        width: 100%;
    }

    .main::after {
        content: '';
        display: block;
        clear: both;
    }

    .left {
        width: 100px;
        background-color: #ce5a4b;
        margin-left: -100%;
    }

    .right {
        width: 200px;
        background-color: #499e56;
        margin-left: -200px;
    }

    .content {
        height: 100%;
        margin: 0 220px 0 120px;
        overflow: hidden;
        background-color: #f8cf5f;
    }
</style>
<div class="container">
    <div class="main">
        <div class="content"></div>
    </div>
    <div class="left"></div>
    <div class="right"></div>
</div>
和圣杯布局类似,只是处理中间栏部分内容被遮挡问题的解决方案有所不同
4. flex布局 (常用)
实现步骤
- 给 container 设置为一个 flex 容器display: flex
- main 的宽度设置为width: 100%,left 和 right 分别设置为width: 200px和width: 100px
- 为了不让 left 和 right 收缩,给它们设置flex-shrink: 0
- 使用order属性给三个部分的 DOM 结构进行排序:left:order: 1,main:order: 2,right:order: 3
```javascript
> 极其灵活(还有其他实现方式),需要注意浏览器兼容性


<a name="aHQGk"></a>
#### 5. table-cell布局
实现步骤

1. 给三栏都设置为表格单元 display: table-cell
1. left 和 right分别设置 width: 100px和width: 200px,container设置 width: 100%
1. 这时 left 和 right 被挤到两边去了,因此要分别设置min-width确保不会被挤压。
```javascript
    <style>
        .container {
            width: 100%;
            display: table;
        }
        .container > div {
            display: table-cell;
            height: 300px;
        }

        .content {
            height: 100%;
            margin: 0 20px;
            background: #f8cf5f;
        }

        .left {
            width: 100px;
            min-width: 100px;
            background-color: #ce5a4b;
        }

        .right {
            width: 200px;
            min-width: 200px;
            background-color: #499e56;
        }
    </style>
    <body>
        <div class="left"></div>
        <!-- 这时的main要放在中间 -->
        <div class="main">
            <div class="content"></div>
        </div>
        <div class="right"></div>
    </body>
这种布局方式能使得三栏的高度是统一的,但不能使main放在最前面得到最先渲染
6. 网格布局 (常用)
实现步骤
- 给 container 设置为display: grid
- 设置三栏的高度:grid-template-rows: 300px
- 设置三栏的宽度,中间自适应,两边固定:grid-template-columns: 100px auto 200px;
 <style>
     .container {
         display: grid;
         width: 100%;
         grid-template-rows: 300px;
         grid-template-columns: 100px auto 200px;
     }
     .left {
         background-color: #ce5a4b;
         margin-right: 20px;
     }
     .main {
         background-color: #f8cf5f;
     }
     .right {
         background-color: #499e56;
         margin-left: 20px;
     }
 </style>
<body>
 <div class="container">
     <div class="left"></div>
     <div class="main"></div>
     <div class="right"></div>
 </div>
</body>
使用起来极其方便,代码简介,但是兼容性很差
[
](https://www.yuque.com/rashomon/lwtok5/css#fPs1y)
多列等高
1. 布局 flex实现等高 (常用)
实现思路:
父元素设置display:flex, 弹性盒子布局flex,默认值就是自带等高布局的特点
 <style>
     .container {
         display: flex;
     }

     .left {
         width: 200px;
         background-color: #ce5a4b;
     }

     .main {
         flex: 1;
         height: 400px;
         background: #f8cf5f;
     }

     .right {
         width: 300px;
         background: #499e56;
     }
 </style>
<body>
 <div class="container">
     <div class="left"></div>
     <div class="main"></div>
     <div class="right"></div>
 </div>
</body>
2. 利用背景图片
 <style>
     .container {
         background: url("column.png") repeat-y;
         width: 960px;
         margin: 0 auto;
     }

     .left {
         float: left;
         width: 220px;
     }

     .main {
         float: left;
         width: 480px;
     }

     .right {
         float: left;
         width: 220px;
     }
 </style>
<body>
 <div class="container">
     <div class="left"></div>
     <div class="main"></div>
     <div class="right"></div>
 </div>
</body>
3. table-cell等高布局
实现步骤:
1.父元素设置dispaly:table, table布局天然就具有等高的特性。<style> .container { display: table; } .left { display: table-cell; width: 300px; background-color: #ce5a4b; } .main { display: table-cell; width: 300px; height: 400px; background: #f8cf5f; } .right { display: table-cell; width: 300px; background: #499e56; } </style> <body> <div class="container"> <div class="left"></div> <div class="main"></div> <div class="right"></div> </div> </body>4. grid布局
    <style>
        .container {
            display: grid;
            grid-auto-flow: column;
        }

        .left {
            background-color: #ce5a4b;
        }

        .main {
            background-color: #f8cf5f;
            height: 300px;
        }

        .right {
            background-color: #499e56;
        }
    </style>
<body>
    <div class="container">
        <div class="left"></div>
        <div class="main"></div>
        <div class="right"></div>
    </div>
</body>
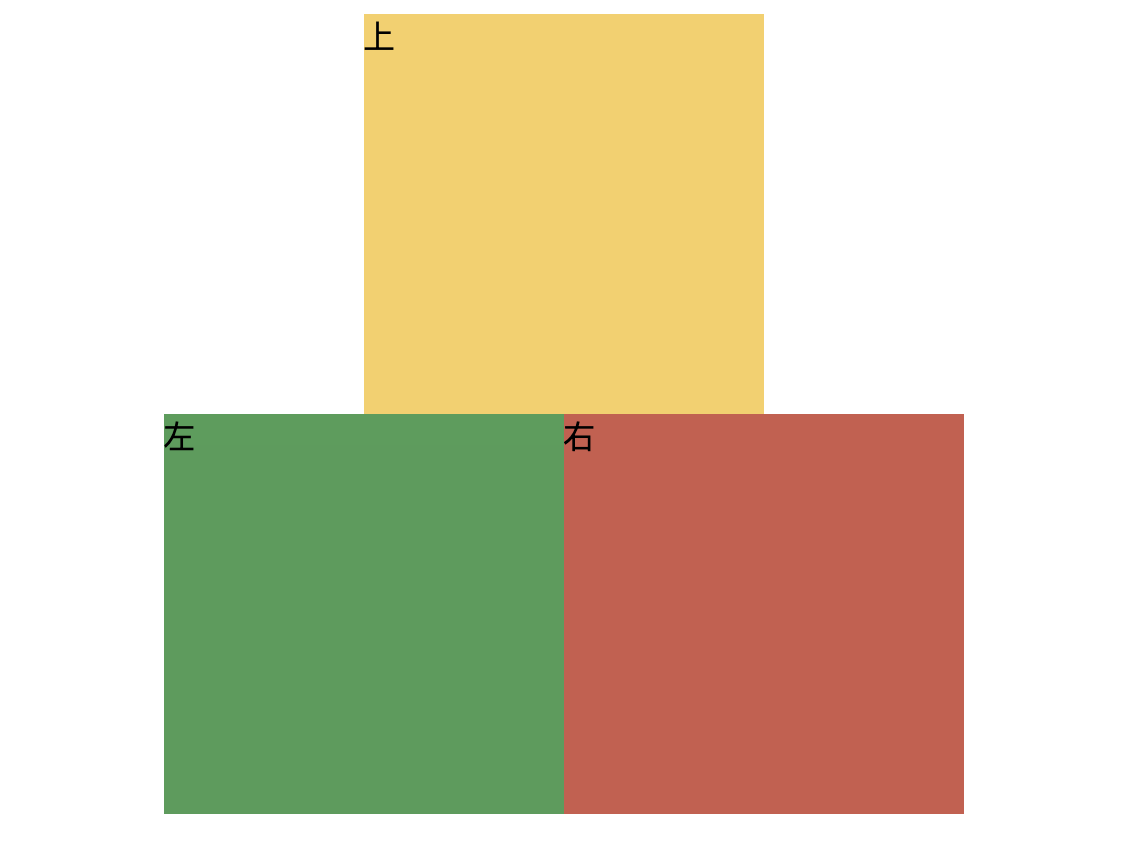
品字形布局
1. inline或float布局方式
实现步骤:
- 三块高宽是确定的;
- 上面那块用margin: 0 auto;居中;
- 下面两块用inline-block或者float不换行
- 用margin调整位置使他们居中(使left元素margin-left为宽度的一般则可居中)
实现方式一:
<style>
  .container > div {
    height: 300px;
    width: 300px;
  }

.top {
  margin: 0 auto;
  background-color: #f8cf5f;
}

.left {
  display: inline-block;
  // float: left;
  margin-left: 150px;
  background-color: #499e56;
}

.right {
  display: inline-block;
  // float: left;
  background-color: #ce5a4b;
}
</style>

 <div class="container">
  <div class="top">上</div>
    <div class="left">左</div>
    <div class="right">右</div>
 </div>
2. 全屏的品字布局
实现步骤:
上面的div宽100%,下面的两个div分别宽50%,然后用float或者inline使其不换行即可
 <style>
     .container>div {
         height: 200px;
     }

     .top {
         width: 100%;
         background-color: #f8cf5f;
     }

     .left {
         // display: inline-block
         float: left;
         width: 50%;
         background-color: #499e56;
     }

     .right {
         // display: inline-block
         float: left;
         width: 50%;
         background-color: #ce5a4b;
     }
 </style>
<body>
 <div class="container">
     <div class="top">上</div>
     <div class="left">左</div>
     <div class="right">右</div>
 </div>
</body>
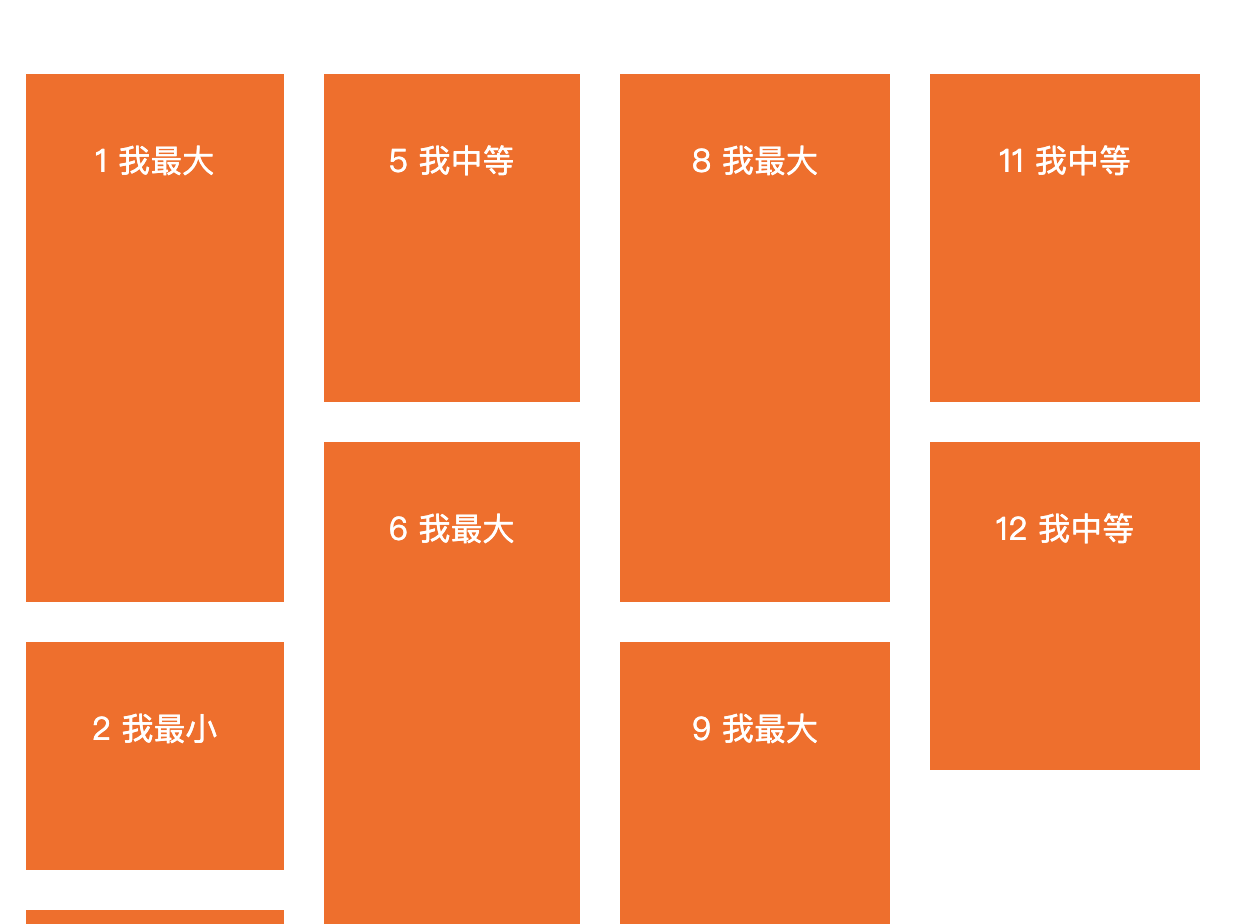
瀑布流布局
multi-columns 方式
实现步骤:
- 瀑布流容器中设置 column-count(列数) 和 column-gap(列间距)
- item 中设置 break-inside:avoid,这是为了控制文本块分解成单独的列,以免项目列表的内容跨列,破坏整体的布局。
为了布局具有响应式效果,可以借助媒体查询属性,在不同屏幕大小的条件下设置瀑布流容器 container 的 column-count 来自适应改变列数
 <style>
     .container {
         -moz-column-count: 3;
         /* Firefox */
         -webkit-column-count: 3;
         /* Safari 和 Chrome */
         column-count: 3;
         -moz-column-gap: 2em;
         -webkit-column-gap: 2em;
         column-gap: 2em;
         width: 70%;
         margin: 2em auto;
     }

     .item {
         padding: 2em;
         margin-bottom: 2em;
         -moz-page-break-inside: avoid;
         -webkit-column-break-inside: avoid;
         break-inside: avoid;
         background: #ce5a4b;
         color: #fff;
         text-align: center;
     }

     .item .content-lar {
         height: 200px;
     }

     .item .content-mid {
         height: 100px;
     }

     .item .content-sma {
         height: 50px;
     }

     @media screen and (max-width: 800px) {
         .container {
             column-count: 2;
             /* two columns on larger phones */
         }
     }

     @media screen and (max-width: 500px) {
         .container {
             column-count: 1;
             /* two columns on larger phones */
         }
     }
 </style>
<body>
 <div class="container">
     <div class="item">
         <div class="item_content content-lar"> 1 我最大 </div>
     </div>
     <div class="item">
         <div class="item_content content-sma"> 2 我最小 </div>
     </div>
     <div class="item">
         <div class="item_content content-mid"> 3 我中等 </div>
     </div>
     <div class="item">
         <div class="item_content content-sma"> 4 我最小 </div>
     </div>
     <div class="item">
         <div class="item_content content-mid"> 5 我中等 </div>
     </div>
     <div class="item">
         <div class="item_content content-lar"> 6 我最大 </div>
     </div>
     <div class="item">
         <div class="item_content content-sma"> 7 我最小 </div>
     </div>
     <div class="item">
         <div class="item_content content-lar"> 8 我最大 </div>
     </div>
     <div class="item">
         <div class="item_content content-lar"> 9 我最大 </div>
     </div>
     <div class="item">
         <div class="item_content content-sma"> 10 我最小 </div>
     </div>
     <div class="item">
         <div class="item_content content-mid"> 11 我中等 </div>
     </div>
     <div class="item">
         <div class="item_content content-mid"> 12 我中等 </div>
     </div>
     <!-- more items -->
 </div>
</body>
flex布局
实现步骤:
- 瀑布流容器设置dispaly:flex,并使用 flex-flow 来控制列,并且允许它换行
- 显式的设置 height 属性,当然除了设置 px 值,还可以设置100vh,让容器的高度和浏览器视窗高度一样(注意:不能不显式的设置,如果没有显式的设置,容器就无法包裹住项目列表)
为了布局具有响应式效果,可以借助媒体查询属性显示设置不同的高度值
 <style>
     .container {
         height: 800px;
         display: flex;
         flex-flow: column wrap;
         width: 70%;
         margin: 2em auto;
     }

     .item {
         padding: 2em;
         margin-bottom: 2em;
         break-inside: avoid;
         background: #f60;
         color: #fff;
         text-align: center;
         margin: 10px;
     }

     .item .content-lar {
         height: 200px;
     }

     .item .content-mid {
         height: 100px;
     }

     .item .content-sma {
         height: 50px;
     }

     @media screen and (max-width: 1100px) {
         .masonry {
             height: 800px;
         }
     }

     @media screen and (max-width: 800px) {
         .masonry {
             height: 1100px;
         }
     }

     @media screen and (max-width: 600px) {
         .masonry {
             height: 1300px;
         }
     }

     @media screen and (max-width: 460px) {
         .masonry {
             height: 1600px;
         }
     }
 </style>
<body>
 <div class="container">
     <div class="item">
         <div class="item_content content-lar"> 1 我最大 </div>
     </div>
     <div class="item">
         <div class="item_content content-sma"> 2 我最小 </div>
     </div>
     <div class="item">
         <div class="item_content content-mid"> 3 我中等 </div>
     </div>
     <div class="item">
         <div class="item_content content-sma"> 4 我最小 </div>
     </div>
     <div class="item">
         <div class="item_content content-mid"> 5 我中等 </div>
     </div>
     <div class="item">
         <div class="item_content content-lar"> 6 我最大 </div>
     </div>
     <div class="item">
         <div class="item_content content-sma"> 7 我最小 </div>
     </div>
     <div class="item">
         <div class="item_content content-lar"> 8 我最大 </div>
     </div>
     <div class="item">
         <div class="item_content content-lar"> 9 我最大 </div>
     </div>
     <div class="item">
         <div class="item_content content-sma"> 10 我最小 </div>
     </div>
     <div class="item">
         <div class="item_content content-mid"> 11 我中等 </div>
     </div>
     <div class="item">
         <div class="item_content content-mid"> 12 我中等 </div>
     </div>
     <!-- more items -->
 </div>
</body>
缺点:两种实现方式都只能从上往下排列,不能从左往右排列
常用css技巧
1. 解决inline-block元素设置overflow:hidden属性导致相邻行内元素向下偏移
.wrap {
  display: inline-block;
  overflow: hidden
    vertical-align: bottom
}
2. 超出部分显示省略号 / 点点点
// 单行文本
.wrap {
    overflow:hidden;
    text-overflow:ellipsis;
    white-space:nowrap;
}
// 多行文本
.wrap {
    width: 100%;
    overflow: hidden;
    display: -webkit-box;
    -webkit-box-orient: vertical;
    -webkit-line-clamp: 3;
    word-break: break-all;
}
3. css实现不换行、自动换行、强制换行
//不换行
.wrap {
  white-space:nowrap;
}
//自动换行
.wrap {
  word-wrap: break-word;
  word-break: normal;
}
//强制换行
.wrap {
  word-break:break-all;
}
4. CSS实现文本两端对齐
.wrap {
  text-align: justify;
  /* ie6-8 */
  text-justify: distribute-all-lines;
  /* 一个块或行的最后一行对齐方式 */
  text-align-last: justify;
  -moz-text-align-last: justify;
  -webkit-text-align-last: justify;
}
5. 实现文字竖向排版
// 单列展示时
.wrap {
    width: 25px;
    line-height: 18px;
    height: auto;
    font-size: 12px;
    padding: 8px 5px;
    word-wrap: break-word;/*英文的时候需要加上这句,自动换行*/
}
// 多列展示时
.wrap {
    height: 210px;
    line-height: 30px;
    text-align: justify;
    writing-mode: vertical-lr;  //从左向右
    writing-mode: tb-lr;        //IE从左向右
    //writing-mode: vertical-rl;  -- 从右向左
    //writing-mode: tb-rl;        -- 从右向左
}
6. 使元素鼠标事件失效
.wrap {
    pointer-events: none;
  cursor: default;
}
7. 禁止用户选择
.wrap {
  -webkit-touch-callout: none;
  -webkit-user-select: none;
  -khtml-user-select: none;
  -moz-user-select: none;
  -ms-user-select: none;
  user-select: none;
}
8. cursor属性
.wrap {
  cursor:pointer; //小手指;
  cursor:help; //箭头加问号;
  cursor:wait; //转圈圈;
  cursor:move; //移动光标;
  cursor:crosshair; //十字光标
}
9. 使用硬件加速
.wrap {
    transform: translateZ(0);
}
10. 图片宽度自适应
img {max-width: 100%}11. Text-transform和Font Variant
p {text-transform: uppercase}  // 将所有字母变成大写字母
p {text-transform: lowercase}  // 将所有字母变成小写字母
p {text-transform: capitalize} // 首字母大写
p {font-variant: small-caps}   // 将字体变成小型的大写字母
12. 消除transtration闪屏
.wrap {
    -webkit-transform-style: preserve-3d;
    -webkit-backface-visibility: hidden;
    -webkit-perspective: 1000;
}
14. 自定义滚动条
overflow-y: scroll;
/* 整个滚动条 */
::-webkit-scrollbar {
    width: 5px;
}

/* 滚动条的轨道 */
::-webkit-scrollbar-track {
    background-color: #ffa336;
    border-radius: 5px;
}

/* 滚动条的滑块 */
::-webkit-scorllbar-thumb {
    background-color: #ffc076;
    border-radius: 5px;
}
15. 让 HTML 识别 string 里的 ‘\n’ 并换行
body {
      white-space: pre-line;
}
16. 使用CSS显示链接之后的URL
a:after{content:" (" attr(href) ") ";}17. 修改input输入框中光标的颜色不改变字体的颜色
input{
    color:  #fff;
    caret-color: red;
}
18. 修改input 输入框中 placeholder 默认字体样式
//webkit内核的浏览器
input::-webkit-input-placeholder {
    color: #c2c6ce;
}
//Firefox版本4-18
input:-moz-placeholder {
    color: #c2c6ce;
}
//Firefox版本19+
input::-moz-placeholder {
    color: #c2c6ce;
}
//IE浏览器
input:-ms-input-placeholder {
    color: #c2c6ce;
}
19. 让div里的图片和文字同时上下居中
.wrap {
  height: 100,
  line-height: 100
}
img {
  vertival-align:middle
}
// vertical-align css的属性vertical-align用来指定行内元素(inline)或表格单元格(table-cell)元素的垂直对齐方式。只对行内元素、表格单元格元素生效,不能用它垂直对齐块级元素
// vertical-align:baseline/top/middle/bottom/sub/text-top;
20. 实现宽高等比例自适应矩形
.scale {
  width: 100%;
  padding-bottom: 56.25%;
  height: 0;
  position: relative;
}

.item {
  position: absolute;
  width: 100%;
  height: 100%;
  background-color: 499e56;
}


<div class="scale">
  <div class="item">
    这里是所有子元素的容器
    </div>
</div>
21. 边框字体同色
    .wrap {
        width: 200px;
        height: 200px;
        color: #000;
        font-size: 30px;
        border: 50px solid currentColor;
        // border: 50px solid; // 实现二
    }
常用命名规范
前言中略微描述了 CSS 怎么使用;下面介绍一下 CSS 的一些代码规范;
CSS 命名一般采用小写英文单词或组合命名,单词与单词间以”-“分割;英文单词不缩写,除非一看就能明白的单词。文本命名规范
- index.css: 一般用于首页建立样式
- head.css: 头部样式,当多个页面头部设计风格相同时使用。
- base.css: 共用样式。
- style.css: 独立页面所使用的样式文件。
- global.css: 页面样式基础,全局公用样式,页面中必须包含。
- layout.css: 布局、版面样式,公用类型较多时使用,一般用在首页级页面和产品类页面中
- module.css: 模块,用于产品类页,也可与其它样式配合使用。
- master.css: 主要的样式表
- columns.css: 专栏样式
- themes.css: 主体样式
- forms.css: 表单样式
- mend.css: 补丁,基于以上样式进行的私有化修补。
页面结构命名
- page: 代表整个页面,用于最外层。
- wrap: 外套,将所有元素包在一起的一个外围包,用于最外层
- wrapper: 页面外围控制整体布局宽度,用于最外层
- container: 一个整体容器,用于最外层
- head, header: 页头区域,用于头部
- nav: 导航条
- content: 内容,网站中最重要的内容区域,用于网页中部主体
- main: 网站中的主要区域(表示最重要的一块位置),用于中部主体内容
- column: 栏目
- sidebar: 侧栏
- foot, footer: 页尾、页脚。网站一些附加信息放置区域,(或命名为 copyright)用于底部
导航命名
- nav, navbar, navigation, nav-wrapper: 导航条或导航包,代表横向导航
- topnav: 顶部导航
- mainbav: 主导航
- subnav: 子导航
- sidebar: 边导航
- leftsidebar 或 sidebar_a: 左导航
- rightsidebar 或 sidebar_b: 右导航
- title: 标题
- summary: 摘要/li>
- menu: 菜单,区域包含一般的链接和菜单
- submenu: 子菜单
- drop: 下拉
- dorpmenu: 下拉菜单
- links: 链接菜单
功能命名
- logo: 标记网站logo标志
- banner: 标语、广告条、顶部广告条
- login: 登陆,(例如登录表单:form-login)
- loginbar: 登录条
- register: 注册
- tool, toolbar: 工具条
- search: 搜索
- searchbar: 搜索条
- searchlnput: 搜索输入框
- shop: 功能区,表示现在的
- icon: 小图标
- label: 商标
- homepage: 首页
- subpage: 二级页面子页面
- hot: 热门热点
- list: 文章列表,(例如:新闻列表:list-news)
- scroll: 滚动
- tab: 标签
- sitemap: 网站地图
- msg 或 message: 提示信息
- current: 当前的
- joinus: 加入
- status: 状态
- btn: 按钮,(例如:搜索按钮可写成:btn-search)
- tips: 小技巧
- note: 注释
- guild: 指南
- arr, arrow: 标记箭头
- service: 服务
- breadcrumb: (即页面所处位置导航提示)
- download: 下载
- vote: 投票
- siteinfo: 网站信息
- partner: 合作伙伴
- link, friendlink: 友情链接
- copyright: 版权信息
- siteinfoCredits: 信誉
- siteinfoLegal: 法律信息


