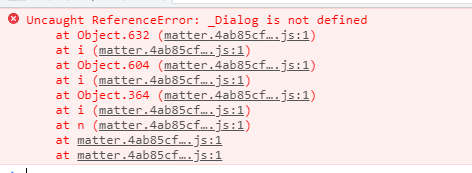
1、页面报错 Uncaught ReferenceError: _Dialog is not defined
2、 按需引入组件,提示 Uncaught ReferenceError: _MessageBox is not defined
原因:未知,为element-ui 内部 BUG
解决:
import Vue from 'vue';import { MessageBox } from "element-ui";const msgBox = MessageBox;Vue.prototype.$confirm = msgBox.confirm;// const { confirm } = msgBox// Vue.prototype.$confirm = confirm;
注意:
引入 MessageBox 组件之后,不要 Vue.use( MessageBox );
3、在element的select组件上扩展beforeSelect方法
定义
import { Select } from 'element-ui';// 修改el-select,添加beforeOptionSelect回调const handleOptionSelect = Select.methods.handleOptionSelect// 给select添加beforeOptionSelect属性Select.props.beforeOptionSelect = {type: Function,default: function() {return function() {}}};// 修改select的handleOptionSelect方法,插入自己的逻辑Select.methods.handleOptionSelect = function(...args) {// 调用beforeOptionSelect回调,如果不返回false,则继续往下// 这里处理了异步和非异步的情况,我用到的是异步的情况if (this.beforeOptionSelect.length === 3) { // 第三个参数是一个回调,说明这是一个异步的操作,不能立马返回const cb = (res) => {if (res !== false) {handleOptionSelect.apply(this, args)} else {this.visible = false}}this.beforeOptionSelect(args[0].value, args[0].label, cb)} else if (this.beforeOptionSelect(args[0].value, args[0].label) !== false) {handleOptionSelect.apply(this, args)} else {this.visible = false}}
使用
<template><el-select v-else :beforeOptionSelect="beforeOptionSelect" ><el-option v-for="item in options" :key="item.value" :label="item.label" :value="item.value"></el-option></el-select></template>
4、在Select 组件上扩展,滚动加载更多的功能
定义扩展
export default {directives: {"loadmore": {bind(el, binding) {// 获取element-ui定义好的scroll盒子const SELECTWRAP_DOM = el.querySelector(".el-select-dropdown .el-select-dropdown__wrap");SELECTWRAP_DOM.addEventListener("scroll", function () {const condition =this.scrollHeight - this.scrollTop <= this.clientHeight;if (condition) {binding.value();}});},},},props:{},}
使用:
<el-select v-if="isScroll" v-el-select-loadmore="load"><el-option v-for="item in options" :key="item.value" :label="item.label" :value="item.value"></el-option><template #empty><slot name="empty"></slot></template></el-select>
5、Element-ui换主题 得注意引用顺序
1、新建 element-variables.scss
/* 改变主题色变量 */$--color-primary:#262DD9;/* 改变 icon 字体路径变量,必需 */$--font-path: '~element-ui/lib/theme-chalk/fonts';@import "~element-ui/packages/theme-chalk/src/index";
2、引用
// 按需引入element-ui中的组件import element from './elementComponent';Vue.use(element);// 这里必须得先Use,再引入样式文件, 不然自定义的主题色会被默认的样式覆盖import '@/assets/style/element-variables.scss';
6、loading 按需加载,提示 loading.service is not function
7、v-for 渲染数组,结果只渲染数组的最后一项
场景:
封装 element-ui 的 table 组件的 操作列,操作列的按钮需要循环生成,于是有了以下代码
<template v-for="(item, index) in handleAttribute(rowHandle.custom, [])" slot-scope="scope"><el-button:key="index"v-if="handleRowHandleShow(item.show, scope.$index, scope.row) && handleAttribute(item.name,'') === 'el-button' ":disabled="handleRowHandleDisabled(item.disabled, scope.$index, scope.row)"v-bind="item"@click="$emit(item.emit, {index: scope.$index, row: scope.row})"><template>{{ item.formatter ? item.formatter(scope.row, scope.column, item.text, scope.$index) : item.text }}</template></el-button><el-switch:key="index"v-if="handleRowHandleShow(item.show, scope.$index, scope.row) && handleAttribute(item.name,'') === 'el-switch' ":disabled="handleRowHandleDisabled(item.disabled, scope.$index, scope.row)"v-bind="item"@change="$emit(item.emit, {index: scope.$index, row: scope.row})">{{item.text}}</el-switch></template><script>export default {data() {return {rowHandle: {align: "left",rowKey: "counterId",label: "操作",minWidth: this.screenWidth > 1500 ? '136' : '155',custom: [{name: 'el-button',class: "fun-btn",type: "text",text: "停用",show: () => {return this.hasCounterActiveRights;},formatter: (row, column, text) => {return row.activeStatus === 1 ? "停用" : "激活"},emit: 'toggleStatus',}, {name: 'el-button',class: "fun-btn",type: "text",text: "编辑",show: () => {return this.hasCounterMgrRights},disabled(index, row) {return row.type === 1 ||row.activeStatus == 1},emit: 'edit',}, {name: 'el-button',class: "fun-btn",type: "text",text: "删除",show: () => {return this.hasCounterMgrRights},disabled(index, row) {return row.type === 1 || row.activeStatus == 1},emit: 'delete',}, {name: 'el-button',class: "fun-btn",type: "text",text: "查询",show: () => {return this.hasCounterMgrRights || this.hasCounterActiveRights},disabled(index, row) {return row.activeStatus !== 1},emit: 'goPage',}]},}}}</script>
现象:
按钮只渲染了最后一项“查询”
排查:
由于循环内使用了 v-if 条件渲染,担心是这个影响,于是,先将 v-if 进行注释,发现数组内最开始的几项数据内的函数有没有渲染也没有调用。后来无奈只能一行行注释,看是哪一行代码影响了渲染,最后注释了 template 上的 slot-scope="scope" 之后,发现数组数量渲染正常。
解决:
<template slot-scope="scope"><template v-for="(item, index) in handleAttribute(rowHandle.custom, [])">......</template></template>

若有收获,就点个赞吧
0 人点赞
