概述
网关是一个运行在网格边缘的负载均衡器,它主要用于接收外部请求并转发给网格内的服务。
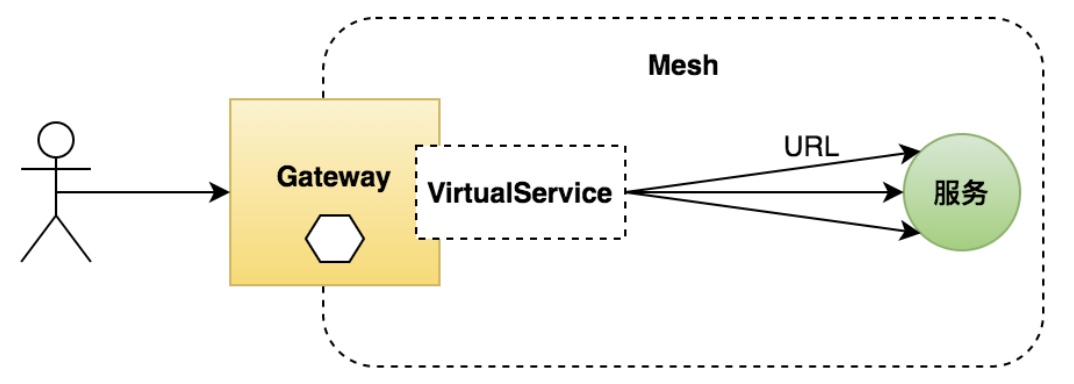
对于一个网关而言,需要配置对外的端口、协议以及并将其与网格内部的服务映射起来。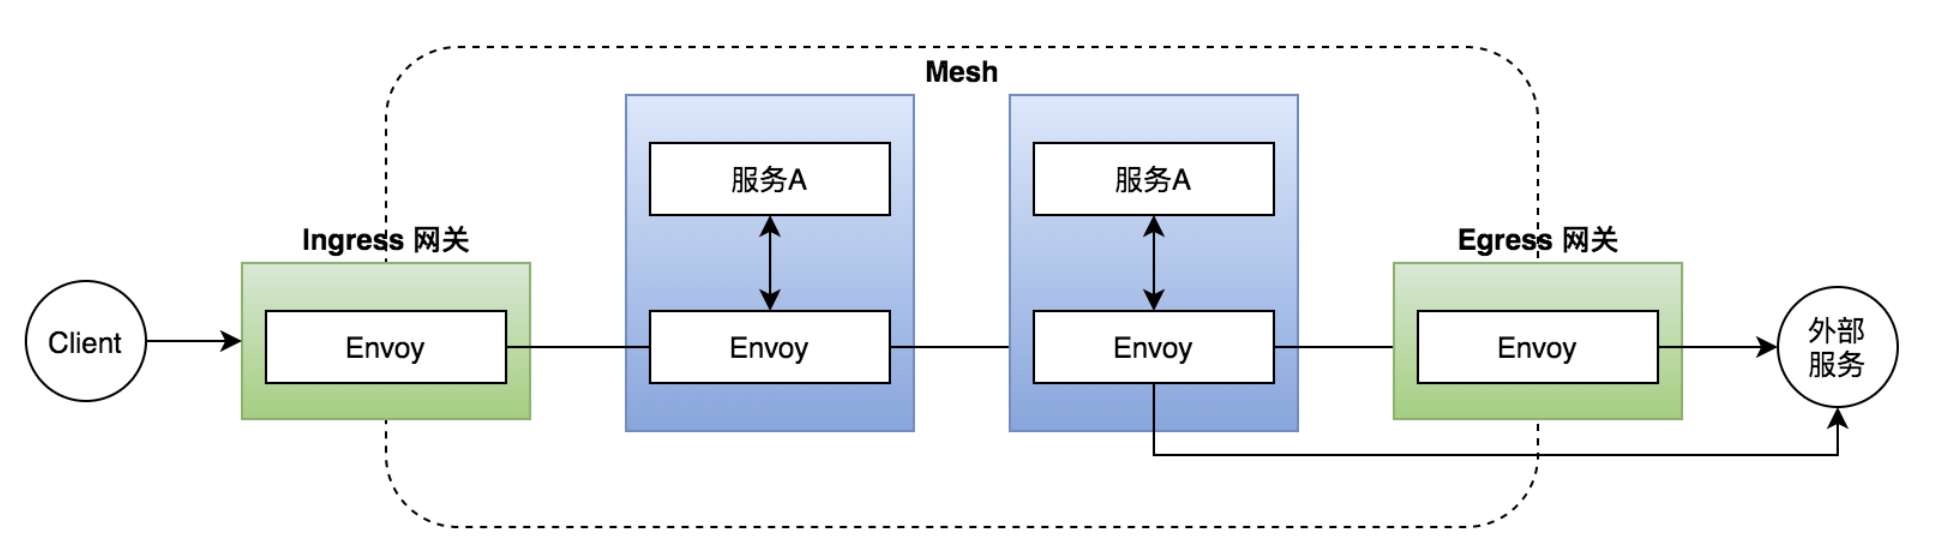
在 Istio 中包含两种类型的网关:
- Ingress 网关: 控制网格外部访问网格内部服务的流量;
- Egress 网关: 控制网格内部服务调用网格外部服务的流量。
实战
在本文在,我们将会演示 Istio 中创建一个入口网关,并将进入网格的流量分发到不同的地址。
具体来说,希望你通过本文的学习可以掌握:
- 通过Gateway控制入口流量;
- 掌握 Gateway 的配置方法。
StepByStep
Step1:检查当前的 gateway 列表
kubectl get gw -n istio-demo# NAME AGE# bookinfo-gateway 9h
可以看到,目前应该仅有一个我们在之前 QuickStart 中创建的对应的网关。
如果有其他的网关,那么建议先进行删除。
Step2:创建detail服务网关
我们可以准备如下一个 detail-gateway.yaml 的配置文件:
apiVersion: networking.istio.io/v1alpha3kind: Gatewaymetadata:name: detail-gatewayspec:selector:istio: ingressgatewayservers:- port:number: 80name: httpprotocol: HTTPhosts:- "*"---apiVersion: networking.istio.io/v1alpha3kind: VirtualServicemetadata:name: detail-vsspec:hosts:- "*"gateways:- detail-gatewayhttp:- match:- uri:prefix: /details- uri:exact: /healthroute:- destination:host: detailsport:number: 9080
然后运行 kubectl 使得上述配置生效:
kubectl apply -f samples/bookinfo/networking/detail-gateway.yaml -n istio-demo# gateway.networking.istio.io/detail-gateway created# virtualservice.networking.istio.io/detail-vs created
Step3:测试一下
下面,我们来测试一下看看吧。
在 QuickStart 中,我们已经演示和如何查询 Ingress 的IP和Port了,如果你不太记得了,没关系,可以用如下命令来快速查询:
# 获取 ingress 的 HostIPexport INGRESS_HOST=$(kubectl get po -l istio=ingressgateway -n istio-system -o jsonpath='{.items[0].status.hostIP}')# 获取 ingress 的 HTTP Portexport INGRESS_PORT=$(kubectl -n istio-system get service istio-ingressgateway -o jsonpath='{.spec.ports[?(@.name=="http2")].nodePort}')# 获取 ingress 的 HTTPS Portexport SECURE_INGRESS_PORT=$(kubectl -n istio-system get service istio-ingressgateway -o jsonpath='{.spec.ports[?(@.name=="https")].nodePort}')# 具体的访问地址export GATEWAY_URL=$INGRESS_HOST:$INGRESS_PORTecho "$GATEWAY_URL"
我们可以先访问 /health 接口看一下:
curl http://$GATEWAY_URL/health# {"status":"Details is healthy"}
可以看到,/health 请求已经访问到了对应的服务。
再来看看 /details/21 接口呢?
curl http://$GATEWAY_URL/details/21{"id": 21,"author": "William Shakespeare","year": 1595,"type": "paperback","pages": 200,"publisher": "PublisherA","language": "English","ISBN-10": "1234567890","ISBN-13": "123-1234567890"}
同样,以 /details 开头的 url 访问也正常访问到了对应的 details 服务。
原理说明
配置分析
下面,我们来对刚才创建的 Gateway 配置和 VirtualService 的配置进行说明。
我们先来看 Gateway 资源对象的配置:
apiVersion: networking.istio.io/v1alpha3kind: Gatewaymetadata:name: detail-gatewayspec:selector:istio: ingressgatewayservers:- port:number: 80name: httpprotocol: HTTPhosts:- "*"
其中:
- selector 指定了具体在哪个Gateway部署对象上生效。
- servers 中包含了 hosts 和 ports 相关的配置,其中,端口本质上可以任意配置,只是由于端口映射等关系,导致通常只有几个端口可以正常使用。
可以看到,在 Gateway 的配置中,我们仅仅会定义网关的入口点,但是不涉及到具体的路由策略。
通过,我们还需要创建一个 VirtualService 来描述对应的路由规则:
apiVersion: networking.istio.io/v1alpha3kind: VirtualServicemetadata:name: detail-vsspec:hosts:- "*"gateways:- detail-gatewayhttp:- match:- uri:prefix: /details- uri:exact: /healthroute:- destination:host: detailsport:number: 9080
其中:
- gateways 指名了它是针对指定 Gateway 入口的流量进行路由的。
- http 块的部分就比较简单了,和前一篇文章中讲到的内容是一致的,本文中就不再赘述了。
资源配置项
了解了我们上述的配置信息,我们再来完整的看一下 Gateway 支持了哪些配置项以及它们的作用: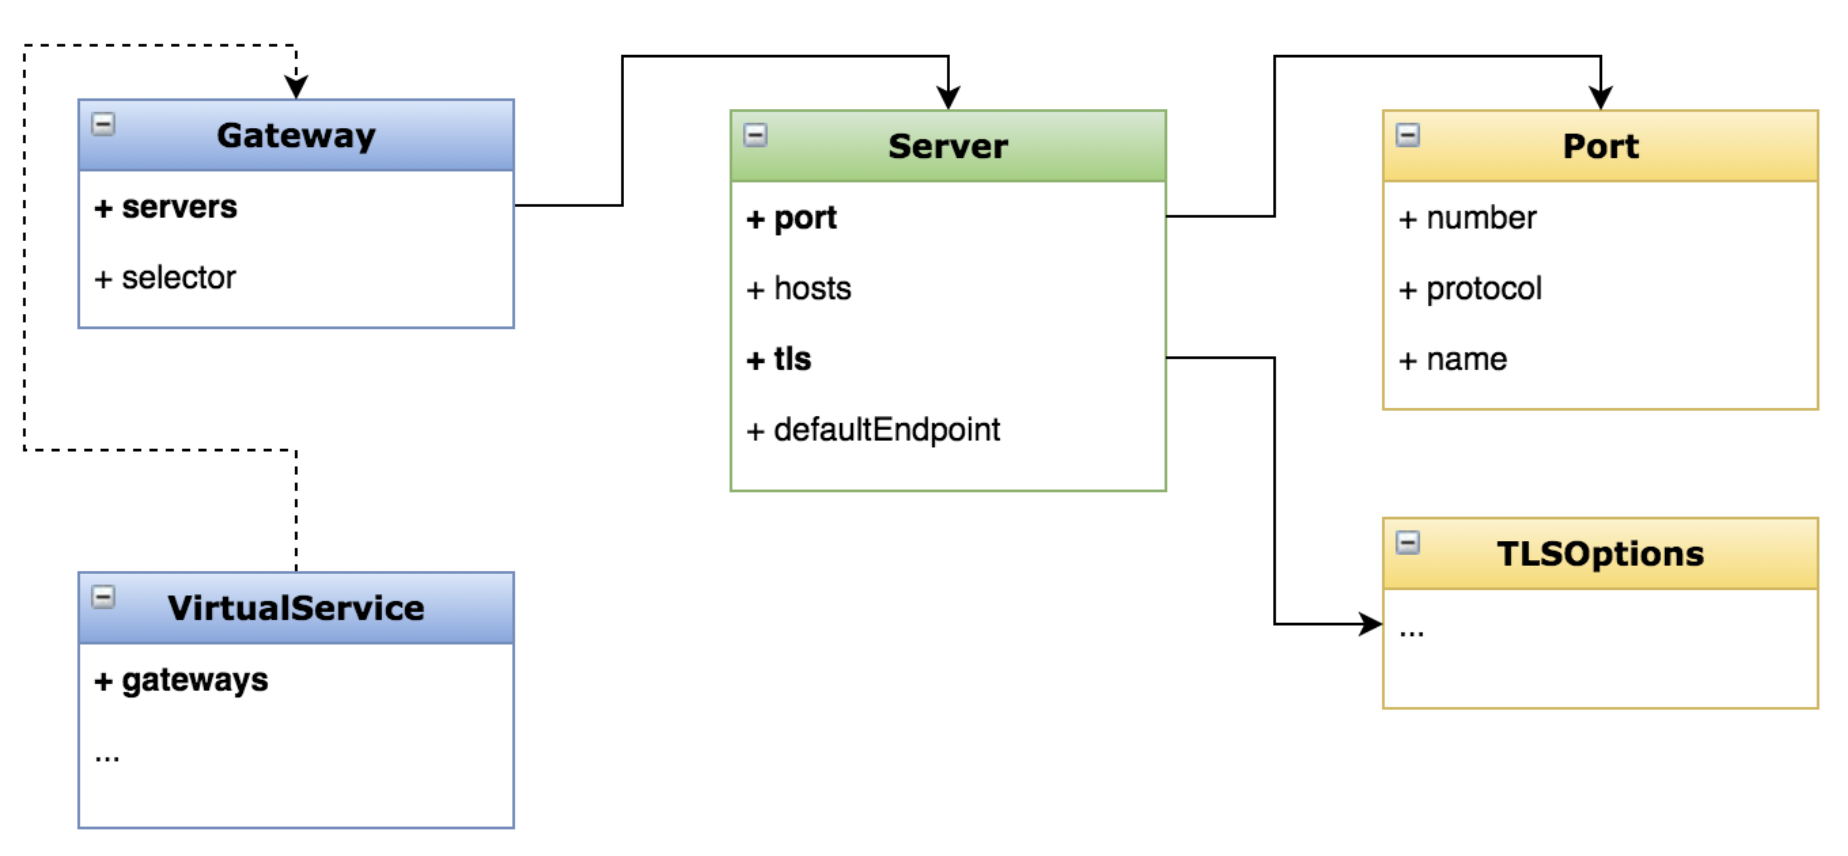
可以看到:
- Gateway 中包含 servers(配置入口点) 和 selector(选择网关Pod的标签)
- 在 Server 中描述了具体的入口点的端口、协议等信息。
- Gateway 本身不负责流量的路由;而是通过创建一个 VirtualService 来关联 Gateway 进行 Gateway 入口的流量路由。
使用场景
最后,我们来讨论一下 Ingress 有哪些使用场景呢?
- 首先,它可以将网格内的服务暴露给外界来访问;
- 其次,可以进行访问安全相关的配置,例如 HTTPS, mTLS 等;
- 最后,我们还可以通过 Ingress 来提供应用的统一入口和 API 聚合。
思考与实战
配置一个网关,只让特定域名的请求访问服务
我们在上文的了解中可以看到,在 Server 配置框中,有一个 hosts 字段可以用于过滤仅针对特定域名的访问时允许请求访问。
因此,我们可以修改 Gateway 的配置如下:
apiVersion: networking.istio.io/v1alpha3kind: Gatewaymetadata:name: detail-gatewayspec:selector:istio: ingressgatewayservers:- port:number: 80name: httpprotocol: HTTPhosts:- istio-gateway.com
下面,我们再来试试看?
kubectl apply -f samples/bookinfo/networking/detail-gateway.yaml -n istio-demo# gateway.networking.istio.io/detail-gateway configured# virtualservice.networking.istio.io/detail-vs unchanged
再次通过机器IP直接访问 /health 看看效果呢?
已经变为了404 Not Found了!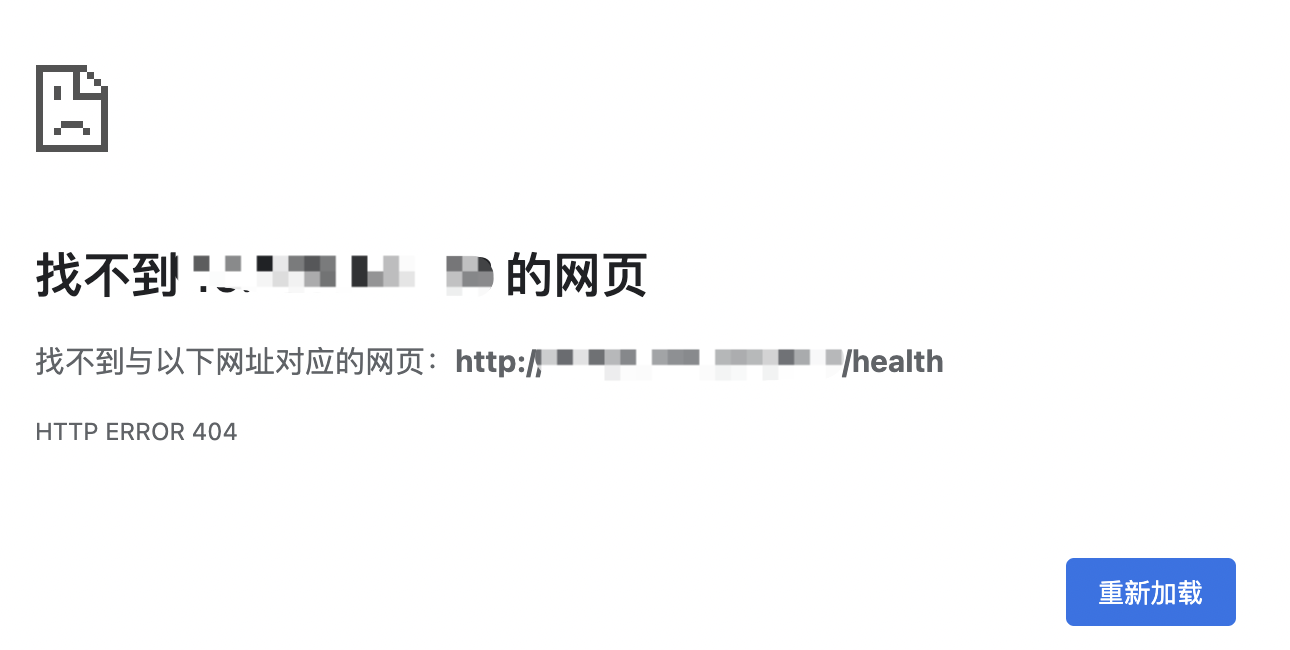
下面,我们来修改一下本机的 /etc/hosts 文件,增加一条将机器IP映射到 istio-gateway.com 域名的配置。
xxx.xxx.xxx.xxx istio-gateway.com
其中,xxx表示你的K8s机器IP地址。
下面,我们再来通过 istio-gateway.com:$port/health 来访问看看吧!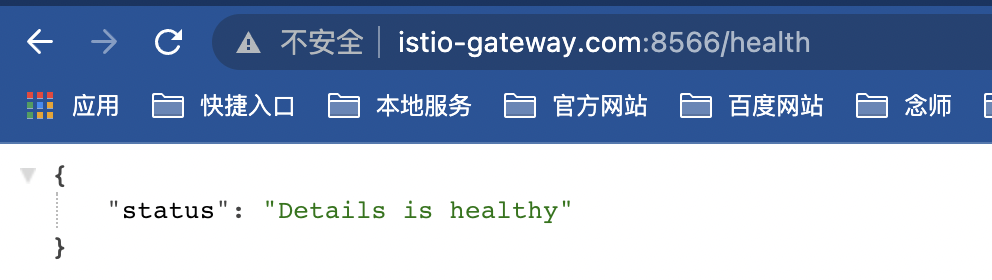
棒!已经可以了!

若有收获,就点个赞吧
0 人点赞
