SpringSecurity课程文档.pdf
3个基本的过滤器:异常过滤器,方法级过滤器,表单过滤器
过滤器的加载过程:
1.DelegatingFilterProxy类
初始化方法:

2.FilterChainProxy类的doFilter方法
doFilterInternal方法
把过滤器加载到过滤器链中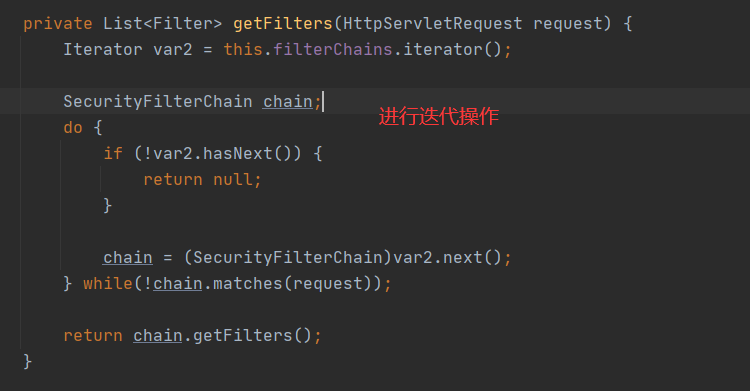
两个重要的接口:
UserDetailsService接口(查询数据库用户名和密码过程):
如果需要自己写认证用户名和密码,自己写一个类继承UsernamePasswordAuthenticationFilter,重写
attemptAuthentication方法,并且重写AbstractAuthenticationProcessingFilter 类中的successfulAuthentication(表示认证失败)方法和unsuccessfulAuthentication(认证不成功调用)获取用户名和密码,去数据库查询,并且进行判断,如果成功,则调用successfulAuthentication否则调用unsuccessfulAuthentication。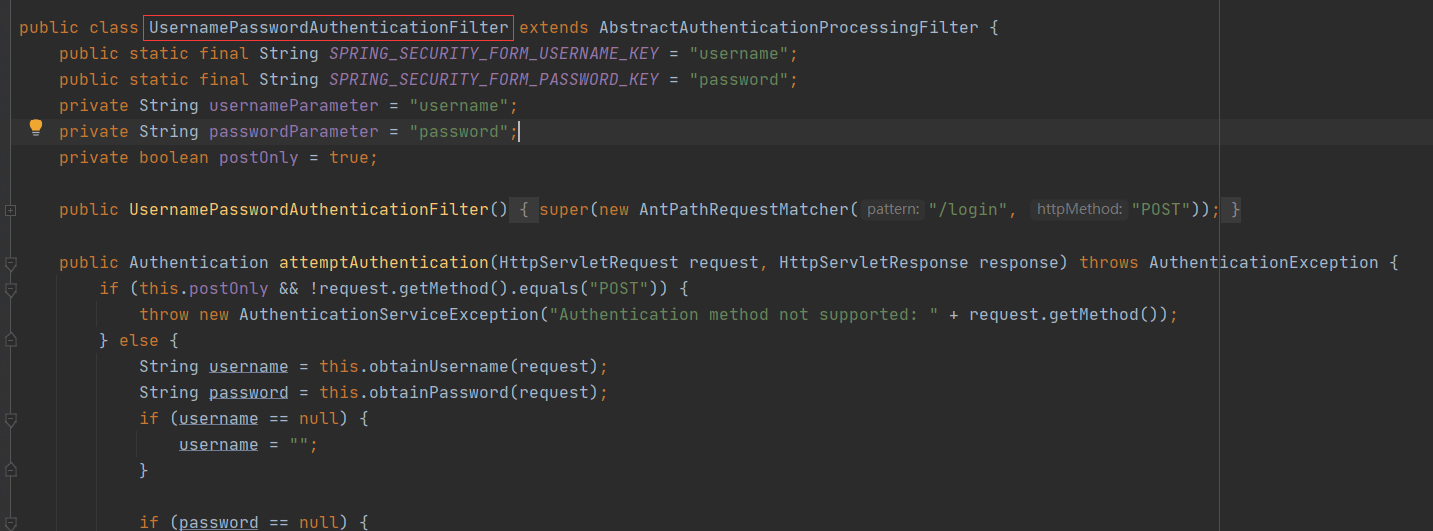
继承这个类
创建类实现UserDetailService,编写查询数据过程,返回User对象,这个User对象是安全框架提供对象
PasswordEncoder接口(密码进行加密的接口):
数据接口加密,用于返回User对象里面的密码加密
设置用户名和密码的三种方式:
1.配置文件中配置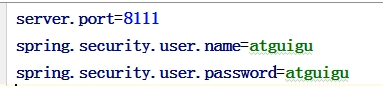
2.通过配置类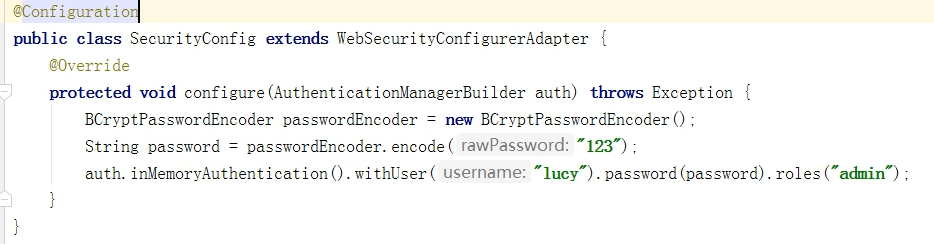
必须要加这个,加密方法必须实现这个接口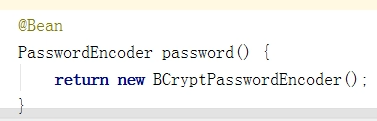
3.自定义编写实现类
步骤一:创建配置类,设置使用哪个userDetailsService
步骤二:实现userDetailsService接口,并且去查询数据库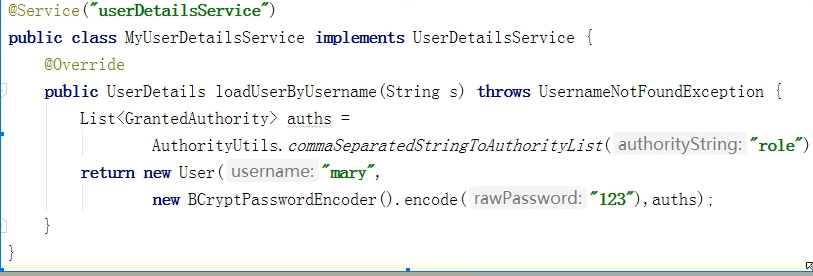
用户认证:重写自定义的登陆页面
相关方法:
http.formLogin() //自定义自己编写的登陆页面
.loginPage(“/login.html”) //登录页面的设置
.loginProcessingUrl(“”) //登陆访问路径(调到哪一个controller)
.defaultSuccessUrl(“/test/index”).permitAll() //登陆成功之后,跳转路径
.and().authorizeRequests() //设置哪些路径可以直接访问,不需要认证
.antMatchers(“/“,”/test/hello”,”/user/login”).permitAll(); //设置哪些路径可以直接访问,不需要认证
.anyRequest().authenticated()
.and().csrf().disable(); //关闭csrf防护
注意:传入的用户名和密码一定要是username和password为名称,写别的名称会报错。
理由是:因为在执行UserDetailsService实现类之前要通过调用UsernamePasswordAuthenticationFilter过滤器。
过滤器中通过request取值就是通过这样的方式取得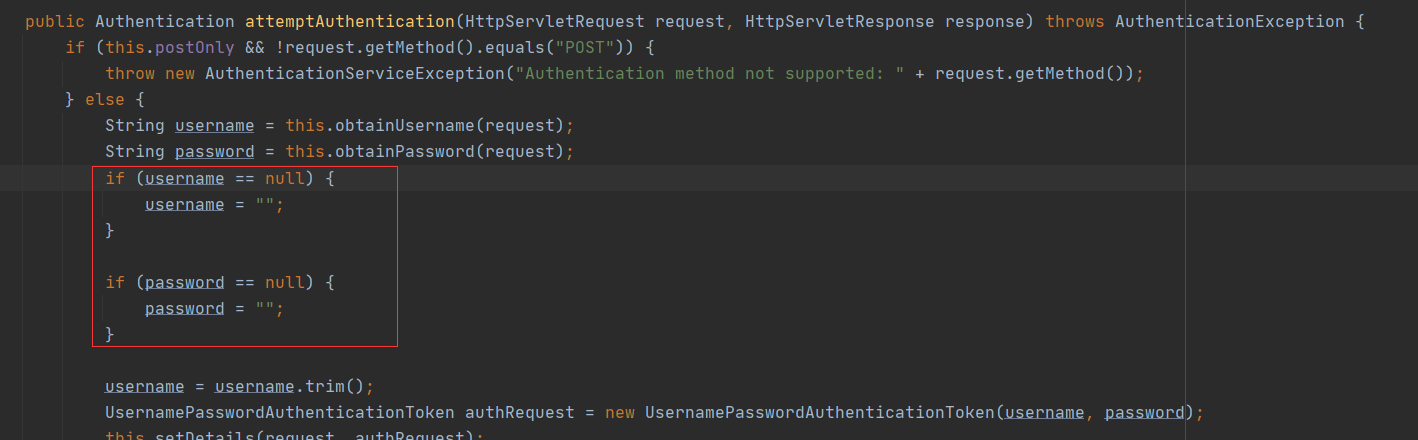

基于角色或者权限进行访问控制
1.在配置类设置当前访问地址有哪些权限
//当前登陆用户,只有具有admin权限才可以访问这个路径
.antMatchers(“/test/index”).hasAuthority(“admins”)
List
2..antMatchers(“/test/index”).hasAnyAuthority(“admins,manager”)
List
3..antMatchers(“/test/index”).hasRole(“sale”) 必须要加上ROLE_前缀,源码中是这样进行操作的
List
3..antMatchers(“/test/index”).hasAnyRole(“sale,admin”) 必须要加上ROLE_前缀,源码中是这样进行操作的
List
配置没有权限访问跳转自定义页面
http.exceptionHandling().accessDeniedPage(“/unauth.html”);
认证授权注解的使用
@Secured
设置用户某些角色能访问方法
@RequestMapping(“testSecured”)
@ResponseBody
@Secured({“ROLE_normal”,”ROLE_admin”})
public String helloUser(){
return “hello,user”;
}
@PreAuthorize
注解适合进入方法前的权限验证
@PreAuthorize(“hasAnyAuthority(‘menu:system’)”)
@PreAuthorize(“hasRole(‘ROLE_管理员’)”)
@PostAuthorize
注解适合进入方法后的权限验证
@preFilter
对你传入方法的数据进行过滤
@postFilter
对你的方法的返回的数据进行过滤
@postFilter(“filterObject.username==’admin’”)
判断集合里面对象的值
用户注销
http.logout().logoutUrl(“/logout”).
logoutSuccessUrl(“/test/hello”).permitAll(); //登陆成功后跳转到哪个页面
跟session有点类似,退出之后还需要再次认证
自动登陆**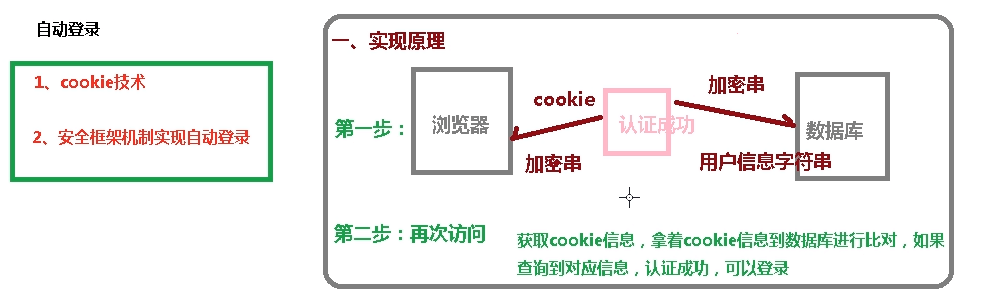


若有收获,就点个赞吧
0 人点赞
