1. 创建企业/组织/团队
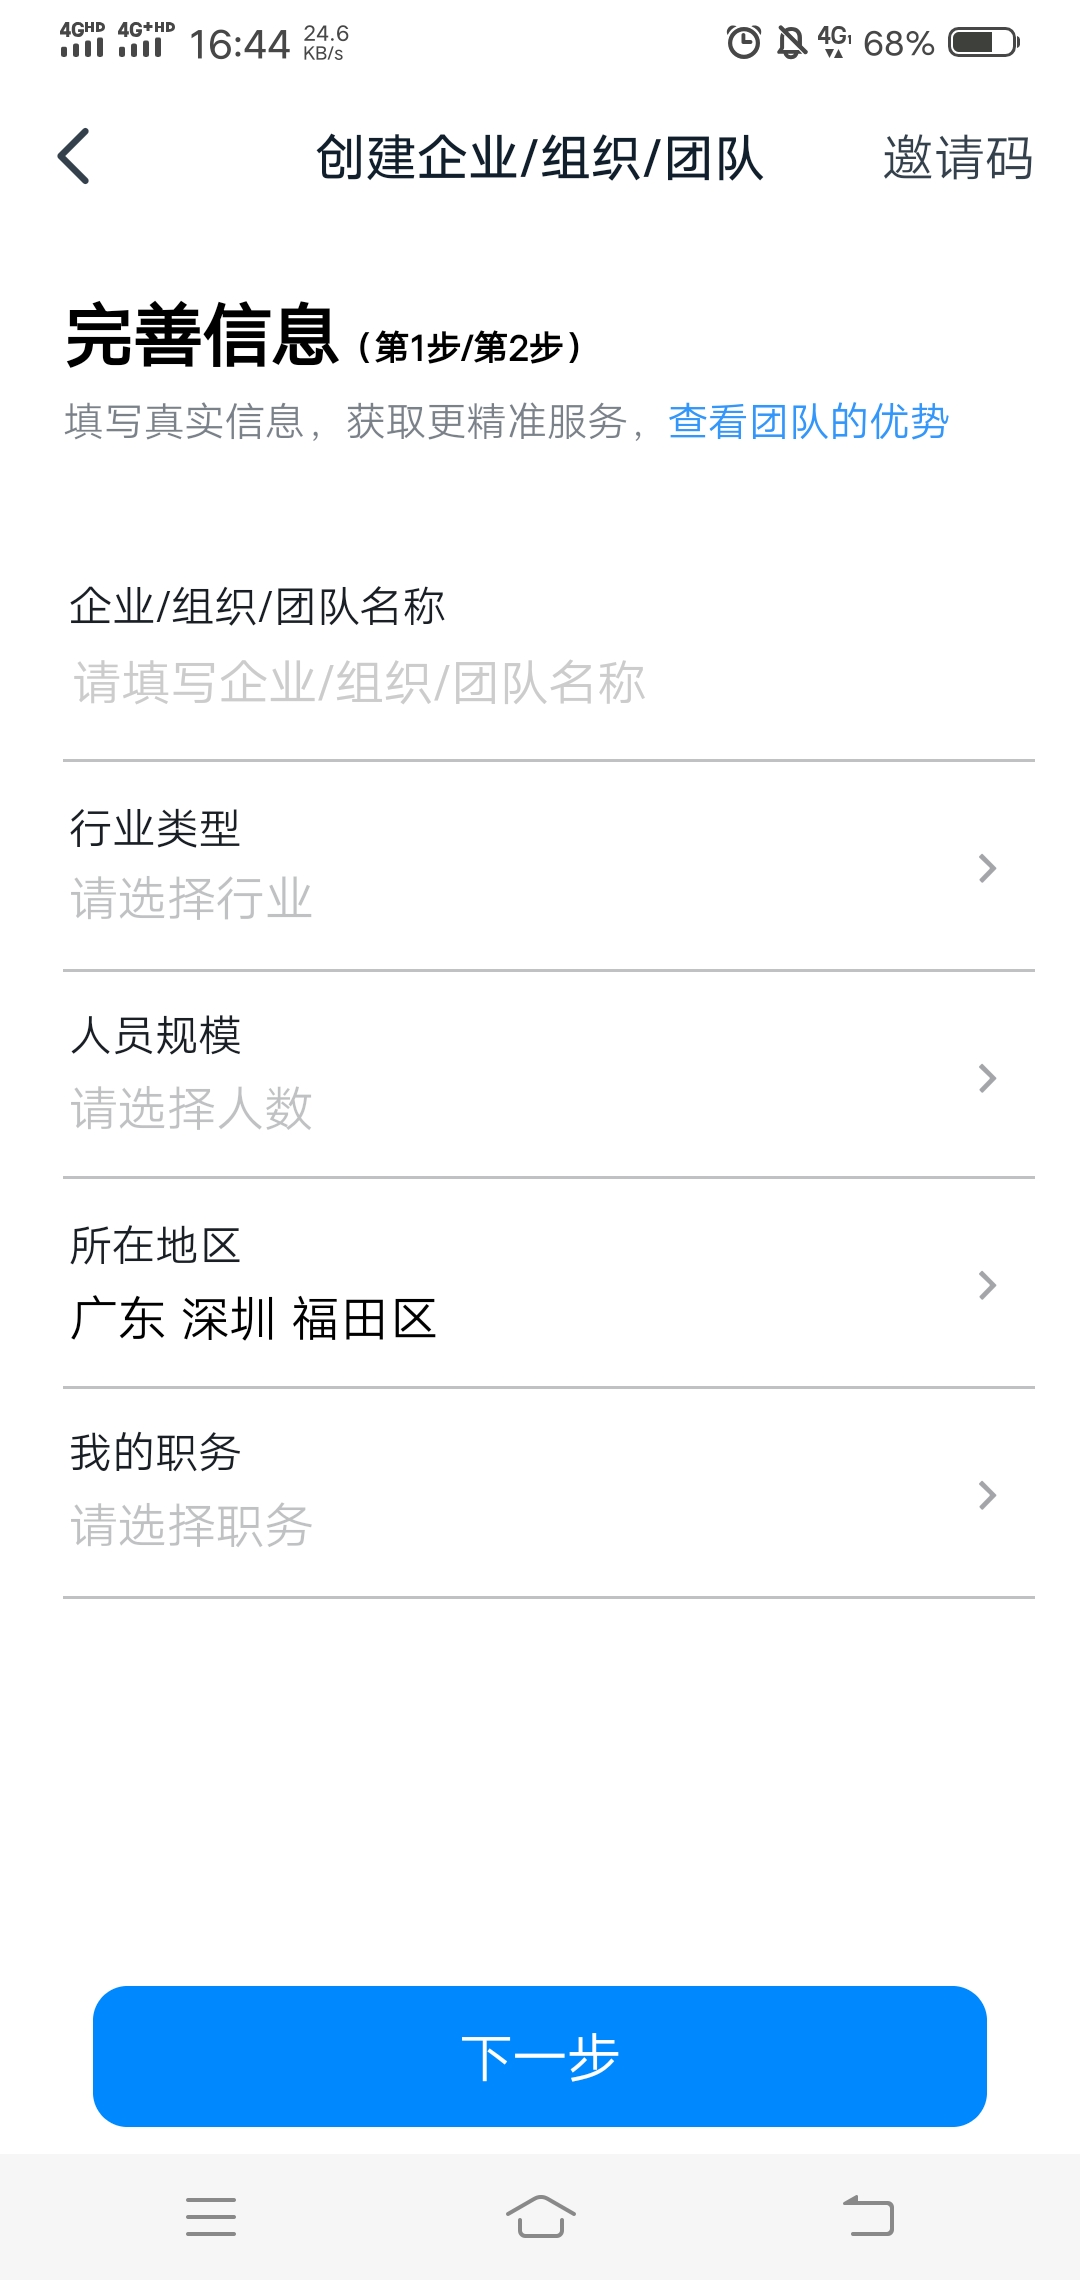
手机端登录钉钉,依次进入:“通讯录”/“创建企业/组织/团队”,填写相关信息即可添加测试团队。
2. 创建钉钉应用
登录钉钉开发平台(开发者后台),依次进入:“应用开发”/“企业内部开发”/“创建应用”,填写“应用名称”、“应用描述”等关键信息,创建“H5微应用”或“小程序”。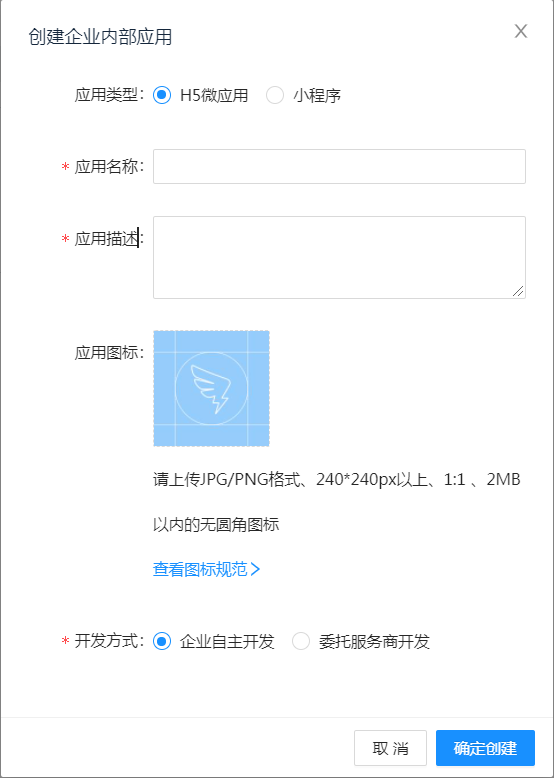
3. 获取钉钉应用令牌
完成钉钉应用添加后,即返回钉钉应用列表,双击对于的钉钉应用后,即可获取钉钉应用的令牌信息(主要关注:AppKey、AppSecret)。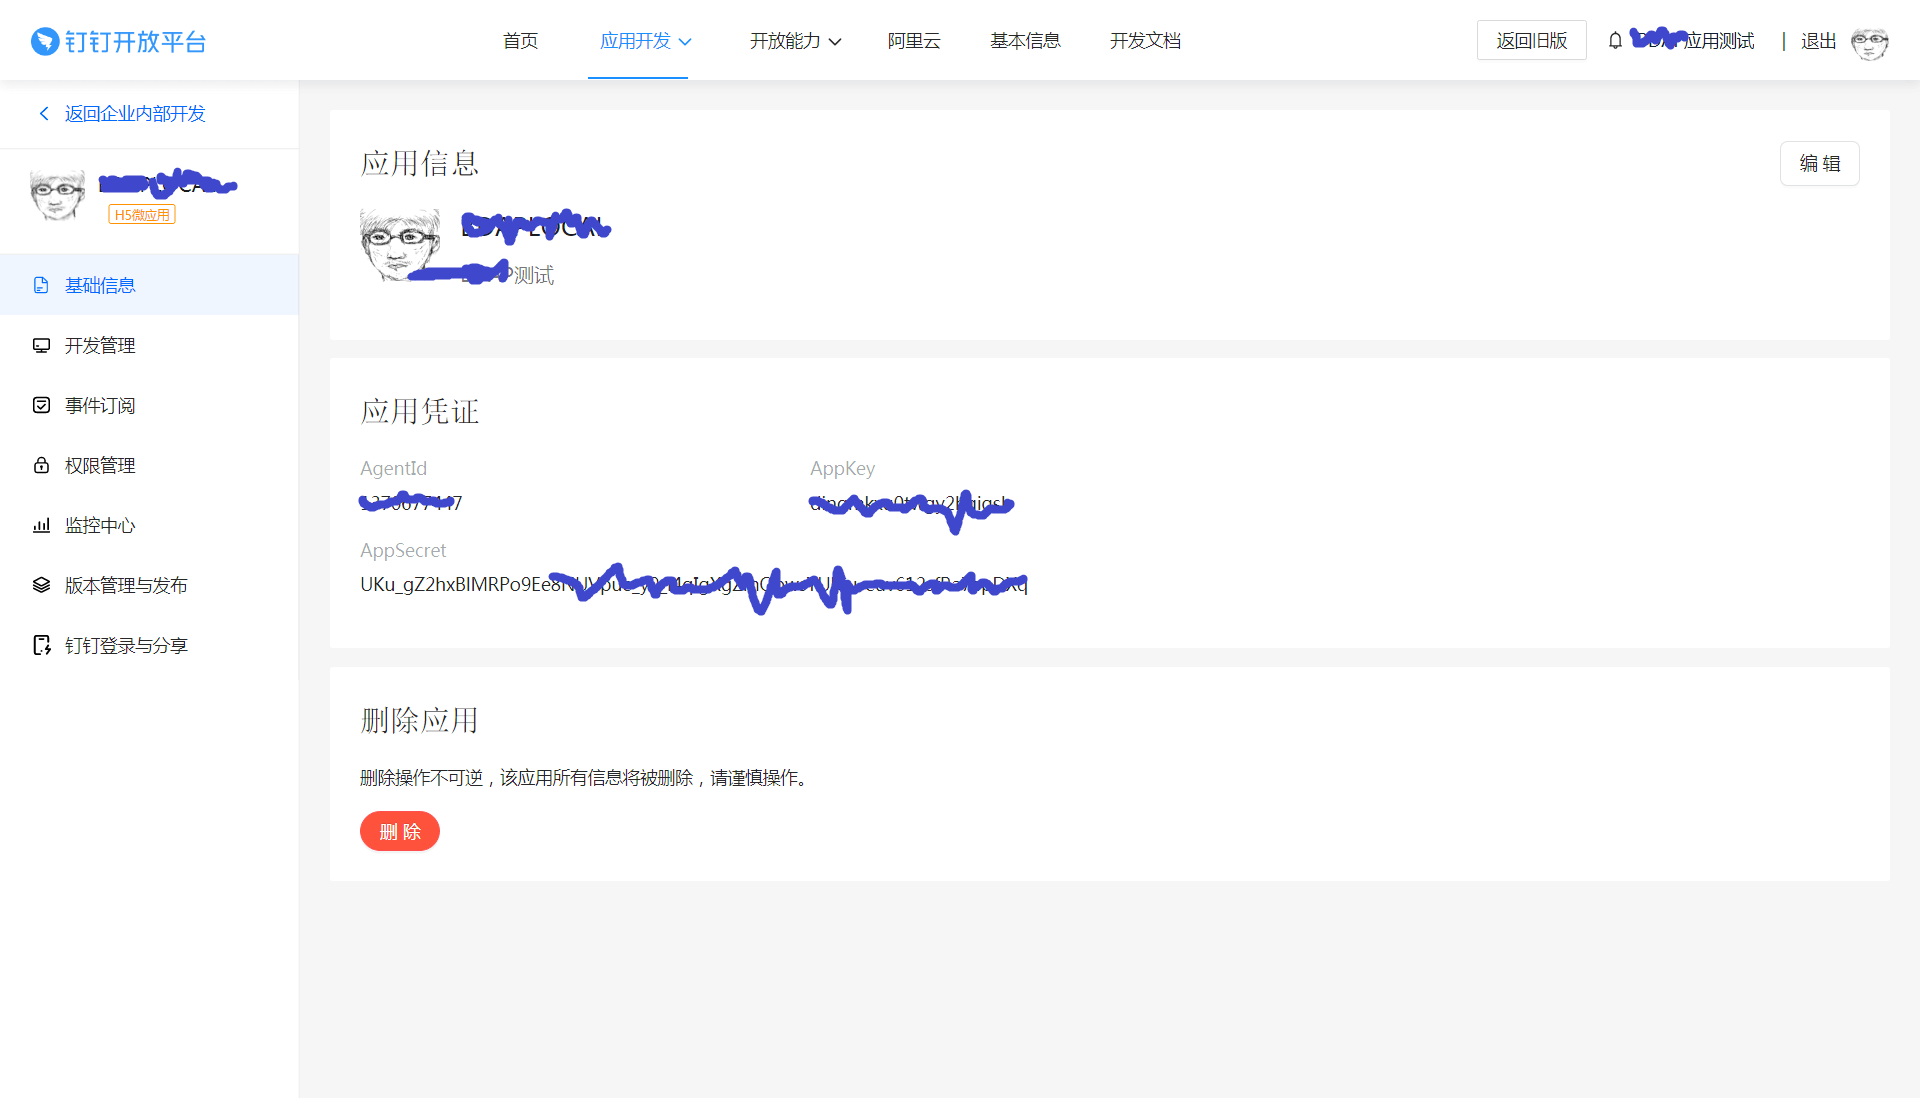
4. 权限分配
钉钉开发平台,依次进入:“应用开发”/“企业内部开发”/“${钉钉应用}”/“权限管理”,之后从权限类别列表中选择“获取凭证”或者在搜索框填写“获取用户token”过滤,查找定位至“调用OpenApp专有API时需要具备的权限”,之后点击“申请权限”即可。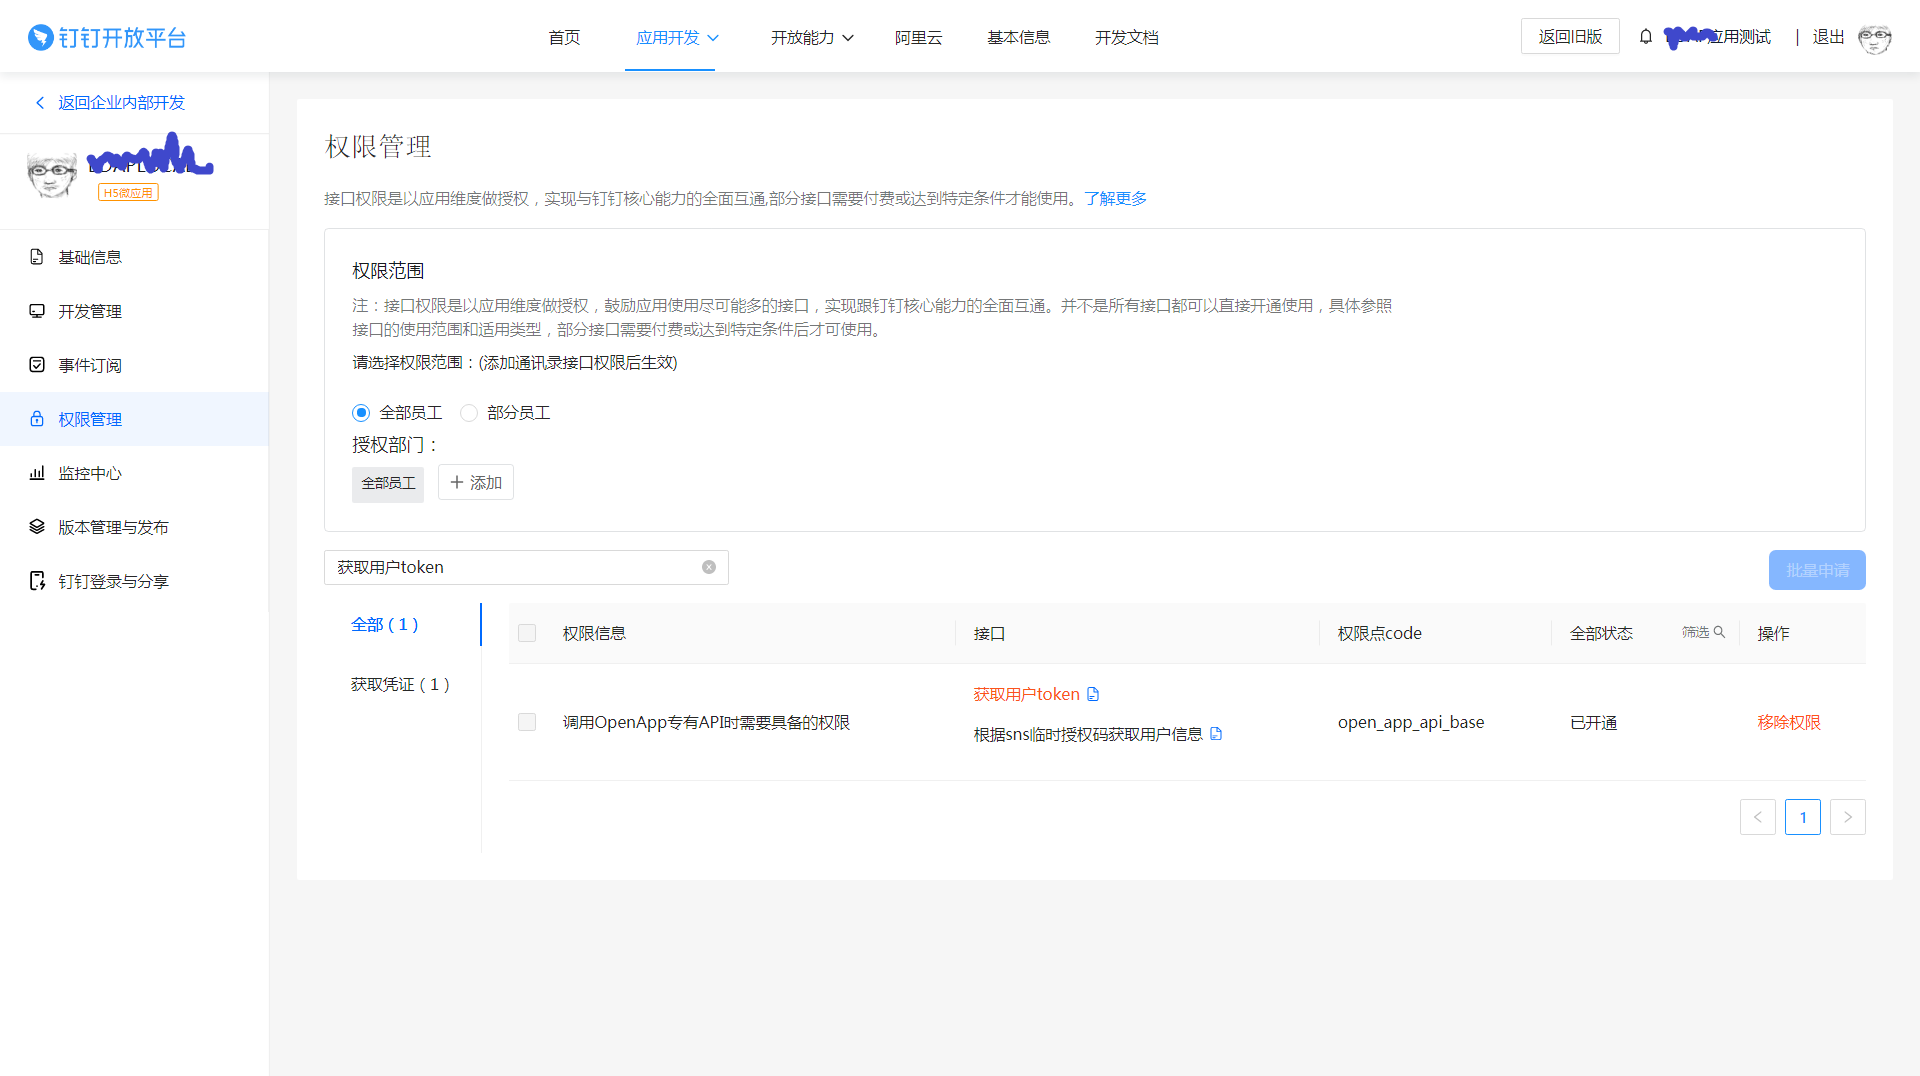
5. 接入登录
钉钉开发平台,依次进入:“应用开发”/“企业内部开发”/“${钉钉应用}”/“钉钉登录与分享”/“接入登录”,填写回调域名,用于扫描登录后跳转回应用程序。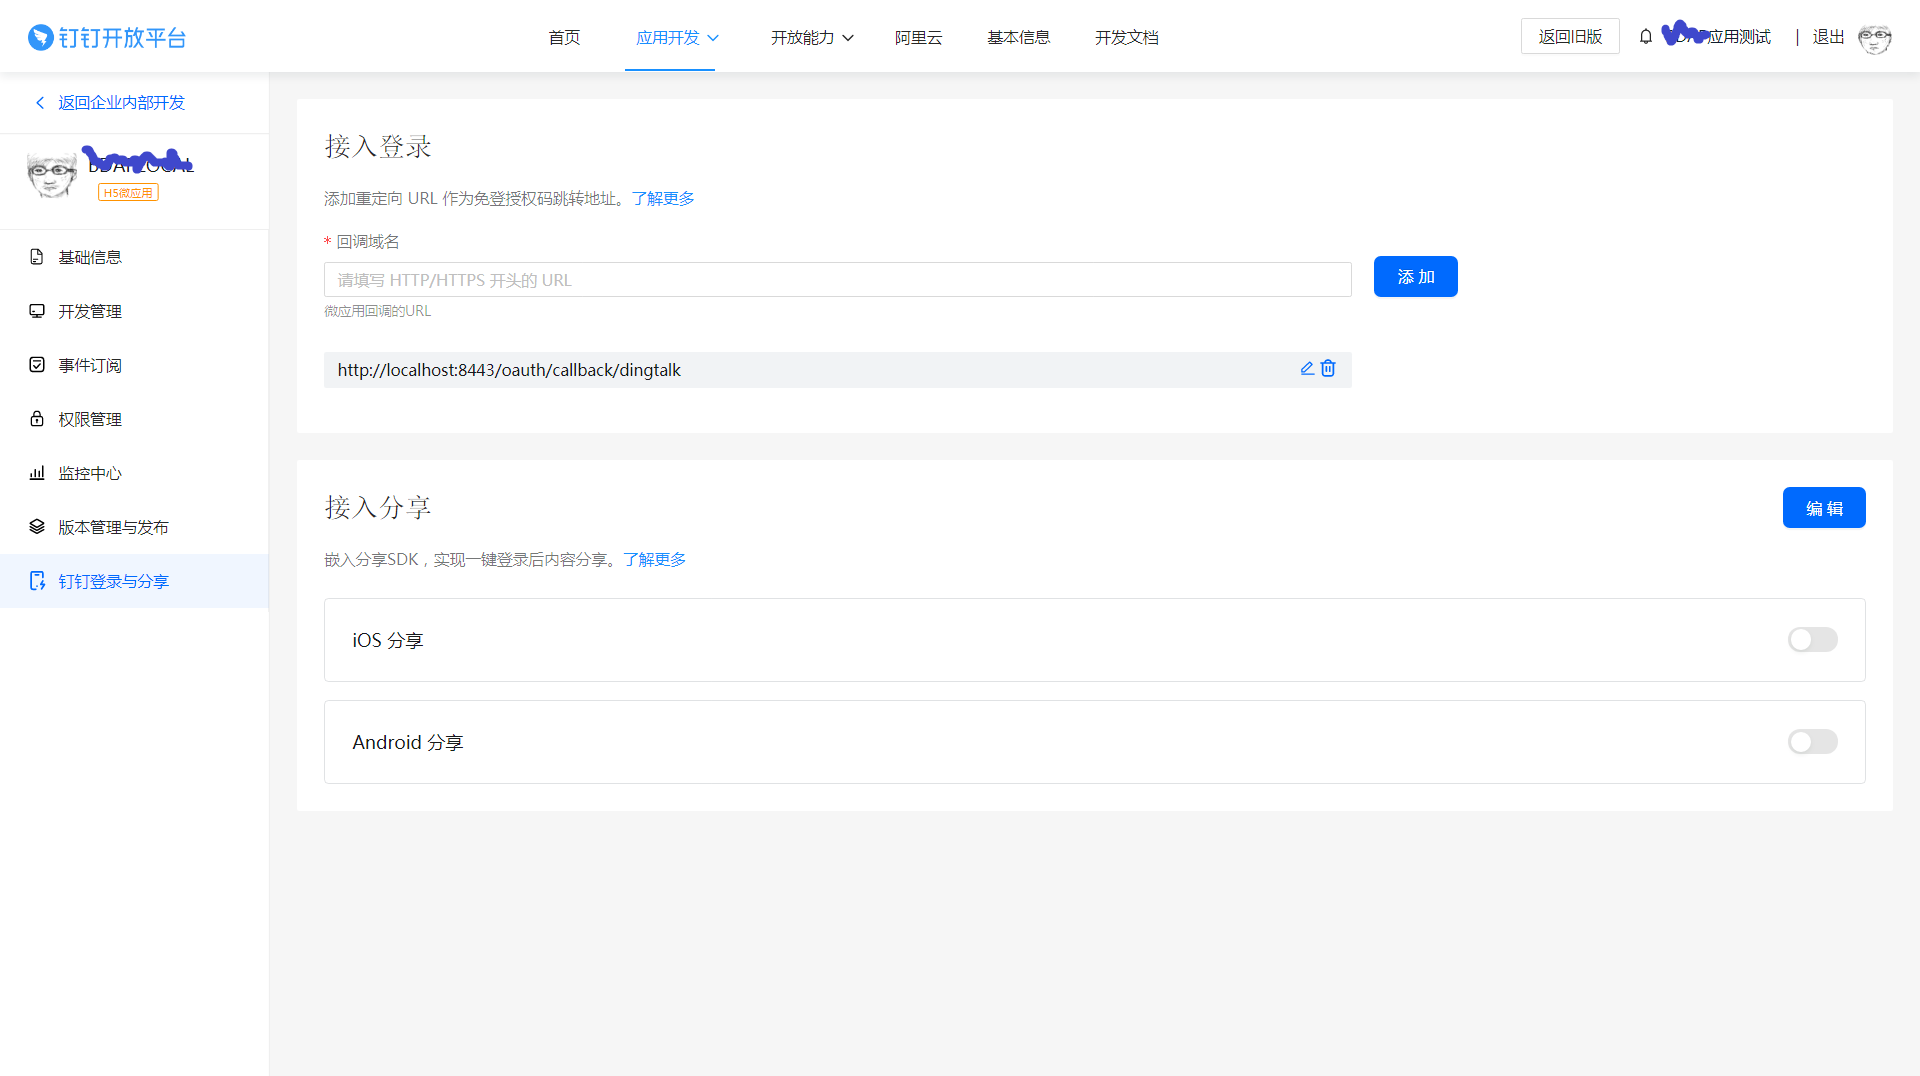
6. 应用系统集成
下载
**JustAuth-demo**工程,gitee或github均可。git clone https://gitee.com/justauth/JustAuth-demo.git
修改配置参数。
- application.properties
根据实际情况修改端口、Redis等配置信息。
server.port=8443spring.thymeleaf.cache=falsespring.devtools.restart.additional-paths=src/main/javaspring.devtools.restart.exclude=static/**,public/**# Redis配置spring.redis.database=0spring.redis.host=localhostspring.redis.port=6379spring.redis.password=
- me.zhyd.justauth.RestAuthController
将获取的钉钉应用令牌信息(AppKey -> clientId、AppSecret -> clientSecret)更新至控制器,同时需要确保在开发者后台配置的回调地址与“redirectUri”保持一致。
/*** 根据具体的授权来源,获取授权请求工具类*/private AuthRequest getAuthRequest(String source) {AuthRequest authRequest = null;switch (source.toLowerCase()) {case "dingtalk":authRequest = new AuthDingTalkRequest(AuthConfig.builder().clientId("${AppKey}").clientSecret("${AppSecret}").redirectUri("http://localhost:8443/oauth/callback/dingtalk").build());break;// ....default:break;}if (null == authRequest) {throw new AuthException("未获取到有效的Auth配置");}return authRequest;}
扫描登录处理逻辑,需根据实际需要进行修改,此处示例登录成功后跳转至第三方站点。
@RequestMapping("/callback/{source}")public ModelAndView login(@PathVariable("source") String source, AuthCallback callback, HttpServletRequest request) {AuthRequest authRequest = getAuthRequest(source);AuthResponse<AuthUser> response = authRequest.login(callback);log.info(JSONObject.toJSONString(response));if (response.ok()) {userService.save(response.getData());// 示例:登录成功后跳转至第三方站点return new ModelAndView("redirect:http://localhost:8089/bcm-szx-sati/index.html#/home");}Map<String, Object> map = new HashMap<>(1);map.put("errorMsg", response.getMsg());return new ModelAndView("error", map);}
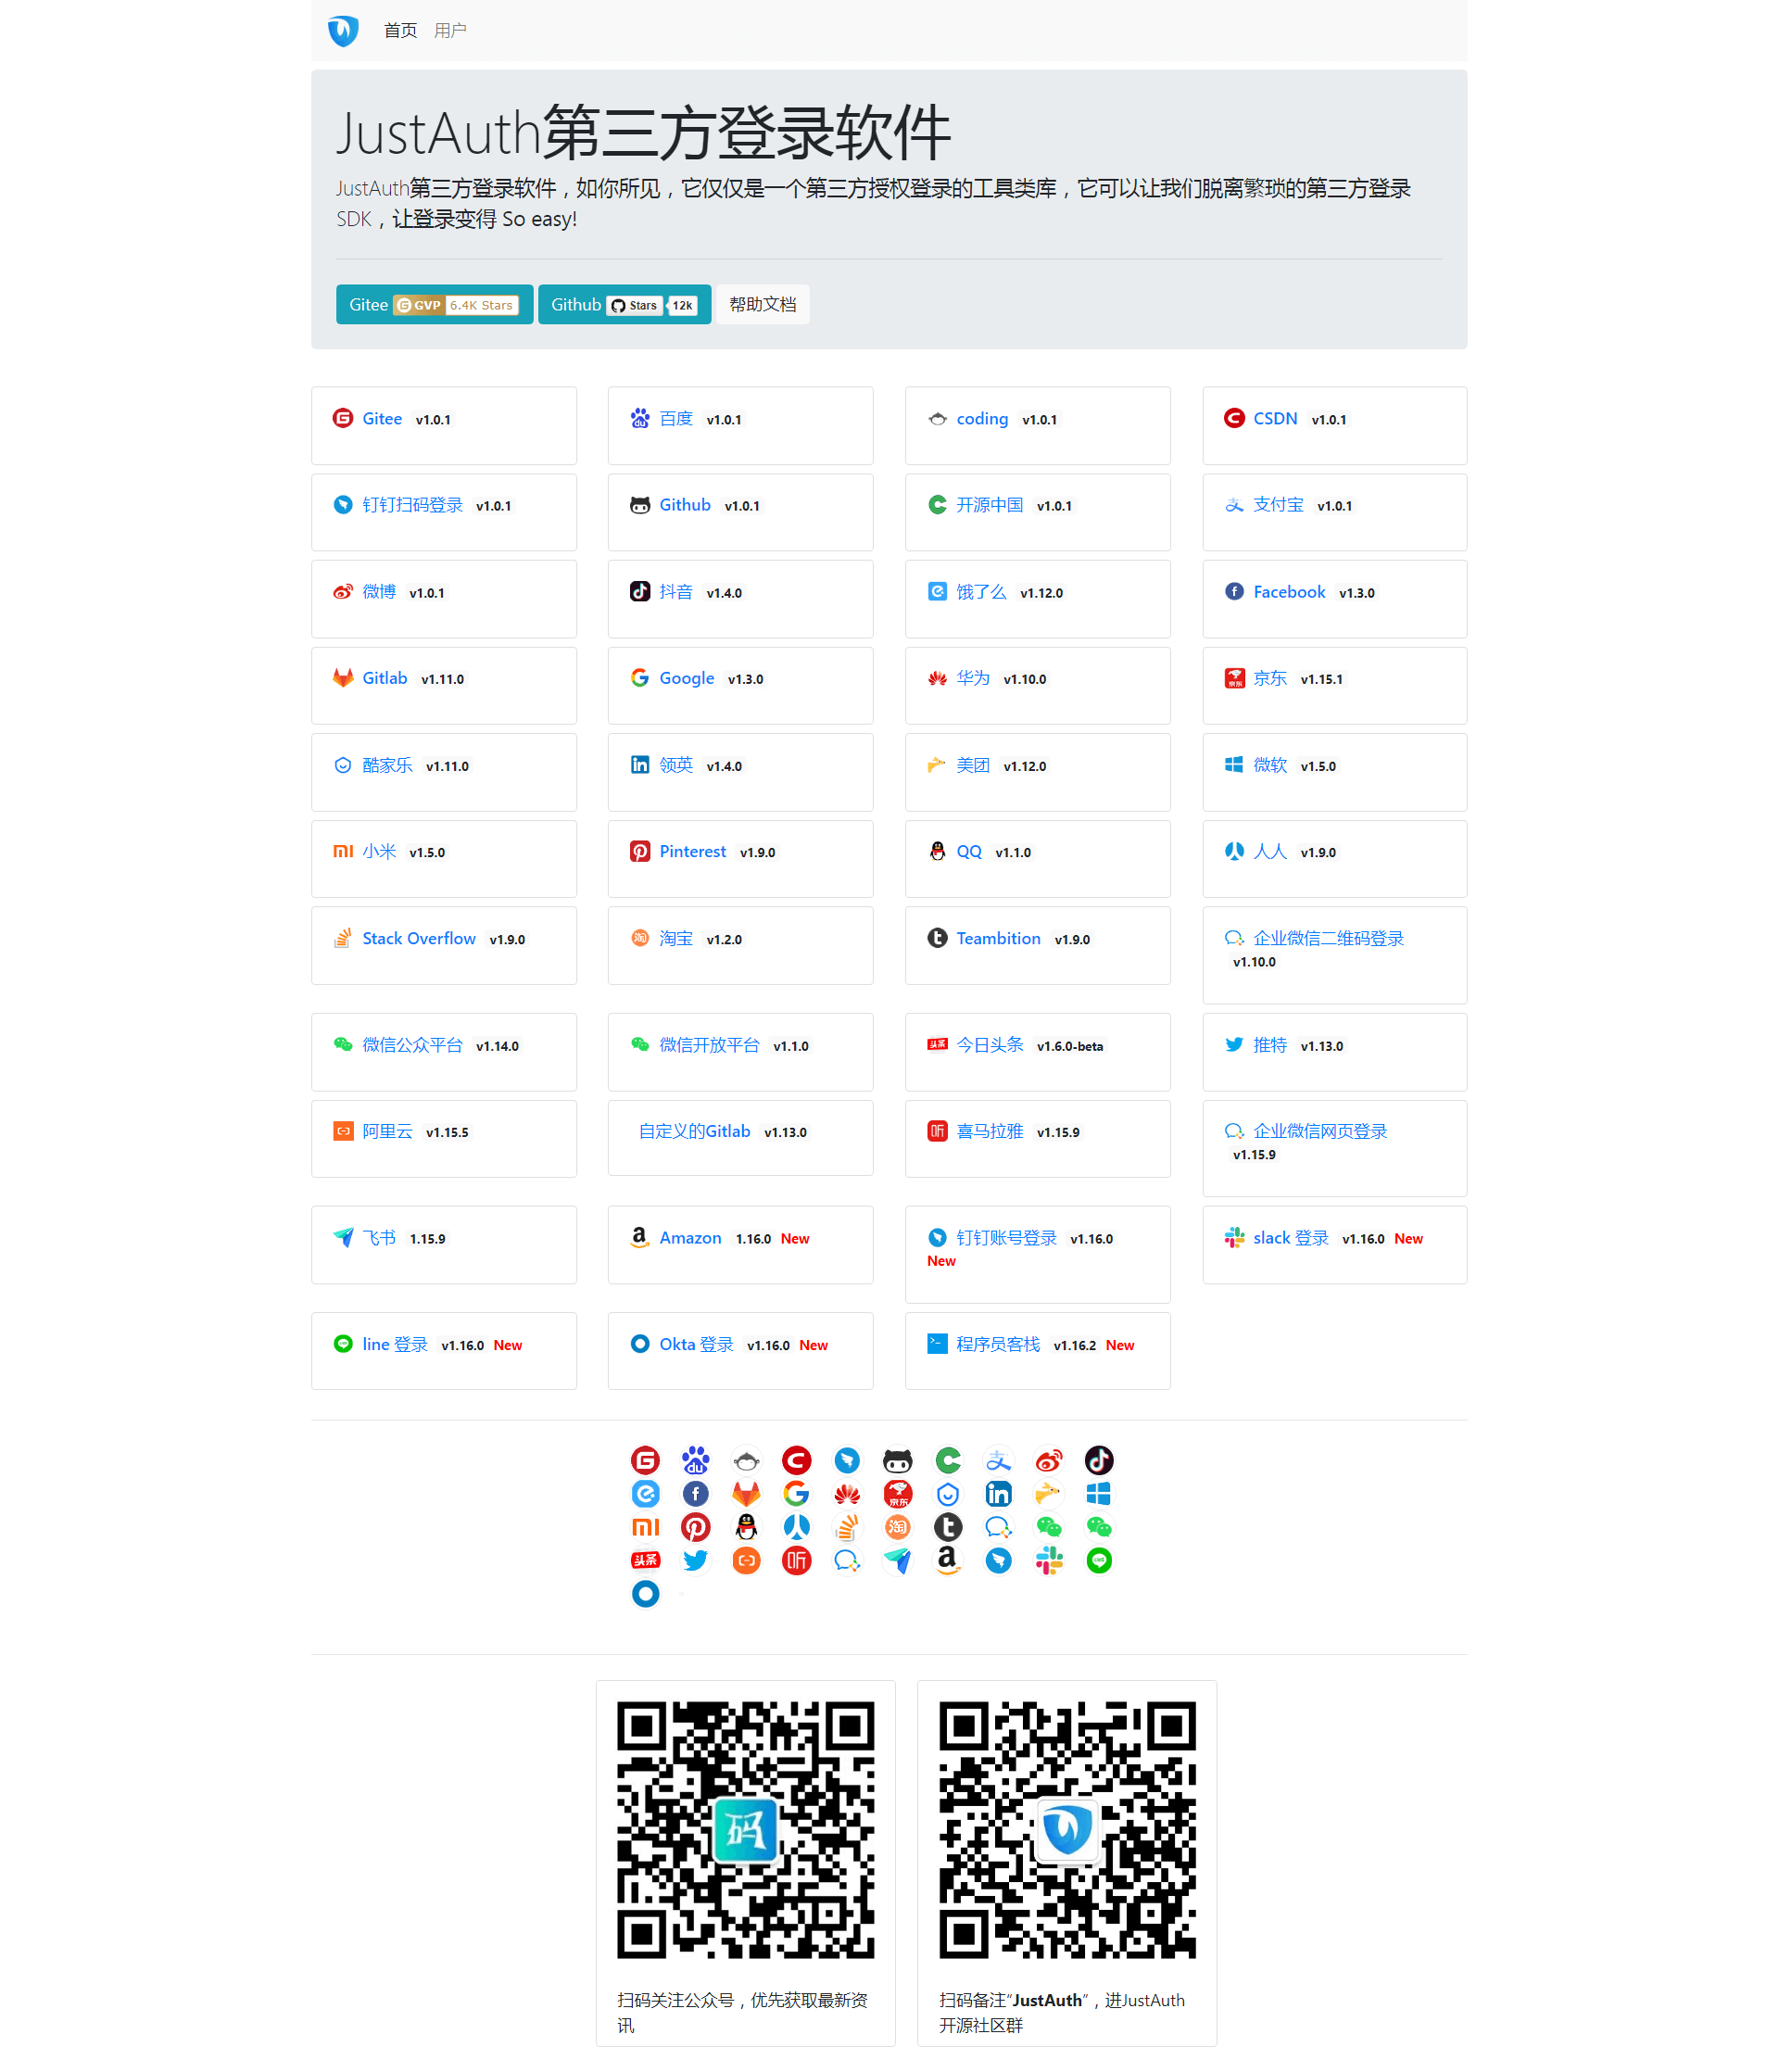
- 启动工程,选择“钉钉扫码登陆”,手机扫描二维码,进行验证。
- 响应消息。
根据响应消息,可获取**token**(包含:**openId**,**unionId**),之后通过这些信息可获取扫描用户更多授权信息。
{"code": 2000,"data": {"gender": "UNKNOWN","nickname": "*************************","rawUserInfo": {"nick": "*************************","unionid": "*************************","dingId": "*************************","openid": "*************************","main_org_auth_high_level": true},"source": "DINGTALK","token": {"expireIn": 0,"openId": "*************************","refreshTokenExpireIn": 0,"unionId": "*************************"},"username": "*************************","uuid": "*************************"}}
参考
钉钉开放平台:扫码登录第三方网站
https://developers.dingtalk.com/document/app/scan-qr-code-to-log-on-to-third-party-websites
JustAuth:集成第三方企业平台指南-钉钉登录
https://justauth.wiki/guide/oauth/dingtalk

