基础环境搭建
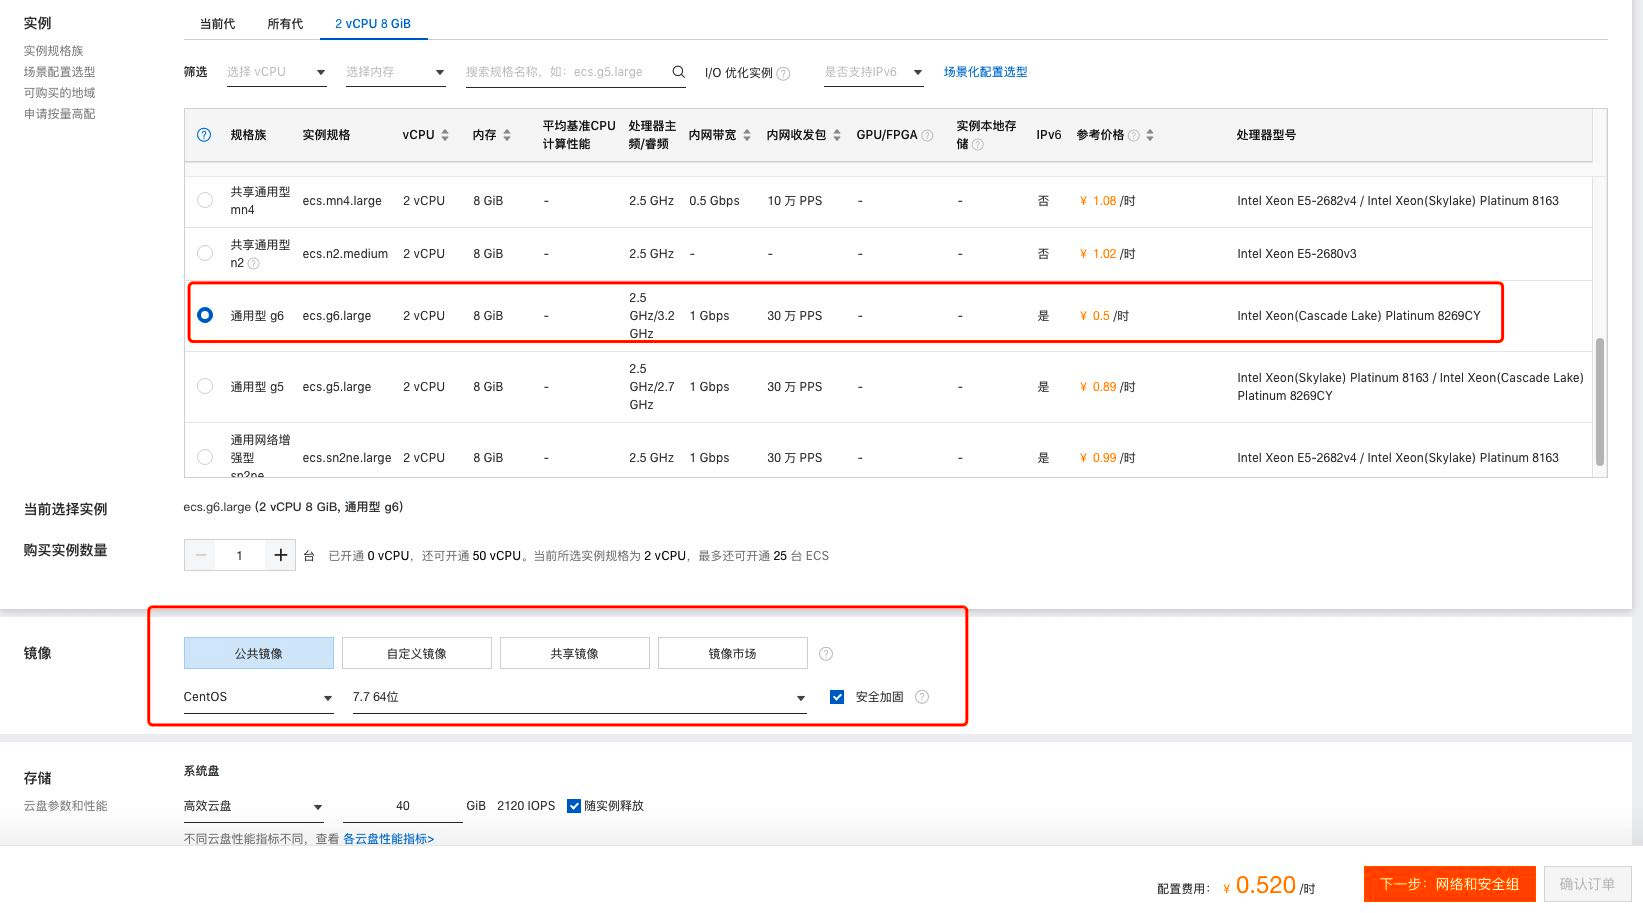
① 购买 ECS
:::warning
② 初始化 CentOS7
curl -O https://pigx.vip/os7init.shsh os7init.sh pig4cloud
③ 安装 JDK
yum install -y javajava -version
④ 安装 Mysql 8
:::success 点击下载 Mysql rpm 安装包 mysql80-community-release-el7-7.noarch.rpm.zip :::
rpm -ivh mysql80-community-release-el7-7.noarch.rpmyum install -y mysql mysql-server# 修改配置文件vim /etc/my.cnflower_case_table_names=1# 重启mysqlsystemctl restart mysqld# 查看默认密码grep password /var/log/mysqld.log# mysql client 链接 mysqlalter user 'root'@'localhost' identified by 'ZxcRoot123!@#';set global validate_password.check_user_name=0;set global validate_password.policy=0;set global validate_password.length=1;alter user 'root'@'localhost' identified by 'root';# 修改为允许远程访问use mysql;update user set host = '%' where user = 'root';FLUSH PRIVILEGES;
⑤ 安装 Redis
yum install redissystemctl restart redis
⑥ 安装 NGINX
vim /etc/yum.repos.d/nginx.repo[nginx-stable]name=nginx stable repobaseurl=http://nginx.org/packages/centos/$releasever/$basearch/gpgcheck=1enabled=1gpgkey=https://nginx.org/keys/nginx_signing.keymodule_hotfixes=true[nginx-mainline]name=nginx mainline repobaseurl=http://nginx.org/packages/mainline/centos/$releasever/$basearch/gpgcheck=1enabled=0gpgkey=https://nginx.org/keys/nginx_signing.keymodule_hotfixes=true
yum install -y yum-utilsyum-config-manager --enable nginx-mainlineyum install -y nginx
⑦ 配置 hosts
vim /etc/hosts127.0.0.1 pig-mysql127.0.0.1 pig-redis127.0.0.1 pig-gateway127.0.0.1 pig-register127.0.0.1 pig-sentinel127.0.0.1 pig-jobsource /etc/hosts
部署应用代码
准备源码包
- pig 服务端 编译 jar
mvn clean install
- pig-ui 前端 编译 dist
npm run build
初始化数据库
mysql -uroot -proot>source pig.sqlsource pig_codegen.sqlsource pig_config.sqlsource pig_job.sql
启动服务端
nohup java -Dfile.encoding=utf-8 -jar pig-register.jar > /dev/null 2>&1 &nohup java -Dfile.encoding=utf-8 -jar pig-monitor.jar > /dev/null 2>&1 &nohup java -Dfile.encoding=utf-8 -jar pig-sentinel-dashboard.jar > /dev/null 2>&1 &nohup java -Dfile.encoding=utf-8 -jar pig-xxl-job-admin.jar > /dev/null 2>&1 &nohup java -Dfile.encoding=utf-8 -jar pig-gateway.jar > /dev/null 2>&1 &nohup java -Dfile.encoding=utf-8 -jar pig-auth.jar > /dev/null 2>&1 &nohup java -Dfile.encoding=utf-8 -jar pig-upms-biz.jar > /dev/null 2>&1 &
部署前端
mkdir -p /data/pig-ui && cp -r dist/* /data/pig-uicd /etc/nginx/conf.d && rm -f default.confvim pigx.confserver {listen 80;server_name localhost;gzip on;gzip_static on; # 需要http_gzip_static_module 模块gzip_min_length 1k;gzip_comp_level 4;gzip_proxied any;gzip_types text/plain text/xml text/css;gzip_vary on;gzip_http_version 1.0; #兼容多层nginx 反代gzip_disable "MSIE [1-6]\.(?!.*SV1)";# 打包好的dist目录文件,放置到这个目录下root /data/pig-ui;# 注意维护新增微服务,gateway 路由前缀location ~* ^/(code|auth|admin|gen) {proxy_pass http://127.0.0.1:9999;#proxy_set_header Host $http_host;proxy_connect_timeout 15s;proxy_send_timeout 15s;proxy_read_timeout 15s;proxy_set_header X-Real-IP $remote_addr;proxy_set_header X-Forwarded-For $proxy_add_x_forwarded_for;proxy_set_header X-Forwarded-Proto http;}# 避免端点安全问题if ($request_uri ~ "/actuator"){return 403;}}nginx
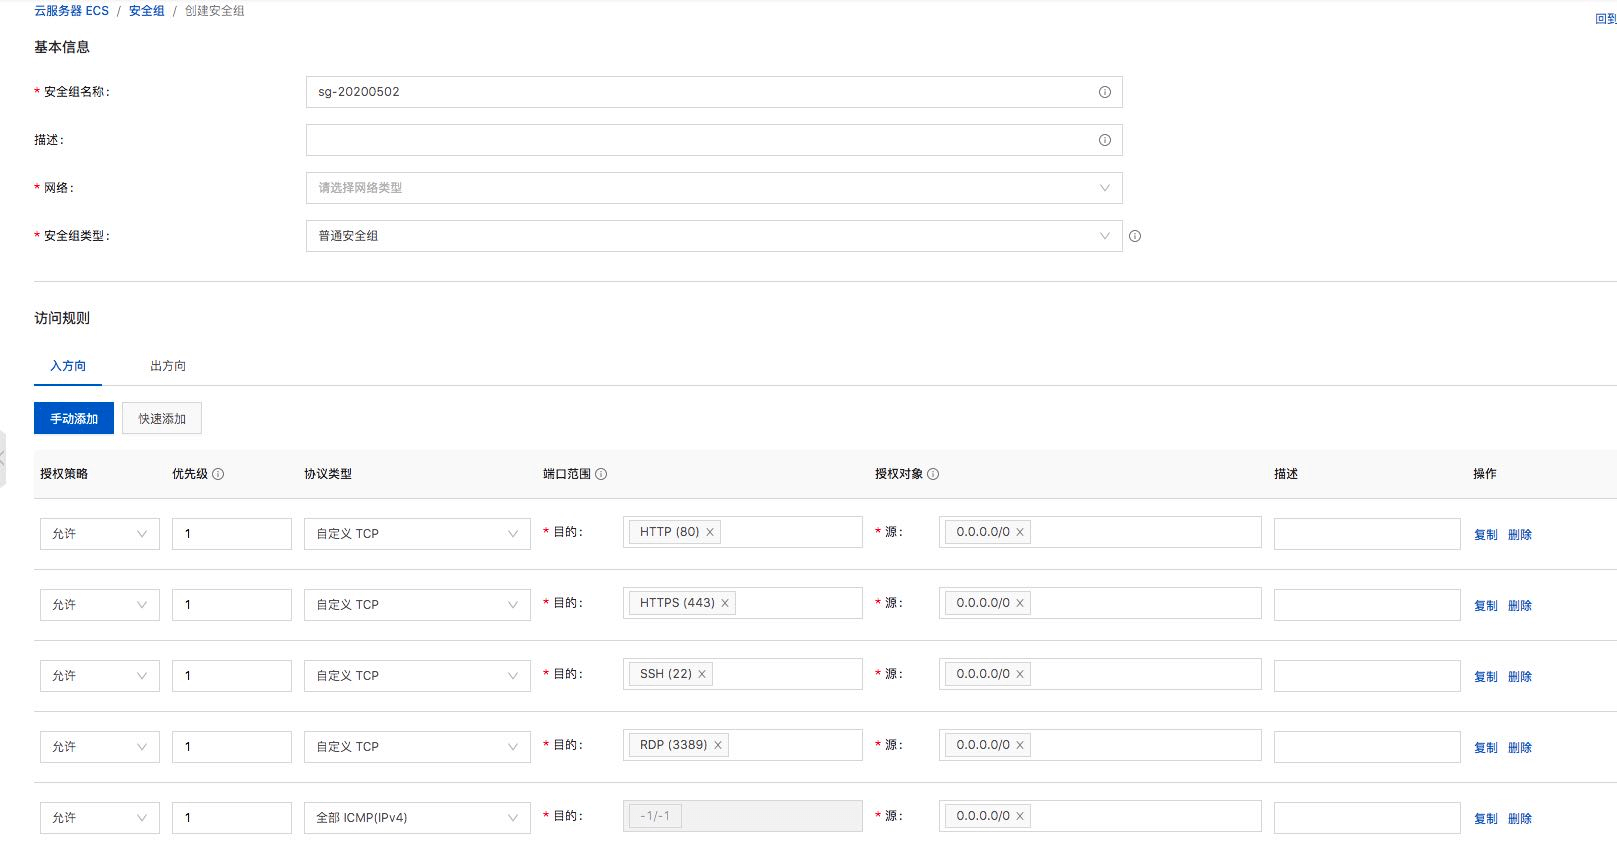
ECS 安全组
注意配置安全组,服务相关的端口对外暴露
80/443 (生产模式只需要开启此关口)
9999 网关 (如需访问swagger 需要)
- 5001 监控 (如需访问monitor 需要)
- 5020 监控 (如需访问monitor 需要)


