- 查看磁盘情况
[root@s01 ~]# lsblk (或 fdisk -l)
- 分区
[root@s01 ~]# fdisk /dev/sdb
Welcome to fdisk (util-linux 2.23.2).Changes will remain in memory only, until you decide to write them.Be careful before using the write command.Device does not contain a recognized partition tableBuilding a new DOS disklabel with disk identifier 0x1ab8be70.Command (m for help): n # 创建新分区Partition type:p primary (0 primary, 0 extended, 4 free)e extendedSelect (default p): p # 选择创建主分区,e是扩展分区Partition number (1-4, default 1): 1 # 分区号选择1First sector (2048-20971519, default 2048): # 回车Using default value 2048Last sector, +sectors or +size{K,M,G} (2048-20971519, default 20971519): # 回车Using default value 20971519Partition 1 of type Linux and of size 10 GiB is setCommand (m for help): p # 查看已创建好的分区Disk /dev/sdb: 10.7 GB, 10737418240 bytes, 20971520 sectorsUnits = sectors of 1 * 512 = 512 bytesSector size (logical/physical): 512 bytes / 512 bytesI/O size (minimum/optimal): 512 bytes / 512 bytesDisk label type: dosDisk identifier: 0x1ab8be70Device Boot Start End Blocks Id System/dev/sdb1 2048 20971519 10484736 83 Linux # (系统默认为83,即:Linux)Command (m for help): t # 修改分区格式Selected partition 1Hex code (type L to list all codes): 8e # 8e为Linux LVM格式Changed type of partition 'Linux' to 'Linux LVM'Command (m for help): p # 查看已经创建的分区Disk /dev/sdb: 10.7 GB, 10737418240 bytes, 20971520 sectorsUnits = sectors of 1 * 512 = 512 bytesSector size (logical/physical): 512 bytes / 512 bytesI/O size (minimum/optimal): 512 bytes / 512 bytesDisk label type: dosDisk identifier: 0x1ab8be70Device Boot Start End Blocks Id System/dev/sdb1 2048 20971519 10484736 8e Linux LVMCommand (m for help): w # (保存)The partition table has been altered!Calling ioctl() to re-read partition table.Syncing disks.
- 创建物理卷PV
[root@s01 ~]# pvcreate /dev/sdb1
[root@s01 ~]# pvdisplay 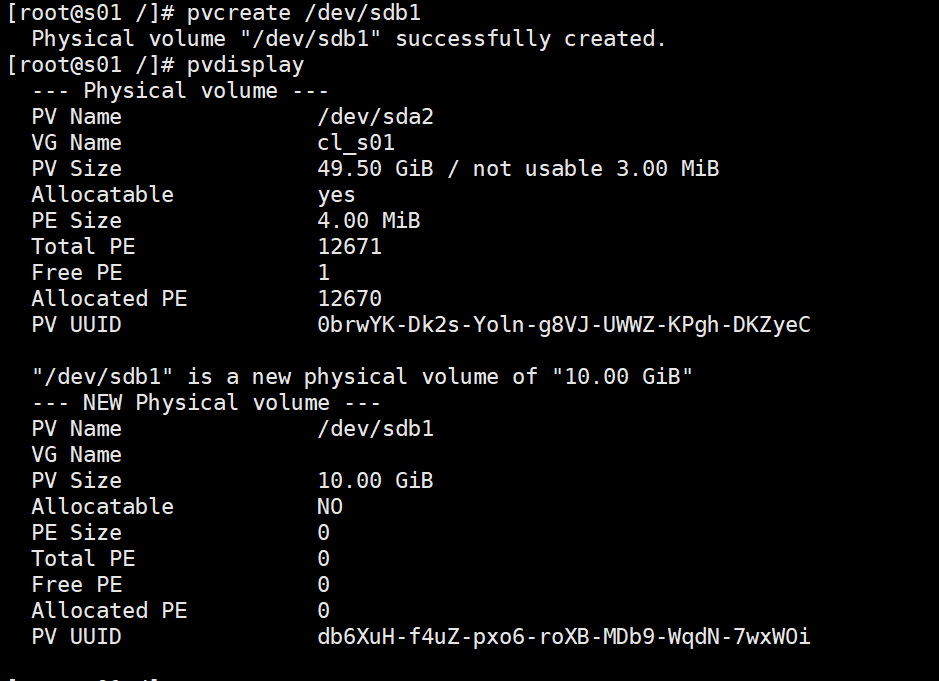
注意:如果创建的时候,提示被排除了。可能之前在这个设备上存在过分区表信息,擦除即可
[root@s01 ~]# wipefs -a /dev/sdb1
- 创建卷组VG
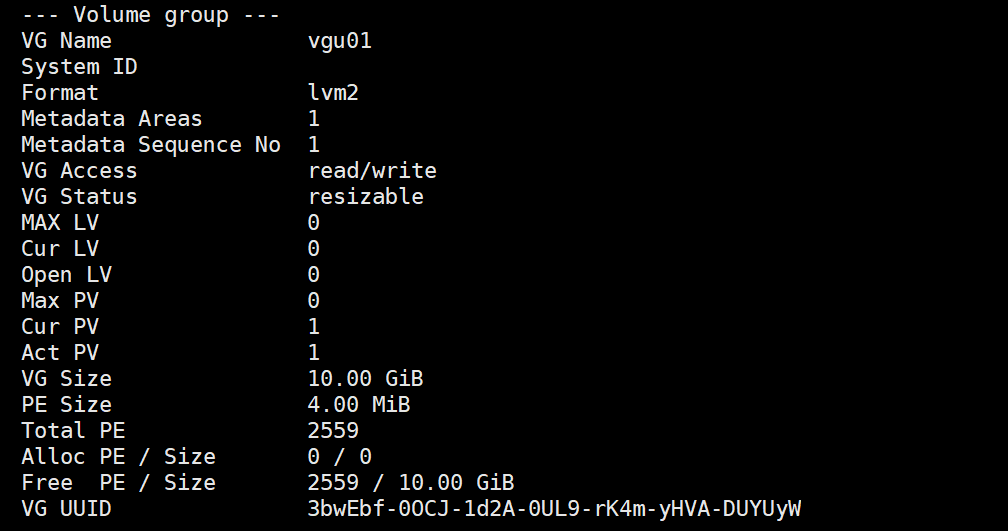
[root@s01 ~]# vgcreate vgu01 /dev/sdb1 u01位所创建的新卷组的名字
[root@s01 ~]# vgdisplay 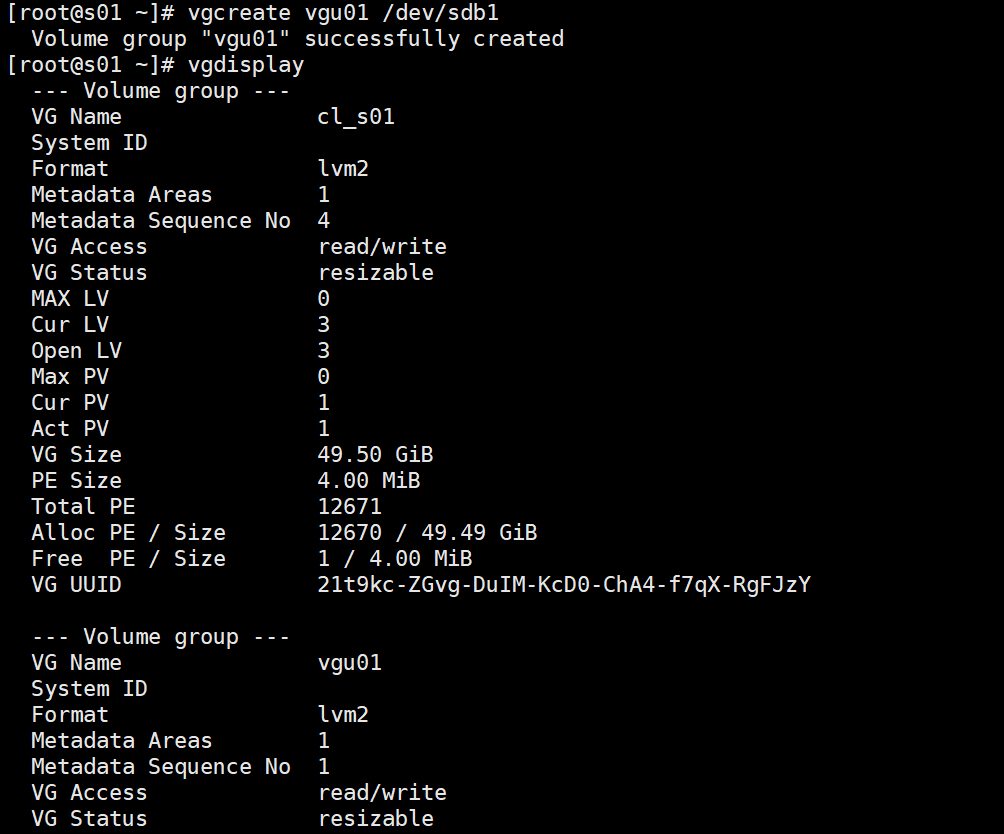
- 创建逻辑卷LV
[root@s01 ~]# lvcreate -l 100%VG -n lvu01 vgu01
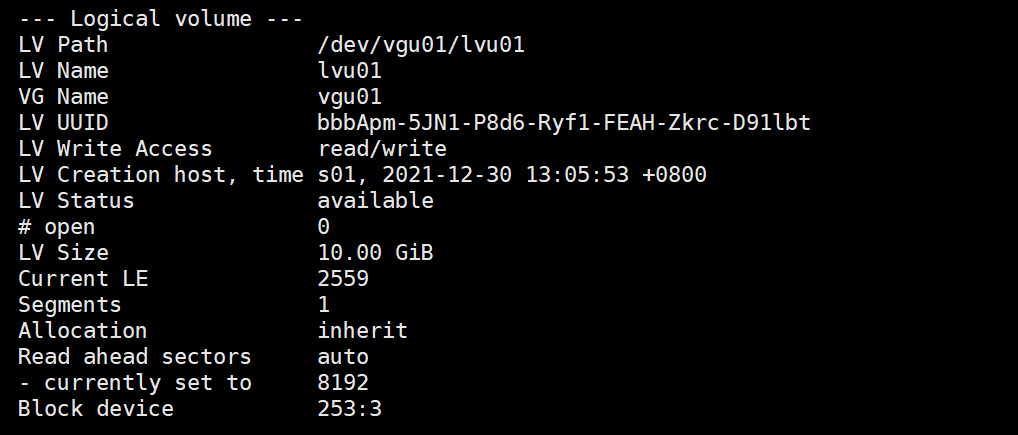
[root@s01 ~]# lvdisplay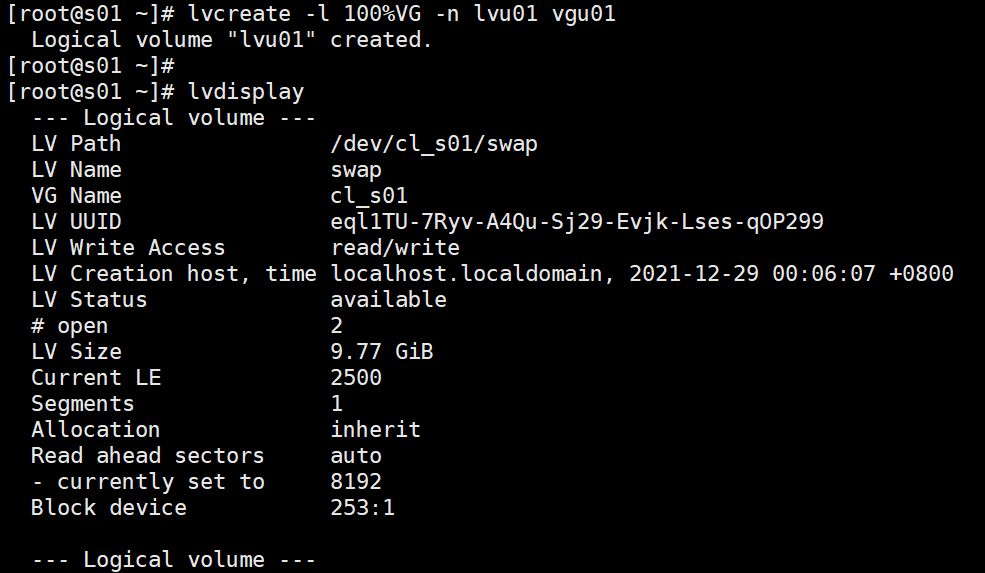
参数说明:
-l:指定逻辑卷大小。使用了100%的卷组。
-n:指定创建的逻辑卷名字。u01 是卷组的名字
- 格式化文件系统
[root@s01 ~]# mkfs.ext4 /dev/vgu01/lvu01 (ext4是文件系统格式)
- 挂载
[root@s01 ~]# mkdir /data (创建挂载目录)
[root@s01 ~]# mount /dev/vgu01/lvu01 /data (卸载:umount)
[root@s01 ~]# lsblk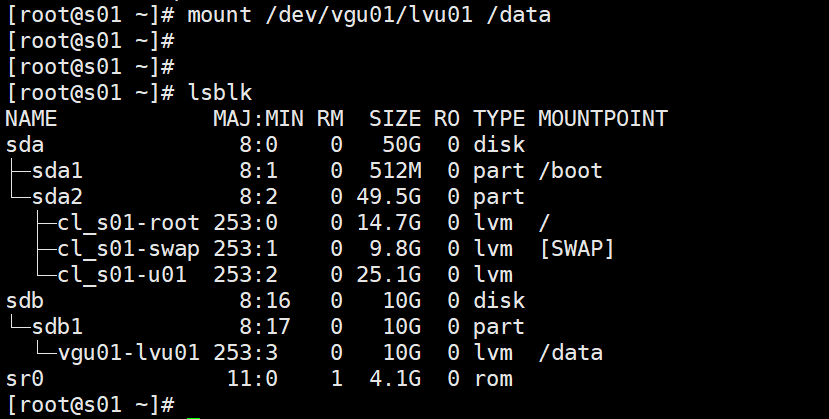
注意:fdisk,命令只适用于2T大小的磁盘格式化,若大于2T,用parted 命令
- 设置磁盘GPT格式
parted /dev/sdb mklabel gpt
- 进入交互命令
parted /dev/sdb
mkpart primary 0 -1
Ignore
quit
#这里会增加一个分区/dev/sdb1
- 与fdisk命令的第三步及以后步骤相同

若有收获,就点个赞吧
0 人点赞
