1、安装Mysql
(1)通过官方安装包(最保险)
https://dev.mysql.com/downloads/mysql/
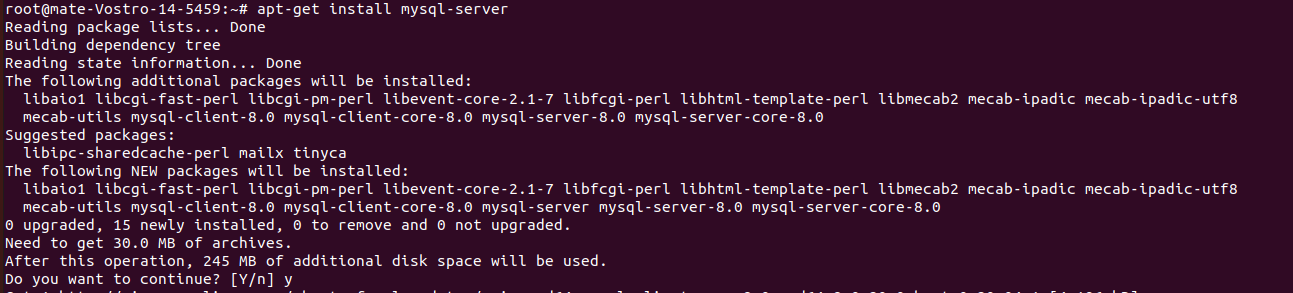
(2)通过命令(有时候默认安装MariaDB)
在Ubuntu中,默认情况下,只有最新版本的MySQL包含在APT软件包存储库中,要安装它,只需更新服务器上的包索引并安装默认包apt-get;但是在Centos上就没有,或者默认安装MariaDB
#更新命令sudo apt-get update#安装命令sudo apt-get install mysql-server#启动mysql-server[mate@localhost ~]$ service mysqld start#或者命令[mate@localhost ~]$ systemctl start mysqld.service
(3)通过官方源安装
https://dev.mysql.com/downloads/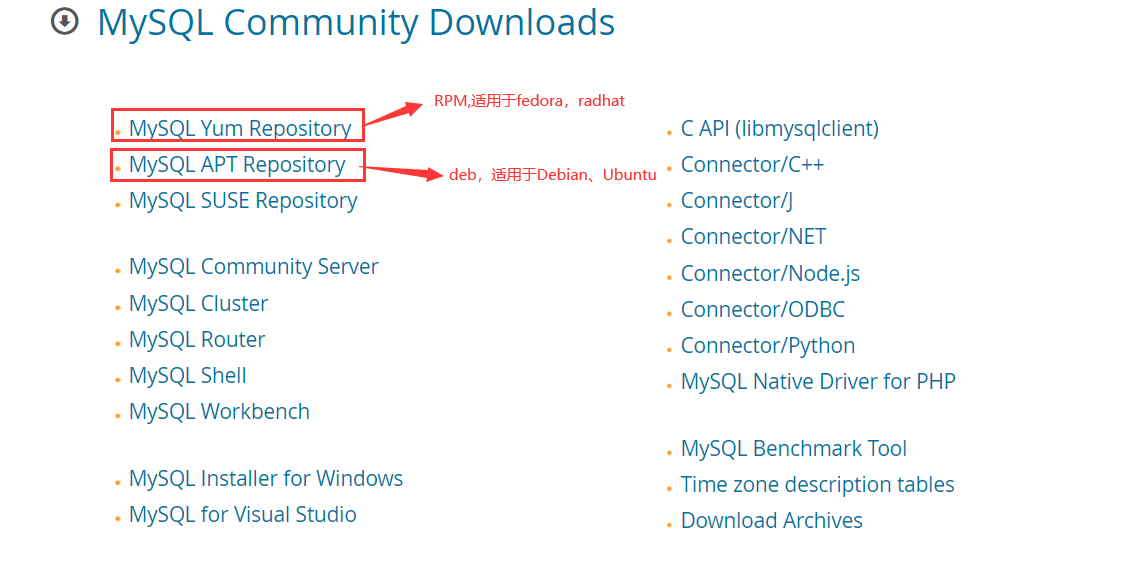
ate@intel-nuc:~/Downloads$ sudo dpkg -i mysql-apt-config_0.8.22-1_all.deb
Selecting previously unselected package mysql-apt-config.
(Reading database ... 177914 files and directories currently installed.)
Preparing to unpack mysql-apt-config_0.8.22-1_all.deb ...
Unpacking mysql-apt-config (0.8.22-1) ...
Setting up mysql-apt-config (0.8.22-1) ...
Warning: apt-key should not be used in scripts (called from postinst maintainerscript of the package mysql-apt-config)
Warning: apt-key is deprecated. Manage keyring files in trusted.gpg.d instead (see apt-key(8)).
OK
不能用应用商店GUI安装。在配置Ubuntu22.04时,出现无效的安装源,在使用apt update命令时,出现mysql源的警告。
因为当时Ubuntu22.04刚发布,mysql还未为新版本创建源,在使用GUI安装时,相关的提醒没有出现,直接安装了一个不存在的源,导致使用apt-update时一直出非法源的警告。
后面使用dpkg安装时发现会提示当前系统版本没有对应的源,但是可以选择安装旧版本的源。
#安装
sudo dnf install mysql-community-server            #fedora
sudo apt install mysql-community-server            #ubuntu

#启动mysql-server
sudo systemctl start mysqld.service        #fedora
sudo systemctl start mysql.service        #ubuntu
安装好官方源后即刻通过命令直接安装mysql官方应用:mysql-server、mysql-client、mysql-devel、mysql-workbench等
2、设置mysql密码等
fedora比较麻烦,需要单独设置密码。ubunut在安装过程会提示设置密码。
fedora设置密码也要先启动mysql服务器。
注意: 推荐使用强密码,包含大小写、数字和特殊字符。密码模式选择strong模式。否则后面警告很多。
特别注意:如果密码设置的很简单,但是选择了strong模式,后面会出现非root用户无法登录的问题
3、 Mysql基础配置
(1)配置流程
root@mate-Vostro-14-5459:~# mysql_secure_installation       //启动配置命令
Securing the MySQL server deployment.
Connecting to MySQL using a blank password.
#1.问你是否要评估密码安全性,我选的N
VALIDATE PASSWORD COMPONENT can be used to test passwords
and improve security. It checks the strength of password
and allows the users to set only those passwords which are
secure enough. Would you like to setup VALIDATE PASSWORD component?
Press y|Y for Yes, any other key for No: N
#2.设置root用户密码
Pease set the password for root here.
New password:
Re-enter new password:
Do you wish to continue with the password provided?(Press y|Y for Yes, any other key for No) : y
#3.问你是不是要删除安装时设置的匿名用户,我选的N
By default, a MySQL installation has an anonymous user, allowing anyone to log into MySQL without
having to have a user account created for them. This is intended only for testing, and to make the installation go a bit smoother.
You should remove them before moving into a production environment.
Remove anonymous users? (Press y|Y for Yes, any other key for No) : n
 ... skipping
#4.问你是不是要禁用允许远程访问root用户,我选的不禁用N.
Normally, root should only be allowed to connect from
'localhost'. This ensures that someone cannot guess at
the root password from the network.
Disallow root login remotely? (Press y|Y for Yes, any other key for No) : y
Success.
#4.问你是不是要删除安装时创建的test数据库,我选的不N.
By default, MySQL comes with a database named 'test' that
anyone can access. This is also intended only for testing,
and should be removed before moving into a production environment.
Remove test database and access to it? (Press y|Y for Yes, any other key for No) : n
 ... skipping.
#4.问你是不是要重新加载权限文件,我选的是Y.
Reloading the privilege tables will ensure that all changes
made so far will take effect immediately.
Reload privilege tables now? (Press y|Y for Yes, any other key for No) : y
Success.
All done!
(2)配置完成后检查服务器状态
root@mate-Vostro-14-5459:~#systemctl status mysql.service
//显示如下结果说明mysql服务是正常的:
mysql.service - MySQL Community Server
  Loaded: loaded (/lib/systemd/system/mysql.service; enabled; vendor preset: en
  Active: active (running) since Sat 2018-06-23 11:09:03 CST; 6min ago
Main PID: 14078 (mysqld)
    Tasks: 29 (limit: 4915)
  CGroup: /system.slice/mysql.service
          └─14078 /usr/sbin/mysqld --daemonize --pid-file=/run/mysqld/mysqld.pi
5月 4 11:09:02 weision systemd[1]: Starting MySQL Community Server...
5月 4 11:09:03 weision systemd[1]: Started MySQL Community Server.
4、安装Mysql开发库
(1)安装开发库
在使用C语言开发访问数据库代码之前,需要下载MySQL开发库:
在终端输入指令:apt-get install libmysqlclient-dev
root@mate-Vostro-14-5459:~# apt-get install libmysqlclient-dev
Reading package lists... Done
Building dependency tree
Reading state information... Done
libmysqlclient-dev is already the newest version (8.0.20-0ubuntu0.20.04.1).
0 upgraded, 0 newly installed, 0 to remove and 0 not upgraded.
(2)开发库所在目录
头文件目录:/usr/include/mysql,路径/usr/include是系统默认头文件路径,引用时直接写“#include
” root@mate-Vostro-14-5459:/usr/include/mysql# ls client_plugin.h my_compress.h mysql.h mysqlx_error.h errmsg.h my_list.h mysql_time.h mysqlx_version.h field_types.h mysql_com.h mysql_version.h plugin_auth_common.h my_command.h mysqld_error.h mysqlx_ername.h udf_registration_types.h动态库目录:/usr/lib/x86_64-linux-gnu,此路径是系统默认库目录,故编译时直接引用,不需指明库所在路径。
root@mate-Vostro-14-5459:/usr/lib/x86_64-linux-gnu# ls |grep mysql
libmysqlclient.a
libmysqlclient.so
libmysqlclient.so.21
libmysqlclient.so.21.1.20
libmysqlservices.a
(3)找不到动态库
首先考虑安装动态库的路径是否正确;试过确认正确应该执行刷新动态库的命令
5、远程访问配置
(1) 配置用户权限
在Ubuntu下MySQL只允许本地访问,使用workbench连接工具连不上;如果你要其他机器也能够访问的话,需要进行配置。注意配置是需要以 root用户登录Mysql数据库的客户端。
1)登录并查看权限
root@mate-Vostro-14-5459:~# mysql -u root -p********     //注意需要以系统的root用户使用mysql
mysql: [Warning] Using a password on the command line interface can be insecure.
…….
mysql> use mysql  ;                               // 注:mysql是自带的数据库名,里面的表是Mysql相关配置信息端
Reading table information for completion of table and column names        // 口,事件等等,其中user表存放用户信息
You can turn off this feature to get a quicker startup with -A
Database changed
mysql> select user,host from user;         //在user表中读取user与相对应的host
+--------------------------+-----------+
| user                     | host      |
+--------------------------+-----------+
| debian-sys-maint         | localhost |  //可以看到每个用户的host都是localhost,说明每个用户只能本地访问
| mysql.infoschema         | localhost |
| mysql.session            | localhost |
| mysql.sys                | localhost |
| root                     | localhost |
+--------------------------+-----------+
5 rows in set (0.00 sec)
2)修改连接ip
我们可以利用SQL操作语句,设置成允许本地和远程连接的host。(目前这种方式可能已经失效,必须用下面的权限赋值语句。)
//执行where语句更新数据库的语句,
mysql>update user set host='%' where user='root';
//修改好host之后刷新权限,让它立即生效
mysql>flush privileges;
我们也可以利用权限赋予进行配置,语句:grant 权限 on 数据库对象 to 用户@IP(或者相应正则),
注:可以赋予select,delete,update,insert,index等权限精确到某一个数据库某一个表。
 //表示赋予该用户所有数据库所有表(*.*表示所有表),%表示所有IP地址。权限
mysql>grant all privileges on *.* to 'root'@'%' identified by '********' with  grant option;

mysql>flush privileges;      //刷新权限,立即生效
3)完成修改后再次查看
mysql> select user,host from user;       //在user表中读取user与相对应的host
+--------------------------+-----------+
| user                     | host      |
+--------------------------+-----------+
| debian-sys-maint         | localhost |
| mysql.infoschema         | localhost |
| mysql.session            | localhost |
| mysql.sys                | localhost |   //可以看到root用户的host都是%,说明每个ip都能访问
| root                     | %         |
+--------------------------+-----------+
5 rows in set (0.00 sec)
这里修改完后可能还不能远程连接,因为mysql服务在启动时绑定了计算机的本地ip,故需要修改mysql的配置文件。
(2) 修改mysql配置文件(/etc/mysql/mysql.conf.d/mysqld.cnf)
root@mate-Vostro-14-5459:~# Vim /etc/mysql/mysql.conf.d/mysqld.cnf   //不同版本配置文件可能放置路径不同
The MySQL database server configuration file.
# You can copy this to one of:
…
[mysqld_safe]
socket         = /var/run/mysqld/mysqld.sock
nice             = 0
[mysqld]
# * Basic Settings
user             = mysql
pid-file         = /var/run/mysqld/mysqld.pid
socket         = /var/run/mysqld/mysqld.sock
port             = 3306
basedir                 = /usr
datadir                  = /var/lib/mysql
tmpdir          = /tmp
lc-messages-dir     = /usr/share/mysql
skip-external-locking
# Instead of skip-networking the default is now to listen only on
# localhost which is more compatible and is not less secure.
bind-address                  = 0.0.0.0     //将原127.0.0.1修改为0.0.0.0
修改完文件并保存,然后重启mysql:
root@mate-Vostro-14-5459:~#service mysql restart
- 注:Ubuntu下MySQL启动,停止,重启方法
启动方式:
      使用 service 启动:service mysql start
      使用 mysqld 脚本启动:/etc/inint.d/mysql start
      使用 safe_mysqld 启动:safe_mysql&
停止防止:
  使用 service 启动:service mysql stop
  使用 mysqld 脚本启动:/etc/inint.d/mysql stop
  使用mysqladmin shutdown
重启:
  使用 service 启动:service mysql restart
  使用 mysqld 脚本启动:/etc/inint.d/mysql restart
6、备份与恢复数据库
(1)备份整个数据
#备份jac_test  SCHEMA数据以及表
[root@localhost ~]# mysqldump -u root -p jac_test > jac_test.sql
[root@localhost home]# ls
admin  CommunicationServer  jac_test.sql  upload  WebServerSimu
[root@localhost home]#
自动备份脚本databaseBackup.sh
#!/bin/bash
# Program:
# 周期性的备份数据库
# History:
# 2021/03/29 袁富林 第一次提交
# Notice:
# 无

#需要备份的数据库
DATABASE_NAME="jac_test"

#数据库角色
DATABASE_OPERATOR="root"

#数据库密码
DATABASE_PASSWD="********"

#备份目录
BACKUP_DIR="./"

#备份周期(单位:秒(s)/分(m)/时(h)/天(d))
CHECK_CYCLE=1d         #周期

#是否压缩备份:0不压缩,1压缩
ISCPMPASS=0

#自动删除备份数据周期:0不执行自动删除,单位:天
DELETE_CYCLE=7

#提示工作目录
echo "PDW = $PWD"


while true ; do

    echo -e "\n"
    #检查备份目录是否存在
    if [ ! -d $BACKUP_DIR ]; then
        mkdir -p $BACKUP_DIR
    fi

    #执行备份任务
    echo "BACKUP_DIR: $BACKUP_DIR"
    echo "BACKUP_DATE : $(date "+%Y-%-m-%d %H:%M:%S")"
    if [ $ISCPMPASS -ne 0 ]; then
        BACKUP_FILE="$BACKUP_DIR/$DATABASE_NAME-$(date "+%Y%m%d%H%M%S").sql.gz"
        mysqldump -u $DATABASE_OPERATOR -p$DATABASE_PASSWD $DATABASE_NAME | gzip > "$BACKUP_FILE"
    else
        BACKUP_FILE="$BACKUP_DIR/$DATABASE_NAME-$(date "+%Y%m%d%H%M%S").sql"
        mysqldump -u $DATABASE_OPERATOR -p$DATABASE_PASSWD $DATABASE_NAME > "$BACKUP_FILE"

    fi

    #备份失败后退出
    if [ $? -ne 0 ]; then
    break
    fi

    #删除较旧的备份文件
    if [ $DELETE_CYCLE -ne 0 ]; then
        find $BACKUP_DIR -name '*.sql.gz' -mtime +$DELETE_CYCLE -ls -delete
        find $BACKUP_DIR -name '*.sql' -mtime +$DELETE_CYCLE -ls -delete
    fi

    sleep $CHECK_CYCLE
done
(2)从备份文件中恢复数据库
#需要先创建数据库
mysql> CREATE SCHEMA jac_test;
Query OK, 1 row affected (0.03 sec)
mysql> exit
Bye
[mate@localhost Downloads]$ ls
 jac_test.sql  '嵌入式Linux开发教程 (上册) .pdf'  '嵌入式Linux开发教程(下册).pdf'  '财务报表(小企业)(1).xlsx'  '财务报表(小企业)(2).xlsx'   财务报表(小企业).xlsx
[mate@localhost Downloads]$ mysql -u root -p jac_test < jac_test.sql
Enter password:
[mate@localhost Downloads]$

若有收获,就点个赞吧
0 人点赞
