学习预览
学习共分为三个阶段:
- 第一阶段:C++基础语法入门,对C++有初步了解,能够有几处编程能力
- 第二阶段:C++核心编程,介绍C++面向对象编程,为大型项目做铺垫
- 第三阶段:C++提高编程,介绍C++泛型编程思想,以及STL的基本使用
C++基础
程序流程结构
选择结构
if循环结构
while
do-while
for跳转结构
break:退出循环
continue:结束本次循环,进入下次循环
goto(不建议用)数组
一维数组
1、数组类型 数组名 [数组长度];
2、数组类型 数组名 [数组长度]={值1,值2……}
3、数组类型 数组名[]={值1,值2,……}
一维数组名称用途:
sizeof(arr):数组占用的内存空间
(int)arr,(int)&arr[2]:数组首地址,每个元素的首地址
冒泡排序法
1、求最大值:
2、数组按大小逆置:
3、冒泡排序算法:
#include<iostream>//头文件#include<string>using namespace std;int main(){//1、创建数组int arr[10] = { 7,8,6,3,2,5,0,1,4,9};cout << "冒泡前: " << endl;for (int i = 0; i < 10; i++){cout << arr[i] << " ";}cout << endl;//2、排序for (int i = 0; i < 10; i++){for (int j = 0; j < 10 - i - 1; j++){if (arr[j] > arr[j+1]){//数字交换int temp = arr[j];arr[j] = arr[j + 1];arr[j + 1] = temp;}}}//3、打印cout << "冒泡后: " << endl;for (int i = 0; i < 10; i++){cout << arr[i] << " ";}}
二维数组
二维数组定义
4种定义方法
二维数组名
1)可以查看占用内存大小;2)可以查看二维数组的首地址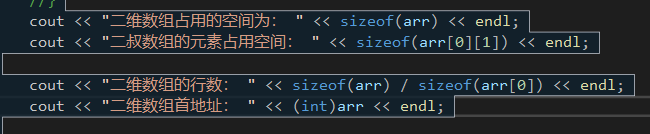
函数
函数定义
1)返回值类型:一个函数名可以返回一个值,在函数中定义
2)函数名:给函数其名称;
3)参数列表:使用该函数时,传入的数据;
4)函数体语句:花括号内的代码,函数内需要执行的语句;
5)return表达式:和返回值类型挂钩,函数执行后,返回相应数据;
语法:
返回值类型 函数名 参数列表
{
函数体语句
return表达式
}
int add(int a,int b){int C = a + b;return C}
函数调用
语法: 函数名(参数列表)
值传递
函数常见样式
1)无参无返:void test()
2)有参无返:void test(参数列表)
3)无参有返:int test()
4)有参有返:int test(参数列表)
函数声明
函数的分文件编写
1、创建后缀名为.h的头文件
#pragma once#include<iostream>using namespace std;void swap(int num1, int num2);int add(int num1, int num2);
2、创建.cpp后缀名的源文件
#include"head.h";int add(int num1, int num2){int sum = num1 + num2;return sum;}
#include"head.h";void swap(int num1, int num2){int temp = num1;num1 = num2;num2 = temp;cout << "a的值为:" << num1 << endl;cout << "b的值为:" << num2<< endl;}
3、在头文件中写函数的声明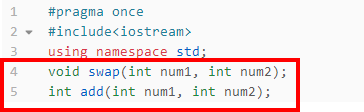
4、在源文件(main函数和被调函数)中写函数定义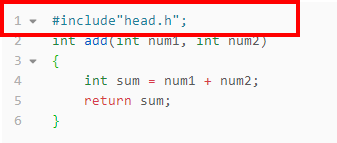
#include<iostream> //头文件#include<string>using namespace std;#include"head.h";//自定义的头文件int main(){int a = 10;int b = 20;swap(a, b);int c = add(a, b);cout << "和为:" << c << endl;}
指针
指针定义
语法:数据类型 * 指针变量
#include<iostream> //头文件#include<string>using namespace std;int main(){int a = 10;int* p;p = &a;cout << "p的值为:" << p << endl;cout << "*p的值:" << *p << endl;}
指针占用空间大小
空指针
1)用以给指针变量进行初始化;2)空指针不可以进行访问。
int * p = NULL
野指针
const修饰指针
const in p=&a(修饰指针指向的值)
int const p=&b(修饰指针指向)
const int * const p = &a(修饰指针指向和指针指向的值)
指针和数组
利用指针访问数组中元素
#include<iostream> //头文件#include<string>using namespace std;#include"head.h";//自定义的头文件int main(){//指针和数组//利用指针访问数组中元素int arr[10] = { 1,2,3,4,5,6,7,8,9,10 };cout << "第一个元素位: " << arr[0] << endl;int* p = arr;cout << "指针指向元素为: " << *p << endl;p++;cout << "指针指向元素为: " << *p << endl;cout << "利用指针遍历数组 " << endl;int* p2 = arr;for (int i = 0; i < 10; i++){cout << *p2 << endl;p2++;}}
指针和函数
使用地址传递:可以修改实参的值;
值传递:不可以修改实参的值。
#include<iostream> //头文件#include<string>using namespace std;#include"head.h";//自定义的头文件void swap02(int* p1, int* p2){int temp = *p1;*p1 = *p2;*p2 = temp;}int main(){//指针和函数//int a = 10;int b = 20;swap02(&a, &b);cout << "a=" << a << endl;cout << "b=" << b << endl;}
指针、数组与函数的应用案例
案例描述:封装一个函数,利用冒泡排序,实现对整型数组的升序排序
#include<iostream> //头文件#include<string>using namespace std;#include"head.h";//自定义的头文件//冒泡排序函数void bubbsort(int* arr, int len){for (int i = 0; i < len - 1; i++){for (int j = 0; j < len - i - 1; j++){if (arr[j] > arr[j + 1]){int temp = arr[j];arr[j] = arr[j + 1];arr[j + 1] = temp;}}}}void printArr(int* arr, int len){for (int i = 0; i < len;i++){cout << arr[i]<<" ";}cout << endl;}int main(){//1、先创建一个数组int arr[10] = {4,3,6,9,1,2,10,8,7,5};int len = sizeof(arr) / sizeof(arr[0]);cout << "原数组为: " << endl;printArr(arr, len);//2、创建函数,实现冒泡排序bubbsort(arr, len);//3、打印排序后的数组cout << "排序后为: " << endl;printArr(arr, len);system("pause");return 0;}
结构体
结构体的定义和使用
结构体属于用户自定义的数据类型,允许用户存储不同的数据类型
创建方法:
- struct 结构体名 变量名
- struct 结构体名 变量名={成员数值1,成员数组2…..}
- 在定义结构体时顺便创建结构体变量
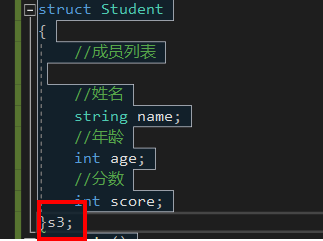
#include<iostream> //头文件#include<string>using namespace std;#include"head.h";//自定义的头文件//1、创建学生数据类型 :学生包括(姓名。年龄,分数)//自定义数据类型,一些类型集合组成的一个类型//语法 struct 类型名//结构体定义struct Student{//成员列表//姓名string name;//年龄int age;//分数int score;}s3;int main(){//2、通过学生类型创建具体学生(三种方式)// 创建结构体变量时,Struct可以省略//2.1、struct Student s1Student s1;s1.name = "张三";s1.age = 18;s1.score = 100;cout << "姓名: " << s1.name << " 年龄: " << s1.age << " 分数: " << s1.score << endl;//2.2、struct Student s2={...}struct Student s2 = { "李四",19,80 };cout << "姓名: " << s2.name << " 年龄: " << s2.age << " 分数: " << s2.score << endl;//2.3、在定义结构体时顺便创建结构变量(不建议使用)s3.name = "王五";s3.age = 20;s3.score = 60;cout << "姓名: " << s3.name << " 年龄: " << s3.age << " 分数: " << s3.score << endl;}
结构体数组
作用:将自定义的结构体放入到数组中,方便维护
语法:struct 结构体名 数组名[元素数目]={…………..}
#include<iostream> //头文件#include<string>using namespace std;#include"head.h";//自定义的头文件//结构体数组//1、定义结构体struct Student{string name;int age;int score;};int main(){//2、创建结构体数组struct Student stuArray[3] ={{"张三",18,100},{"李四",28,99},{"王五",38,66}};//3、给结构体数组中的元素赋值、stuArray[2].name = "赵六";stuArray[2].age = 80;stuArray[2].score = 60;//4、遍历结构体数组for (int i = 0; i < 3; i++){cout << " 姓名为:" << stuArray[i].name << " 年龄为: " << stuArray[i].age << " 分数为: " << stuArray[i].score << endl;}}
结构体指针
作用:利用结构体指针访问结构体中的成员
#include<iostream> //头文件#include<string>using namespace std;//结构体指针//1、定义结构体struct Student{string name;int age;int score;};int main(){//1、创建学生结构体变量struct Student s = { "张三",18,100};//2、通过指针指向结构体变量struct Student * p = &s;//3、通过指针访问结构体变量中的数据cout << "姓名: " << p->name << " 年龄: " << p->age << " 分数: " << p->score << endl;}
结构体嵌套结构结构体
作用:结构体中的成员可以是另一个结构体
#include<iostream> //头文件#include<string>using namespace std;//结构体嵌套结构体// 1、定义学生结构体struct student{string name;int age;int score;};//2、定义老师结构体struct teacher{int id;string name;int age;struct student stu;};int main(){//3、创建老师结构体变量struct teacher t;t.id = 10000;t.name = "老王";t.age = 50;t.stu.name = "小王";t.stu.age = 20;t.stu.score = 60;cout << "老师姓名:" << t.name << " 老师编号: " << t.id << " 老师年龄:" << t.age<< " 学生姓名: " << t.stu.name << " 学生年龄: " << t.stu.age << " 学生成绩: " << t.stu.score << endl;}
结构体做函数参数
作用:接昂结构体作为参数向函数中传递
传递的两种方式:
//结构体嵌套结构体 // 1、定义学生结构体 struct Student { string name; int age; int score; };
//打印学生信息 //1、值传递 void printStudent(struct Student s) { cout << “姓名:” << s.name << “ 年龄: “ << s.age << “ 成绩: “ << s.score << endl; } //2、地址传递 //将形参改为指针,可以减少内存,而且不会复制新的副本 void printStudent(struct Student* p) { cout << “姓名:” << p->name << “ 年龄:” << p->age << “ 成绩:” << p->score << endl; } int main() { //结构体做函数参数 //创建结构体变量 struct Student s1; s1.name = “张三”; s1.age = 18; s1.score = 80;
struct Student s2;s2.name = "李四";s2.age = 20;s2.score = 90;printStudent(s1);printStudent(&s2);
}
<a name="mrTXp"></a>#### 结构体中Const的使用场景作用:用const来防止误操作```cpp#include<iostream> //头文件#include<string>using namespace std;//结构体嵌套结构体// 1、定义学生结构体struct Student{string name;int age;int score;};//打印学生信息//1、值传递void printStudent(struct Student s){cout << "姓名:" << s.name << " 年龄: " << s.age << " 成绩: " << s.score << endl;}//2、地址传递void printStudent(const struct Student* p) //加入const后,一旦修改,就会报错{cout << "姓名:" << p->name << " 年龄:" << p->age << " 成绩:" << p->score << endl;}int main(){//结构体做函数参数//创建结构体变量struct Student s1;s1.name = "张三";s1.age = 18;s1.score = 80;struct Student s2;s2.name = "李四";s2.age = 20;s2.score = 90;printStudent(s1);printStudent(&s2);}
结构体实践
案例1:
#include<iostream> //头文件#include<string>#include<ctime>using namespace std;//案列1// 定义学生结构体struct Student{string sname;int score;};// 定义老师结构体struct teacher{string tname;struct Student sArray[5];};//给老师和学生赋值的函数void allocatespace(struct teacher tArray[],int len){string nameseed = "ABCDE";for (int i = 0;i < len;i++){tArray[i].tname = "teacher_";tArray[i].tname += nameseed[i];//通过循环给每名老师带的学生赋值for (int j = 0; j < 5; j++){tArray[i].sArray[j].sname = "Student";tArray[i].sArray[j].sname += nameseed[j];//字符串拼接int random = rand() % 61 + 40; //使用随机数定义[40,100]的分数区间tArray[i].sArray[j].score = random;}}}void printInfo(struct teacher tArray[],int len){for (int i = 0; i < len; i++){cout << "老师姓名:" << tArray[i].tname << endl;for (int j = 0;j < 5;j++){cout << "\t学生姓名:" << tArray[i].sArray[j].sname <<" "<<"考试分数:" << tArray[i].sArray[j].score << endl;}}}int main(){//随机种子(作用是使分数更加随机?)srand((unsigned int)time(NULL));//1、创建3名老师的数组struct teacher tArray[3];//2、通过函数给3名老师的信息赋值,并给老师带的学生信息赋值;int len = sizeof(tArray) / sizeof(tArray[0]);allocatespace(tArray, len);//3、打印所有老师及所带学生信息printInfo(tArray, len);}
案例2:
#include<iostream> //头文件#include<string>using namespace std;//案列2//1、创建英雄数组struct Hero{string name;int age;string sex;};//冒泡排序void bubbleSort(struct Hero heroArray[],int len){for (int i = 0;i < len - 1;i++)for (int j = 0; j < len - i - 1; j++){if (heroArray[j].age > heroArray[j + 1].age){struct Hero temp = heroArray[j];heroArray[j] = heroArray[j + 1];heroArray[j + 1] = temp;}}}//打印程序void printHero(struct Hero heroArray[], int len){for (int i = 0; i < len; i++){cout << "姓名: " << heroArray[i].name << " 年龄:" << heroArray[i].age<< " 性别:" << heroArray[i].sex<< endl;}}int main(){//2、创建数组存放5名英雄struct Hero heroArray[5] ={{"刘备",23,"男"},{"关羽",22,"男"},{"张飞",20,"男"},{"赵云",21,"男"},{"貂蝉",19,"女"}};int len = sizeof(heroArray) / sizeof(heroArray[0]);//3、对数组排序,按照年龄顺序bubbleSort(heroArray, len);//4、打印输出printHero(heroArray, len);}
项目开发实战
通讯录管理系统
1、退出系统
2、添加联系人
void addPerson(Addressbooks * abs){//判断通讯是否已满,如满就不添加if (abs->m_Size > MAX){cout << "通讯录已满,无法添加!" << endl;return;}else{//添加具体联系人//姓名string name;cout << "请输入姓名:" << endl;cin >> name;abs->personArray[abs->m_Size].m_Name = name;//性别cout << "请输入性别:" << endl;cout << "1---男" << endl;cout << "2---女" << endl;int sex = 0;while (true){cin >> sex;if (sex == 1 || sex == 2){//如果输入1或2,可以退出循环,如果不是,重新输入abs->personArray[abs->m_Size].m_Sex = sex;break;}cout << "输入有误,清重新输入!" << endl;}//年龄cout << "请输入年龄:" << endl;int age = 0;cin >> age;abs->personArray[abs->m_Size].m_Age = age;//电话cout << "请输入联系电话:" << endl;string phone;cin >> phone;abs->personArray[abs->m_Size].m_Phone = phone;//住址cout << "请输入家庭住址:" << endl;string address;cin >> address;abs->personArray[abs->m_Size].m_Addr = address;//更新通讯录人数abs->m_Size++;cout << "添加成功!" << endl;system("pause"); //请按任意键继续system("cls"); //清屏操作}}
3、显示联系人
封装显示联系人的思路:
PS:1)三目运算符的使用;2)转置运算符”\t”
void showPerson(Addressbooks* abs){//判断通讯录中人数是否为0,提示记录为空//如果不是0,显示记录的联系人信息if (abs->m_Size == 0){cout << "当前记录为空" << endl;}else{for (int i = 0; i < abs->m_Size; i++){cout << "姓名: " <<abs->personArray[i].m_Name<<"\t";cout << "性别: " <<(abs->personArray[i].m_Sex == 1?"男":"女") << "\t"; //使用三目运算符简化代码cout << "年龄: " << abs->personArray[i].m_Age << "\t";cout << "电话: " << abs->personArray[i].m_Phone << "\t";cout << "住址: " << abs->personArray[i].m_Addr << endl;}}system("pause");system("cls");}
4、删除联系人
//检测联系人是否存在(如果存在,返回联系人具体位置,不存在返回-1)//参数1 通讯录, 参数2 对比姓名int isExist(Addressbooks* abs, string name){for (int i = 0; i < abs->m_Size; i++){//if (abs->personArray[i].m_Name == name){return i;}else{return -1;}}}
//删除联系人void deletePerson(Addressbooks* abs){cout << "请输入要删除人员姓名:" << endl;string name;cin >> name;//ret =-1 未查到//ret !=-1 查到int ret = isExist(abs, name);if (ret != -1){//查到此人,要进行删除操作for (int i = ret; i < abs->m_Size; i++){//数据前移abs->personArray[i] = abs->personArray[i + 1];}abs->m_Size--;//更新通讯录中的人员数cout << "删除成功" << endl;}else{cout << "查无此人" << endl;}system("pause");system("cls");}
5、查找联系人
//查找联系人void findPerson(Addressbooks* abs){cout << "请输入要查找的联系人:" << endl;string name;cin >> name;//判断指定联系人是否在通讯录中int ret = isExist(abs, name);if (ret != -1) //找到联系人{cout << "姓名:" << abs->personArray[ret].m_Name << endl;cout << "性别:" << abs->personArray[ret].m_Sex << endl;cout << "年龄:" << abs->personArray[ret].m_Age << endl;cout << "电话:" << abs->personArray[ret].m_Phone << endl;cout << "住址:" << abs->personArray[ret].m_Sex << endl;}else //未找到联系人{cout << "查无此人" << endl;}//按任意键清屏system("pause");system("cls");}
5、修改联系人
//修改联系人void modifyPerson(Addressbooks* abs){cout << "请输入要修改人的姓名:" << endl;string name;cin >> name;int ret = isExist(abs, name);if (ret != -1){//姓名string name;cout << "请输入姓名:" << endl;cin >> name;abs->personArray[ret].m_Name = name;//性别cout << "请输入性别:" << endl;cout << "1---男" << endl;cout << "2---女" << endl;int sex = 0;while (true){cin >> sex;if (sex == 1 || sex == 2){//输入正确,退出循环输入abs->personArray[ret].m_Sex = sex;break;}else{cout << "输入有误,请重新输入!" << endl;}}//年龄int age;cout << "请输入年龄:" << endl;cin >> age;abs->personArray[ret].m_Age = age;//联系电话string phone;cout << "请输入联系方式:" << endl;cin >> phone;abs->personArray[ret].m_Phone = phone;//住址cout << "请输入家庭住址:" << endl;string address;cin >> address;abs->personArray[ret].m_Addr = address;cout << "已修改成功!" << endl;}else{cout << "查无此人" << endl;}system("pause"); //按任意键继续system("cls"); //修改完成后清屏}
6、清空联系人
//清空联系人void cleanPerson(Addressbooks* abs){abs->m_Size = 0; //将当期记录联系人数量置0,做逻辑清空操作cout << "通讯录已清空!" << endl;system("pause");system("cls");}
全部程序
//-封装函数显示该界面 如void showMenu()//-在main函数中调用封装好的函数#include <iostream>#include <string>#define MAX 1000 //宏定义数目using namespace std;//菜单界面void showMenu(){cout << "**********************" << endl;cout << "*****1、添加联系人*****" << endl;cout << "*****2、显示联系人*****" << endl;cout << "*****3、删除联系人*****" << endl;cout << "*****4、查找联系人*****" << endl;cout << "*****5、修改联系人*****" << endl;cout << "*****6、清空联系人*****" << endl;cout << "*****0、退出通讯录*****" << endl;cout << "**********************" << endl;}//设计联系人结构体struct person{string m_Name; //姓名int m_Sex; //性别:1、男 2、女int m_Age; //年龄string m_Phone; //电话string m_Addr; //住址};//设计通讯录结构体struct Addressbooks{struct person personArray[MAX]; //通讯录中保存的联系人数组int m_Size; //通讯录中当前记录联系人个数};//1、添加联系人void addPerson(Addressbooks * abs){//判断通讯是否已满,如满就不添加if (abs->m_Size > MAX){cout << "通讯录已满,无法添加!" << endl;return;}else{//添加具体联系人//姓名string name;cout << "请输入姓名:" << endl;cin >> name;abs->personArray[abs->m_Size].m_Name = name;//性别cout << "请输入性别:" << endl;cout << "1---男" << endl;cout << "2---女" << endl;int sex = 0;while (true){cin >> sex;if (sex == 1 || sex == 2){//如果输入1或2,可以退出循环,如果不是,重新输入abs->personArray[abs->m_Size].m_Sex = sex;break;}cout << "输入有误,清重新输入!" << endl;}//年龄cout << "请输入年龄:" << endl;int age = 0;cin >> age;abs->personArray[abs->m_Size].m_Age = age;//电话cout << "请输入联系电话:" << endl;string phone;cin >> phone;abs->personArray[abs->m_Size].m_Phone = phone;//住址cout << "请输入家庭住址:" << endl;string address;cin >> address;abs->personArray[abs->m_Size].m_Addr = address;//更新通讯录人数abs->m_Size++;cout << "添加成功!" << endl;system("pause"); //请按任意键继续system("cls"); //清屏操作}}//2、显示联系人void showPerson(Addressbooks* abs){//判断通讯录中人数是否为0,提示记录为空//如果不是0,显示记录的联系人信息if (abs->m_Size == 0){cout << "当前记录为空" << endl;}else{for (int i = 0; i < abs->m_Size; i++){cout << "姓名: " <<abs->personArray[i].m_Name<<"\t";cout << "性别: " <<(abs->personArray[i].m_Sex == 1?"男":"女") << "\t"; //使用三目运算符简化代码cout << "年龄: " << abs->personArray[i].m_Age << "\t";cout << "电话: " << abs->personArray[i].m_Phone << "\t";cout << "住址: " << abs->personArray[i].m_Addr << endl;}}system("pause");system("cls");}//检测联系人是否存在(如果存在,返回联系人具体位置,不存在返回-1)//参数1 通讯录, 参数2 对比姓名int isExist(Addressbooks* abs, string name){for (int i = 0; i < abs->m_Size; i++){//if (abs->personArray[i].m_Name == name){return i;}else{return -1;}}}//删除联系人void deletePerson(Addressbooks* abs){cout << "请输入要删除人员姓名:" << endl;string name;cin >> name;//ret =-1 未查到//ret !=-1 查到int ret = isExist(abs, name);if (ret != -1){//查到此人,要进行删除操作for (int i = ret; i < abs->m_Size; i++){//数据前移abs->personArray[i] = abs->personArray[i + 1];}abs->m_Size--;//更新通讯录中的人员数cout << "删除成功" << endl;}else{cout << "查无此人" << endl;}system("pause");system("cls");}//查找联系人void findPerson(Addressbooks* abs){cout << "请输入要查找的联系人:" << endl;string name;cin >> name;//判断指定联系人是否在通讯录中int ret = isExist(abs, name);if (ret != -1) //找到联系人{cout << "姓名:" << abs->personArray[ret].m_Name << endl;cout << "性别:" << abs->personArray[ret].m_Sex << endl;cout << "年龄:" << abs->personArray[ret].m_Age << endl;cout << "电话:" << abs->personArray[ret].m_Phone << endl;cout << "住址:" << abs->personArray[ret].m_Sex << endl;}else //未找到联系人{cout << "查无此人" << endl;}//按任意键清屏system("pause");system("cls");}//修改联系人void modifyPerson(Addressbooks* abs){cout << "请输入要修改人的姓名:" << endl;string name;cin >> name;int ret = isExist(abs, name);if (ret != -1){//姓名string name;cout << "请输入姓名:" << endl;cin >> name;abs->personArray[ret].m_Name = name;//性别cout << "请输入性别:" << endl;cout << "1---男" << endl;cout << "2---女" << endl;int sex = 0;while (true){cin >> sex;if (sex == 1 || sex == 2){//输入正确,退出循环输入abs->personArray[ret].m_Sex = sex;break;}else{cout << "输入有误,请重新输入!" << endl;}}//年龄int age;cout << "请输入年龄:" << endl;cin >> age;abs->personArray[ret].m_Age = age;//联系电话string phone;cout << "请输入联系方式:" << endl;cin >> phone;abs->personArray[ret].m_Phone = phone;//住址cout << "请输入家庭住址:" << endl;string address;cin >> address;abs->personArray[ret].m_Addr = address;cout << "已修改成功!" << endl;}else{cout << "查无此人" << endl;}system("pause"); //按任意键继续system("cls"); //修改完成后清屏}//清空联系人void cleanPerson(Addressbooks* abs){abs->m_Size = 0; //将当期记录联系人数量置0,做逻辑清空操作cout << "通讯录已清空!" << endl;system("pause");system("cls");}int main(){//创建通讯录结构体变量Addressbooks abs;//初始化abs.m_Size = 0;int select = 0;//创建用户选择输入的变量while (true){//菜单调用showMenu();cin >> select;switch (select){case 1: //添加联系人addPerson(&abs);break;case 2: //显示联系人showPerson(&abs);break;case 3: //删除联系人deletePerson(&abs);break;case 4: //查找联系人findPerson(&abs);break;case 5: //修改联系人modifyPerson(&abs);break;case 6: //清空联系人cleanPerson(&abs);break;case 0: //退出通讯录cout << "欢迎下次使用" << endl;system("pause"); //按任意键继续return 0;break;default:break;}}system("pause"); //请按任意键继续return 0;}
C++核心编程
本阶段主要针对C++面向对象编程技术做详细讲解,探讨C++的核心和精髓
内存分区模型
四个区的划分: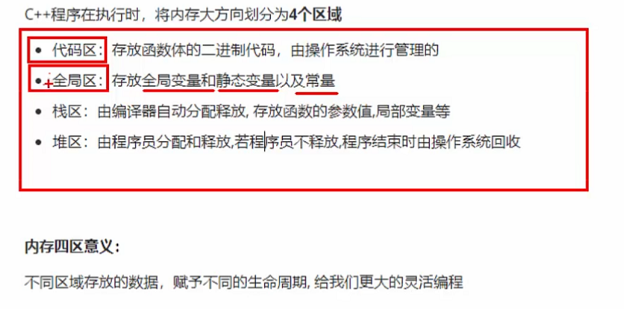
#include<iostream> //头文件#include<string>#include<ctime>using namespace std;//全局变量、静态变量、常量//全局变量int g_a = 10;int g_b = 10;//const修饰的全局变量const int c_g_a = 10;const int c_g_b = 10;int main(){cout << "全局变量g_a的地址为:" << &g_a << endl;cout << "全局变量g_b的地址为:" << &g_b << endl;cout << "全局常量c_g_a的地址为:" << &c_g_a << endl;cout << "全局常量c_g_b的地址为:" << &c_g_b << endl;//静态变量 在普通变量前添加staticstatic int s_a = 10;static int s_b = 10;cout << "静态变量s_a的地址为:" << (int)&s_a << endl;cout << "静态变量s_b的地址为:" << (int)&s_b << endl;//创建普通局部变量int l_a = 10;int l_b = 10;cout << "局部变量l_a的地址为:" << &l_a << endl;cout << "局部变量l_b的地址为:" << &l_b << endl;//创建局部常量const int c_l_a = 10;const int c_l_b = 10;cout << "局部常量c_l_a的地址为:" << &c_l_a << endl;cout << "局部常量c_l_b的地址为:" << &c_l_b << endl;//常量//字符串常量cout << "字符串常量的地址为:" << (int)&"hello world" << endl;//const修饰的全局变量,const修饰的局部变量system("pause");return 0;}
程序运行前
在程序编译后,生成了exe可执行程序,未执行该程序前分为两个阶段
代码区:1)只读;2)共享
全局区:该区域的数据在程序结构后由操作系统释放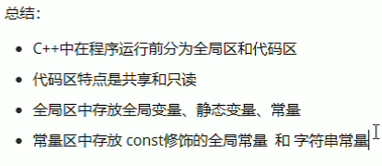
程序运行中

局部变量存放在栈区,函数运行完成,自动清理
int * func(){int a = 10;return &a; //返回局部变量地址,有误}int main(){int * p = func();cout<<*p<<endl; //编译器保留一次局部变量数据cout<<*p<<endl; //编译器不会保存两次局部变量数据system("pause");return 0;}
#include<iostream> //头文件#include<string>using namespace std;int func(){//利用new关键字 可以将数据开辟到堆区//指针本质也是局部变量,放在栈上int* p = new int(10);return p;}int main(){//在堆区开辟数据cout << *p << endl;cout << *p << endl;system("pause");return 0;}
new操作符
#include<iostream> //头文件#include<string>using namespace std;//1、new的基本语法int* func(){//在堆区创建整型数据//new返回使该整型类型的指针int* p = new int(10);return p;}//2、在堆区利用new开辟数组void test02(){//创建int* arr = new int[10]; //10代表数组由10各元素for (int i = 0; i < 10; i++){arr[i] = i + 100;}for (int i = 0; i < 10; i++){cout << arr[i] << endl;}//释放堆区数组//释放数组的时候,要加[]才行}int main(){int* p = func();cout << *p << endl;cout << *p << endl;test02();system("pause");return 0;}
引用
引用的基本使用
#include<iostream> //头文件#include<string>using namespace std;int main(){int a = 10;int& b = a; //变量a的别名为bcout << "a=" << a << endl;cout << "b=" << b << endl;system("pause");return 0;}
引用注意事项
- 引用必须初始化(int &b;,错误);
- 引用之后就不可以改变(如果定义为a的别名,就不能设置为其他变量的别名)
引用做函数参数
作用:函数传参时,可以利用引用的技术让形参修饰实参
优点:可以简化指针修改实参 ```cppinclude
//头文件 include
using namespace std;
//交换函数
//1、值传递 void myswap01(int a, int b) { int temp = a; a = b; b = temp; } //2、地址传递 void myswap02(int a, int b) { int temp = a; a = b; b = temp; }
//3、引用传递 void myswap03(int &a, int &b) { int temp = a; a = b; b = temp; }
int main()
{
int a = 10;
int b = 20;
//myswap01(a,b); //值传递,形参无法修改实参
myswap02(&a, &b); //指针传递,形参可以修改实参
//myswap03(a,b); // 引用传递,形参可以修改实参
cout << "a=" << a << endl;cout << "b=" << b << endl;system("pause");return 0;
}
<a name="cGDci"></a>#### 引用做函数返回值```cpp#include<iostream> //头文件#include<string>using namespace std;//函数做函数返回值//1、不要返回局部变量的引用//2、函数的调用可以作为左值//返回局部变量引用int& test01(){int a = 10;return a;}//返回静态变量引用int& test02(){static int b = 10;return b;}int main(){//不要返回局部变量的引用int& ref = test01();cout << "ref=" << ref << endl;cout << "ref=" << ref << endl;//如果函数做左值,那么必须返回引用int& ref2 = test02();cout << "ref2=" << ref2 << endl;cout << "ref2=" << ref2 << endl;test02() = 1000;cout << "ref2=" << ref2 << endl;cout << "ref2=" << ref2 << endl;system("pause");return 0;}
引用的本质
本质:引用本质在C++中内部实现是一个指针常量
结论:C++推荐用引用技术,因为语法方便,引用本质为指针常量,但是所有指针操作编译器都帮我们做了
常量引用
#include<iostream> //头文件#include<string>using namespace std;//打印函数void showvalue(const int& val) //添加const,形参无法改变{//val = 1000; 形参无法改变cout << "val=" << val << endl;}int main(){//常量引用//使用场景:用来修饰形参,防止误操作int a = 100;showvalue(a);system("pause");return 0;}
函数提高
函数默认参数
在C++中,函数的形参列表中的形参是可以有默认值的。
语法:返回值类型 函数名 (参数 = 默认值){ }
#include<iostream> //头文件#include<string>using namespace std;//函数默认参数//如果我们自己传入数据,有用自己的数据,没有就用默认值//语法:返回值类型 函数名(形参=默认值){}int func(int a,int b = 20,int c = 30) //b和c用的默认值{return a + b + c;}int func2(int a = 10, int b = 10); //2、如果函数声明有默认参数,函数实现就不能有默认参数int main(){//注意事项//1、如果某个位置有了默认参数,那么从这个位置往后的形参都要有默认值cout << func(10) << endl; //b和c使用形参列表中的默认值cout << func(10, 30) << endl; //b使用实参列表中的值cout << func2(10, 10) << endl;}int func2(int a,int b)//函数实现就不能有默认参数{return a + b;}
函数占位参数
C++中函数的形参列表里可以有占位参数,用来做占位,调用函数时必须填补该变量
语法:返回值类型 函数名(数据类型){}
#include<iostream> //头文件#include<string>using namespace std;//占位参数//语法:返回值类型 函数名(数据类型){}//占位参数还可以是默认参数void func(int a, int = 10){cout << "this is func" << endl;}int main(){func(10, 10);system("pause");return 0;}
函数重载-基本语法
作用:函数名可以相同,提高函数名的复用性
函数重载满足条件:
- 同一作用域下
- 函数名相同
- 函数参数类型不同或个数不同或顺序不同
注意:函数返回值不可以作为函数重载的条件
#include<iostream> //头文件#include<string>using namespace std;//函数重载//可以让函数名重复使用,提高复用性// 满足条件://1、同一作用域下//2、函数名称相同//3、函数参数类型不同,个数不同,顺序不同void func(){cout << "" << endl;}void func(int a){cout << "this is func" << endl;}void func(int a, double b) //形参数目不同{cout << "3" << endl;}void func(double a, int b) //形参顺序不同{cout << "4" << endl;}int main(){func(); // 调用第一个func函数func(10);//调用第二个func函数system("pause");return 0;}
函数重载-注意事项
//函数重载的注意事项 //1、引用作为重载条件 void func(int& a) { cout << “func(int &a)调用” << endl; }
void func(const int& a) { cout << “func(const int &a)调用” << endl; }
//2、函数重载碰到默认参数 void func2(int a, int b = 10) { cout << “调用func2(int a, int b = 10)” << endl; }
void func2(int a) { cout << “调用func2(int a)” << endl; }
int main() { int a = 10; func(a); //调用第一个函数版本 func(10); //调用第二个函数版本
system("pause");return 0;
}
<a name="Y2wfK"></a>### 类和对象<a name="NXubl"></a>### 封装(*)C++面向对象的三大特性:封装、继承、多态<a name="mZP2G"></a>#### 封装的意义一语法:class 类名{};<br />类中的属性和行为都称为“成员”<br />属性---成员属性 成员变量<br />行为---成员函数 成员方法```cpp#include<iostream> //头文件#include<string>using namespace std;//设计一个圆类,求圆的周长//圆周长公式:2*PI*半径const double PI = 3.14;//class 代表设计一个类class Circle{//访问权限//公共权限public://属性//半径int m_r;//行为//获取圆的周长double calculateZC(){return 2 * PI * m_r;}};int main(){//通过圆类 创建具体的圆(对象)Circle cl;//给圆对象的属性进行赋值cl.m_r = 10;cout << "圆的周长为:" << cl.calculateZC() << endl;system("pause");return 0;}
#include<iostream> //头文件#include<string>using namespace std;//设计一个学生类,可以给学生姓名和学号赋值,可以显示学生姓名和学号class Student{//访问权限//公共权限public://属性//学生姓名和学号string Name;string Number;//行为void print(){cout << "学生姓名为:" << Name << endl;cout << "学生学号为:" << Number << endl;}};int main(){string name;cout << "请输入学生的姓名:" << endl;cin >> name;string number;cout << "请输入学生的学号:" << endl;cin >> number;//生成一个学生类Student st1;st1.Name = name;st1.Number = number;st1.print(name, number);system("pause");return 0;}
封装意义二
封装权限:
1)public 公共权限,类内可以访问,类外也可以访问;
2)protected保护权限,类内可以访问,类外不可以访问,儿子可以访问父亲的保护内容;
2)private私有权限,类内可以访问,类外不可以访问,儿子不可以访问父亲的私有内容。
#include<iostream> //头文件#include<string>using namespace std;//设计一个学生类,可以给学生姓名和学号赋值,可以显示学生姓名和学号class Person{public:string name;protected:string car;private:int Password;public:void func(){name = "张三";car = "奔驰"; //类内可以访问Password = 123456; //类内可以访问}};int main(){Person pr;pr.name = "李四"; //类外仅可以访问公共权限system("pause");return 0;}
struct 和class的区别
C++中class和struct 的唯一区别在于默认权限不一样
- srtuct:默认权限为公共权限
- class:默认权限为私有权限
封装-成员属性私有化
优点:1)可以设置成员变量的读/写的权限;2)对于写可以检测数据的有效性 ```cpp class Person { public: //姓名 可写 void setName(string name) {
} //姓名 可读 string getname() {m_Name = name;
} //获取年龄 只读 int getAge() {return m_Name;
} //设置情人 只写 void setlover(string lover) {m_Age = 0;return m_Age;
}m_Lover = lover;
private: //姓名 可读可写 string m_Name; //年龄 只读 int m_Age; //情人 只写 string m_Lover; };
<a name="v5Arm"></a>#### 封装-案例2- **在类中可以将另一个类作为成员**- **如将类与成员函数分开写,简化代码**头文件:```cpp#pragma once#include<iostream>//头文件中对类中成员进行声明class point{public://成员函数声明//设置xvoid setX(int x);//获取xint getX();//设置yvoid setY(int y);//获取yint getY();private://成员变量声明int m_X;int m_Y;};
#pragma once#include<iostream>#include"point.h"class circle{public://设置半径void setR(int r);//获取半径int getR();//设置圆心void setCenter(point center);//获取圆心point getCenter();private://半径int m_R;//圆心point m_Center;};
源文件:
#include<iostream> //头文件#include<string>#include"circle.h"#include"point.h"using namespace std;void isInCircle(circle& c, point& p){//计算距离平方int distance =(c.getCenter().getX() - p.getX()) * (c.getCenter().getX() - p.getX()) +(c.getCenter().getY() - p.getY()) * (c.getCenter().getY() - p.getY());//计算半径平方int rdistance = c.getR() * c.getR();//判断位置关系if (distance == rdistance){cout << "点在圆上" << endl;}else if (distance > rdistance){cout << "点在圆外" << endl;}else{cout << "点在圆内" << endl;}}int main(){circle c;point p;p.setX(10);p.setY(10);c.setR(10);c.setCenter(p);isInCircle(c, p);system("pause");return 0;}
#include"point.h"#include<iostream>void point::setX(int x){m_X = x;}int point::getX(){return m_X;}void point::setY(int y){m_Y = y;}int point::getY(){return m_Y;}
#include"circle.h"#include<iostream>void circle::setR(int r){m_R = r;}int circle::getR(){return m_R;}void circle::setCenter(point center){m_Center = center;}point circle::getCenter(){return m_Center;}
对象初始化和清理(?)
构造函数和析构函数
两个函数将会被编译器自动调用
- 构造函数:作用在于创建对象时为对象的成员属性赋值,语法: 类名(){}
- 析构函数:主要作用在于对象销毁前系统自动调用,语法:~类名(){}
```cpp
include
//头文件 include
using namespace std;
//对象的初始化和清理 //1、构造函数 进行初始化操作 class Person { public: //1、构造函数 //没有返回值 不用写void //函数名 与类名相同 //构造函数可以有参数,可以发生重载 //创建对象的时候,构造函数会自动调用,而且只调用一次 Person() { cout << “Person构造函数的调用” << endl; } //2、析构函数 进行清理的操作 //没有返回值 不用写void //函数名和类名相同 在名称前加~ //析构函数不可以有参数的,不可以发生重载 //对象销毁前 会自动调用析构函数 而且只调用一次 ~Person() { cout << “Person析构函数的调用” << endl; } };
void test01() { Person p; // 在栈上的数据,在test01执行完毕后,释放这个对象 }
int main() { test01();//调用test01函数
system("pause");return 0;
}
<a name="buhdj"></a>#### 构造函数的分类及应用```cpp#include<iostream>#include<string>using namespace std;//1、构造函数分类//按照参数分类分为有参和无参构造 午餐又称为默认构造函数//按照类型分类分为 普通构造和拷贝构造class Person{public://无参(默认)构造函数Person(){cout << "无参构造函数!" << endl;}//有参构造函数Person(int a){age = a;cout << "有参构造函数!" << endl;}//拷贝构造函数Person(const Person &P) //注意形参的写法{//将传入的人身上的所有属性,拷贝到我身上age = P.age;cout << "拷贝函数!" << endl;}//析构函数~Person(){cout << "析构函数!" << endl;}public:int age;};void test02(){//1、括号法Person p1; //默认构造函数调用Person p2(10); // 有参构造函数Person p3(p2); //拷贝构造函数调用//注意事项//调用默认函数时,不要加()//因为下面这行代码,编译器会认为时一个函数的声明//2、显示法//Person p1;//Person p2 = Person(10); //有参构造//Person p3 = Person(p2); //拷贝函数//注意事项2//不要利用拷贝构造函数,初始化匿名对象//3、隐式转换法//Person p4 = 10; //相当于写了 Person p4 = Person(10),有参构造//Person p5 = p4; //拷贝构造}int main(){test02();system("pause");return 0;}
拷贝构造函数调用时机
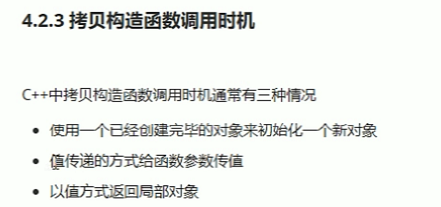
#include<iostream>#include<string>using namespace std;//拷贝构造函数调用时机//1、使用一个已经创建完毕的对象来初始化一个新对象//2、值传递的方式给函数参数传值//3、值方式返回局部对象class Person{public:Person(){cout << "Person默认构造函数调用" << endl;}Person(int age){m_Age = age;}Person(const Person& p){cout << "Person拷贝构造函数调用" << endl;m_Age = p.m_Age;}~Person(){cout << "Person析构函数调用" << endl;}int m_Age;};//1、使用一个已经创建完毕的对象来初始化一个新对象void test01(){Person p1(20);Person p2(p1);cout << "p2的年龄为:" <<p2.m_Age<< endl;}//2、值传递的方式给函数参数传值void dowork(Person p){}void test02(){Person p;dowork(p);}//3、值方式返回局部对象Person dowork2(){Person p1;return p1;}void test03(){Person p = dowork2();}int main(){test01();test02();test03();system("pause");return 0;}
构造函数的调用规则

#include<iostream>#include<string>using namespace std;//构造函数的调用规则//1、创建一个类,C++编译器会给每个类都添加至少3个函数//默认构造(空实现)// 析构函数(空实现)//拷贝构造(值拷贝)class Person{public:Person(){cout << "Person的默认构造函数调用" << endl;}Person(int age){cout << "Person的有参构造函数调用" << endl;m_Age = age;}Person(const Person& p){cout << "Person的拷贝造函数调用" << endl;m_Age = p.m_Age;}~Person(){cout << "" << endl;}int m_Age;};//2、//如果有了有参构造函数,编译器就不再提供默认构造函数,但是会提供拷贝构造函数//如果我们写了拷贝构造函数,编译器就不再提供其他构造函数void test01(){Person p;p.m_Age = 18;Person p2(p);cout << "p2的年龄为:" << p2.m_Age << endl;}int main(){test01();system("pause");return 0;}
深拷贝和浅拷贝
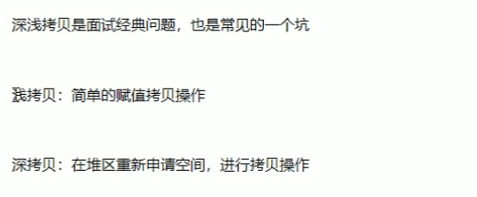
浅拷贝带来的问题就是堆区的内存重复释放,需要利用深拷贝的问题来进行解决
#include<iostream>#include<string>using namespace std;//深拷贝与浅拷贝class Person{public:Person(){cout << "调用默认构造函数" << endl;}Person(int age, int height){m_Age = age;m_Height = new int(height);cout << "Person的有参构造函数调用" << endl;}//自己实现拷贝构造函数 解决浅拷贝带来的问题Person(){cout << "Person kaobei hanshu s" << endl;}~Person(){//析构代码,将堆区开辟的数据做释放操作if (m_Height != NULL){delete m_Height;m_Height = NULL;}cout << "Person的析构函数调用" << endl;}int m_Age; //年龄int* m_Height; //身高};int main(){test01();system("pause");return 0;}
初始化列表
#include<iostream>#include<string>using namespace std;//初始化列表class Person{public://传统初始化操作//int m_A;//int m_B;//int m_C;//初始化列表初始化属性Person(int a, int b, int c) :m_A(a),m_B(b),m_C(c){}int m_A;int m_B;int m_C;};int main(){Person p(30, 20, 10);cout << "m_A:" << p.m_A << endl;cout << "m_B" << p.m_B << endl;cout << "m_C:" << p.m_C << endl;system("pause");return 0;}
类对象作为类成员
C++类中的成员可以作为另一个类中的对象,我们称之为对象成员
#include<iostream>#include<string>using namespace std;//类对象作为类成员//手机类class Phone{public:Phone(string pName){m_PName = pName;cout << "phone的构造函数调用" << endl;}~Phone(){cout << "Phone的析构函数调用" << endl;}string m_PName;};class Person{public://Phone m_Phone = pName 隐式转化法Person(string name, string pName) :m_Name(name), m_Phone(pName){cout << "Person的构造函数调用" << endl;}~Person(){cout << "Person的析构函数调用" << endl;}//姓名string m_Name;//手机Phone m_Phone;};//当其他类对象作为本类成员,构造时先构造对象,在构造自身,析构的顺序与构造相反void test01(){Person p("张三","苹果");cout<<p.m_Name << "拿着" << p.m_Phone.m_PName << endl;}int main(){test01();system("pause");return 0;}
静态成员
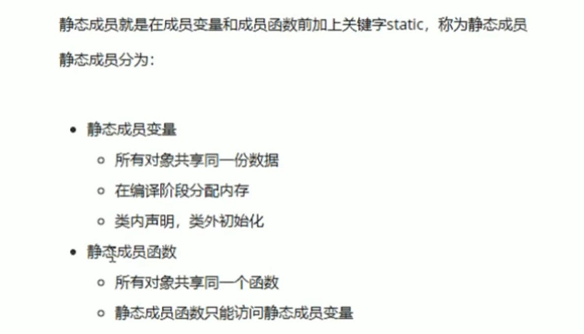
#include<iostream>#include<string>using namespace std;//静态成员class Person{public:static int m_A;//静态成员变量也有访问权限private:static int m_B;};int Person::m_A = 100;void test01(){//静态成员变量,不属于某个对象上,所有对象都可以共享同一份数据//因此静态成员变量有两种访问方式//1、通过对象访问Person p1;cout << p1.m_A << endl;//2、通过类名进行访问cout << Person::m_A << endl;}int main(){test01();system("pause");return 0;}
C++对象模型和this指针
this指针概念
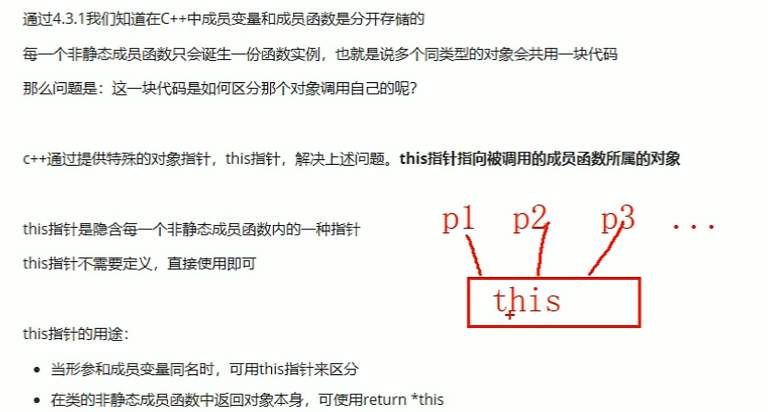
#include<iostream>#include<string>using namespace std;class Person{public:Person(int age){this->age = age; //this指针指向被调用成员函数的所属对象}Person& PersonAddAge(Person p){Person p1(10);this->age += p1.age;return *this;}int age;};//1、解决名称冲突void test01(){Person p1(18);cout << "p1的年龄为:" << p1.age << endl;}//2、返回对象本身*thisvoid test02(){Person p1(10);Person p2(10);p2.PersonAddAge(p1).PersonAddAge(p1).PersonAddAge(p1);cout << "p2的年龄为:" << p2.age << endl;}int main(){test01();test02();system("pause");return 0;}
空指针访问成员函数
Const修饰成员函数

#include<iostream>#include<string>using namespace std;//空指针调用成员函数class Person {public:Person() {m_A = 0;m_B = 0;}//this指针的本质是一个指针常量,指针的指向不可修改//如果想让指针指向的值也不可以修改,需要声明常函数void ShowPerson() const {//const Type* const pointer;//this = NULL; //不能修改指针的指向 Person* const this;//this->mA = 100; //但是this指针指向的对象的数据是可以修改的//const修饰成员函数,表示指针指向的内存空间的数据不能修改,除了mutable修饰的变量this->m_B = 100;}void MyFunc() const {//mA = 10000;}public:int m_A;mutable int m_B; //可修改 可变的};//const修饰对象 常对象void test01() {const Person person; //常量对象cout << person.m_A << endl;//person.mA = 100; //常对象不能修改成员变量的值,但是可以访问person.m_B = 100; //但是常对象可以修改mutable修饰成员变量//常对象访问成员函数person.MyFunc(); //常对象不能调用const的函数}int main() {test01();system("pause");return 0;}
友元
生活中你的家有客厅(Public),有你的卧室(Private)
客厅所有来的客人都可以进去,但是你的卧室是私有的,也就是说只有你能进去
但是呢,你也可以允许你的好闺蜜好基友进去。
在程序里,有些私有属性 也想让类外特殊的一些函数或者类进行访问,就需要用到友元的技术
友元的目的就是让一个函数或者类 访问另一个类中私有成员
友元的关键字为 ==friend==
全局函数做友元
#include<iostream>#include<string>using namespace std;class Building{//告诉编译器 goodGay全局函数 是 Building类的好朋友,可以访问类中的私有内容friend void goodGay(Building* building);public:Building(){this->m_SittingRoom = "客厅";this->m_BedRoom = "卧室";}public:string m_SittingRoom; //客厅private:string m_BedRoom; //卧室};void goodGay(Building* building){cout << "好基友正在访问: " << building->m_SittingRoom << endl;cout << "好基友正在访问: " << building->m_BedRoom << endl;}void test01(){Building b;goodGay(&b);}int main() {test01();system("pause");return 0;}
类做友元
#include<iostream>#include<string>using namespace std;class Building;class goodGay{public:goodGay();void visit();private:Building* building;};class Building{//告诉编译器 goodGay类是Building类的好朋友,可以访问到Building类中私有内容friend class goodGay;public:Building();public:string m_SittingRoom; //客厅private:string m_BedRoom;//卧室};Building::Building() //类内定义,类外实现{this->m_SittingRoom = "客厅";this->m_BedRoom = "卧室";}goodGay::goodGay(){building = new Building;}void goodGay::visit(){cout << "好基友正在访问" << building->m_SittingRoom << endl;cout << "好基友正在访问" << building->m_BedRoom << endl;}void test01(){goodGay gg;gg.visit();}int main() {test01();system("pause");return 0;}
成员函数做友元
#include<iostream>#include<string>using namespace std;class Building;class goodGay{public:goodGay();void visit(); //只让visit函数作为Building的好朋友,可以发访问Building中私有内容void visit2();private:Building* building;};class Building{//告诉编译器 goodGay类中的visit成员函数 是Building好朋友,可以访问私有内容friend void goodGay::visit();public:Building();public:string m_SittingRoom; //客厅private:string m_BedRoom;//卧室};Building::Building(){this->m_SittingRoom = "客厅";this->m_BedRoom = "卧室";}goodGay::goodGay(){building = new Building;}void goodGay::visit(){cout << "好基友正在访问" << building->m_SittingRoom << endl;cout << "好基友正在访问" << building->m_BedRoom << endl;}void goodGay::visit2(){cout << "好基友正在访问" << building->m_SittingRoom << endl;//cout << "好基友正在访问" << building->m_BedRoom << endl;}void test01(){goodGay gg;gg.visit();}int main() {test01();system("pause");return 0;}
运算符重载
运算符重载概念:对已有的运算符重新进行定义,赋予其另一种功能,以适应不同的数据类型
加号运算符重载
作用:实现两个自定义数据类型相加的运算
#include<iostream>#include<string>using namespace std;class Person {public:Person() {};Person(int a, int b){this->m_A = a;this->m_B = b;}//1、成员函数实现 + 号运算符重载Person operator+(const Person& p) {Person temp;temp.m_A = this->m_A + p.m_A;temp.m_B = this->m_B + p.m_B;return temp;}public:int m_A;int m_B;};//2、全局函数实现 + 号运算符重载//Person operator+(const Person& p1, const Person& p2) {// Person temp(0, 0);// temp.m_A = p1.m_A + p2.m_A;// temp.m_B = p1.m_B + p2.m_B;// return temp;//}//运算符重载 可以发生函数重载(形参类型不同,实现函数重载)Person operator+(const Person& p2, int val){Person temp;temp.m_A = p2.m_A + val;temp.m_B = p2.m_B + val;return temp;}void test() {Person p1(10, 10);Person p2(20, 20);//成员函数方式Person p3 = p2 + p1; //相当于 p2.operaor+(p1)cout << "mA:" << p3.m_A << " mB:" << p3.m_B << endl;Person p4 = p3 + 10; //相当于 operator+(p3,10)cout << "mA:" << p4.m_A << " mB:" << p4.m_B << endl;}int main() {test();system("pause");return 0;}
PS:总结1:对于内置的数据类型的表达式的的运算符是不可能改变的
总结2:不要滥用运算符重载
左移运算符重载(?)
作用:可以输出自定义数据类型
通常不利用成员函数重载左移运算符
#include<iostream>#include<string>using namespace std;class Person{friend ostream& operator<<(ostream& out, Person& p);public:Person(int a, int b){this->m_A = a;this->m_B = b;}//成员函数 实现不了 p << cout 不是我们想要的效果//void operator<<(Person& p){//}private:int m_A;int m_B;};//全局函数实现左移重载//ostream对象只能有一个ostream& operator<<(ostream& out, Person& p) {out << "a:" << p.m_A << " b:" << p.m_B;return out;}void test() {Person p1(10, 20);cout << p1 << "hello world" << endl; //链式编程}int main() {test();system("pause");return 0;}
递增运算符重载
作用: 通过重载递增运算符,实现自己的整型数据
#include<iostream>#include<string>using namespace std;class MyInteger {friend ostream& operator<<(ostream& out, MyInteger myint);public:MyInteger() {m_Num = 0;}//前置++MyInteger& operator++() {//先++m_Num++;//再返回return *this;}//后置++MyInteger operator++(int) {//先返回MyInteger temp = *this; //记录当前本身的值,然后让本身的值加1,但是返回的是以前的值,达到先返回后++;m_Num++;return temp;}private:int m_Num;};ostream& operator<<(ostream& out, MyInteger myint) {out << myint.m_Num;return out;}//前置++ 先++ 再返回void test01() {MyInteger myInt;cout << ++myInt << endl;cout << myInt << endl;}//后置++ 先返回 再++void test02() {MyInteger myInt;cout << myInt++ << endl;cout << myInt << endl;}int main() {test01();//test02();system("pause");return 0;}
总结: 前置递增返回引用,后置递增返回值
赋值运算符重载
c++编译器至少给一个类添加4个函数:
- 默认构造函数(无参,函数体为空)
- 默认析构函数(无参,函数体为空)
- 默认拷贝构造函数,对属性进行值拷贝
- 赋值运算符 operator=, 对属性进行值拷贝
如果类中有属性指向堆区,做赋值操作时也会出现深浅拷贝问题
#include<iostream>#include<string>using namespace std;class Person{public:Person(int age){//将年龄数据开辟到堆区m_Age = new int(age);}//重载赋值运算符Person& operator=(Person &p){if (m_Age != NULL){delete m_Age;m_Age = NULL;}//编译器提供的代码是浅拷贝//m_Age = p.m_Age;//提供深拷贝 解决浅拷贝的问题m_Age = new int(*p.m_Age);//返回自身return *this;}~Person(){if (m_Age != NULL){delete m_Age;m_Age = NULL;}}//年龄的指针int *m_Age;};void test01(){Person p1(18);Person p2(20);Person p3(30);p3 = p2 = p1; //赋值操作cout << "p1的年龄为:" << *p1.m_Age << endl;cout << "p2的年龄为:" << *p2.m_Age << endl;cout << "p3的年龄为:" << *p3.m_Age << endl;}int main() {test01();//int a = 10;//int b = 20;//int c = 30;//c = b = a;//cout << "a = " << a << endl;//cout << "b = " << b << endl;//cout << "c = " << c << endl;system("pause");return 0;}
疑问:1)怎样区分栈区数据和堆区数据;2)深浅拷贝的作用和区别
关系运算符重载
作用:重载关系运算符,可以让两个自定义类型对象进行对比操作
#include<iostream>#include<string>using namespace std;class Person{public:Person(string name, int age){this->m_Name = name;this->m_Age = age;};bool operator==(Person & p){if (this->m_Name == p.m_Name && this->m_Age == p.m_Age){return true;}else{return false;}}bool operator!=(Person & p){if (this->m_Name == p.m_Name && this->m_Age == p.m_Age){return false;}else{return true;}}string m_Name;int m_Age;};void test01(){//int a = 0;//int b = 0;Person a("孙悟空", 18);Person b("孙悟空", 18);if (a == b){cout << "a和b相等" << endl;}else{cout << "a和b不相等" << endl;}if (a != b){cout << "a和b不相等" << endl;}else{cout << "a和b相等" << endl;}}int main() {test01();system("pause");return 0;}
函数调用运算符重载
class MyPrint { public: void operator()(string text) { cout << text << endl; }
}; void test01() { //重载的()操作符 也称为仿函数 MyPrint myFunc; myFunc(“hello world”); }
class MyAdd { public: int operator()(int v1, int v2) { return v1 + v2; } };
void test02() { MyAdd add; int ret = add(10, 10); cout << “ret = “ << ret << endl;
//匿名对象调用cout << "MyAdd()(100,100) = " << MyAdd()(100, 100) << endl;
}
int main() {
test01();test02();system("pause");return 0;
}
<a name="QUZ5y"></a>### 继承(*)<a name="g4E5u"></a>#### 基本语法作用:减少重复代码```cpp#include<iostream>#include<string>using namespace std;//公共页面class BasePage{public:void header(){cout << "首页、公开课、登录、注册...(公共头部)" << endl;}void footer(){cout << "帮助中心、交流合作、站内地图...(公共底部)" << endl;}void left(){cout << "Java,Python,C++...(公共分类列表)" << endl;}};//Java页面class Java : public BasePage //语法{public:void content(){cout << "JAVA学科视频" << endl;}};//Python页面class Python : public BasePage{public:void content(){cout << "Python学科视频" << endl;}};//C++页面class CPP : public BasePage{public:void content(){cout << "C++学科视频" << endl;}};void test01(){//Java页面cout << "Java下载视频页面如下: " << endl;Java ja;ja.header();ja.footer();ja.left();ja.content();cout << "--------------------" << endl;//Python页面cout << "Python下载视频页面如下: " << endl;Python py;py.header();py.footer();py.left();py.content();cout << "--------------------" << endl;//C++页面cout << "C++下载视频页面如下: " << endl;CPP cp;cp.header();cp.footer();cp.left();cp.content();}int main() {test01();system("pause");return 0;}
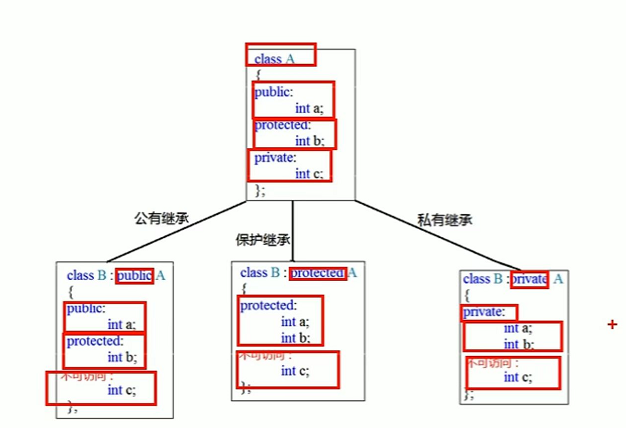
继承方式
继承的语法:class 子类 : 继承方式 父类
继承方式一共有三种:
- 公共继承
- 保护继承
- 私有继承
 、
、
#include<iostream>#include<string>using namespace std;class Base1{public:int m_A;protected:int m_B;private:int m_C;};//公共继承class Son1 :public Base1{public:void func(){m_A; //可访问 public权限m_B; //可访问 protected权限//m_C; //不可访问}};void myClass(){Son1 s1;s1.m_A; //其他类只能访问到公共权限}//保护继承class Base2{public:int m_A;protected:int m_B;private:int m_C;};class Son2 :protected Base2{public:void func(){m_A; //可访问 protected权限m_B; //可访问 protected权限//m_C; //不可访问}};void myClass2(){Son2 s;//s.m_A; //不可访问}//私有继承class Base3{public:int m_A;protected:int m_B;private:int m_C;};class Son3 :private Base3{public:void func(){m_A; //可访问 private权限m_B; //可访问 private权限//m_C; //不可访问}};class GrandSon3 :public Son3{public:void func(){//Son3是私有继承,所以继承Son3的属性在GrandSon3中都无法访问到//m_A;//m_B;//m_C;}};
继承中的对象模型
父类中私有成员也是被子类继承下去了,只是由编译器给隐藏后访问不到
#include<iostream>#include<string>using namespace std;class Base{public:int m_A;protected:int m_B;private:int m_C; //私有成员只是被隐藏了,但是还是会继承下去};//公共继承class Son :public Base{public:int m_D;};void test01(){//16//父类中所有非静态成员属性都会倍子类继承下去//父类中私有成员属性被编译器隐藏了,因此访问不到,但确实被继承下去了cout << "sizeof Son = " << sizeof(Son) << endl;}int main() {test01();system("pause");return 0;}
继承中构造和析构顺序
子类继承父类后,当创建子类对象,也会调用父类的构造函数
问题:父类和子类的构造和析构顺序是谁先谁后?
#include<iostream>#include<string>using namespace std;class Base{public:Base(){cout << "Base构造函数!" << endl;}~Base(){cout << "Base析构函数!" << endl;}};class Son : public Base{public:Son(){cout << "Son构造函数!" << endl;}~Son(){cout << "Son析构函数!" << endl;}};void test01(){//继承中 先调用父类构造函数,再调用子类构造函数,析构顺序与构造相反Son s;}int main() {test01();system("pause");return 0;}
结论:继承中 先调用父类构造函数,再调用子类构造函数,析构顺序与构造相反。
继承中同名成员处理方式
#include<iostream>#include<string>using namespace std;class Base {public:Base(){m_A = 100;}void func(){cout << "Base - func()调用" << endl;}void func(int a){cout << "Base - func(int a)调用" << endl;}public:int m_A;};class Son : public Base {public:Son(){m_A = 200;}//当子类与父类拥有同名的成员函数,子类会隐藏父类中所有版本的同名成员函数//如果想访问父类中被隐藏的同名成员函数,需要加父类的作用域void func(){cout << "Son - func()调用" << endl;}public:int m_A;};void test01(){Son s;cout << "Son下的m_A = " << s.m_A << endl;cout << "Base下的m_A = " << s.Base::m_A << endl;//添加父类的作用域,实现父类中同名成员的调用s.func();s.Base::func();s.Base::func(10);}int main() {test01();system("pause");return EXIT_SUCCESS;}
总结:
- 子类对象可以直接访问到子类中同名成员
- 子类对象加作用域可以访问到父类同名成员
- 当子类与父类拥有同名的成员函数,子类会隐藏父类中同名成员函数,加作用域可以访问到父类中同名函数
继承中同名静态成员处理方式
问题:继承中同名的静态成员在子类对象上如何进行访问?
静态成员和非静态成员出现同名,处理方式一致
class Base { public: static void func() { cout << “Base - static void func()” << endl; } static void func(int a) { cout << “Base - static void func(int a)” << endl; }
static int m_A;
};
int Base::m_A = 100;
class Son : public Base { public: static void func() { cout << “Son - static void func()” << endl; } static int m_A; };
int Son::m_A = 200;
//同名成员属性 void test01() { //通过对象访问 cout << “通过对象访问: “ << endl; Son s; cout << “Son 下 m_A = “ << s.m_A << endl; cout << “Base 下 m_A = “ << s.Base::m_A << endl;
//通过类名访问cout << "通过类名访问: " << endl;cout << "Son 下 m_A = " << Son::m_A << endl;//第一个::代表通过类名方式访问,第二个::代表访问父类作用域下cout << "Base 下 m_A = " << Son::Base::m_A << endl;
}
//同名成员函数 void test02() { //通过对象访问 cout << “通过对象访问: “ << endl; Son s; s.func(); s.Base::func();
cout << "通过类名访问: " << endl;Son::func();Son::Base::func();//出现同名,子类会隐藏掉父类中所有同名成员函数,需要加作作用域访问Son::Base::func(100);
} int main() {
//test01();test02();system("pause");return 0;
}
**总结:同名静态成员处理方式和非静态处理方式一样,只不过有两种访问的方式(通过对象 和 通过类名)**<a name="jQJNr"></a>#### 多继承语法(不建议使用)C++允许**一个类继承多个类**<br />语法:class 子类 :继承方式 父类1 , 继承方式 父类2...<br />多继承可能会引发父类中有同名成员出现,需要加作用域区分<br />**C++实际开发中不建议用多继承**```cpp#include<iostream>#include<string>using namespace std;class Base1 {public:Base1(){m_A = 100;}public:int m_A;};class Base2 {public:Base2(){m_A = 200; //开始是m_B 不会出问题,但是改为mA就会出现不明确}public:int m_A;};//语法:class 子类:继承方式 父类1 ,继承方式 父类2class Son : public Base2, public Base1{public:Son(){m_C = 300;m_D = 400;}public:int m_C;int m_D;};//多继承容易产生成员同名的情况//通过使用类名作用域可以区分调用哪一个基类的成员void test01(){Son s;cout << "sizeof Son = " << sizeof(s) << endl;cout << s.Base1::m_A << endl;cout << s.Base2::m_A << endl;}int main() {test01();system("pause");return 0;}
总结: 多继承中如果父类中出现了同名情况,子类使用时候要加作用域
菱形继承问题及解决方法(用的比较少)
菱形继承概念:
两个派生类继承同一个基类
又有某个类同时继承者两个派生类
这种继承被称为菱形继承,或者钻石继承
#include<iostream>#include<string>using namespace std;class Animal{public:int m_Age;};//继承前加virtual关键字后,变为虚继承//此时公共的父类Animal称为虚基类class Sheep : virtual public Animal {};class Tuo : virtual public Animal {};class SheepTuo : public Sheep, public Tuo {};void test01(){SheepTuo st;st.Sheep::m_Age = 100;st.Tuo::m_Age = 200;//当菱形继承,两个父类拥有相同数据,需要加以作用域区分cout << "st.Sheep::m_Age = " << st.Sheep::m_Age << endl;cout << "st.Tuo::m_Age = " << st.Tuo::m_Age << endl;//利用虚继承解决同时继承两份数据的情况cout << "st.m_Age = " << st.m_Age << endl;}int main() {test01();system("pause");return 0;}
总结:
- 菱形继承带来的主要问题是子类继承两份相同的数据,导致资源浪费以及毫无意义
-
多态(*)
多态基本语法
多态是C++面向对象三大特性之一
多态分为两类 静态多态: 函数重载 和 运算符重载属于静态多态,复用函数名
- 动态多态: 派生类和虚函数实现运行时多态
静态多态和动态多态区别:
class Animal { public: //Speak函数就是虚函数 //函数前面加上virtual关键字,变成虚函数,那么编译器在编译的时候就不能确定函数调用了。 virtual void speak() { cout << “动物在说话” << endl; } };
class Cat :public Animal { public: //函数重写 函数返回值 函数名 参数列表 完全相同 void speak() { cout << “小猫在说话” << endl; } };
class Dog :public Animal { public:
void speak(){cout << "小狗在说话" << endl;}
}; //我们希望传入什么对象,那么就调用什么对象的函数 //如果函数地址在编译阶段就能确定,那么静态联编 //如果函数地址在运行阶段才能确定,就是动态联编
void DoSpeak(Animal& animal) //通过父类的指针实现 { animal.speak(); } // //多态满足条件: //1、有继承关系 //2、子类重写父类中的虚函数 //多态使用: //父类指针或引用指向子类对象
void test01() { Cat cat; DoSpeak(cat);
Dog dog;DoSpeak(dog);
}
int main() {
test01();system("pause");return 0;
}
总结:<br />多态满足条件:- 有继承关系- 子类重写父类中的虚函数多态使用条件:- 父类指针或引用指向子类对象重写:函数返回值类型 函数名 参数列表 完全一致称为重写<a name="InYAY"></a>#### 多态原理剖析<a name="tV9R4"></a>#### 多态案例一```cpp#include<iostream>#include<string>using namespace std;class Calculator{public:int getResult(string oper){if (oper == "+"){return m_Num1 + m_Num2;}else if (oper == "-"){return m_Num1 - m_Num2;}else if (oper == "*"){return m_Num1 * m_Num2;}}//如果想扩展新的功能,需要修改源码//在真实开发中,提倡 开闭原则//开闭原则:对扩展开放,对修改关闭int m_Num1; //操作数1int m_Num2; //操作数2};//利用多态实现计算器//多态优点://1、组织结构清晰//2、可读性强//3、有利于前期和后期的扩展和维护class AbstractCalculator : public Calculator{public:virtual int getResult(){return 0;}int m_Num1;int m_Num2;};//加法计算器类class AddCalculator : public AbstractCalculator{int getResult(){return m_Num1 + m_Num2;}};//减法计算器类class SubCalculator : public AbstractCalculator{public:int getResult(){return m_Num1 - m_Num2;}};//乘法计算器类class MulCalculator : public AbstractCalculator{public:int getResult(){return m_Num1 * m_Num2;}};void test01() //未使用多态的实现方法{Calculator c;c.m_Num1 = 10;c.m_Num2 = 10;cout << c.m_Num1<<"+" << c.m_Num2 << "=" << c.getResult("+") << endl;cout << c.m_Num1 << "-" << c.m_Num2 << "=" << c.getResult("-") << endl;cout << c.m_Num1 << "*" << c.m_Num2 << "=" << c.getResult("*") << endl;}void test02() //使用多态实现{//多态使用条件//父类指针或者引用指向子类对象//加法运算AbstractCalculator* abc = new AddCalculator;abc->m_Num1 = 10;abc->m_Num2 = 10;cout << abc->m_Num1 << "+" << abc->m_Num2 << "=" << abc->getResult() << endl;//堆区数据,使用完需要销毁delete abc;//减法运算abc = new SubCalculator;abc->m_Num1 = 100;abc->m_Num2 = 100;cout << abc->m_Num1 << "-" << abc->m_Num2 << "=" << abc->getResult() << endl;//堆区数据,使用完需要销毁delete abc;//乘法运算abc = new MulCalculator;abc->m_Num1 = 100;abc->m_Num2 = 100;cout << abc->m_Num1 << "*" << abc->m_Num2 << "=" << abc->getResult() << endl;//堆区数据,使用完需要销毁delete abc;}int main(){test02();system("pause");return 0;}
纯虚函数与抽象类
在多态中,通常父类中虚函数的实现是毫无意义的,主要都是调用子类重写的内容
因此可以将虚函数改为纯虚函数
纯虚函数语法:virtual 返回值类型 函数名 (参数列表)= 0 ;
当类中有了纯虚函数,这个类也称为抽象类
抽象类特点:
class Base { public: //纯虚函数 //类中只要有一个纯虚函数就称为抽象类 //抽象类无法实例化对象 //子类必须重写父类中的纯虚函数,否则也属于抽象类 virtual void func() = 0; };
class Son :public Base { public: virtual void func() { cout << “func调用” << endl; }; };
void test01() { Base * base = NULL; //base = new Base; // 错误,抽象类无法实例化对象 base = new Son; base->func(); delete base;//记得销毁 }
int main() {
test01();system("pause");return 0;
}
<a name="nKAnA"></a>#### 多态案列二:```cpp#include<iostream>#include<string>using namespace std;//制作饮品class AbstractDrinking{public://煮水virtual void Boil() = 0;//冲泡virtual void Brew() = 0;//倒入杯中virtual void PourInCup() = 0;//加入辅料virtual void PutSometing() = 0;//制作饮品void makeDrink(){Boil();Brew();PourInCup();PutSometing();}};class Coffee : public AbstractDrinking{public://煮水virtual void Boil(){cout << "煮农夫山泉" << endl;};//冲泡virtual void Brew(){cout << "冲泡" << endl;};//倒入杯中virtual void PourInCup(){cout << "倒入杯中" << endl;};//加入辅料virtual void PutSometing(){cout << "放入咖啡" << endl;};};class Tea : public AbstractDrinking{public://煮水virtual void Boil(){cout << "煮矿泉水" << endl;};//冲泡virtual void Brew(){cout << "冲泡" << endl;};//倒入杯中virtual void PourInCup(){cout << "倒入杯中" << endl;};//加入辅料virtual void PutSometing(){cout << "放入柠檬" << endl;};};void doWork(AbstractDrinking* abs){abs->makeDrink();}void test01(){//制作咖啡doWork(new Coffee);cout << "-----------" << endl;doWork(new Tea);}int main() {test01();system("pause");return 0;}
虚析构与纯虚析构
多态使用时,如果子类中有属性开辟到堆区,那么父类指针在释放时无法调用到子类的析构代码
解决方式:将父类中的析构函数改为虚析构或者**
虚析构和纯虚析构共性:
- 可以解决父类指针释放子类对象
- 都需要有具体的函数实现
虚析构和纯虚析构区别:
- 如果是纯虚析构,该类属于抽象类,无法实例化对象
虚析构语法:virtual ~类名(){}
纯虚析构语法:virtual ~类名() = 0;类名::~类名(){}
#include<iostream>#include<string>using namespace std;//虚析构与纯虚析构class Animal {public:Animal(){cout << "Animal 构造函数调用!" << endl;}virtual void Speak() = 0;//析构函数加上virtual关键字,变成虚析构函数//virtual ~Animal()//{// cout << "Animal虚析构函数调用!" << endl;//}virtual ~Animal() = 0; ///纯虚析构};Animal::~Animal(){cout << "Animal 纯虚析构函数调用!" << endl;}//和包含普通纯虚函数的类一样,包含了纯虚析构函数的类也是一个抽象类。不能够被实例化。class Cat : public Animal {public:Cat(string name){cout << "Cat构造函数调用!" << endl;m_Name = new string(name);}virtual void Speak(){cout << *m_Name << "小猫在说话!" << endl;}~Cat(){cout << "Cat析构函数调用!" << endl;if (this->m_Name != NULL) {delete m_Name;m_Name = NULL;}}public:string* m_Name;};void test01(){Animal* animal = new Cat("Tom");animal->Speak();//通过父类指针去释放,会导致子类对象可能清理不干净,造成内存泄漏//怎么解决?给基类增加一个虚析构函数//虚析构函数就是用来解决通过父类指针释放子类对象delete animal;}int main() {test01();system("pause");return 0;}
总结:
1. 虚析构或纯虚析构就是用来解决通过父类指针释放子类对象
2. 如果子类中没有堆区数据,可以不写为虚析构或纯虚析构
3. 拥有纯虚析构函数的类也属于抽象类
案列三
电脑主要组成部件为 CPU(用于计算),显卡(用于显示),内存条(用于存储)
将每个零件封装出抽象基类,并且提供不同的厂商生产不同的零件,例如Intel厂商和Lenovo厂商
创建电脑类提供让电脑工作的函数,并且调用每个零件工作的接口
测试时组装三台不同的电脑进行工作。
#include<iostream>#include<string>#include<vector>using namespace std;//抽象不同的类class CPU{public:virtual void calculate() = 0;};class VideoCard{public:virtual void display() = 0;};class Memory{public:virtual void storage() = 0;};class Computer{public:Computer(CPU* cpu, VideoCard* vc, Memory* mem){m_cpu = cpu;m_vc = vc;m_mem = mem;}//提供工作函数void work(){//让零件工作起来m_cpu->calculate();m_vc->display();m_mem->storage();}//提供析构函数 释放3各电脑零件~Computer(){if (m_cpu != NULL){delete m_cpu;m_cpu = NULL;}if (m_vc != NULL){delete m_vc;m_vc = NULL;}if (m_mem != NULL){delete m_mem;m_mem = NULL;}}private:CPU* m_cpu; //CPU的指针VideoCard* m_vc; //显卡的指针Memory* m_mem; //内存的指针};//具体厂商//Intel厂商class IntelCPU : public CPU{public:virtual void calculate(){cout << "Intel的CPU开始计算了!" << endl;}};class IntelVideoCard : public VideoCard{public:virtual void display(){cout << "Intel的显卡开始显示了!" << endl;}};class IntelMemory : public Memory{public:virtual void storage(){cout << "Intel的内存开始存储了!" << endl;}};//Lenovo厂商class LenovoCPU : public CPU{public:virtual void calculate(){cout << "ILenovo的CPU开始计算了!" << endl;}};class LenovoVideoCard : public VideoCard{public:virtual void display(){cout << "Lenovo的显卡开始显示了!" << endl;}};class LenovoMemory : public Memory{public:virtual void storage(){cout << "Lenovo的内存开始存储了!" << endl;}};void test01(){//第一台电脑零件CPU* intelcpu = new IntelCPU;VideoCard* intelCard = new IntelVideoCard;Memory* intelMem = new IntelMemory;//创建第一台电脑Computer* computer1 = new Computer(intelcpu, intelCard, intelMem);computer1->work();delete computer1;cout << "-------------------------------" << endl;cout << "第二台电脑开始工作" << endl;//创建第二台电脑Computer* computer2 = new Computer(new LenovoCPU, new LenovoVideoCard,new LenovoMemory);computer2->work();delete computer2;cout << "-------------------------------" << endl;cout << "第三台电脑开始工作" << endl;//创建第三台电脑Computer* computer3 = new Computer(new LenovoCPU, new IntelVideoCard, new LenovoMemory);computer3->work();delete computer3;}int main(){test01();system("pause");return 0;}
文件操作
文本文件
写文件
写文件步骤如下:
- 包含头文件
#include - 创建流对象
ofstream ofs; - 打开文件
ofs.open(“文件路径”,打开方式); - 写数据
ofs << “写入的数据”; - 关闭文件
ofs.close();
文件打开方式:
| 打开方式 | 解释 |
|---|---|
| ios::in | 为读文件而打开文件 |
| ios::out | 为写文件而打开文件 |
| ios::ate | 初始位置:文件尾 |
| ios::app | 追加方式写文件 |
| ios::trunc | 如果文件存在先删除,再创建 |
| ios::binary | 二进制方式 |
注意: 文件打开方式可以配合使用,利用|操作符
例如:用二进制方式写文件 **ios::binary | ios:: out**
示例:
#include<iostream>#include <fstream>using namespace std;void test01(){//1、包含头文件 fstream//2、创建流对象ofstream ofs;//3、指定打开方式ofs.open("test.txt", ios::out);//4、写文件ofs << "姓名:张三" << endl;ofs << "性别:男" << endl;ofs << "年龄:18" << endl;//5、关闭文件ofs.close();}int main() {test01();system("pause");return 0;}
总结:
- 文件操作必须包含头文件 fstream
- 读文件可以利用 ofstream ,或者fstream类
- 打开文件时候需要指定操作文件的路径,以及打开方式
- 利用<<可以向文件中写数据
- 操作完毕,要关闭文件
读文件
读文件与写文件步骤相似,但是读取方式相对于比较多
读文件步骤如下:
- 包含头文件
#include - 创建流对象
ifstream ifs; - 打开文件并判断文件是否打开成功
ifs.open(“文件路径”,打开方式); - 读数据
四种方式读取 - 关闭文件
ifs.close();
示例:
#include <fstream>#include <string>void test01(){//1、包含头文件//2、创建流对象ifstream ifs;//3、打开文件,并且判断是否打开成功ifs.open("test.txt", ios::in);//4、判断是否打开成功if (!ifs.is_open()){cout << "文件打开失败" << endl;return;}//5、读文件//第一种方式//char buf[1024] = { 0 };//while (ifs >> buf)//{// cout << buf << endl;//}//第二种//char buf[1024] = { 0 };//while (ifs.getline(buf,sizeof(buf)))//{// cout << buf << endl;//}//第三种string buf;while (getline(ifs, buf)){cout << buf << endl;}//第四种(不推荐)//char c;//while ((c = ifs.get()) != EOF)//{// cout << c;//}//6、关闭文件ifs.close();}int main() {test01();system("pause");return 0;}
总结:
- 读文件可以利用 ifstream ,或者fstream类
- 利用is_open函数可以判断文件是否打开成功
- close 关闭文件
二进制文件(?)
写文件
二进制方式写文件主要利用流对象调用成员函数write
函数原型 :ostream& write(const char * buffer,int len);
参数解释:字符指针buffer指向内存中一段存储空间。len是读写的字节数
示例: ```cinclude
include
include
using namespace std;
class Person { public: char m_Name[64]; int m_Age; };
//二进制文件 写文件 void test01() { //1、包含头文件
//2、创建输出流对象ofstream ofs("person.txt", ios::out | ios::binary);//3、打开文件//ofs.open("person.txt", ios::out | ios::binary);Person p = { "张三" , 18 };//4、写文件ofs.write((const char*)&p, sizeof(p));//5、关闭文件ofs.close();
}
int main() {
test01();system("pause");return 0;
}
总结:- 文件输出流对象 可以通过write函数,以二进制方式写数据<a name="G27si"></a>#### 读文件二进制方式读文件主要利用流对象调用成员函数read<br />函数原型:`istream& read(char *buffer,int len);`<br />参数解释:字符指针buffer指向内存中一段存储空间。len是读写的字节数<br />示例:```c#include<iostream>#include <fstream>#include <string>using namespace std;class Person{public:char m_Name[64];int m_Age;};//二进制文件 读文件void test01(){//1、包含头文件//2、创建流文件ifstream ifs("person.txt", ios::in | ios::binary);//3、判断文件是否打开成功if (!ifs.is_open()){cout << "文件打开失败" << endl;}//4、读文件Person p;ifs.read((char*)&p, sizeof(p));cout << "姓名: " << p.m_Name << " 年龄: " << p.m_Age << endl;//5、关闭文件ifs.close();}int main() {test01();system("pause");return 0;}
退出功能
创建职工类
在workerManager.cpp中的构造函数追加代码:
//文件存在,并且没有记录char ch;ifs >> ch;if (ifs.eof()){cout << "文件为空!" << endl;this->m_EmpNum = 0;this->m_FileIsEmpty = true;this->m_EmpArray = NULL;ifs.close();return;}
追加代码位置如图:
将文件创建后清空文件内容,并测试该情况下初始化功能
我们发现文件不存在或者为空清空 m_FileIsEmpty 判断文件是否为空的标志都为真,那何时为假?
成功添加职工后,应该更改文件不为空的标志
在void WorkerManager::Add_Emp()成员函数中添加:
//更新职工不为空标志this->m_FileIsEmpty = false;
- 文件存在且保存职工数据
在workerManager.h中添加成员函数 int get_EmpNum();
//统计人数int get_EmpNum();
workerManager.cpp中实现
int WorkerManager::get_EmpNum(){ifstream ifs;ifs.open(FILENAME, ios::in);int id;string name;int dId;int num = 0;while (ifs >> id && ifs >> name && ifs >> dId){//记录人数num++;}ifs.close();return num;}
在workerManager.cpp构造函数中继续追加代码:
int num = this->get_EmpNum();cout << "职工个数为:" << num << endl; //测试代码this->m_EmpNum = num; //更新成员属性
手动添加一些职工数据,测试获取职工数量函数
初始化数组
根据职工的数据以及职工数据,初始化workerManager中的Worker ** m_EmpArray 指针
在WorkerManager.h中添加成员函数 void init_Emp();
//初始化员工void init_Emp();
在WorkerManager.cpp中实现
void WorkerManager::init_Emp(){ifstream ifs;ifs.open(FILENAME, ios::in);int id;string name;int dId;int index = 0;while (ifs >> id && ifs >> name && ifs >> dId){Worker * worker = NULL;//根据不同的部门Id创建不同对象if (dId == 1) // 1普通员工{worker = new Employee(id, name, dId);}else if (dId == 2) //2经理{worker = new Manager(id, name, dId);}else //总裁{worker = new Boss(id, name, dId);}//存放在数组中this->m_EmpArray[index] = worker;index++;}}
在workerManager.cpp构造函数中追加代码
//根据职工数创建数组this->m_EmpArray = new Worker *[this->m_EmpNum];//初始化职工init_Emp();//测试代码for (int i = 0; i < m_EmpNum; i++){cout << "职工号: " << this->m_EmpArray[i]->m_Id<< " 职工姓名: " << this->m_EmpArray[i]->m_Name<< " 部门编号: " << this->m_EmpArray[i]->m_DeptId << endl;}
运行程序,测试从文件中获取的数据
至此初始化数据功能完毕,测试代码可以注释或删除掉!
显示职工
模板
模板概念
函数模板
函数模板语法
函数模板注意事项
普通函数与函数的
类模板
类模板语法
STL(标准模板库)初识
STL基本概念
- STL(Standard Template Library,标准模板库)
- STL 从广义上分为: 容器(container) 算法(algorithm) 迭代器(iterator)
- 容器和算法之间通过迭代器进行无缝连接。
- STL 几乎所有的代码都采用了模板类或者模板函数
STL六大组件
STL大体分为六大组件,分别是:容器、算法、迭代器、仿函数、适配器(配接器)、空间配置器
- 容器:各种数据结构,如vector、list、deque、set、map等,用来存放数据。
- 算法:各种常用的算法,如sort、find、copy、for_each等
- 迭代器:扮演了容器与算法之间的胶合剂。
- 仿函数:行为类似函数,可作为算法的某种策略。
- 适配器:一种用来修饰容器或者仿函数或迭代器接口的东西。
- 空间配置器:负责空间的配置与管理

若有收获,就点个赞吧
0 人点赞
