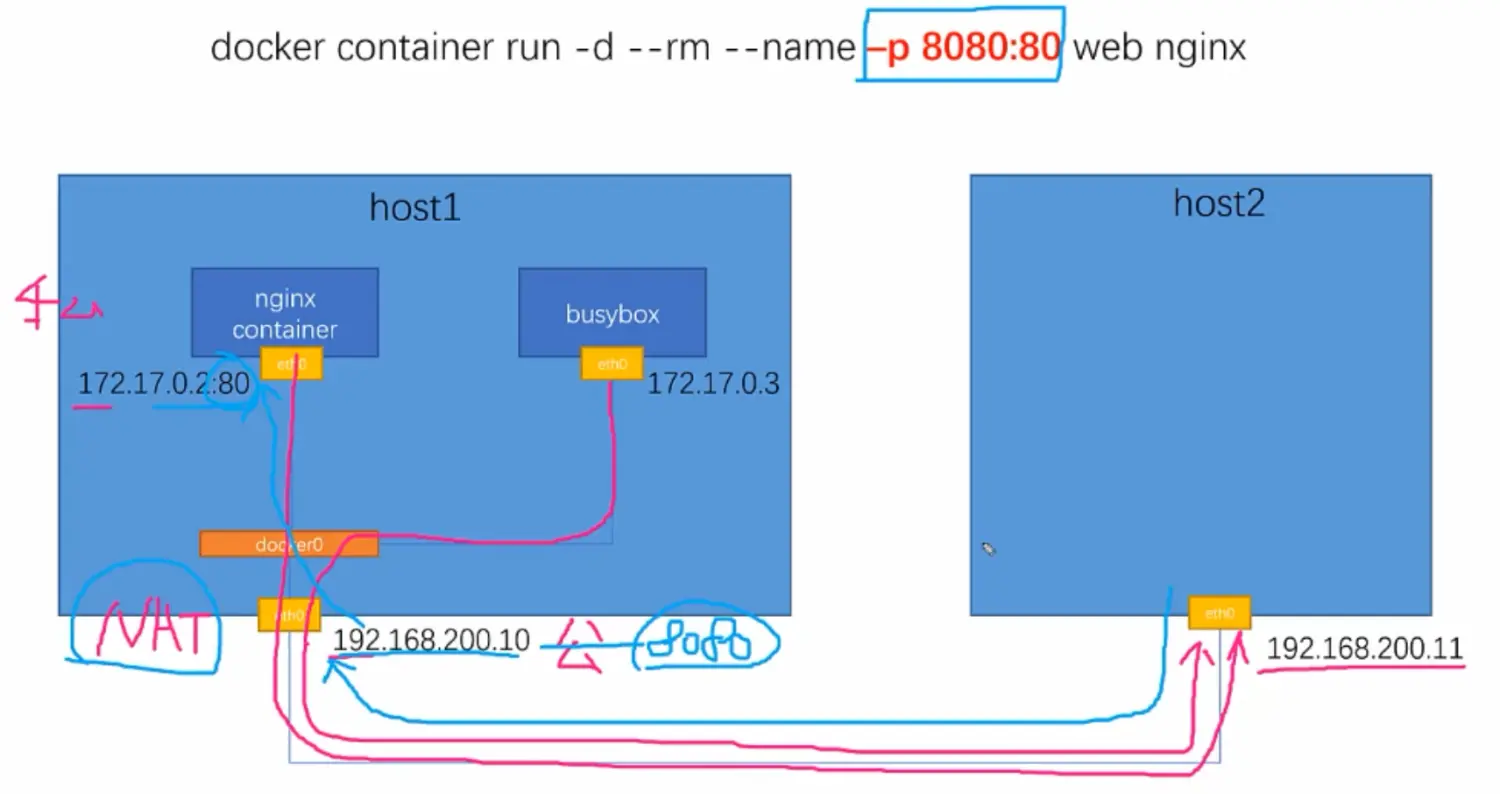
转发过程
要实现host2能够访问host1的172.17.0.2:80的Nginx服务,需要进行端口转发。
首先host1与host2能够相互ping通。其中host1中的容器(nginx和busybox)可通过docker的NAT(容器ip为私网,宿主机为公网)功能访问到外网,也就能访问到host2。但是host1中两个容器的ip未在host2的路由表中,所以host2不能直接访问到host1的nginx。此时就需要nginx容器和宿主机host1进行端口转发,将内部的80端口映射到宿主机host1的8080端口。这样host2就能通过host1的8080端口访问到host1的nginx80端口了。
docker中使用-p <外网端口>:<内网端口>来实现端口转发,如:docker container run -d --rm --name web -p 8080:80 nginx。此过程中实际是iptables在生效。
查看iptables(iptables -t nat -nvxL | grep -A 5 'Chain DOCKER')信息发现,iptables增加了DNAT(Destination NAT)规则,此规则将宿主机的8080转发为172.17.0.4即容器nginx的80端口
端口转发实战
Note 查看容器的指定信息,可以通过
docker container inspect --format '{{detail}}' <container_name>来实现,如docker container inspect --format '{{.NetworkSettings.IPAddress}}' web
- 创建nginx容器进行端口转发并查看容器的ip
- web容器将nginx的80端口映射为宿主机的8080端口
[root@localhost ~]# docker container run -d --rm --name web -p 8080:80 nginxUnable to find image 'nginx:latest' locallylatest: Pulling from library/nginxe5ae68f74026: Pull complete21e0df283cd6: Pull completeed835de16acd: Pull complete881ff011f1c9: Pull complete77700c52c969: Pull complete44be98c0fab6: Pull completeDigest: sha256:9522864dd661dcadfd9958f9e0de192a1fdda2c162a35668ab6ac42b465f0603Status: Downloaded newer image for nginx:latesta155f83b05ffae86bfe37db7f095d831c07c3c2aa401b0013603206e34bdf558[root@localhost ~]#[root@localhost ~]# docker container inspect --format '{{.NetworkSettings.IPAddress}}' web172.17.0.4[root@localhost ~]#[root@localhost ~]# docker run -d --rm --name client busybox /bin/sh -c "while true; do sleep 3600; done"82e754694e9ecd5dfe542eeaaccc5882977d30bc6e58699a5409c66aff08b624[root@localhost ~]#[root@localhost ~]# docker container inspect --format '{{.NetworkSettings.IPAddress}}' client172.17.0.5
client容器访问web容器并下载对应的html文件
[root@localhost ~]# docker container exec -it client wget http://172.17.0.4Connecting to 172.17.0.4 (172.17.0.4:80)saving to 'index.html'index.html 100% |*****************************************************************************************************| 615 0:00:00 ETA'index.html' saved
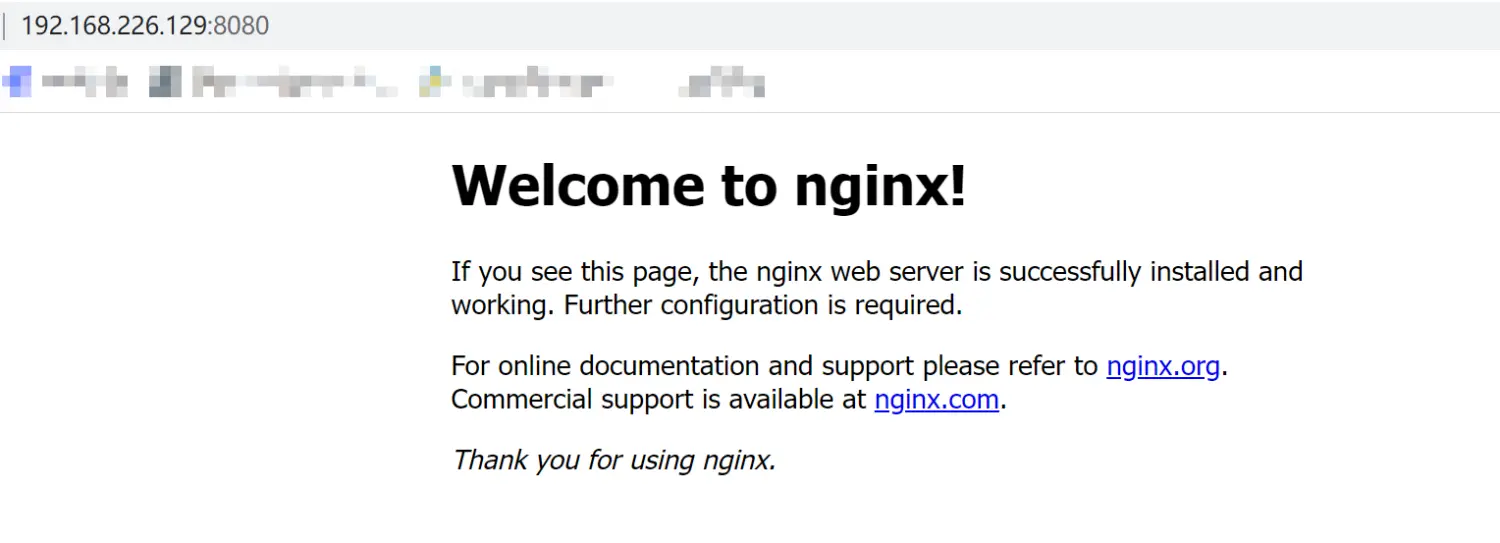
宿主机访问本机的8080端口,能够访问到web的nginx
[root@localhost ~]# curl 127.0.0.1:8080<!DOCTYPE html><html><head><title>Welcome to nginx!</title><style>html { color-scheme: light dark; }body { width: 35em; margin: 0 auto;font-family: Tahoma, Verdana, Arial, sans-serif; }</style></head><body><h1>Welcome to nginx!</h1><p>If you see this page, the nginx web server is successfully installed andworking. Further configuration is required.</p><p>For online documentation and support please refer to<a href="http://nginx.org/">nginx.org</a>.<br/>Commercial support is available at<a href="http://nginx.com/">nginx.com</a>.</p><p><em>Thank you for using nginx.</em></p></body></html>
在web端访问宿主机的8080端口

若有收获,就点个赞吧
0 人点赞
