1. RBAC 权限模型
1.1 模型介绍
其基本思想是,对系统操作的各种权限不是直接授予具体的用户,而是在用户与权限之间建立一个角色。
每一种角色对应一组相应的权限。一旦用户被分配了适当的角色后,该用户就拥有此角色的所有操作权限。
优点:
可以简化用户的权限管理;
不必在每次创建用户时都进行分配权限的操作,只需给用户分配相应的角色即可,方便批量改变相同角色的一组用户的权限。
权限管理分认证和授权两部分
认证:用户通过有效凭证才可以登入系统访问系统资源;
授权:为用户授予分配好的角色和权限;(角色一般使用角色名称来表示,权限可以使用预定义好的权限名称 或 资源的URI来表示)
授权检查:用户访问系统资源,检查是否有访问该资源的权限。
1.2 权限解决方案
细粒度的权限解决方案,要控制到对资源的访问,我们的解决方案思路:
角色:只作为连接用户和权限的桥梁,方便后台给用户分配权限。
权限:可以是资源的URI,也可是是预定义好的一些权限名称。
- 方案一: 方法调用权限控制,在方法上通过注解设置权限名称,调用该方法时,和用户拥有的权限名称匹配,完成权限检查。
- 方案二: 动态URL权限控制,通过请求的URI和用户已经拥有的URI资源匹配完成权限查。
辅助方案: 对前后端不分类的系统,可以在页面或模板中使用扩展的安全标签,控制客户端页面只显示用户有权限访问的资源的链接或按钮。
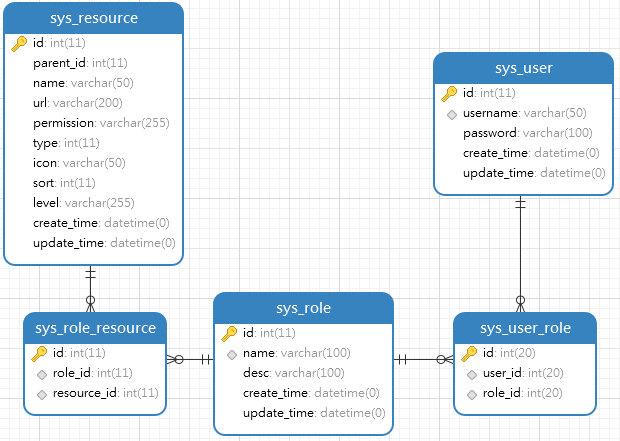
1.3 数据库设计
1.4 初始化数据库
数据库脚本:
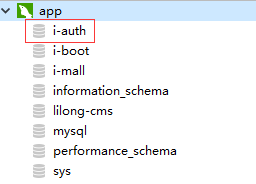
i-auth.sql2. 开发环境准备
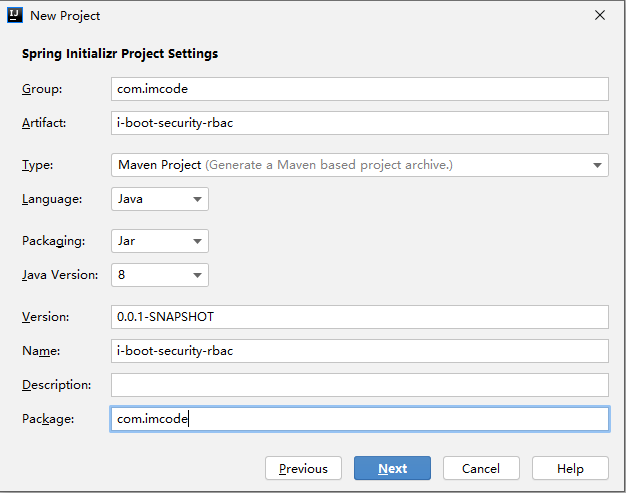
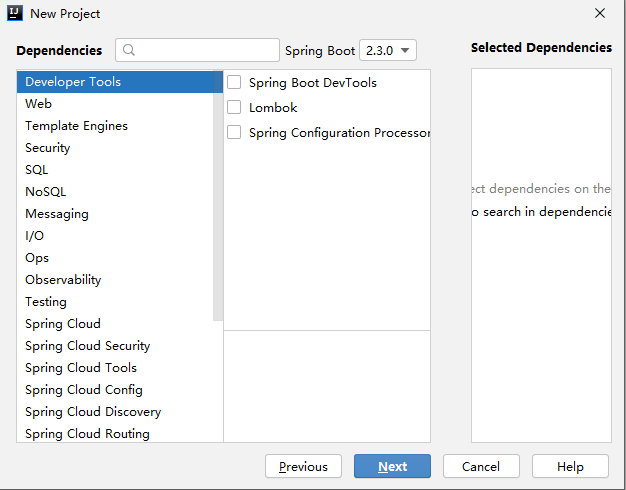
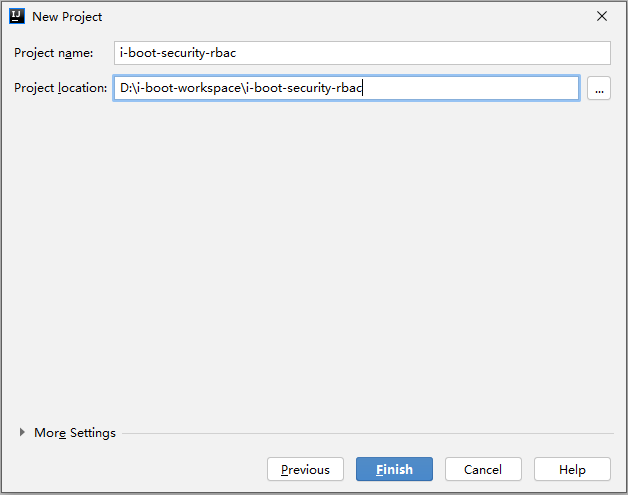
2.1 创建 Maven 工程
2.2 引入项目依赖
<?xml version="1.0" encoding="UTF-8"?><project xmlns="http://maven.apache.org/POM/4.0.0" xmlns:xsi="http://www.w3.org/2001/XMLSchema-instance"xsi:schemaLocation="http://maven.apache.org/POM/4.0.0 https://maven.apache.org/xsd/maven-4.0.0.xsd"><modelVersion>4.0.0</modelVersion><parent><groupId>org.springframework.boot</groupId><artifactId>spring-boot-starter-parent</artifactId><version>2.3.0.RELEASE</version><relativePath/> <!-- lookup parent from repository --></parent><groupId>com.imcode</groupId><artifactId>i-boot-security-rbac</artifactId><version>0.0.1-SNAPSHOT</version><name>i-boot-security-rbac</name><properties><java.version>1.8</java.version></properties><dependencies><dependency><groupId>org.springframework.boot</groupId><artifactId>spring-boot-starter-web</artifactId></dependency><dependency><groupId>org.springframework.boot</groupId><artifactId>spring-boot-starter-thymeleaf</artifactId></dependency><dependency><groupId>org.springframework.boot</groupId><artifactId>spring-boot-starter-security</artifactId></dependency><dependency><groupId>org.thymeleaf.extras</groupId><artifactId>thymeleaf-extras-springsecurity5</artifactId></dependency><dependency><groupId>mysql</groupId><artifactId>mysql-connector-java</artifactId><version>5.1.47</version></dependency><dependency><groupId>com.alibaba</groupId><artifactId>druid-spring-boot-starter</artifactId><version>1.1.22</version></dependency><dependency><groupId>com.baomidou</groupId><artifactId>mybatis-plus-boot-starter</artifactId><version>3.3.1</version></dependency><dependency><groupId>com.baomidou</groupId><artifactId>mybatis-plus-generator</artifactId><version>3.3.1</version></dependency><dependency><groupId>org.freemarker</groupId><artifactId>freemarker</artifactId><version>2.3.30</version></dependency><dependency><groupId>org.projectlombok</groupId><artifactId>lombok</artifactId><scope>provided</scope></dependency><dependency><groupId>org.springframework.boot</groupId><artifactId>spring-boot-devtools</artifactId><scope>runtime</scope><optional>true</optional></dependency><dependency><groupId>org.springframework.boot</groupId><artifactId>spring-boot-starter-test</artifactId><scope>test</scope><exclusions><exclusion><groupId>org.junit.vintage</groupId><artifactId>junit-vintage-engine</artifactId></exclusion></exclusions></dependency></dependencies><build><plugins><plugin><groupId>org.springframework.boot</groupId><artifactId>spring-boot-maven-plugin</artifactId><configuration><fork>true</fork></configuration></plugin></plugins></build></project>
2.3 添加配置文件
spring:
datasource:
  url: jdbc:mysql://127.0.0.1:3306/i-auth?useSSL=false&serverTimezone=Asia/Shanghai
  username: root
  password: 123456
  type: com.alibaba.druid.pool.DruidDataSource
mybatis-plus:
mapper-locations: classpath*:/mapper/**/*.xml
2.4 启动类

增加 MyBatis Mapper 接口扫描注解: ```java package com.imcode;
import org.mybatis.spring.annotation.MapperScan; import org.springframework.boot.SpringApplication; import org.springframework.boot.autoconfigure.SpringBootApplication;
@SpringBootApplication @MapperScan(“com.imcode.*.mapper”) public class IBootSecurityRbacApplication {
public static void main(String[] args) {
    SpringApplication.run(IBootSecurityRbacApplication.class, args);
}
}
<a name="7x73K"></a>
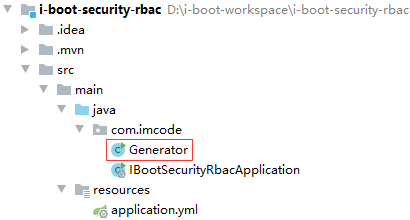
## 2.5 代码生成器
```java
package com.imcode;
import com.baomidou.mybatisplus.core.exceptions.MybatisPlusException;
import com.baomidou.mybatisplus.core.toolkit.StringPool;
import com.baomidou.mybatisplus.core.toolkit.StringUtils;
import com.baomidou.mybatisplus.generator.AutoGenerator;
import com.baomidou.mybatisplus.generator.InjectionConfig;
import com.baomidou.mybatisplus.generator.config.*;
import com.baomidou.mybatisplus.generator.config.po.TableInfo;
import com.baomidou.mybatisplus.generator.config.rules.NamingStrategy;
import com.baomidou.mybatisplus.generator.engine.FreemarkerTemplateEngine;
import java.util.ArrayList;
import java.util.List;
import java.util.Scanner;
/**
* 代码生成器
*/
public class Generator {
/**
* 读取控制台内容
*/
public static String scanner(String tip) {
Scanner scanner = new Scanner(System.in);
StringBuilder help = new StringBuilder();
help.append("请输入" + tip + ":");
System.out.println(help.toString());
if (scanner.hasNext()) {
String ipt = scanner.next();
if (StringUtils.isNotBlank(ipt)) {
return ipt;
}
}
throw new MybatisPlusException("请输入正确的" + tip + "!");
}
public static void main(String[] args) {
// 代码生成器
AutoGenerator mpg = new AutoGenerator();
// 全局配置
GlobalConfig gc = new GlobalConfig();
String projectPath = System.getProperty("user.dir");
gc.setOutputDir(projectPath + "/src/main/java");
gc.setAuthor("jack");
gc.setOpen(false);
// gc.setSwagger2(true); // 实体属性Swagger2注解
gc.setBaseResultMap(true);
gc.setBaseColumnList(true);
mpg.setGlobalConfig(gc);
// 数据源配置
DataSourceConfig dsc = new DataSourceConfig();
dsc.setUrl("jdbc:mysql://localhost:3306/i-auth?useSSL=false");
dsc.setDriverName("com.mysql.jdbc.Driver");
dsc.setUsername("root");
dsc.setPassword("123456");
mpg.setDataSource(dsc);
// 包配置
PackageConfig pc = new PackageConfig();
pc.setModuleName(scanner("模块名"));
pc.setParent("com.imcode");
mpg.setPackageInfo(pc);
// 自定义配置
InjectionConfig cfg = new InjectionConfig() {
@Override
public void initMap() {
// to do nothing
}
};
List<FileOutConfig> focList = new ArrayList<>();
focList.add(new FileOutConfig("/templates/mapper.xml.ftl") {
@Override
public String outputFile(TableInfo tableInfo) {
// 自定义输入文件名称
return projectPath + "/src/main/resources/mapper/" + pc.getModuleName()
+ "/" + tableInfo.getEntityName() + "Mapper" + StringPool.DOT_XML;
}
});
cfg.setFileOutConfigList(focList);
mpg.setCfg(cfg);
mpg.setTemplate(new TemplateConfig().setXml(null));
// 策略配置
StrategyConfig strategy = new StrategyConfig();
strategy.setNaming(NamingStrategy.underline_to_camel);
strategy.setColumnNaming(NamingStrategy.underline_to_camel);
strategy.setEntityLombokModel(true); // 使用Lombok插件
strategy.setInclude(scanner("表名"));
//strategy.setSuperServiceClass("com.imcode.common.service.IService");
//strategy.setSuperServiceImplClass("com.imcode.common.service.impl.ServiceImpl");
// Controller配置
strategy.setSkipView(false);
strategy.setControllerMappingHyphenStyle(true);
strategy.setRestControllerStyle(false); //@Controller @RestController
//strategy.setTablePrefix(pc.getModuleName() + "_");
mpg.setStrategy(strategy);
// 选择 freemarker 引擎需要指定如下加,注意 pom 依赖必须有!
mpg.setTemplateEngine(new FreemarkerTemplateEngine());
mpg.execute();
}
}
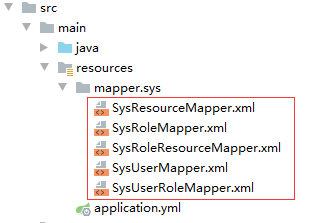
2.6 代码自动生成
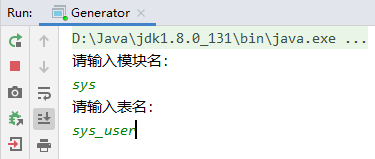
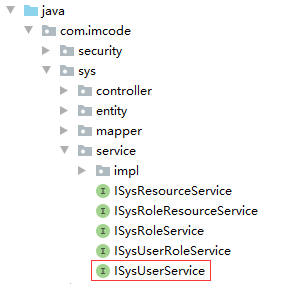
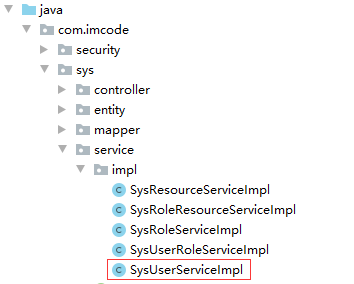
运行代码生成器的main 方法,自动生成sys_user、sys_role、sys_user_role、sys_resource、sys_role_resource 五张表的Entity、Mapper接口、Mapper映射文件、Service接口和实现、控制器。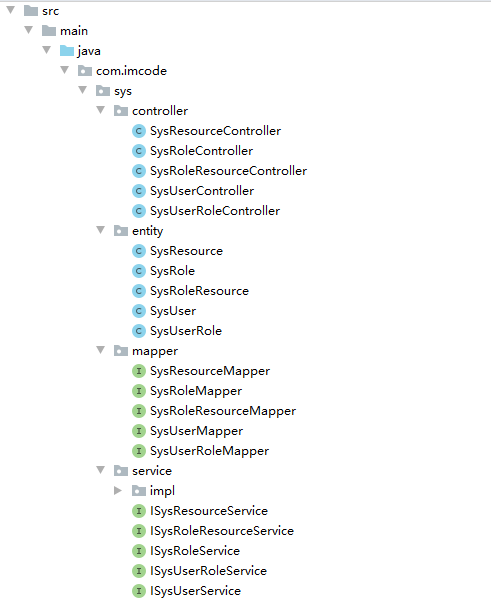
3. 集成 SpringSecurity
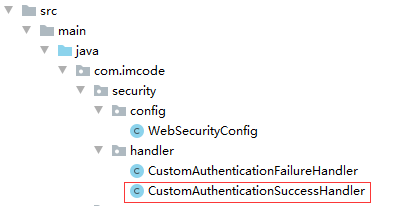
3.1 CustomAuthenticationSuccessHandler
package com.imcode.security.handler;

import com.fasterxml.jackson.databind.ObjectMapper;
import org.springframework.security.core.Authentication;
import org.springframework.security.web.authentication.AuthenticationSuccessHandler;
import org.springframework.stereotype.Component;

import javax.annotation.Resource;
import javax.servlet.http.HttpServletRequest;
import javax.servlet.http.HttpServletResponse;
import java.io.IOException;
import java.util.HashMap;
import java.util.Map;

/**
 * 处理登录成功的处理逻辑
 */
@Component
public class CustomAuthenticationSuccessHandler implements AuthenticationSuccessHandler {

    @Resource
    private ObjectMapper objectMapper;
    /**
     * 重写登录成功后的处理逻辑
     * @param request
     * @param response
     * @param authentication
     * @throws IOException
     */
    @Override
    public void onAuthenticationSuccess(
            HttpServletRequest request, HttpServletResponse response, Authentication authentication)
            throws IOException {
        Map<String, String> result = new HashMap<>();
        result.put("code", "0");
        result.put("msg", "登录成功");
        response.setContentType("application/json;charset=UTF-8");
        response.getWriter().write(objectMapper.writeValueAsString(result));
    }
}
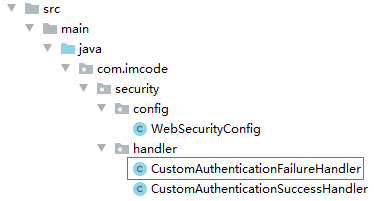
3.2 CustomAuthenticationFailureHandler
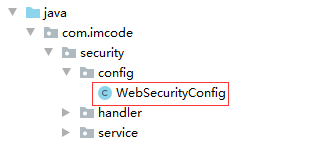
3.3 WebSecurityConfig 配置

package com.imcode.security.config;

import com.imcode.security.handler.CustomAuthenticationFailureHandler;
import com.imcode.security.handler.CustomAuthenticationSuccessHandler;
import org.springframework.context.annotation.Bean;
import org.springframework.security.config.annotation.web.builders.HttpSecurity;
import org.springframework.security.config.annotation.web.configuration.EnableWebSecurity;
import org.springframework.security.config.annotation.web.configuration.WebSecurityConfigurerAdapter;
import org.springframework.security.crypto.bcrypt.BCryptPasswordEncoder;
import org.springframework.security.crypto.password.PasswordEncoder;

import javax.annotation.Resource;

@EnableWebSecurity
public class WebSecurityConfig extends WebSecurityConfigurerAdapter {

    @Resource
    private CustomAuthenticationFailureHandler authenticationFailureHandler;
    @Resource
    private CustomAuthenticationSuccessHandler authenticationSuccessHandler;

    @Override
    protected void configure(HttpSecurity http) throws Exception {
        http.authorizeRequests()
                // js和css下的静态资源不需要认证
                .antMatchers("/js/**", "/css/**").permitAll()
                .anyRequest().authenticated() // 其它资源需要认证通过才能访问

                .and()
                .formLogin()
                .loginPage("/login")  // 登录页面的URL
                .loginProcessingUrl("/login") // 处理登录请求的 URL
                .successHandler(authenticationSuccessHandler) // 登录成功后的处理逻辑
                .failureHandler(authenticationFailureHandler)  // 登录失败后的处理逻辑
                .permitAll() // 登录相关资源不需要认证就可以访问

                .and()
                .csrf().disable(); // 禁用跨域请求伪造防护,后续讲解
    }
}
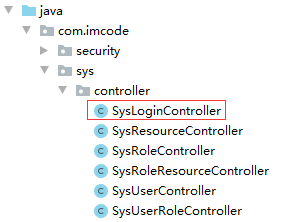
3.4 SysLoginController
package com.imcode.sys.controller;

import org.springframework.stereotype.Controller;
import org.springframework.web.bind.annotation.GetMapping;

@Controller
public class SysLoginController {

    @GetMapping("/login")
    public String login() {
        return "login";
    }
}
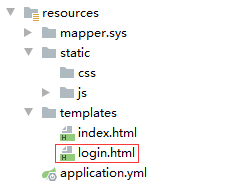
3.5 登录页面
<!DOCTYPE html>
<html xmlns:th="http://www.thymeleaf.org">
<head>
<meta charset="UTF-8">
<title>系统登录</title>
</head>
<body>
<h1>登录页面</h1>
<form id="form-login" method="post">
<p class="error"></p>
用户名:<input type="text" name="username"/><br/>
密 码:<input type="password" name="password"/><br/>
<input type="button" id="btn-login" value="登录"/>
</form>
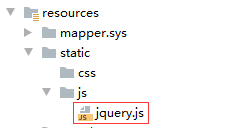
<script th:src="@{/js/jquery.js}"></script>
<script th:inline="javascript">
const ctx = [[${#httpServletRequest.getContextPath()}]];
$('#btn-login').bind('click',function () {
$.ajax({
url: ctx + '/login',
type: 'post',
data: $('#form-login').serialize(),
success: function (response) {
console.log(response);
if (response.code == 0) {
window.location.href = ctx + '/';
} else {
$('.error').text(response.msg);
}
}
});
})
</script>
</body>
</html>
3.6 初始化页面
<!DOCTYPE html>
<html xmlns:th="http://www.thymeleaf.org"
      xmlns:sec="http://www.thymeleaf.org/thymeleaf-extras-springsecurity5">
<head>
    <meta charset="UTF-8">
    <title>系统初始化页面</title>
</head>
<body>

<div>
    Hello Spring Security
    <hr>
    <a th:href="@{/logout}">注销</a>
</div>
</body>
</html>
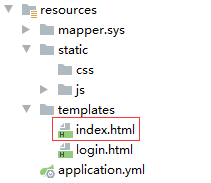
3.7 静态资源
验证系统登录和退出功能是否正常。
4. 从数据库加载用户信息
实际项目开发中,用户、角色、权限信息都是存储在关系型数据库,Spring Security 提供的user用户功能有限,实际开发中需要扩展成自己的用户信息。
自定义用户信息只需要实现 UserDetailsService 接口中的 loadUserByUsername 方法即可,该方法返回一个 UserDetails 对象。该对象存储用户的用户名、密码、角色、权限等信息。
我们首选需要实现一个通过用户名从数据库获取用户信息的方法,获取到用户信息以后,还需要一个通过用户ID获取到用户的授权资源的方法。
4.1 通过用户名获取用户
4.1.1 Service 接口
package com.imcode.sys.service;

import com.imcode.sys.entity.SysUser;
import com.baomidou.mybatisplus.extension.service.IService;

/**
 * <p>
 * 系统用户 服务类
 * </p>
 *
 * @author jack
 * @since 2020-05-17
 */
public interface ISysUserService extends IService<SysUser> {

    /**
     * 根据用户名查询用户信息
     * @param username
     * @return
     */
    SysUser getByUsername(String username);
}
4.1.2 Service 接口实现
package com.imcode.sys.service.impl;

import com.baomidou.mybatisplus.core.conditions.query.QueryWrapper;
import com.imcode.sys.entity.SysUser;
import com.imcode.sys.mapper.SysUserMapper;
import com.imcode.sys.service.ISysUserService;
import com.baomidou.mybatisplus.extension.service.impl.ServiceImpl;
import org.springframework.stereotype.Service;

/**
 * <p>
 * 系统用户 服务实现类
 * </p>
 *
 * @author jack
 * @since 2020-05-17
 */
@Service
public class SysUserServiceImpl extends ServiceImpl<SysUserMapper, SysUser>
implements ISysUserService {

    /**
     * 根据用户名查询用户
     * @param username
     * @return
     */
    public SysUser getByUsername(String username) {
        // 1. 通过用户名查询用户信息
        QueryWrapper<SysUser> queryWrapper = new QueryWrapper<>();
        queryWrapper.eq("username",username);
        return this.getOne(queryWrapper);
    }
}
4.2 通过用户ID获取资源
4.2.1 Mapper
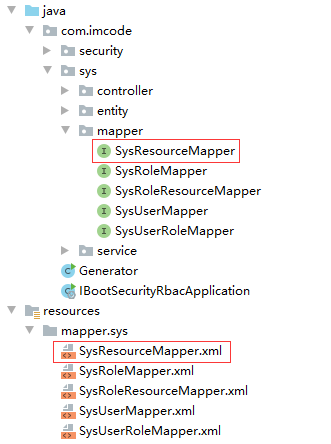
Mapper 接口:
package com.imcode.sys.mapper;

import com.imcode.sys.entity.SysResource;
import com.baomidou.mybatisplus.core.mapper.BaseMapper;

import java.util.List;
import java.util.Set;

/**
 * <p>
 * 资源管理 Mapper 接口
 * </p>
 *
 * @author jack
 * @since 2020-05-17
 */
public interface SysResourceMapper extends BaseMapper<SysResource> {
    List<SysResource> selectResourceByUserId(Integer userId);
}
Mapper 映射文件:
<?xml version="1.0" encoding="UTF-8"?>
<!DOCTYPE mapper PUBLIC "-//mybatis.org//DTD Mapper 3.0//EN" "http://mybatis.org/dtd/mybatis-3-mapper.dtd">
<mapper namespace="com.imcode.sys.mapper.SysResourceMapper">

      ......

    <select id="selectResourceByUserId" parameterType="java.lang.Integer"
            resultMap="BaseResultMap">
        SELECT
            t1.*
        FROM sys_resource t1
        LEFT JOIN sys_role_resource t2 ON t1.id = t2.resource_id
        LEFT JOIN sys_user_role t3 ON t3.role_id = t2.role_id
        WHERE
            t3.user_id = #{id}
    </select>
</mapper>
4.2.2 Service
Service 接口:
package com.imcode.sys.service;
import com.imcode.sys.entity.SysResource;
import com.baomidou.mybatisplus.extension.service.IService;
import java.util.List;
import java.util.Set;
/**
* <p>
* 资源管理服务类
* </p>
*
* @author jack
* @since 2020-05-17
*/
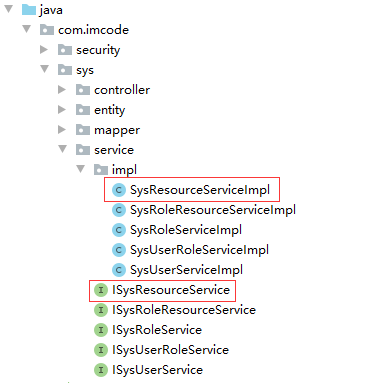
public interface ISysResourceService extends IService<SysResource> {
List<SysResource> listResourceByUserId(Integer userId);
}
Service 实现:
package com.imcode.sys.service.impl;
import com.baomidou.mybatisplus.extension.service.impl.ServiceImpl;
import com.imcode.sys.entity.SysResource;
import com.imcode.sys.mapper.SysResourceMapper;
import com.imcode.sys.service.ISysResourceService;
import org.springframework.stereotype.Service;
import javax.annotation.Resource;
import java.util.List;
/**
 * <p>
 * 资源管理服务实现类
 * </p>
 *
 * @author jack
 * @since 2020-05-17
 */
@Service
public class SysResourceServiceImpl extends
    ServiceImpl<SysResourceMapper, SysResource>
    implements ISysResourceService {

    @Resource
    private SysResourceMapper resourceMapper;
    @Override
    public List<SysResource> listResourceByUserId(Integer userId) {
        return resourceMapper.selectResourceByUserId(userId);
    }
}
4.3 实现 UserDetails 接口
同时实现 CredentialsContainer 接口,该接口提供清除用户敏感信息的方法,如密码等.
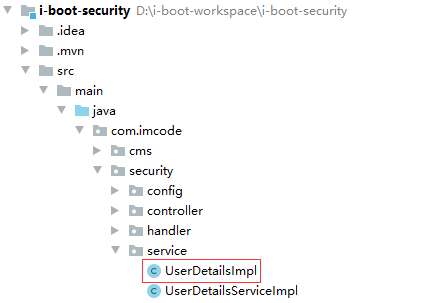
package com.imcode.security.service;//package com.imcode.security.service;

import org.springframework.security.core.CredentialsContainer;
import org.springframework.security.core.GrantedAuthority;
import org.springframework.security.core.userdetails.UserDetails;

import java.util.Collection;
import java.util.HashSet;
import java.util.Set;

public class UserDetailsImpl implements UserDetails, CredentialsContainer {

    private Integer id; // 用户ID
    private String username;
    private String password;
    private Collection<? extends GrantedAuthority> authorities;
    private boolean accountNonExpired;
    private boolean accountNonLocked;
    private boolean credentialsNonExpired;
    private boolean enabled;
    private Set<String> urls;//用户拥有的URL资源


    public UserDetailsImpl(Integer id, Set<String> urls, UserDetails user) {
        this.id = id;
        this.urls = urls;
        this.username = user.getUsername();
        this.password = user.getPassword();
        this.authorities = user.getAuthorities();
        this.accountNonExpired = user.isAccountNonExpired();
        this.accountNonLocked = user.isAccountNonLocked();
        this.credentialsNonExpired = user.isCredentialsNonExpired();
        this.enabled = user.isEnabled();
    }

    public Integer getId() {
        return id;
    }

    public Set<String> getUrls() {
        return urls;
    }

    @Override
    public Collection<? extends GrantedAuthority> getAuthorities() {
        return this.authorities;
    }

    @Override
    public String getPassword() {
        return this.password;
    }

    @Override
    public String getUsername() {
        return this.username;
    }

    @Override
    public boolean isAccountNonExpired() {
        return this.accountNonExpired;
    }

    @Override
    public boolean isAccountNonLocked() {
        return this.accountNonLocked;
    }

    @Override
    public boolean isCredentialsNonExpired() {
        return this.credentialsNonExpired;
    }

    @Override
    public boolean isEnabled() {
        return this.enabled;
    }

    // 清除用户敏感信息
    @Override
    public void eraseCredentials() {
        this.password = null;
    }
}
4.4 实现 UserDetailsService 接口
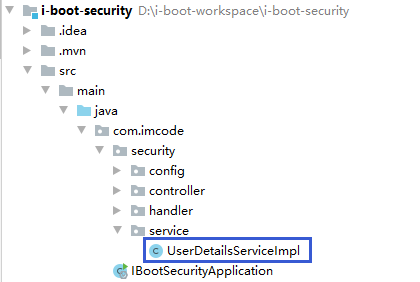
package com.imcode.security.service;//package com.imcode.security.service;

import com.imcode.sys.entity.SysResource;
import com.imcode.sys.entity.SysUser;
import com.imcode.sys.service.ISysResourceService;
import com.imcode.sys.service.ISysUserService;
import lombok.extern.slf4j.Slf4j;
import org.springframework.security.core.userdetails.User;
import org.springframework.security.core.userdetails.UserDetails;
import org.springframework.security.core.userdetails.UserDetailsService;
import org.springframework.security.core.userdetails.UsernameNotFoundException;
import org.springframework.stereotype.Service;
import org.springframework.util.StringUtils;

import javax.annotation.Resource;
import java.util.HashSet;
import java.util.List;
import java.util.Set;

@Service
@Slf4j
public class UserDetailsServiceImpl implements UserDetailsService {

    @Resource
    private ISysUserService userService;

    @Resource
    private ISysResourceService resourceService;

    /**
     * @param username 登录页面传递过来的用户名
     * @return
     * @throws UsernameNotFoundException
     */
    @Override
    public UserDetails loadUserByUsername(String username) throws UsernameNotFoundException {

        // 1.通过用户名查询用户信息
        SysUser sysUser = null;
        if (!StringUtils.isEmpty(username)) {
            sysUser = userService.getByUsername(username);
        }
        if (sysUser == null) {
            throw new UsernameNotFoundException("用户名或密码错误");
        }

        // 2.通过用户id查询用户资源信息
        List<SysResource> resourceList = resourceService.listResourceByUserId(sysUser.getId());
        Set<String> urls = new HashSet<>();
        StringBuffer permissions = new StringBuffer();
        for (SysResource resource : resourceList) {
            if (!StringUtils.isEmpty(resource.getUrl())) {
                urls.add(resource.getUrl());
            }
            if (!StringUtils.isEmpty(resource.getPermission())) {
                permissions.append(resource.getPermission() + ",");
            }
        }
        String[] authorities =
                permissions.substring(0, permissions.length() - 1).split(",");

        UserDetails user = User.builder()
                .username(sysUser.getUsername())
                .password(sysUser.getPassword())
                .authorities(authorities)
                .build();
        return new UserDetailsImpl(sysUser.getId(), urls, user);
    }
}
4.5 WebSecurityConfig 配置
package com.imcode.security.config;

import com.imcode.security.handler.CustomAuthenticationFailureHandler;
import com.imcode.security.handler.CustomAuthenticationSuccessHandler;
import org.springframework.context.annotation.Bean;
import org.springframework.security.config.annotation.method.configuration.EnableGlobalMethodSecurity;
import org.springframework.security.config.annotation.web.builders.HttpSecurity;
import org.springframework.security.config.annotation.web.configuration.EnableWebSecurity;
import org.springframework.security.config.annotation.web.configuration.WebSecurityConfigurerAdapter;
import org.springframework.security.crypto.bcrypt.BCryptPasswordEncoder;
import org.springframework.security.crypto.password.PasswordEncoder;
import javax.annotation.Resource;

@EnableWebSecurity
@EnableGlobalMethodSecurity(prePostEnabled = true)
public class WebSecurityConfig extends WebSecurityConfigurerAdapter {

    @Resource
    private CustomAuthenticationFailureHandler authenticationFailureHandler;
    @Resource
    private CustomAuthenticationSuccessHandler authenticationSuccessHandler;

    @Override
    protected void configure(HttpSecurity http) throws Exception {

        http.authorizeRequests()
                // js和css下的静态资源不需要认证
                .antMatchers("/js/**", "/css/**").permitAll()
                .and()
                .formLogin()
                .loginPage("/login")  // 登录页面的URL
                .loginProcessingUrl("/login") // 处理登录请求的 URL
                .successHandler(authenticationSuccessHandler) // 登录成功后的处理逻辑
                .failureHandler(authenticationFailureHandler)  // 登录失败后的处理逻辑
                .permitAll() // 登录相关资源不需要认证就可以访问
                .and()
                .csrf().disable(); // 禁用跨域请求伪造防护,后续讲解
        http.authorizeRequests()
                .anyRequest().authenticated();
    }

    /**
     * 密码加密
     * @return
     */
    @Bean
    public PasswordEncoder passwordEncoder() {
        return new BCryptPasswordEncoder();
    }
}
4.6 查看授权信息
@RequestMapping("/info")
public Authentication info() {
    // 获取认证对象
    SecurityContext securityContext = SecurityContextHolder.getContext();
    Authentication authentication = securityContext.getAuthentication();
    return authentication;
}
登录成功以后,访问:http://127.0.0.1:8080/info
显示如下信息:
{
  "authorities": [
    {
      "authority": "ROLE_ADMIN"
    },
    {
      "authority": "ROLE_USER"
    }
  ],
  "details": {
    "remoteAddress": "127.0.0.1",
    "sessionId": "1AE23D21FDD678840136EADA68FDE467"
  },
  "authenticated": true,
  "principal": {
    "password": null,
    "username": "jack",
    "authorities": [
      {
        "authority": "ROLE_ADMIN"
      },
      {
        "authority": "ROLE_USER"
      }
    ],
    "accountNonExpired": true,
    "accountNonLocked": true,
    "credentialsNonExpired": true,
    "enabled": true
  },
  "credentials": null,
  "name": "jack"
}
注意:设置角色的时候,会自动在原有角色名称前加ROLE_前缀。
4.7 认证流程源码分析
AuthenticationProvider
AuthenticationProvider 接口是 Spring Security 实现认证管理的顶级接口;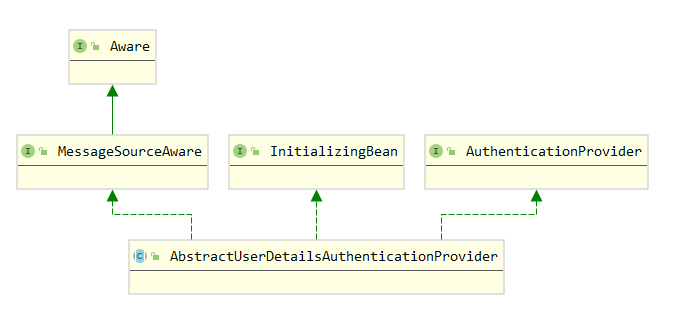
DaoAuthenticationProvider 继承了抽象类 AbstractUserDetailsAuthenticationProvider,
/**
Authentication authentication 该认证对象上携带了用户登录输入的用户名、密码等相关信息
*/
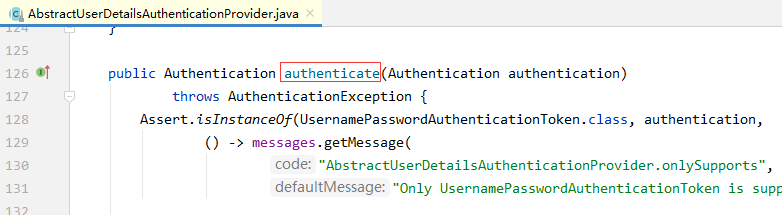
public Authentication authenticate(Authentication authentication)
throws AuthenticationException {
Assert.isInstanceOf(UsernamePasswordAuthenticationToken.class, authentication, () -> {
return this.messages.getMessage("AbstractUserDetailsAuthenticationProvider.onlySupports",
"Only UsernamePasswordAuthenticationToken is supported");
});
// 获取用户名
String username =
authentication.getPrincipal() == null ? "NONE_PROVIDED" : authentication.getName();
boolean cacheWasUsed = true;
// 从缓存中获取登录用户信息
UserDetails user = this.userCache.getUserFromCache(username);
// 如果缓存中不存在
if (user == null) {
cacheWasUsed = false;
try {
// 调用retrieveUser获取用户信息,该方法会调用我们自定义的loadUserByUsername 方法
// 获取到的user对象是从数据库获取的用户信息
user = this.retrieveUser(username, (UsernamePasswordAuthenticationToken)authentication);
} catch (UsernameNotFoundException var6) {
this.logger.debug("User '" + username + "' not found");
if (this.hideUserNotFoundExceptions) {
throw new BadCredentialsException(this.messages.getMessage("AbstractUserDetailsAuthenticationProvider.badCredentials", "Bad credentials"));
}
throw var6;
}
Assert.notNull(user, "retrieveUser returned null - a violation of the interface contract");
}
try {
//检查账号是否过期、是否禁用、是否被锁定
this.preAuthenticationChecks.check(user);
// 校验密码是否正确
this.additionalAuthenticationChecks(user,
(UsernamePasswordAuthenticationToken) authentication);
} catch (AuthenticationException var7) {
// 如果不是缓存的用户,直接抛出认证未通过异常
if (!cacheWasUsed) {
throw var7;
}
cacheWasUsed = false;
// 如果是缓存中的用户认证未通过,从数据库重新查询用户信息,再次认证
user = this.retrieveUser(username, (UsernamePasswordAuthenticationToken)authentication);
this.preAuthenticationChecks.check(user);
this.additionalAuthenticationChecks(user, (UsernamePasswordAuthenticationToken)authentication);
}
// 检查凭证是否过期
this.postAuthenticationChecks.check(user);
// 将认证通过的用户放入缓存
if (!cacheWasUsed) {
this.userCache.putUserInCache(user);
}
Object principalToReturn = user;
if (this.forcePrincipalAsString) {
principalToReturn = user.getUsername();
}
// 返回认证成功的token对象
return this.createSuccessAuthentication(principalToReturn, authentication, user);
}
retrieveUser()
retrieveUser 方法源码
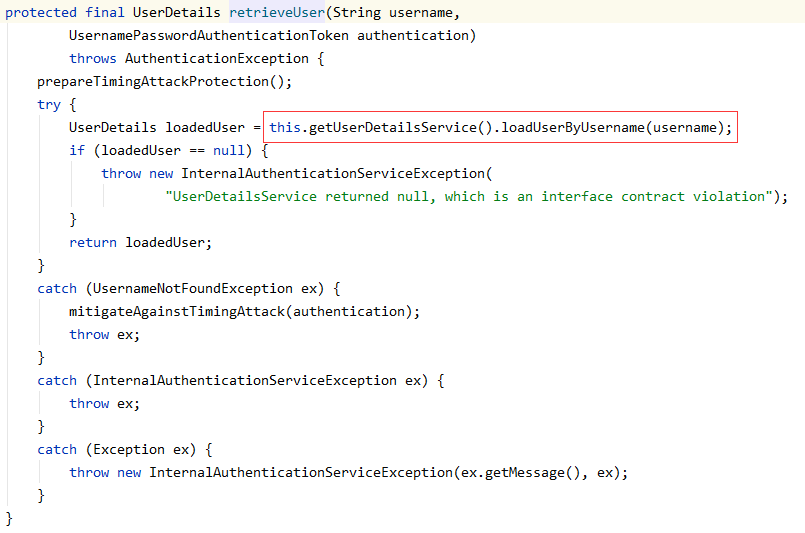
this.getUserDetailsService() 获取到的就是我们自定义的 UserDetailServiceImpl 的对象;retrieveUser方法会调用我们自己实现的 loadUserByUsername 方法。
additionalAuthenticationChecks()
校验密码的方法源码:additionalAuthenticationChecks 方法
protected void additionalAuthenticationChecks(
    UserDetails userDetails, UsernamePasswordAuthenticationToken authentication)
    throws AuthenticationException {

    // 密码为空
    if (authentication.getCredentials() == null) {
        this.logger.debug("Authentication failed: no credentials provided");
        throw new BadCredentialsException(
            this.messages.getMessage("AbstractUserDetailsAuthenticationProvider.badCredentials",
                                     "Bad credentials"));
    }
    else {
        // 获取客户端输入的密码
        String presentedPassword = authentication.getCredentials().toString();
        // 将客户端输入的密码加密后和数据库的密码进行匹配
        if (!this.passwordEncoder.matches(presentedPassword, userDetails.getPassword())) {
            this.logger.debug("Authentication failed: password does not match stored value");
            throw new BadCredentialsException(
                this.messages.getMessage(
                    "AbstractUserDetailsAuthenticationProvider.badCredentials",
                    "Bad credentials"));
        }
    }
}
Authentication
调用 authenticate() 方法认证通过后,会返回一个 Authentication 接口的对象。
public interface Authentication extends Principal, Serializable {

    // 用户的角色和权限信息
       Collection<? extends GrantedAuthority> getAuthorities();

    // 详细信息,如sessionId,客户机ip等信息
       Object getDetails();

    // 存储 UserDeatils 对象的信息
       Object getPrincipal();

    // 是否认证通过
       boolean isAuthenticated();
    // 设置认证状态
       void setAuthenticated(boolean isAuthenticated) throws IllegalArgumentException;
}
该接口有如下实现类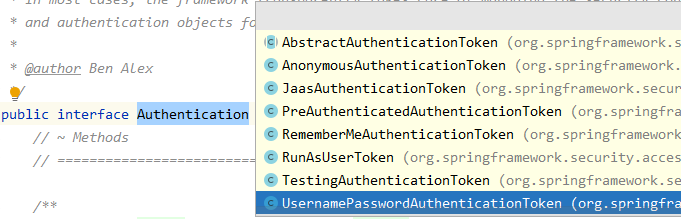
调用 authenticate() 方法认证通过后,返回的是子类 UsernamePasswordAuthenticationToken 的对象。
SecurityContext
SecurityContext 是存储 Authentication 的容器,认证成功后获得Authentication,将其存入SecurityContext中,再将SecurityContext 存到 session 里面。
public interface SecurityContext extends Serializable {

    Authentication getAuthentication();

    void setAuthentication(Authentication authentication);
}
SecurityContextHolder
SecurityContextHolder 是操作 SecurityContext 的工具类,
提供的静态方法有 setSecurityContext() 、getSecurityContext() 、clearContext()等。执行注销操作,会先执行session.invalidate(),再执行SecurityContextHolder.clearContext()。
5. 方法调用权限控制
5.1 user_list.html
<!DOCTYPE html>
<html xmlns:th="http://www.thymeleaf.org"
      xmlns:sec="http://www.thymeleaf.org/thymeleaf-extras-springsecurity5">
<head>
    <meta charset="UTF-8">
    <title>Title</title>
</head>
<body>
<h3>用户列表</h3>
<hr>
<a th:href="@{/sys/user/add}">新增</a>
<table style="width: 50%; text-align: left">
    <tr>
        <th>ID</th>
        <th>用户名</th>
        <th>操作</th>
    </tr>
    <tr th:each="user: ${userList}">
        <td th:text="${user.id}"></td>
        <td th:text="${user.username}"></td>
        <td>
            <a th:href="@{/sys/user/edit/{id}(id=${user.id})}">修改</a> |
            <a th:href="@{/sys/user/del/{id}(id=${user.id})}">删除</a>
        </td>
    </tr>
</table>
</body>
</html>
5.2 SysUserController
package com.imcode.sys.controller;

import com.imcode.sys.service.ISysUserService;
import org.springframework.security.access.prepost.PreAuthorize;
import org.springframework.stereotype.Controller;
import org.springframework.ui.Model;
import org.springframework.web.bind.annotation.GetMapping;
import org.springframework.web.bind.annotation.PathVariable;
import org.springframework.web.bind.annotation.RequestMapping;
import org.springframework.web.bind.annotation.ResponseBody;

import javax.annotation.Resource;

/**
 * <p>
 * 系统用户 前端控制器
 * </p>
 *
 * @author jack
 * @since 2020-05-17
 */

@Controller
@RequestMapping("/sys/user")
public class SysUserController {

    @Resource
    private ISysUserService userService;

    @GetMapping
    @PreAuthorize("hasAuthority('sys:user:view')")
    public String list(Model model) {
        model.addAttribute("userList", userService.list());
        return "user_list";
    }

    @GetMapping("/add")
    @ResponseBody
    @PreAuthorize("hasAuthority('sys:user:add')")
    public String add() {
        return "跳转新增页面成功";
    }

    @GetMapping("/edit/{id}")
    @PreAuthorize("hasAuthority('sys:user:edit')")
    @ResponseBody
    public String edit(@PathVariable Long id) {
        return "跳转修改页面成功";
    }

    @GetMapping("/del/{id}")
    @PreAuthorize("hasAuthority('sys:user:del')")
    @ResponseBody
    public String del(@PathVariable Long id) {
        return "删除成功";
    }
}
注意:权限的注解可以用户任何受 Spring 控制的类,不局限与Controller 层。
6. 动态URL权限控制
动态URL权限控制的实现思路,用户有权限访问的URI 存储在数据库,在用户登录成功以后,将所有URL加载到自定义的 UserDeails 对象的 urls 属性中。
每次客户端请求到来,判断客户端请求的资源的URI 是否在 urls 中,如果在,则允许访问该URI 资源。
6.2 PermissionService

package com.imcode.security.service;

import org.springframework.security.core.Authentication;
import org.springframework.stereotype.Service;
import org.springframework.util.AntPathMatcher;
import javax.servlet.http.HttpServletRequest;

@Service
public class PermissionService {
    /**
     * @param request        当前请求的信息
     * @param authentication 当前用户的信息
     * @return 是否拥有访问权限
     */
    public boolean hasPermission(HttpServletRequest request,
                                        Authentication authentication) {
        Object principal = authentication.getPrincipal();
        boolean hasPermission = false;
        if (principal instanceof UserDetailsImpl) {
            UserDetailsImpl userDetails = (UserDetailsImpl) principal;
            AntPathMatcher antPathMatcher = new AntPathMatcher();
            for (String url : userDetails.getUrls()) {
                if (antPathMatcher.match(url, request.getRequestURI())) {
                    hasPermission = true;
                    break;
                }
            }
        }
        return hasPermission;
    }
}
客户端每次访问了需要权限的资源时,都需要调用 hasPermission 来判断是否有权限,结合SpringSecurity 配置类和SPEL表达式,可以很方便的实现该功能。
6.3 WebSecurityConfig 配置
package com.imcode.security.config;

import com.imcode.security.handler.CustomAuthenticationFailureHandler;
import com.imcode.security.handler.CustomAuthenticationSuccessHandler;
import com.imcode.security.service.PermissionService;
import org.springframework.context.annotation.Bean;
import org.springframework.security.config.annotation.method.configuration.EnableGlobalMethodSecurity;
import org.springframework.security.config.annotation.web.builders.HttpSecurity;
import org.springframework.security.config.annotation.web.configuration.EnableWebSecurity;
import org.springframework.security.config.annotation.web.configuration.WebSecurityConfigurerAdapter;
import org.springframework.security.crypto.bcrypt.BCryptPasswordEncoder;
import org.springframework.security.crypto.password.PasswordEncoder;
import javax.annotation.Resource;

@EnableWebSecurity
@EnableGlobalMethodSecurity(prePostEnabled = true)
public class WebSecurityConfig extends WebSecurityConfigurerAdapter {

    @Resource
    private CustomAuthenticationFailureHandler authenticationFailureHandler;
    @Resource
    private CustomAuthenticationSuccessHandler authenticationSuccessHandler;
    @Resource
    private PermissionService permissionService;

    @Override
    protected void configure(HttpSecurity http) throws Exception {

        http.authorizeRequests()
                // js和css下的静态资源不需要认证
                .antMatchers("/js/**", "/css/**").permitAll()

                .and()
                .formLogin()
                .loginPage("/login")  // 登录页面的URL
                .loginProcessingUrl("/login") // 处理登录请求的 URL
                .successHandler(authenticationSuccessHandler) // 登录成功后的处理逻辑
                .failureHandler(authenticationFailureHandler)  // 登录失败后的处理逻辑
                .permitAll() // 登录相关资源不需要认证就可以访问

                .and()
                .csrf().disable(); // 禁用跨域请求伪造防护,后续讲解


//        http.authorizeRequests()
//                .anyRequest().authenticated();

        http.authorizeRequests()
                .anyRequest()
                .access("@permissionService.hasPermission(request, authentication)");

    }

    /**
     * 密码加密
     * @return
     */
    @Bean
    public PasswordEncoder passwordEncoder() {
        return new BCryptPasswordEncoder();
    }
}
7. 页面权限控制
7.1 index.html
<!DOCTYPE html>
<html xmlns:th="http://www.thymeleaf.org"
      xmlns:sec="http://www.thymeleaf.org/thymeleaf-extras-springsecurity5">
<head>
    <meta charset="UTF-8">
    <title>系统初始化页面</title>
</head>
<body>
<div>
    <a th:href="@{/logout}">注销</a>
</div>
<hr>
<a th:href="@{/sys/user}"
   sec:authorize="hasAuthority('sys:user:view')">用户列表</a>
<!--<a th:href="@{/sys/user}">用户列表</a>-->
<hr>
<p>Username: <th:block sec:authentication="principal.username"></th:block></p>
<p>Authorities: <th:block sec:authentication="principal.authorities"></th:block></p>
<hr>
</body>
</html>
7.2 user_list.html
<!DOCTYPE html>
<html xmlns:th="http://www.thymeleaf.org"
      xmlns:sec="http://www.thymeleaf.org/thymeleaf-extras-springsecurity5">
<head>
    <meta charset="UTF-8">
    <title>Title</title>
</head>
<body>
<h3>用户列表</h3>
<hr>
<a th:href="@{/sys/user/add}"
   sec:authorize="hasAuthority('sys:user:add')">新增</a>
<table style="width: 50%; text-align: left">
    <tr>
        <th>ID</th>
        <th>用户名</th>
        <th>操作</th>
    </tr>
    <tr th:each="user: ${userList}">
        <td th:text="${user.id}"></td>
        <td th:text="${user.username}"></td>
        <td>
            <a th:href="@{/sys/user/edit/{id}(id=${user.id})}"
               sec:authorize="hasAuthority('sys:user:edit')">修改</a> |

            <a th:href="@{/sys/user/del/{id}(id=${user.id})}"
               sec:authorize="hasAuthority('sys:user:del')">删除</a>
        </td>
    </tr>
</table>
</body>
</html>
SpringSecurity 的标签属性有以下几个:
sec:authorize=”isAuthenticated()”
判断用户是否已经登陆认证,引号内的参数必须是 isAuthenticated()。
sec:authentication=”name”
获得当前用户的用户名,引号内的参数必须是 name。
sec:authorize=”hasRole(‘role’)”
判断当前用户是否拥有指定的权限。引号内的参数为权限的名称。
sec:authentication=”principal.authorities”
获得当前用户的全部角色,引号内的参数必须是 principal.authorities。

若有收获,就点个赞吧
0 人点赞
