1. 图形验证码
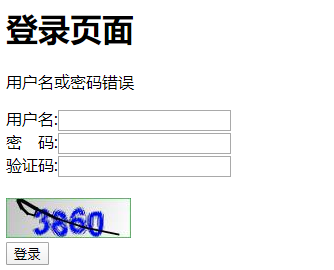
验证码是为了防止恶意用户暴力重试而设置的。不管是用户注册、用户登录,如果不加以限制,一旦某些恶意用户利用计算机发起无限重试,就很容易使系统遭受破坏。
1.1 实现思路
添加验证码大致可以分为三个步骤:
- 根据随机数生成验证码图片;
- 将验证码图片显示到登录页面;
- 认证流程中加入验证码校验。
Spring Security 的认证校验是由 UsernamePasswordAuthenticationFilter 过滤器完成的,所以我们的验证码校验逻辑应该在这个过滤器之前。
1.2 生成图形验证码
kaptcha 是一款开源的图像校验码工具,可以用它来绘制图像校验码。
详细使用参考:https://www.jianshu.com/p/a3525990cd82
引入依赖
<dependency><groupId>com.github.penggle</groupId><artifactId>kaptcha</artifactId><version>2.3.2</version></dependency>
校验码配置
在 WebSecurityConfig 中添加校验码配置。
@Beanpublic DefaultKaptcha captchaProducer() {Properties properties = new Properties();// 显示边框properties.setProperty("kaptcha.border","yes");// 边框颜色properties.setProperty("kaptcha.border.color","105,179,90");// 字体颜色properties.setProperty("kaptcha.textproducer.font.color","blue");// 字体大小properties.setProperty("kaptcha.textproducer.font.size","35");// 图片宽度properties.setProperty("kaptcha.image.width","125");// 图片高度properties.setProperty("kaptcha.image.height","40");// 验证码长度properties.setProperty("kaptcha.textproducer.char.length","4");// 文本内容 从设置字符中随机抽取properties.setProperty("kaptcha.textproducer.char.string","0123456789");DefaultKaptcha kaptcha = new DefaultKaptcha();kaptcha.setConfig(new Config(properties));return kaptcha;}
输出验证码
将生成的验证码输出到浏览器页面,同时将验证码的内容和过期时间存储到 HttpSession 中。过期时间设置成60秒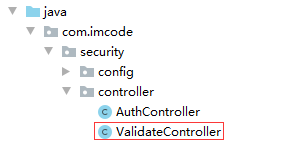
package com.imcode.security.controller;import com.google.code.kaptcha.Constants;import com.google.code.kaptcha.Producer;import org.springframework.stereotype.Controller;import org.springframework.web.bind.annotation.GetMapping;import javax.annotation.Resource;import javax.imageio.ImageIO;import javax.servlet.http.HttpServletRequest;import javax.servlet.http.HttpServletResponse;import java.awt.image.BufferedImage;import java.io.IOException;import java.time.LocalDateTime;@Controllerpublic class ValidateController {@Resourceprivate Producer captchaProducer;@GetMapping("/imgcode")public void createImgCode(HttpServletRequest request, HttpServletResponse response) throws IOException {// 生成图形校验码内容String text = captchaProducer.createText();// 将验证码内容存入 HttpSessionrequest.getSession().setAttribute(Constants.KAPTCHA_SESSION_KEY, text);// 将验证码有效期存入 HttpSession,60秒有效request.getSession().setAttribute(Constants.KAPTCHA_SESSION_DATE, LocalDateTime.now().plusSeconds(60));// 生成图形校验码图片BufferedImage bufferedImage = captchaProducer.createImage(text);// 将校验码图片信息输出到浏览器ImageIO.write(bufferedImage, "jpeg", response.getOutputStream());}}
注意在 WebSecurity 中配置 /imgcode 路径不需要认证就可以访问。
显示校验码
点击验证码图片,可以刷新验证码。
<!DOCTYPE html><html xmlns:th="http://www.thymeleaf.org"><head><meta charset="UTF-8"><title>系统登录</title></head><body><h1>登录页面</h1><form id="form-login" method="post"><p class="error"></p>用户名:<input type="text" name="username"/><br>密 码:<input type="password" name="password"/><br>验证码:<input type="text" name="imgcode"/><br><br><img id="imgcode" src="/imgcode" style="cursor: pointer;" title="看不清?换一张"/> <br><input type="button" id="btn-login" value="登录"/></form><script th:src="@{/js/jquery.js}"></script><script th:inline="javascript">const ctx = [[${#httpServletRequest.getContextPath()}]];$('#btn-login').bind('click',function () {$.ajax({url: ctx + '/login',type: 'post',data: $('#form-login').serialize(),success: function (response) {console.log(response);if (response.code == 0) {window.location.href = ctx + '/';} else {$('.error').text(response.msg);}}});})// 刷新验证码$("#imgcode").bind("click", function () {$(this).hide().attr('src', '/imgcode?random=' + Math.random()).fadeIn();});</script></body></html>
1.3 实现验证功能
自定义验证码异常类
在校验验证码的过程中,可能会抛出各种验证码类型的异常,比如“验证码错误”、“验证码已过期”等,所以我们定义一个验证码类型的异常类,验证码异常类继承 AuthenticationException,该异常属于认证异常。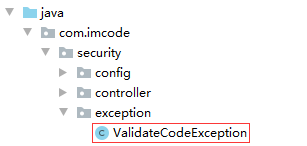
package com.imcode.security.exception;
import org.springframework.security.core.AuthenticationException;

/**
 * 验证码异常类
 */
public class ValidateCodeException extends AuthenticationException {

    ValidateCodeException(String message) {
        super(message);
    }
}
自定义验证码过滤器
Spring Security的认证校验是由 UsernamePasswordAuthenticationFilter 过滤器完成的,所以我们的验证码校验过滤器应该在这个过滤器之前。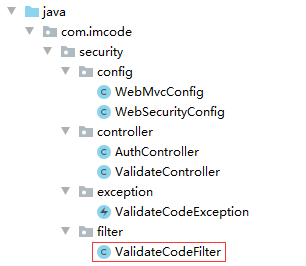
package com.imcode.security.filter;

import com.google.code.kaptcha.Constants;
import com.imcode.security.exception.ValidateCodeException;
import com.imcode.security.handler.CustomAuthenticationFailureHandler;
import org.springframework.security.web.authentication.AuthenticationFailureHandler;
import org.springframework.stereotype.Component;
import org.springframework.util.StringUtils;
import org.springframework.web.filter.OncePerRequestFilter;

import javax.annotation.Resource;
import javax.servlet.FilterChain;
import javax.servlet.ServletException;
import javax.servlet.http.HttpServletRequest;
import javax.servlet.http.HttpServletResponse;
import javax.servlet.http.HttpSession;
import java.io.IOException;
import java.time.LocalDateTime;

/**
 * 验证码校验过滤器
 */
@Component
public class ValidateCodeFilter extends OncePerRequestFilter {
    @Resource
    private CustomAuthenticationFailureHandler authenticationFailureHandler;
    @Override
    protected void doFilterInternal(HttpServletRequest request, HttpServletResponse response,
                                    FilterChain chain)
            throws ServletException, IOException {

        if ("/login".equalsIgnoreCase(request.getRequestURI())
                && "POST".equalsIgnoreCase(request.getMethod())) {
            try {
                HttpSession session = request.getSession();
                // Session中的校验码
                String sessionImgCode = (String) session.getAttribute(Constants.KAPTCHA_SESSION_KEY);
                // Session 中校验码过期时间
                LocalDateTime expireTime = (LocalDateTime) session.getAttribute(Constants.KAPTCHA_SESSION_DATE);
                // 客户端提交的校验码
                String requestImgCode = request.getParameter("imgcode");
                if (StringUtils.isEmpty(requestImgCode)) {
                    throw new ValidateCodeException("验证码不能为空!");
                }
                if (expireTime == null || LocalDateTime.now().isAfter(expireTime)) {
                    // 清除Session中校验码相关信息
                    session.removeAttribute(Constants.KAPTCHA_SESSION_KEY);
                    session.removeAttribute(Constants.KAPTCHA_SESSION_DATE);
                    throw new ValidateCodeException("验证码已过期!");
                }
                if (!requestImgCode.equalsIgnoreCase(sessionImgCode)) {
                    throw new ValidateCodeException("验证码不正确!");
                }
                // 清除Session中校验码相关信息
                session.removeAttribute(Constants.KAPTCHA_SESSION_KEY);
                session.removeAttribute(Constants.KAPTCHA_SESSION_DATE);
            } catch (ValidateCodeException e) {
                authenticationFailureHandler.onAuthenticationFailure(request, response, e);
                return;
            }
        }
        chain.doFilter(request, response);
    }
}
配置校验码过滤器
@EnableWebSecurity
//@EnableGlobalMethodSecurity(prePostEnabled = true)
public class WebSecurityConfig extends WebSecurityConfigurerAdapter {

    @Resource
    private CustomAuthenticationFailureHandler authenticationFailureHandler;
    @Resource
    private CustomAuthenticationSuccessHandler authenticationSuccessHandler;
    @Resource
    private CustomAccessDeniedHandler accessDeniedHandler;
    @Resource
    private CustomLogoutSuccessHandler logoutSuccessHandler;

    @Resource
    private ValidateCodeFilter validateCodeFilter;

    @Override
    protected void configure(HttpSecurity http) throws Exception {

        // 添加验证码校验过滤器,在UsernamePasswordAuthenticationFilter过滤器前执行
        http.addFilterBefore(validateCodeFilter,
                             UsernamePasswordAuthenticationFilter.class);
        http
                .exceptionHandling()
                // 无权限访问的处理器
                .accessDeniedHandler(accessDeniedHandler);
        http
                .formLogin() // 表单认证配置
                .loginPage("/login")  // 登录页面的 URL
                .loginProcessingUrl("/login") // 处理登录请求的 URL
                // 登录成功后的处理逻辑
                .successHandler(authenticationSuccessHandler)
                // 登录失败后的处理逻辑
                .failureHandler(authenticationFailureHandler)

                .and()
                .logout()
                .deleteCookies("JSESSIONID")
                // 退出成功后的处理逻辑
                .logoutSuccessHandler(logoutSuccessHandler)

                .and()
                .authorizeRequests()
                // 登录页面和处理登录的请求允许任意权限访问
                .antMatchers("/login", "/imgcode", "/js/**").permitAll()
                // 其它所有请求都需要认证
                //.anyRequest().authenticated();
                // 其它请求判断是否有权限访问
                .anyRequest()
                  .access("@permissionService.hasPermission(request, authentication)")

                .and()
                // 禁用跨域请求伪造防护,后续讲解
                .csrf().disable();
    }

    /**
     * 密码加密
     *
     * @return
     */
    @Bean
    public PasswordEncoder passwordEncoder() {
        return new BCryptPasswordEncoder();
    }


    /**
     * 图形校验码配置
     *
     * @return
     */
    @Bean
    public DefaultKaptcha captchaProducer() {
        Properties properties = new Properties();
        // 显示边框
        properties.setProperty("kaptcha.border","yes");
        // 边框颜色
        properties.setProperty("kaptcha.border.color","105,179,90");
        // 字体颜色
        properties.setProperty("kaptcha.textproducer.font.color","blue");
        // 字体大小
        properties.setProperty("kaptcha.textproducer.font.size","35");
        // 图片宽度
        properties.setProperty("kaptcha.image.width","125");
        // 图片高度
        properties.setProperty("kaptcha.image.height","40");
        // 验证码长度
        properties.setProperty("kaptcha.textproducer.char.length","4");
        // 文本内容 从设置字符中随机抽取
        properties.setProperty("kaptcha.textproducer.char.string","0123456789");
        DefaultKaptcha kaptcha = new DefaultKaptcha();
        kaptcha.setConfig(new Config(properties));
        return kaptcha;
    }
}
2. 自动登录
2.1 实现思路
- 用户勾选记住我登录成功;
- Spring Security生成一个token标识,然后将该 token 标识持久化到数据库;
- 同时生成一个与该 token 相对应的 cookie 返回给浏览器;
- 当用户过段时间再次访问系统时,如果该 cookie 没有过期,Spring Security 便会根据cookie包含的信息从数据库中获取相应的token信息;
- 帮用户自动完成登录操作。
2.2 配置数据源
Spring Security 生成的token标识要持久化到数据库,我们需要引入JDBC驱动和数据源的配置。
<dependency>
    <groupId>mysql</groupId>
    <artifactId>mysql-connector-java</artifactId>
    <version>5.1.47</version>
</dependency>

<dependency>
    <groupId>com.alibaba</groupId>
    <artifactId>druid-spring-boot-starter</artifactId>
    <version>1.1.22</version>
</dependency>

<dependency>
    <groupId>org.springframework.boot</groupId>
    <artifactId>spring-boot-starter-jdbc</artifactId>
</dependency>
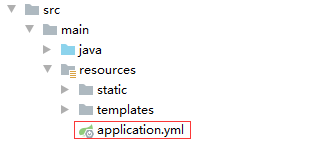
spring:
  datasource:
    url: jdbc:mysql://127.0.0.1:3306/i-auth?useSSL=false&serverTimezone=Asia/Shanghai
    username: root
    password: 123456
    type: com.alibaba.druid.pool.DruidDataSource
2.3 PersistentTokenRepository
PersistentTokenRepository 是 Spring Security 提供的持久化token的接口。接口源码如下:
public interface PersistentTokenRepository {
    void createNewToken(PersistentRememberMeToken var1);

    void updateToken(String var1, String var2, Date var3);

    PersistentRememberMeToken getTokenForSeries(String var1);

    void removeUserTokens(String var1);
}
该接口有两个实现类:JdbcTokenRepositoryImpl 和 InMemoryTokenRepositoryImpl。
- JdbcTokenRepositoryImpl 使用 JdbcTemplate 模板操作token持久化到数据库。
- InMemoryTokenRepositoryImpl 是基于内存的token持久化方案。
我们使用 JdbcTokenRepositoryImpl,查看 JdbcTokenRepositoryImpl 源码:
public class JdbcTokenRepositoryImpl extends JdbcDaoSupport implements PersistentTokenRepository {
    public static final String CREATE_TABLE_SQL = "create table persistent_logins (username varchar(64) not null, series varchar(64) primary key, token varchar(64) not null, last_used timestamp not null)";
    public static final String DEF_TOKEN_BY_SERIES_SQL = "select username,series,token,last_used from persistent_logins where series = ?";
    public static final String DEF_INSERT_TOKEN_SQL = "insert into persistent_logins (username, series, token, last_used) values(?,?,?,?)";
    public static final String DEF_UPDATE_TOKEN_SQL = "update persistent_logins set token = ?, last_used = ? where series = ?";
    public static final String DEF_REMOVE_USER_TOKENS_SQL = "delete from persistent_logins where username = ?";
    private String tokensBySeriesSql = "select username,series,token,last_used from persistent_logins where series = ?";
    private String insertTokenSql = "insert into persistent_logins (username, series, token, last_used) values(?,?,?,?)";
    private String updateTokenSql = "update persistent_logins set token = ?, last_used = ? where series = ?";
    private String removeUserTokensSql = "delete from persistent_logins where username = ?";
    private boolean createTableOnStartup;

    public JdbcTokenRepositoryImpl() {
    }

    // 执行建表语句 创建表 persistent_logins,该表用来存储记住我的token
    protected void initDao() {
        if (this.createTableOnStartup) {
            this.getJdbcTemplate()
                .execute("create table persistent_logins (username varchar(64) not null, series varchar(64) primary key, token varchar(64) not null, last_used timestamp not null)");
        }
    }

    // 将token信息存储到数据库
    public void createNewToken(PersistentRememberMeToken token) {
        this.getJdbcTemplate().update(this.insertTokenSql, new Object[]{token.getUsername(), token.getSeries(), token.getTokenValue(), token.getDate()});
    }

    // 更新token 信息
    public void updateToken(String series, String tokenValue, Date lastUsed) {
        this.getJdbcTemplate().update(this.updateTokenSql, new Object[]{tokenValue, lastUsed, series});
    }

    // 获取持久化的token对象
    public PersistentRememberMeToken getTokenForSeries(String seriesId) {
        try {
            return (PersistentRememberMeToken)this.getJdbcTemplate().queryForObject(this.tokensBySeriesSql, (rs, rowNum) -> {
                return new PersistentRememberMeToken(rs.getString(1), rs.getString(2), rs.getString(3), rs.getTimestamp(4));
            }, new Object[]{seriesId});
        } catch (EmptyResultDataAccessException var3) {
            if (this.logger.isDebugEnabled()) {
                this.logger.debug("Querying token for series '" + seriesId + "' returned no results.", var3);
            }
        } catch (IncorrectResultSizeDataAccessException var4) {
            this.logger.error("Querying token for series '" + seriesId + "' returned more than one value. Series should be unique");
        } catch (DataAccessException var5) {
            this.logger.error("Failed to load token for series " + seriesId, var5);
        }

        return null;
    }

    // 从数据库删除token
    public void removeUserTokens(String username) {
        this.getJdbcTemplate().update(this.removeUserTokensSql, new Object[]{username});
    }

    // 是否在系统启动的时候初始化token记录表
    public void setCreateTableOnStartup(boolean createTableOnStartup) {
        this.createTableOnStartup = createTableOnStartup;
    }
}
2.4 配置 JdbcTokenRepositoryImpl
@EnableWebSecurity
//@EnableGlobalMethodSecurity(prePostEnabled = true)
public class WebSecurityConfig extends WebSecurityConfigurerAdapter {

    ......

    @Resource
    private DataSource dataSource;
    @Resource
    private UserDetailsService userDetailsService;

    @Override
    protected void configure(HttpSecurity http) throws Exception {

        // 添加验证码校验过滤器,在UsernamePasswordAuthenticationFilter过滤器前执行
        http.addFilterBefore(validateCodeFilter,
                             UsernamePasswordAuthenticationFilter.class);
        http
                .exceptionHandling()
                // 无权限访问的处理器
                .accessDeniedHandler(accessDeniedHandler);
        http
                .formLogin() // 表单认证配置
                .loginPage("/login")  // 登录页面的 URL
                .loginProcessingUrl("/login") // 处理登录请求的 URL
                // 登录成功后的处理逻辑
                .successHandler(authenticationSuccessHandler)
                // 登录失败后的处理逻辑
                .failureHandler(authenticationFailureHandler)

                .and()
                .logout()
                .deleteCookies("JSESSIONID")
                // 退出成功后的处理逻辑
                .logoutSuccessHandler(logoutSuccessHandler)

                .and()
                .rememberMe()
                .tokenRepository(persistentTokenRepository()) // 配置token持久化仓库
                .tokenValiditySeconds(60 * 60 * 24 * 7) // remember 过期时间7天内有效单为秒
                .userDetailsService(userDetailsService) // 自动登录调用

                .and()
                .authorizeRequests()
                // 登录页面和处理登录的请求允许任意权限访问
                .antMatchers("/login", "/imgcode", "/js/**").permitAll()
                // 其它所有请求都需要认证
                //.anyRequest().authenticated();
                // 其它请求判断是否有权限访问
                .anyRequest().access("@permissionService.hasPermission(request, authentication)")

                .and()
                // 禁用跨域请求伪造防护,后续讲解
                .csrf().disable();
    }

    @Bean
    public PersistentTokenRepository persistentTokenRepository() {
        JdbcTokenRepositoryImpl jdbcTokenRepository = new JdbcTokenRepositoryImpl();
        // 配置数据源
        jdbcTokenRepository.setDataSource(dataSource);
        // 系统启动是否创建表
        jdbcTokenRepository.setCreateTableOnStartup(false);
        return jdbcTokenRepository;
    }

    ......
}
2.5 初始化数据库
CREATE TABLE persistent_logins (
    username VARCHAR (64) NOT NULL,
    series VARCHAR (64) PRIMARY KEY,
    token VARCHAR (64) NOT NULL,
    last_used TIMESTAMP NOT NULL
);
2.5 页面改造
<form id="form-login" method="post">
    <p class="error"></p>
    用户名:<input type="text" name="username"/><br>
    密 码:<input type="password" name="password"/><br>
    验证码:<input type="text" name="imgcode"/><br><br>
    <img id="imgcode" src="/imgcode" style="cursor: pointer;" title="看不清?换一张"/> <br>
    <input type="checkbox" name="remember-me"/> 记住我 <br>
    <input type="button" id="btn-login" value="登录"/>
</form>
记住我的表单名称必须是 remember-me
2.6 测试验证
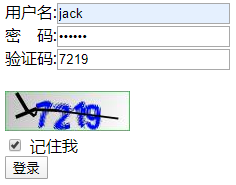

登录成功以后,浏览器cookie中增加了名称为remember-me的cookie,有效期7天。
3. 会话管理
3.1 会话超时配置
server:
  servlet:
    session:
      timeout: 60s
最短有效期为60秒(60s),默认为30分钟(30m) 会话超时后,再次请求系统会跳转到登录页面
3.2 自定义会话超时后处理逻辑
@Override
protected void configure(HttpSecurity http) throws Exception {
        .......

        .and()
        .authorizeRequests()
        // 登录页面和处理登录的请求允许任意权限访问
        .antMatchers("/login", "/imgcode","/timeout", "/js/**").permitAll()
        // 其它所有请求都需要认证
        //.anyRequest().authenticated();
        // 其它请求判断是否有权限访问
        .anyRequest().access("@permissionService.hasPermission(request, authentication)")

        .and()
        .sessionManagement() // 会话管理器
        .invalidSessionUrl("/timeout") // 会话超时后的链接

        .and()
        // 禁用跨域请求伪造防护,后续讲解
        .csrf().disable();
}
@GetMapping("/timeout")
@ResponseBody
public Map<String, String> timeout() {
    Map<String, String> result = new HashMap<>();
    result.put("code", "403");
    result.put("msg", "会话已过期,请重新登录");
    return result;
}
3.3 会话并发控制
并发会话策略配置
会话并发控制可以控制相同用户最多可以在多少个不同设备上登录。
常见策略:
- 一个账号同一时间段只允许在一个设备登录
- 策略一:第二个设备登录,第二个设备强制踢出;
- 策略二:第二个设备登录,不允许登录,提示账号已经在其它设备登录。 ```java …
.and() .sessionManagement() // 会话管理器 .invalidSessionUrl(“/timeout”) // 会话超时后的链接 .maximumSessions(1) // 设置一个账号同时登录的设备数 // 超过最大登录数的策略 true:不允许再登录新设备 false:踢出上一个设备的会话 默认false .maxSessionsPreventsLogin(true) .and()
….
第一个会话被踢出:<br /><br />第二个会话不允许登录:<br />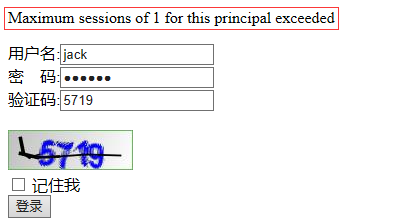
<a name="q7fGi"></a>
### 自定义并发会话失效策略
策略一:<br />需要实现 SessionInformationExpiredStrategy 接口:自定义第一个会话被踢出的提示。<br />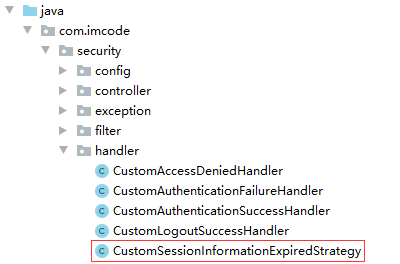
```java
package com.imcode.security.handler;
import com.fasterxml.jackson.databind.ObjectMapper;
import org.springframework.security.web.session.SessionInformationExpiredEvent;
import org.springframework.security.web.session.SessionInformationExpiredStrategy;
import org.springframework.stereotype.Component;
import javax.annotation.Resource;
import javax.servlet.ServletException;
import javax.servlet.http.HttpServletResponse;
import java.io.IOException;
import java.util.HashMap;
import java.util.Map;
@Component
public class CustomExpiredSessionStrategy implements SessionInformationExpiredStrategy {
@Resource
private ObjectMapper objectMapper;
@Override
public void onExpiredSessionDetected(SessionInformationExpiredEvent event)
throws IOException, ServletException {
Map<String, String> result = new HashMap<>();
result.put("code", "403");
result.put("msg", "您的账号已经在其它设备登录,如果非本人操作,请立即修改密码!");
HttpServletResponse response = event.getResponse();
response.setContentType("application/json;charset=UTF-8");
response.getWriter().write(objectMapper.writeValueAsString(result));
}
}
修改配置:
@Resource
private CustomExpiredSessionStrategy expiredSessionStrategy;

.and()
    .sessionManagement() // 会话管理器
    .invalidSessionUrl("/timeout") // 会话超时后的链接
    .maximumSessions(1) // 设置一个账号同时登录的设备数
    // 超过最大登录数的策略 true:不允许再登录新设备  false:踢出上一个设备的会话 默认false
    .maxSessionsPreventsLogin(false)
    // 配置并发会话被踢出的策略
    .expiredSessionStrategy(expiredSessionStrategy)
    .and()
测试效果:
策略二:
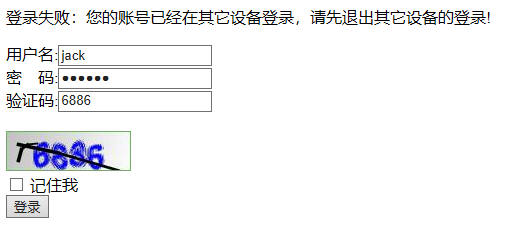
将 .maxSessionsPreventsLogin(true) 设置为true,修改登录失败后的处理器: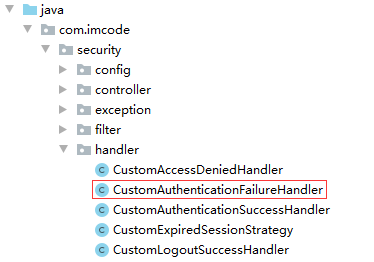
@Override
public void onAuthenticationFailure(
        HttpServletRequest request, HttpServletResponse response, AuthenticationException e)
        throws IOException, ServletException {
    System.out.println(e);
    log.error(e.getMessage());
    Map<String, String> result = new HashMap<>();
    result.put("code", "1");
    if (e instanceof SessionAuthenticationException) {
        result.put("msg", "登录失败:您的账号已经在其它设备登录,请先退出其它设备的登录!");
    } else {
        result.put("msg", e.getMessage());
    }
    response.setContentType("application/json;charset=UTF-8");
    response.getWriter().write(objectMapper.writeValueAsString(result));
}
3.4 集群会话
环境准备:
- Redis
- Nginx
当我们登录成功后,用户认证的信息存储在Session中,而这些Session默认是存储在运行程序的服务器上的,比如Tomcat,netty等。
使用集群部署的时候,用户在A服务器上登录认证,后续通过负载均衡可能会把请求发送到B服务器,而B应用服务器上并没有与该请求匹配的Session信息,所以用户就需要重新进行认证。
要解决这个问题,我们可以把Session信息存储在第三方容器里(如Redis集群),而不是各自的服务器,这样应用集群就可以通过第三方容器来共享Session了。
引入依赖
引入 spring-boot-starter-data-redis和 spring-session 的依赖。spring-session 是spring 框架提供的分布式会话模块,可以很轻松的实现 session 共享。
<dependency>
    <groupId>org.springframework.boot</groupId>
    <artifactId>spring-boot-starter-data-redis</artifactId>
</dependency>

<dependency>
    <groupId>org.springframework.session</groupId>
    <artifactId>spring-session-data-redis</artifactId>
</dependency>
打包应用
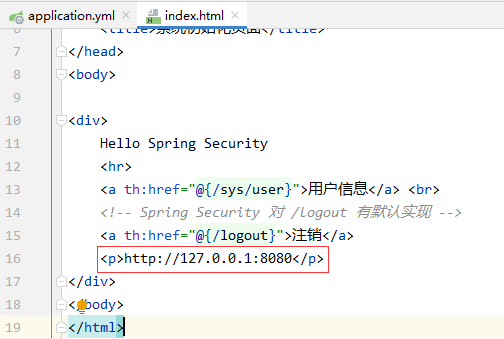
修改端口和和页面提示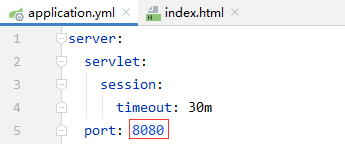
打包: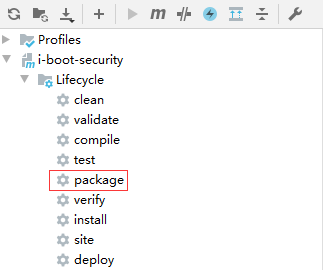
打包后的jar: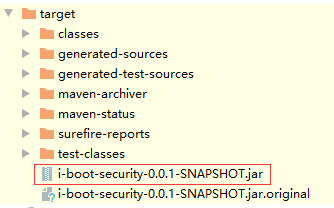
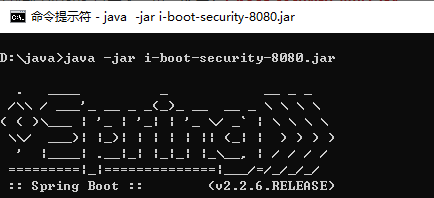
将该jar包复制到 D:\java 目录下,重命名为:i-boot-security-8080.jar
将端口号和页面提示修改为8081,再次打包;
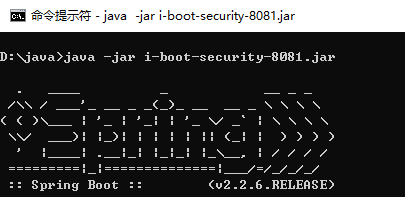
将该jar包复制到 D:\java 目录下,重命名为:i-boot-security-8081.jar
最终效果: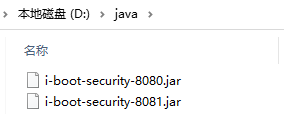
启动应用
配置集群
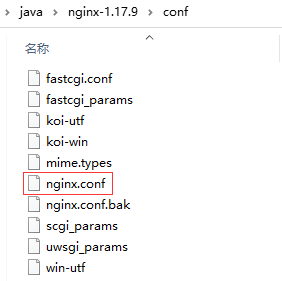
nginx.conf 内容:
worker_processes  1;
events {
    worker_connections  1024;
}
http {
    include       mime.types;
    default_type  application/octet-stream;
    sendfile        on;
    keepalive_timeout  65;

    upstream server {
                server 127.0.0.1:8080;
                server 127.0.0.1:8081;
    }
    server {
        listen    80;                        # nginx HTTP服务端口号
        location / {
            proxy_pass http://server;      # 请求转向 server 定义的服务器列表
        }
    }
}
启动nginx: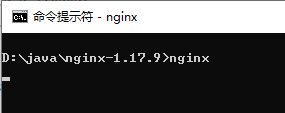
访问:http://127.0.0.1,登录成功以后,每次刷新主页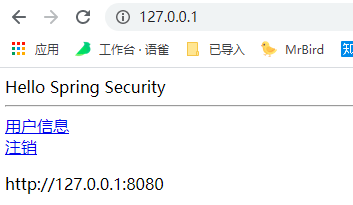
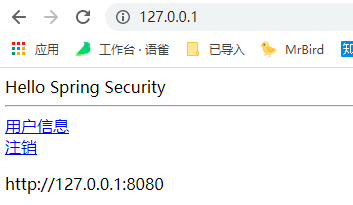
8080 和 8081 应用的页面会轮询显示,说明两个应用的session会话已经共享成功。
查看Redis 服务器数据: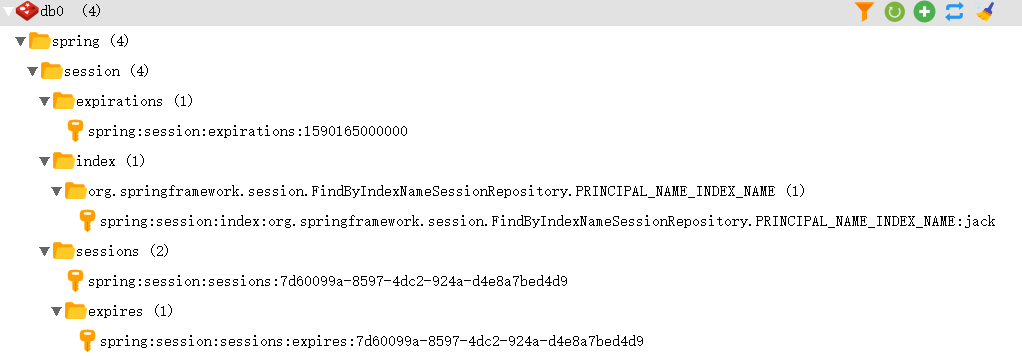
用户的会话数据已经存储到了 Redis 数据库。
