1.3 认证
1.3.1 认证定制
上节案例中用户名和密码都是由 Spring Security 生成,实际开发中用户信息存储在数据库。所以我们要自定义认证逻辑。
需要实现 Spring Security 提供的 UserDetailService 接口,该接口只有一个抽象方法 loadUserByUsername,用来获取外部(如数据库) 的用户信息,源码如下:
public interface UserDetailsService {UserDetails loadUserByUsername(String username) throws UsernameNotFoundException;}
loadUserByUsername方法返回一个 UserDetail 对象,该对象也是一个接口,包含一些用于描述用户信息的方法,源码如下:
public interface UserDetails extends Serializable {// 获取用户包含的权限集合,权限是一个继承了GrantedAuthority的对象Collection<? extends GrantedAuthority> getAuthorities();// 用户名String getPassword();// 密码String getUsername();// 用户账号是否过期boolean isAccountNonExpired();// 用户账号是否被锁定boolean isAccountNonLocked();// 用户凭证是否过期boolean isCredentialsNonExpired();// 用户是否可用boolean isEnabled();}
UserDeatils 接口
创建 User 类实现 UserDetails 接口。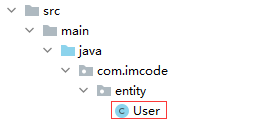
package com.imcode.entity;

import org.springframework.security.core.GrantedAuthority;
import org.springframework.security.core.userdetails.UserDetails;
import java.util.Collection;

public class User implements UserDetails {
    private String username;
    private String password;
    private Collection<? extends GrantedAuthority> authorities;

    public User(String username, String password) {
        this.username = username;
        this.password = password;
    }

    public User(String username, String password,
                Collection<? extends GrantedAuthority> authorities) {
        this.username = username;
        this.password = password;
        this.authorities = authorities;
    }

    @Override
    public Collection<? extends GrantedAuthority> getAuthorities() {
        return this.authorities;
    }

    @Override
    public String getPassword() {
        return this.password;
    }

    @Override
    public String getUsername() {
        return this.username;
    }

    @Override
    public boolean isAccountNonExpired() {
        return Boolean.TRUE;
    }

    @Override
    public boolean isAccountNonLocked() {
        return Boolean.TRUE;
    }

    @Override
    public boolean isCredentialsNonExpired() {
        return Boolean.TRUE;
    }

    @Override
    public boolean isEnabled() {
        return Boolean.TRUE;
    }
}
UserDetailsService 接口
创建 UserServiceImpl 类实现 UserDetailsService 接口。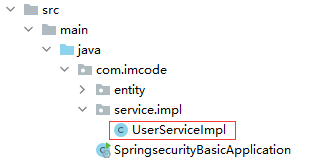
注意:该类要添加 @Service 注解,启动的时候该类的对象纳入 Spring 容器管理。
package com.imcode.service.impl;

import com.imcode.entity.User;
import org.springframework.security.authentication.BadCredentialsException;
import org.springframework.security.core.userdetails.UserDetails;
import org.springframework.security.core.userdetails.UserDetailsService;
import org.springframework.security.core.userdetails.UsernameNotFoundException;
import org.springframework.stereotype.Service;

@Service
public class UserServiceImpl implements UserDetailsService {
    @Override
    public UserDetails loadUserByUsername(String username) throws UsernameNotFoundException {
        // 模拟一个存储在数据库中的用户
        String dbUsername = "jack";
        String dbPassword = "123456";
        if (!dbUsername.equals(username)) {
            throw new UsernameNotFoundException("用户名或密码错误");
        }
        // 创建UserDetails的对象并返回
        return new User(dbUsername, dbPassword);
    }
}
访问 http://localhost:8080/login,输入用户名 jack ,密码 123456 登录,登录不成功,后台日志:
我们需要对秘密进行加密,并配置一个 PasswordEncoder。
1.3.2 密码加密
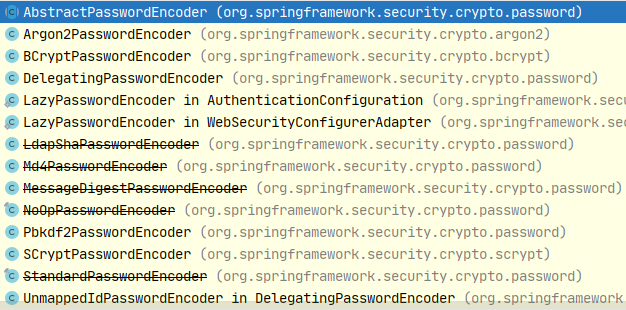
PasswordEncoder
接口源码:
public interface PasswordEncoder {
    // 把参数按照指定算法编码
    String encode(CharSequence var1);

    // 验证编码后密码与明文密码是否匹配
    // 第一个参数:明文密码。第二个参数:指定算法编码后的密文。
    boolean matches(CharSequence var1, String var2);
    ....
}
Bcrypt
BCryptPasswordEncoder 是 Spring Security 官方推荐的密码解析器。
BCryptPasswordEncoder 是对 Bcrypt 散列算法的具体实现。该算法是不可逆的,可以用在密码加密。
特点:
- 相同的明文每次使用 Bcrypt 编码后的密文都不一样;
- 计算非常缓慢,有效防止暴力破解。
Bcrypt有四个变量:
- saltRounds: 正数,代表 Hash 次数,数值越高越安全,默认10次;
- myPassword: 明文密码字符串;
- salt: 盐,一个128bits 随机字符串;
- myHash: 经过明文密码password 和盐 salt 进行hash,循环加盐 hash10 次,得到 myHash;
每次明文字符串myPassword过来,就通过10次循环加盐salt加密后得到myHash, 然后拼接BCrypt版本号+salt盐+myHash等到最终的bcrypt密码 
校验时,从myHash中取出salt,salt 跟 myPassword 按saltRounds次数进行hash;得到的结果跟myHash 进行比对。
BCryptPasswordEncoder
使用案例:
@Test
public void test01() {
    //用户明文密码
    String password = "123456";
    //密码加密
    PasswordEncoder passwordEncoder = new BCryptPasswordEncoder();
    //加密
    String newPassword = passwordEncoder.encode(password);
    System.out.println("加密密码为:" + newPassword);
    //对比这两个密码是否是同一个密码
    boolean matches = passwordEncoder.matches(password, newPassword);
    System.out.println("两个密码一致:" + matches);
}

将生成的密码替换原来的明文密码: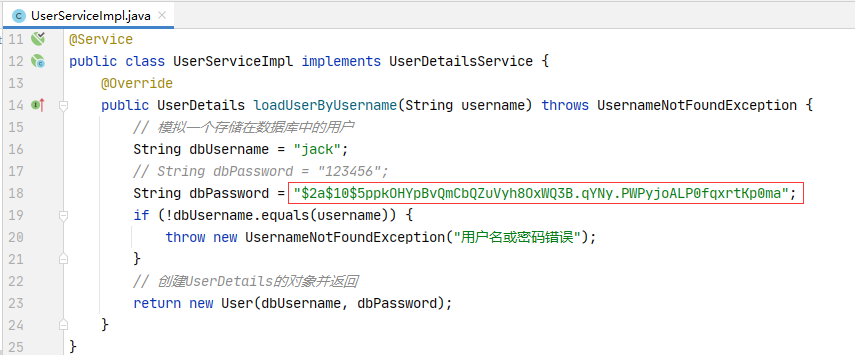
我们需要让 Spring 容器知道我们使用了 Bcrypt 算法进行密码加密。 创建 WebSecurityConfig 配置类,在该配置类注入 BCryptPasswordEncoder 即可: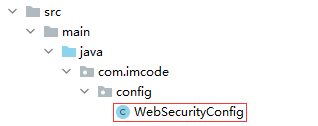
package com.imcode.config;

import org.springframework.context.annotation.Bean;
import org.springframework.context.annotation.Configuration;
import org.springframework.security.crypto.bcrypt.BCryptPasswordEncoder;
import org.springframework.security.crypto.password.PasswordEncoder;

@Configuration
public class WebSecurityConfig {
    @Bean
    public PasswordEncoder passwordEncoder() {
        return new BCryptPasswordEncoder();
    }
}
重启项目访问 http://localhost:8080/login,输入用户名 jack,密码123456 验证。
1.3.3 自定义登录
表单登录配置
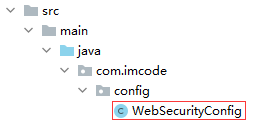
让我们的 WebSecurityConfig 类继承 Spring Security 的 WebSecurityConfigurerAdapter 类,重写 configure(HttpSecurity http) 方法,来完成配置。
注意:重写 configure(HttpSecurity http) 方法后,Spring Security 对表单用户名密码登录认证的默认配置都将失效,我们需要自己来配置表单认证的配置。
@Configuration
public class WebSecurityConfig extends WebSecurityConfigurerAdapter {

    @Override
    protected void configure(HttpSecurity http) throws Exception {
        http
                // 表单登录配置项
                .formLogin()
                .loginPage("/login")  // 登录页面的 URL GET
                .loginProcessingUrl("/login")// 处理登录请求的 URL POST

                .and()
                // 认证配置项
                .authorizeRequests()
                .antMatchers("/login").permitAll() // 登录请求允许不通过认证访问
                .anyRequest().authenticated() // 其它请求都需要认证通过才能访问

                .and()
                // 禁用跨域请求伪造防护
                .csrf().disable();
    }

    @Bean
    public PasswordEncoder passwordEncoder() {
        return new BCryptPasswordEncoder();
    }
}
登录控制器
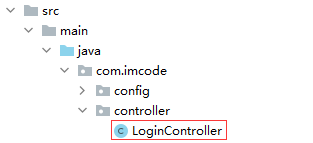
package com.imcode.controller;

import org.springframework.stereotype.Controller;
import org.springframework.web.bind.annotation.GetMapping;

@Controller
public class LoginController {
    @GetMapping("/login")
    public String login() {
        return "login";
    }
}
登录页面
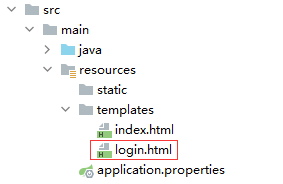
<!DOCTYPE html>
<html>
<head>
    <meta charset="UTF-8">
    <title>系统登录</title>
</head>
<body>
<h1>登录页面</h1>
<form method="post" action="/login">
    用户名:<input type="text" name="username"/><br/>
    密 码:<input type="password" name="password"/><br/>
    <input type="submit" value="登录"/>
</form>
</body>
</html>
注意:提交表单的 URL 地址要和配置类
WebSecurityConfig中 .loginProcessingUrl(“/login”) 一致。 登录的逻辑不用程序员开发,springsecurity 框架会帮我们完成。
启动系统访问,登录页面效果如下: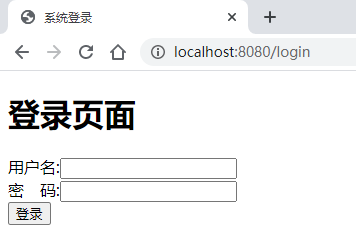
测试结果:
登录成功:默认跳转到系统初始化页面,满足需求 登录失败:又重新跳转到了登录页面,但没有了错误提示信息,不满足需求 我们需要将登录失败后能够给出用户错误提示。
登录失败处理
配置
添加登录失败的URL配置: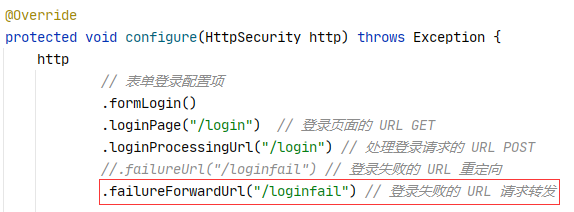
注意 .failureUrl 和 .failureForwardUrl 的区别,前者是重定向,后者是请求转发;
代码
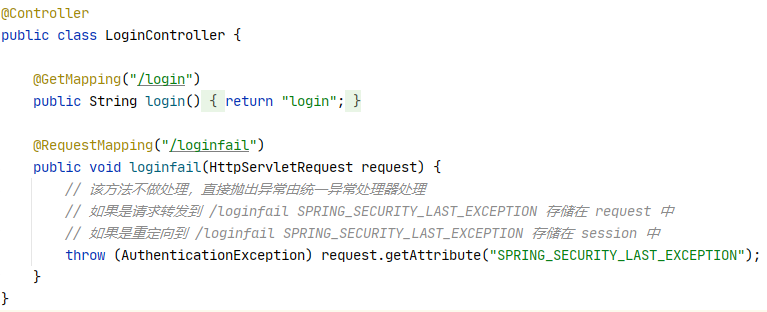
建议使用 .failureForwardUrl 配置登录失败的 URL,异常信息存储在 request 对象中。使用 .failureUrl 配置
统一异常处理
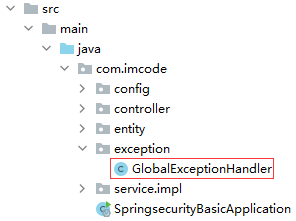
@RestControllerAdvice
@Slf4j
public class GlobalExceptionHandler {
    @ExceptionHandler(BadCredentialsException.class)
    @ResponseStatus(HttpStatus.UNAUTHORIZED)
    public Map<String, Object> handleBadCredentialsException(BadCredentialsException e) {
        log.error("错误代码:{}:{}", HttpStatus.UNAUTHORIZED.value(), e.getMessage());
        Map<String, Object> map = new HashMap<>();
        map.put("code", HttpStatus.UNAUTHORIZED.value());
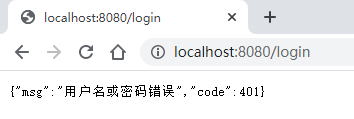
        map.put("msg", "用户名或密码错误");
        return map;
    }
}
1.3.4 退出登录
Spring Security 默认的退出登录URL为 /logout,退出登录后,Spring Security会做如下处理:
- 失效当前的 HttpSession 对象;
- 清除与当前用户关联的 RememberMe 记录;
- 清空当前的 SecurityContext 对象内容;
- 重定向到登录页。
