学习目标
驱动编写:
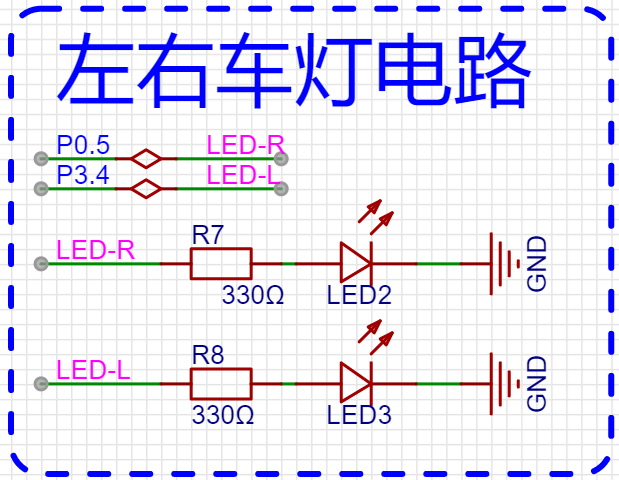
#ifndef __LIGHT_H#define __LIGHT_H#include "config.h"#define LIGHT_LEFT_PIN P34#define LIGHT_RIGHT_PIN P05#define LIGHT_INIT() {P3M1 &= ~0x10, P3M0 |= 0x10, P0M1 &= ~0x20, P0M0 |= 0x20;}#define LIGHT_LEFT_ON() (LIGHT_LEFT_PIN = 1)#define LIGHT_LEFT_OFF() (LIGHT_LEFT_PIN = 0)#define LIGHT_RIGHT_ON() (LIGHT_RIGHT_PIN = 1)#define LIGHT_RIGHT_OFF() (LIGHT_RIGHT_PIN = 0)typedef enum {LIGHT_ALL = 0, LIGHT_LEFT = 1, LIGHT_RIGHT = 2} Light;void Light_init(void);void Light_on(Light l);void Light_off(Light l);#endif
#include "Light.h"void Light_init(void) {LIGHT_INIT();}void Light_on(Light l) {if(l == LIGHT_ALL) {LIGHT_LEFT_ON();LIGHT_RIGHT_ON();} else if(l == LIGHT_LEFT) {LIGHT_LEFT_ON();} else if(l == LIGHT_RIGHT) {LIGHT_RIGHT_ON();}}void Light_off(Light l) {if(l == LIGHT_ALL) {LIGHT_LEFT_OFF();LIGHT_RIGHT_OFF();} else if(l == LIGHT_LEFT) {LIGHT_LEFT_OFF();} else if(l == LIGHT_RIGHT) {LIGHT_RIGHT_OFF();}}
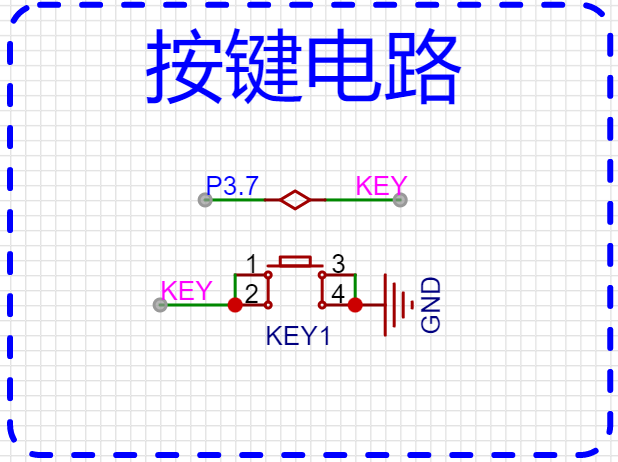
按键

驱动编写:
#ifndef __KEY_H__#define __KEY_H__#include "config.h"#define KEY_PIN P37#define KEY_PIN_INIT() {P3M1 &= ~0x80, P3M0 &= ~0x80;}void Key_init();void Key_scan();extern void Key_on_keyup();extern void Key_on_keydown();#endif
#include "Key.h"static u8 key_state = 0x01;void Key_init() {KEY_PIN_INIT();}void Key_scan() {if(KEY_PIN == 0 && key_state == 1) {// 当前按下,之前是抬起key_state = 0;Key_on_keydown();} else if(KEY_PIN == 1 && key_state == 0){key_state = 1;Key_on_keyup();}}
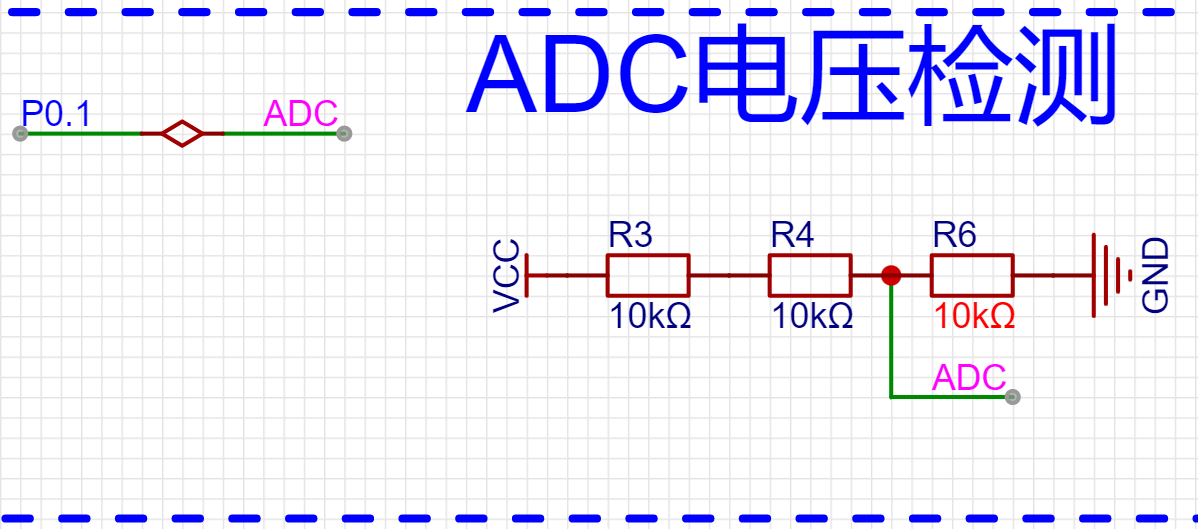
电压检测

ADC测电压
驱动编写:
#ifndef __BATTERY_H_#define __BATTERY_H_#include "config.h"#include "ADC.h"#define BATTERY_PIN P01#define BATTERY_CHN 9#define BATTERY_PIN_INIT() {P0M1 |= 0x02, P0M0 &= ~0x02;}void Battery_init();float Battery_get_voltage();#endif
#include "Battery.h"void Battery_init() {BATTERY_PIN_INIT();}float Battery_get_voltage() {u16 result = Get_ADCResult(BATTERY_CHN);float v = result * 2.5 / 4096;return v * 3.0;}
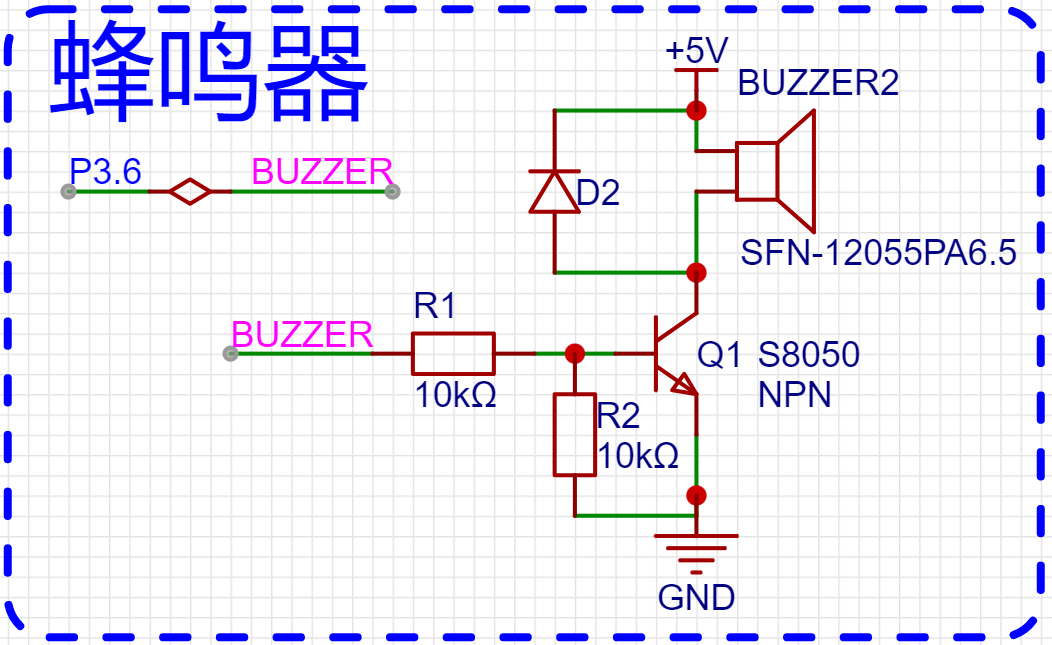
蜂鸣器

- 如果蜂鸣器采用的是无源蜂鸣器,通过指定频率和占空比的PWM进行控制。
- 如果蜂鸣器采用的是有源蜂鸣器,通电就可以响。
驱动编写:
#ifndef __BUZZER_H__#define __BUZZER_H__#include "config.h"#define BUZZER_PIN P36#define BUZZER_PIN_INIT() {P3M1 &= ~0x40, P3M0 |= 0x40;}void Buzzer_init();void Buzzer_start();void Buzzer_stop();#endif
#include "Buzzer.h"void Buzzer_init() {BUZZER_PIN_INIT();}void Buzzer_start() {BUZZER_PIN = 1;}void Buzzer_stop() {BUZZER_PIN = 0;}
练习题
- 通过按键来切换蜂蜜器响或者不响
- 通过按键来控制灯的开关
- 打印电压数据


