课件
12.1 模板
模板函数与函数模板
模板类与类模板
notes
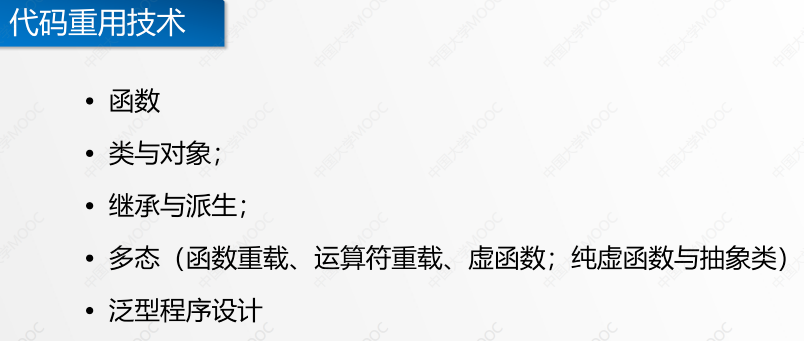
代码重用技术
- 函数
- 类与对象
- 继承与派生
- 多态(函数重载、运算符重载、虚函数、纯虚函数、抽象类)
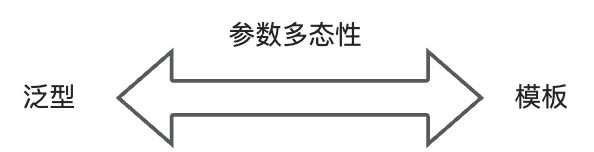
- 泛型程序设计
泛型程序设计:通用的代码需要 不受数据类型的影响,并且可以自动适应数据类型的变化,这种程序设计类型称为 泛型程序设计。
模板
- 模板的类型包括:函数模板、类模板
- 模板的声明(定义):只能在全局,命名空间或类范围内进行。即不能在局部范围,函数内进行,比如不能在 main 函数中声明或定义一个模板。
代码重用是指在软件开发中使用现有的代码模块,以实现新的功能或模块的过程。它可以提高软件开发的效率和质量,减少重复工作和维护成本。
以下是一些常用的代码重用技术:
- 函数和子程序:将一些常用的功能封装在函数或子程序中,以便在不同的程序中重用。
- 类和对象:使用面向对象编程中的类和对象,通过继承和多态性来实现代码重用。
- 组件和模块:使用可重用的组件和模块来构建软件系统,这些组件和模块可以通过接口和协议进行通信。
- 泛型编程:使用泛型编程技术,将一些通用的算法和数据结构实现为模板,以便在不同的数据类型和程序中重用。
- 库和框架:使用现有的软件库和框架来加速开发过程,减少代码量和维护成本。
这些技术都可以帮助程序员在不同的应用程序中重用代码,提高开发效率和软件质量。选择哪种代码重用技术取决于具体的应用场景和需求。
模板(template)是一种泛型编程技术,它允许程序员编写通用代码,而不用关心代码将被用于什么类型。模板允许在编译时使用参数化类型,从而在编译时生成具体的代码。模板可以用于定义函数模板和类模板。
使用模板,程序员可以编写一次通用代码,然后将其用于许多不同的数据类型,从而减少了代码的冗余和维护成本,同时也提高了代码的重用性和可读性。C++ STL(标准模板库)是一个典型的例子,其中大量使用了模板技术。
模板实例化是指在使用模板时,编译器会根据实际情况将模板中的类型参数替换为具体的类型,生成对应的代码。实例化的过程可以在编译期间或运行期间进行。模板实例化的主要目的是生成可执行的代码,以便使用模板类或模板函数提供的功能。在编译期间进行实例化可以提高程序的执行效率,因为编译器可以在编译时就生成针对特定类型的优化代码。
模板参数是指在模板定义中所定义的形式参数。模板参数可以是类型参数,也可以是非类型参数。
类型参数是指可以替换为任意类型的形式参数,例如下面的模板定义中的 T 就是类型参数:
template<typename T>void print(T value) {std::cout << value << std::endl;}
非类型参数是指可以替换为任意常量表达式的形式参数,例如下面的模板定义中的 N 就是非类型参数:
template<int N>int get() {return N;}
模板参数可以用来表示模板中的类型、大小等信息,从而实现模板的通用性和灵活性。在模板实例化时,需要提供具体的模板参数,以生成特定的模板实例。
#include <iostream>#include <algorithm>using namespace std;template <typename T>T max(T a, T b) {return a > b ? a : b;}int main() {int a = 5, b = 10;cout << "Max of " << a << " and " << b << " is " << std::max<int>(a, b) << endl;return 0;}/*Max of 5 and 10 is 10*/
函数模板和模板函数都是泛型编程的重要概念,但是它们在C++中是不同的概念。
函数模板(Function Template)指的是用通用形式定义的函数,通常形式如下:
template <typename T>void my_swap(T& a, T& b) {T temp = a;a = b;b = temp;}
这里,T 是一个类型参数,用于指定在使用函数时要使用的具体类型。在编译期间,编译器会根据代码中的实际类型来实例化函数模板,并为每种类型生成一个相应的函数。
模板函数(Template Function)是指具体的使用函数模板生成的函数。例如,如果在代码中调用 my_swap(3, 4),则编译器会根据这个调用生成一个类型为 int 的模板函数 my_swap
因此,函数模板是一个通用的函数定义,可以根据需要生成任意类型的模板函数;而模板函数则是根据函数模板实例化生成的、具体的函数。
函数模板
⚠️ 课件中使用的 max 标识符统一替换为 my_max,使用 max 作为标识符,可能会出现一些无法预测的错误。
问题描述:
A:一个函数求两个值中的最大者。
B:针对什么数据类型求解?
A:所有基本数据类型都有可能要使用这个功能。
B:函数重载,写多个函数,功能一模一样,但数据类型不同,比如 int my_max(int x,int y){ … } float my_max(float x,float y){ … }
A:这些函数除了操作的数据类型不同之外,代码框架是一样的。这使程序代码变得累赘而加大维护难度。
B:宏定义怎样?#define my_max(x, y) ((x) > (y) ? (x) : (y))
A:解决了代码维护问题,但缺少类型检查,容易产生错误!
C++ 的模板可以轻松地解决上述问题,此时 数据类型本身就是一个参数。
template<class 形参名1,class 形参名2,......> 返回类型 函数名(参数列表) {函数体}
template<class T> T my_max(T x,T y) {return x > y ? x : y;}
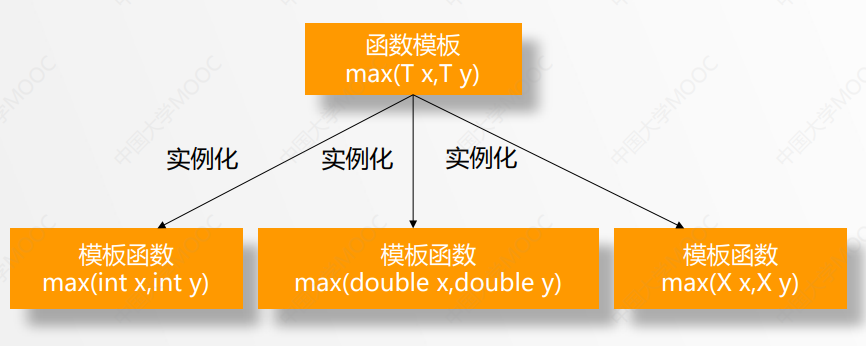
my_max 代表了一类具有相同程序逻辑的函数,称为函数模板。
由函数模板实例化出的函数称为 模板函数。
函数模板必须实例化
- 隐式实例化:当调用模板函数时,编译器会根据传入的参数类型自动推导模板参数类型并实例化模板函数,然后进行编译和链接。这个过程被称为隐式实例化。
- 显式实例化:显式实例化是指在代码中手动指定需要实例化的模板参数类型,这样编译器就只会生成指定的模板实例,而不是对所有可能的类型都进行实例化。
#include <iostream>using namespace std;template <class T> T my_max(T x, T y) { return x > y ? x : y; }int main() {double a = 1.0, b;b = my_max(a, 2.0); // 隐式实例化,相当于 b = my_max<double>(a, 2.0);cout << "b = " << b << endl; // => b = 2return 0;}
#include <iostream>using namespace std;template <class T> T my_max(T x, T y) { return x > y ? x : y; }int main() {double a = 1.0, b;b = my_max<double>(a, 2.0); // 显式实例化cout << "b = " << b << endl; // => b = 2return 0;}
- 显式实例化可以在编译时生成特定类型的函数代码,避免因为传入参数类型的差异导致的代码重复,可以提高程序的运行效率和减小程序的体积。
- 有些编译器可能无法自动推导出函数模板的实参类型,需要手动进行实例化。
补充:即便我们将语句
b = my_max<double>(a, 2.0);故意写成b = my_max<int>(a, 2.0);在有些编译器下也不会报错,程序依旧可以正常执行。这一点有个印象就好,如果能够明确知道数据类型,写上就对了,不要故意写错。
函数模板与模板函数的关系
B:函数模板实例化的时候,实例化为类类型可以吗?A:可以!但要注意:max 模板需要比较 2 个数据的大小,您的这个类型认识 ~~`>` 运算符吗?`>`,是不是就可以了?`>` 运算符作用在类类型上是什么意思。重载之后就知道了!也就可以实例化并在类类型上面使用 max 函数。~~
👆🏻 课件中的这段对话是有问题的,函数模板实例化为类类型是不合法的。
// 无法实例化这 2 个 max 函数!怎么解决?// 使用 my_max(int,int) 还是 my_max(char,char) 呢?void Func(int num, char ch){int a = my_max(num, ch);int b = my_max(ch, num);}
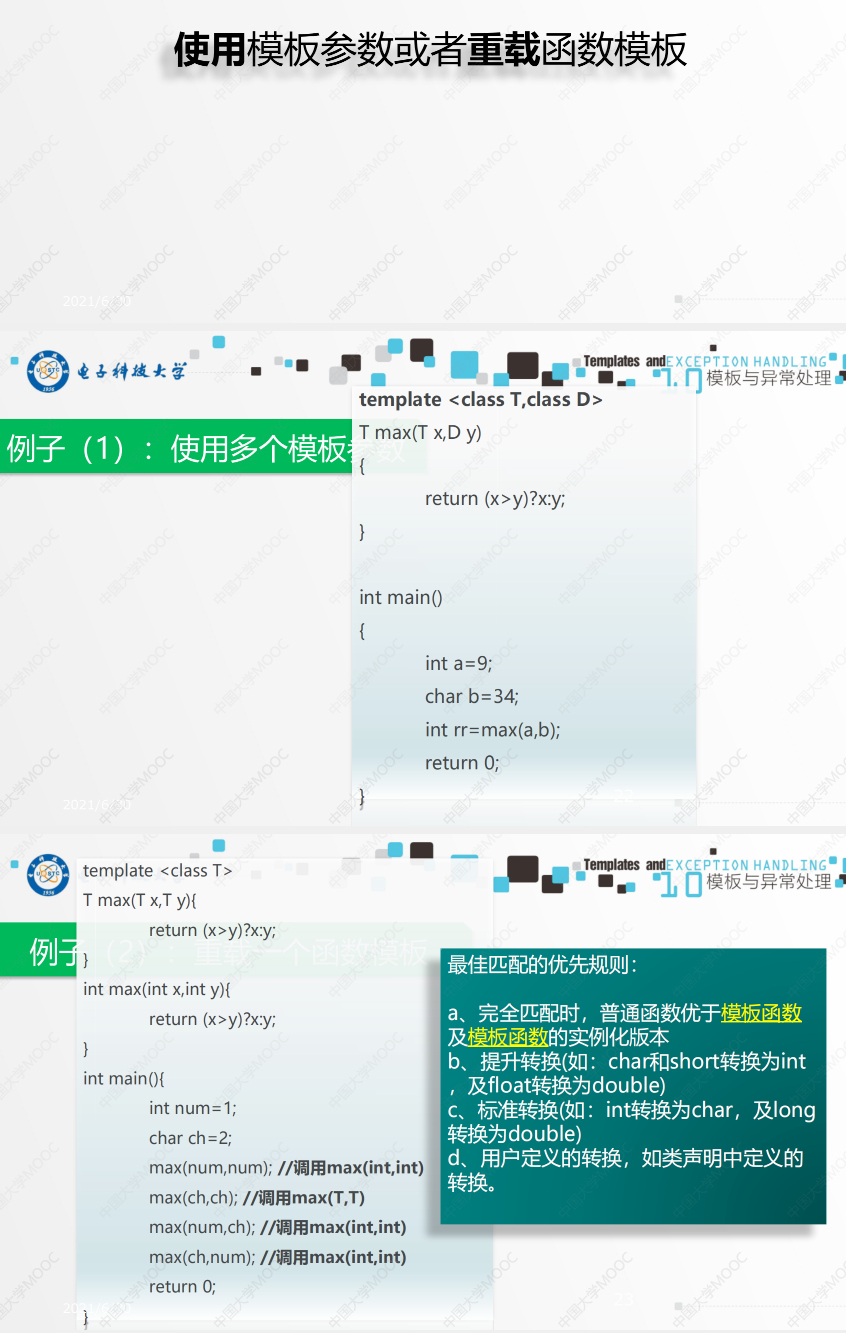
#include <iostream>using namespace std;template <class T, class D> T my_max(T x, D y) { return (x > y) ? x : y; }int main() {int a = 9;char b = 34;int rr = my_max<int>(a, b);cout << "rr = " << rr << endl; // => rr = 34return 0;}
#include <iostream>using namespace std;template <class T> T my_max(T x, T y) { return x > y ? x : y; }int main() {int a = 9;char b = 34;int rr = my_max<int>(a, b);cout << "rr = " << rr << endl; // => rr = 34return 0;}
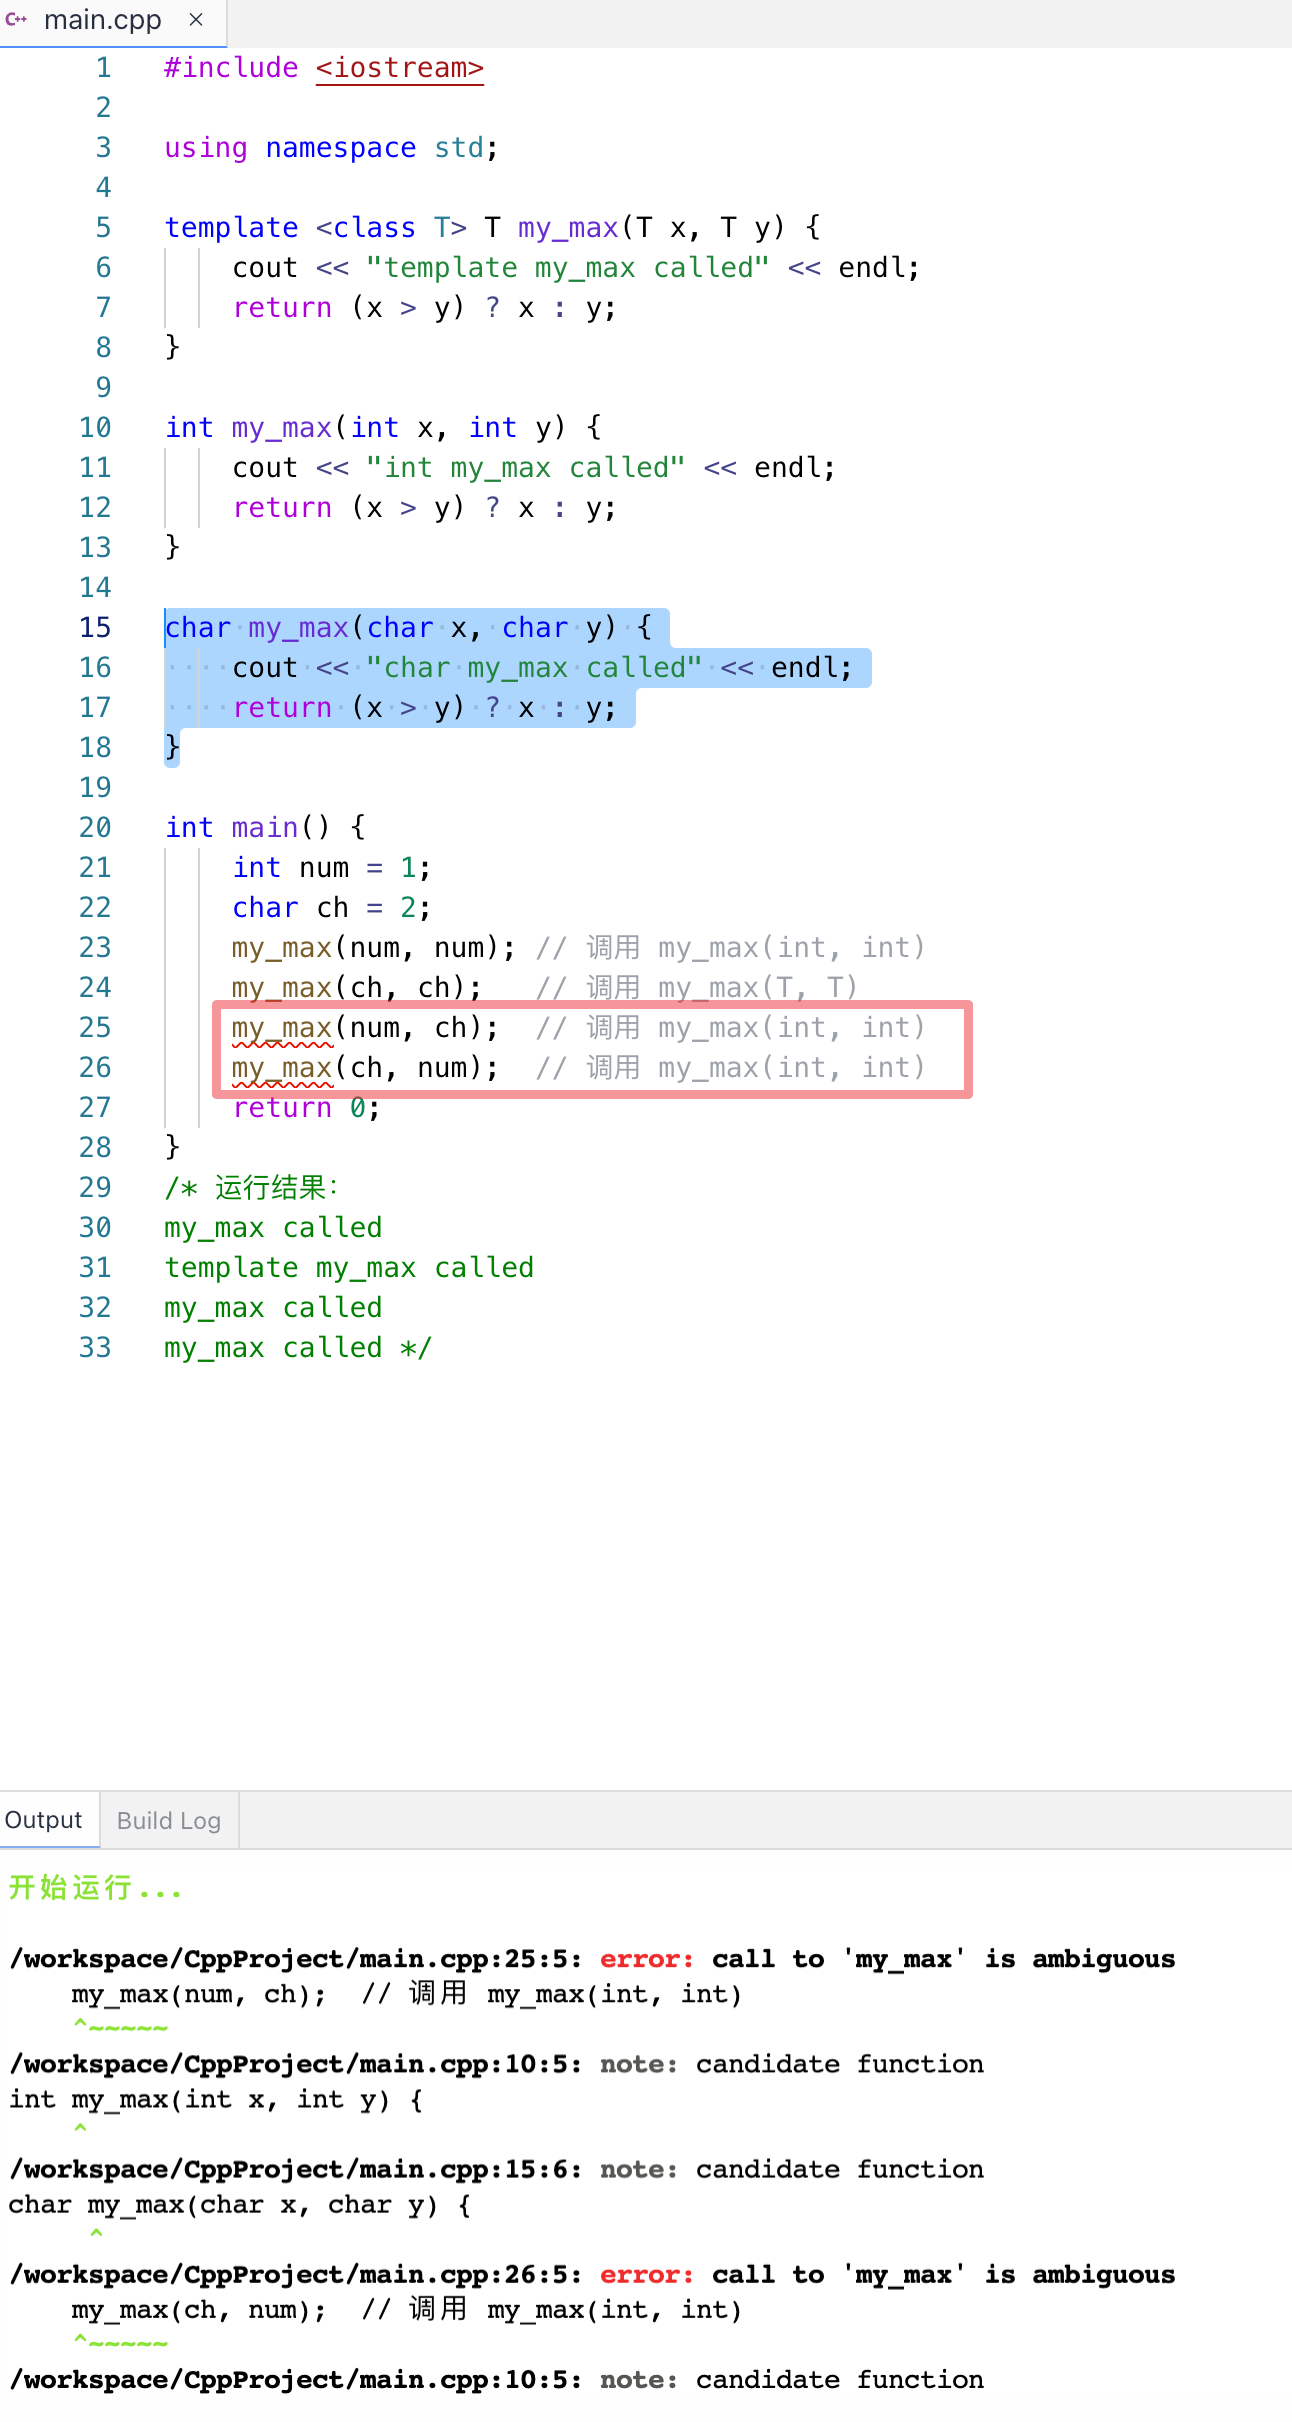
#include <iostream>using namespace std;template <class T> T my_max(T x, T y) {cout << "template my_max called" << endl;return (x > y) ? x : y;}int my_max(int x, int y) {cout << "my_max called" << endl;return (x > y) ? x : y;}int main() {int num = 1;char ch = 2;my_max(num, num); // 调用 my_max(int, int)my_max(ch, ch); // 调用 my_max(T, T)my_max(num, ch); // 调用 my_max(int, int)my_max(ch, num); // 调用 my_max(int, int)return 0;}/* 运行结果:my_max calledtemplate my_max calledmy_max calledmy_max called */
最佳匹配的优先规则:
- 完全匹配时,普通函数优于模板函数及模板函数的实例化版本
- 提升转换(如:char 和 short 转换为 int,及 float 转换为 double)
- 标准转换(如:int 转换为 char,及 long 转换为 double)
- 用户定义的转换,如类声明中定义的转换。
问题记录
char my_max(char x, char y) {cout << "char my_max called" << endl;return (x > y) ? x : y;}
类模板
#include <iostream>using namespace std;class node {private:int value;node* prev;node* next;public:node() {prev = NULL;next = NULL;}void setValue(int value) { this->value = value; }void append(node* p);void print();};void node::append(node* p) {p->next = this->next;p->prev = this;if (next != NULL)next->prev = p;next = p;}void node::print() {node* p = this;while (p != NULL) {cout << p->value << " ";p = p->next;}cout << endl;}int main() {node* list_head;node node, node1, node2, node3, node4;node.setValue(1);node1.setValue(2);node2.setValue(3);node3.setValue(4);node4.setValue(5);list_head = &node;list_head->print(); // 1list_head->append(&node1);list_head->print(); // 1 2list_head->append(&node2);list_head->print(); // 1 3 2list_head->append(&node3);list_head->print(); // 1 4 3 2list_head->append(&node4);list_head->print(); // 1 5 4 3 2return 0;}
append 方法,用于向当前节点的后一个位置插入新成员
int main() {node* list_head;node node, node1, node2, node3, node4;node.setValue(1);node1.setValue(2);node2.setValue(3);node3.setValue(4);node4.setValue(5);list_head = &node;list_head->print(); // 1node.append(&node1);list_head->print(); // 1 2node1.append(&node2);list_head->print(); // 1 2 3node2.append(&node3);list_head->print(); // 1 2 3 4node3.append(&node4);list_head->print(); // 1 2 3 4 5return 0;}
template<class 形参名,class 形参名,…> class 类名 {// ...};
template<模板形参列表> 函数返回类型 类名<模板形参名>::函数名(参数列表) {// ...}
#include <iostream>using namespace std;template <class T> class node {T value;node *prev, *next;public:node() {prev = NULL;next = NULL;}void setValue(T value) { this->value = value; }void append(node* p);void print();};// node<T> 是类模板的名字template <class T> void node<T>::append(node* p) {p->next = this->next;p->prev = this;if (next != NULL)next->prev = p;next = p;}template <class T> void node<T>::print() {node* p = this;while (p != NULL) {cout << p->value << " ";p = p->next;}cout << endl;}int main() {// 用模板实参实例化模板类node<int>* list_head;node<int> node, node1, node2, node3, node4;node.setValue(1);node1.setValue(2);node2.setValue(3);node3.setValue(4);node4.setValue(5);list_head = &node;list_head->print(); // 1node.append(&node1);list_head->print(); // 1 2node1.append(&node2);list_head->print(); // 1 2 3node2.append(&node3);list_head->print(); // 1 2 3 4node3.append(&node4);list_head->print(); // 1 2 3 4 5return 0;}

12.2 命名空间

C++ 中的命名空间是一种封装机制,可以帮助开发者避免名称冲突,提高代码可读性和可维护性。
命名空间是一个逻辑上的概念,用于将一组相关的函数、类、变量等封装在一个命名空间中,从而避免命名冲突。在命名空间中,每个名字都与一个特定的命名空间相关联。在不同的命名空间中,可以使用相同的名称来定义不同的实体。
C++ 中的命名空间使用 namespace 关键字来定义,例如:
namespace my_namespace {// 命名空间中的代码}
在命名空间中定义的变量、函数和类等都可以通过命名空间限定符来访问,例如:
my_namespace::my_function();my_namespace::my_class obj;
还可以通过 using 关键字来引入命名空间中的名称,例如:
using my_namespace::my_function;my_function();
也可以通过 using namespace 来引入整个命名空间,例如:
using namespace my_namespace;my_function();my_class obj;
但是在实际开发中,为了避免命名冲突,通常不建议使用 using namespace 引入整个命名空间,而是建议使用命名空间限定符来访问。
#include <iostream>using namespace std;class Student {public:void ShowMe() { cout << "MyStudent" << endl; }};
#include <iostream>using namespace std;class Student {public:void ShowMe() { cout << "YourStudent" << endl; }};
#include "MyStudent.cpp"#include "YourStudent.cpp"int main() {Student s;s.ShowMe();return 0;}

#include <iostream>using namespace std;namespace MyStudent {class Student {public:void ShowMe() { cout << "MyStudent" << endl; }};} // namespace MyStudent
#include <iostream>using namespace std;namespace YourStudent {class Student {public:void ShowMe() { cout << "YourStudent" << endl; }};}
#include "MyStudent.cpp"#include "YourStudent.cpp"int main() {MyStudent::Student ms;YourStudent::Student ys;ms.ShowMe(); // => MyStudentys.ShowMe(); // => YourStudentreturn 0;}
MyStudent::如果想要简写为 Student,那么可以加上using namespace MyStudent;语句,表示使用 MyStudent 命名空间中的成员。YourStudent::如果想要简写为 Student,那么可以加上using namespace YourStudent;语句,表示使用 YourStudent 命名空间中的成员。
注意:如果同时写 using namespace MyStudent;、using namespace YourStudent; 这两条语句,那么还是会出现命名冲突错误,因为这两个命名空间中的成员 Student 重名了。
小结:
- 命名空间也称为 名字空间,它是表达多个变量和多个函数组合成一个组的方法。
- 主要是为了解决名字(用户定义的类型名、变量名、函数名)冲突的问题。
- 一个命令空间是一个作用域,在不同名字空间中命名相同的符号代表不同的实体。
- 命名空间可以在两个地方被定义:在 全局范围 层次或者是在另一个命名空间中被定义(这样就形成一个 嵌套名字空间),不能在函数和类的内部定义。
- 全局命名空间是隐式声明的,存在于每个程序中,可以用作用域操作符引用全局命名空间的成员。
- 全局命名空间是隐含的,它没有名字,可以通过使用双冒号
::来访问其中的实体。比如,全局变量x可以通过::x来访问。
#include <iostream>namespace ns1 {int x = 1;namespace ns2 {int y = 2;}} // namespace ns1int main() {std::cout << ns1::x << std::endl; // 访问 ns1 的 xstd::cout << ns1::ns2::y << std::endl; // 访问 ns1::ns2 的 yreturn 0;}/* 运行结果:12 */
12.3 异常处理
异常处理
今天是内存空间不足,昨天是硬盘文件被人移动到其他驱动器,前天是打印机未连接好!
程序崩溃!
总算解决程序老崩溃的问题了。
现在做到部分功能可以允许用户排除环境错误,继续运行程序;部分功能可以给出适当的提示信息。
引发异常
处理异常
异常引发和处理不在同一个函数
下层解决问题
上层处理各种异常
异常处理机制提供程序中错误检测与错误处理部分之间的通信。
异常存在于程序的正常功能之外,要求程序立即处理。
Try 和异常处理
- 异常机制提供程序中 错误检测与错误处理 部分之间的通信。
- throw 表达式:引发异常条件
- try 块:以try开始,并以一个或多个catch结束。在try块中执行的代码所抛出的异常,常会被其中一个Catch子句处理。
- 标准库定义的一组 异常类:用来在throw和相应的catch之间传递有关的错误信息。
- try{statements;}
- catch(exception expression1){statements;}
- catch(exception expression2){statements;}
- catch(exception expressionN){statements;}
try … catch 语句表达式如下:
// Throw 表达式int test() {sales_item item1, item2;std::cin >> item1 >> item2;if (item1.same_isbn(item2)) {std::cout << item1 + item2 << std::endl;return 0;} else {std::cerr << "Data must refer to same ISBN" << std::endl;return -1;}}
// 改用 throwif (!item1.same_isbn(item2))throw runtime_error("Data must refer to same ISBN");// ok, if we are still here the ISBNs are samstd::cout << item1 + item2 << std::endl;
While(cin >> item1 >> item2) {try {if (item1.sameisbn(item2)) {cout << item1 + item2 << endl;} elsethrow runtime_error("Data must refer to same ISBN");} catch (runtime_error err) {cout << err.what() << "\n Try Again? Enter y or n" << endl;char c;cin >> c;if (cin && c == 'n')break;}}
#include <iostream>using namespace std;void f1() {void f2();try {f2();} //调用f2()catch (char) {cout << "OK1!";}cout << "end1" << endl;}void f2() {void f3();try {f3();} // 调用 f3()catch (int) {cout << "Ok2!" << endl;}cout << "end2" << endl;}void f3() {double a = 0;try {throw a;} // 抛出 double 类型异常信息catch (float) {cout << "OK3!" << endl;}cout << "end3" << endl;} // f3()int main() {void f1();try {f1();} // 调用 f1()catch (double) {cout << "OK0!" << endl;}cout << "end0" << endl;return 0;}/* 运行结果:OK0!end0 */
OK0!(在主函数中捕获异常)end0(执行主函数中最后一个语句时的输出)
#include <iostream>using namespace std;void f1() {void f2();try {f2();} //调用f2()catch (char) {cout << "OK1!";}cout << "end1" << endl;}void f2() {void f3();try {f3();} // 调用 f3()catch (int) {cout << "Ok2!" << endl;}cout << "end2" << endl;}void f3() {double a = 0;try {throw a;} // 抛出 double 类型异常信息catch (double) {cout << "OK3!" << endl;}cout << "end3" << endl;} // f3()int main() {void f1();try {f1();} // 调用 f1()catch (double) {cout << "OK0!" << endl;}cout << "end0" << endl;return 0;}/* 运行结果:OK3!end3end2end1end0 */
OK3!(在f3函数中捕获异常)end3(执行f3函数中最后一个语句时的输出)end2(执行f2函数中最后一个语句时的输出)end1(执行f1函数中最后一个语句时的输出)end0(执行主函数中最后一个语句时的输出)
#include <iostream>using namespace std;void f1() {void f2();try {f2();} //调用f2()catch (char) {cout << "OK1!";}cout << "end1" << endl;}void f2() {void f3();try {f3();} // 调用 f3()catch (int) {cout << "Ok2!" << endl;}cout << "end2" << endl;}void f3() {double a = 0;try {throw a;} // 抛出 double 类型异常信息catch (double) {cout << "OK3!" << endl;throw;}cout << "end3" << endl;} // f3()int main() {void f1();try {f1();} // 调用 f1()catch (double) {cout << "OK0!" << endl;}cout << "end0" << endl;return 0;}/* 运行结果:OK3!OK0!end0 */
OK3!(在f3函数中捕获异常)OK0!(在主函数中捕获异常)end0(执行主函数中最后一个语句时的输出)
标准异常
- exception 头文件:最常见的异常类,类名为:exception.只通知异常,不提供更多信息。
- stdexcept:定义了几种常见的异常类。
- new:头文件定义了 bad_alloc 异常类型,提供因无法分配内存而由 new 抛出的异常
- type_info:定义了 bad_cast 异常类。
预处理器、断言与调试
int main(){#ifndef NDEBUGcerr<< "starting main" <<endl;#endif}
这段代码使用了预处理器指令 #ifndef NDEBUG 和 #endif,它们之间的代码只有在 NDEBUG 未定义时才会编译。这个特殊的宏定义通常用于调试代码,开启宏定义后可以在编译器输出一些调试信息。在这个例子中,如果使用了调试选项编译程序,编译器会输出 starting main。如果没有开启调试选项,这段代码不会输出任何信息。
预处理器指令是指一组用于指导预处理器处理源代码的特殊指令,它们以 # 字符开头。预处理器指令不是 C++ 语句,而是在编译前由预处理器处理的指令。预处理器指令可以用于定义常量、条件编译、包含头文件等操作。
预处理器是 C++ 编译器中的一个程序,用于在编译程序之前对源代码进行处理,它可以根据程序中的指示修改、添加或删除文本。预处理器指令是预处理器所识别的命令,以 # 开头。预处理器指令告诉预处理器执行某些动作,比如包含文件、定义宏、检查程序中是否存在特定的条件等。
命令:$CC –D NDEBUG main.c
这条命令将 main.c 文件编译成可执行文件,其中的 $CC 是编译器的名称,-D NDEBUG 是指示预处理器定义了 NDEBUG 宏。在程序中使用了预处理指令 #ifndef NDEBUG,如果定义了 NDEBUG,则会跳过其中的代码块。这个机制可以在编译时决定是否打印调试信息,提高程序运行效率。
__FILE__ 文件名__LINE__ 当前行号__TIME__ 文件编译时间__DATE__ 文件被编译的日期
Assert(expr)
Assert(word.size()>threshold);
只要 NDEBUG 未定义,assert 宏就求解条件表达式 expr,如果结果为 false,assert 输出信息并且终止程序的执行。如果该表达式有一个非零值,则 assert 不做任何操作。
在成品代码中,assert 不做任何工作,因此没有任何运行时代价。当然也不会引起任何运行时检查。Assert 仅用于检查确实不可能的条件,这只对程序的调试有帮助,但不能用来代替运行时的逻辑检查,也不能代替对程序可能产生的错误检测。

若有收获,就点个赞吧
0 人点赞
