一、简介
1.1 CountDownLatch 是什么?
CountDownLatch是一个同步辅助类,在完成一组正在其他线程中执行的操作之前,它允许一个或多个线程一直等待。
1.2 CountDownLatch 与 CyclicBarrier 的区别?
- CountDownLatch的作用是允许1或N个线程等待其他线程完成执行;而CyclicBarrier则是允许N个线程相互等待。
- CountDownLatch的计数器无法被重置;CyclicBarrier的计数器可以被重置后使用,因此它被称为是循环的barrier。
- CountDownLatch 内部自行采用 AQS实现的共享锁 ;而 CyclicBarrier内部采用 可重入锁 ReentrantLock 和Condition
1.3 CountDownLatch的API
```java //给定一个count的计数器 初始化CountDownLatch public CountDownLatch(int count);
//阻塞当前线程,直到CountDownLatch 的计数器归零,除非线程被打断(Thread#interrupt) public void await() throws InterruptedException
//阻塞当前线程,直到CountDownLatch 的计数器归零,或者等待超时,除非线程被打断(Thread#interrupt) public boolean await(long timeout, TimeUnit unit)
//递减锁存器的计数,如果计数到达零,则释放所有等待的线程。 public void countDown();
//返回当前计数。 public long getCount();
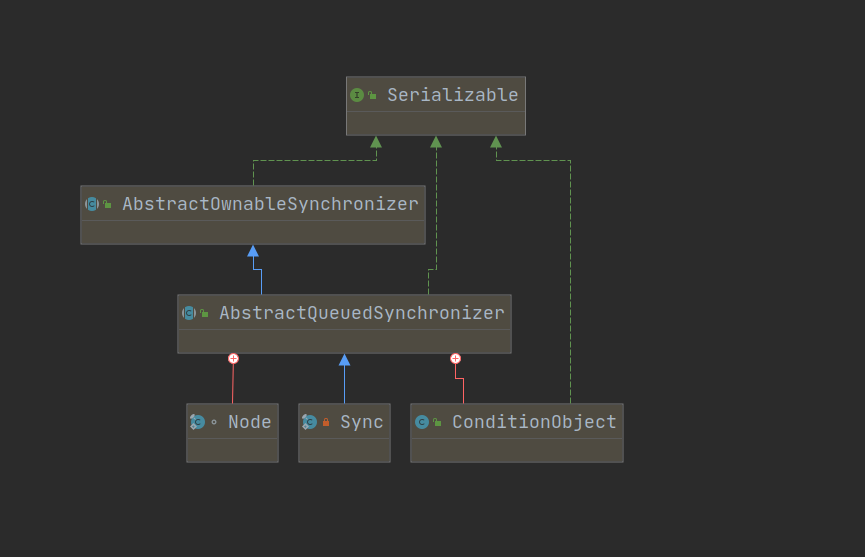
<a name="4N8CS"></a>### 二、数据结构及图示<a name="s7rSm"></a>#### 2.1 CountDownLatch的UML类图<a name="c9WWt"></a>#### 2.2 内部成员```java#共享锁private final Sync sync;
CountDownLatch 内部采用“共享锁” 实现,内部的对象Sync 继承与AbstractQueuedSynchronizer。
三、源码分析
3.1 构造方法
//传入计数值public CountDownLatch(int count) {if (count < 0) throw new IllegalArgumentException("count < 0");//实例化“共享锁”this.sync = new Sync(count);}
3.2 核心 Sync 内部类
//继承AQS 实现的共享锁private static final class Sync extends AbstractQueuedSynchronizer {private static final long serialVersionUID = 4982264981922014374L;Sync(int count) {setState(count);}int getCount() {return getState();}//尝试获取共享锁protected int tryAcquireShared(int acquires) {return (getState() == 0) ? 1 : -1;}//释放共享锁protected boolean tryReleaseShared(int releases) {// Decrement count; signal when transition to zerofor (;;) {//获取AQS 同步状态的值int c = getState();//判断锁是否已经释放if (c == 0)return false;int nextc = c-1;//CAS 修改同步状态值if (compareAndSetState(c, nextc))return nextc == 0;}}}
3.3 await 方法
public void await() throws InterruptedException {sync.acquireSharedInterruptibly(1);}
以上其实是调用AQS 中的 acquireSharedInterruptibly (可打断获取共享锁)
public final void acquireSharedInterruptibly(int arg)throws InterruptedException {//判断线程是否被打断if (Thread.interrupted())throw new InterruptedException();//尝试获取共享锁if (tryAcquireShared(arg) < 0)doAcquireSharedInterruptibly(arg);}
打断模式获取共享锁
//doAcquireSharedInterruptibly()会使当前线程一直等待,//直到当前线程获取到共享锁(或被中断)才返回。private void doAcquireSharedInterruptibly(int arg)throws InterruptedException {//以共享模式,创建节点加入等待队列final Node node = addWaiter(Node.SHARED);boolean failed = true;try {for (;;) {//获取节点的前一个节点final Node p = node.predecessor();//如果是CLH队列的头节点,则可以尝试获取共享锁if (p == head) {int r = tryAcquireShared(arg);if (r >= 0) {setHeadAndPropagate(node, r);p.next = null; // help GCfailed = false;return;}}//如果不是表头,则自旋,直到获取到共享锁。if (shouldParkAfterFailedAcquire(p, node) &&parkAndCheckInterrupt())throw new InterruptedException();}} finally {if (failed)cancelAcquire(node);}}
图示
3.4 countDown 方法
public void countDown() {sync.releaseShared(1);}
- 以上实际上是调用AQS 中的releaseShared方法
```java
public final boolean releaseShared(int arg) {
//tryReleaseShared 尝试释放锁
if (tryReleaseShared(arg)) {
} return false; }//尝试失败,则通过doReleaseShared()去释放共享锁doReleaseShared();return true;
- CountDownLatch Sync 实现的tryReleaseShared 方法```java//释放共享锁protected boolean tryReleaseShared(int releases) {// Decrement count; signal when transition to zerofor (;;) {//获取AQS 同步状态的值int c = getState();//判断锁是否已经释放if (c == 0)return false;//计数器 -1int nextc = c-1;//CAS 修改同步状态值if (compareAndSetState(c, nextc))return nextc == 0;}}
3.5 总结
CountDownLatch 内部是 通过继承AQS 的共享锁 Sync 实现的同步辅助类。在创建CountDownLatch中时,会传递一个int类型参数count,该参数是“锁计数器”的初始状态(实际赋值给AQS 的同步状态值 state ),表示该“共享锁”最多能被count 个线程同时获取。而“共享锁”可用的条件,就是“锁计数器”的值为0!而“锁计数器”的初始值为count,每当一个线程调用该CountDownLatch对象的countDown()方法时,才将“锁计数器”-1;通过这种方式,必须有count个线程调用countDown()之后,“锁计数器”才为0,而前面提到的等待线程才能继续运行!
四、示例(Java 8)
4.1 实现最大并行(默认用户同时请求)
//实例化 CountDownLatchCountDownLatch countDownLatch = new CountDownLatch(1);List<Thread> threads = Stream.generate(() -> new Thread(() -> {try {System.out.println(Thread.currentThread().getName() + " 等待");countDownLatch.await();} catch (InterruptedException e) {e.printStackTrace();}System.out.println(Thread.currentThread().getName() + " 获取用户信息API ");})).limit(100).collect(Collectors.toList());//启动线程threads.forEach(Thread::start);//开始同时访问TimeUnit.SECONDS.sleep(5);countDownLatch.countDown();System.out.println("完成请求===> ");
4.2 “主线程”等待”5个子线程”全部都完成”指定的工作”之后,再继续运行。
//实例化 CountDownLatchCountDownLatch countDownLatch = new CountDownLatch(5);List<Thread> threads = Stream.generate(() -> new Thread(() -> {System.out.println(Thread.currentThread().getName() + "处理任务");try {//模拟耗时TimeUnit.SECONDS.sleep(new Random().nextInt(3));} catch (InterruptedException e) {e.printStackTrace();}countDownLatch.countDown();System.out.println(Thread.currentThread().getName() + "完成任务");})).limit(5).collect(Collectors.toList());//启动线程threads.forEach(Thread::start);System.out.println("主线程等待");countDownLatch.await();System.out.println("主线程开始汇总任务");

