从flink源码中案例开始讲解
public class WordCount {public static void main(String[] args) throws Exception {final MultipleParameterTool params = MultipleParameterTool.fromArgs(args);// set up the execution environmentfinal ExecutionEnvironment env = ExecutionEnvironment.getExecutionEnvironment();// make parameters available in the web interfaceenv.getConfig().setGlobalJobParameters(params);// get input dataDataSet<String> text = null;if (params.has("input")) {// union all the inputs from text filesfor (String input : params.getMultiParameterRequired("input")) {if (text == null) {text = env.readTextFile(input);} else {text = text.union(env.readTextFile(input));}}Preconditions.checkNotNull(text, "Input DataSet should not be null.");} else {// get default test text dataSystem.out.println("Executing WordCount example with default input data set.");System.out.println("Use --input to specify file input.");text = WordCountData.getDefaultTextLineDataSet(env);}DataSet<Tuple2<String, Integer>> counts =// split up the lines in pairs (2-tuples) containing: (word,1)text.flatMap(new Tokenizer())// group by the tuple field "0" and sum up tuple field "1".groupBy(0).sum(1);// emit resultif (params.has("output")) {counts.writeAsCsv(params.get("output"), "\n", " ");// execute programenv.execute("WordCount Example");} else {System.out.println("Printing result to stdout. Use --output to specify output path.");counts.print();}}
程序的最终开始执行是从 env.execute开始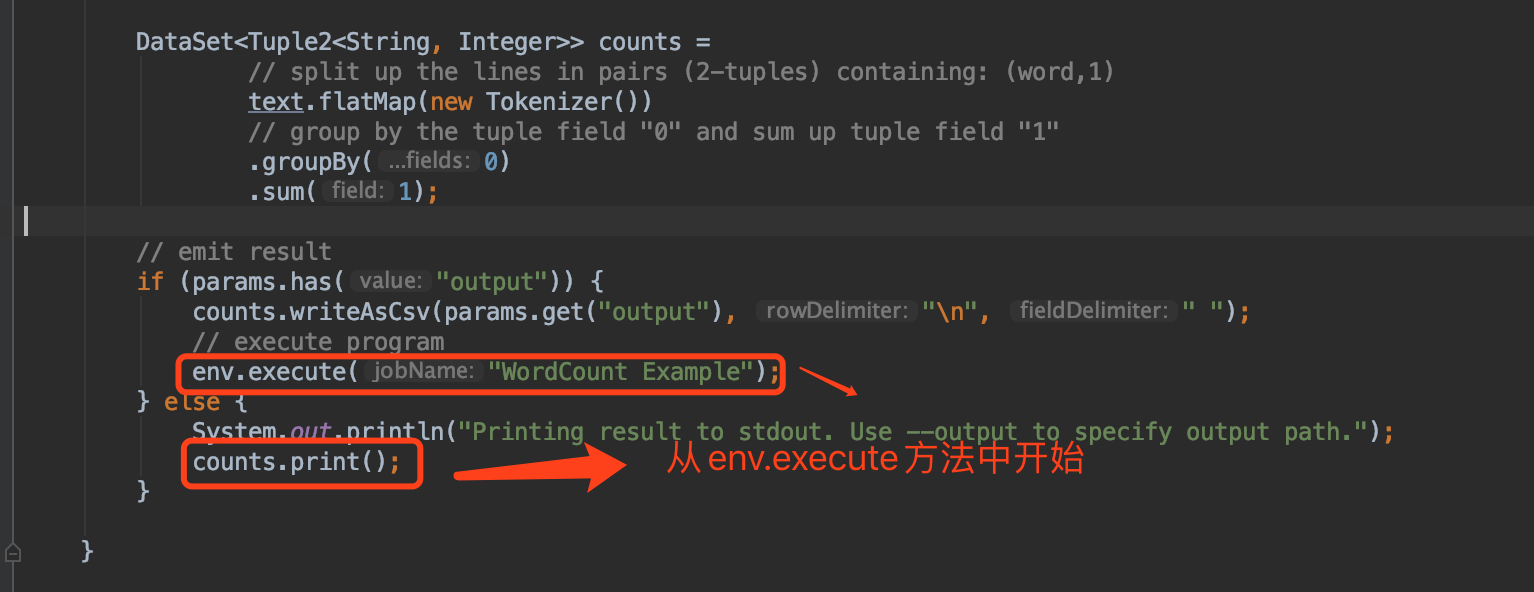
从 env.execute 点击 ,我们首先看 final JobClient jobClient = executeAsync(jobName); 从这个方法继续点击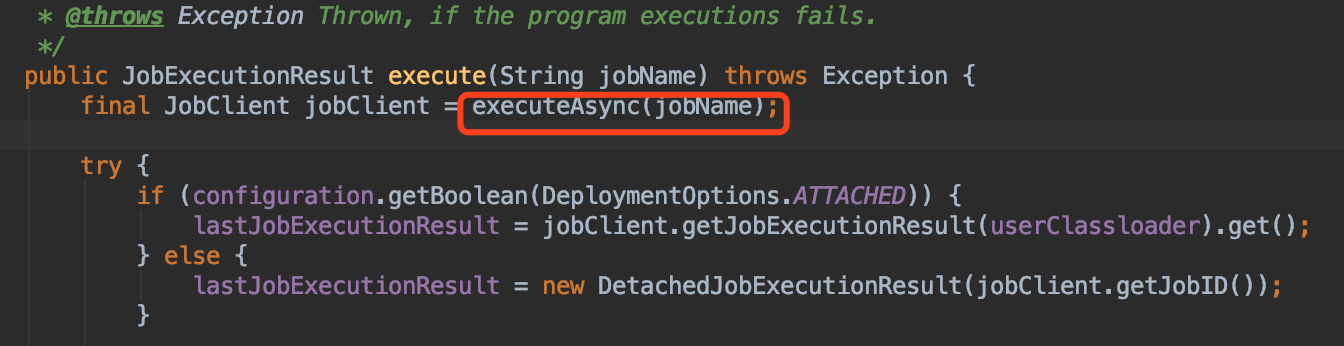
从这个方法中,我们可以看到程序开始执行的位置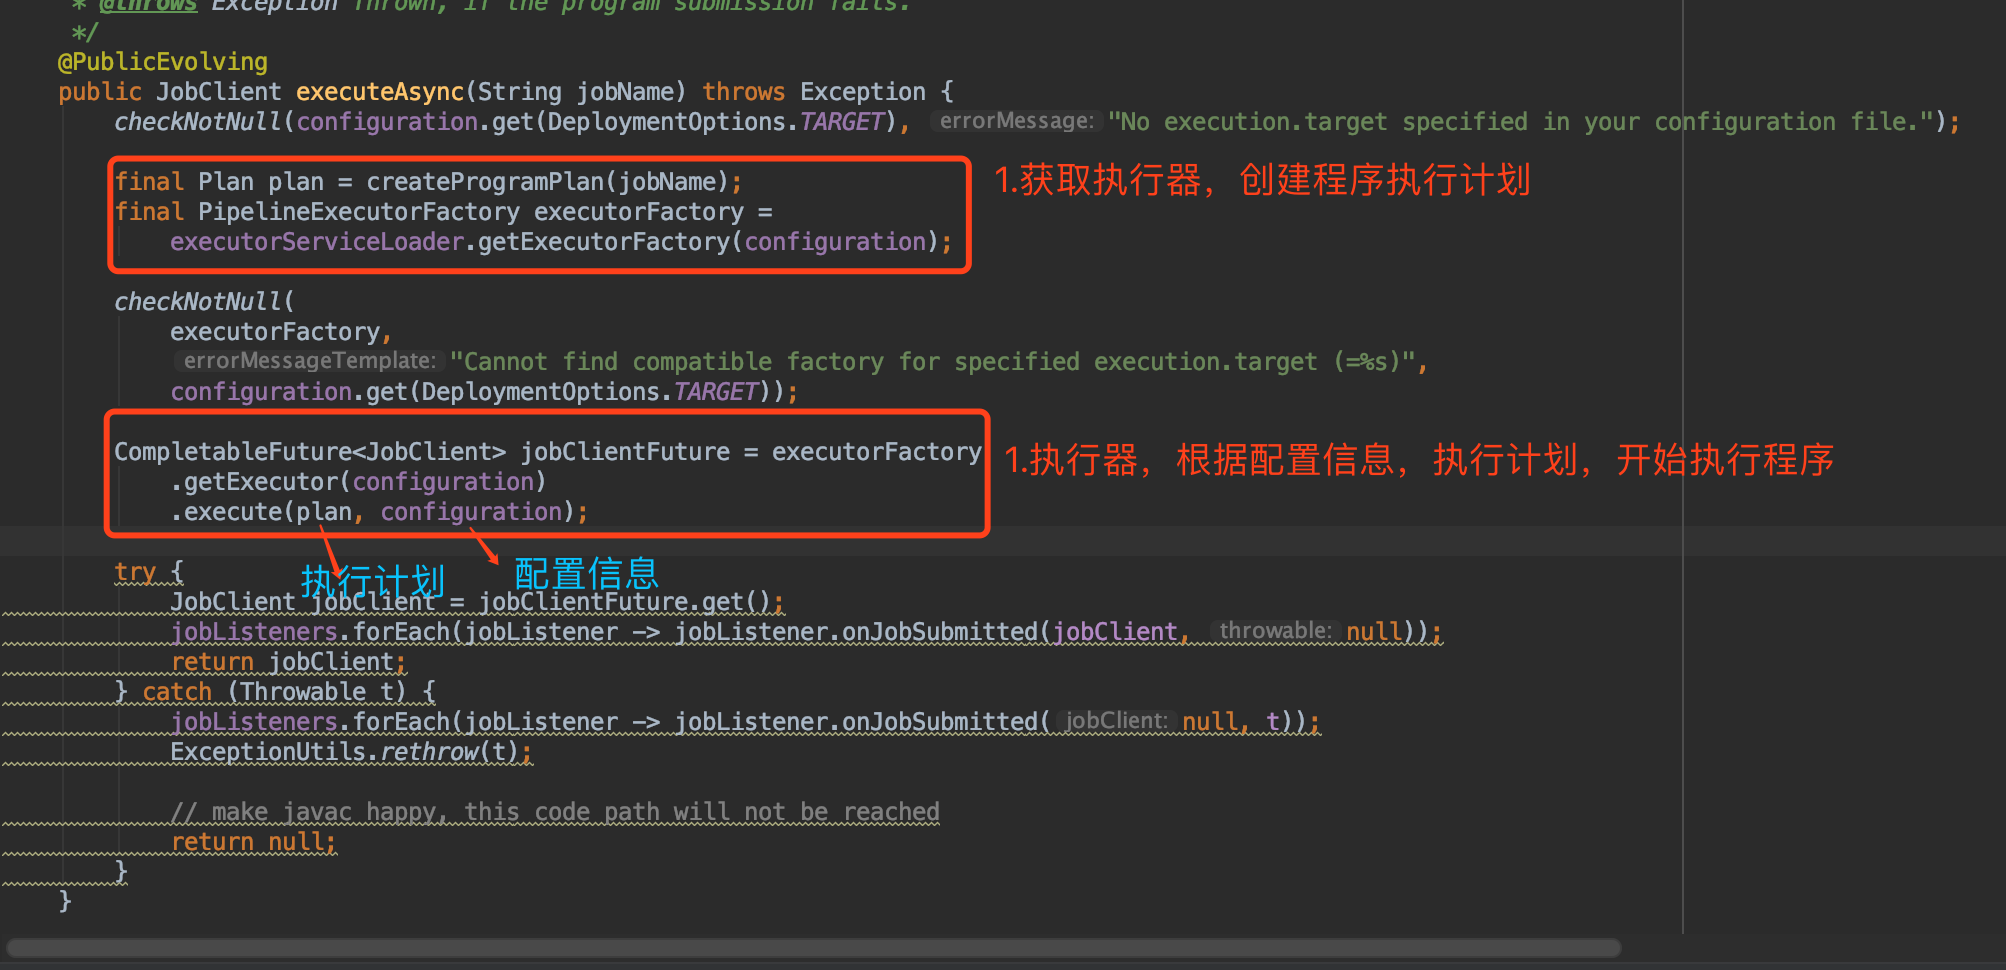
从这个方法中查看详细的执行步骤
可以看出,所有的执行器是 PipelineExecutor 接口, 具体的执行器,需要继承该方法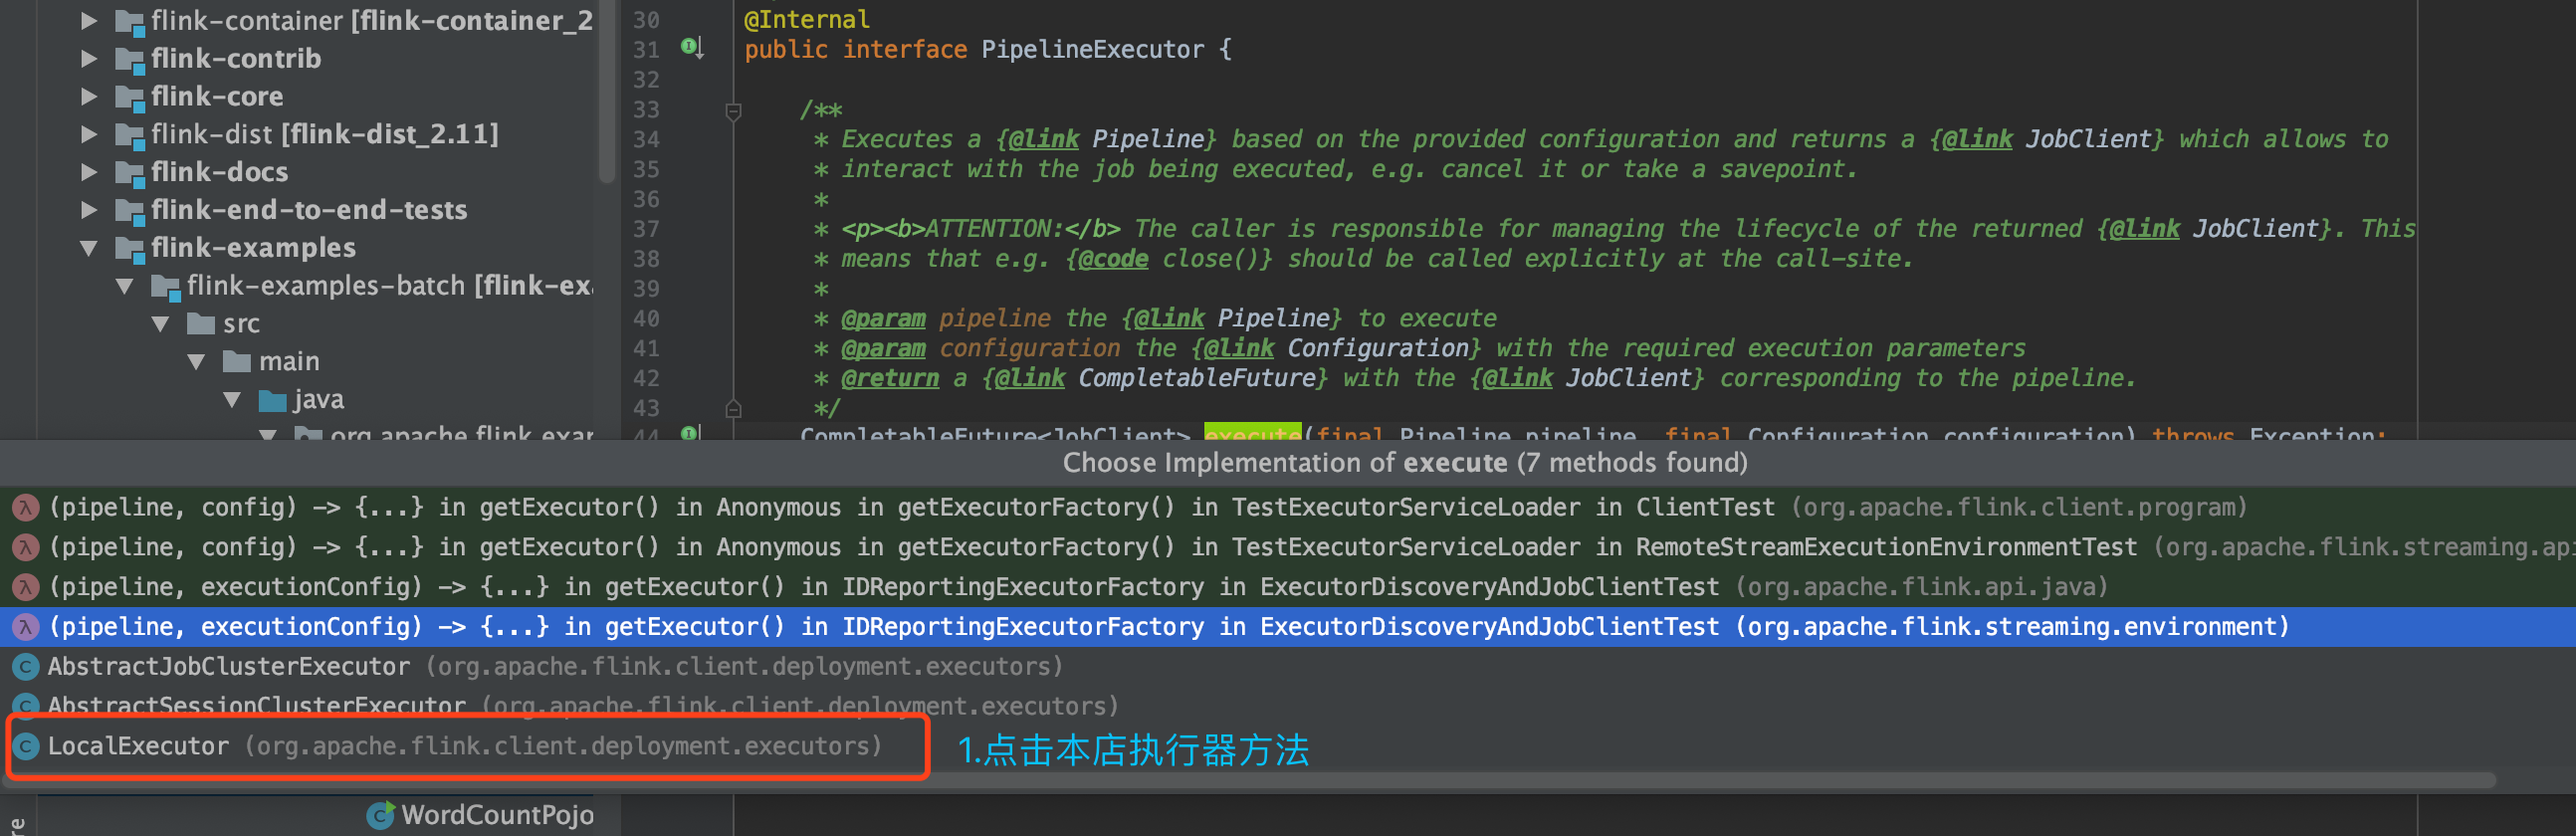
该LocalExecutor的** execute 方法中,可以看到详细的作业执行流程,接下来,我们分别从这几个方法中入手,详细分析具体的实现步骤细节**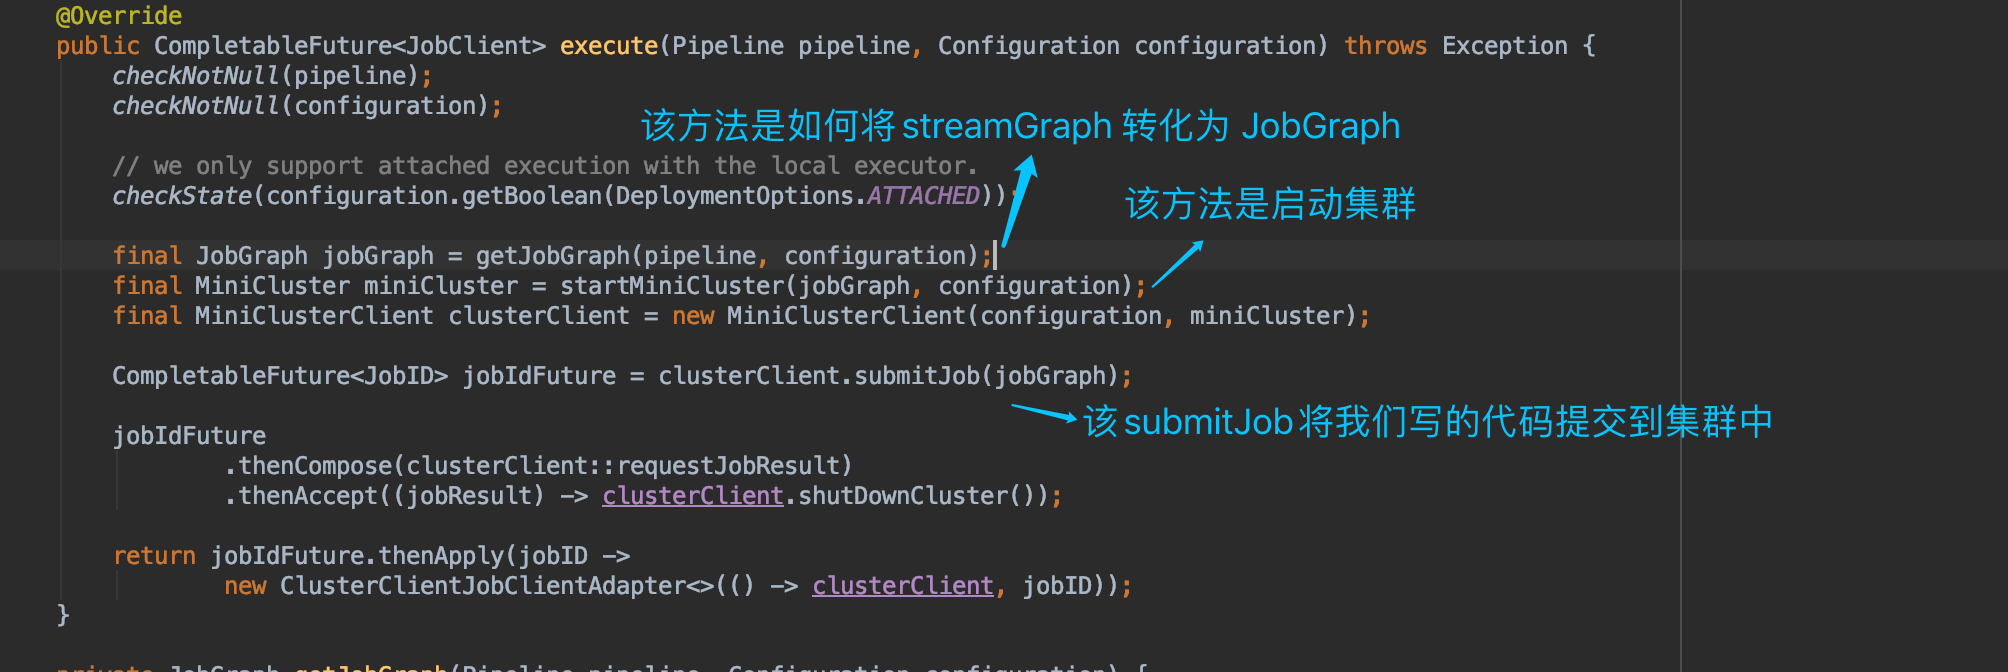
1.getJobGraph 方法中详细 将 streamGraph 如何转化为 JobGraph
2.startMiniCluster 方法是如何 启动ResourceManager, JobMaster 等 信息
3.submitJob如何提交自己写的代码作业

若有收获,就点个赞吧
0 人点赞
