appium继承了selenium中的元素定位方法,并且增加了自己的一些方法,但是从继承selenium中的定位方法中,一般只会用到id、class_name、xpath这三种方法
一、常用定位方式
- driver.find_element_by_accessibility_id() 对应content-desc(描述元素作用)
- driver.find_element_by_id() 对应resource-id
- driver.find_element_by_class_name() 对应class
- driver.find_element_by_xpath() 对应xpath
二、Xpath定位
- driver.find_element_by_xpath(“//*[@text=‘注册’and @class=’android.widget.TextView’]”)
- driver.find_element_by_xpath(“//*[@resource-id=‘com.taobao.taobao:id/tv_scan_text’]”)
- driver.find_element_by_xpath(“//*[@content-desc=‘帮助’]”)
- driver.find_element(By.XPATH,”//*[@resource-id=‘com.xueqiu.android:id/name’ and @text=‘阿里巴巴’]”)
- //[Contains(*@text,“注册商品”)] 这是xpath的text模糊搜索的方法
三、By定位方式
首先要 from appium.webdriver.common.mobileby import MobileBy as By
- self.driver.find_element(By.ID,””) 对应resource-id
- self.driver.find_element(By.XPATH,””) 对应xpath
- self.driver.find_element(By.ACCESSIBILITY_ID,””) 对应content-desc
- self.driver.find_element(By.CLASS_NAME,””) 对应class
四、常用操作
点击操作
self.driver.find_element_by_id("home_search").click()
输入操作
self.driver.find_element_by_id("search_input_text").send_keys("阿里巴巴")获取元素属性
get_attribute(name)如获取text:get_attribute(“text”), 获取content_desc:get_attribute(“content_desc”)
五、uiautomator定位
uiautomator是Android工作引擎,速度快,滚动查找比较方便,但表达式书写复杂,容易写错
通过uiautomator可实现:
- resource-id 定位
- className 定位
- content-desc 定位
- text 定位
- 组合定位
- 父子关系定位
用法:driver.find_element_by_android_uiautomator(‘表达式’)
注:外层用单引号,内层字符串用双引号
- 通过文本定位:new UiSelector().text(“text文本”)
- 通过id定位:new UiSelector().resourceId(“com.xueqiu.android:id/login_account”)
- 通过content-desc定位:new UiSelector().description(“contenet-des属性”)
- 组合定位:new UiSelector().resourceId(“com.xueqiu.android:id/login_account”).text(“我的”)
六、webView元素的定位
webView是手机应用内嵌的浏览器,在Android 4.4 之前 webView 内核采用的是 WebKit,Android 4.4 之后才是 Chrome 作为内置浏览器,它是用来加载HTML页面控件,要定位测试应用中的webView需要前端开发打开webView的调试开关,要启用 webView 调试,在webView类上调用静态方法 setWebContentsDebuggingEnabled
if (Build.VERSION.SDK INT >= Build.VERSION CODES.KITKAT){
    if (0 != (getApplicationInfo ().flags &\
        ApplicationInfo.FLAG DEBUGGABLE))
        { WebView.setWebContentsDebuggingEnabled(true);}
}
打开这个开关,手机端打开被测试的webView页面,然后在电脑端 chrome浏览器地址栏输入 “chrome://inspect”将显示设备上的webView列表,点击webView下方的inspect链接,就可以查看页面源代码了,实现元素定位。
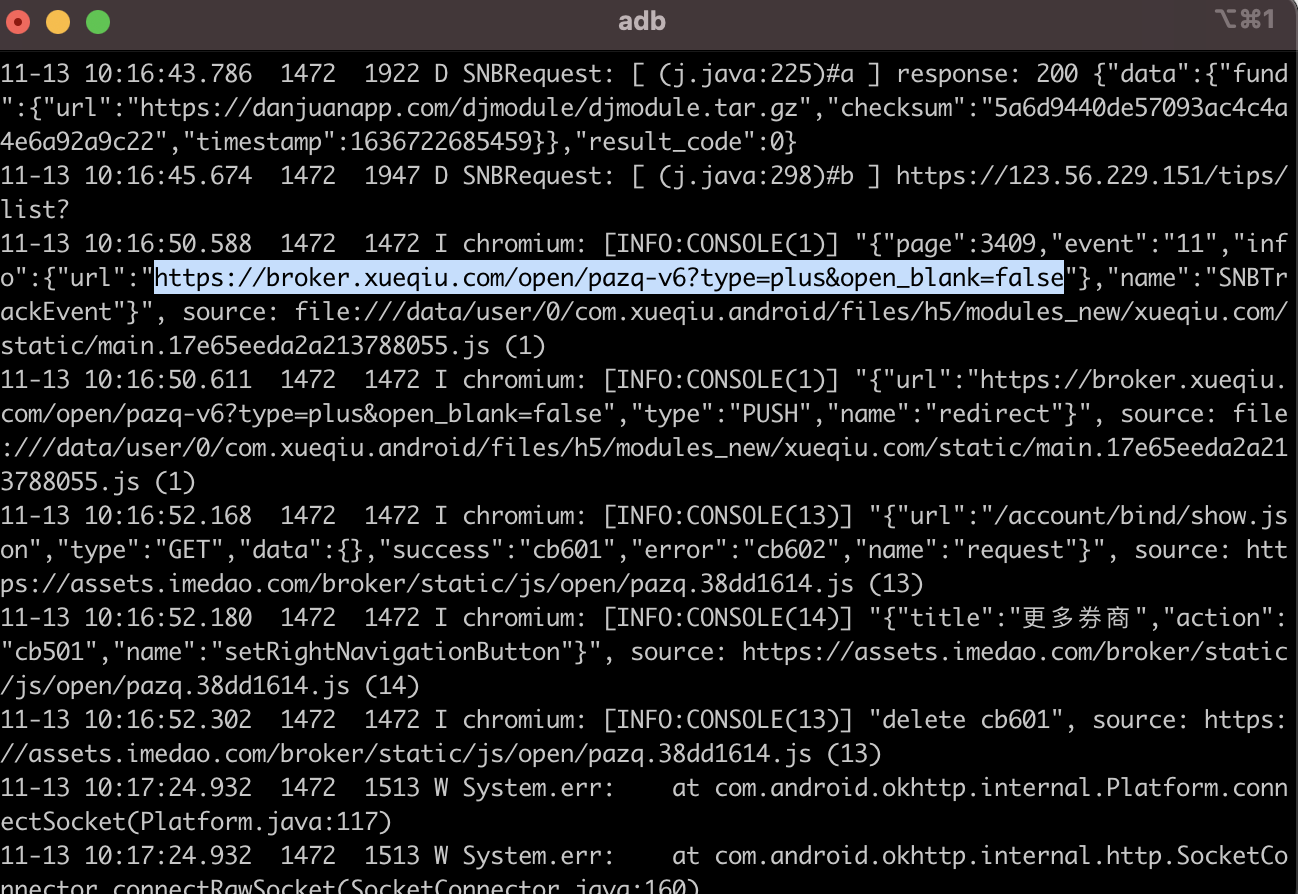
在应用中需要查看打开的webView的url地址:
- adb shell
- logcat | grep http
当app中打开webView页面后,在测试代码中加入webview_list = driver.contexts,即可获取上下文列表(前提app包中webView调试已经打开),通过driver.switch_to.context(webview_list[-1])即切换到最新打开的webview页面,再根据webview中元素进行定位及交互
webview_list = driver.contexts # 获取上下文列表,返回一个列表,列表中 'NATIVE_APP'即为原生应用
driver.switch_to.context(webview_list[-1]) # 切换到最新打开的webview页面

若有收获,就点个赞吧
0 人点赞
