1、系统要求
1.1 Maven设置
进入Maven的安装目录,双击打开conf文件夹,并修改Setting.xml配置文件。如下
配置一</mirrors><mirror><id>nexus-aliyun</id><mirrorOf>central</mirrorOf><name>Nexus aliyun</name><url>http://maven.aliyun.com/nexus/content/groups/public</url></mirror></mirrors><localRepository>G:\apache-maven-3.5.2\repository</localRepository>配置二<profiles><profile><id>jdk-1.8</id><activation><activeByDefault>true</activeByDefault><jdk>1.8</jdk></activation><properties><maven.compiler.source>1.8</maven.compiler.source><maven.compiler.target>1.8</maven.compiler.target><maven.compiler.compilerVersion>1.8</maven.compiler.compilerVersion></properties></profile><profiles>
2、编写简单的HelloWorld
2.1 创建Maven工程
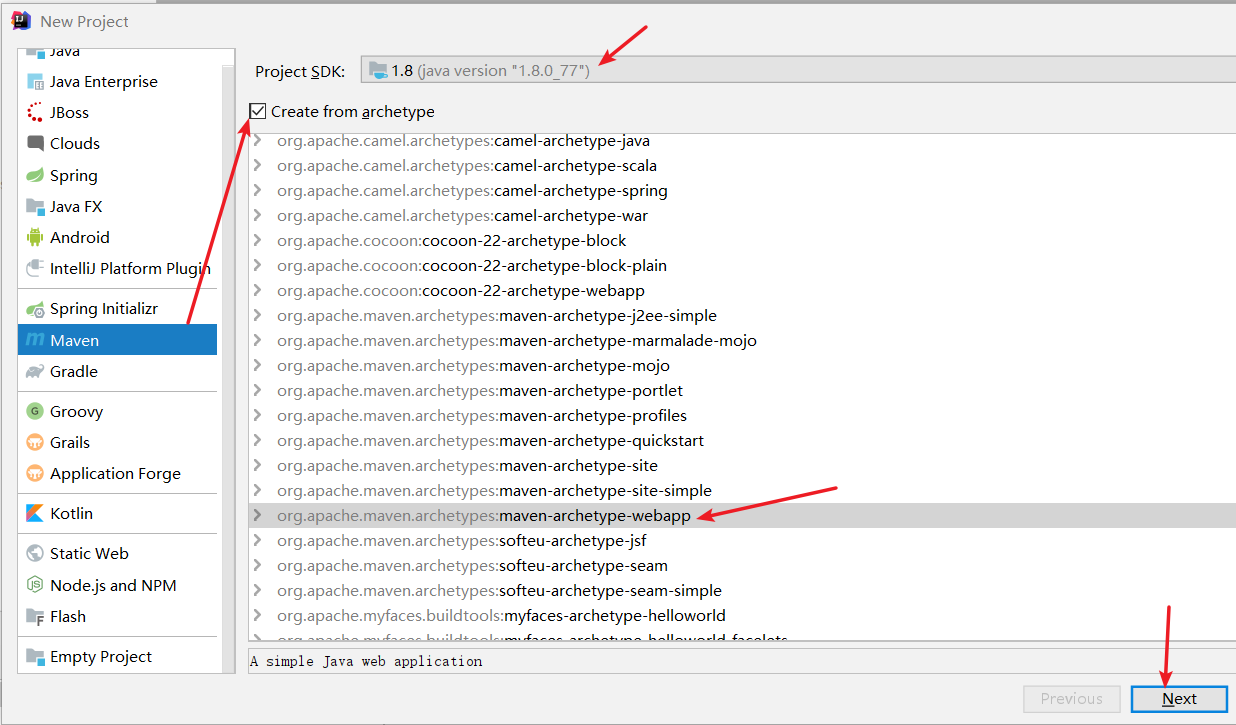

2.2 引入依赖
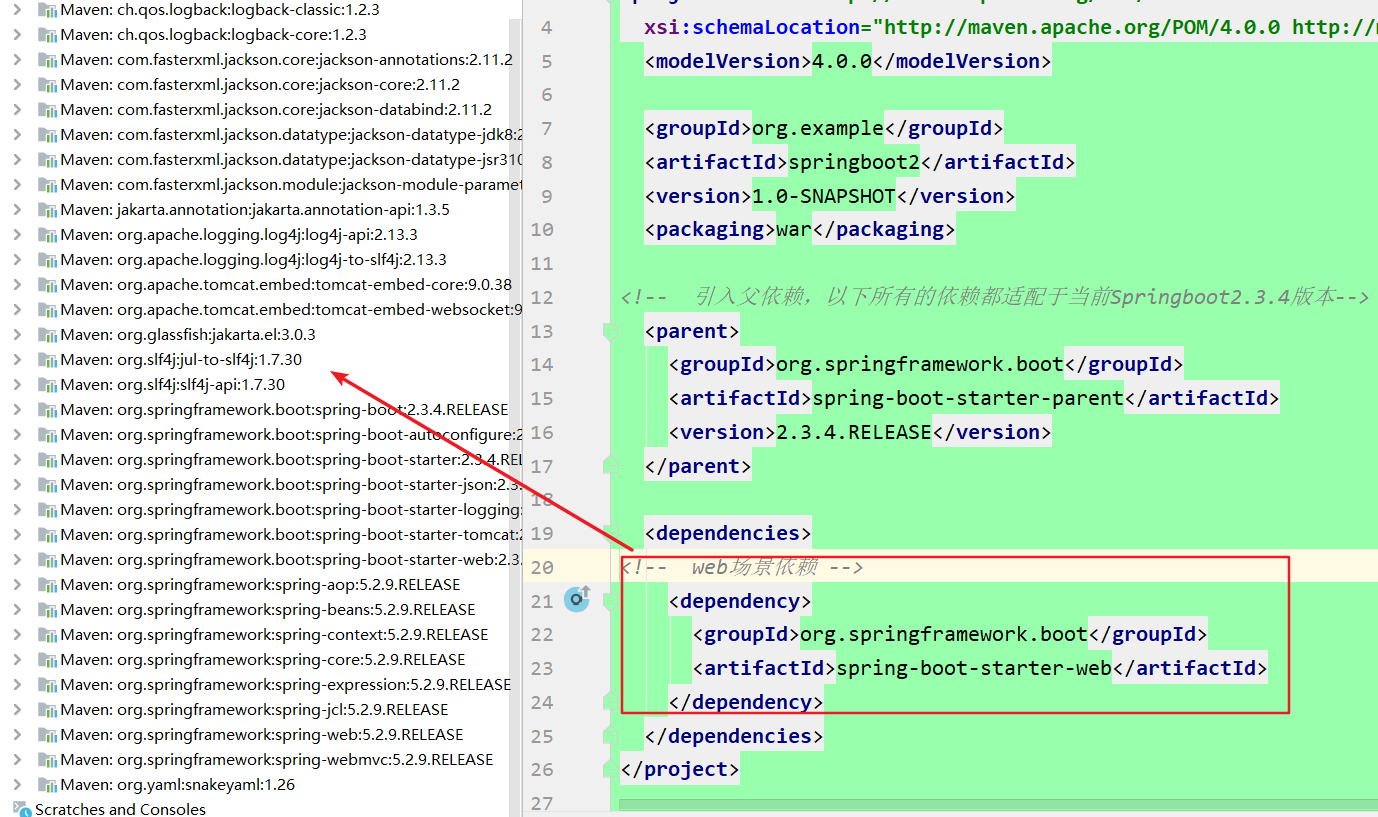
引入父工程pom依赖,再次添加springboot开始依赖
<parent><groupId>org.springframework.boot</groupId><artifactId>spring-boot-starter-parent</artifactId><version>2.3.4.RELEASE</version></parent><dependencies><dependency><groupId>org.springframework.boot</groupId><artifactId>spring-boot-starter-web</artifactId></dependency></dependencies>
2.3 创建主程序
编写springboot主启动类
/*** 主程序类* @SpringBootApplication:这是一个SpringBoot应用* @author dongxinxin* @create 2022-01-18 10:37*/@SpringBootApplicationpublic class SpringbootApplication {public static void main(String[] args) {SpringApplication.run(SpringbootApplication.class,args);}}
2.4 编写业务
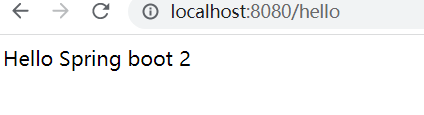
在controller(控制层)中编写业务逻辑,并实现简单的helloWorld
第一部 编写controller业务
/*** @ResponseBody* @Controller** @RestController 此注解可代替以上两个注解,因此使用该注解* @author dongxinxin* @create 2022-01-18 10:39*/@RestControllerpublic class HelloController {/*** @ResponseBody 直接响应页面,无需进行页面跳转* @return*/@RequestMapping("hello")public String helloTest(){return "Hello Spring boot 2";}}
2.5 改成jar包方式并且进行打包
<build><plugins><plugin><groupId>org.springframework.boot</groupId><artifactId>spring-boot-maven-plugin</artifactId></plugin></plugins></build>
2.6 简化部署
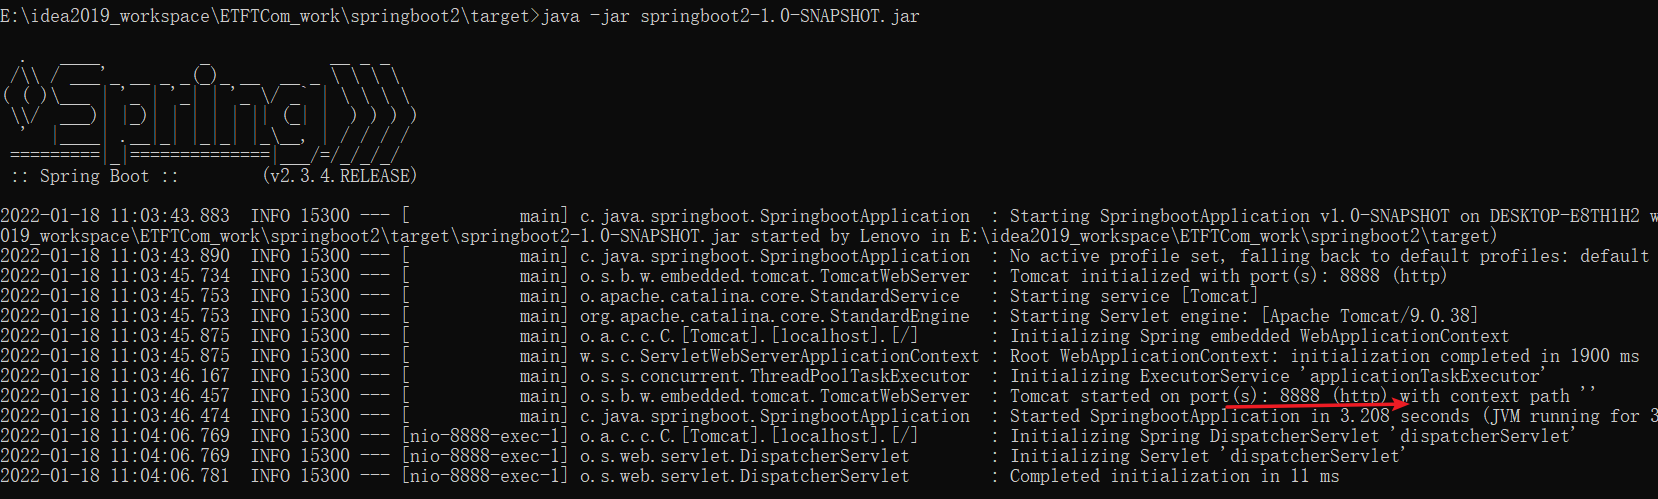
在Maven中选中clare和package 并进行运行,形成jar包,并在命令行中使用java -jar + 刚打的jar包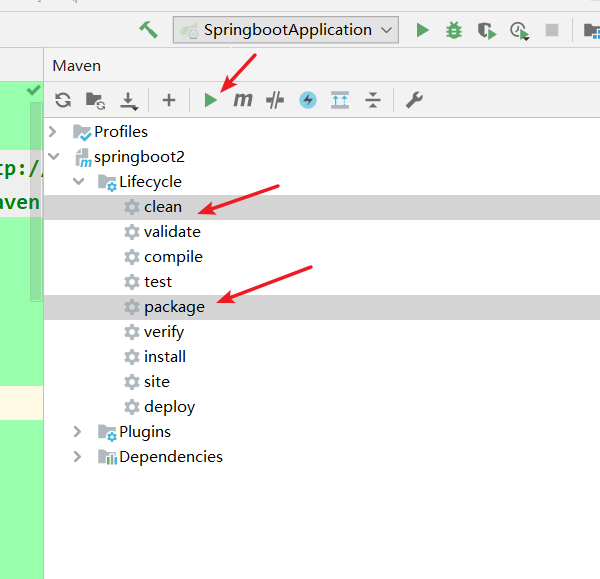
注:取消cmd中的快速编辑模式

若有收获,就点个赞吧
0 人点赞
