- 管理难度大:配置文件散落在各个微服务中,难以管理。
- 安全性低:配置跟随源代码保存在代码库中,容易造成配置泄漏。
- 时效性差:微服务中的配置修改后,必须重启服务,否则无法生效。
- 局限性明显:无法支持动态调整,例如日志开关、功能开关。
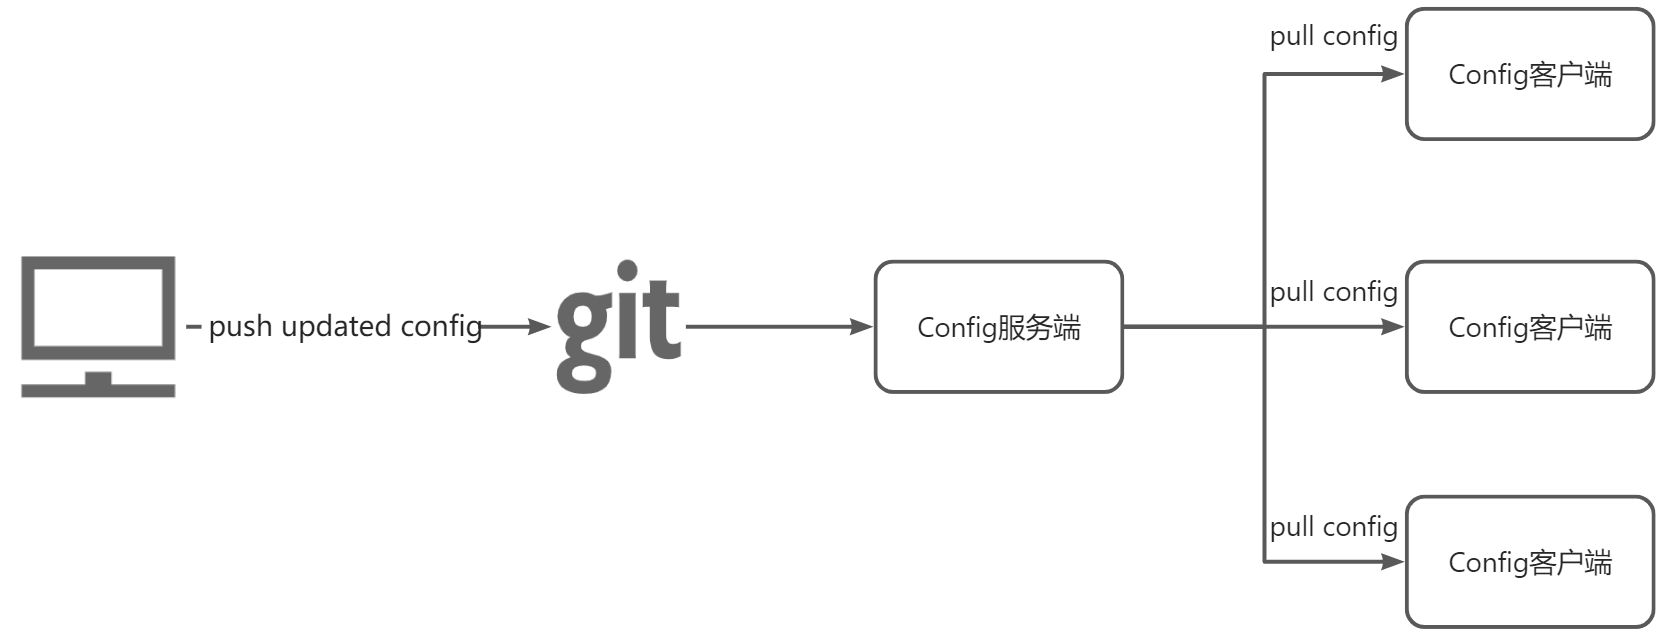
- Config Server:也被称为分布式配置中心,它是一个独立运行的微服务应用,用来连接配置仓库并为客户端提供获取配置信息、加密信息和解密信息的访问接口。
- Config Client:指的是微服务架构中的各个微服务,它们通过 Config Server 对配置进行管理,并从 Config Sever 中获取和加载配置信息。
- 提交配置文件到远程的 Git 仓库。
- Config 服务端(分布式配置中心)负责连接配置仓库 Git,并对 Config 客户端暴露获取配置的接口。
- Config 客户端通过 Config 服务端暴露出来的接口,拉取配置仓库中的配置。
- Config 客户端获取到配置信息,以支持服务的运行。
搭建Config服务端
- 在 Github 上创建一个名为
spring-cloud-config的仓库(Repository)并获取该仓库的地址。Github 站点对于国内用户来说不够稳定,很可能存在加载缓慢等问题,因此我们可以在码云上执行该操作
- 创建
config模块spring-cloud-config-center-8006,添加config所需核心依赖如下
<dependency><groupId>org.springframework.cloud</groupId><artifactId>spring-cloud-starter-netflix-eureka-client</artifactId></dependency><!--配置中心服务器依赖--><dependency><groupId>org.springframework.cloud</groupId><artifactId>spring-cloud-config-server</artifactId></dependency>
- 在类路径(
<font style="color:rgb(68, 68, 68);">/resources </font>目录)下,创建一个名为<font style="color:rgb(68, 68, 68);">application.yml</font>的配置文件
server:port: 8006 #端口号spring:application:name: spring-cloud-config-center-8006 #服务名cloud:config:server:git:# 可以使用git也可使用码云,github 站点访问较慢,因此这里我们使用gitee,实现道理思路都一样uri: https://gitee.com/chenhaijia/spring-cloud-config.git#仓库名search-paths:- spring-cloud-configforce-pull: true# 如果Git仓库为公开仓库,可以不填写用户名和密码,如果是私有仓库需要填写# username: ******# password: ******#分支名label: mastereureka:client: #将客户端注册到 eureka 服务列表内service-url:defaultZone: http://127.0.0.1:9001/eureka
- 主启动类上使用 @EnableConfigServer 注解开启 Spring Cloud Config 配置中心功能
@SpringBootApplication
@EnableEurekaClient
@EnableConfigServer
public class SpringCloudConfigCenter8006Application {

    public static void main(String[] args) {
        SpringApplication.run(SpringCloudConfigCenter8006Application.class, args);
    }

}
获取到刚才所创建 Git 仓库的地址并且 Clone 。HTTPS 或者 SSH 的都可以。在本地找好目录(我放在未知和本模块同级,放哪里都OK根据自己喜好),就直接在这个目录下打开 git-bash ,然后进行克隆git@gitee.com:chenhaijia/spring-cloud-config.git
克隆后创建三个配置文件如下:
- config-dev.yml
config:
  info: spring-cloud-config-center-8006-dev
  branch: master
  name: config-dev.yml
  version: 1.0
- config-test.yml
config:
  info: spring-cloud-config-center-8006-test
  branch: master
  name: config-test.yml
  version: 2.0
- config-prod.yml
config:
  info: spring-cloud-config-center-8006-prod
  branch: master
  name: config-prod.yml
  version: 2.0
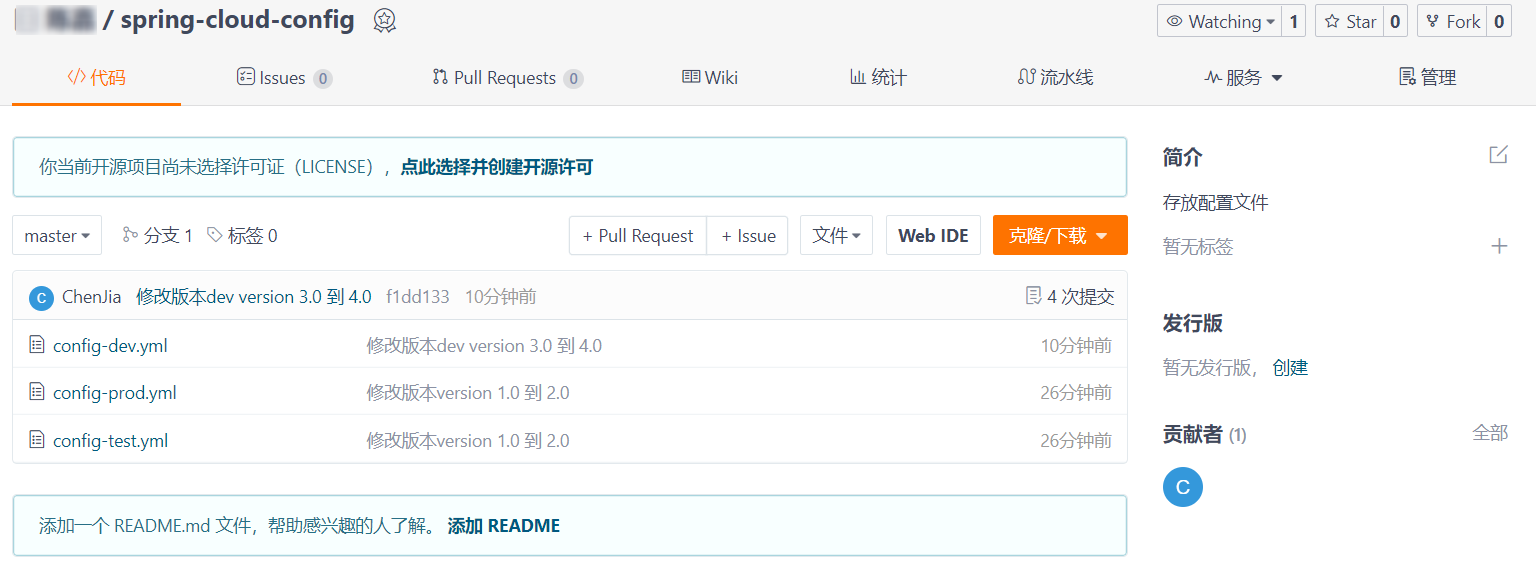
分别创建三个配置文件(演示使用)创建完毕后,然后通过 git add . ,git commit -m 'first commit' ,git push -u origin "master"等命令上传到 Github&Gitee 上
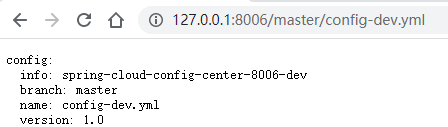
- 依次启动Eureka,Config服务端,Config客户端。浏览器访问 http://127.0.0.1:8006/master/config-dev.yml
| 访问规则 | 示例 |
|---|---|
| /{application}/{profile}[/{label}] | /config/dev/master |
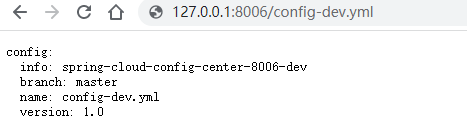
| /{application}-{profile}.{suffix} | /config-dev.yml |
| /{label}/{application}-{profile}.{suffix} | /master/config-dev.yml |
- {application}:应用名称,即配置文件的名称,例如 config-dev。
- {profile}:环境名,一个项目通常都有开发(dev)版本、测试(test)环境版本、生产(prod)环境版本,配置文件则以 application-{profile}.yml 的形式进行区分,例如 application-dev.yml、application-test.yml、application-prod.yml 等。
- {label}:Git 分支名,默认是 master 分支,当访问默认分支下的配置文件时,该参数可以省略,即第二种访问方式。
- {suffix}:配置文件的后缀,例如 config-dev.yml 的后缀为 yml。
 # 搭建Config客户端
1. 搭建
# 搭建Config客户端
1. 搭建<font style="color:rgb(68, 68, 68);">config</font>客户端模块spring-cloud-config-client-8007,添加核心依赖如下
xml
<dependency>
    <groupId>org.springframework.cloud</groupId>
    <artifactId>spring-cloud-starter-netflix-eureka-client</artifactId>
</dependency>
<!--SpringCloud2020及以后的版本默认不启用 bootstrap 配置,我们需要在pom里面显式地引入:-->
<dependency>
    <groupId>org.springframework.cloud</groupId>
    <artifactId>spring-cloud-starter-bootstrap</artifactId>
</dependency>
<dependency>
    <groupId>org.springframework.boot</groupId>
    <artifactId>spring-boot-starter-actuator</artifactId>
</dependency>
2. 类路径<font style="color:rgb(68, 68, 68);">/resources</font> 目录下,创建一个名为 <font style="color:rgb(68, 68, 68);">bootstrap.yml</font> 的配置文件
#bootstrap.yml 是系统级别的,加载优先级高于 application.yml ,负责从外部加载配置并解析
server:
  port: 8007

spring:
  application:
    name: spring-cloud-config-client-8007 #服务名
  cloud:
    config:
      label: master #分支名称
      name: config  #配置文件名称,config-dev.yml 中的 config
      profile: dev  #环境名  config-dev.yml 中的 dev
      #这里不要忘记添加 http:// 否则无法读取
      uri: http://127.0.0.1:8006/ #Spring Cloud Config 服务端(配置中心)地址

eureka:
  client: #将客户端注册到 eureka 服务列表内
    service-url:
      defaultZone: http://127.0.0.1:9001/eureka
- 创建
ConfigClientController通过改类查看配置文件中的内容
//读取配置中心指定配置文件的内容,并展示到页面
@RestController
public class ConfigClientController {

    @Value("${server.port}")
    private String serverPort;

    @Value("${config.info}")
    private String configInfo;

    @Value("${config.branch}")
    private String configBranch;

    @Value("${config.name}")
    private String configName;

    @Value("${config.version}")
    private String configVersion;

    @GetMapping(value = "/getConfig")
    public String getConfig() {
        return "port【"+serverPort+"】info【"+ configInfo +"】branch【"+configBranch+"】name【"+configName+"】configVersion【"+configVersion+"】";
    }
}
- 修改主启动类,添加
@EnableEurekaClient启动Eureka
@SpringBootApplication
@EnableEurekaClient
public class SpringCloudConfigClient8007Application {

    public static void main(String[] args) {
        SpringApplication.run(SpringCloudConfigClient8007Application.class, args);
    }

}
- 启动
spring-cloud-config-client-8007模块的服务,浏览器访问 http://localhost:8007/getConfig

- 将配置文件 config-dev.yml 中 version 的值修改为 2.0,配置如下
config:
  info: spring-cloud-config-center-8006-dev
  branch: master
  name: config-dev.yml
  version: 2.0
- 重新启动
spring-cloud-config-client-8007模块的服务,浏览器访问 http://localhost:8007/getConfig

- 配置更新后,Spring Cloud Config 服务端(Server)可以直接从 Git 仓库中获取最新的配置。
- 除非重启 Spring Cloud Config 客户端(Client),否则无法通过 Spring Cloud Config 服务端获取最新的配置信息。
收到刷新配置
为了解决不重启 Config 客户端无法获取最新配置的问题,接下来,我们就对spring-cloud-config-client-8007进行改造,步骤如下
- 在
spring-cloud-config-client-8007模块添加以下依赖,引入 Spring Boot actuator 监控模块
<dependency>
    <groupId>org.springframework.boot</groupId>
    <artifactId>spring-boot-starter-actuator</artifactId>
</dependency>
- 配置文件
<font style="color:rgb(68, 68, 68);">bootstrap.yml</font>中添加以下配置,对外暴露<font style="color:rgb(68, 68, 68);">Spring Boot actuator</font>的监控节点
management:
  endpoints:
    web:
      exposure:
        include: "*"   # * 在yaml 文件属于关键字,所以需要加引号
- 使用
@RefreshScope注解开启配置刷新
@RestController
@RefreshScope //为了让动态(手动)的获取最新的git 配置,在添加 actuator 监控加载 RefreshScope,
//读取配置中心指定配置文件的内容,并展示到页面
public class ConfigClientController {

    @Value("${server.port}")
    private String serverPort;

    @Value("${config.info}")
    private String configInfo;

    @Value("${config.branch}")
    private String configBranch;

    @Value("${config.name}")
    private String configName;

    @Value("${config.version}")
    private String configVersion;

    @GetMapping(value = "/getConfig")
    public String getConfig() {
        return "port【"+serverPort+"】info【"+ configInfo +"】branch【"+configBranch+"】name【"+configName+"】configVersion【"+configVersion+"】";
    }
}
- 将配置文件 config-dev.yml 中 version 的值修改为 3.0,配置如下
config:
  info: spring-cloud-config-center-8006-dev
  branch: master
  name: config-dev.yml
  version: 3.0
不重启客户端,直接去访问我们会发现,配置好动态刷新后配置依然没有实时刷新。那是应为我们还少一步,往下看。
- 开命令行窗口,使用以下命令发送一个 POST 请求刷新
spring-cloud-config-client-8007客户端,通知客户端配置文件已经修改,需要重新拉去配置
curl -X POST "http://localhost:8007/actuator/refresh"
- 浏览器再次访问如下已经刷新 http://localhost:8007/getConfig


若有收获,就点个赞吧
0 人点赞
