
前言
众所周知,maven 实质上是一个插件执行框架,所有的工作都是通过插件完成的。包括我们日常使用到的类似 install、clean、deploy、compiler。。。这些命令,其实底层都是一个一个的 maven 插件。
如何开发自己的插件
1. maven 插件的命名规范
在写一个项目之前,第一件事就是确定一个名称。maven 插件也不例外。它有着自己的一套命名规范。但是规范很简单,一句话就可以概括,官方插件命名的格式为 maven-xxx-plugin,非官方的插件命名为 xxx-maven-plugin 。是不是觉得很眼熟,没错,spring boot starter 的命名也有类似的规范。
好的,我们的第一个 maven 插件项目就叫 demo-maven-plugin 吧。
2. 创建项目
名称起好了,下一步就是创建这个项目。如果你使用 idea 的话,那么创建十分的便捷,按如下步骤即可:
2.1 选择 org.apache.maven.archetypes:maven-archetype-mojo 为骨架创建项目
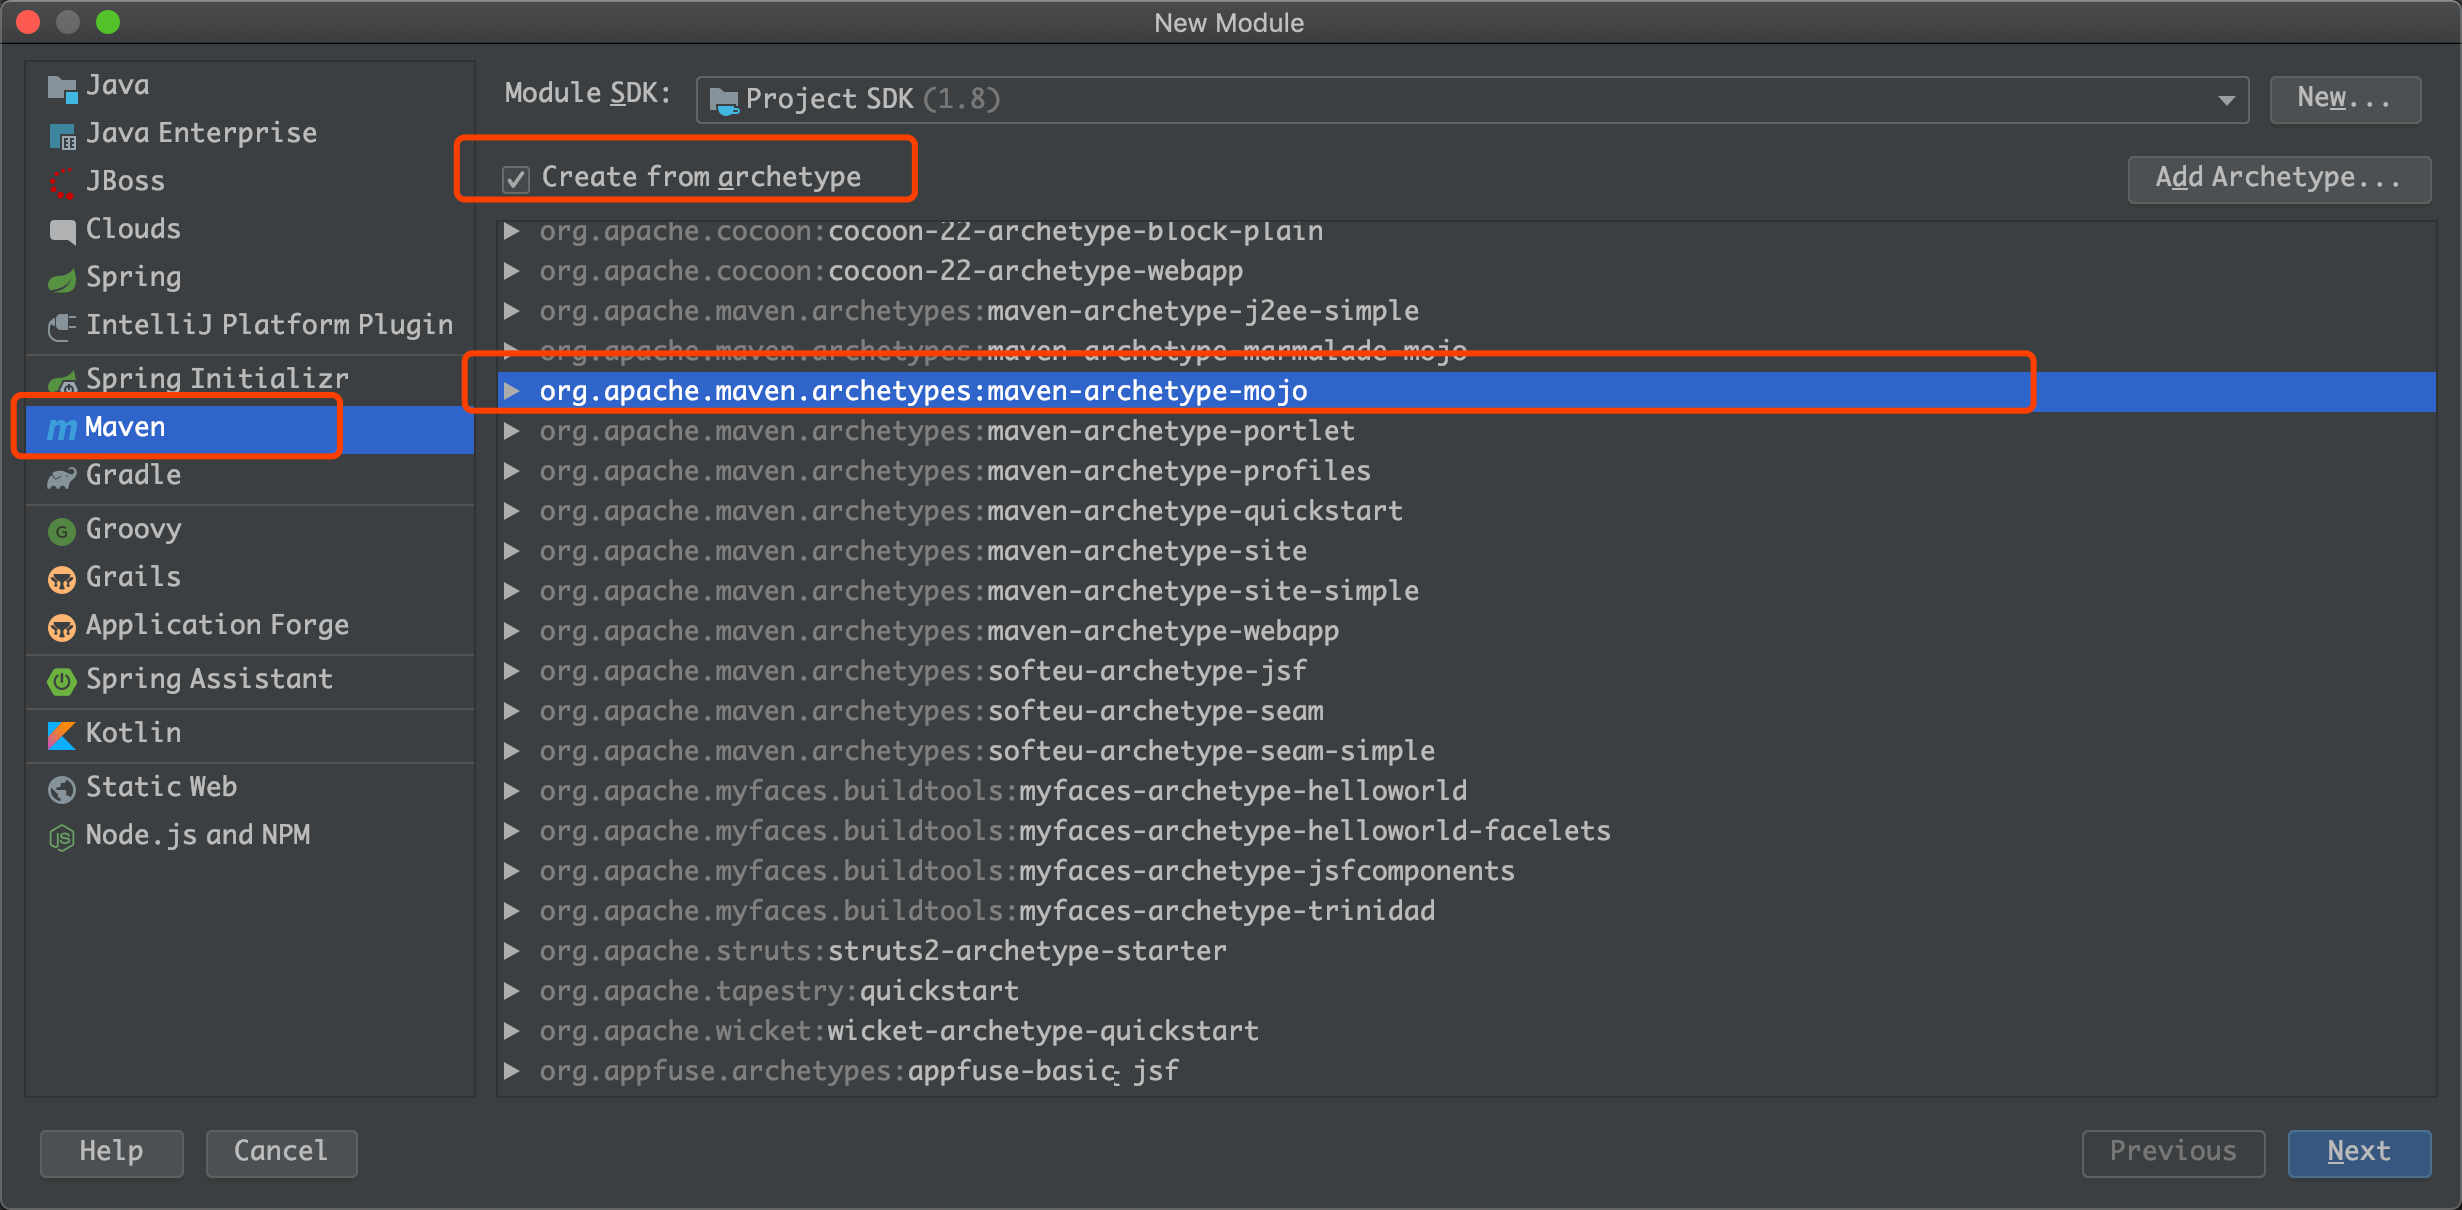
- 选择创建新项目
- 选择通过 maven 创建
- 勾选 Create from archetype 通过项目骨架创建
- 选择 org.apache.maven.archetypes:maven-archetype-mojo
- 点击下一步
2.2 输入在第一步起的项目名
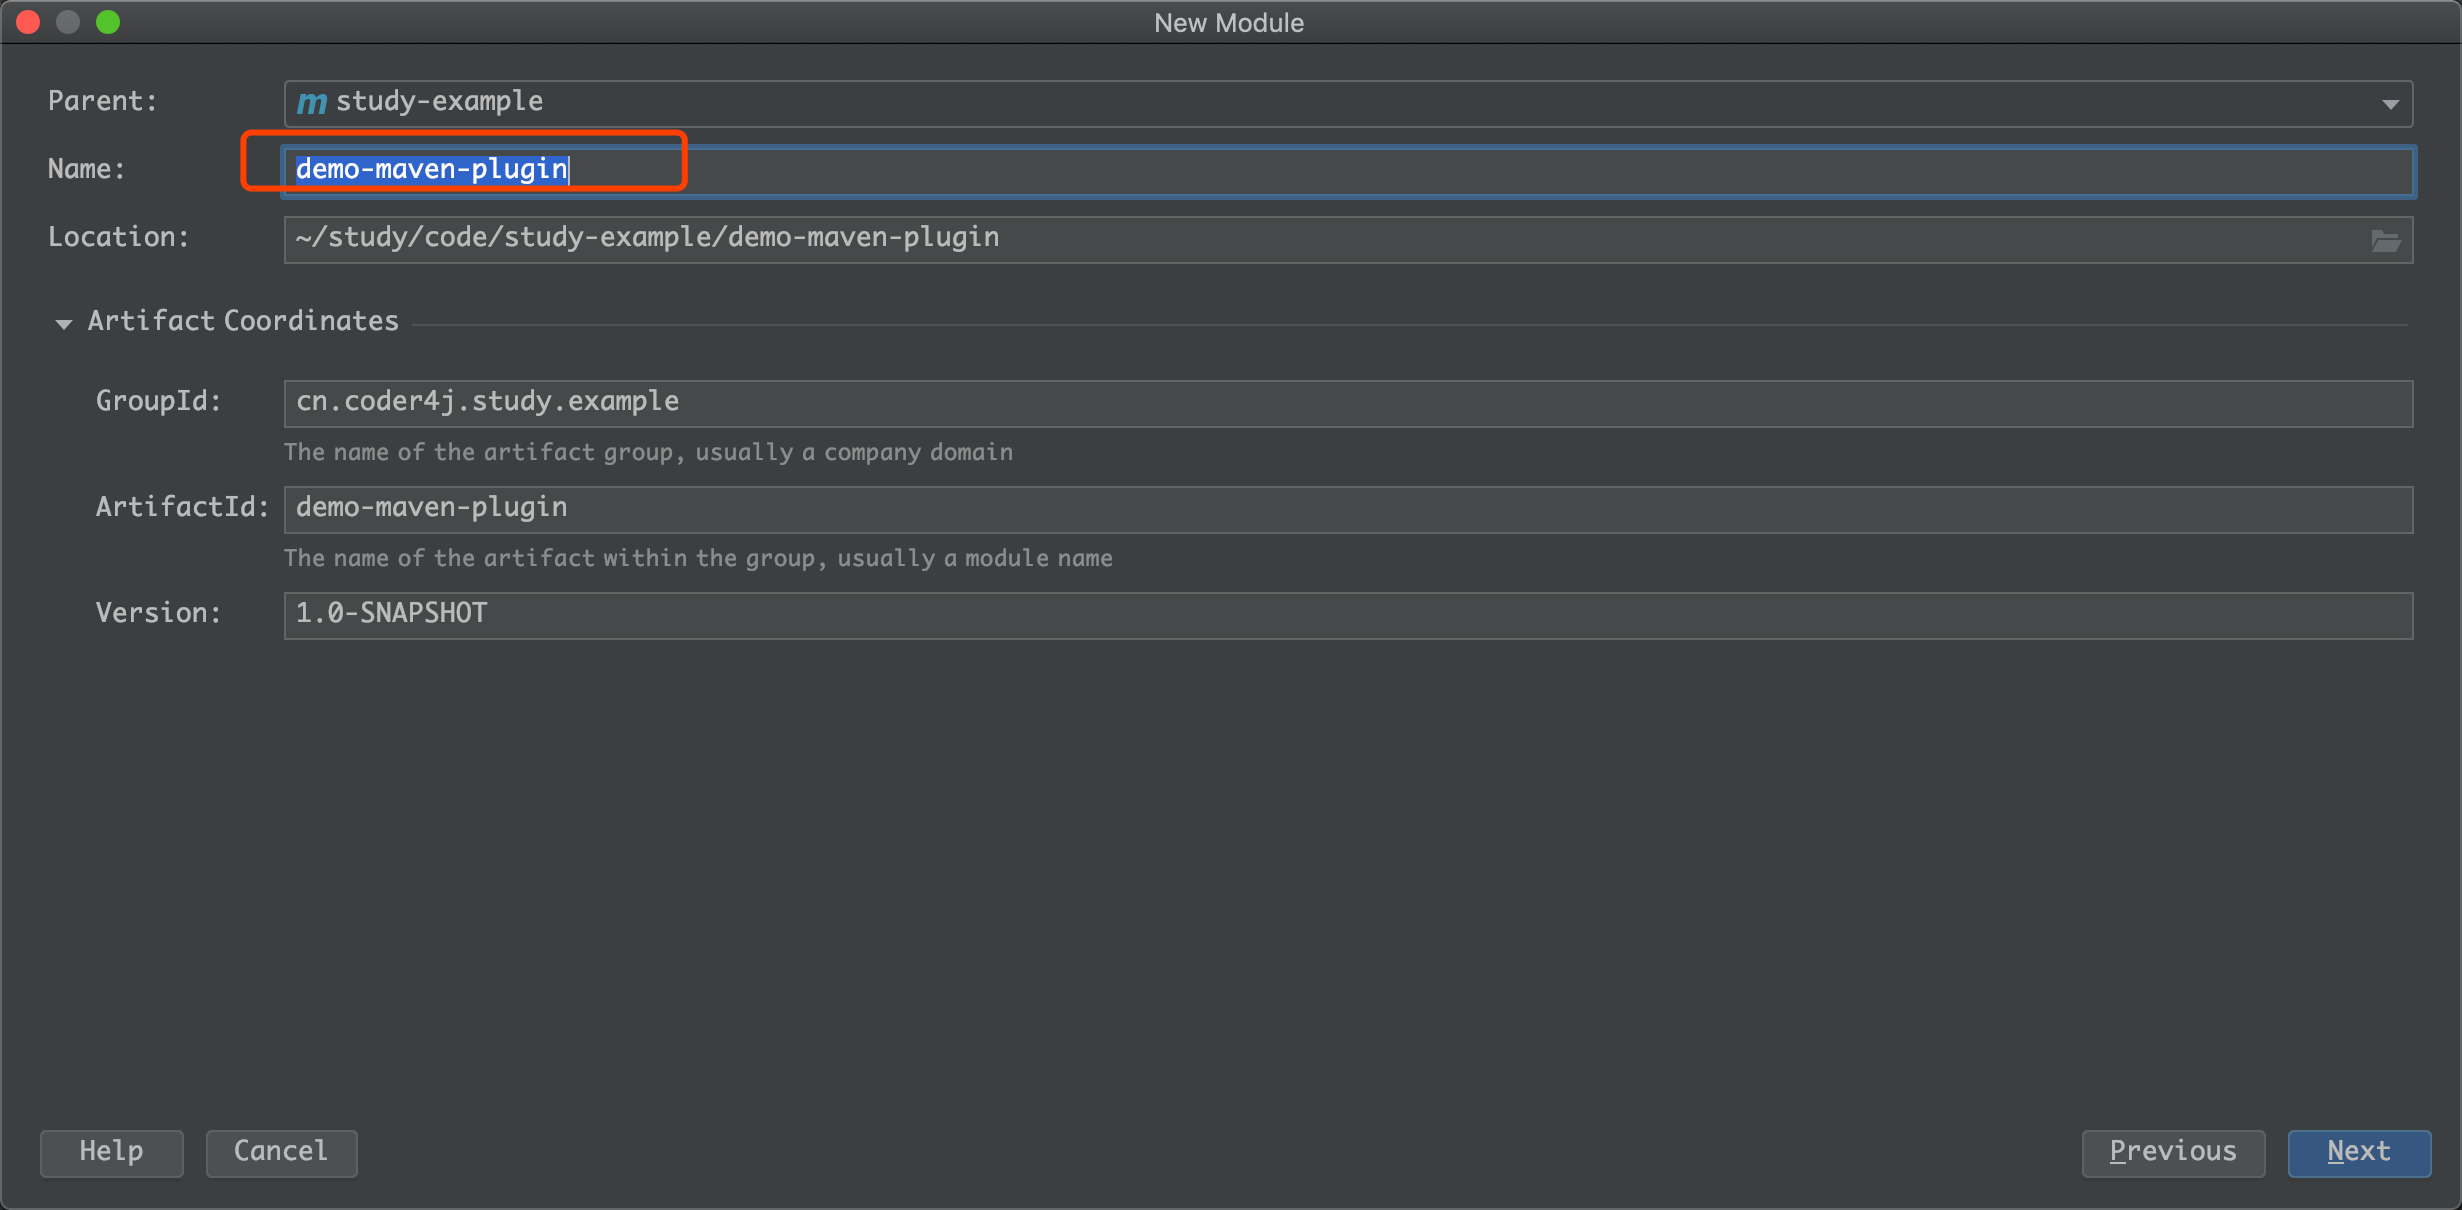
点击 Next
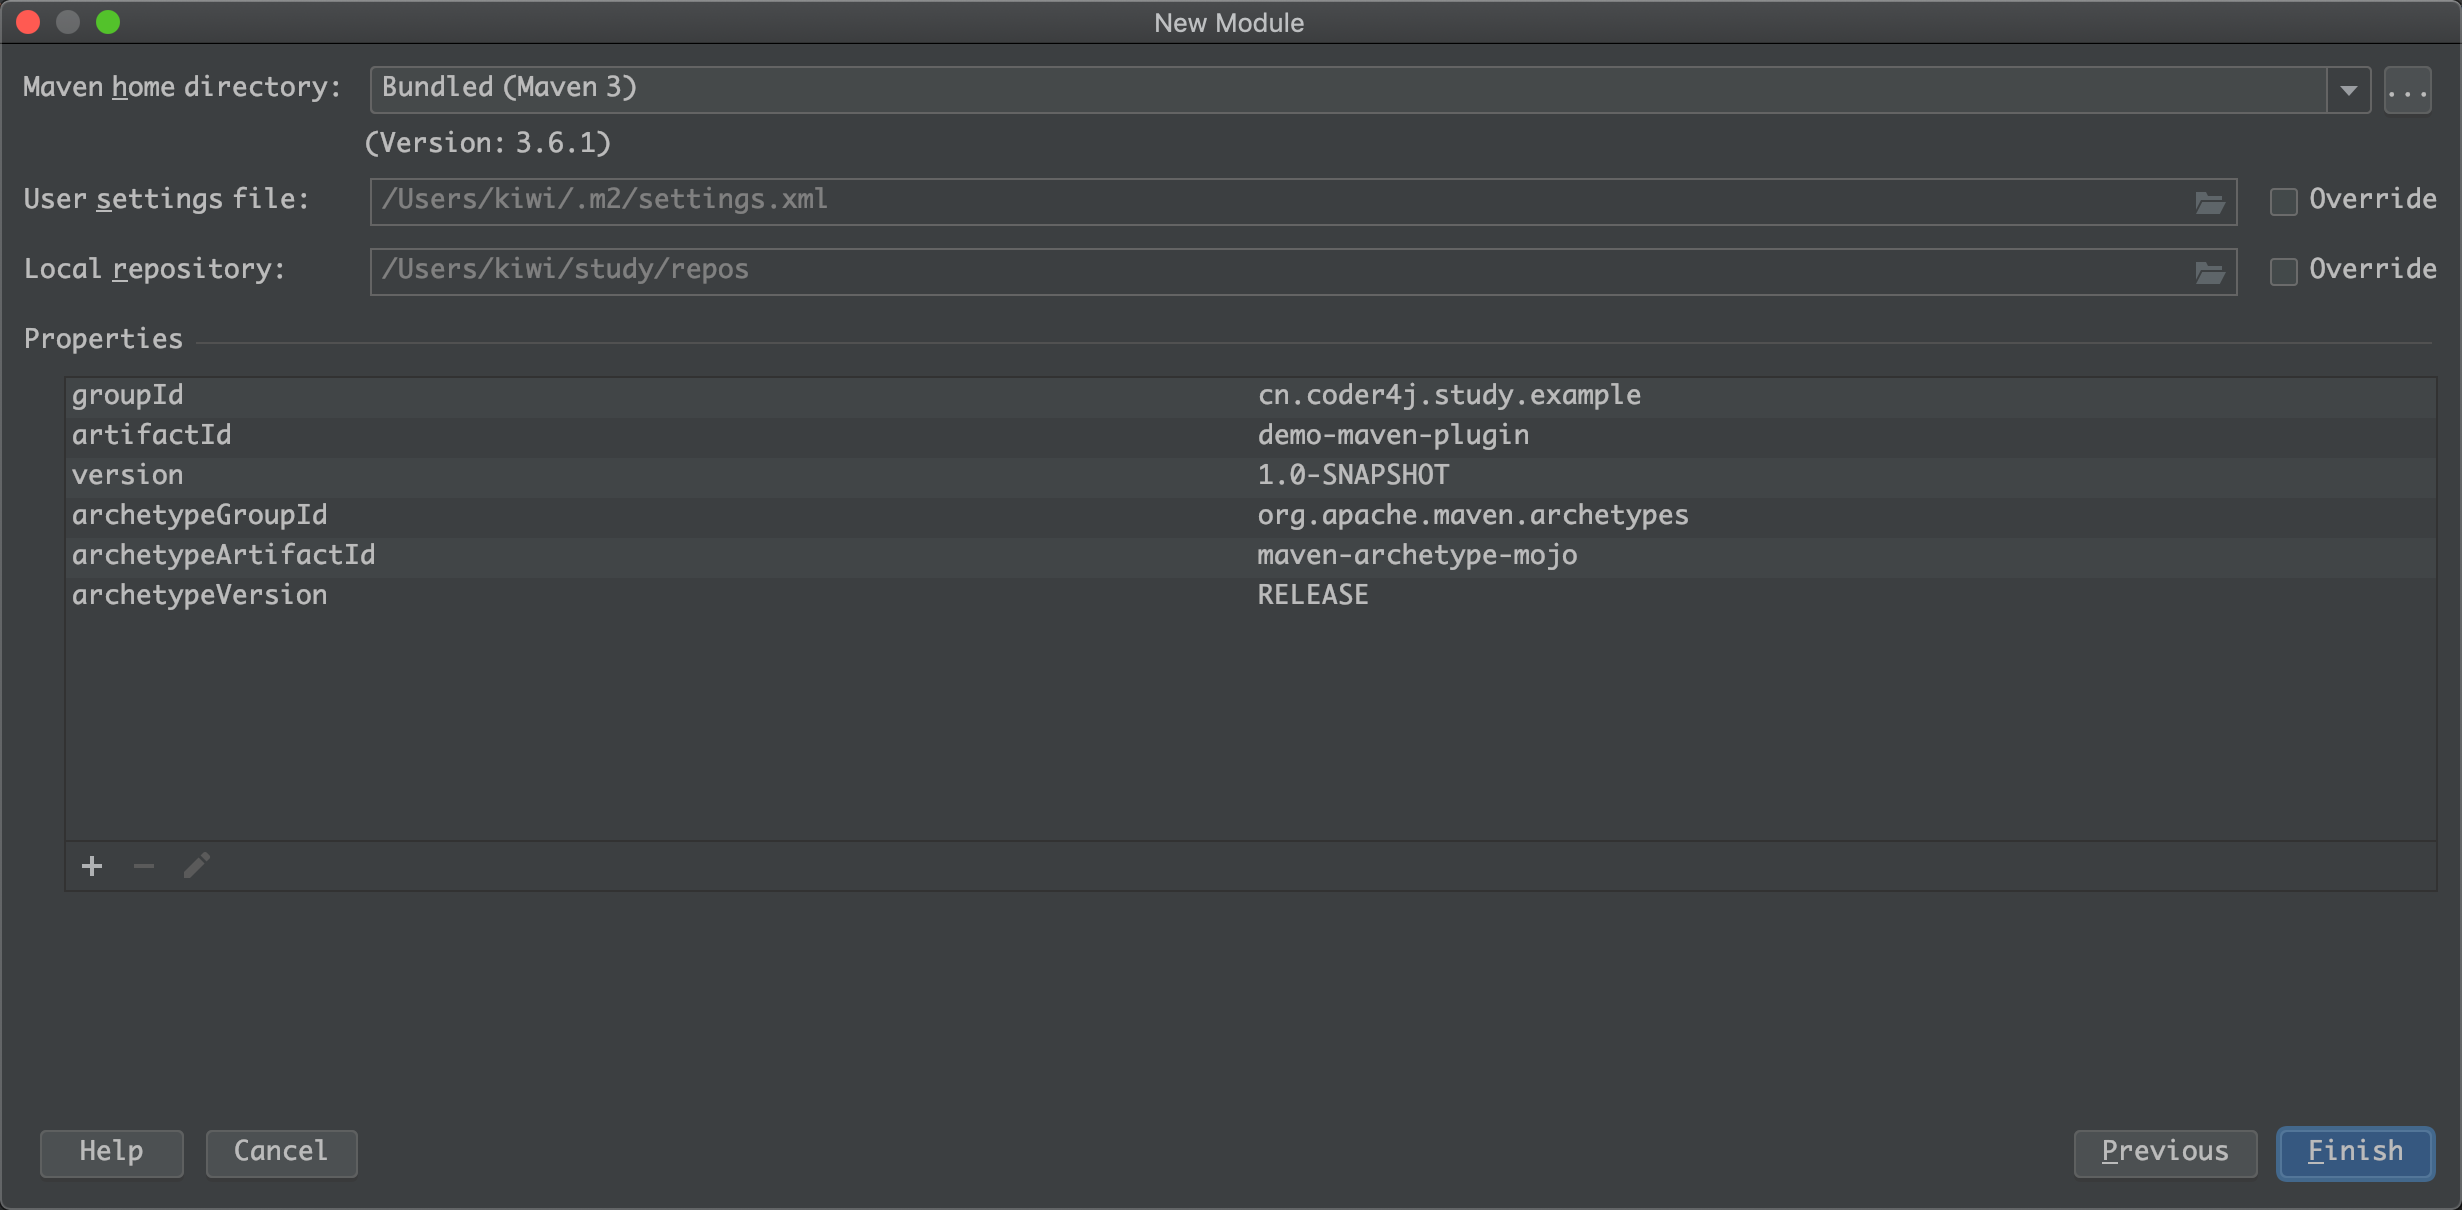
2.3 点击 Finish 完成项目创建
2.4 分析项目文件
项目结构
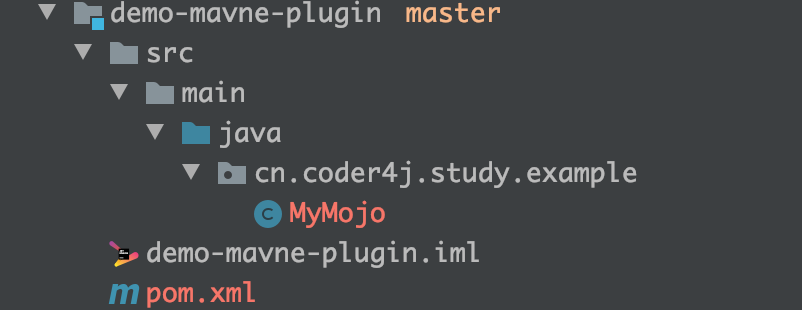
可以看到生成的项目就是我们最最常见的 maven 项目的结构,生成的文件也很少,一个 pom.xml 文件,一个 MyMojo 文件,简单介绍一下这两个文件
pom.xml
<project xmlns="http://maven.apache.org/POM/4.0.0" xmlns:xsi="http://www.w3.org/2001/XMLSchema-instance"xsi:schemaLocation="http://maven.apache.org/POM/4.0.0 http://maven.apache.org/maven-v4_0_0.xsd"><modelVersion>4.0.0</modelVersion><groupId>cn.coder4j.study.example</groupId><artifactId>demo-maven-plugin</artifactId><packaging>maven-plugin</packaging><version>1.0-SNAPSHOT</version><name>demo-mavne-plugin Maven Mojo</name><url>http://maven.apache.org</url><dependencies><dependency><groupId>org.apache.maven</groupId><artifactId>maven-plugin-api</artifactId><version>2.0</version></dependency><dependency><groupId>junit</groupId><artifactId>junit</artifactId><version>3.8.1</version><scope>test</scope></dependency></dependencies></project>
首先生成的项目 pom.xml 中,自动依赖了两个项目,一个是 maven-plugin-api ,这个是开发 maven 插件必须依赖的核心包。另一个是单元测试时使用的 junit 包。这两个没什么要注意的,真正要注意的是这个项目的 packaging,通常我遇到的 packaging 都是 jar、war、pom,这里比较特殊是 maven-plugin。
MyMojo.java
package cn.coder4j.study.example;/** Copyright 2001-2005 The Apache Software Foundation.** Licensed under the Apache License, Version 2.0 (the "License");* you may not use this file except in compliance with the License.* You may obtain a copy of the License at** http://www.apache.org/licenses/LICENSE-2.0** Unless required by applicable law or agreed to in writing, software* distributed under the License is distributed on an "AS IS" BASIS,* WITHOUT WARRANTIES OR CONDITIONS OF ANY KIND, either express or implied.* See the License for the specific language governing permissions and* limitations under the License.*/import org.apache.maven.plugin.AbstractMojo;import org.apache.maven.plugin.MojoExecutionException;import java.io.File;import java.io.FileWriter;import java.io.IOException;/*** Goal which touches a timestamp file.** @goal touch** @phase process-sources*/public class MyMojoextends AbstractMojo{/*** Location of the file.* @parameter expression="${project.build.directory}"* @required*/private File outputDirectory;public void execute()throws MojoExecutionException{File f = outputDirectory;if ( !f.exists() ){f.mkdirs();}File touch = new File( f, "touch.txt" );FileWriter w = null;try{w = new FileWriter( touch );w.write( "touch.txt" );}catch ( IOException e ){throw new MojoExecutionException( "Error creating file " + touch, e );}finally{if ( w != null ){try{w.close();}catch ( IOException e ){// ignore}}}}}
首先生成的类继承了 AbstractMojo 这个抽象类,这里是 maven 插件的规范要求,maven 插件必须要继承 AbstractMojo 并实现他的 execute 方法。
另外可以看到类与方法使用了很多 tag。注意是 tag 而不是注解,注解是直接标记的,而 tag 是在文档注释里面的。
其中 @goal 这个 tag 的作用是指定插件的命名,比如我们常用的 mvn clean,这个 clean 就是他的 @goal 。
而 @phase 是绑定插件执行的生成周期,比如你绑定在 clean 这个周期,那你在执行 clean 的时候会自动触发你的插件。
@parameter 用来指定插件的参数。
小朋友你是否有很多问号?tag 这个东西写在文档注释里面的东西,方便是方便但是容易写错呀,写错没有语法报错,写对时候也没有语法提示,为什么不直接用注解的形式呢?原因是 java 的注解是 jdk1.5 之后才有的,而实现 maven 的时候还没有这种语法。所以要一条路走到黑,一直背这个历史包袱吗?当然不是,后面我们会说解决办法。另外,这种写法虽然不推荐使用了,但是有些 maven 的经典插件由于完成时间比较早,熟悉这些 tag 对于理解代码也有帮助。
3. 开发插件
3.1 代码未动,依赖先行 pom.xml
<project xmlns="http://maven.apache.org/POM/4.0.0" xmlns:xsi="http://www.w3.org/2001/XMLSchema-instance"xsi:schemaLocation="http://maven.apache.org/POM/4.0.0 http://maven.apache.org/maven-v4_0_0.xsd"><modelVersion>4.0.0</modelVersion><groupId>cn.coder4j.study.example</groupId><artifactId>demo-maven-plugin</artifactId><packaging>maven-plugin</packaging><version>1.0-SNAPSHOT</version><name>demo-mavne-plugin Maven Mojo</name><url>http://maven.apache.org</url><dependencies><dependency><groupId>org.apache.maven</groupId><artifactId>maven-plugin-api</artifactId><version>3.5.2</version></dependency><dependency><groupId>org.apache.maven.plugin-tools</groupId><artifactId>maven-plugin-annotations</artifactId><version>3.5.2</version><scope>provided</scope></dependency></dependencies><build><plugins><plugin><groupId>org.apache.maven.plugins</groupId><artifactId>maven-plugin-plugin</artifactId><version>3.5.2</version></plugin></plugins></build></project>
相较于默认的 pom.xml 文件,我们做了如下几个变动:
- 升级 maven-plugin-api 的插件版本到 3.5.2 。原生的 2.0 实在是太老了。
- 添加 maven-plugin-annotations 这个依赖,还记得上面说的 tag 的事吗?有了这个依赖就可以直接使用注解了
- 添加 maven-plugin-plugin 插件依赖,添加这个依赖主要是为了在 jdk1.8 能编译通过,否则会报错
3.2 DemoMojo.java
/*** * ** * * blog.coder4j.cn* * * Copyright (C) 2016-2020 All Rights Reserved.* ***/package cn.coder4j.study.example;import org.apache.maven.plugin.AbstractMojo;import org.apache.maven.plugin.MojoExecutionException;import org.apache.maven.plugin.MojoFailureException;import org.apache.maven.plugins.annotations.Mojo;import org.apache.maven.plugins.annotations.Parameter;/*** @author buhao* @version DemoMojo.java, v 0.1 2020-03-30 22:51 buhao*/@Mojo(name = "hello")public class DemoMojo extends AbstractMojo {@Parameter(name = "name", defaultValue = "kiwi")private String name;public void execute() throws MojoExecutionException, MojoFailureException {getLog().info("hello " + name);}}
首先,同生成的类一样,我们的类必须继承 AbstractMojo 并实现他的 execute 方法,而 execute 方法其实就是这个插件的入口类。
示例代码中有两个很重要的注解,一个是 @Mojo ,它主要用来定义插件相关的信息相当于上面说的 @goal ,其中 name 属性用来指定这个插件名称,同 clean 类似。
另外一个重要注解 @Parameter ,则是用来指定插件运行时使用的参数,其中 name 是参数名,defaultValue 顾名思义是默认值,也就是在用户没有设置的时候使用的值。
详细的插件及作用如下:
import org.apache.maven.execution.MavenSession;import org.apache.maven.plugin.AbstractMojo;import org.apache.maven.plugin.MojoExecution;import org.apache.maven.plugin.descriptor.PluginDescriptor;import org.apache.maven.plugins.annotations.Component;import org.apache.maven.plugins.annotations.Execute;import org.apache.maven.plugins.annotations.InstantiationStrategy;import org.apache.maven.plugins.annotations.LifecyclePhase;import org.apache.maven.plugins.annotations.Mojo;import org.apache.maven.plugins.annotations.Parameter;import org.apache.maven.plugins.annotations.ResolutionScope;import org.apache.maven.project.MavenProject;import org.apache.maven.settings.Settings;// 此Mojo对应的目标的名称@Mojo( name = "<goal-name>",aggregator = <false|true>,configurator = "<role hint>",// 执行策略executionStrategy = "<once-per-session|always>",inheritByDefault = <true|false>,// 实例化策略instantiationStrategy = InstantiationStrategy.<strategy>,// 如果用户没有在POM中明确设置此Mojo绑定到的phase,那么绑定一个MojoExecution到那个phasedefaultPhase = LifecyclePhase.<phase>,requiresDependencyResolution = ResolutionScope.<scope>,requiresDependencyCollection = ResolutionScope.<scope>,// 提示此Mojo需要被直接调用(而非绑定到生命周期阶段)requiresDirectInvocation = <false|true>,// 提示此Mojo不能在离线模式下运行requiresOnline = <false|true>,// 提示此Mojo必须在一个Maven项目内运行requiresProject = <true|false>,// 提示此Mojo是否线程安全,线程安全的Mojo支持在并行构建中被并发的调用threadSafe = <false|true> ) // (since Maven 3.0)// 何时执行此Mojo@Execute( goal = "<goal-name>", // 如果提供goal,则隔离执行此Mojophase = LifecyclePhase.<phase>, // 在此生命周期阶段自动执行此Mojolifecycle = "<lifecycle-id>" ) // 在此生命周期中执行此Mojopublic class MyMojoextends AbstractMojo{@Parameter( name = "parameter",// 在POM中可使用别名来配置参数alias = "myAlias",property = "a.property",defaultValue = "an expression, possibly with ${variables}",readonly = <false|true>,required = <false|true> )private String parameter;@Component( role = MyComponentExtension.class,hint = "..." )private MyComponent component;@Parameter( defaultValue = "${session}", readonly = true )private MavenSession session;@Parameter( defaultValue = "${project}", readonly = true )private MavenProject project;@Parameter( defaultValue = "${mojoExecution}", readonly = true )private MojoExecution mojo;@Parameter( defaultValue = "${plugin}", readonly = true )private PluginDescriptor plugin;@Parameter( defaultValue = "${settings}", readonly = true )private Settings settings;@Parameter( defaultValue = "${project.basedir}", readonly = true )private File basedir;@Parameter( defaultValue = "${project.build.directory}", readonly = true )private File target;public void execute(){}}
回到示例上了,我们这个插件作用很简单,根据配置输出 hello xxx,如果没有配置就输出 hello kiwi。我们在写插件时,当然不会这样写,但是通过这个 demo,你就掌握了 maven 插件的大部分知识,可以自己做一些很有趣的插件。
4. 使用插件
首先上面我们的代码写完了,必须要 Install 一下,否则别的项目无法直接依赖,如果你还想给其它人使用,那还需上传到 maven 仓库。
4.1 依赖插件
<build><plugins><plugin><groupId>cn.coder4j.study.example</groupId><artifactId>demo-maven-plugin</artifactId><version>1.0-SNAPSHOT</version></plugin></plugins></build>
在我们想使用插件的项目中,添加如上配置,其中 plugin 中使用我们插件的 GAV 信息。
4.2 启动插件
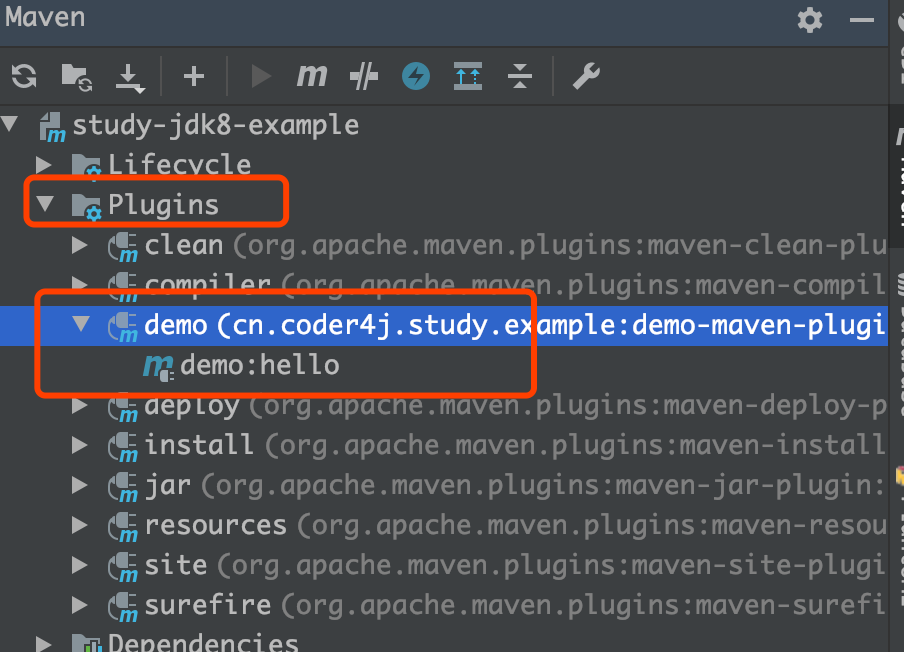
如果上面配置的都正确,那么在 idea 右侧的 Maven 中,你配置的项目的 Plugins 下会多了一个 demo(具体根据你插件项目的名称),而 demo 里面会有一个 demo:hello,其中这个 demo 对应你插件项目的名称,而 hello 对应你插件的名称也就是 @Mojo 中的 name 。
好的,我们双击一下,demo:hello ,会输出如下日志:
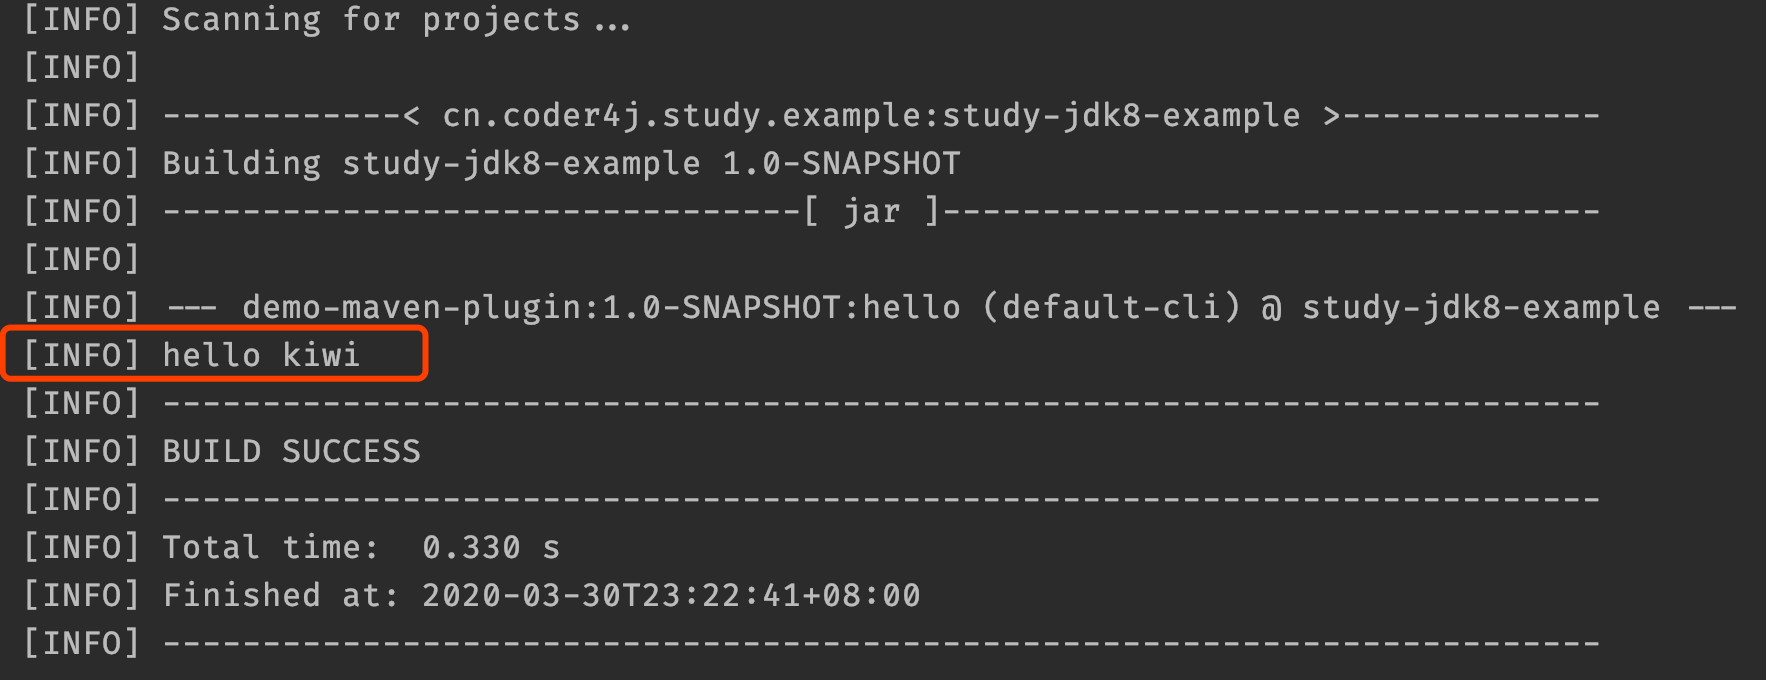
这样,我们的第一个 Maven 插件就好了。
4.3 配置参数
可能你还记得,我们在写 DemoMojo 的时候还指定了一个 name 属性,并且为它指定了一个 Parameter,这个如何使用。只要在依赖的插件下面添加 configuration 标签就可以了。
<build><plugins><plugin><groupId>cn.coder4j.study.example</groupId><artifactId>demo-maven-plugin</artifactId><version>1.0-SNAPSHOT</version><configuration><name>tom</name></configuration></plugin></plugins></build>
其中 configuration 标签内的标签,对应你定义的参数名称,而且 idea 还有语法提示,很 nice。
好的,我们再运行一下,结果如下:
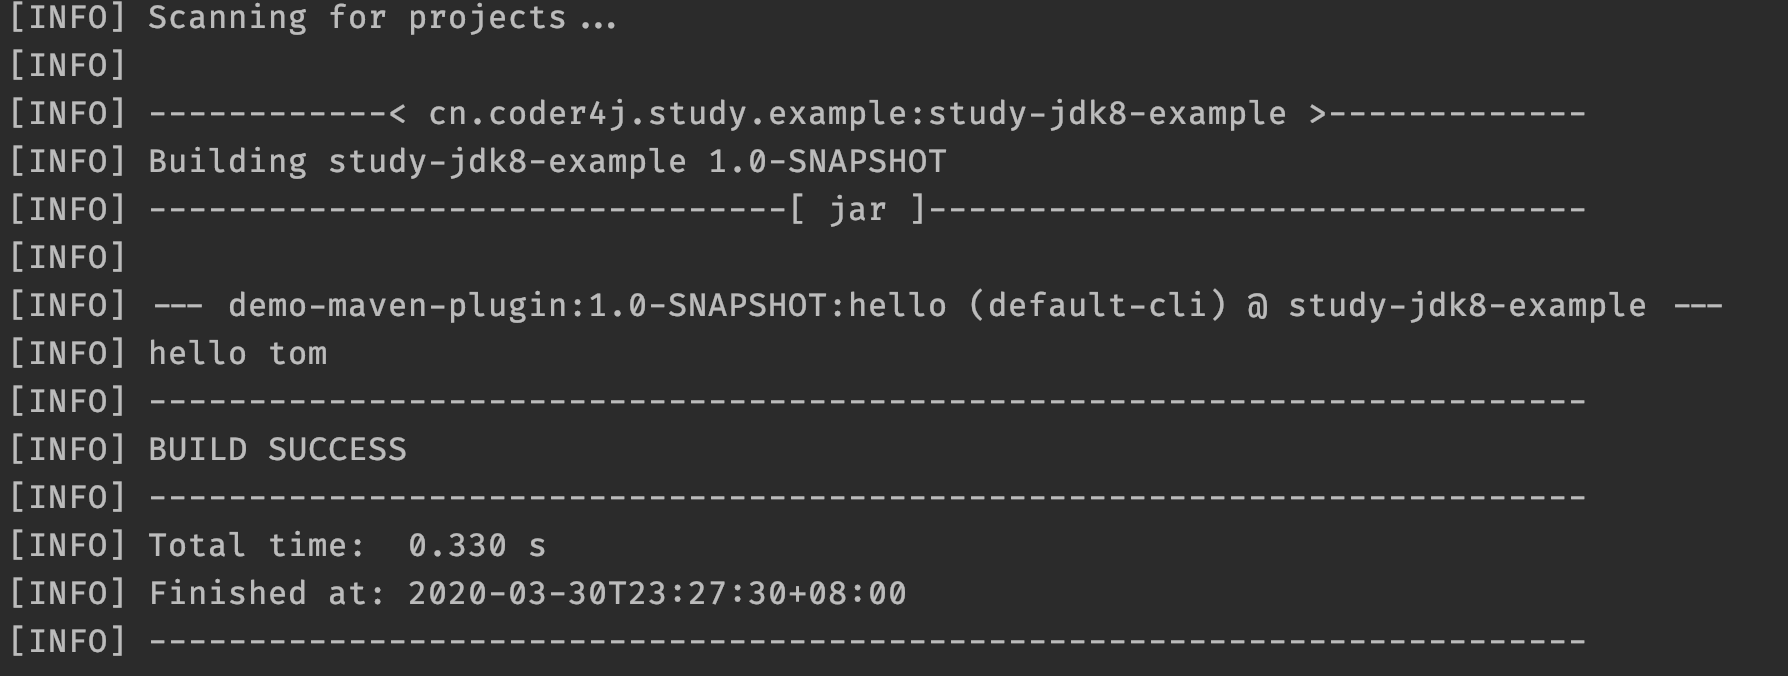
好的,大功告成。
其它
参考链接
项目源码
因为篇幅有限,无法贴完所有代码,如遇到问题可到 github 上查看源码。
关于我


若有收获,就点个赞吧
0 人点赞
