BHOL702 - 在流水线中增加SonarQube代码扫描环节
本节实验中,我们将在流水线中增加 SonarQube 的代码检查环节。
提示,如果还没有在 DevOpsBox 中启用 SonarQube 服务器,请参考 DevOpsBox 安装指南。
01 - 配置SonarQube,获取认证Token
进入SonarQube | 当前账号的MyAccount菜单 | Security 页面 中
在 Enter Token Name 中输入 Jenkins ,然后点击 Generate

记录这个 token 字符串,后续需要用到。
02 - 添加 sonarqube 项目配置文件并在本地运行检查
在boathouse-calculator中增加 sonar-project.properties 文件,内容如下
# must be unique in a given SonarQube instancesonar.projectKey=boat-house-calculator-ci# --- optional properties ---# defaults to project key#sonar.projectName=My project# defaults to 'not provided'#sonar.projectVersion=1.0# Path is relative to the sonar-project.properties file. Defaults to .#sonar.sources=.# Encoding of the source code. Default is default system encoding#sonar.sourceEncoding=UTF-8
然后运行如下命令
注意:我们这里同样使用了容器的方式来运行sonar-scanner工具,这样可以避免安装对应的工具。请替换以下脚本中的
- ${SONAR_HOST_URL} 为你的sonar服务器地址,应该是 http://192.168.99.102:9000
- ${SONAR_LOGIN} 为你在上面步骤获取的sonar token值
docker run --rm -e SONAR_HOST_URL="${SONAR_HOST_URL}" -e SONAR_LOGIN="${SONAR_LOGIN}" -v "${PWD}:/usr/src" sonarsource/sonar-scanner-cli
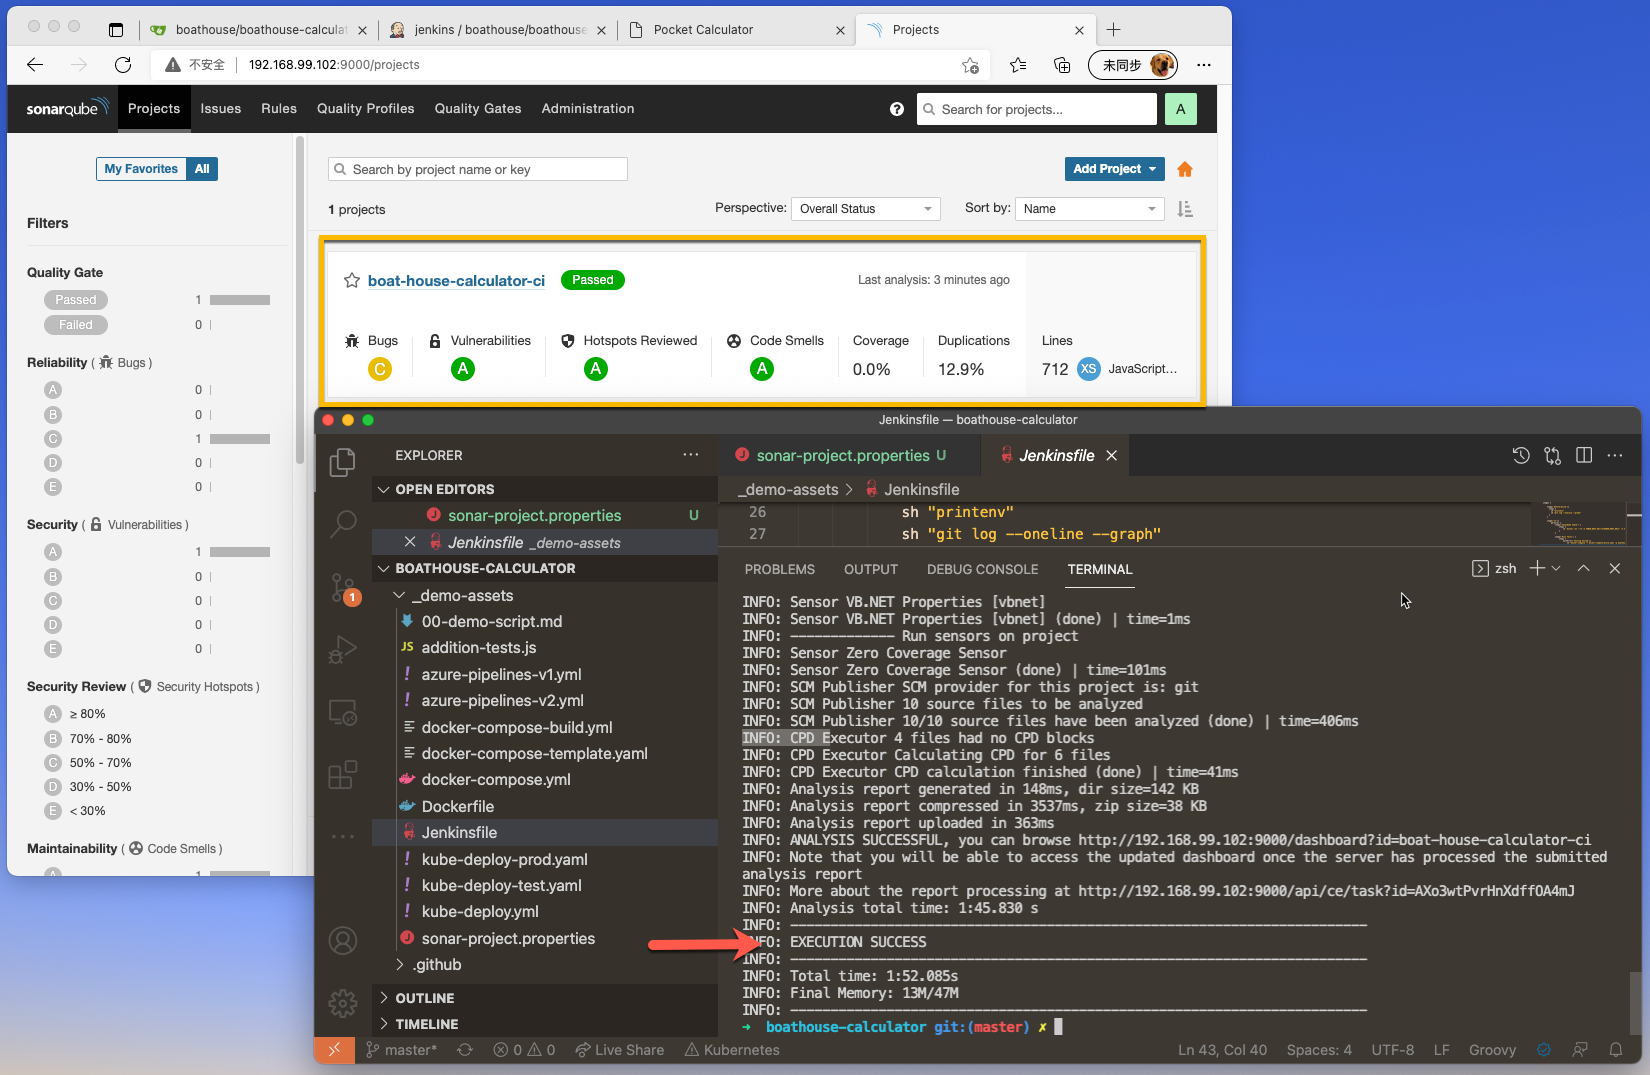
执行成功后即可在服务器上看到检查结果
03 - 添加SonarQube检查到流水线中
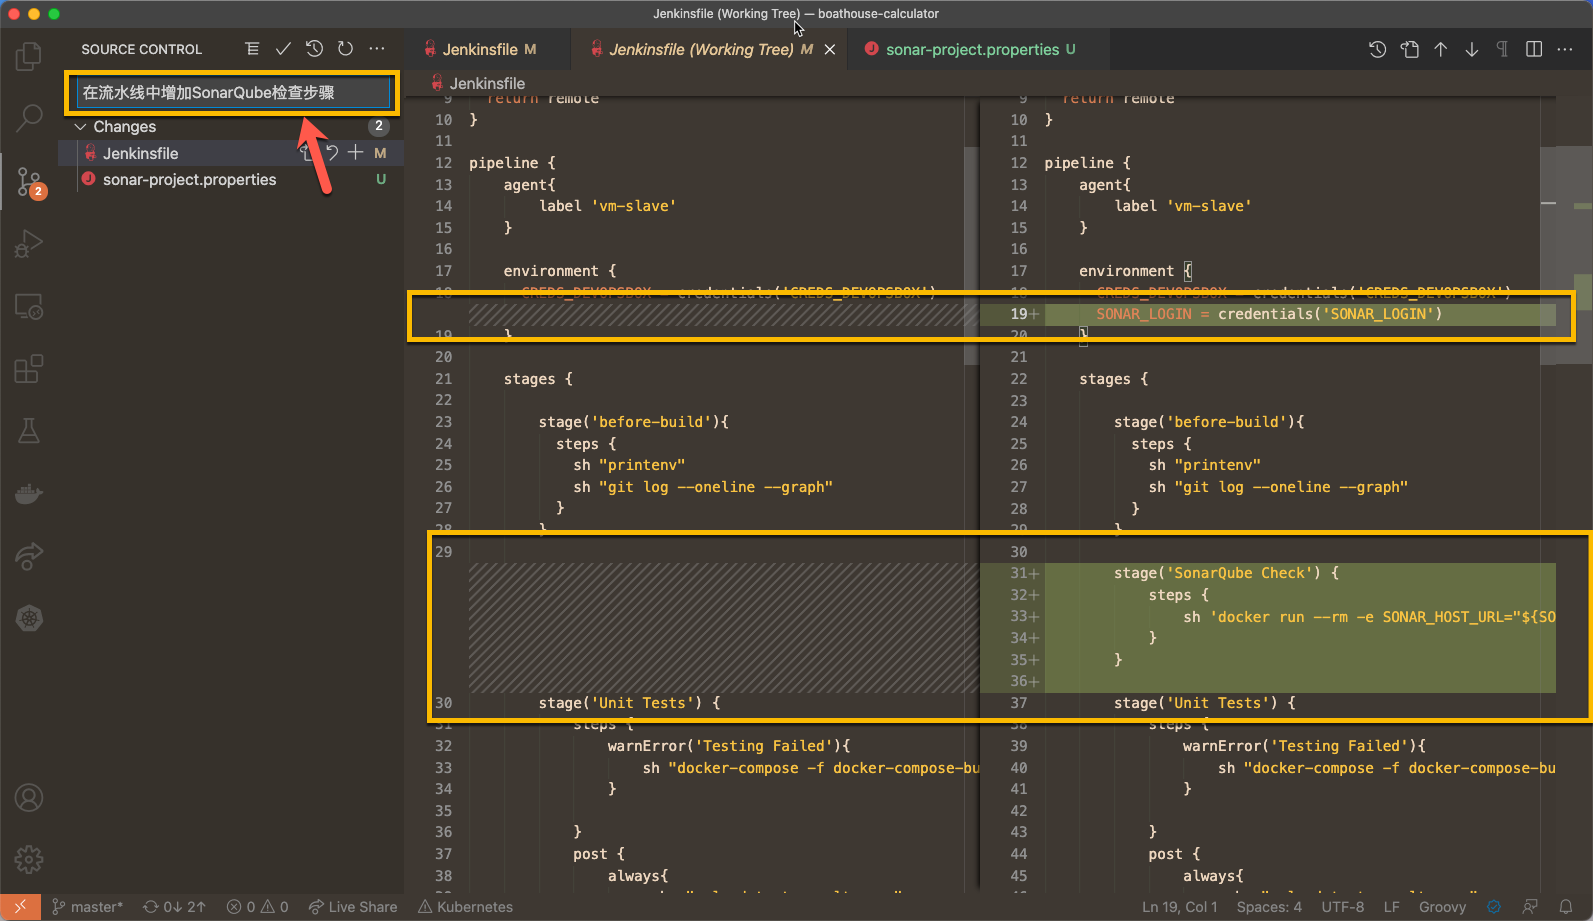
在 Jenkinsfile 中的 environment 配置节中增加以下参数
SONAR_LOGIN = credentials('SONAR_LOGIN')
在 Jenkinsfile 中的 before-build 步骤后增加一个 SonarQube Check 的 stage
stage('SonarQube Check') {steps {sh 'docker run --rm -e SONAR_HOST_URL="${SONAR_HOST_URL}" -e SONAR_LOGIN="${SONAR_LOGIN}" -v "${PWD}:/usr/src" sonarsource/sonar-scanner-cli'}}
提交以上代码到Gitea服务器
04 - 在Jenkins中配置参数
我们在以上脚本中增加了2个参数,需要按照 BHOL06 | 01 节 中的方法分别创建为环境变量和Credential
- SONAR_HOST_URL: 环境变量
- SONAR_LOGIN: 密钥,请使用 Secret text 密钥类型
完成上述配置后,再次触发流水线,即可看到如下效果
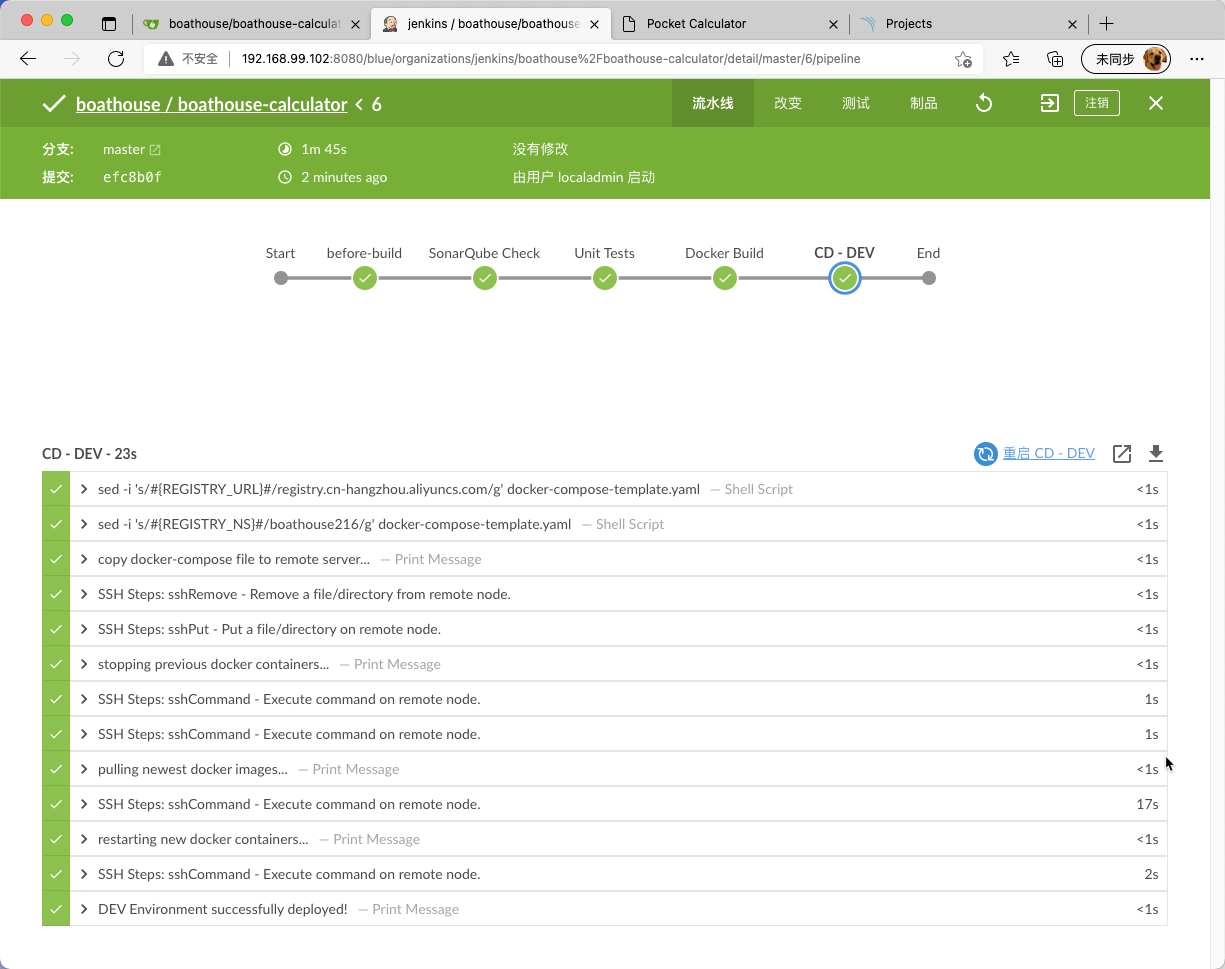
同时查看 SonarQube 中的记录,会发现记录会被更新。
小结
本节实验中,我们在基础流水线上引入了SonarQube的质量检查步骤。

若有收获,就点个赞吧
0 人点赞
