Nexus搭建及使用指南
安装
# Docker 安装sudo apt-get updatesudo apt install docker.iosudo usermod -a -G docker {localadmin}sudo curl -L "https://github.com/docker/compose/releases/download/1.25.3/docker-compose-$(uname -s)-$(uname -m)" -o /usr/local/bin/docker-composesudo chmod +x /usr/local/bin/docker-composesudo systemctl daemon-reloadsudo systemctl restart docker# Nexus 安装sudo mkdir ~/nexus-datasudo chown -R 200 ~/nexus-datadocker run -d -p 8081:8081 -p:2020:2020 --name nexus -v ~/nexus-data:/nexus-data sonatype/nexus3# 查看admin用户的默认密码sudo cat ~/nexus-data/admin.password
仓库类型
具体仓库类型主要分为hosted/proxy/group三种。
- proxy 是远程仓库的代理。比如说在nexus中配置了一个central repository的proxy,当用户向这个proxy请求一个artifact,这个proxy就会先在本地查找,如果找不到的话,就会从远程仓库下载,然后返回给用户,相当于起到一个中转的作用。
- hosted 是宿主仓库,用户可以把自己的一些构件,deploy到hosted中,也可以手工上传构件到hosted里。比如说oracle的驱动程序,ojdbc6.jar,在central repository是获取不到的,就需要手工上传到hosted里。
- group 是仓库组,在maven里没有这个概念,是nexus特有的。目的是将上述多个仓库聚合,对用户暴露统一的地址,这样用户就不需要在pom中配置多个地址,只要统一配置group的地址就可以了。
一般使用Proxy类型就可以了!
Maven
选择 Server administration and configuration
选择 Repository > Repositories
选择 Create Prepository
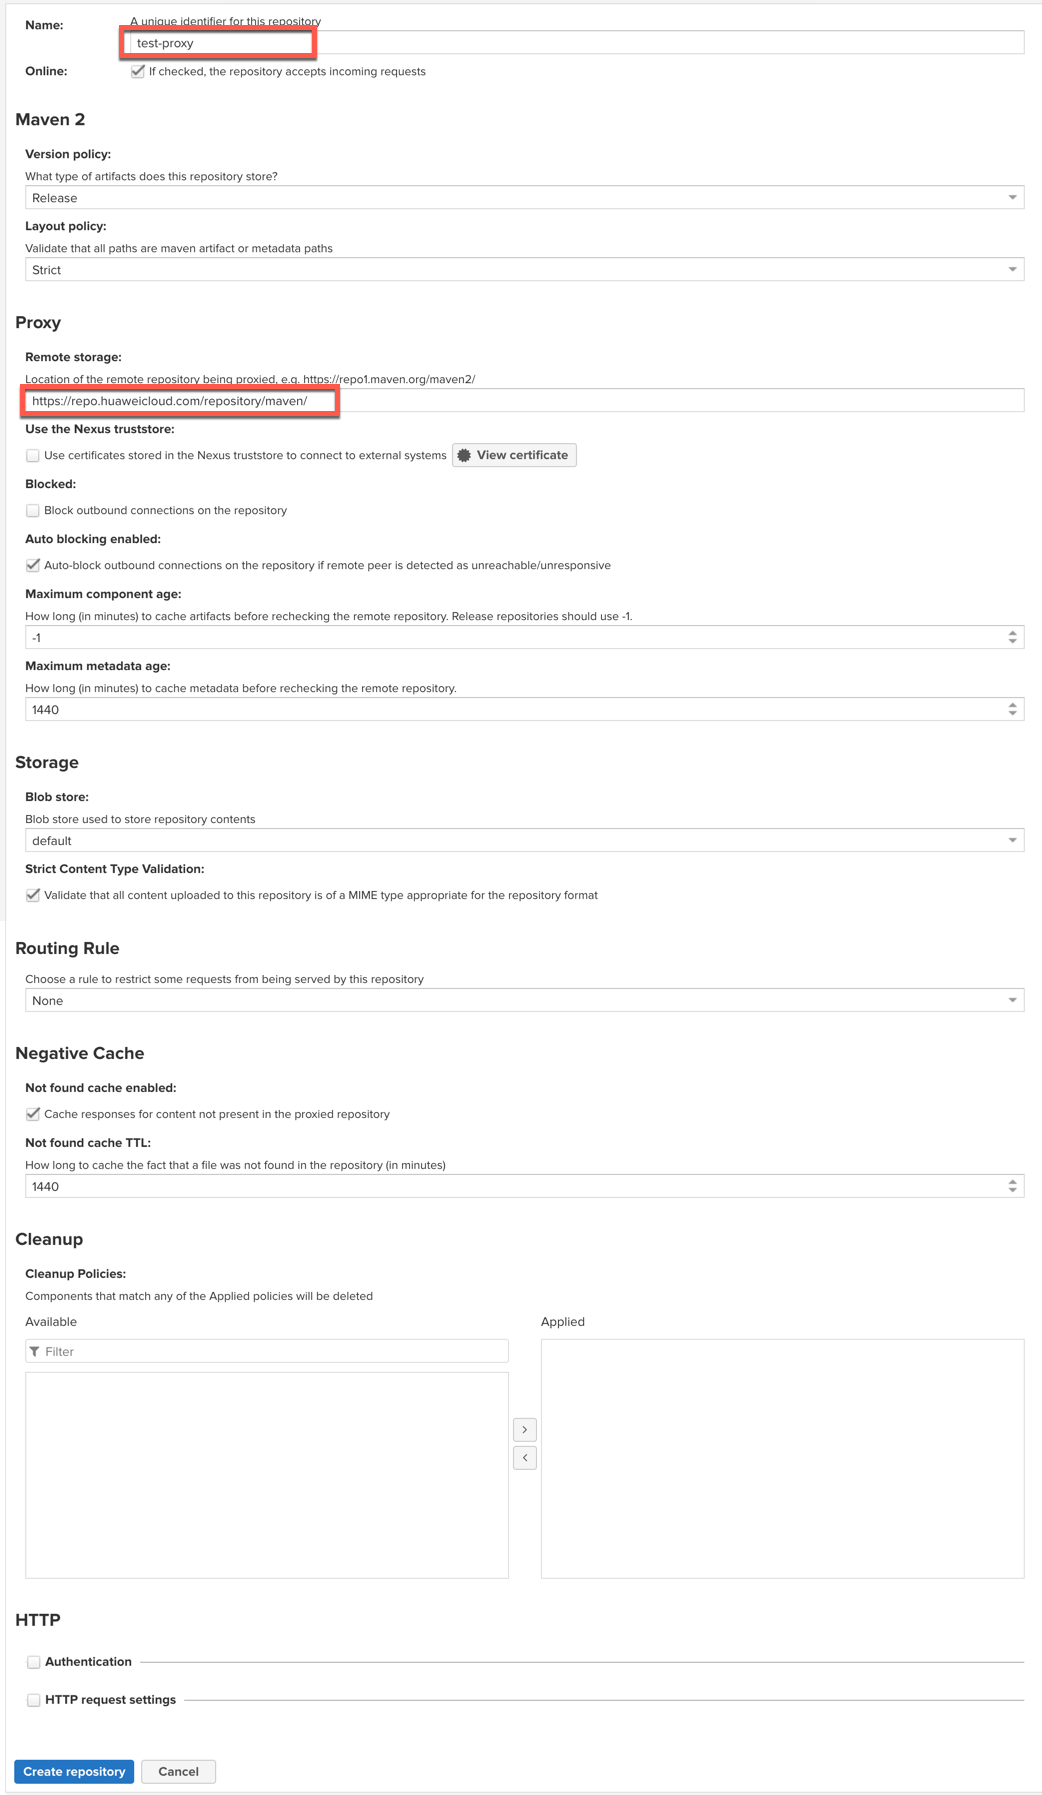
选择 maven2(proxy)
 输入name
remote storage: https://repo.huaweicloud.com/repository/maven/
其他选项默认即可
点击按钮 Create Prepository ,保存
输入name
remote storage: https://repo.huaweicloud.com/repository/maven/
其他选项默认即可
点击按钮 Create Prepository ,保存
进入列表页
点击 Analyze 开启统计
点击 Copy 复制repository的地址

打开POM文件,修改
<id>nexus-repository</id><name>nexus</name><url>http://tools-nexus.boat-house.cn/repository/maven-central/</url>

NPM
选择 Server administration and configuration , 选择 Repository > Repositories 选择 Create Prepository 选择 npm(proxy) 录入name、remote storage(建议使用 https://r.npm.taobao.org/) 进入列表页 点击 Analyze 开启统计 进入列表页 点击 copy 复制repository的地址 打开命令行工具,修改NPM的源地址
# maccnpm config set registry http://tools-nexus.boat-house.cn/repository/npm-proxy/# windows / linuxnpm config set registry http://tools-nexus.boat-house.cn/repository/npm-proxy/
NuGet
选择 Server administration and configuration , 选择 Repository > Repositories 选择 Create Prepository 选择 nuget(proxy) 录入name、remote storage(建议使用 https://nuget.cnblogs.com/v3/) 进入列表页 点击 Analyze 开启统计 进入列表页 点击 copy 复制repository的地址
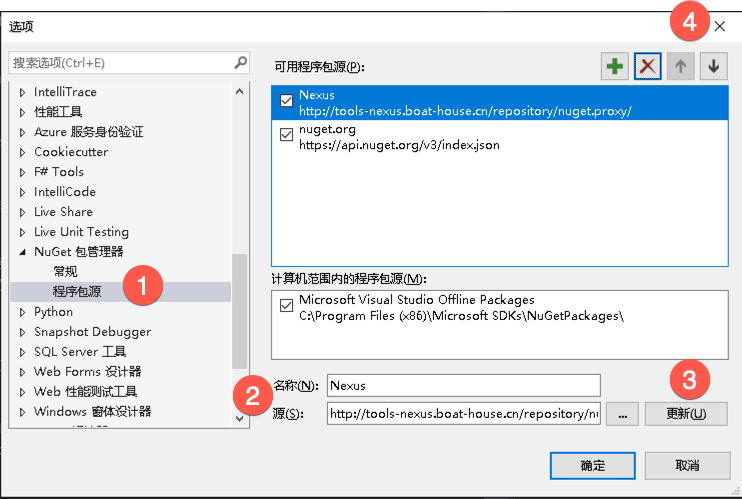
打开 Visual Studio 点击菜单项 工具,点击 选项 点击 NuGet包管理器,点击 程序包源, 点击“+”图标新建源, 输入名称、源地址,点击更新 ,点击“↑”把当前程序包源优先级提到最高,点击 确定 提交

若有收获,就点个赞吧
0 人点赞
