BHOL402 - k8s应用开发部署 - 使用pod进行部署
在这几节实验中,我们将完成我们的 Hello Boathouse 应用的k8s部署过程,其中会涉及到一下k8s中的对象
- Pod
- Deployment
- Service
- Secret
- Namespace
这些内容基本上覆盖了我们k8s集群进行应用开发部署的主要对象。
01 - 创建 Hello Boathouse 应用并打包成 docker 镜像
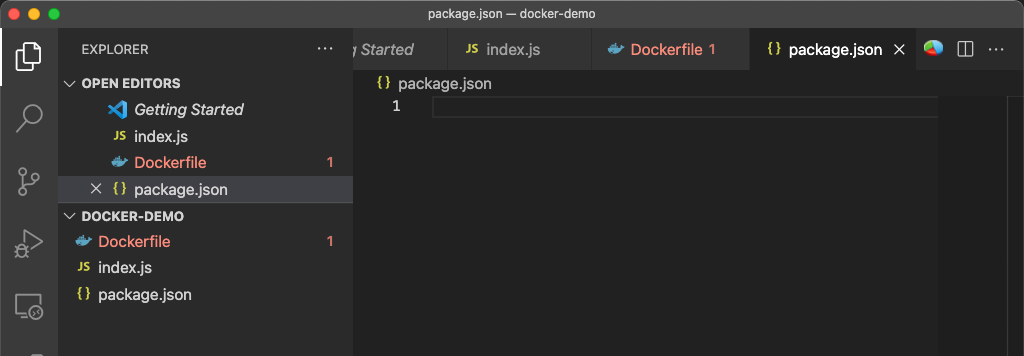
使用以下命令创建代码目录并用vscode打开
mkdir hello-boathousecd hello-boathousecode .
使用vscode分别创建以下文件
- index.js
- Dockerfile
- package.json
将以下内容分别复制到对应的文件中
index.js - 这是我们的应用入口,其功能就是在网页中直接输出 Hello Boathouse!的字样
var express = require('express');var os = require('os');var app = express();app.get('/', function (req, res) {console.log('Hello Boathouse v1 from ... %s', os.hostname );res.send('Hello Boathouse v1 from ... '+ os.hostname);});var server = app.listen(3000, function () {var host = server.address().address;var port = server.address().port;console.log('Example app listening at http://%s:%s', host, port);});
package.json - 这是 node.js 项目的配置文件,描述了本项目的依赖以及入口
{"name": "myapp","version": "0.0.1","private": true,"scripts": {"start": "node index.js"},"engines": {"node": "^4.6.1"},"dependencies": {"express": "^4.14.0","http-errors": "^1.7.0","mysql": "^2.10.2"},"devDependencies": {"inherits": "^2.0.3","mocha": "^5.2.0","ms": "^2.1.1"}}
Dockerfile - 用于 docker build 的打包脚本文件,我们基于node:12基础镜像,将应用代码复制到 /app 目录后执行 npm install,然后执行 package.json 中定义的应用入口 npm start 启动应用。
FROM node:12WORKDIR /appADD . /appRUN npm installEXPOSE 3000CMD npm start
使用一下命令将 hello-boathouse 应用打包成docker镜像并上传到个人镜像仓库
cd hello-boathouse## docker 打包docker build -t hello-boathouse .## 推送到个人镜像仓库docker tag hello-boathouse registry.cn-hangzhou.aliyuncs.com/{命名空间}/hello-boathousedocker push registry.cn-hangzhou.aliyuncs.com/{命名空间}/hello-boathouse## 同样的镜像,tag成v1docker tag hello-boathouse registry.cn-hangzhou.aliyuncs.com/{命名空间}/hello-boathouse:v1docker push registry.cn-hangzhou.aliyuncs.com/{命名空间}/hello-boathouse:v1
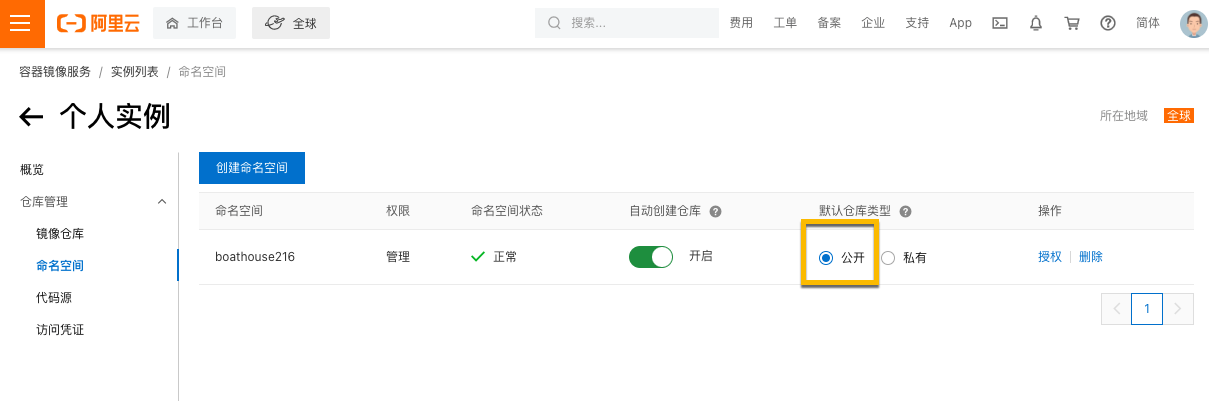
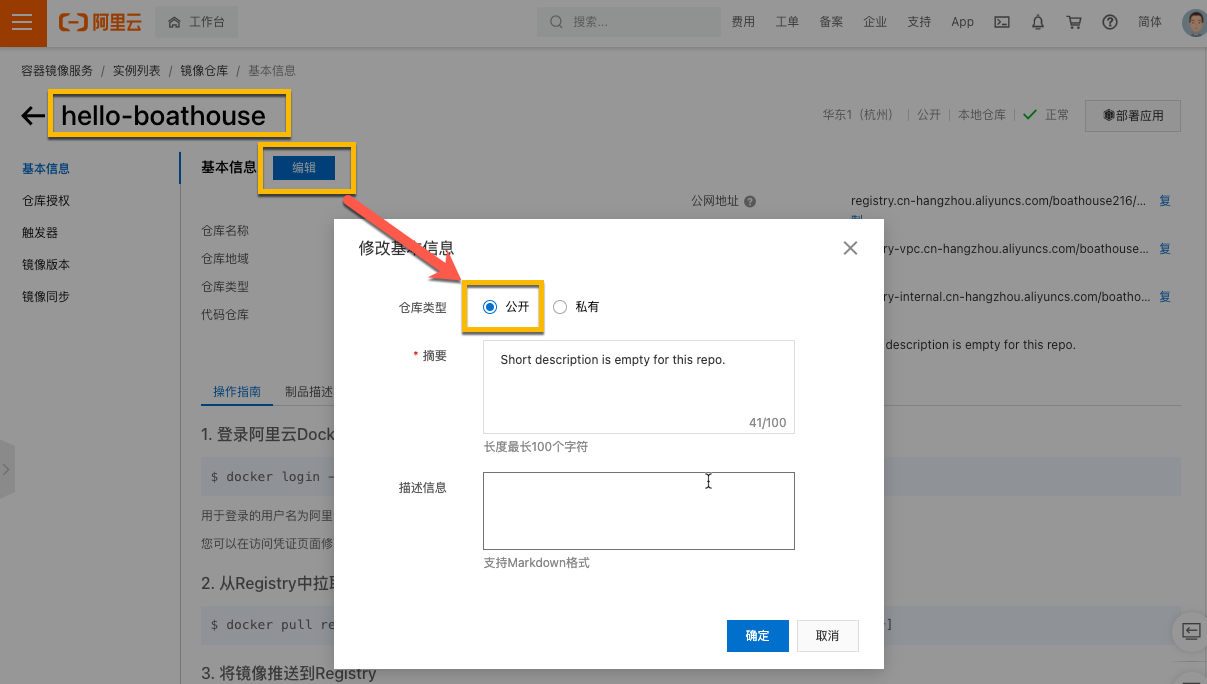
将boat-house仓库设置为公开仓库,需要同时对命名空间和仓库本身进行“公开”设置
注意:这个设置是为了简化我们后续的操作,可以在无需授权的情况下直接拉取镜像。实际应用中一般我们不会将镜像设置为公开。
02 - 为 Hello Boathouse 应用添加 k8s 部署文件并创建 Pod
在 hello-boathouse 目录中创建 kube-deploy 目录,并添加 hello-boathouse-pod.yaml 文件,文件内容如下:
apiVersion: v1kind: Podmetadata:name: hello-boathouse-podlabels:app: hello-boathousespec:containers:- name: hello-boathouseimage: registry.cn-hangzhou.aliyuncs.com/boathouse216/hello-boathouseports:- name: nodejs-portcontainerPort: 3000
运行一下命令,完成 Pod 部署
## 创建 Podkubectl create -f kube-deploy/hello-boathouse-pod.yaml## 获取 pod 状态### 这里需要等待一会儿,因为k8s需要先拉取镜像### 可以通过 BHOL401 中所介绍的工具实时监控 Pod 创建状态kubectl get podsNAME READY STATUS RESTARTS AGEhello-boathouse-pod 1/1 Running 0 2m29s## 获取 pod 状态详情### 同样的信息也可以通过 BHOL401 中所介绍的工具获取kubectl describe pod hello-boathouse-podName: hello-boathouse-podNamespace: defaultPriority: 0Node: minikube/192.168.99.106Start Time: Thu, 10 Jun 2021 12:23:44 +0800Labels: app=hello-boathouseAnnotations: <none>Status: RunningIP: 172.17.0.3IPs:IP: 172.17.0.3Containers:hello-boathouse:Container ID: docker://17ca9f4d81ec8c9c6deff4c06e1b510c26654ed06c86bd6ffb4b7d32480aff31Image: registry.cn-hangzhou.aliyuncs.com/boathouse216/hello-boathouseImage ID: docker-pullable://registry.cn-hangzhou.aliyuncs.com/boathouse216/hello-boathouse@sha256:8932c0b090a1bb4ee61b9d55b9f85a9a93660322d391b33ecfcec700b2b2afcfPort: 3000/TCPHost Port: 0/TCPState: RunningStarted: Thu, 10 Jun 2021 12:25:53 +0800Ready: TrueRestart Count: 0Environment: <none>Mounts:/var/run/secrets/kubernetes.io/serviceaccount from default-token-57vz9 (ro)Conditions:Type StatusInitialized TrueReady TrueContainersReady TruePodScheduled TrueVolumes:default-token-57vz9:Type: Secret (a volume populated by a Secret)SecretName: default-token-57vz9Optional: falseQoS Class: BestEffortNode-Selectors: <none>Tolerations: node.kubernetes.io/not-ready:NoExecute op=Exists for 300snode.kubernetes.io/unreachable:NoExecute op=Exists for 300sEvents:Type Reason Age From Message---- ------ ---- ---- -------Normal Scheduled 4m16s default-scheduler Successfully assigned default/hhello-boathouse-pod to minikubeNormal Pulling 4m15s kubelet Pulling image "registry.cn-hangzhou.aliyuncs.com/boathouse216/hello-boathouse"Normal Pulled 2m8s kubelet Successfully pulled image "registry.cn-hangzhou.aliyuncs.com/boathouse216/hello-boathouse" in 2m7.440614757sNormal Created 2m8s kubelet Created container hello-boathouseNormal Started 2m7s kubelet Started container hello-boathouse
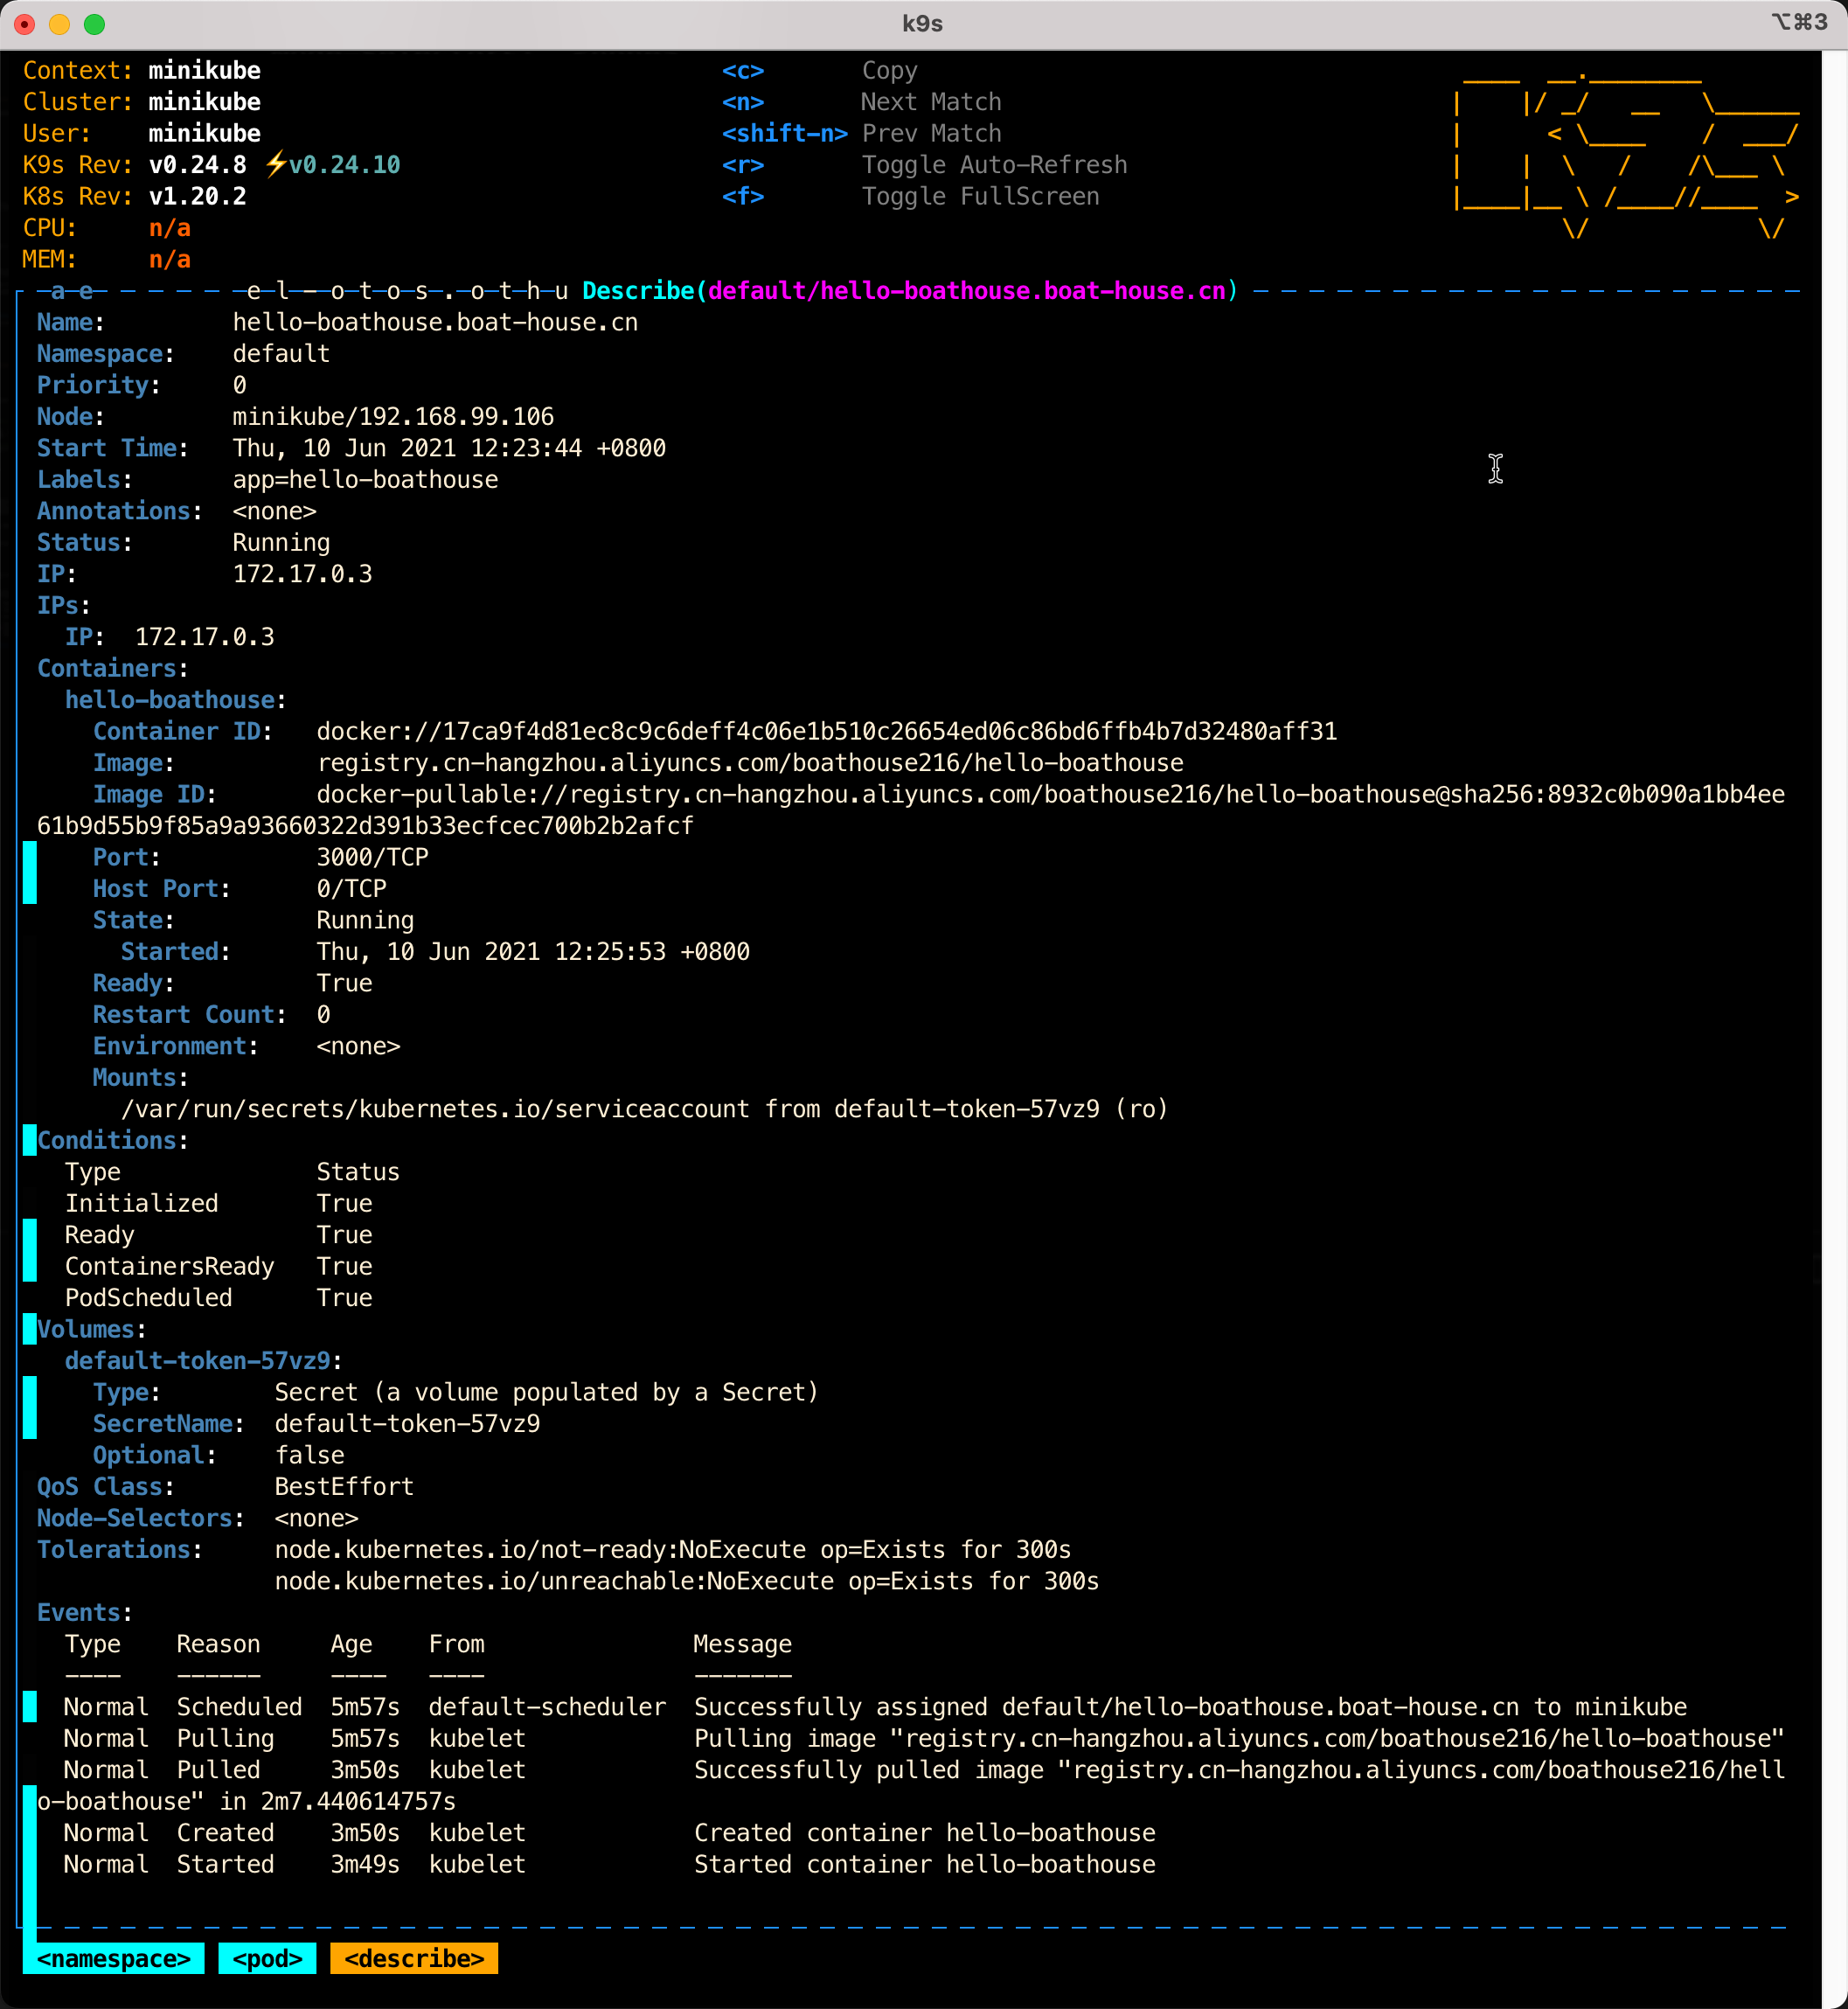
通过k9s获取pod详情
03 - 获取 hello-boathouse 应用的外部访问
使用端口转发方式
kubectl 可以将k8s集群中的应用端口转发到我们本机上,方便我们对应用进行快速调试,运行一下命令即可启动端口转发
kubectl port-forward hello-boathouse-pod 8081:3000Forwarding from 127.0.0.1:8081 -> 3000Forwarding from [::1]:8081 -> 3000
这时打开浏览器,通过 http://localhost:8081 即可访问我们的应用,效果如下:
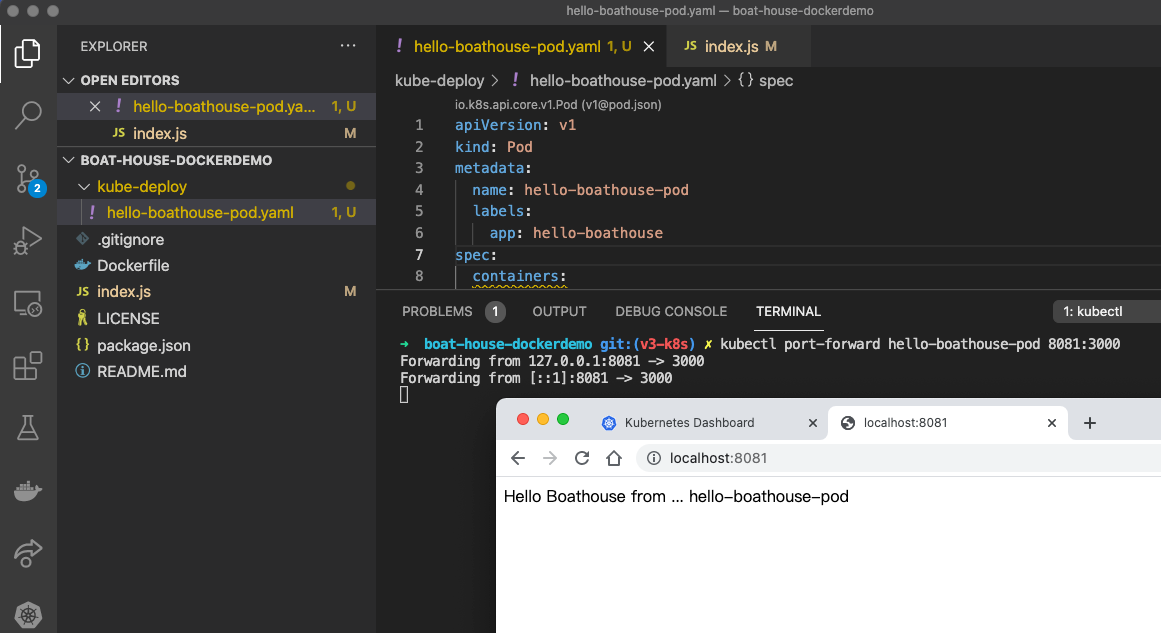
按 Ctrl+C 结束端口转发
使用节点端口(NodePort)方式直接在节点上开放端口
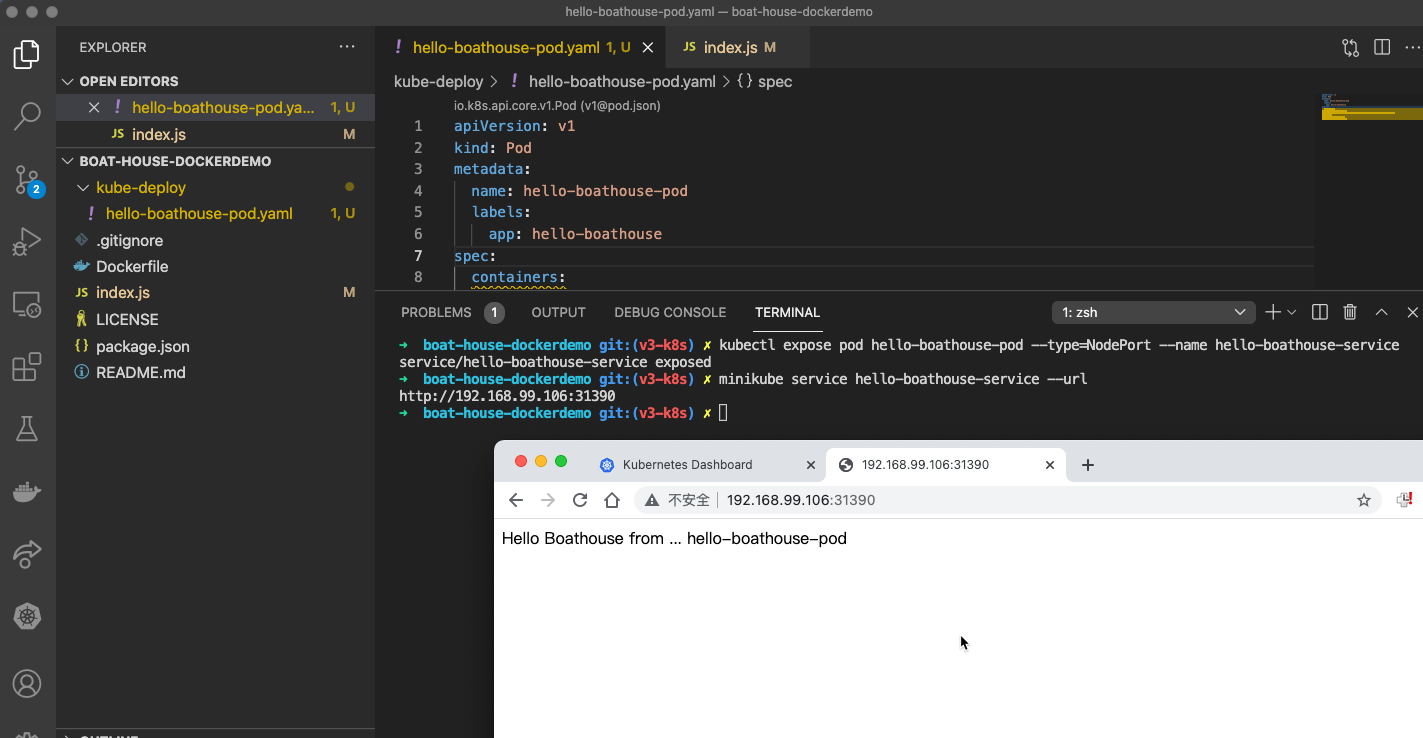
## 为 Pod 创建 Service 并使用 NodePort 模式kubectl expose pod hello-boathouse-pod --type=NodePort --name hello-boathouse-serviceservice/hello-boathouse-service exposed## 从 minikube 获取对外暴露的端口号minikube service hello-boathouse-service --urlhttp://192.168.99.106:31359## 获取 Service 列表kubectl get servicesNAME TYPE CLUSTER-IP EXTERNAL-IP PORT(S) AGEhello-boathouse-service NodePort 10.96.202.41 <none> 3000:31359/TCP 5m8skubernetes ClusterIP 10.96.0.1 <none> 443/TCP 30h
这时打开浏览器,通过 http://192.168.99.106:31359 (具体要参考你自己的输出) 即可访问我们的应用,效果如下:
04 - 常用kubectl命令
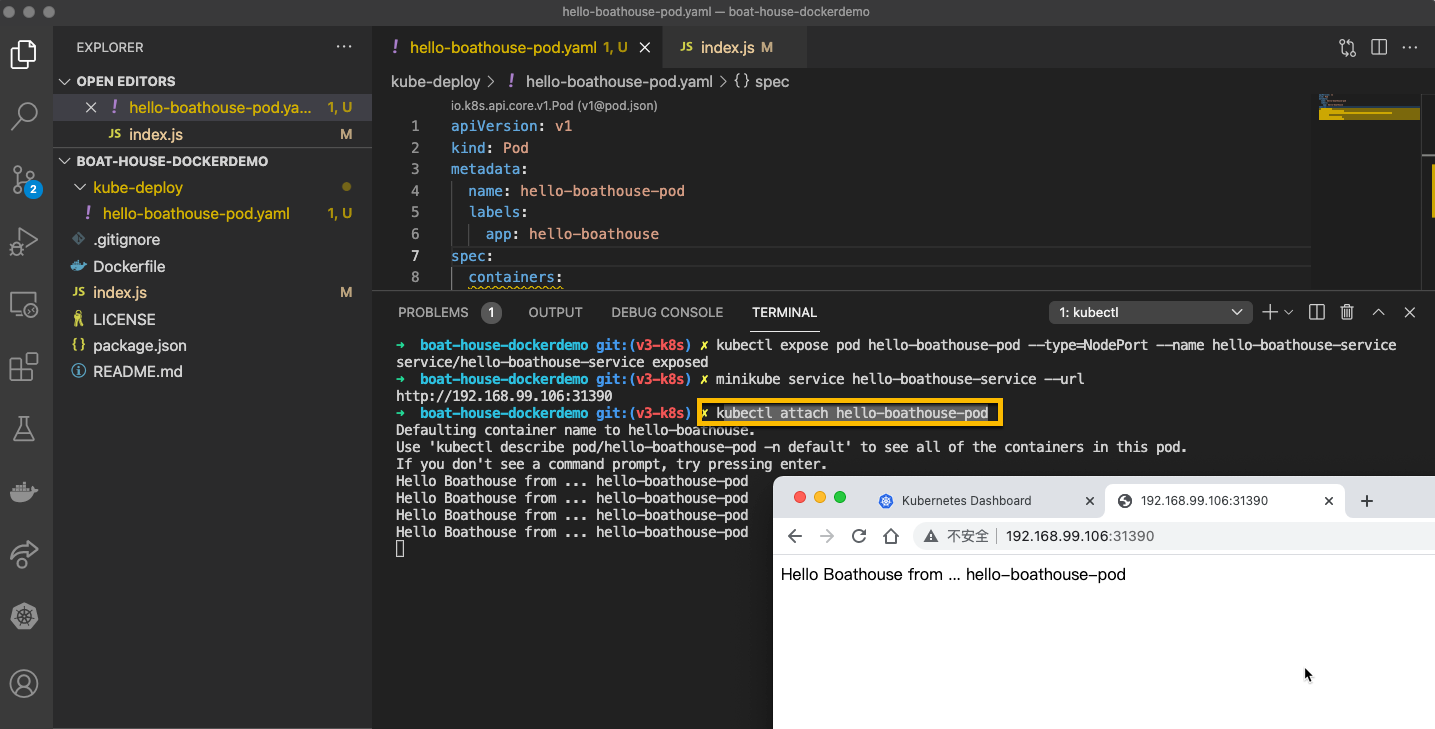
kubectl attach
连接 pod 日志输出
kubectl attach hello-boathouse-pod
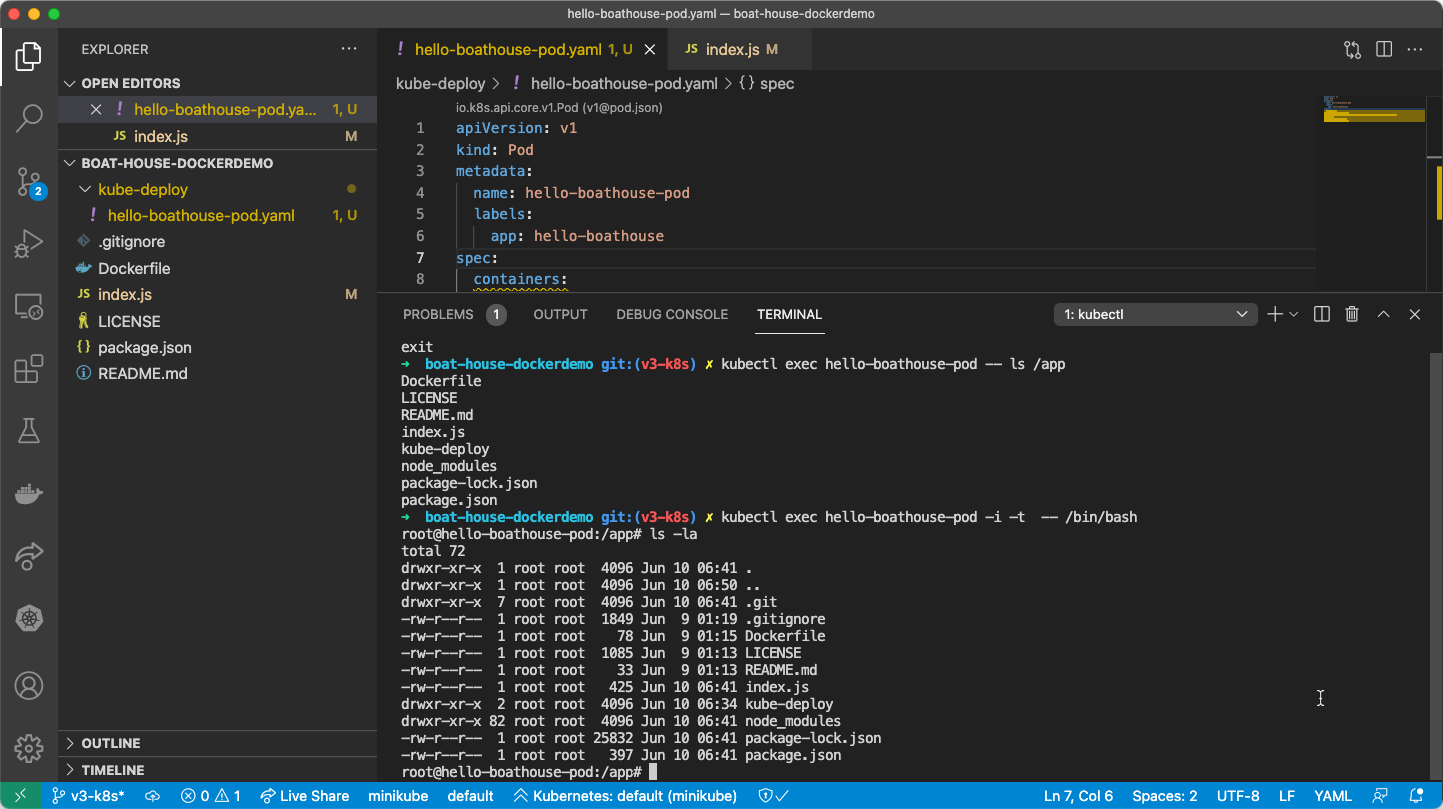
kubectl exec
在 pod 中执行指令
## 列出 /app 目录内容kubectl exec hello-boathouse-pod -- ls /app## 在 Pod 中运行 bashkubectl exec hello-boathouse-pod -i -t -- /bin/bash
kubectl run
使用 busybox 在 k8s 集群中调试应用
## 使用 describe 获取 Service 详情,记录Endpoint信息kubectl describe service hello-boathouse-service## 使用 busybox 启动临时 pod,对服务进行测试kubectl run -i --tty busybox --image=busybox --restart=Never -- shping {EndPoint IP 地址}telnet {EndPoint IP 地址} {EndPoint 端口}
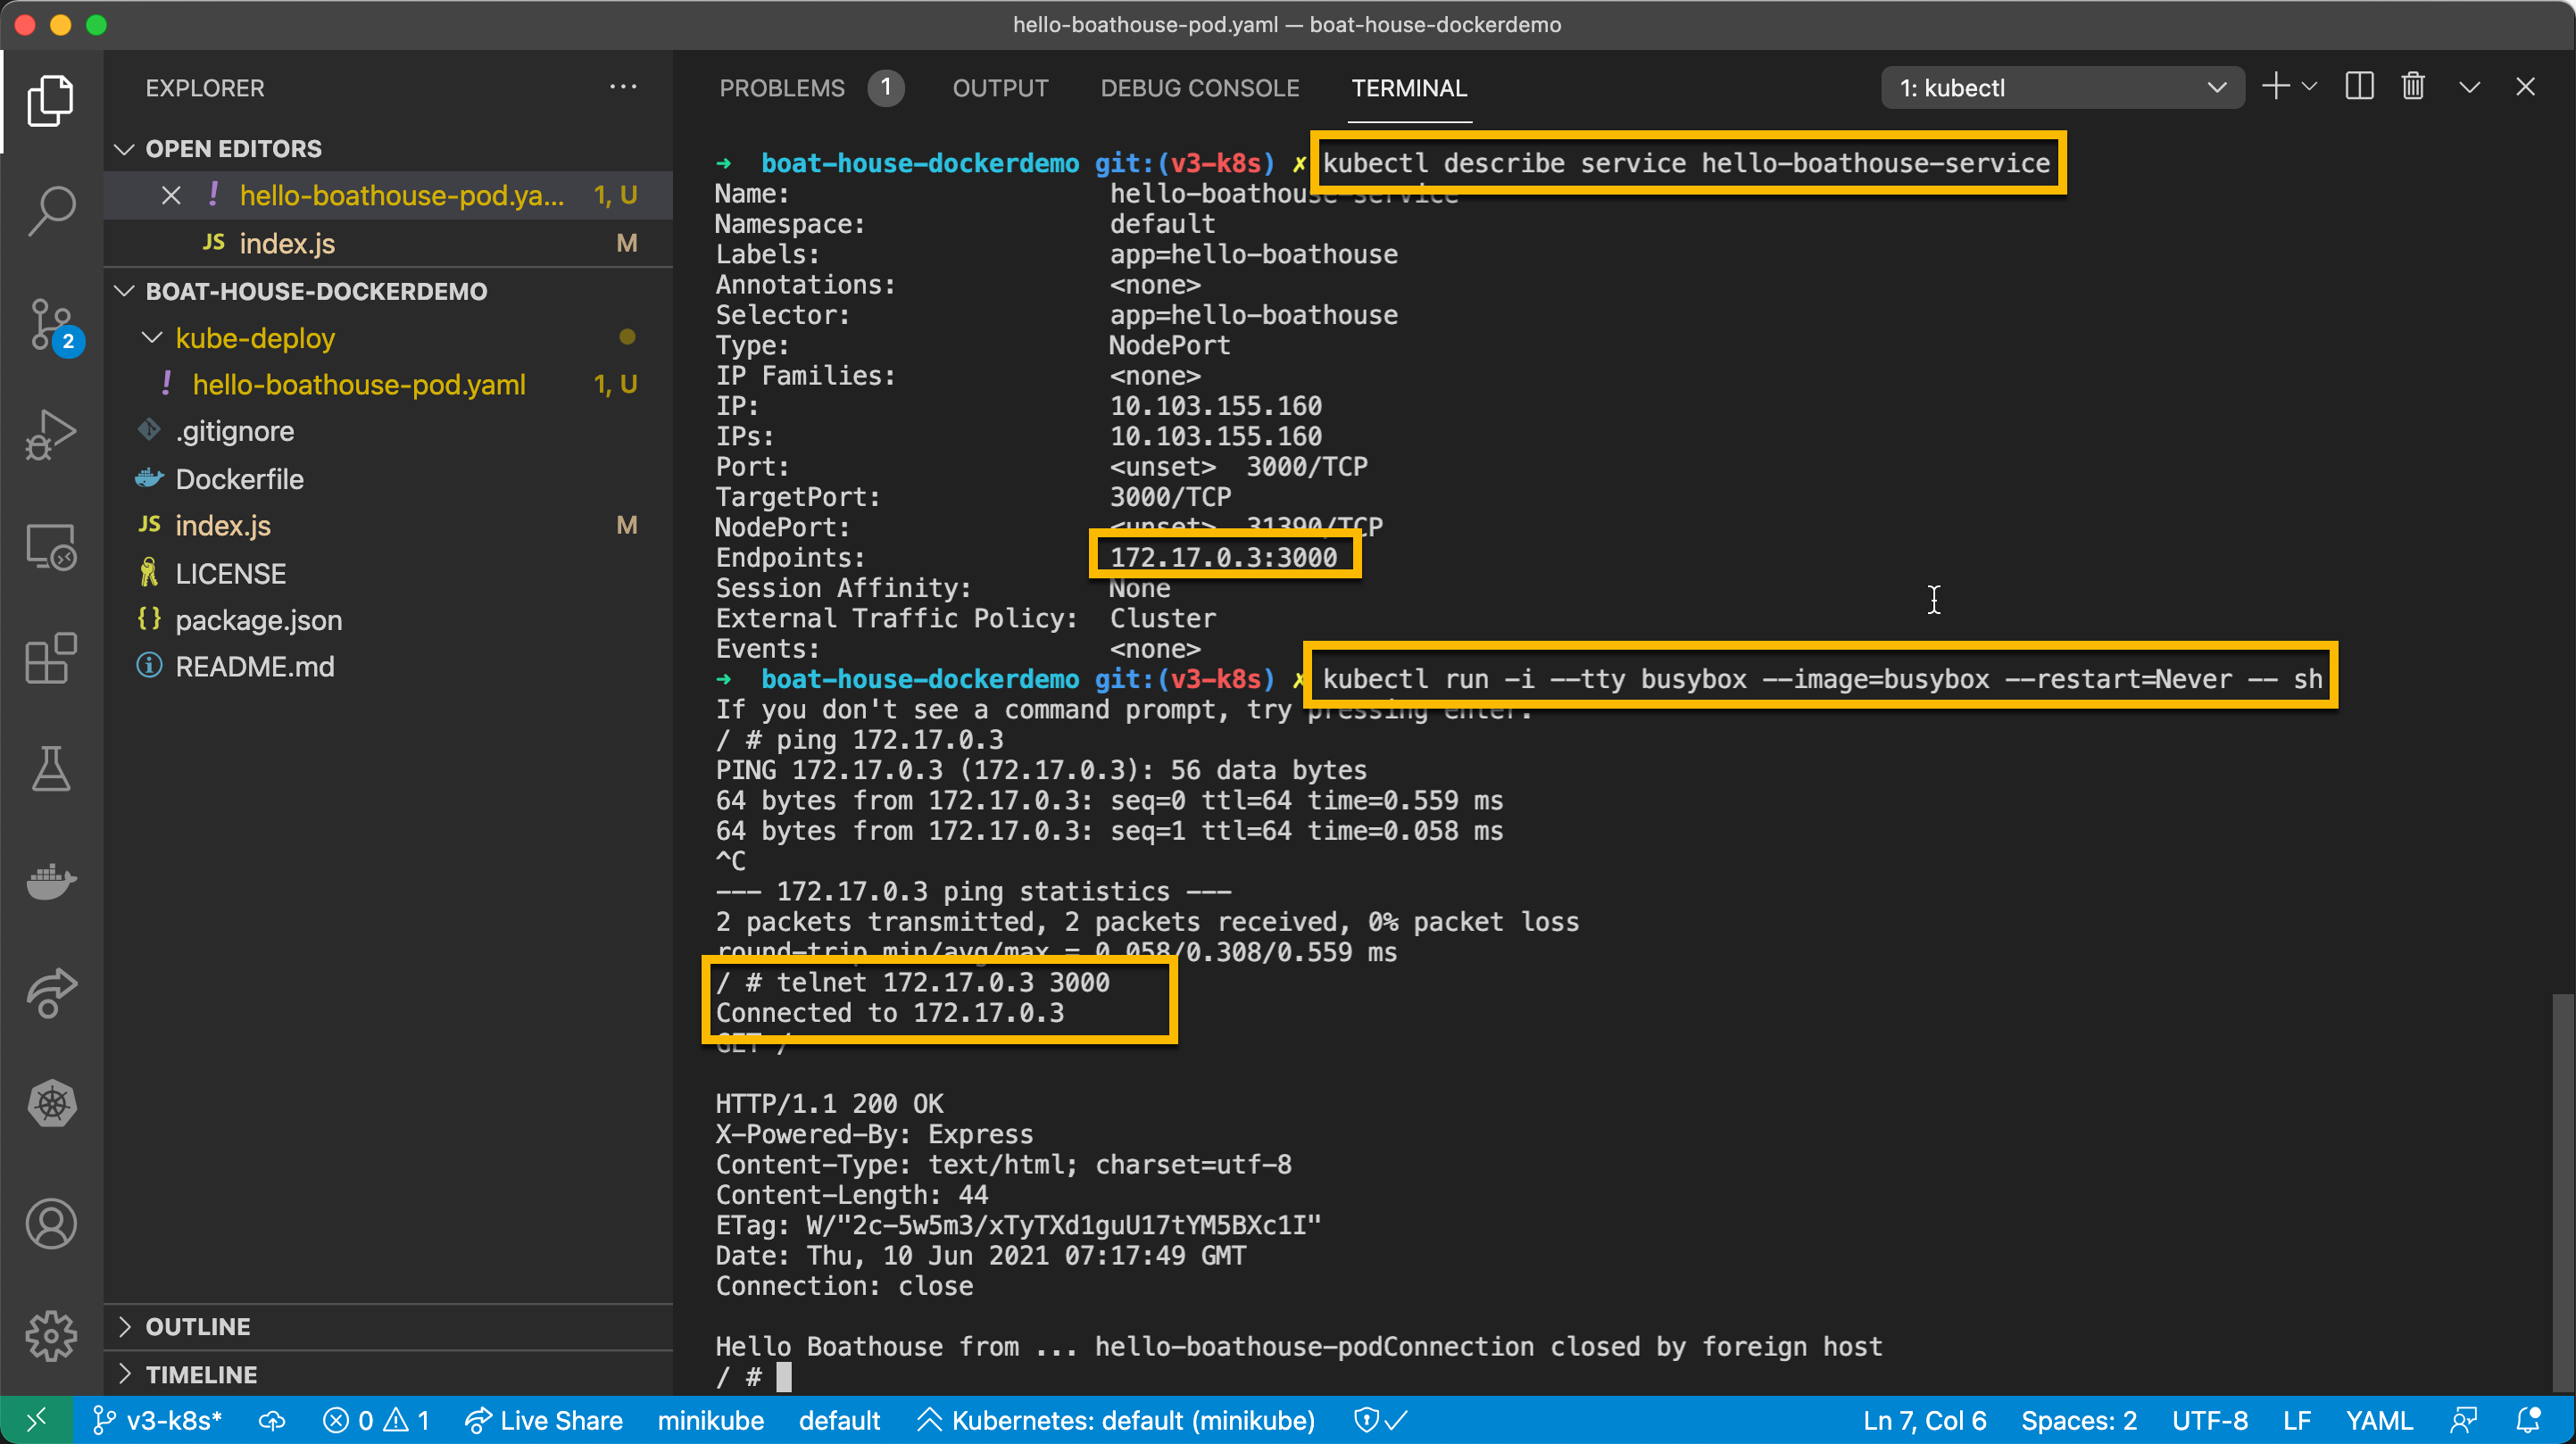
使用这种方式我们可以进入k8s进群内部定位问题,确定我们启动的pod是否工作正常。

若有收获,就点个赞吧
0 人点赞
