- nGrinder接口性能测试指南
nGrinder接口性能测试指南
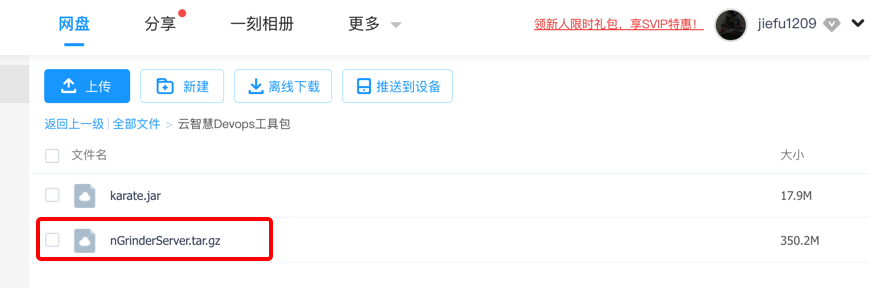
1.nGrinder 环境准备主要包含(JDK1.8.152 以上版本 和nGrinder安装包)已经有一键部署安装包具体下载地址如下:链接: https://pan.baidu.com/s/1Ip3kvju2nia1jXvtBDlTeA 提取码: jxxv ,或者扫二维码下载 “nGrinderServer.tar.gz”
 |
 |
|---|---|
2.将下载后的文件上传至Jenkins部署机器(用于压测)指定目录下,如 /home/ghuser(执行 sudo su 获取root权限)
执行 tar -xvzf nGrinderServer.tar.gz && cd nGrinderServer && sh ./Autoinstall.sh
安装完成后 通过执行 ps -ef|grep “tomcat” 确认nGrinder 服务是否安装成功;如下图

执行ss -tnlp |grep 80 如下图-安装成功

备注:1.一键安装包会试图安装Agent,因目前在本次Demo环境会安装失败,请安装下面步骤手动安装(非root用户,通过sudo su 获取roo’t 权限;
2.默认Tomcat端口为80端口,如果冲突,Tomcat应该会启动失败,通过/nGrinderServer/apache-tomcat-9.0.36/conf/server.xml 配置文件修改为可用端口,如下图所示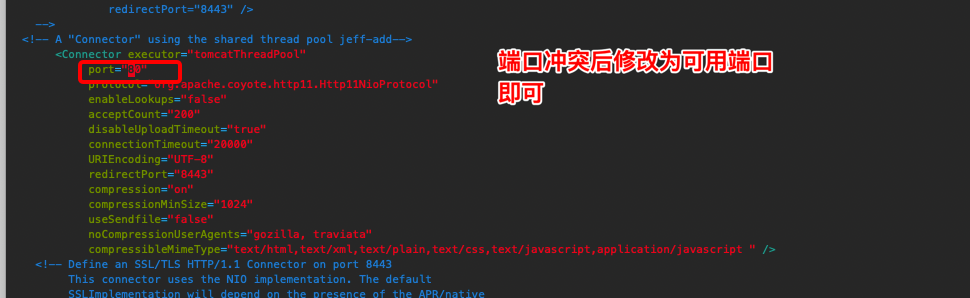
端口修改后,执行 nGrinderServer/nGrinderStart.sh脚本重新启动nGrinder,启动成功后检查方法同上面

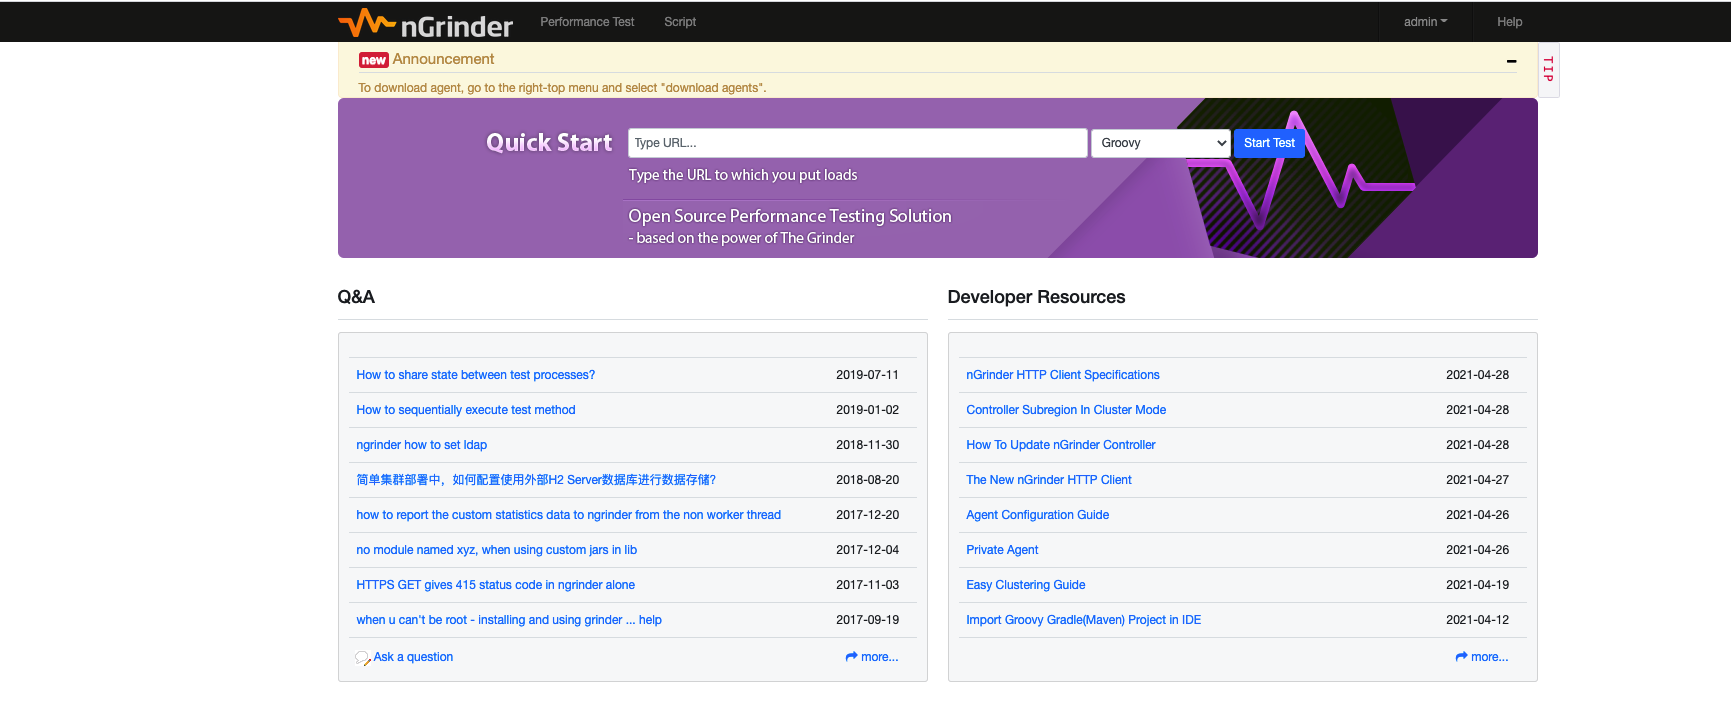
3.启动成功后,通过本地浏览器访问(demo)
如: http://jenkins部署机器IP或域名(如果端口不是80,请带上指定端口)
出现如下页面,输入用户名和密码,默认为admin/admin

登录成功后
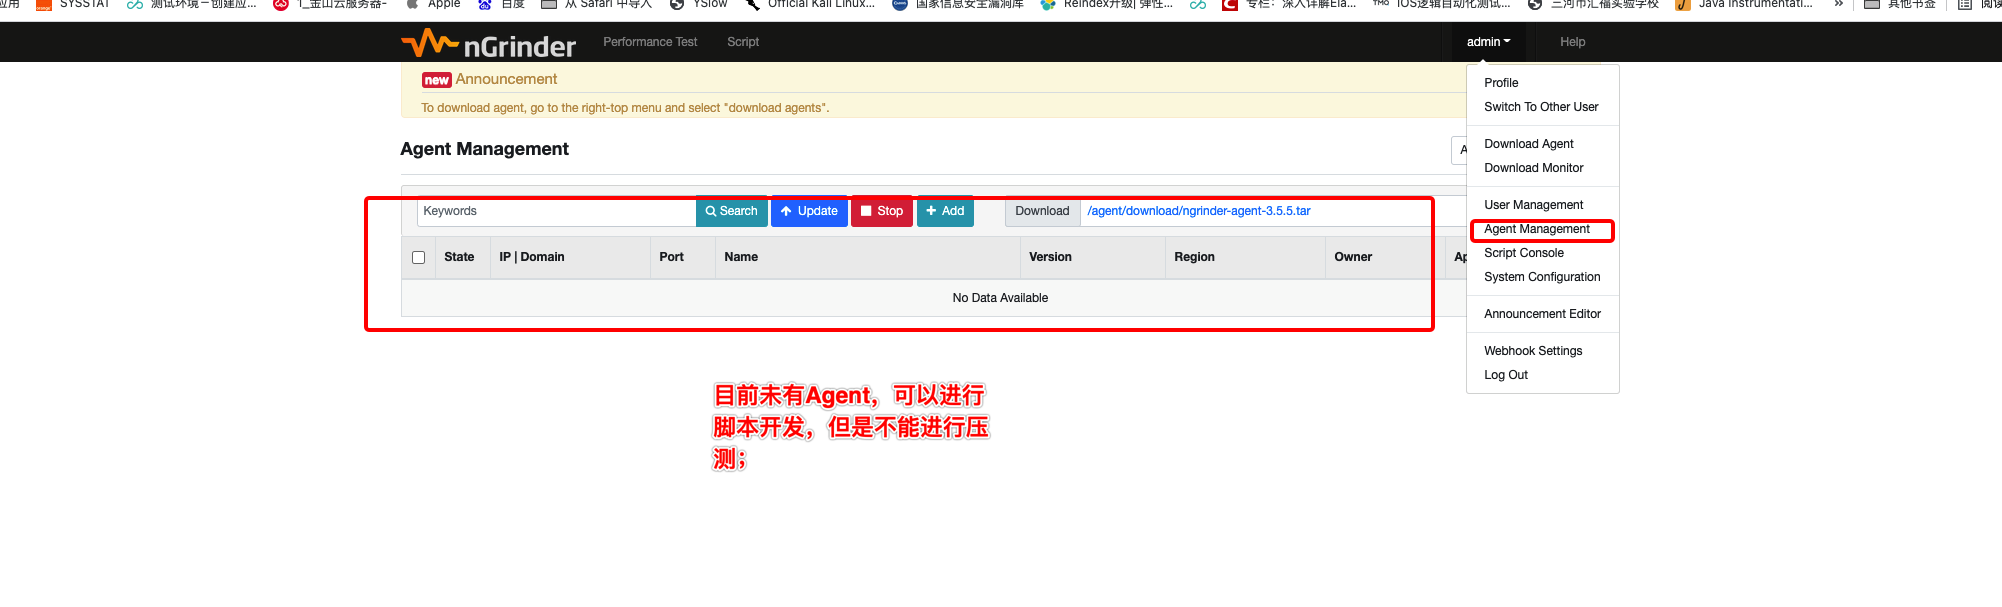
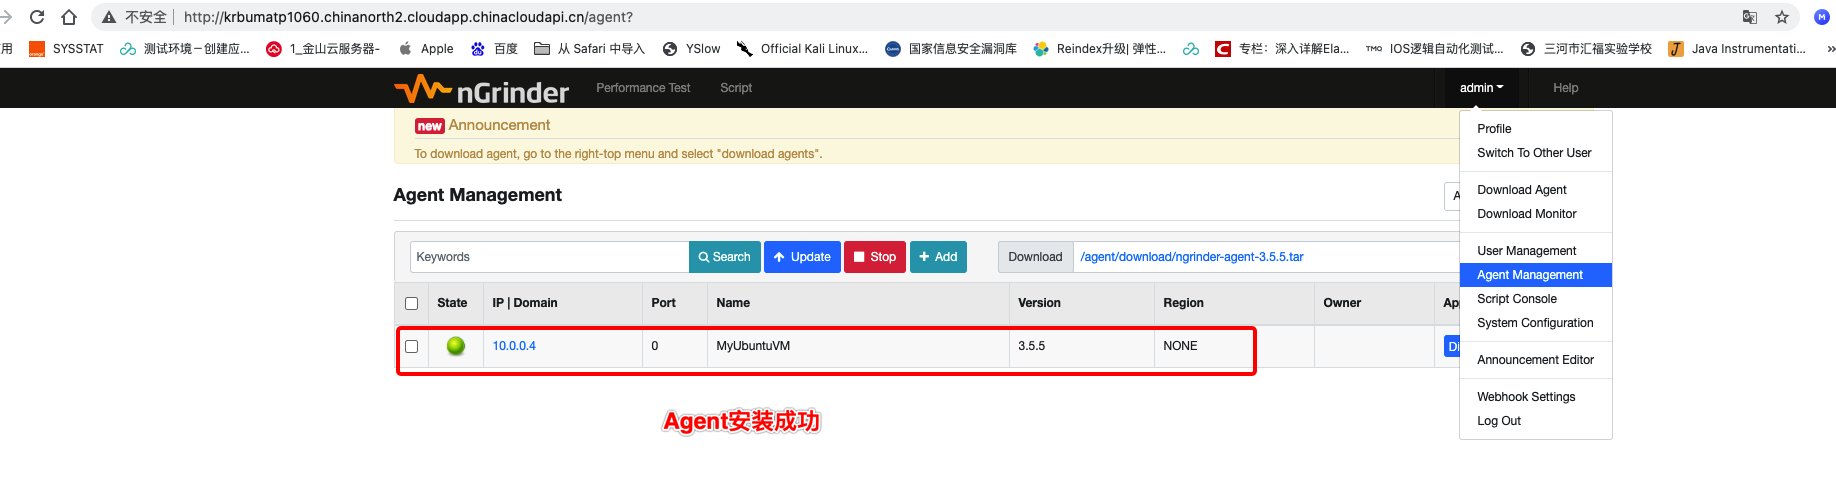
4.检查Agent是否安装成功,如下图所示
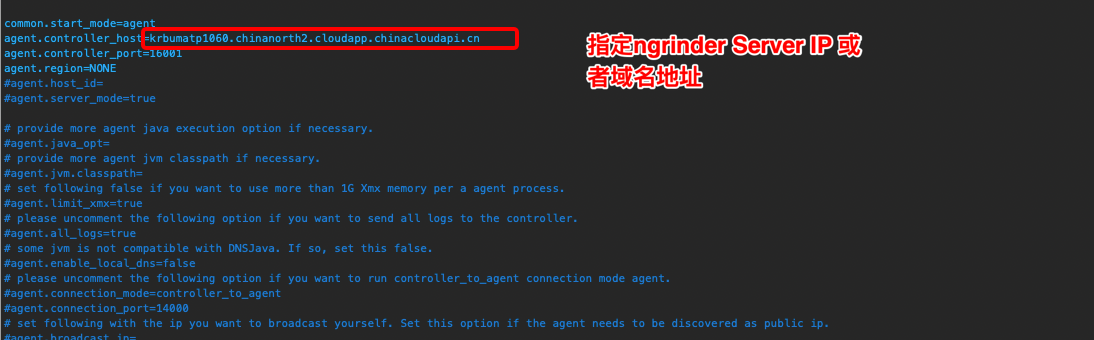
5.安装Agent,
a.修改 /home/ghuser/nGrinderServer/ngrinder-agent/__agent.conf 中的agent.controller_host参数,如本机域名地址:”“krbumatp.chinanorth2.cloudapp.chinacloudapi.cn” 如下图所示,修改成功后,保存并退出;
b.启动Agent cd /home/ghuser/nGrinderServer/ngrinder-agent && sh ./run_agent_bg.sh
c.执行 jps 或者ps -ef|grep java 查看Agent是否启动成功


d.agent 安装启动成功;
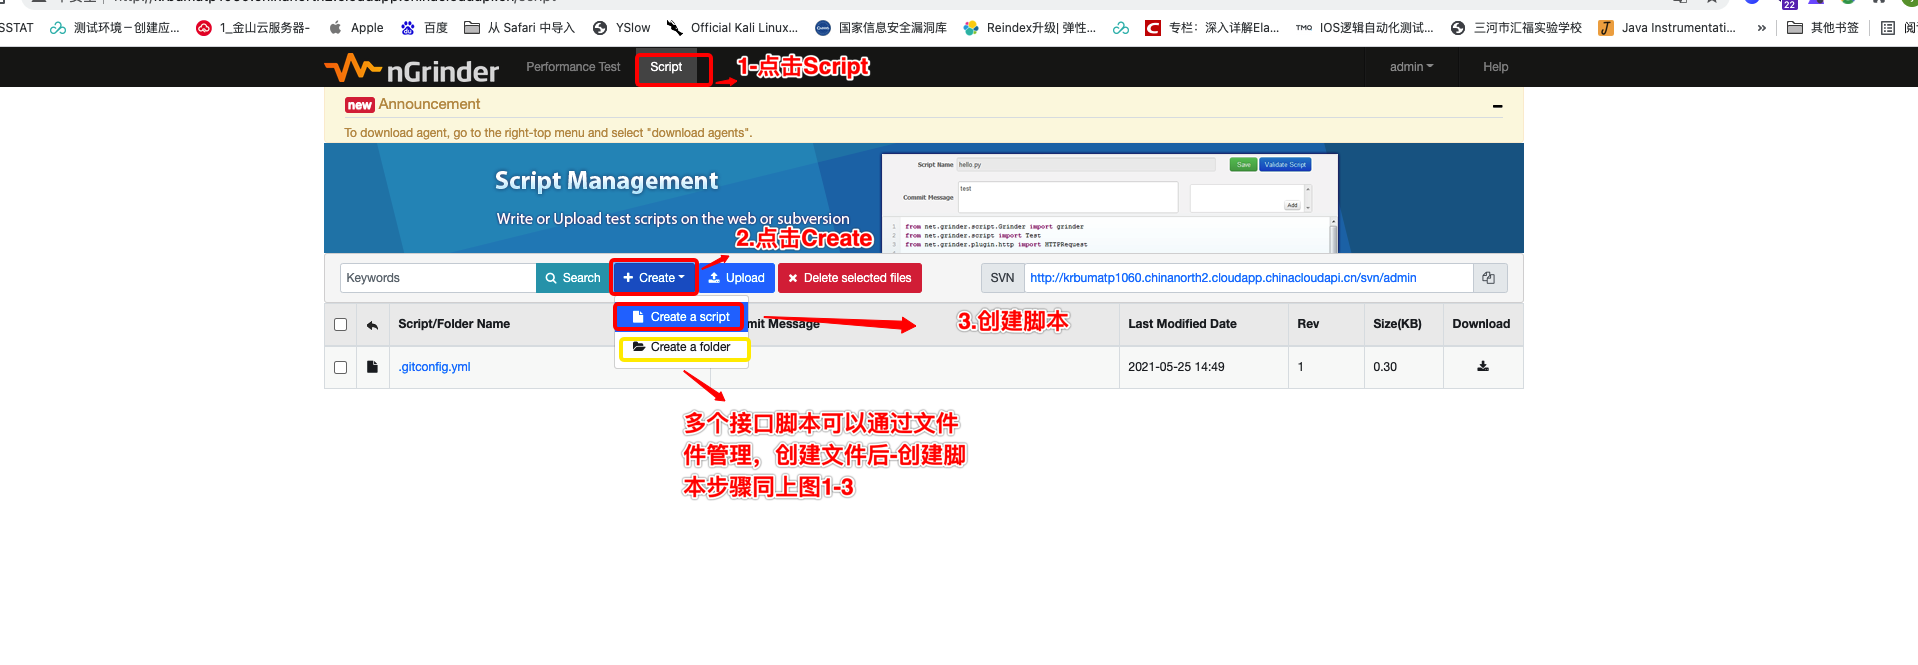
6.接口压测脚本开发:
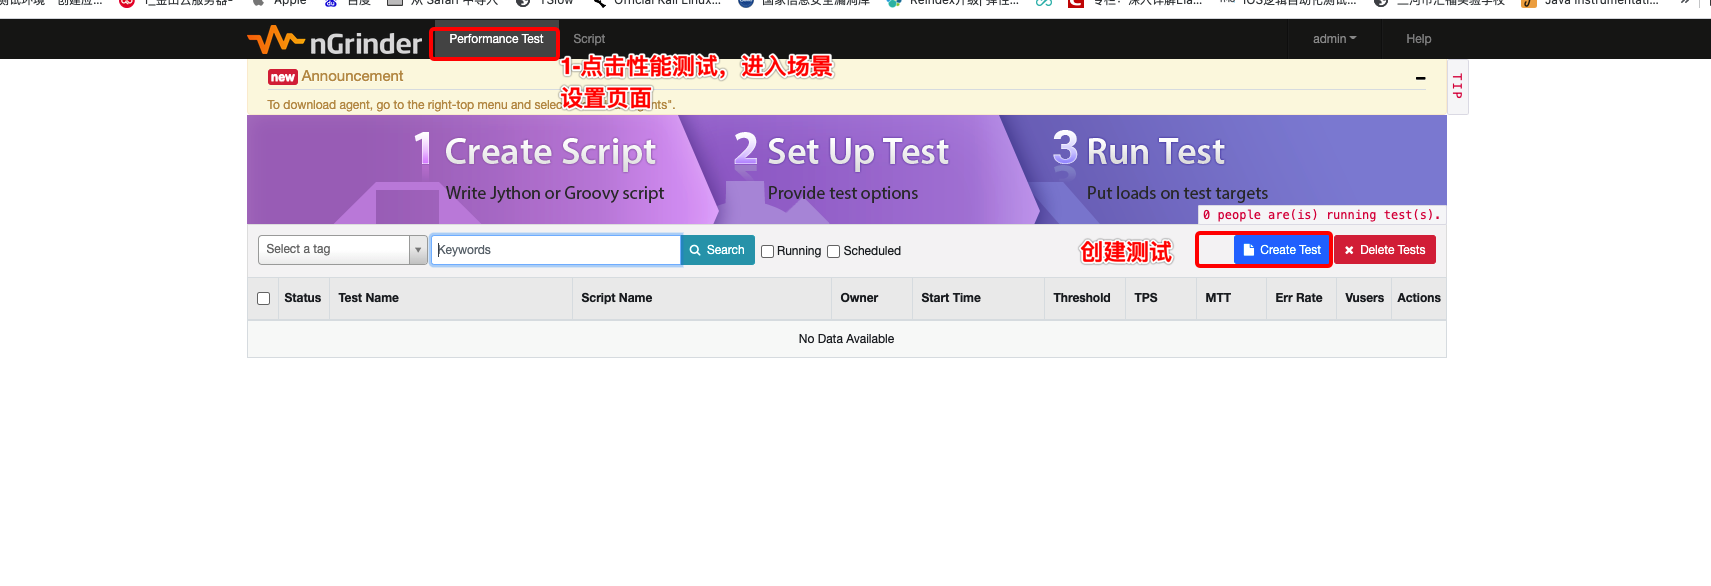
a.按下图操作创建压测脚本
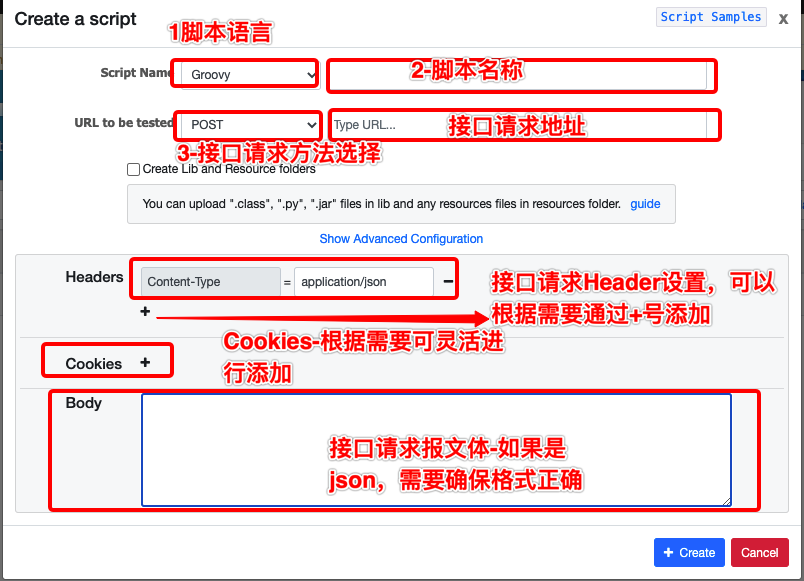
b.本次样例:

C.点击“Create” 按钮后,进入下面脚本编辑和调试页面
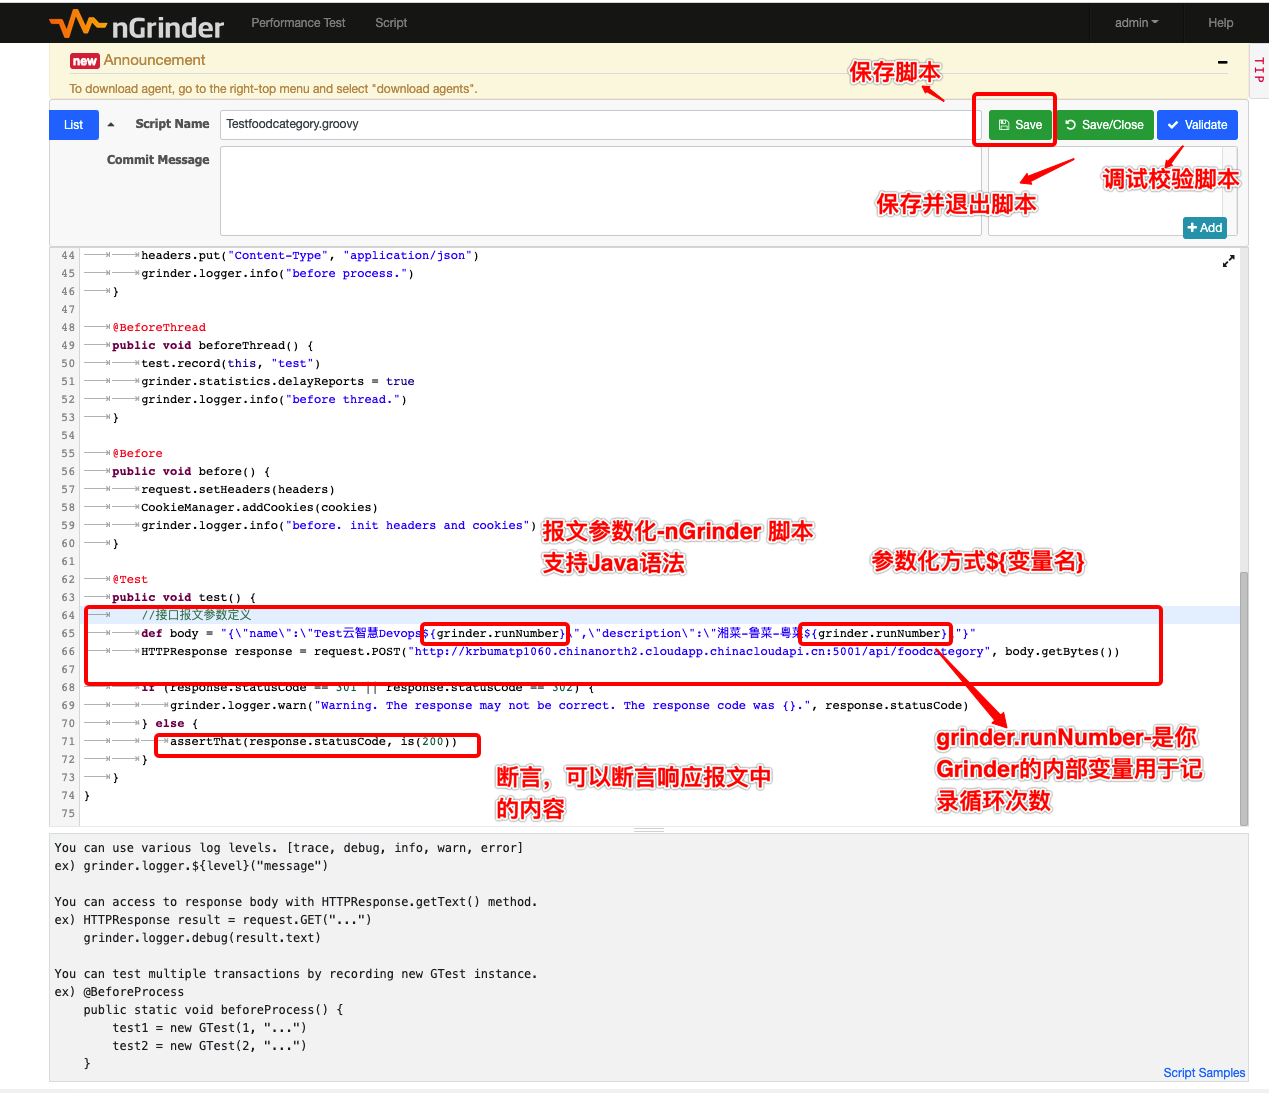
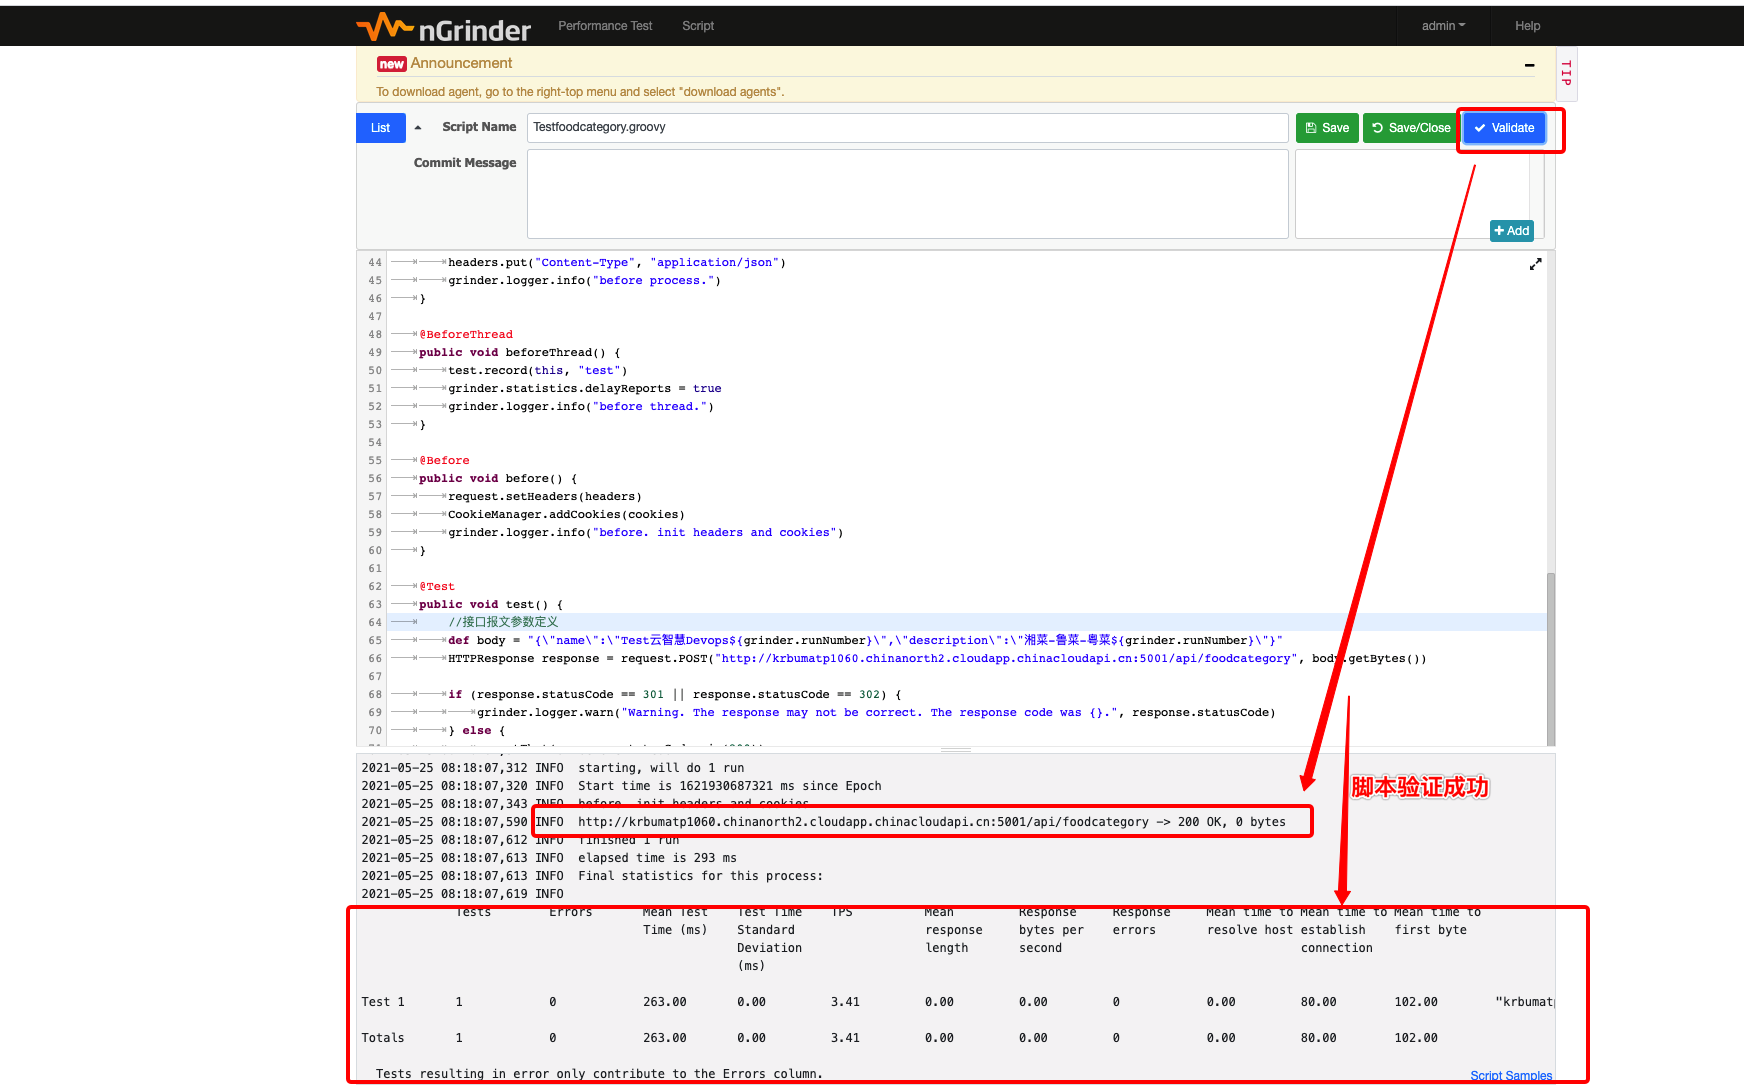
d.脚本参数完成后-通过“validate” 进行脚本调试和验证,脚本验证成功后,才能进行创建场景进行压测
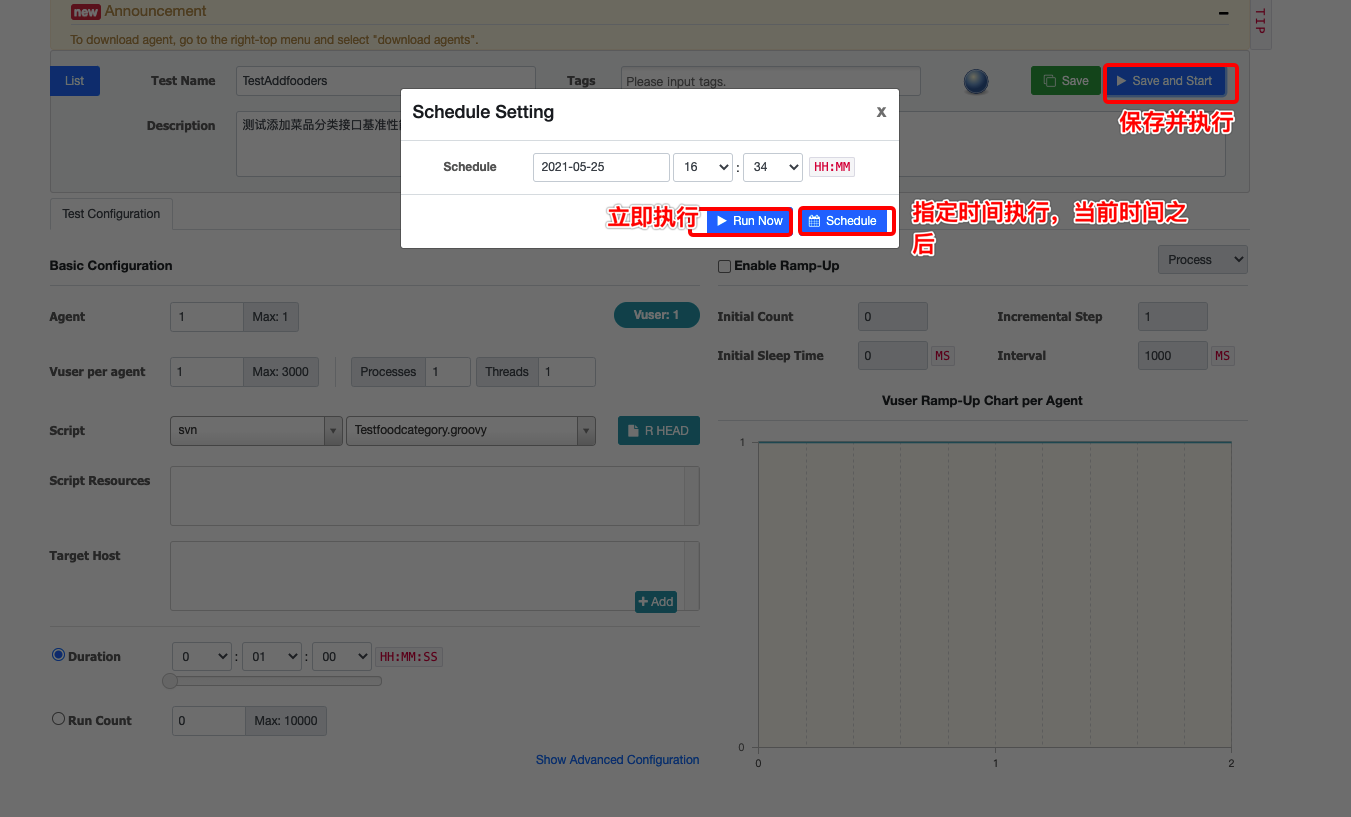
e.创建场景,按下图操作

f.根据上图将场景创建完毕后,点击 “SAVA and Start” 按钮,如下图所示,(选择立即执行)
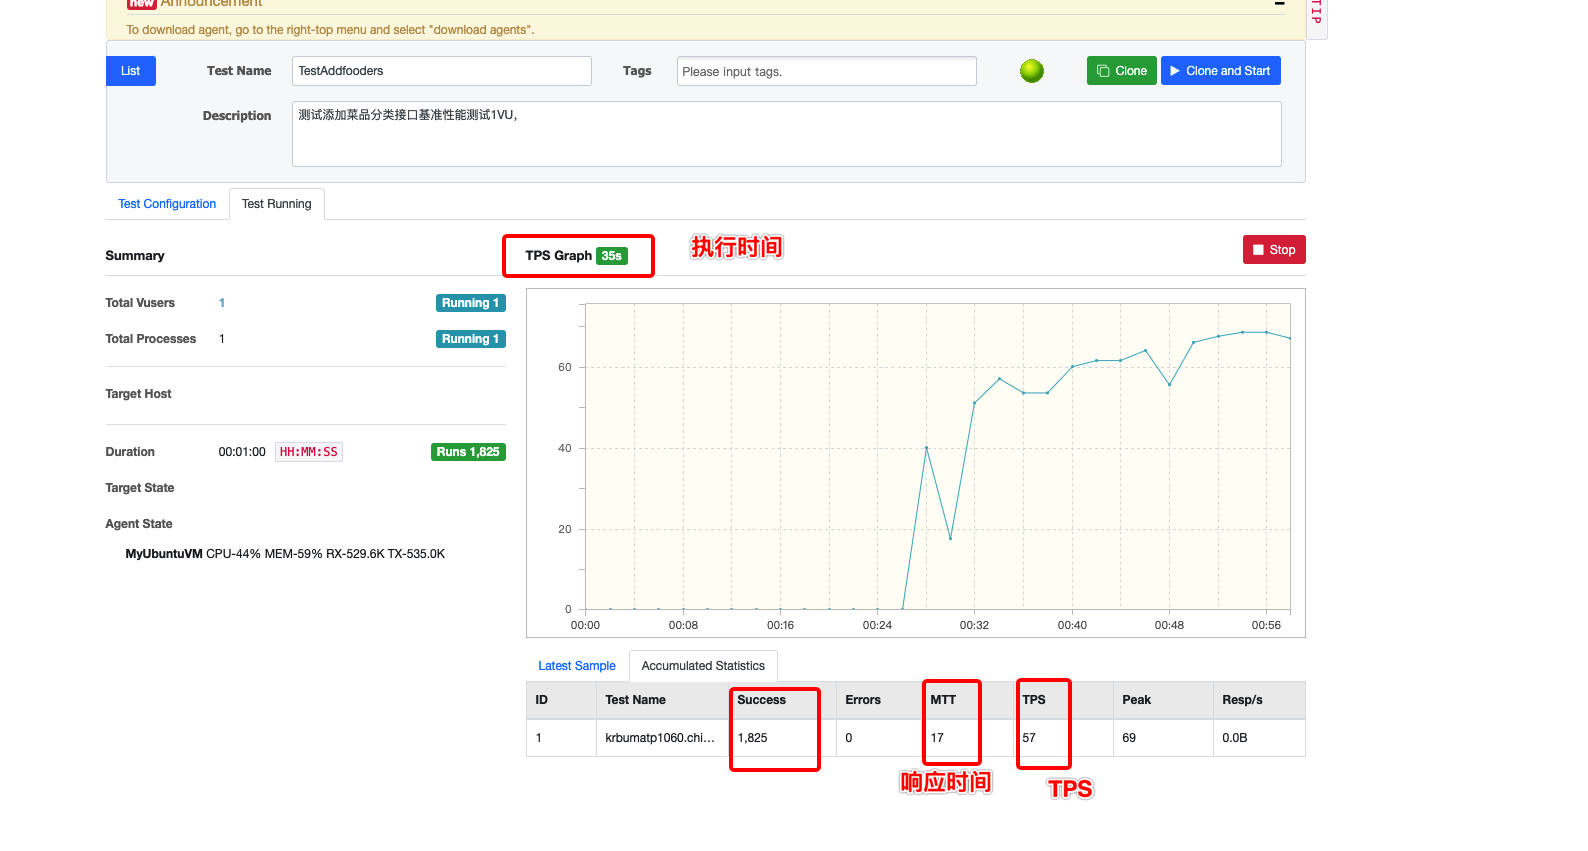
g.压测场景启动成功后,如下图所示,会显示执行时间,TPS,响应时间等信息
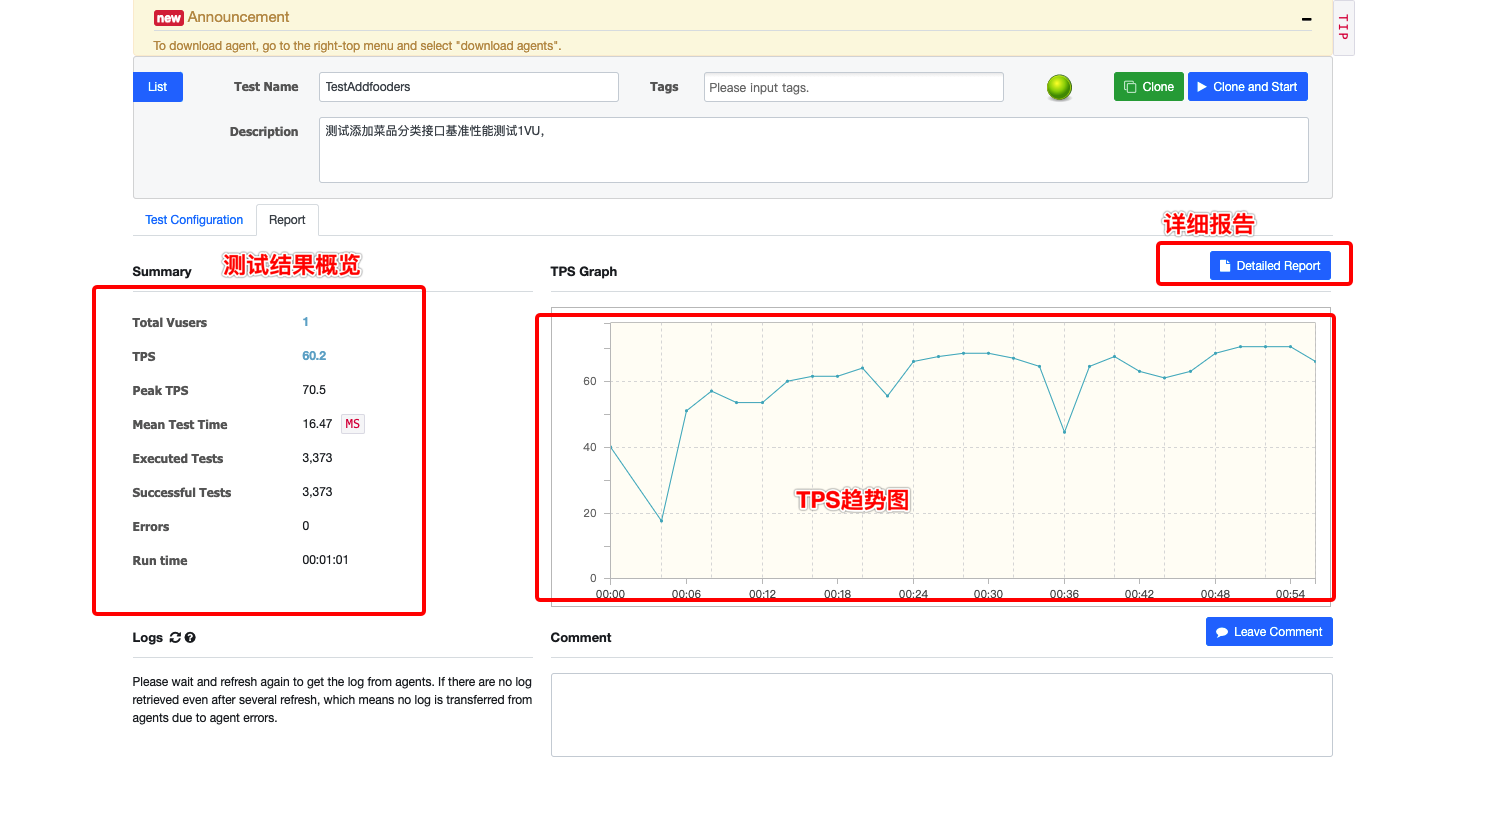
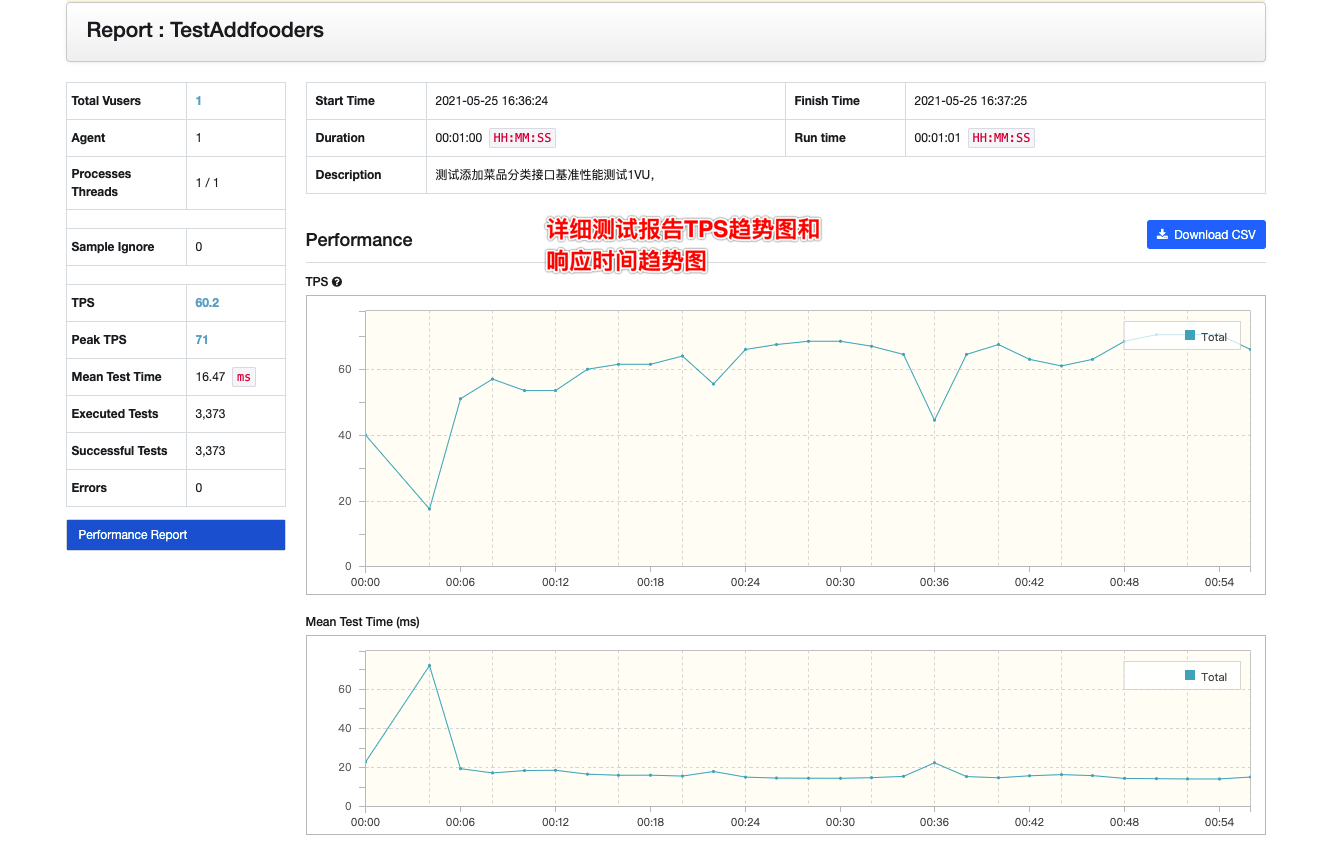
h.场景执行成功结束后,如下图所示,可以点击“detailed Report” 查看详细报告
i详细报告如下:
附件:本次样例脚本:
import static net.grinder.script.Grinder.grinderimport static org.junit.Assert.*import static org.hamcrest.Matchers.*import net.grinder.script.GTestimport net.grinder.script.Grinderimport net.grinder.scriptengine.groovy.junit.GrinderRunnerimport net.grinder.scriptengine.groovy.junit.annotation.BeforeProcessimport net.grinder.scriptengine.groovy.junit.annotation.BeforeThread// import static net.grinder.util.GrinderUtils.* // You can use this if you're using nGrinder after 3.2.3import org.junit.Beforeimport org.junit.BeforeClassimport org.junit.Testimport org.junit.runner.RunWithimport org.ngrinder.http.HTTPRequestimport org.ngrinder.http.HTTPRequestControlimport org.ngrinder.http.HTTPResponseimport org.ngrinder.http.cookie.Cookieimport org.ngrinder.http.cookie.CookieManager/*** A simple example using the HTTP plugin that shows the retrieval of a single page via HTTP.** This script is automatically generated by ngrinder.** @author admin*/@RunWith(GrinderRunner)class TestRunner {public static GTest testpublic static HTTPRequest requestpublic static Map<String, String> headers = [:]public static List<Cookie> cookies = []@BeforeProcesspublic static void beforeProcess() {HTTPRequestControl.setConnectionTimeout(300000)test = new GTest(1, "krbumatp1060.chinanorth2.cloudapp.chinacloudapi.cn")request = new HTTPRequest()// Set header dataheaders.put("Content-Type", "application/json")grinder.logger.info("before process.")}@BeforeThreadpublic void beforeThread() {test.record(this, "test")grinder.statistics.delayReports = truegrinder.logger.info("before thread.")}@Beforepublic void before() {request.setHeaders(headers)CookieManager.addCookies(cookies)grinder.logger.info("before. init headers and cookies")}@Testpublic void test() {//接口报文参数定义可以根据测试需求进行参数化def body = "{\"name\":\"Test云智慧Devops${grinder.runNumber}\",\"description\":\"湘菜-鲁菜-粤菜${grinder.runNumber}\"}"HTTPResponse response = request.POST("http://krbumatp1060.chinanorth2.cloudapp.chinacloudapi.cn:5001/api/foodcategory", body.getBytes())if (response.statusCode == 301 || response.statusCode == 302) {grinder.logger.warn("Warning. The response may not be correct. The response code was {}.", response.statusCode)} else {assertThat(response.statusCode, is(200))}}}

若有收获,就点个赞吧
0 人点赞
