第五期视频回放
第五期代码及课件下载地址
第五期直播内容文字版
模拟输入调用命令
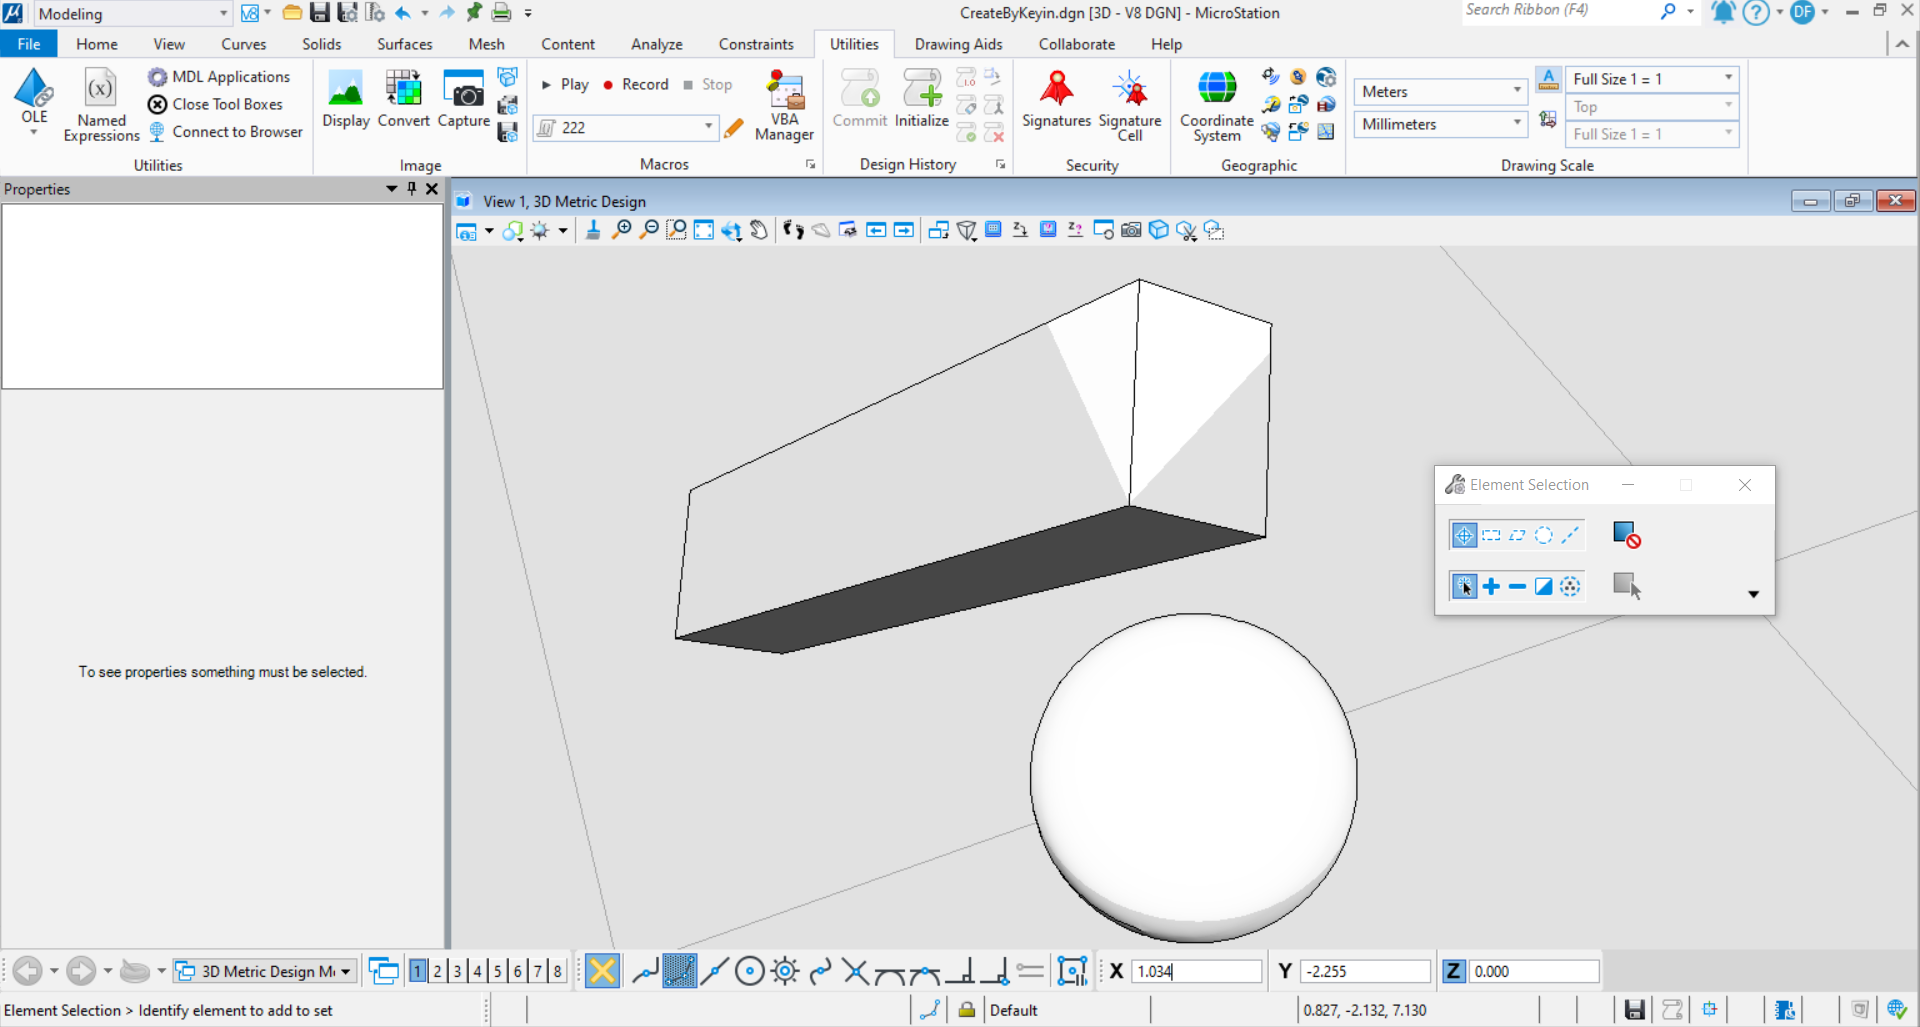
对于目前使用C#在Addin框架编程来说,对于某些方法可能封装的并不是十分完全,或者说目前的MicroStation软件中的原生功能可以完美的实现业务需求,但是需要对其进行参数化,自动化并进行重复工作,那么模拟输入调用命令的方法便必须掌握。它可以实现在编程情况下采用模拟输入key-in的方式实现命令的调用。<br />关于如何获得模拟输入的key-in方法:<br />1.点击MicroStation软件中Modeling中的Utilities中的Record录制宏<br /><br />**图2 MicroStation宏模块**<br />2.执行操作,完成后点击Stop,对宏进行命名<br /><br />**图3 MicroStation宏启动录制按钮**<br />3.在下方下拉框中选取刚刚命名的宏,点击右边的铅笔按钮,此时会弹出界面显示宏所调用的命令<br /><br />**图3 MicroStation宏停止录制按钮**<br /> 在这里我们需要注意:在模拟输入坐标时,Relative是坐标增量值,Fixed是坐标固定值,前者是指该点与上一个点之间坐标值的增量,后者指的是绝对坐标值,在模拟输入过程中需要确定输入的方式。<br />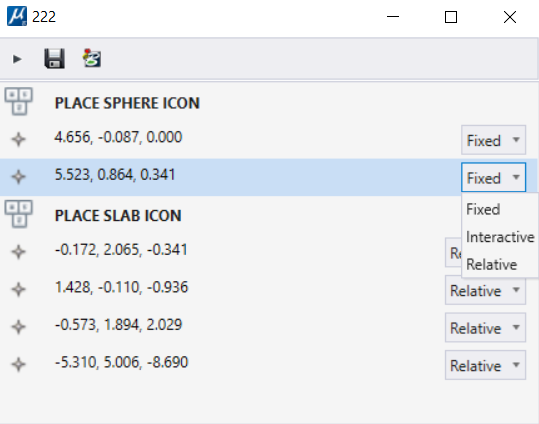<br />**图4 宏信息界面**<br /> 在本案例中,根据宏中录制的命令及模拟输入坐标值,重现了宏执行的过程。若需直接使用MicroStation软件中的既有工作流,可以采用该方法实现既定目标。
public static void CreateByKeyin(string unparsed)//Case:CreateByKeyin{Session.Instance.Keyin("PLACE SPHERE ICON;" +"Point absolute 4.656,-0.087,0.000;" +"Point absolute 5.523,0.864,0.341"); //模拟输入Key-inSession.Instance.Keyin("PLACE SLAB ICON");Session.Instance.Keyin("Point absolute 5.351,2.928,0.000");Session.Instance.Keyin("Point absolute 6.778,2.818,-0.936");Session.Instance.Keyin("Point absolute 6.205,4.712,1.093");Session.Instance.Keyin("Point absolute 0.895,9.718,-7.598");}
模型操作
模型创建
当我们需要创建模型时,需要使用CreateNewModel( )来对模型进行创建,在此过程中需要输入新建模型名称,模型类别以及确定模型类别是2D还是3D的。完成后即生成指定模型。
public static void CreateDgnModel(string unparsed){DgnFile dgnFile = Session.Instance.GetActiveDgnFile();//获得当前激活的dgn文件信息dgnFile.CreateNewModel(out DgnModelStatus status,"test",DgnModelType.Normal,true,null);/** 声明新模型* error:(输出)若声明失败,则返回error* name:新声明模型的名称* type:声明模型类型(Normal,Sheet,Drawing,DgnComponentDefinition)* is3D:声明模型是三维还是二维模型* seedModel:声明模型所使用的种子文件*/MessageBox.Show("Create status:\n "+status.ToString());//将声明模型结果以文本的形式输出到对话框中}

模型删除
当我们需要删除模型时,需要使用DeleteModel( )删除模型,执行删除模型的流程为首先根据模型名称找到模型ID,然后通过模型ID获取对应的模型空间,最后执行模型删除操作。
public static void DeleteDgnModel(string unparsed){CreateDgnModel(unparsed);//调用上方声明模型的方法DgnFile dgnFile = Session.Instance.GetActiveDgnFile();//获得当前激活的文件信息ModelId id= dgnFile.FindModelIdByName("test");//获得名为“test”的模型IDDgnModel dgnModel = dgnFile.LoadRootModelById(out StatusInt status,id);//使用ID读取获得对应的模型空间if(status==StatusInt.Success)//判断是否获得名为“test”的模型{StatusInt statusInt= dgnFile.DeleteModel(dgnModel);//从文件中删除该模型if(statusInt== StatusInt.Success)//判断是否删除成功{MessageBox.Show("Delete status:\nSuccess");//对话框输出删除成功}}}private static DgnModel CreateDgnModelTest(string modelName){DgnFile dgnFile = Session.Instance.GetActiveDgnFile();//获得当前激活的dgn文件信息ModelId id = dgnFile.FindModelIdByName(modelName);//检索文件中是否存在名为modelname引用字符串的模型if(id!= ModelId.InvalidModel)//判断模型ID是否有效{DgnModel existModel = dgnFile.LoadRootModelById(out StatusInt status, id);//使用ID读取获得对应的模型空间dgnFile.DeleteModel(existModel);}DgnModel dgnModel = dgnFile.CreateNewModel(out DgnModelStatus createStatus, modelName, DgnModelType.Normal, true, null);//声明新模型return dgnModel;//返回新建模型}
在本案例中我们对名为test的模型执行删除操作,执行代码后指定模型被成功删除。<br /><br />**图7 执行代码前**<br /><br />**图8 模型删除结果**
模型整体复制
当我们需要对模型整体复制时,需要使用CopyModelContents( )方法实现既定目标,实现的步骤为首先找到复制的目标模型,然后获取被复制的模型,最后使用上述方法执行模型数据的复制。
public static void CopyDgnModelWithAllData(string unparsed){CreateDgnModelTest("test");//声明名为“test”的模型DgnFile dgnFile = Session.Instance.GetActiveDgnFile();//获得当前激活的文件信息#region Create elements in dgnmodelModelId id = dgnFile.FindModelIdByName("test");//获得名为“test”的模型ID#region Create Smart SolidDgnModel dgnModel = dgnFile.LoadRootModelById(out StatusInt status, id);//使用ID读取获得对应的模型空间DPoint3d profilePo1 = new DPoint3d(1000, 1000, -10000);//声明截面轮廓线端点DPoint3d profilePo2 = new DPoint3d(1000, -1000, -10000);DPoint3d profilePo3 = new DPoint3d(-1000, -1000, -10000);DPoint3d profilePo4 = new DPoint3d(-1000, 1000, -10000);DPoint3d[] profilePos = { profilePo1, profilePo2, profilePo3, profilePo4 };//声明截面轮廓线端点集ShapeElement shape = new ShapeElement(dgnModel, null, profilePos);//声明形元素CurveVector curve = CurvePathQuery.ElementToCurveVector(shape);//使用形元素获得轮廓线DPoint3d pathPo1 = new DPoint3d(0, 0, -10000);//声明扫掠轨迹线端点DPoint3d pathPo2 = new DPoint3d(0, 0, 0);DPoint3d pathPo3 = new DPoint3d(10000, 10000, 10000);DPoint3d pathPo4 = new DPoint3d(-10000, -10000, 20000);DPoint3d pathPo5 = new DPoint3d(0, 0, 30000);DPoint3d pathPo6 = new DPoint3d(0, 0, 40000);DPoint3d[] pathPos = { pathPo1, pathPo2, pathPo3, pathPo4, pathPo5, pathPo6 };//声明扫掠轨迹端点集LineStringElement lineString = new LineStringElement(dgnModel, null, pathPos);//声明线串元素CurveVector pathCurve = lineString.GetCurveVector();//使用线串元素获得扫掠轨迹点Create.BodyFromSweep(out SolidKernelEntity entityOut, curve, pathCurve, dgnModel, false, true, false,null, null, null, null);//使用横截面扫掠路径声明实体BentleyStatus result = Convert1.BodyToElement(out Element eeh, entityOut, null, dgnModel);//将SolidKernelEntity转换为元素eeh.AddToModel();//将元素写入模型#endregion#endregionDgnModel newModel= CreateDgnModelTest("test2");//声明名为“test2”的模型BentleyStatus copyStatus= DgnFile.CopyModelContents(newModel, dgnModel);//将test1中的所有信息复制到test2中MessageBox.Show("Copy result:\n"+copyStatus);//在对话框中输出复制结果}private static DgnModel CreateDgnModelTest(string modelName){DgnFile dgnFile = Session.Instance.GetActiveDgnFile();//获得当前激活的dgn文件信息ModelId id = dgnFile.FindModelIdByName(modelName);//检索文件中是否存在名为modelname引用字符串的模型if(id!= ModelId.InvalidModel)//判断模型ID是否有效{DgnModel existModel = dgnFile.LoadRootModelById(out StatusInt status, id);//使用ID读取获得对应的模型空间dgnFile.DeleteModel(existModel);}DgnModel dgnModel = dgnFile.CreateNewModel(out DgnModelStatus createStatus, modelName, DgnModelType.Normal, true, null);//声明新模型return dgnModel;//返回新建模型}
在本案例中,首先创建了一个名为"test"的被复制模型,为了体现效果,在被复制模型中创建智能实体,然后又创建了一个名为"test2"的模型,最后将模型为"test"的模型数据复制到名为"test2"模型中。<br /><br />**图9 模型创建结果**<br />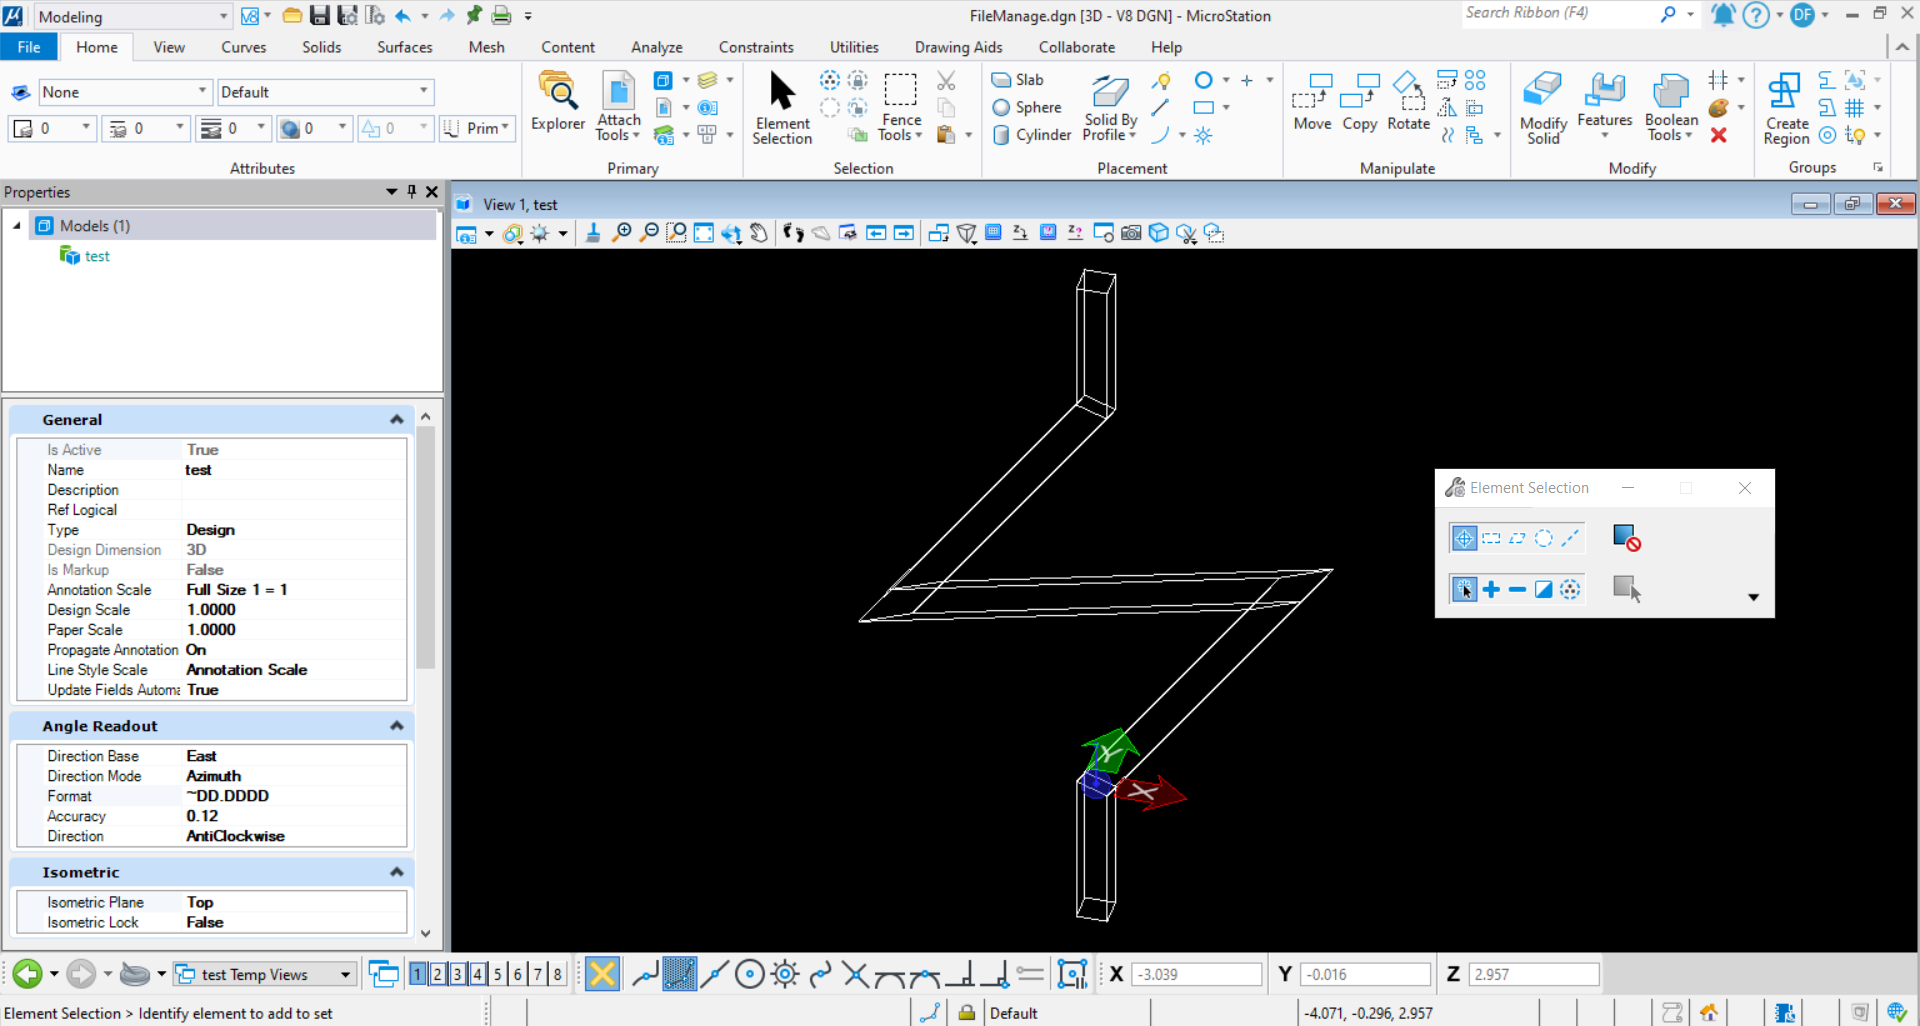<br />**图10 被复制模型数据**<br /><br />**图11 生成模型数据**
模型部分复制
当我们在复制过程中只需要对部分元素进行复制操作时,使用上述方法便无法满足既定要求,这里我们使用ElementCopyContext( )执行数据的复制,该方法使用的步骤为遍历模型中的元素,然后对元素进行筛选,最后将指定的模型复制到指定模型空间中。
public static void CopyDgnModelWithPartialData(string unparsed){DgnModel dgnModel = CreateDgnModelTest("test");//声明名为“test”的模型#region Create elements in dgnmodel#region Create Smart SolidDgnFile dgnFile = Session.Instance.GetActiveDgnFile();//获得当前激活的dgn文件信息DPoint3d profilePo1 = new DPoint3d(1000, 1000, -10000);//声明截面轮廓线端点DPoint3d profilePo2 = new DPoint3d(1000, -1000, -10000);DPoint3d profilePo3 = new DPoint3d(-1000, -1000, -10000);DPoint3d profilePo4 = new DPoint3d(-1000, 1000, -10000);DPoint3d[] profilePos = { profilePo1, profilePo2, profilePo3, profilePo4 };//声明截面轮廓线端点集ShapeElement shape = new ShapeElement(dgnModel, null, profilePos);//声明形元素CurveVector curve = CurvePathQuery.ElementToCurveVector(shape);//使用形元素获得轮廓线DPoint3d pathPo1 = new DPoint3d(0, 0, -10000);//声明扫掠轨迹线端点DPoint3d pathPo2 = new DPoint3d(0, 0, 0);DPoint3d pathPo3 = new DPoint3d(10000, 10000, 10000);DPoint3d pathPo4 = new DPoint3d(-10000, -10000, 20000);DPoint3d pathPo5 = new DPoint3d(0, 0, 30000);DPoint3d pathPo6 = new DPoint3d(0, 0, 40000);DPoint3d[] pathPos = { pathPo1, pathPo2, pathPo3, pathPo4, pathPo5, pathPo6 };//声明扫掠轨迹端点集LineStringElement lineString = new LineStringElement(dgnModel, null, pathPos);//声明线串元素CurveVector pathCurve = lineString.GetCurveVector();//使用线串元素获得扫掠轨迹点Create.BodyFromSweep(out SolidKernelEntity entityOut, curve, pathCurve, dgnModel, false, true, false,null, null, null, null);//使用横截面扫掠路径声明实体BentleyStatus result = Convert1.BodyToElement(out Element eeh, entityOut, null, dgnModel);//将SolidKernelEntity转换为元素eeh.AddToModel();//将元素写入模型#endregion#regionDPoint3d centerPo = DPoint3d.Zero;//声明圆心坐标EllipseElement ellipseElem = new EllipseElement(dgnModel, null, centerPo, 20000, 10000, DMatrix3d.Identity);//声明椭圆元素ellipseElem.AddToModel();//将椭圆元素写入模型空间#endregion#endregionDgnModel newModel = CreateDgnModelTest("test2");//声明名为“test2”的模型ModelElementsCollection elements= dgnModel.GetGraphicElements();//获得模型中的所有图形元素foreach (Element elem in elements)//遍历元素容器中的元素{using (ElementCopyContext copyContext = new ElementCopyContext(newModel))//复制元素{if(elem.ElementType==MSElementType.Ellipse)//判断元素类型是否为椭圆{copyContext.DoCopy(elem);//将元素复制到指定模型中}}}}private static DgnModel CreateDgnModelTest(string modelName){DgnFile dgnFile = Session.Instance.GetActiveDgnFile();//获得当前激活的dgn文件信息ModelId id = dgnFile.FindModelIdByName(modelName);//检索文件中是否存在名为modelname引用字符串的模型if(id!= ModelId.InvalidModel)//判断模型ID是否有效{DgnModel existModel = dgnFile.LoadRootModelById(out StatusInt status, id);//使用ID读取获得对应的模型空间dgnFile.DeleteModel(existModel);}DgnModel dgnModel = dgnFile.CreateNewModel(out DgnModelStatus createStatus, modelName, DgnModelType.Normal, true, null);//声明新模型return dgnModel;//返回新建模型}
在本案例中,首先新建了一个名为"test"的模型,然后在该模型中创建了一个智能实体和一个椭圆元素,然后又创建了一个名为"test2"的模型,最后遍历"test"模型中的元素,将模形中元素类型是椭圆的元素复制到"test2"模型中。<br /><br />**图12 模型创建结果**<br />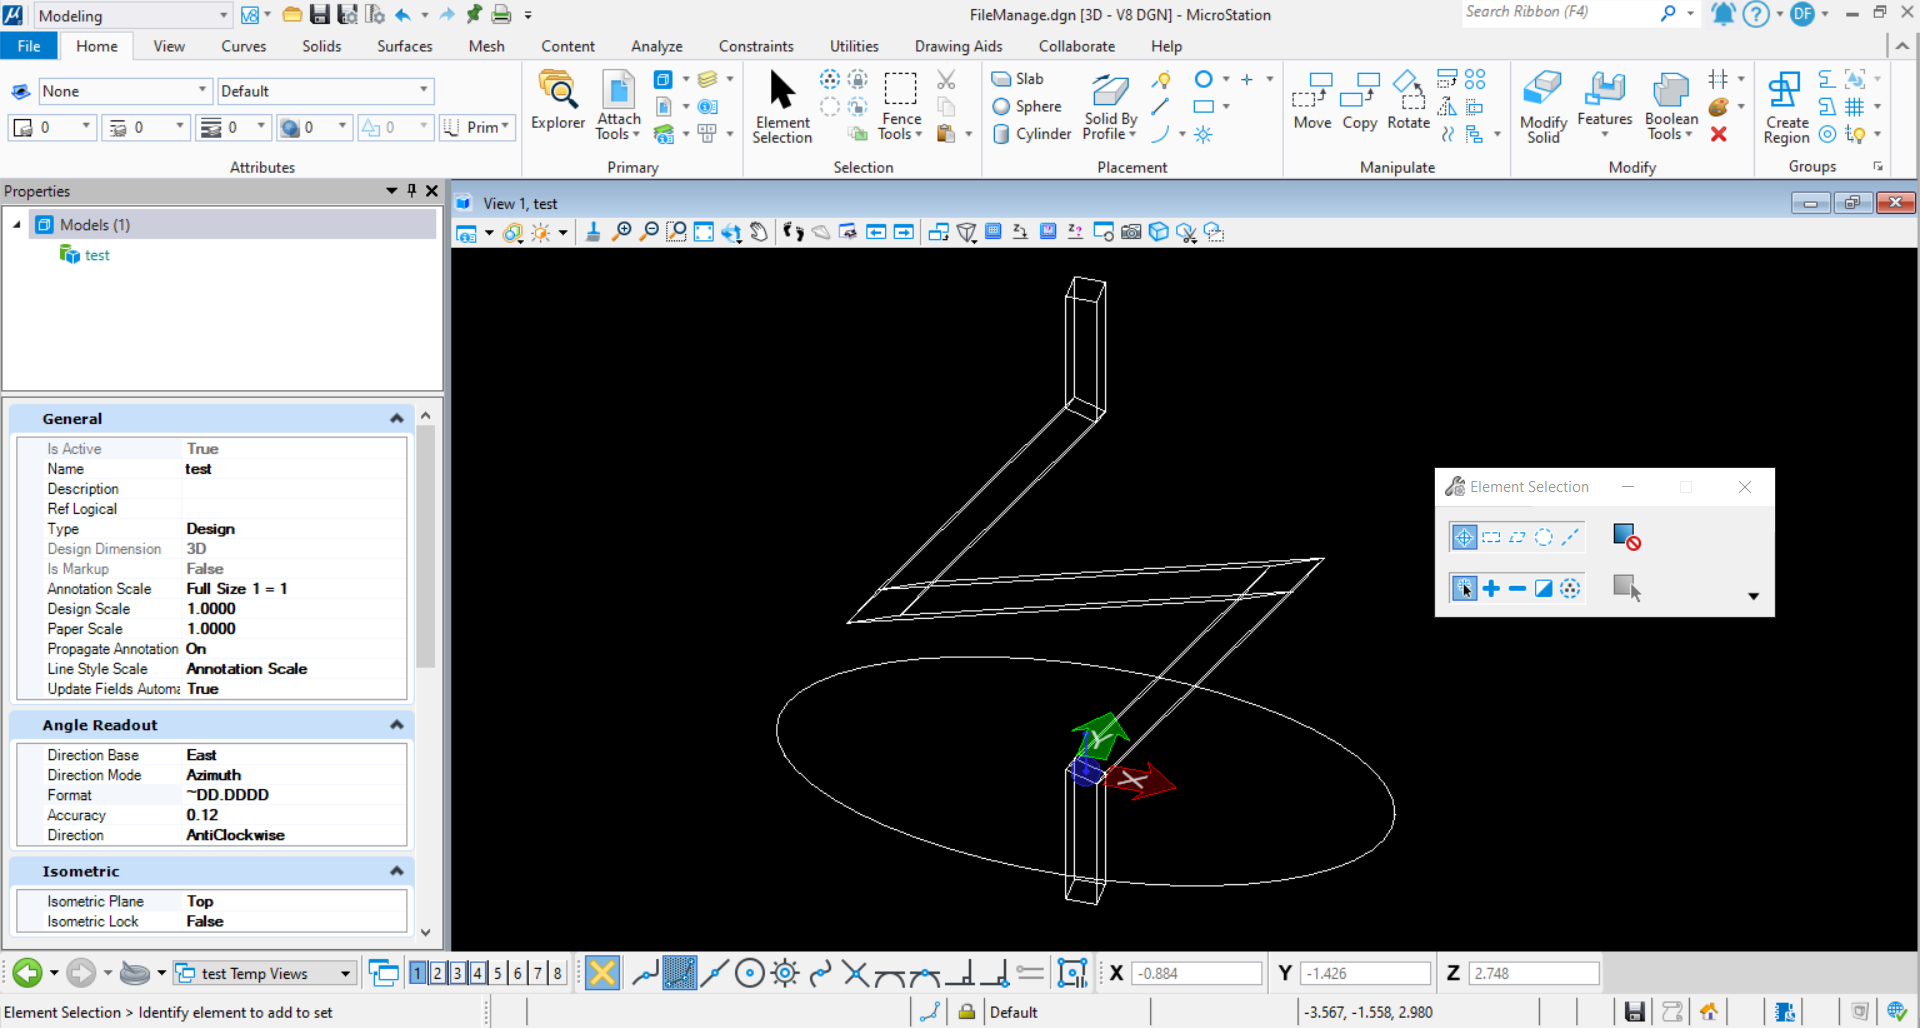<br />**图13 被复制模型数据**<br />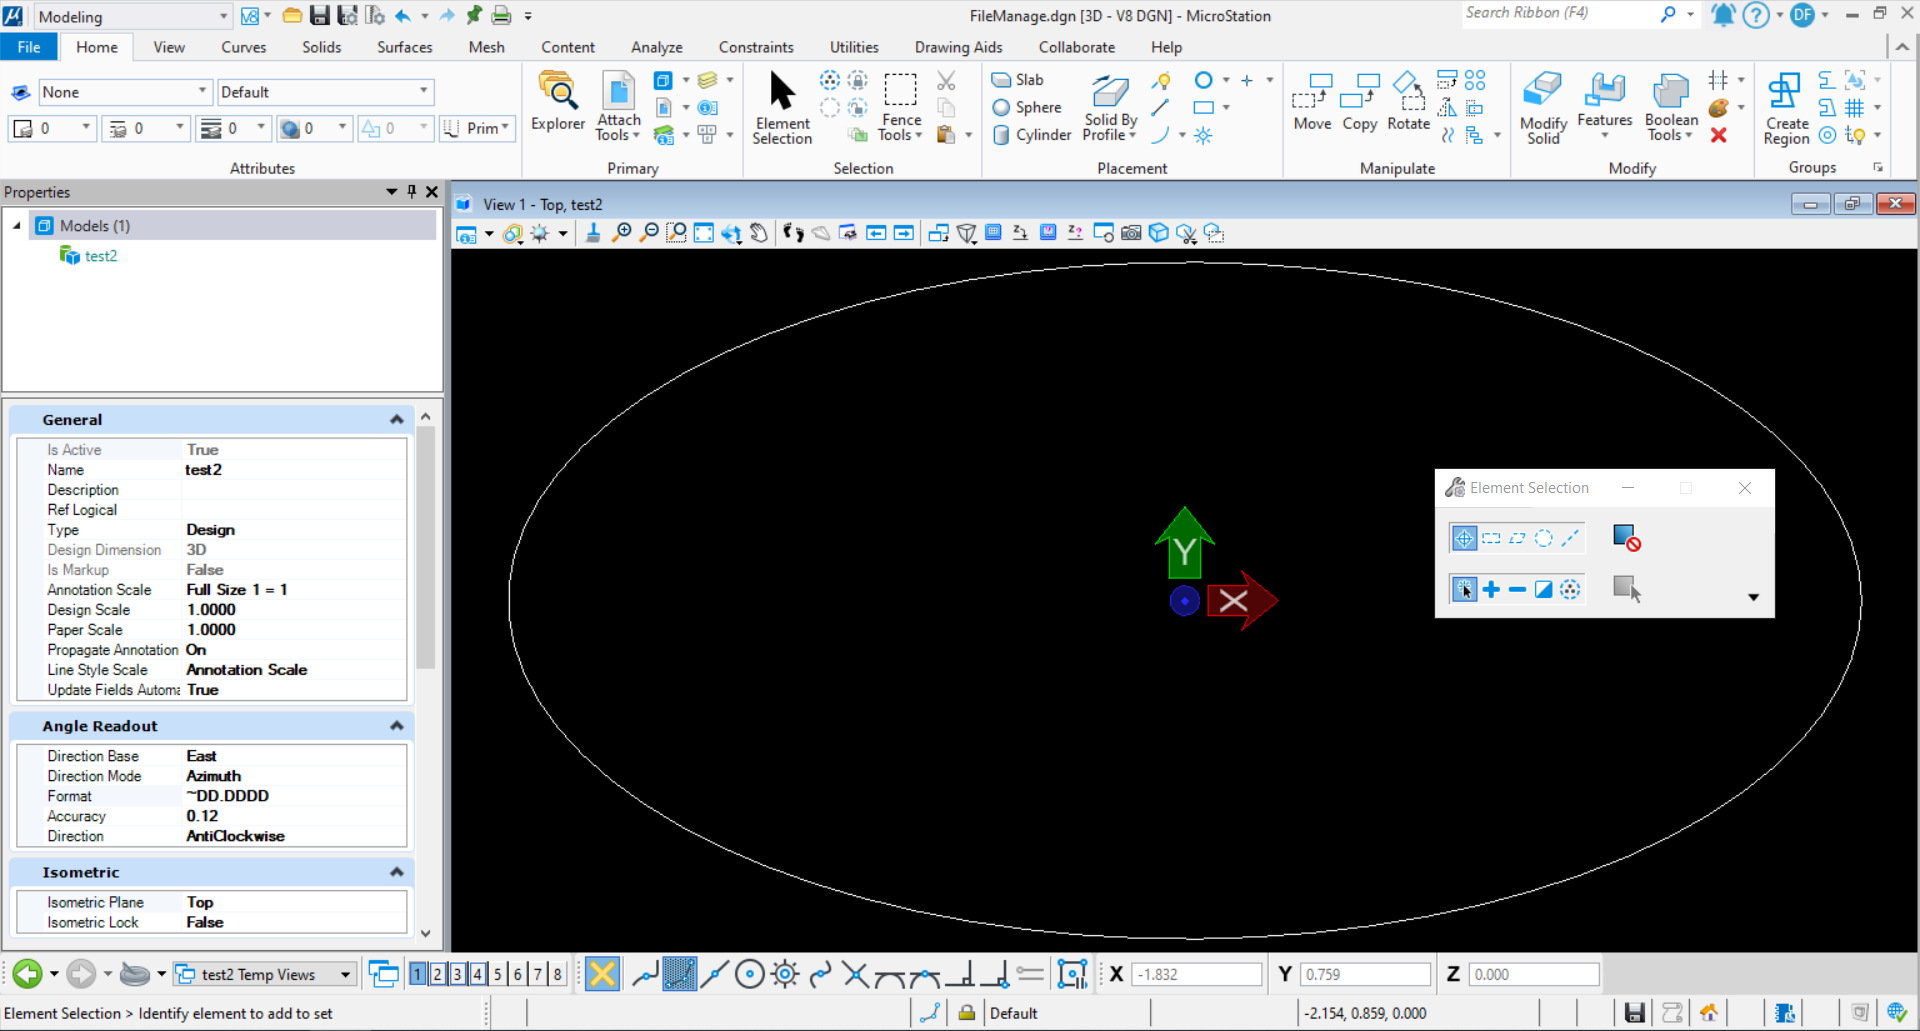<br />**图14 生成模型数据**
参照操作
模型参照(*.dgn)
当我们需要与同专业,或者跨专业协同配合时,总是无可避免的需要参照他人的模型。若想通过编程的方式提前将参照模型与指定场景绑定起来,那么就需要掌握模型参照的方法。关于该方法大致的使用流程为首先确定参照引用的目标模型,然后通过参照文件的储存路径获取对应的文件,最后将文件中指定模型参照到目标模型中,写入模型即引用模型成功。
public static void AttachDgnModel(string unparsed){DgnModel dgnModel = Session.Instance.GetActiveDgnModel();//获得当前激活的模型空间string strDgn = "E:\\工作相关\\20211213MS案例直播\\直播资料\\Part4\\FileManage - Copy.dgn";//文件储存路径DgnDocumentMoniker moniker = DgnDocumentMoniker.CreateFromFileName(strDgn,null);//声明引用文件系统的DgnDocumentMoniker对象DgnAttachment attach=dgnModel.CreateDgnAttachment(moniker,"test");//将指定模型引用到当前模型空间中StatusInt status= attach.WriteToModel(false);//将引用写入模型if(status==StatusInt.Success)//判断写入是否成功{MessageBox.Show("Attach DgnModel:\nSuccess");//对话框输出成功提示}}
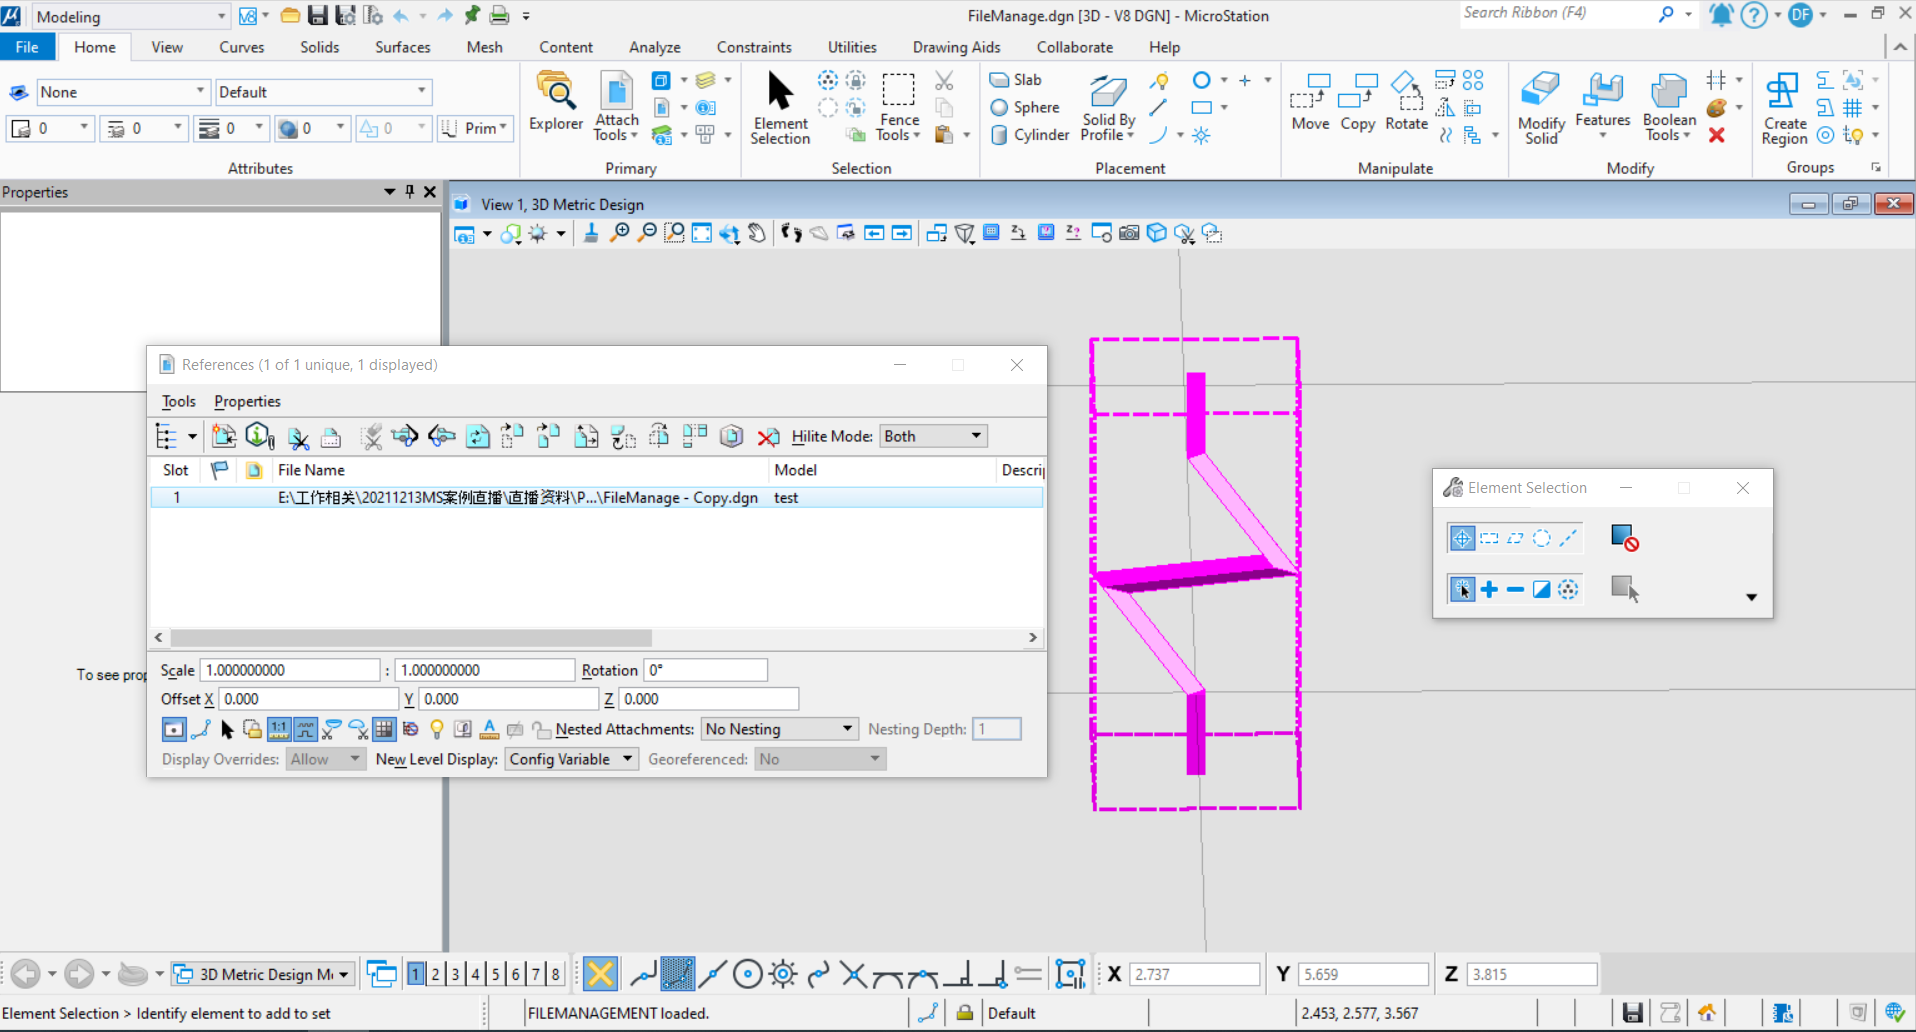
在本案例中,执行上述代码后可以发现,名为FileManage - Copy.dgn的文件中的"test"模型中的数据被成功参照到当前模型空间中。<br />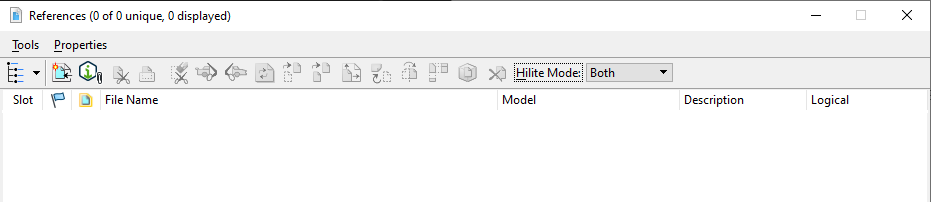<br />**图15 命令执行前**<br />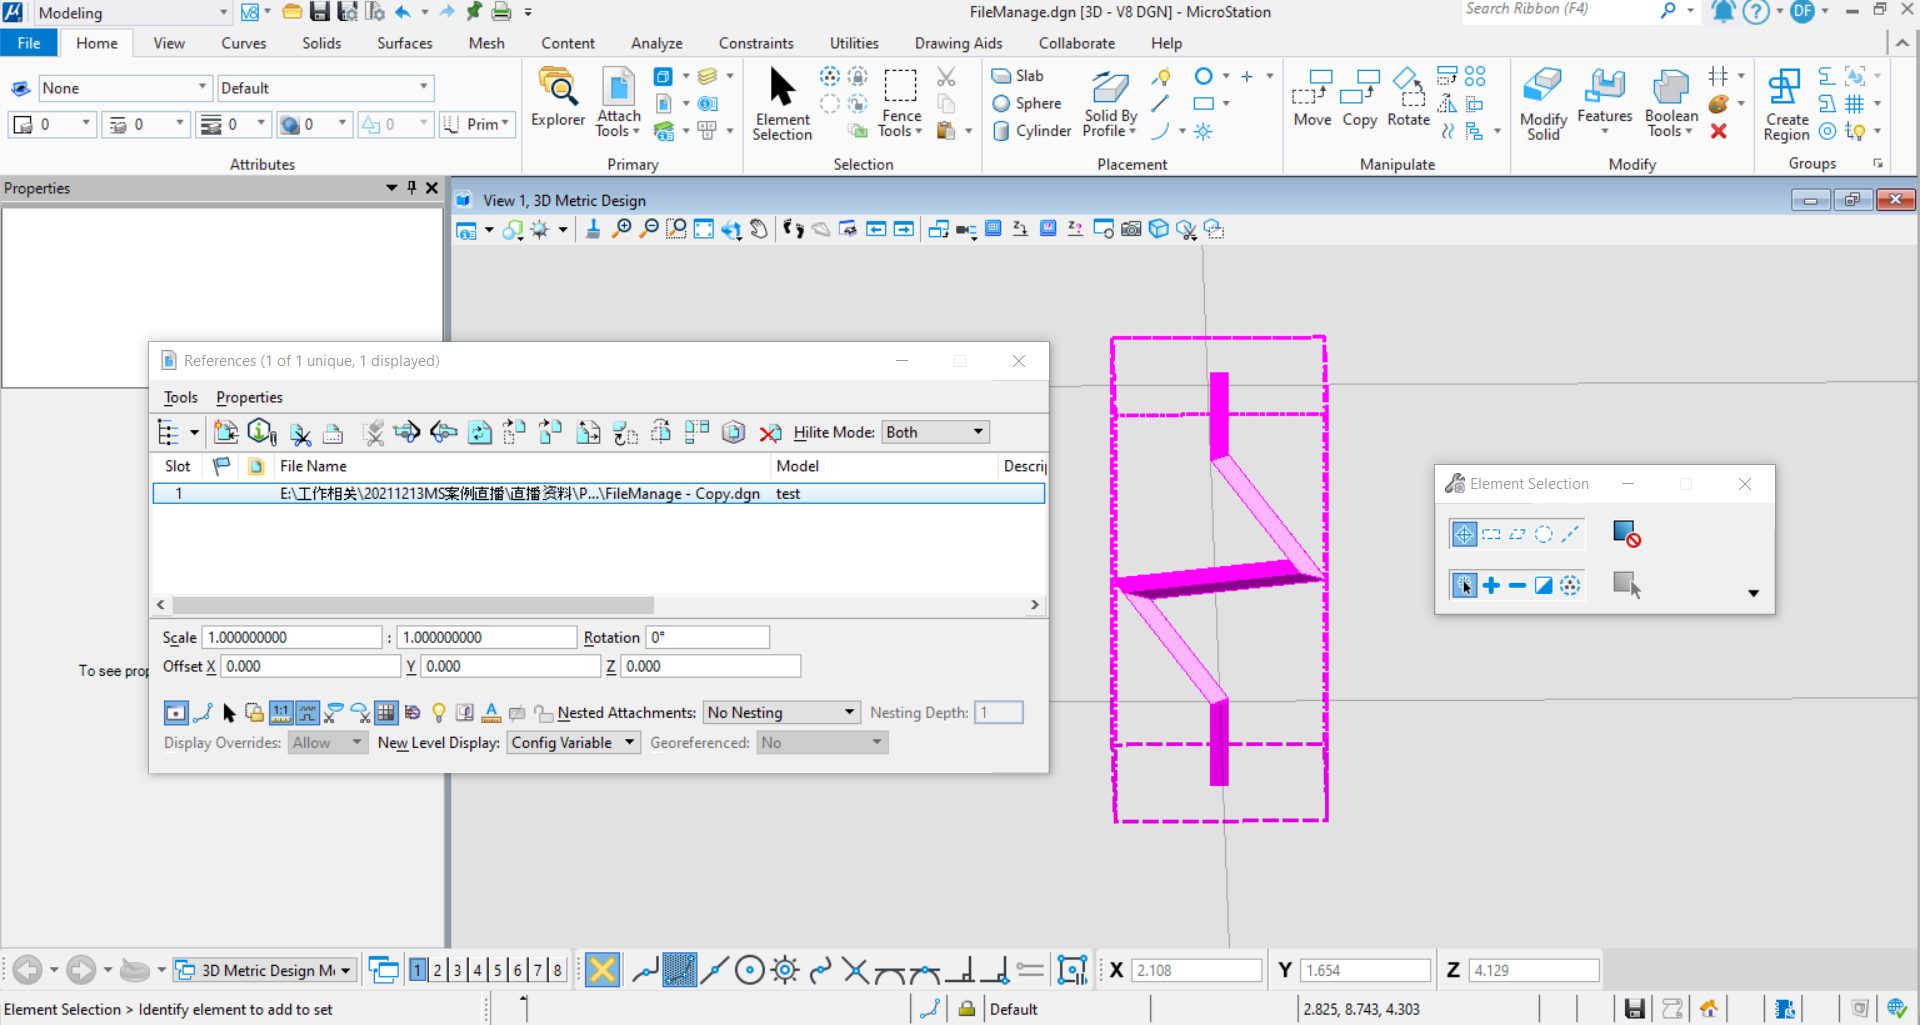<br />**图16 命令执行结果**
CAD图纸参照(*.dwg)
当我们需要使用CAD图纸进行参考时,对应的也可以使用参考的方式实现CAD图纸的参考,采用的方法与模型参照一致。
public static void AttachDWGFile(string unparsed){DgnModel dgnModel = Session.Instance.GetActiveDgnModel();//获得当前激活的模型空间string strDgn = "E:\\工作相关\\20211213MS案例直播\\直播资料\\Part4\\111.dwg";//文件储存路径DgnDocumentMoniker moniker = DgnDocumentMoniker.CreateFromFileName(strDgn, null);//声明引用文件系统的DgnDocumentMoniker对象DgnAttachment attach = dgnModel.CreateDgnAttachment(moniker, null);//将指定模型引用到当前模型空间中StatusInt status = attach.WriteToModel(false);//将引用写入模型if (status == StatusInt.Success)//判断写入是否成功{MessageBox.Show("Attach DWG File:\nSuccess");//对话框输出成功提示}}
在本案例中,执行上述代码后,名为111.dwg的图纸被成功参考到当前的模型空间中。<br /><br />**图17 命令执行前**<br />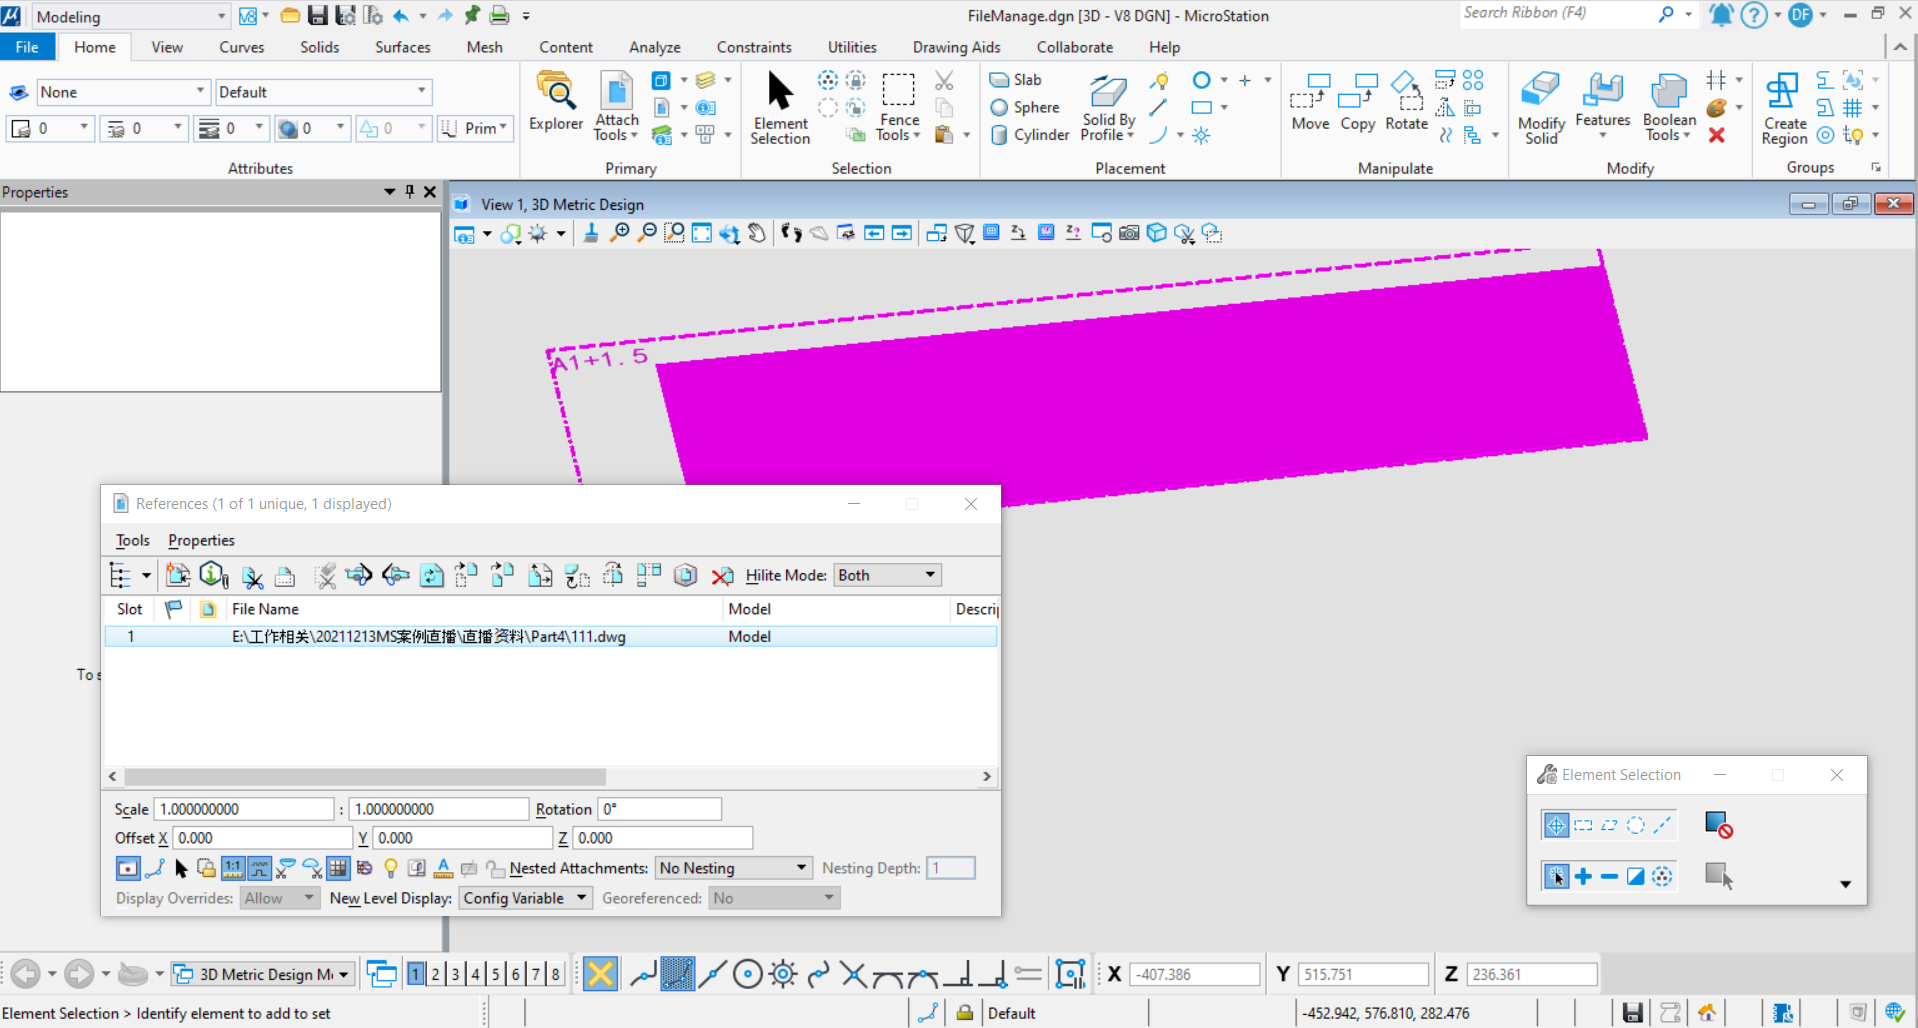<br />**图18 命令执行结果**
取消模型参照
当我们需要取消模型中的指定参照时,需要使用到DeleteDgnAttachment( )。大致的流程为遍历模型中的参照模型,根据名称找到需要取消参照的指定参照模型,使用上述方法执行取消参照的操作。
public static void DetachDgnModel(string unparsed){DgnModel dgnModel = Session.Instance.GetActiveDgnModel();//获得当前激活的模型空间DgnAttachmentCollection attachments = dgnModel.GetDgnAttachments();//获得该模型空间中所有的参照foreach(DgnAttachment attachment in attachments)//遍历模型空间中的所有参照{if(attachment.AttachModelName== "test")//判断参照的模型名称是否为test{StatusInt status = dgnModel.DeleteDgnAttachment(attachment);//删除模型中的指定参照if (status == StatusInt.Success)//判断写入是否成功{MessageBox.Show("Detach DgnModel:\nSuccess");//对话框输出成功提示}}}}
文件操作
文件读取
当我们希望对非当前文件执行读取操作时,就需要使用该方法实现跨文件的数据读取。关于文件读取的大致流程为首先确定需要操作文件的路径,然后通过DgnDocument获得对应的DgnFile,通过DgnFile即可读取文件中信息。
public static void ReadDgnFile(string unparsed){string strDgn = "E:\\工作相关\\20211213MS案例直播\\直播资料\\Part4\\ReadFile.dgn";//文件储存路径DgnDocument dgnDoc = DgnDocument.CreateForLocalFile(strDgn);//声明DgnDocument对象DgnFileOwner dgnFileOwner = DgnFile.Create(dgnDoc, DgnFileOpenMode.ReadOnly);//声明一个用于加载部分文件的DgnFile,控制DgnFile的生存期DgnFile dgnFile = dgnFileOwner.DgnFile;//获得已加载的DgnFiledgnFile.LoadDgnFile(out StatusInt errorStatus);//读取加载DgnFiledgnFile.FillDictionaryModel();//确定已填充模型字典(非模型区,保存各种内置对象,如图层、样式等)DgnModel dgnModel = dgnFile.LoadRootModelById(out errorStatus, dgnFile.DefaultModelId);//根据模型ID读取文件中的指定模型ModelElementsCollection elems=dgnModel.GetGraphicElements();//获得模型中的所有图形元素string result = "The result is:\n";//声明字符串foreach(Element elem in elems)//遍历图形元素{result = result + "ElementId = " + elem.ElementId + " Element Type = " + elem.ElementType+'\n';//输出模型中的元素ID及元素类型}MessageBox.Show(result);//输出结果}
在本案例中,通过指定文件路径获取到对应文件中的信息,而后找到文件的默认模型,获取模型中的图形元素信息并进行输出,通过查看对应文件中的模型可以看出,输出结果与文件中实际存在的模型信息一一对应。<br />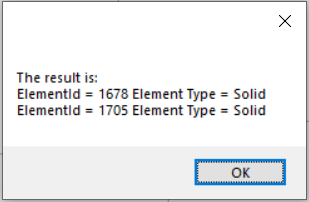<br />**图21 命令输出结果**<br />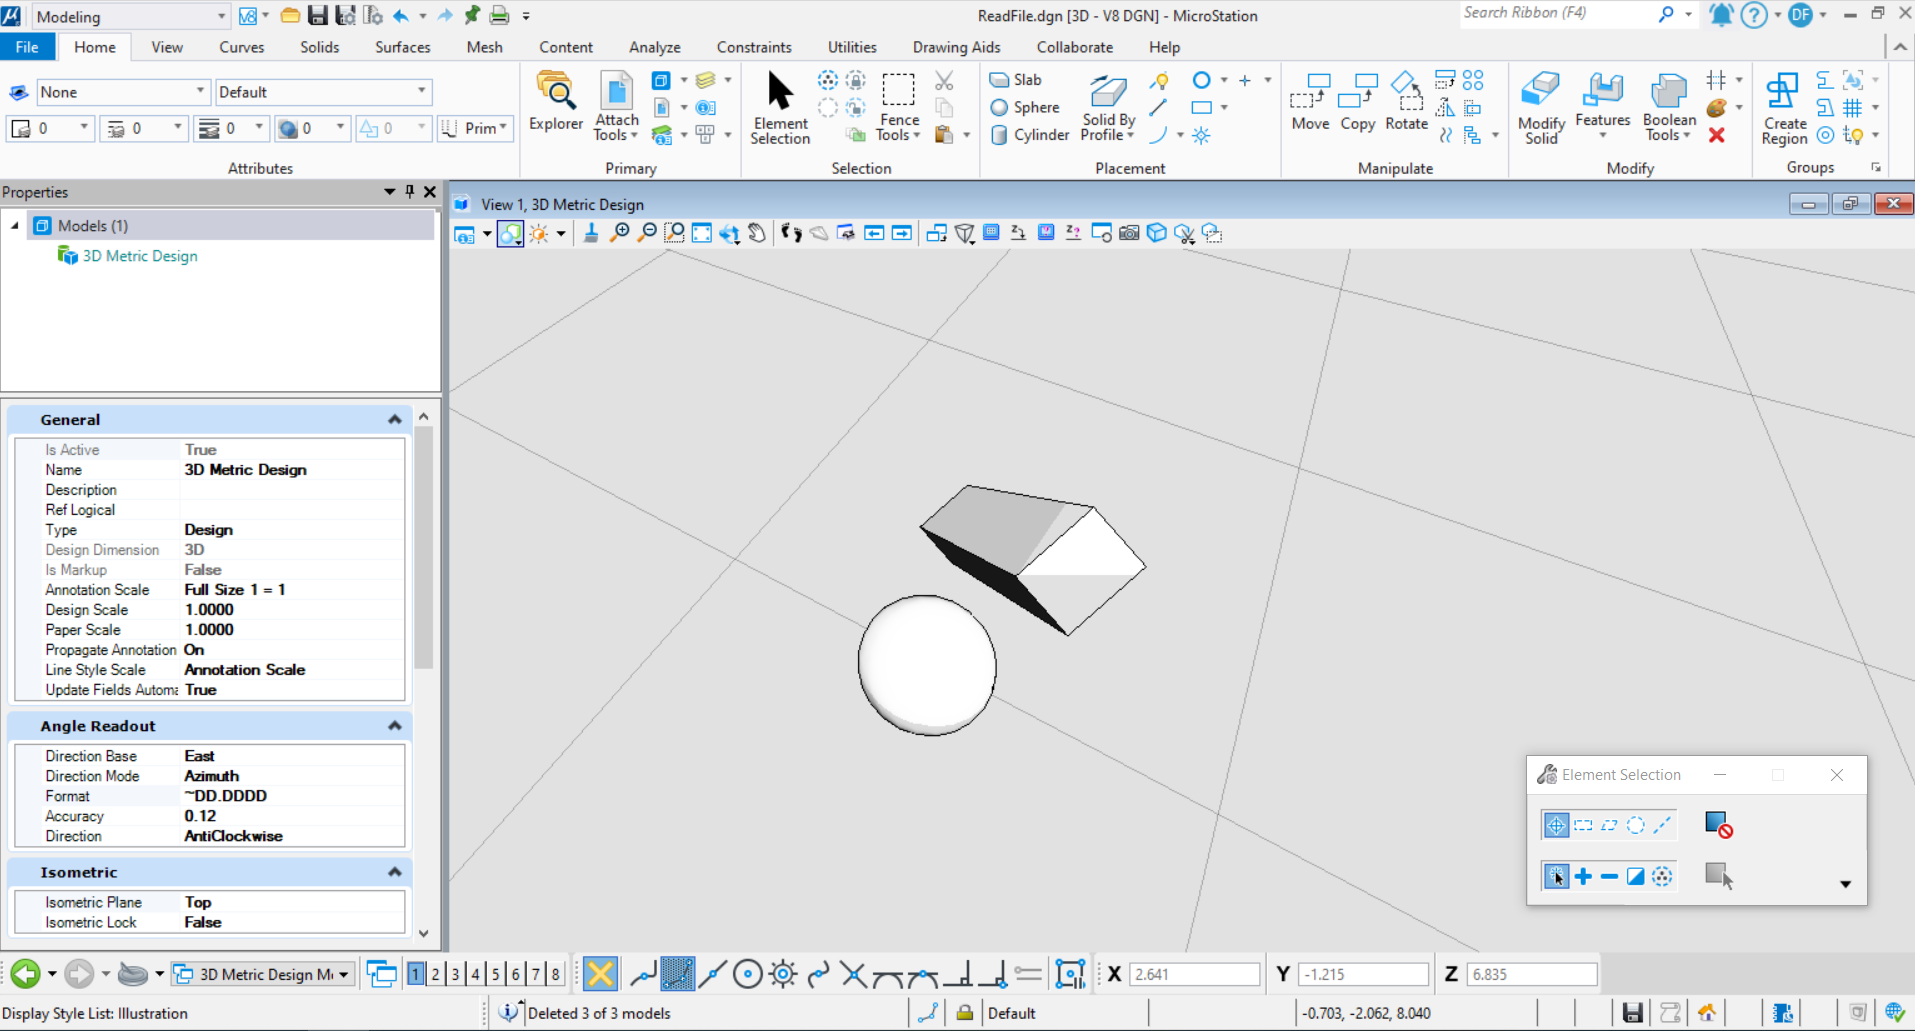<br />**图22 读取文件默认模型**
文件另存为
当我们需要使用代码的方式实现文件的另存为时,就需要使用到DoSaveAs( )这个方法。实现另存为的功能流程为:首先在指定位置创建文件,创建完成后将需要另存的文件保存至刚才创建文件中。
public static void SaveAsDgnFile(string unparsed)//Case:test{string filePath = "E:\\工作相关\\20211213MS案例直播\\直播资料\\Part4\\NewFileBySaveAs.dgn";//文件储存路径DgnDocument dgnDoc = DgnDocument.CreateForNewFile(out DgnFileStatus status, filePath, "", 0, "",DgnDocument.OverwriteMode.Always,DgnDocument.CreateOptions.Default);/** 用DgnDocument对象表示在文件中声明的新文件* status:若返回空,则有可能为:文件已存在,但未指定覆盖或无法覆盖* documentName:声明文件的文件名称* searchPath:用于设置搜索的基本路径,可为空,他包含一个或多个配置变量,目录路径或文件路径* defFileId:表示声明的文件类型* wDefaultFileName:指定根据名称查找现有文件时使用的默认驱动器,路径,文件名或扩展名* overwriteMode:指定当文件存在时要执行的操作* options:声明类型*/if (dgnDoc!=null)//判断文件是否声明成功{StatusInt statusInt = dgnDoc.OnNewFileCreated();//声明文件后调用,允许文档管理器将文件添加到储存库中,若该文件只是临时文件则无需调用if (statusInt == StatusInt.Success)//判断是否成功{DgnFile dgnFile = Session.Instance.GetActiveDgnFile();//获得当前激活的文件信息statusInt = dgnFile.DoSaveAs(dgnDoc, DgnFileFormatType.V8, true, false);//将本文件另存到新建文件中}}}
在本案例中,首先在指定路径下创建了一个名为NewFileBySaveAs的dgn文件,然后将当前的文件信息另存至刚才创建的文件中。<br />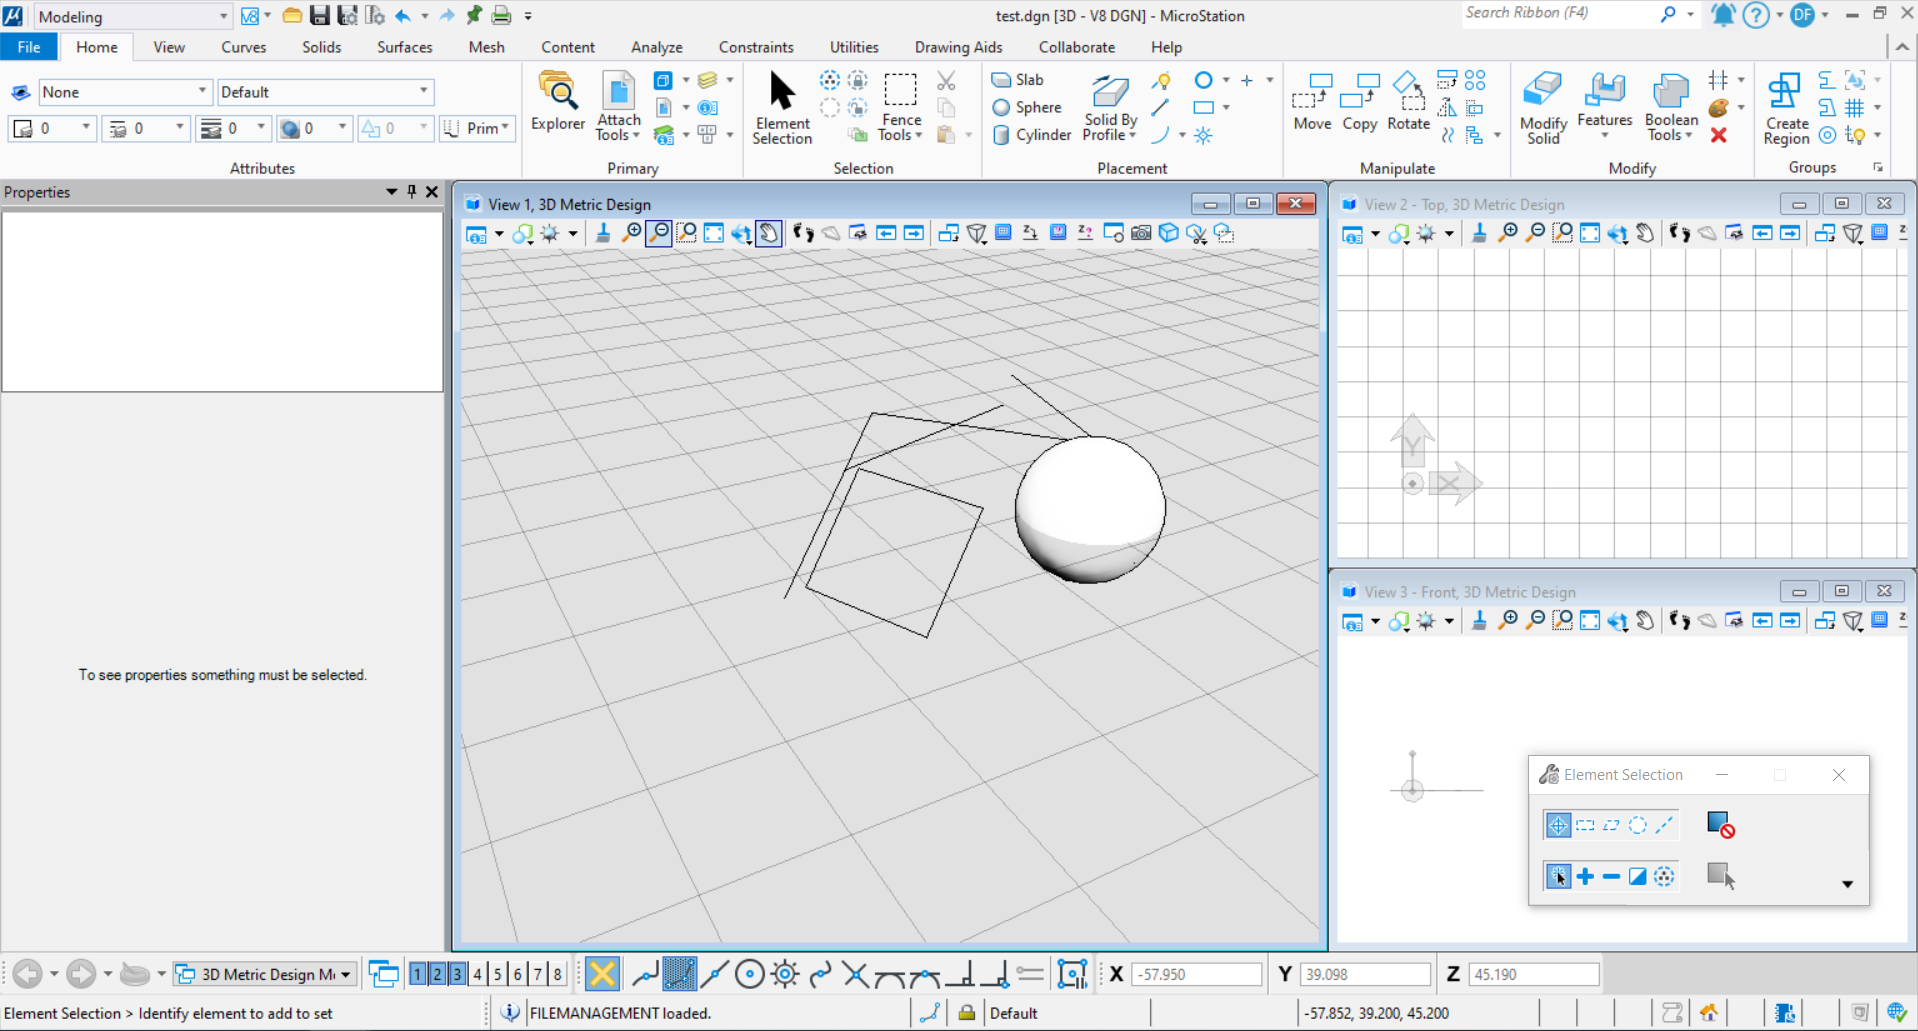<br />**图23 当前文件中的模型**<br />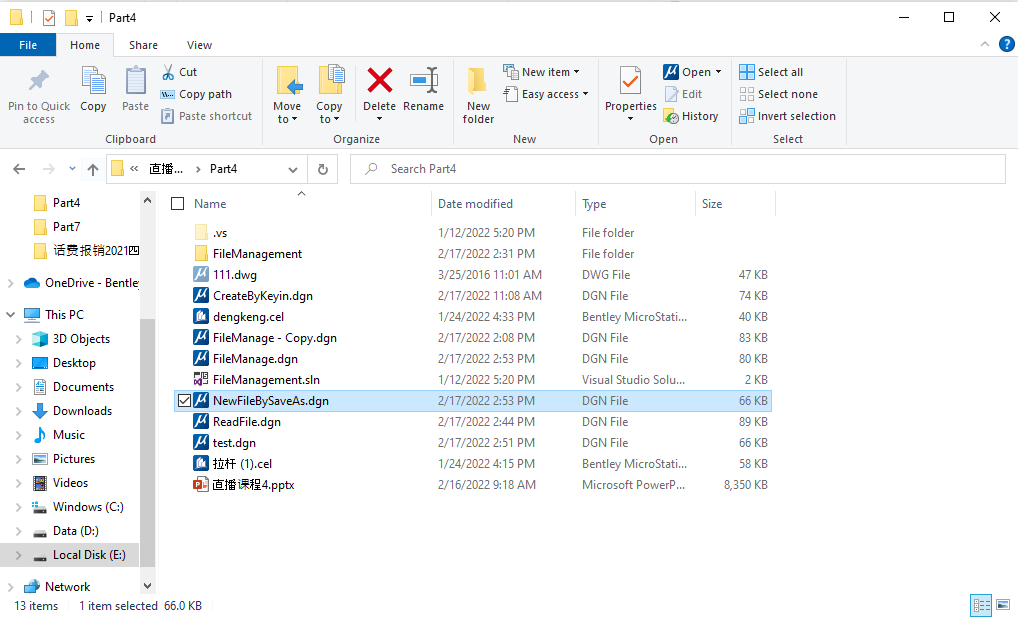<br />**图24 命令执行后生成NewFileBySaveAs文件**<br />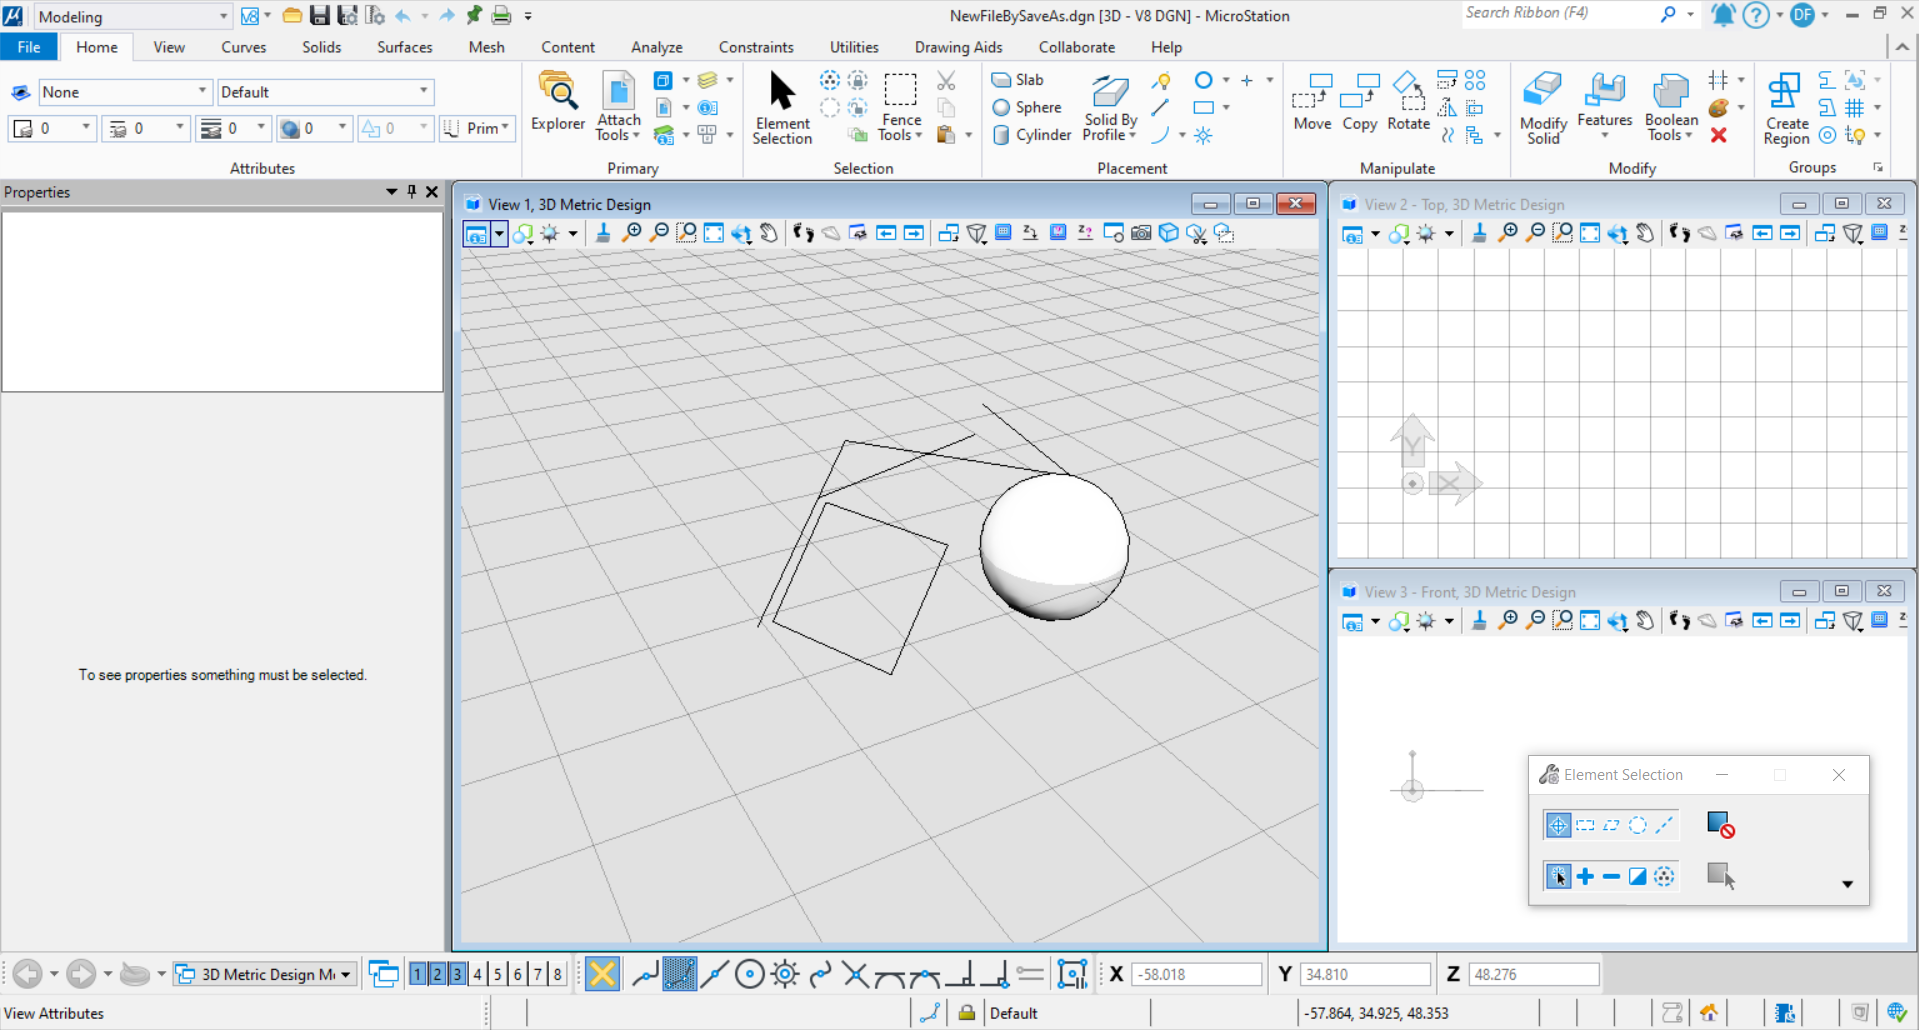<br />**图24 NewFileBySaveAs文件中的模型**
文件创建
当我们需要创建一个新的文件时,需要使用CreateNew( )实现。实现该功能的大致流程为首先确定文件储存地址,然后使用种子文件,文件打开模式等信息创建文件。
public static void CreateDgnFile(string unparsed){string filePath = "E:\\工作相关\\20211213MS案例直播\\直播资料\\Part4\\NewCreateFile.dgn";//文件储存路径DgnDocument dgnDoc = DgnDocument.CreateForNewFile(out DgnFileStatus status, filePath, "", 0, "", DgnDocument.OverwriteMode.Always, DgnDocument.CreateOptions.Default);//用DgnDocument对象表示在文件中声明的新文件if (dgnDoc != null)//判断文件是否声明成功{StatusInt statusInt = dgnDoc.OnNewFileCreated();//声明文件后调用,允许文档管理器将文件添加到储存库中,若该文件只是临时文件则无需调用if (statusInt == StatusInt.Success)//判断是否成功{DgnFile dgnFile = Session.Instance.GetActiveDgnFile();//获得当前激活的文件信息SeedData seed = new SeedData(dgnFile, dgnFile.DefaultModelId, SeedCopyFlags.AllData, false);//获得当前文中默认模型的种子信息DgnFileOwner owner = DgnFile.CreateNew(out DgnFileStatus fileStatus, dgnDoc, DgnFileOpenMode.ReadWrite, seed, DgnFileFormatType.V8, true);//基于种子文件(可选),声明一个dgn文件owner.Dispose();//在内存中释放该文件}}}
在本案例中,命令执行之后在指定的路径下生成了一个名为NewCreateFile的文件。<br />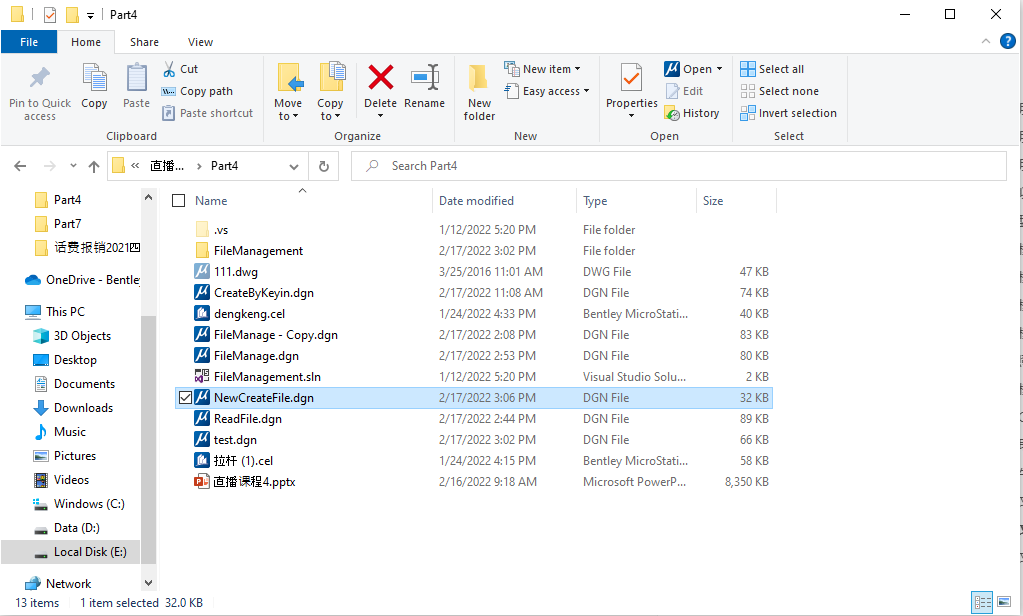<br />**图25 命令执行后生成NewCreateFile文件**<br />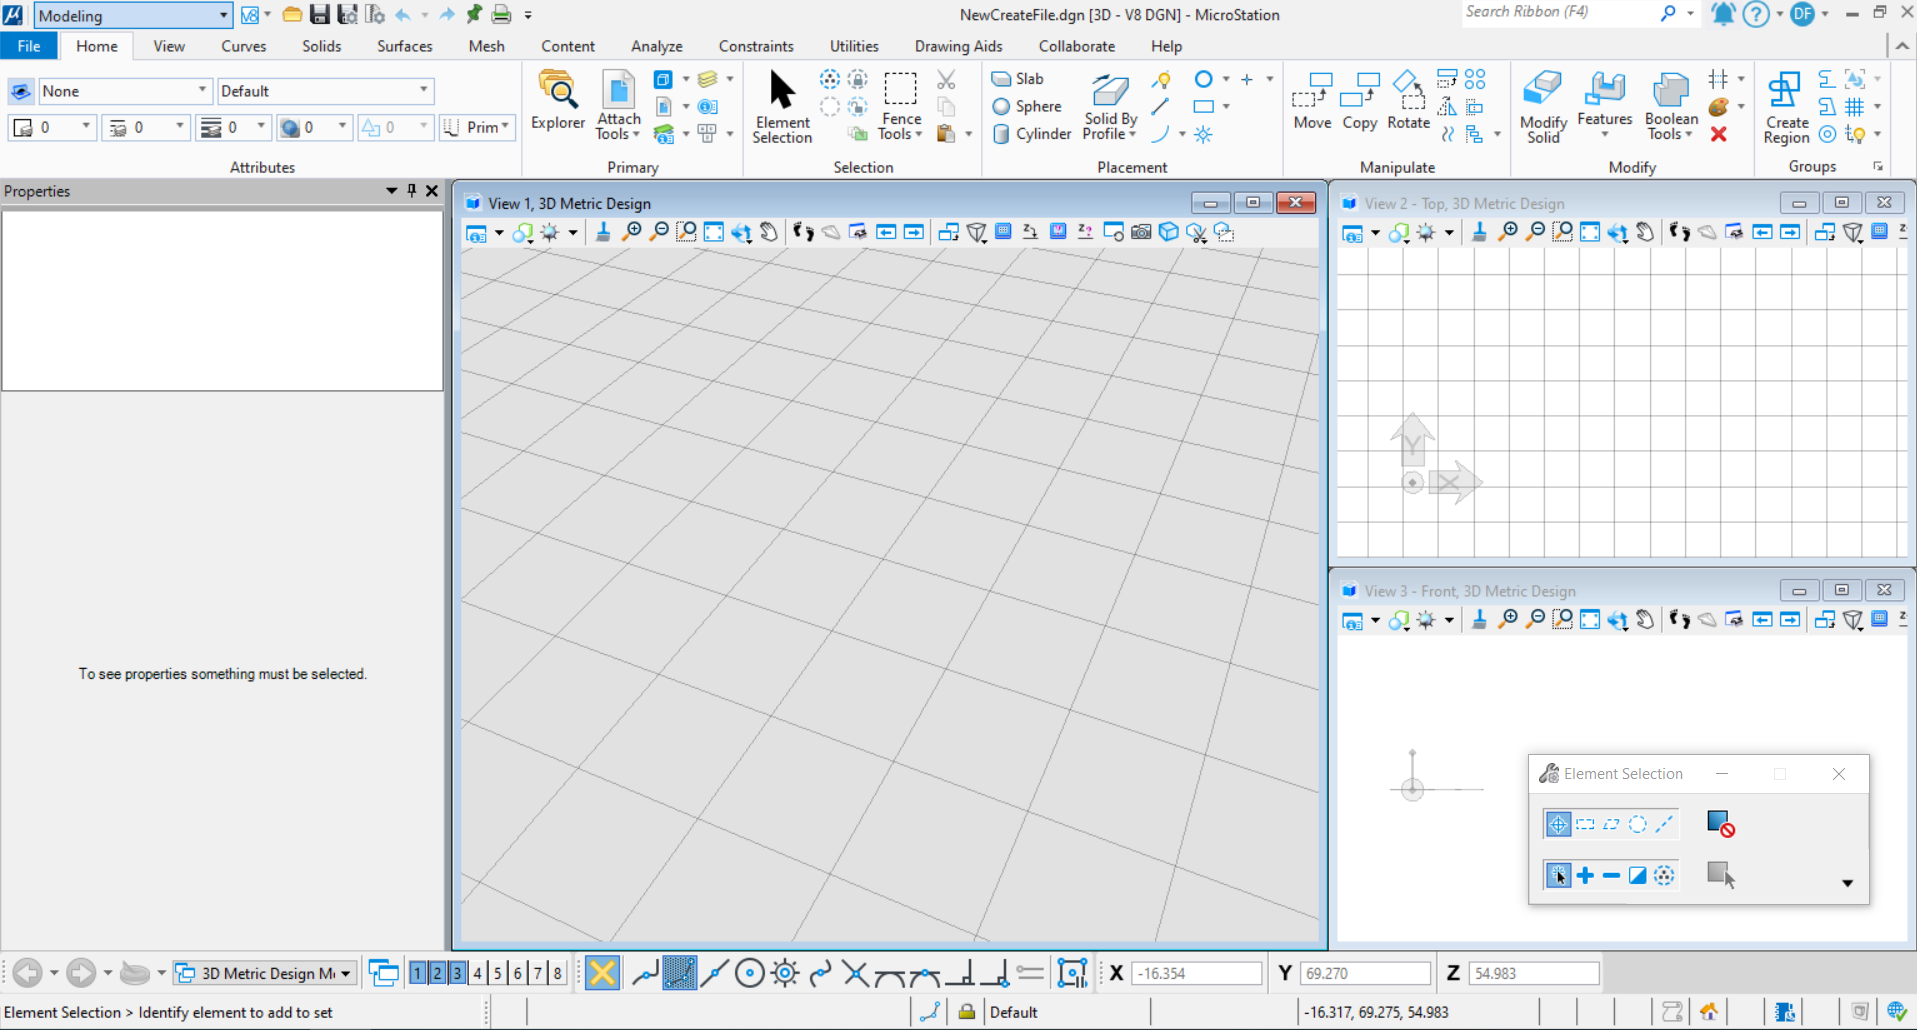<br />**图26 生成NewCreateFile文件**
NamedGroup介绍
当我们需要对模型中的元素分组时,就需要使用NamedGroup功能,不同于单元,他们的元素并没有那么强的组合关系,同时,组与组之间可以实现嵌套,体现元素间的层级关系。<br />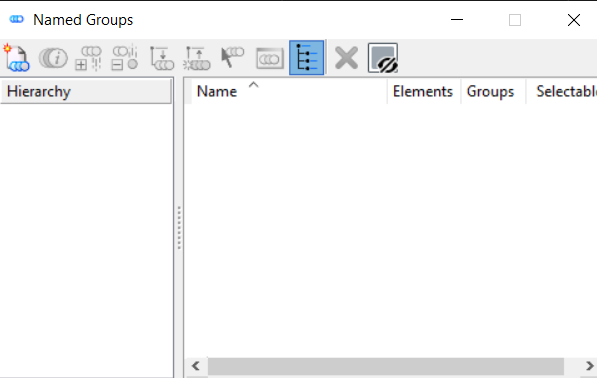<br />**图27 NamedGroups界面**
创建NamedGroup
NamedGroup的创建流程为声明NamedGroup后添加成员,然后将NamedGroup写入模型。
public static void CreateNamedGroup(string unparsed){DgnModelRef dgnmodelRef = Session.Instance.GetActiveDgnModelRef();//获得当前激活的dgn模型DgnModel dgnModel = Session.Instance.GetActiveDgnModel();//获得当前激活的dgn模型double uorMeter = Session.Instance.GetActiveDgnModel().GetModelInfo().UorPerMeter;//获得当前模型中的单位#regionDPoint3d[] ptArr = new DPoint3d[5];//声明面片元素端点集ptArr[0] = new DPoint3d(-15 * uorMeter, -5 * uorMeter, 0 * uorMeter);//声明端点坐标ptArr[1] = new DPoint3d(-15 * uorMeter, 5 * uorMeter, 0 * uorMeter);ptArr[2] = new DPoint3d(-5 * uorMeter, 5 * uorMeter, 0 * uorMeter);ptArr[3] = new DPoint3d(-5 * uorMeter, -5 * uorMeter, 0 * uorMeter);ptArr[4] = new DPoint3d(-15 * uorMeter, -5 * uorMeter, 0 * uorMeter);ShapeElement shapeEle = new ShapeElement(dgnModel, null, ptArr);//声明形元素shapeEle.AddToModel();//将形元素写入模型DPlacementZX dPlaceZX = DPlacementZX.Identity;//声明椭圆放置平面dPlaceZX.Origin = new DPoint3d(-10 * 10000, 0, 0);//设置平面原点DEllipse3d ellipse = new DEllipse3d(dPlaceZX, 5 * uorMeter, 5 * uorMeter, Angle.Zero, Angle.TWOPI);//声明几何椭圆EllipseElement elliElem = new EllipseElement(dgnModel, null, ellipse);//声明椭圆元素elliElem.AddToModel();//将椭圆元素写入模型#endregionstring groupName = "TestGroupName";//设置NamedGroup名称string groupDescription = "TestGroupDescription";//设置NamedGroup描述NamedGroupFlags flags = new NamedGroupFlags();//声明NamedGroup设置NamedGroup group = new NamedGroup(groupName,groupDescription, flags, dgnmodelRef);//声明NamedGroupNamedGroupMemberFlags memberFlags1 = new NamedGroupMemberFlags();//声明NamedGroup成员设置memberFlags1.GroupPropagate = NamedGroupPropagationFlags.Always;//当此元素属于其他组时,是否遍历这些组group.AddMember(shapeEle.ElementId,dgnmodelRef, memberFlags1);//将NamedGroup成员添加到NamedGroup中NamedGroupMemberFlags memberFlags2 = new NamedGroupMemberFlags();//声明NamedGroup成员设置memberFlags2.GroupPropagate = NamedGroupPropagationFlags.Always;//当此元素属于其他组时,是否遍历这些组group.AddMember(elliElem.ElementId, dgnmodelRef, memberFlags2);//将NamedGroup成员添加到NamedGroup中NamedGroupStatus status= group.WriteToFile(true);//将NamedGroup写入文件MessageBox.Show("Name Group Create Status:\n"+status);//输出写入结果}
本案例中,首先在文件中创建了一个形元素和一个椭圆元素,然后创建了一个NamedGroup,并将刚才创建的两个元素加入到NamedGroup中。当我们删除NamedGroup中的元素时NamedGroup中的信息也会同步更新。<br />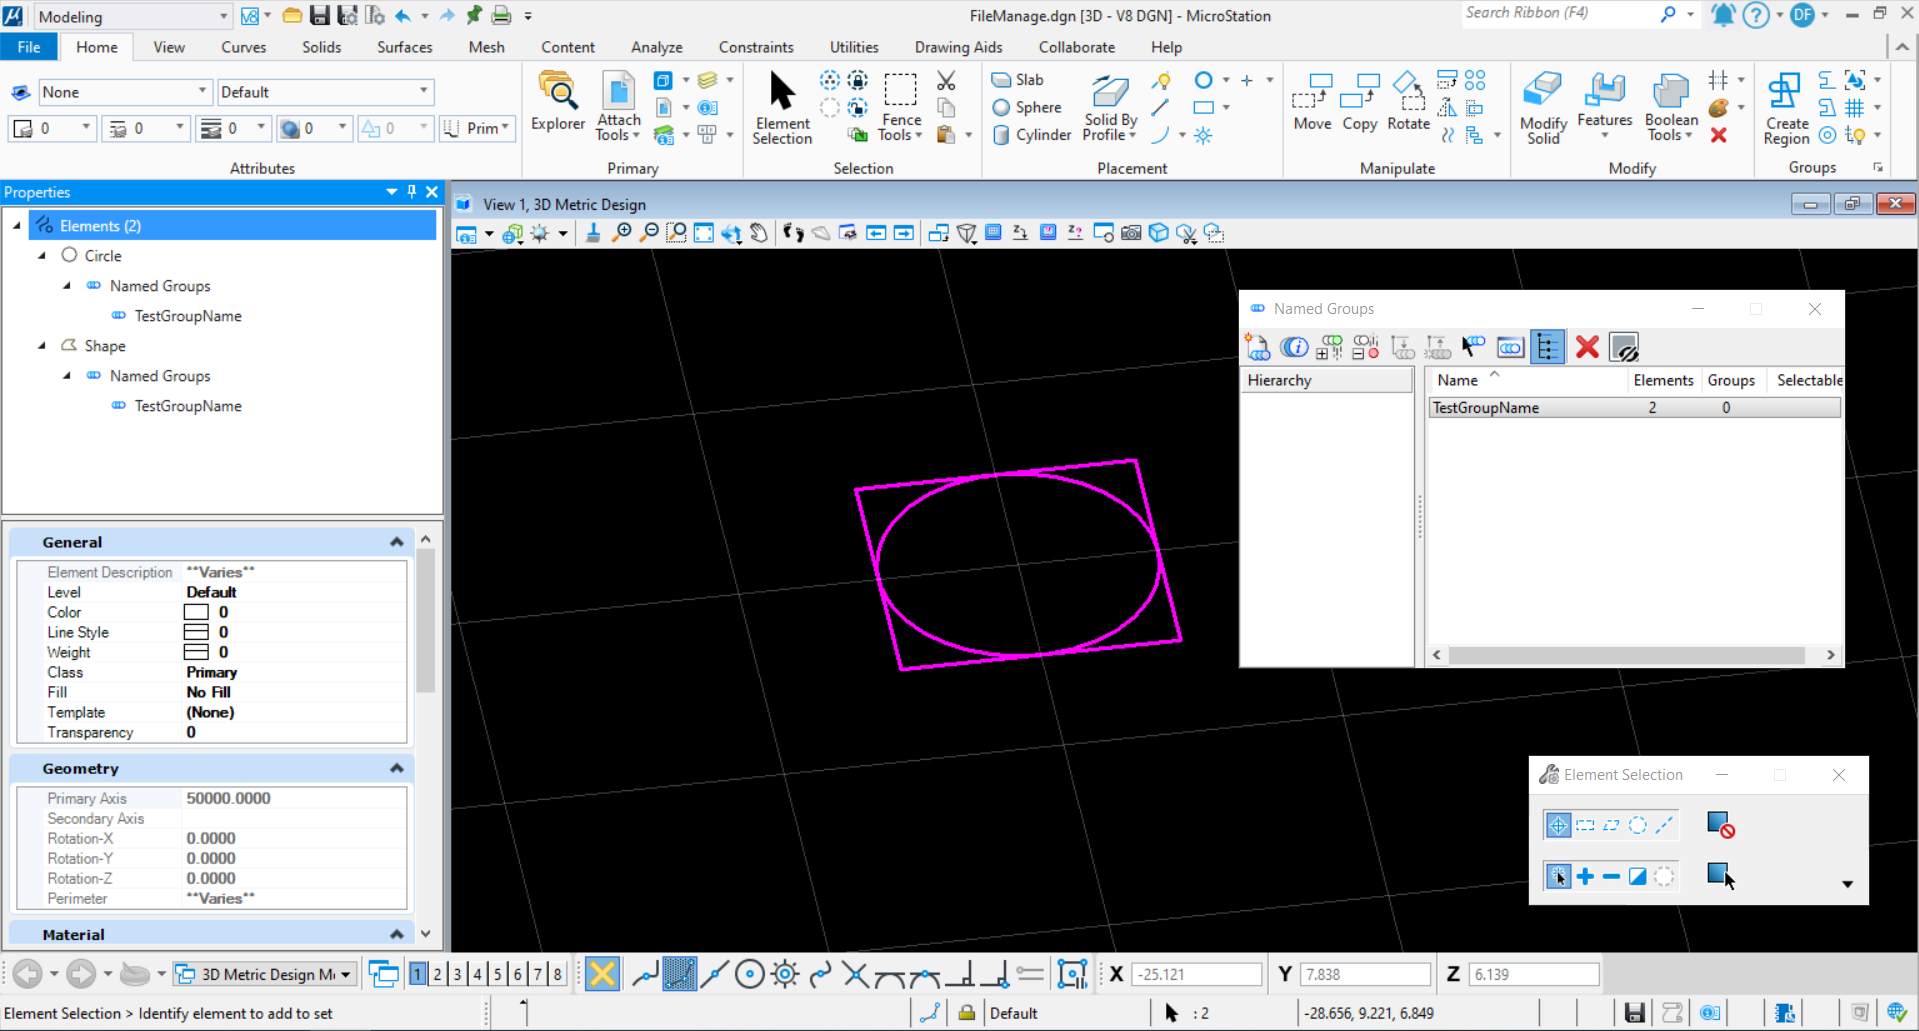<br />**图28 命令执行结果**<br />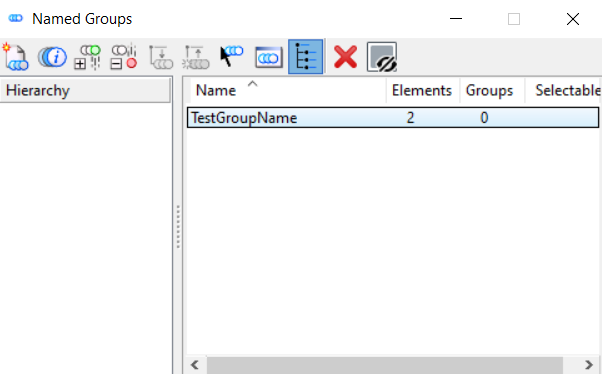<br />**图29 NamedGroups界面**
创建带有层级关系的NamedGroup
当我们需要对模型中的元素进行从属关系分类管理时,可能会使用到具有层级关系表达功能的NamedGroup。在NamedGroup中进行添加时,我们不仅可以添加元素,同时也可以添加NamedGroup,以便对元素或元素集进行管理。
public static void CreateNamedGroupWithHierarchy(string unparsed){DgnModelRef dgnmodelRef = Session.Instance.GetActiveDgnModelRef();//获得当前激活的dgn模型DgnModel dgnModel = Session.Instance.GetActiveDgnModel();//获得当前激活的dgn模型double uorMeter = Session.Instance.GetActiveDgnModel().GetModelInfo().UorPerMeter;//获得当前模型中的单位#regionDPoint3d[] ptArr = new DPoint3d[5];//声明面片元素端点集ptArr[0] = new DPoint3d(-15 * uorMeter, -5 * uorMeter, 0 * uorMeter);//声明端点坐标ptArr[1] = new DPoint3d(-15 * uorMeter, 5 * uorMeter, 0 * uorMeter);ptArr[2] = new DPoint3d(-5 * uorMeter, 5 * uorMeter, 0 * uorMeter);ptArr[3] = new DPoint3d(-5 * uorMeter, -5 * uorMeter, 0 * uorMeter);ptArr[4] = new DPoint3d(-15 * uorMeter, -5 * uorMeter, 0 * uorMeter);ShapeElement shapeEle = new ShapeElement(dgnModel, null, ptArr);//声明形元素shapeEle.AddToModel();//将面片元素写入模型DPlacementZX dPlaceZX = DPlacementZX.Identity;//声明椭圆放置平面dPlaceZX.Origin = new DPoint3d(-10 * 10000, 0, 0);//设置平面原点DEllipse3d ellipse = new DEllipse3d(dPlaceZX, 5 * uorMeter, 5 * uorMeter, Angle.Zero, Angle.TWOPI);//声明几何椭圆EllipseElement elliElem = new EllipseElement(dgnModel, null, ellipse);//声明椭圆元素elliElem.AddToModel();//将椭圆元素写入模型#endregionstring groupName1 = "TestGroupName1";//设置NamedGroup名称string groupDescription1 = "TestGroupDescription1";//设置NamedGroup描述NamedGroupFlags flags1 = new NamedGroupFlags();//声明NamedGroup设置NamedGroup group1 = new NamedGroup(groupName1, groupDescription1, flags1, dgnmodelRef);//声明NamedGroupNamedGroupMemberFlags memberFlags1 = new NamedGroupMemberFlags();//当此元素属于其他组时,是否遍历这些组memberFlags1.GroupPropagate = NamedGroupPropagationFlags.Always;//当此元素属于其他组时,是否遍历这些组group1.AddMember(shapeEle.ElementId, dgnmodelRef, memberFlags1);//将NamedGroup成员添加到NamedGroup中group1.WriteToFile(true);//将NamedGroup写入文件string groupName2 = "TestGroupName2";//设置NamedGroup名称string groupDescription2 = "TestGroupDescription2";//设置NamedGroup描述NamedGroupFlags flags2 = new NamedGroupFlags();//声明NamedGroup设置NamedGroup group2 = new NamedGroup(groupName2, groupDescription2, flags2, dgnmodelRef);//声明NamedGroupNamedGroupMemberFlags memberFlags2 = new NamedGroupMemberFlags();//当此元素属于其他组时,是否遍历这些组memberFlags2.GroupPropagate = NamedGroupPropagationFlags.Always;//当此元素属于其他组时,是否遍历这些组group2.AddMember(elliElem.ElementId, dgnmodelRef, memberFlags2);//将NamedGroup成员添加到NamedGroup中(元素)group2.AddMember(group1.GetElement().ElementId, dgnmodelRef, memberFlags2);//将NamedGroup成员添加到NamedGroup中(NamedGroup)group2.WriteToFile(true);//将NamedGroup写入文件}
在本案例中,首先在模型空间中创建了一个形元素与一个椭圆元素,将形元素添加到名为"TestGroupName1"的NamedGroup中,与上面的方法不同,本案例中将椭圆元素和名为"TestGroupName1"的NamedGroup添加到名为"TestGroupName2"的NamedGroup中,从而实现了对具有层级关系的元素进行管理。<br /><br />**图30 命令执行结果**<br />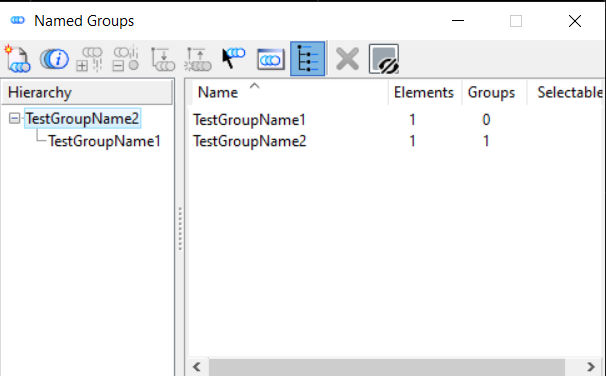<br />**图31 NamedGroups界面**
删除NamedGroup
当我们需要删除NamedGroup,需要使用DeleteFromFile( )。大致的流程为遍历模型中的NamedGroup集合,找到指定名称的NamedGroup,然后调用方法删除NamedGroup。
public static void DeleteNamedGroup(string unparsed){DgnModelRef dgnModelRef= Session.Instance.GetActiveDgnModelRef();//获得当前激活的dgn模型NamedGroupCollection groups = new NamedGroupCollection(dgnModelRef);//获得模型中的NamedGroup集NamedGroup group= groups.FindByName("TestGroupName");//根据名称获取对应的NamedGroupif (group!=null)//判断是否成功获得指定NamedGroup{NamedGroupStatus status= group.DeleteFromFile();//将指定NamedGroup删除MessageBox.Show("Name Group Delete Status:\n" + status);//输出结果}}
本案例中采用上方创建NamedGroup命令,生成了带有NamedGroup属性的元素,使用删除NamedGroup命令后,名为"TestGroupName"的NamedGroup被删除,元素上的NamedGroup属性被移除。<br />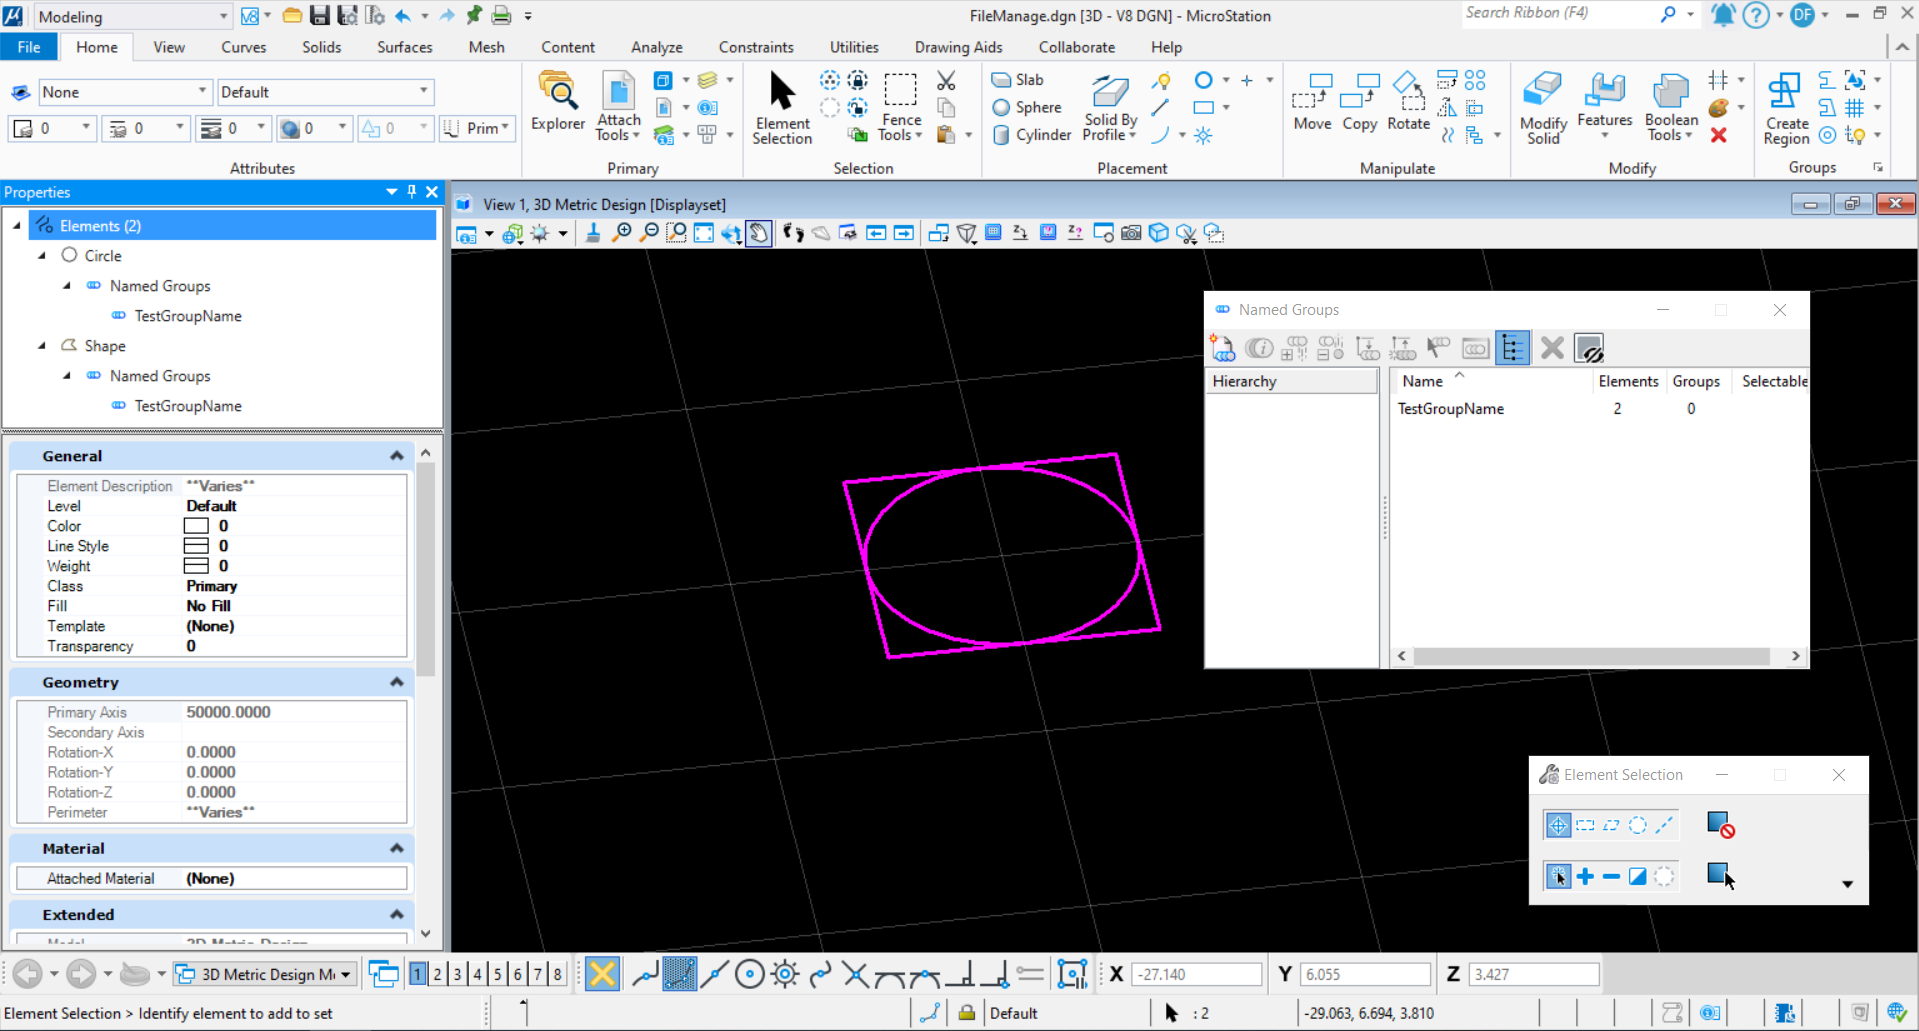<br />**图32 命令执行前**<br />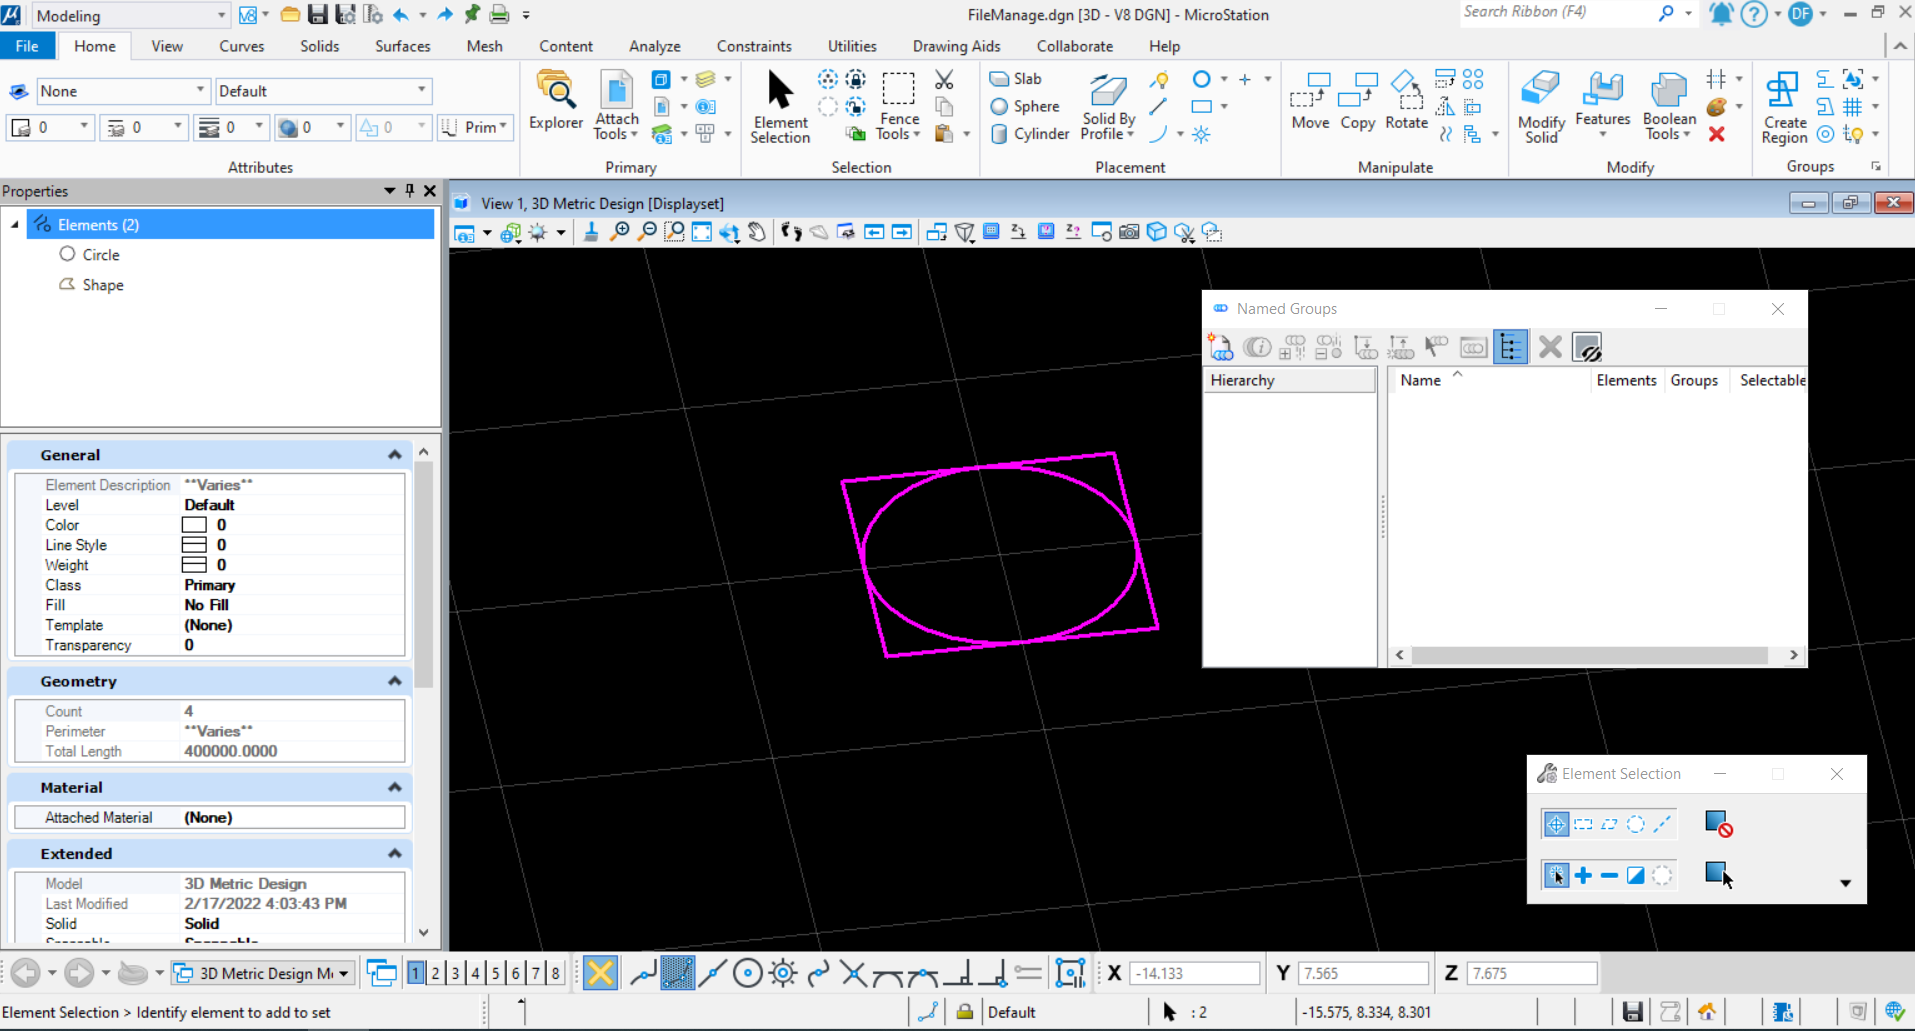<br />**图33 命令执行结果**
材质
材质主要用于对元素进行材质贴图,以表现实际的材料样式。材质表中包含材质表,材质面板以及材质。而其属性记录了反射等多种属性以表达实际材质效果。<br />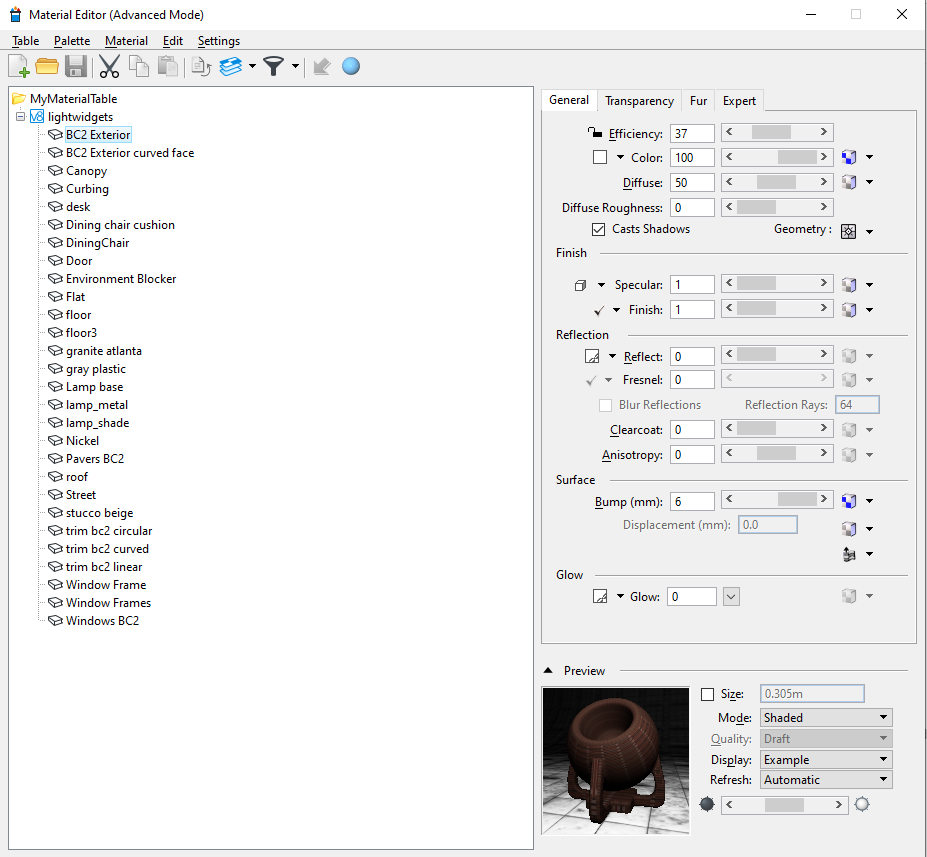<br />**图34 材质编辑器界面**
创建材质
当我们需要创建自定义的材质时,对应的,需要依次创建材质表,材质面板以及材质。
public static void CreateMaterial(string unparsed){DgnFile dgnFile = Session.Instance.GetActiveDgnFile();//获得当前激活的dgn文件DgnModel dgnModel = Session.Instance.GetActiveDgnModel();//获得当前激活的dgn模型MaterialTable createdTable = new MaterialTable(dgnFile);//声明材料表createdTable.Name = "Table1";//设置材料表名称createdTable.Description = "Description1";//设置材料表描述信息Material savedMaterial1 = new Material(dgnModel);//声明材料savedMaterial1.Name = "Material5";//设置材料名称PaletteInfo pInfo1 = savedMaterial1.GetPalette();//设置材料所在面板信息pInfo1.Name = "SavedPalette";//设置材料所在面板名称pInfo1.SetSource(dgnFile.GetDocument().GetMoniker());//设置面板源文件域pInfo1.Type = PaletteInfo.PaletteType.Dgn;//设置面板类型MaterialManager.SaveMaterial(null, savedMaterial1, dgnFile);//保存材料信息Material savedMaterial2 = new Material(dgnModel);//声明材料savedMaterial2.Name = "Material7";//设置材料名称PaletteInfo pInfo2 = savedMaterial2.GetPalette();//设置材料所在面板信息pInfo2.Name = "SavedPalette";//设置材料所在面板名称pInfo2.SetSource(dgnFile.GetDocument().GetMoniker());//设置面板源文件域pInfo2.Type = PaletteInfo.PaletteType.Dgn;//设置面板类型MaterialManager.SaveMaterial(null, savedMaterial2, dgnFile);//保存材料信息MaterialId materialId = new MaterialId("Material5");//声明材料IDcreatedTable.AddAssignment(new MaterialAssignment(materialId, "Level 1", 0, createdTable.GetRenderDgn()));//将材料分配信息添加到表中createdTable.AddAssignment(new MaterialAssignment(new MaterialId("Material7"), "Level 10", 4, createdTable.GetRenderDgn()));//将材料分配信息添加到表中MaterialManager.SaveTable(createdTable);//保存材料表}
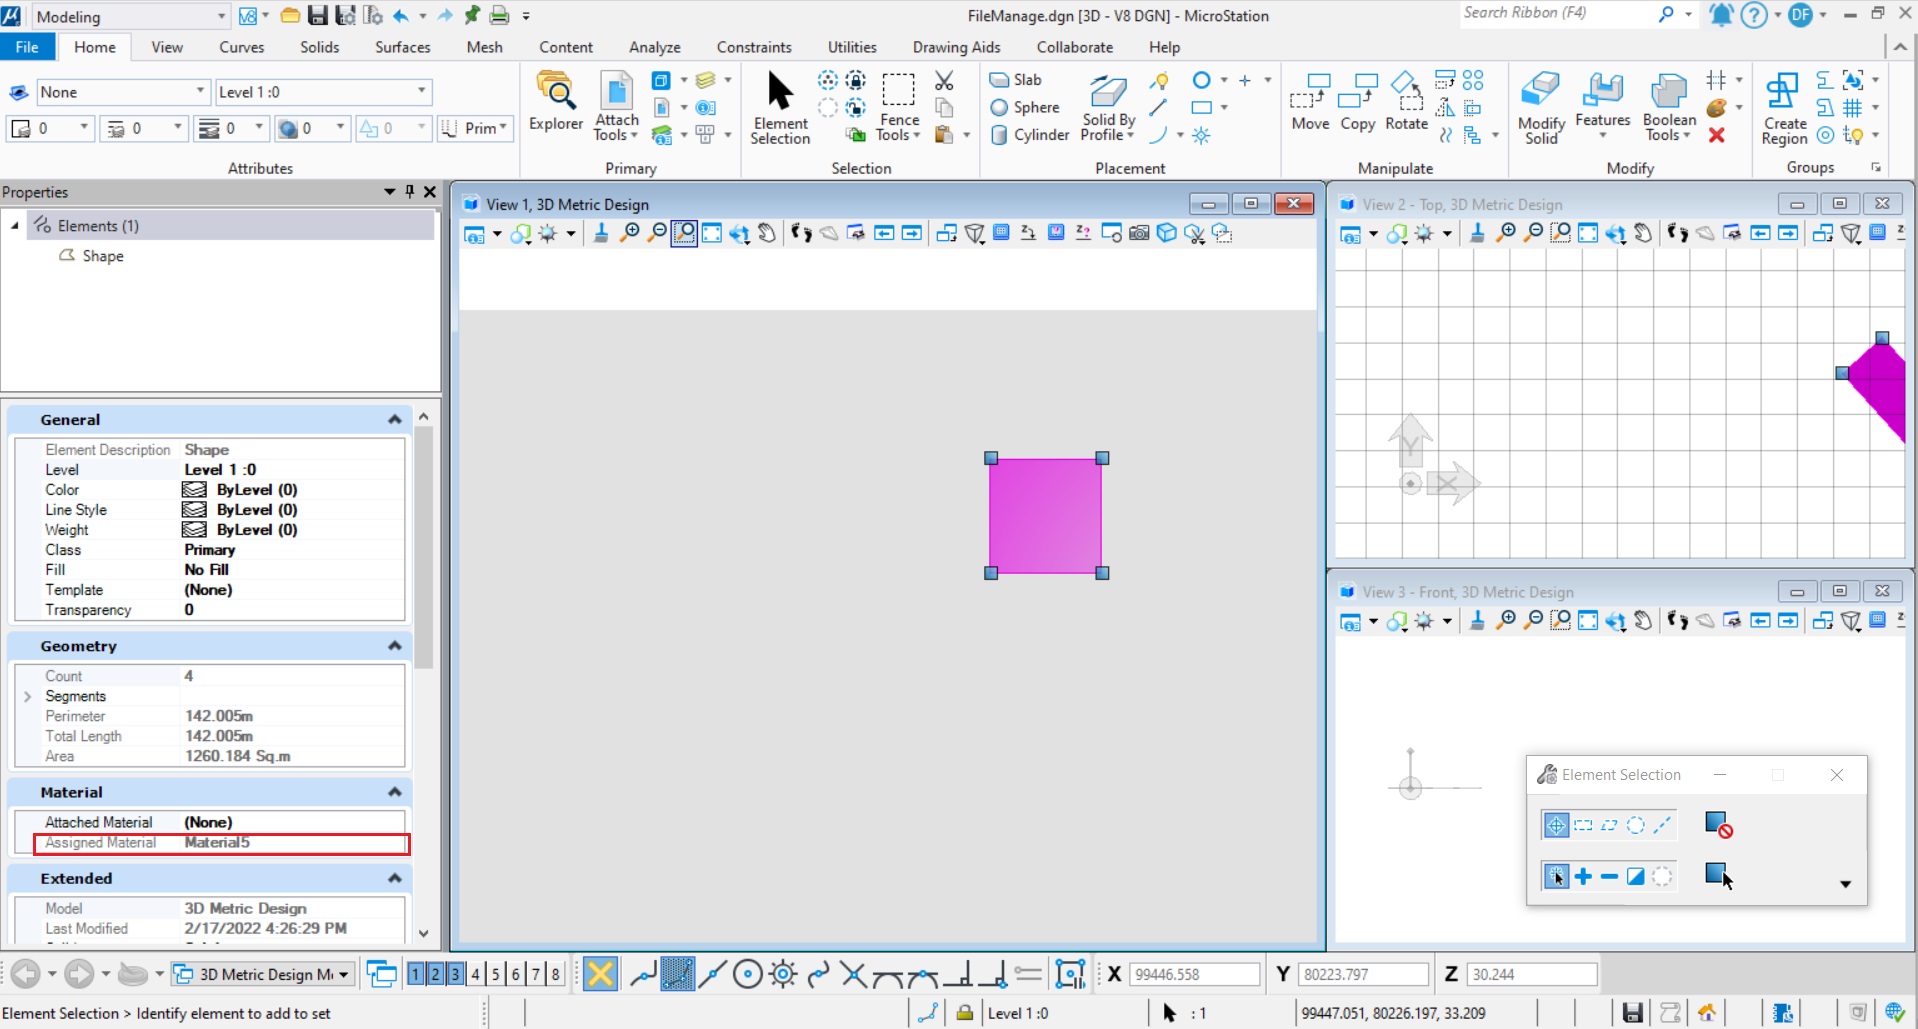
本案例中,首先创建了一个名为"Table1"的材质表,然后创建了一个名为"SavedPalette"的材质面板,最后分别创建了名为"Material7"与"Material5",并将材质与图层绑定。<br />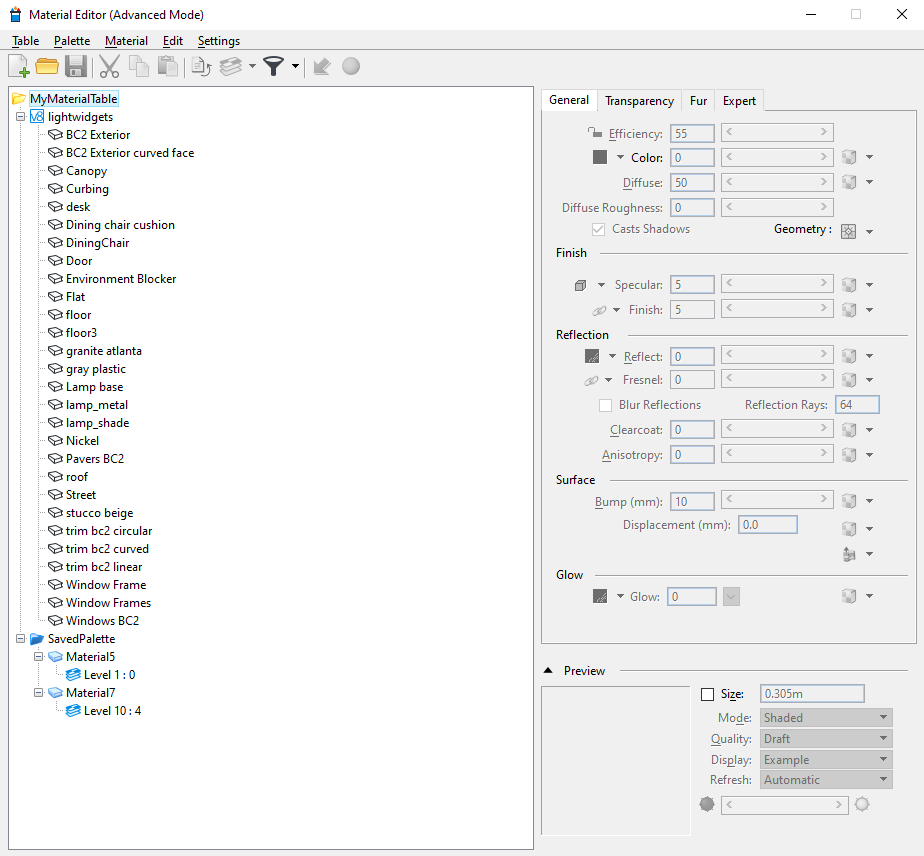<br />**图35 材质编辑器界面**
图层
图层材质赋予
使用材质的方式一般来说主要是将材质赋予元素,该方法即可将材质与图层绑定后赋予元素。主要的步骤为在文件中创建指定名称的图层,完成后创建材料,并将材料与图层绑定。命令执行完毕后当给元素赋予该图层后,其材质即为创建的材质。
public static void CreateLevelWithMaterial(string unparsed){DgnFile dgnFile = Session.Instance.GetActiveDgnFile();//获得当前激活的dgn文件DgnModel dgnModel = Session.Instance.GetActiveDgnModel();//获得当前激活的dgn模型string levelName = "Level 1 :0";//声明字符串指代图层名称FileLevelCache flc = dgnModel.GetFileLevelCache();//获得模型中的图层文件缓存flc.Write();//将文件写入缓存LevelHandle level = flc.GetLevelByName(levelName);//根据图层名称获得图层句柄if (!level.IsValid)//判断图层是否有效(若图层无效在则为真){EditLevelHandle elh = flc.CreateLevel(levelName);//声明名为levelName的图层CreateMaterial(unparsed);//声明材料}}public static void CreateMaterial(string unparsed){DgnFile dgnFile = Session.Instance.GetActiveDgnFile();//获得当前激活的dgn文件DgnModel dgnModel = Session.Instance.GetActiveDgnModel();//获得当前激活的dgn模型MaterialTable createdTable = new MaterialTable(dgnFile);//声明材料表createdTable.Name = "Table1";//设置材料表名称createdTable.Description = "Description1";//设置材料表描述信息Material savedMaterial1 = new Material(dgnModel);//声明材料savedMaterial1.Name = "Material5";//设置材料名称PaletteInfo pInfo1 = savedMaterial1.GetPalette();//设置材料所在面板信息pInfo1.Name = "SavedPalette";//设置材料所在面板名称pInfo1.SetSource(dgnFile.GetDocument().GetMoniker());//设置面板源文件域pInfo1.Type = PaletteInfo.PaletteType.Dgn;//设置面板类型MaterialManager.SaveMaterial(null, savedMaterial1, dgnFile);//保存材料信息Material savedMaterial2 = new Material(dgnModel);//声明材料savedMaterial2.Name = "Material7";//设置材料名称PaletteInfo pInfo2 = savedMaterial2.GetPalette();//设置材料所在面板信息pInfo2.Name = "SavedPalette";//设置材料所在面板名称pInfo2.SetSource(dgnFile.GetDocument().GetMoniker());//设置面板源文件域pInfo2.Type = PaletteInfo.PaletteType.Dgn;//设置面板类型MaterialManager.SaveMaterial(null, savedMaterial2, dgnFile);//保存材料信息MaterialId materialId = new MaterialId("Material5");//声明材料IDcreatedTable.AddAssignment(new MaterialAssignment(materialId, "Level 1", 0, createdTable.GetRenderDgn()));//将材料分配信息添加到表中createdTable.AddAssignment(new MaterialAssignment(new MaterialId("Material7"), "Level 10", 4, createdTable.GetRenderDgn()));//将材料分配信息添加到表中MaterialManager.SaveTable(createdTable);//保存材料表}
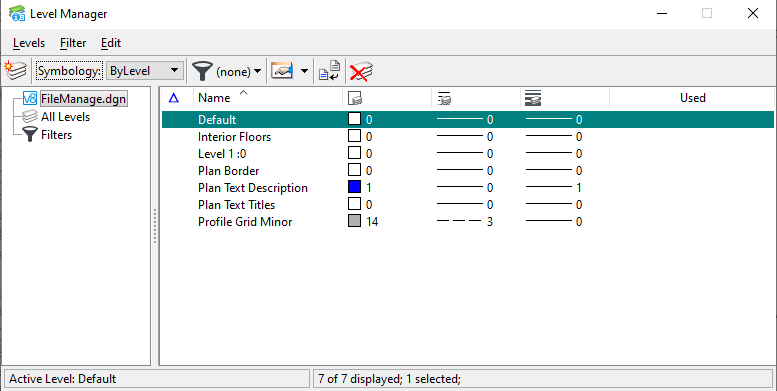
图层颜色及线形样式赋予
若我们需要创建一个颜色及线形样式的图层时,需要使用LevelDefinitionLineStyle( )的构造函数实现。大致的流程为:创建图层后对图层的颜色与线形样式进行设置并应用于指定名称的图层上。
public static void CreateLevelWithColorAndLineStyle(string unparsed){DgnFile dgnFile = Session.Instance.GetActiveDgnFile();//获得当前激活的dgn文件DgnModel dgnModel = Session.Instance.GetActiveDgnModel();//获得当前激活的dgn模型string levelName = "TestLevel";//声明字符串指代图层名称FileLevelCache flc = dgnModel.GetFileLevelCache();//获得模型中的图层文件缓存flc.Write();//将文件写入缓存LevelHandle level = flc.GetLevelByName(levelName);//根据图层名称获得图层句柄if (!level.IsValid)//判断图层是否有效(若图层无效在则为真){EditLevelHandle elh = flc.CreateLevel(levelName);//声明名为levelName的图层LevelDefinitionColor color = new LevelDefinitionColor(4, dgnFile);//声明图层颜色定义elh.SetByLevelColor(color);//设置图层颜色elh.ByLevelWeight = 2;//设置图层线宽int num = LineStyleManager.GetNumberFromName("Simple 05 V2", dgnFile, true, true);//获得名为Simple 05 V2的线样式索引值LevelDefinitionLineStyle lineStyle = new LevelDefinitionLineStyle(num, null, dgnFile);//声明图层线样式索引elh.SetByLevelLineStyle(lineStyle);//设置图层线样式}}
在本案例中,首先创建了一个名为"TestLevel"的图层,然后设置图层颜色为颜色索引值为4的黄色,设置名为"Simple 05 V2"的样式为该图层的线形样式。<br />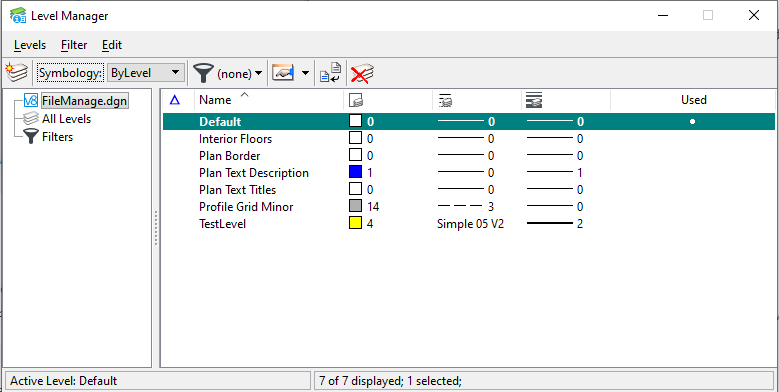<br />**图38 图层管理器界面**<br />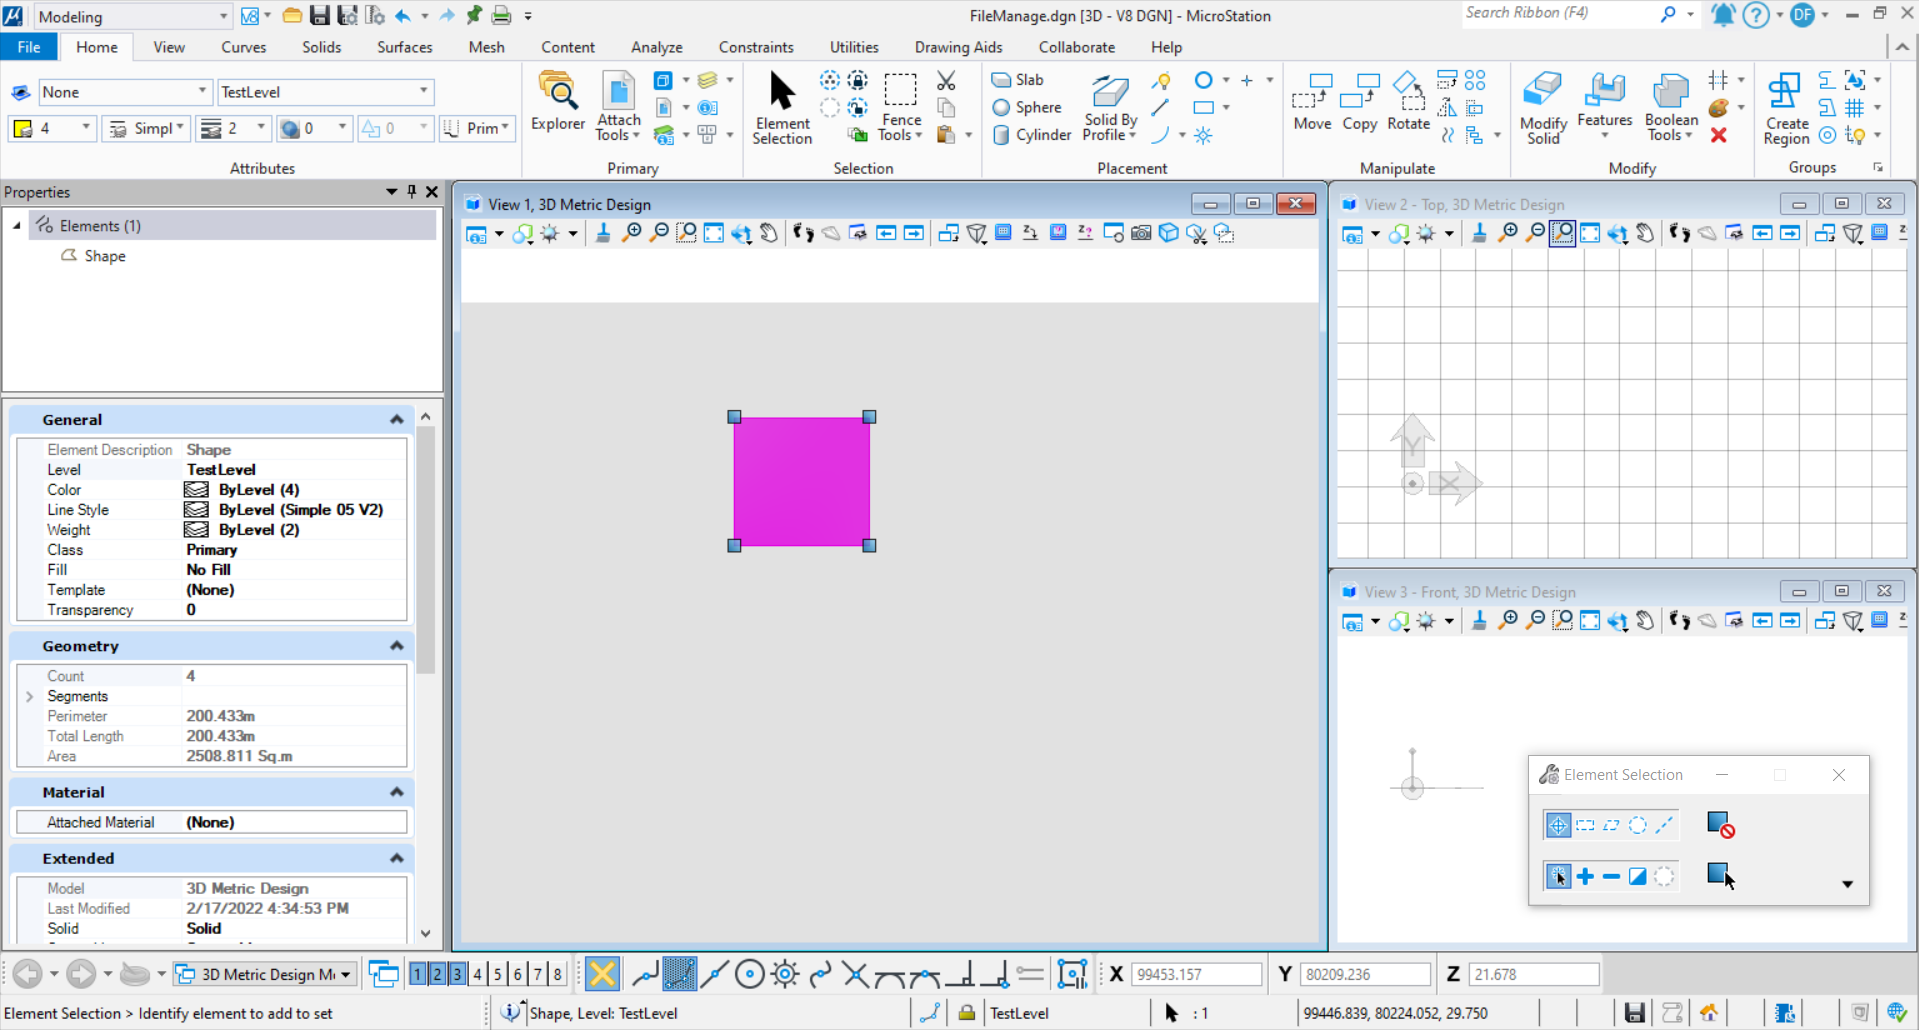<br />**图39 材质应用于元素后效果**
文字样式
创建文字样式
该方法用于创建自定义的文字样式,大致的流程为声明文字样式后设置文字样式中文字的字体,字体宽度,高度等属性。
public static void CreateTextStyle(string unparsed){DgnFile dgnFile = Session.Instance.GetActiveDgnFile();//获得当前激活的dgn文件1DgnModel dgnModel = Session.Instance.GetActiveDgnModel();//获得声明文本元素的模型空间double uorMeter = dgnModel.GetModelInfo().UorPerMeter;//获得当前模型中的单位DgnTextStyle textStyle = new DgnTextStyle("TestTextStyle", dgnFile);//声明文本样式DgnFont font = DgnFontManager.FindSystemFont("KaiTi",DgnFontFilterFlags.All);//获得名为"KaiTi"的字体textStyle.SetFontProperty(TextStyleProperty.Font, font);//设置字体textStyle.SetProperty(TextStyleProperty.Width,20* uorMeter);//设置文本宽度textStyle.SetProperty(TextStyleProperty.Height, 20 * uorMeter);//设置文本高度textStyle.Add(dgnFile);//将文本样式添加到文件中#region Create text elementTextBlockProperties txtBlockProp = new TextBlockProperties(dgnModel);//声明文本属性txtBlockProp.IsViewIndependent = false;//设置文本非独立于视图ParagraphProperties paraProp = new ParagraphProperties(dgnModel);//声明段落属性RunProperties runProp = new RunProperties(textStyle, dgnModel);//声明运行属性TextBlock txtBlock = new TextBlock(txtBlockProp, paraProp, runProp, dgnModel);//声明文本块txtBlock.AppendText("试验");//设置文本块文字内容TextElement text = (TextElement)TextElement.CreateElement(null, txtBlock);//声明文本元素text.AddToModel();//将生成的文本元素写入模型#endregion}
本案例中,首先创建了一个名为"TestTextStyle"的文字样式,并设置字体为楷体,文字宽度及高度均为20个单位长,然后创建文本块,设置文本内容后创建文本元素,最后将文本元素写入模型。<br />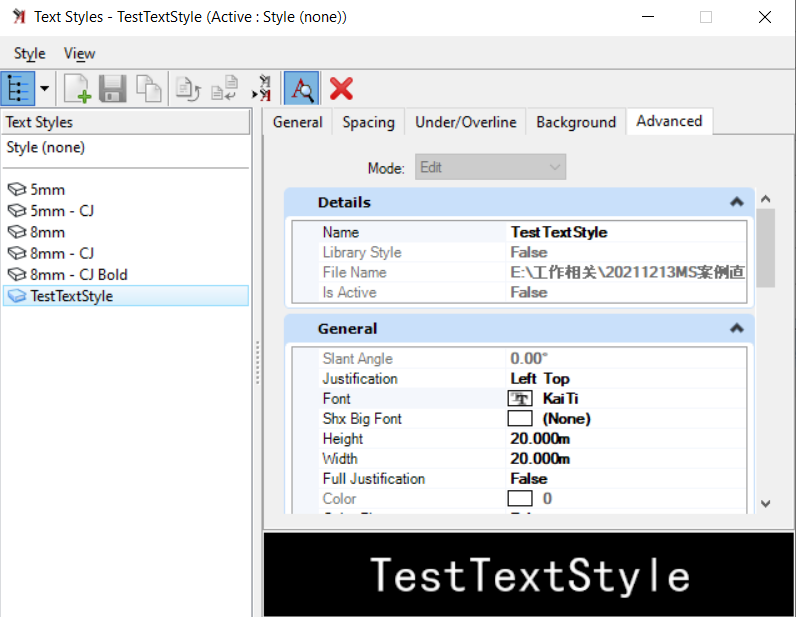<br />**图40 文本样式创建结果**<br />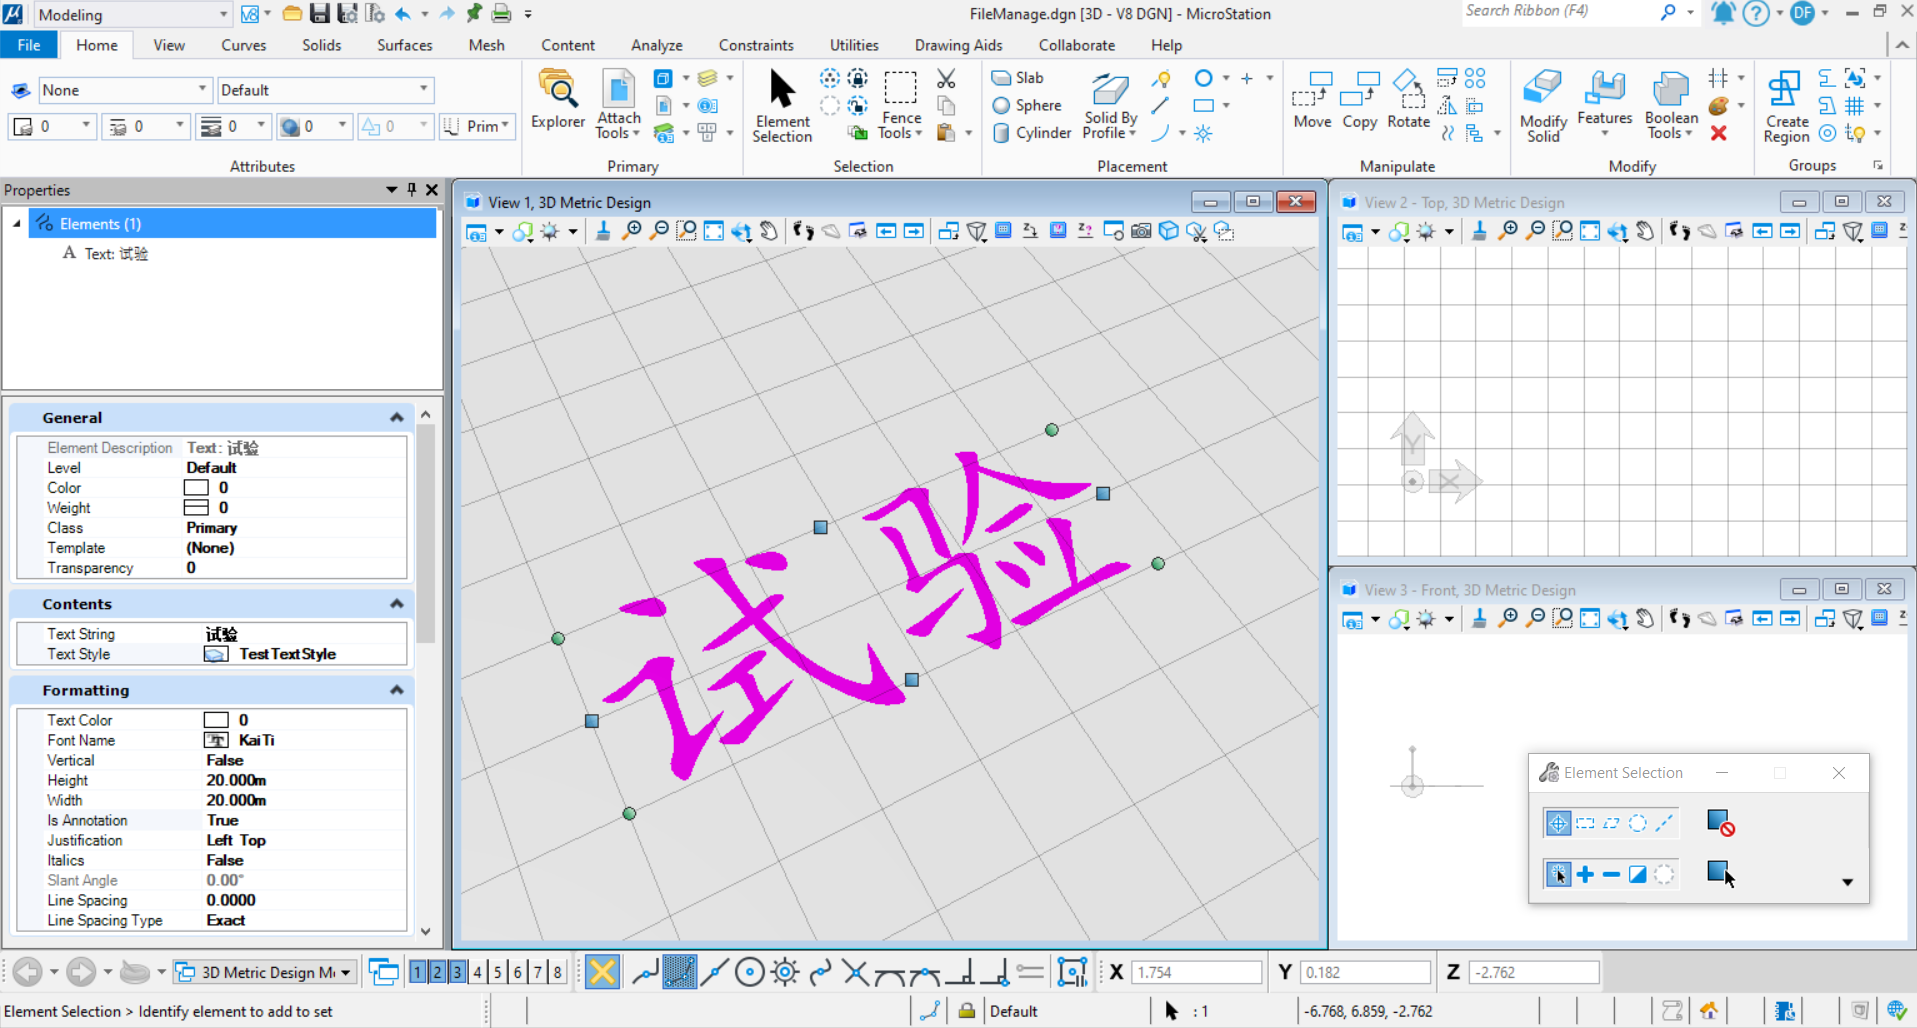<br />**图41 命令执行结果**
单元导入
参数化单元导入
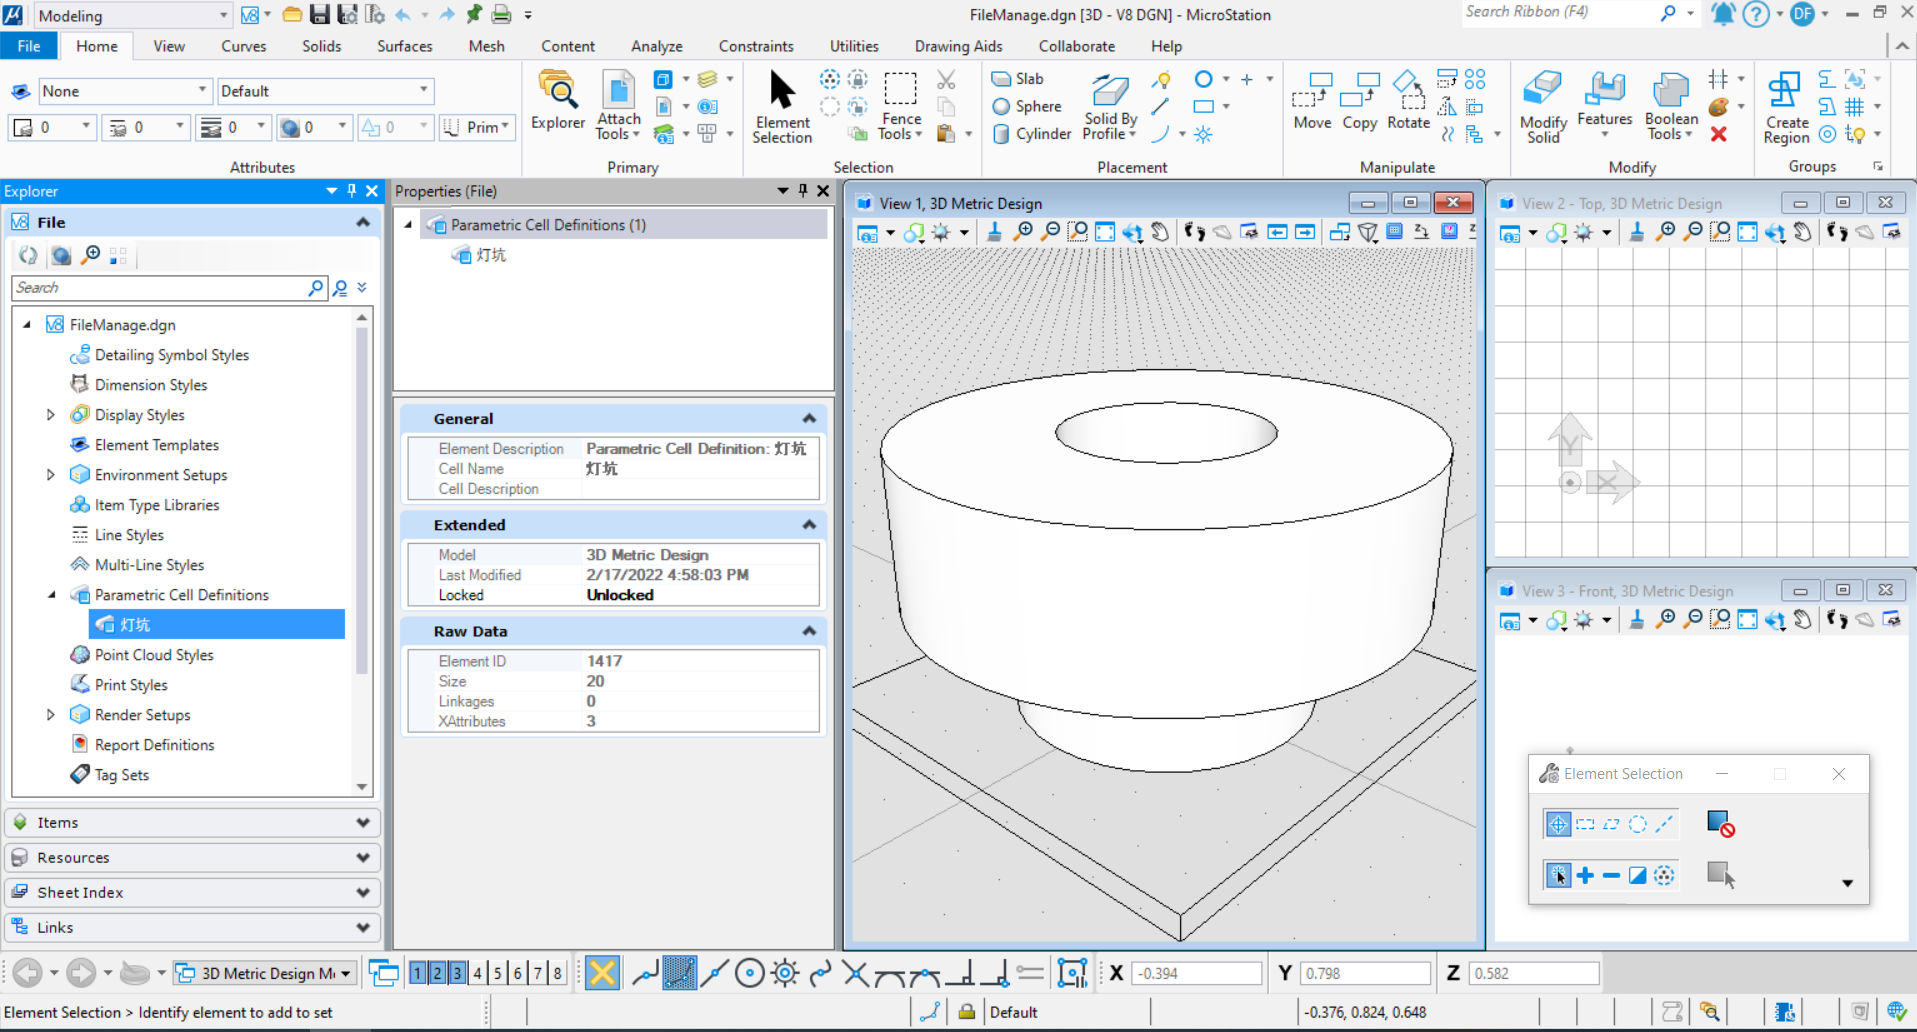
参数化单元的导入方法为获得参数化单元存放地址后读取参数化文件中的信息,找到指定名称的模型。使用找到的模型在需要导入单元的文件中定义参数化单元定义元素,此时参数化单元即导入成功。
public static void ImportParametricCellElement(string unparsed){const string cellName = "灯坑";//设置需要获取的单元名称string filePath = "E:\\工作相关\\20211213MS案例直播\\直播资料\\Part4\\dengkeng.cel";//设置单元库路径DgnDocument document = DgnDocument.CreateForLocalFile(filePath);//根据路径获取单元库文件DgnFileOwner owner = DgnFile.Create(document,DgnFileOpenMode.ReadOnly);//声明可读取文件信息的DgnFile对象DgnFile cellFile = owner.DgnFile;//获得读取文件信息的对象cellFile.LoadDgnFile(out StatusInt fileLoadStatus);//读取文件信息if(fileLoadStatus==StatusInt.Error)//若读取失败则返回{return;}ModelId id= cellFile.FindModelIdByName(cellName);//根据单元名称获取对应单元的模型IDDgnModel cellModel = cellFile.LoadRootModelById(out StatusInt modelLoadStatus,id);//根据模型ID获取对应的模型空间if (modelLoadStatus == StatusInt.Error)// 若读取失败则返回{return;}DgnFile dgnFile = Session.Instance.GetActiveDgnFile();//获取当前激活的文件DgnModel dgnModel = Session.Instance.GetActiveDgnModel();//获取当前激活的模型ParametricCellDefinitionElement pcDef = ParametricCellDefinitionElement.FindByName(cellName, dgnFile);//根据名称在文件中获取对应的参数化定义元素if (null == pcDef)//判断是否存在指定的参数化模型定义{DgnComponentDefinitionHandler hdlr = DgnComponentDefinitionHandler.GetForModel(cellModel);//获得模型中的定义句柄ParameterStatus status = hdlr.DefinitionModelHandler.CreateCellDefinition(dgnFile);//声明单元定义if (ParameterStatus.Success == status)//判断是否声明成功{pcDef = ParametricCellDefinitionElement.FindByName(cellName, dgnFile);//根据名称在文件中获取对应的参数化定义元素}else{MessageCenter.Instance.ShowErrorMessage("Error Creating cellDef", null, true);//输出参数化单元定义声明失败的提示return;}}if (pcDef!=null)//判断参数化单元定义是否成功声明{ParametricCellElement pcElem = ParametricCellElement.Create(pcDef, null, dgnModel);//使用参数化定义声明参数化元素DTransform3d trans = DTransform3d.Identity;//声明变换几何TransformInfo transInfo = new TransformInfo(trans);//声明变换信息pcElem.ApplyTransform(transInfo);//对参数化单元进行变换pcElem.AddToModel();//将参数化单元元素写入模型}}
普通单元导入
与参数化单元导入的方法类似,大致的流程未首先将指定位置的单元模型文件读取到内存中,然后根据名称获取指定模型,读取模型中的元素,在目标模型中使用所得模型中的元素对普通单元进行定义。
public static void ImportCellElement(string unparsed){const string cellName = "服务车道平缝加拉杆直径14mm";//设置需要获取的单元名称string filePath = "E:\\工作相关\\20211213MS案例直播\\直播资料\\Part4\\拉杆 (1).cel";//设置单元库路径DgnDocument document = DgnDocument.CreateForLocalFile(filePath);//根据路径获取单元库文件DgnFileOwner owner = DgnFile.Create(document, DgnFileOpenMode.ReadOnly);//声明可读取文件信息的DgnFile对象DgnFile cellFile = owner.DgnFile;//获得读取文件信息的对象cellFile.LoadDgnFile(out StatusInt fileLoadStatus);//读取文件信息if (fileLoadStatus == StatusInt.Error)//若读取失败则返回{return;}ModelId id = cellFile.FindModelIdByName(cellName);//根据单元名称获取对应单元的模型IDDgnModel cellModel = cellFile.LoadRootModelById(out StatusInt modelLoadStatus, id);//根据模型ID获取对应的模型空间if (modelLoadStatus == StatusInt.Error)// 若读取失败则返回{return;}DgnModel dgnModel = Session.Instance.GetActiveDgnModel();//获取当前激活的模型List<Element> elems = new List<Element>();//声明单元子元素列表foreach (Element elem in cellModel.GetElements())//对普通单元的模型进行遍历{if (elem.IsGraphics)//将单元中的子元素添加到列表中{elems.Add(elem);}}CellHeaderElement cellHeaderElem = CellHeaderElement.CreateOrphanCellElement(dgnModel, cellName, elems);//使用子元素声明普通单元DTransform3d trans = DTransform3d.FromMatrixAndFixedPoint(DMatrix3d.Identity, DPoint3d.Zero);//声明几何变换TransformInfo transform = new TransformInfo(trans);//声明变换信息cellHeaderElem.ApplyTransform(transform);//对普通单元应用变换cellHeaderElem.AddToModel();//将普通单元写入模型}
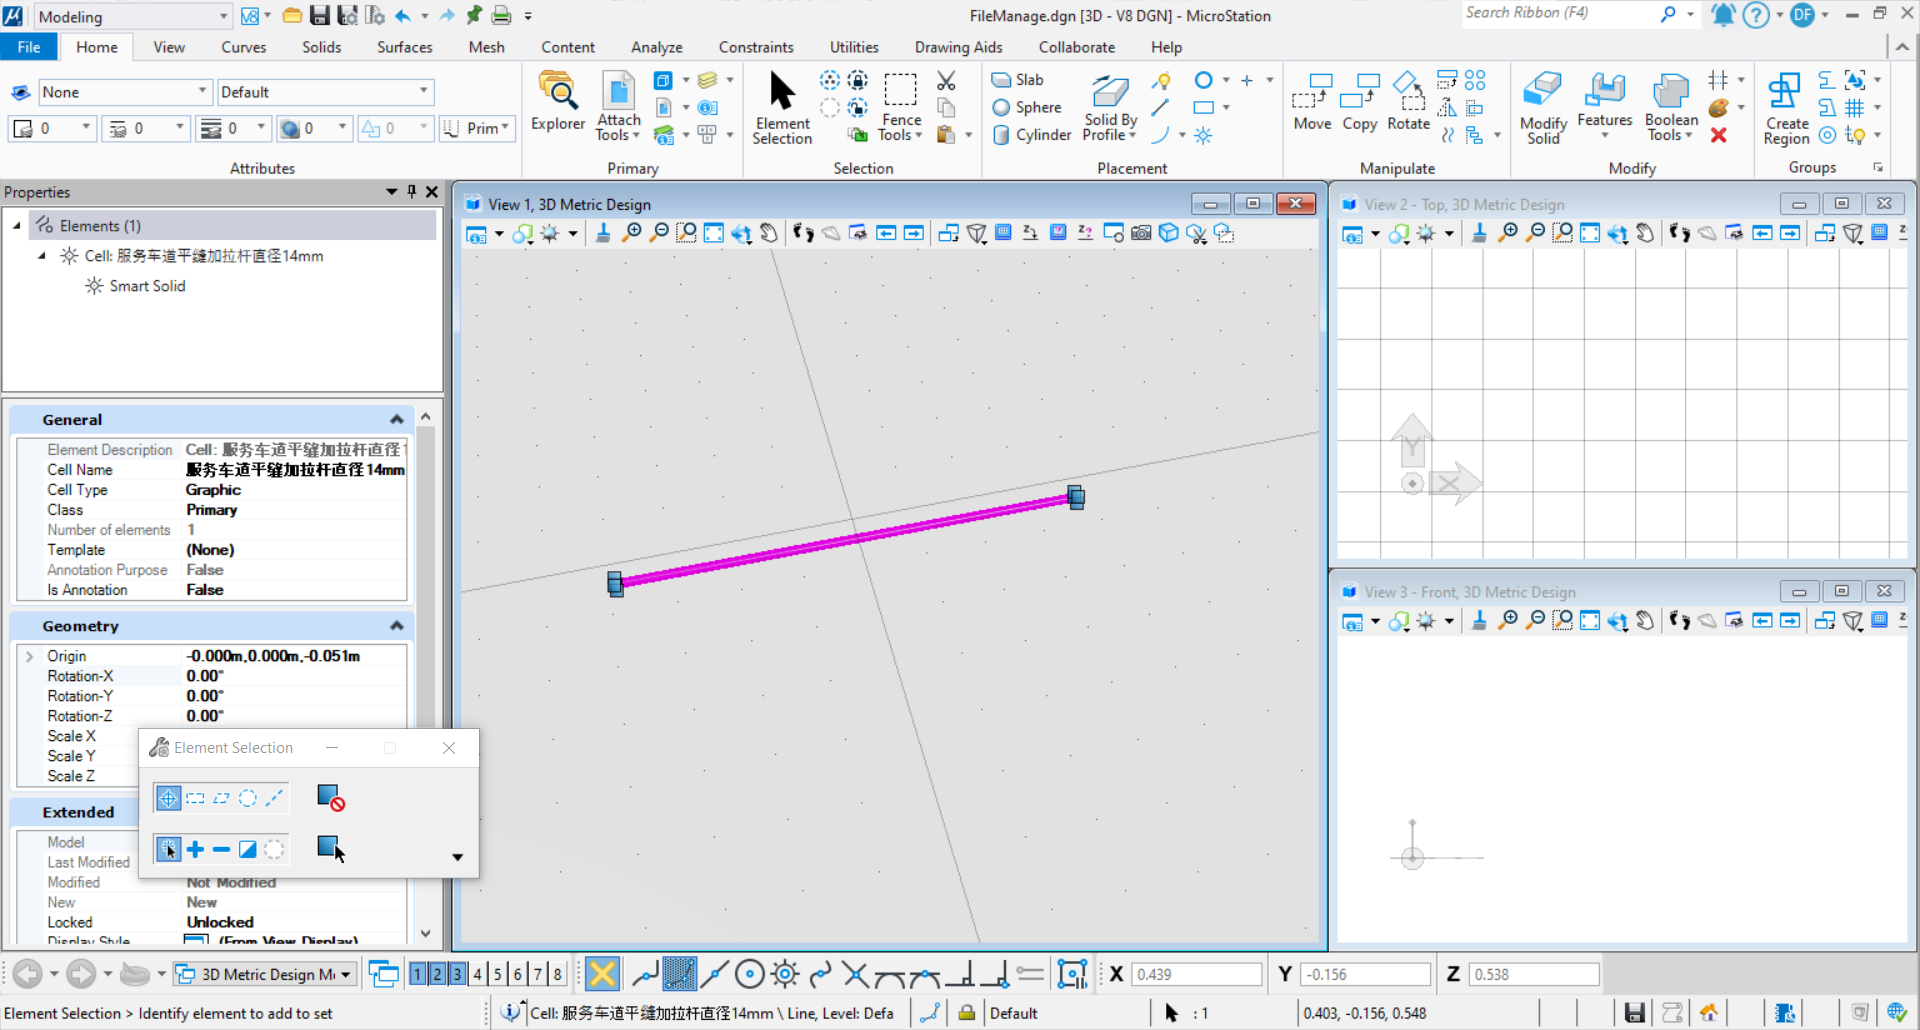
图43 命令执行结果

若有收获,就点个赞吧
0 人点赞
