概述
快速本地构建k8s集群
官方地址:https://kind.sigs.k8s.io/
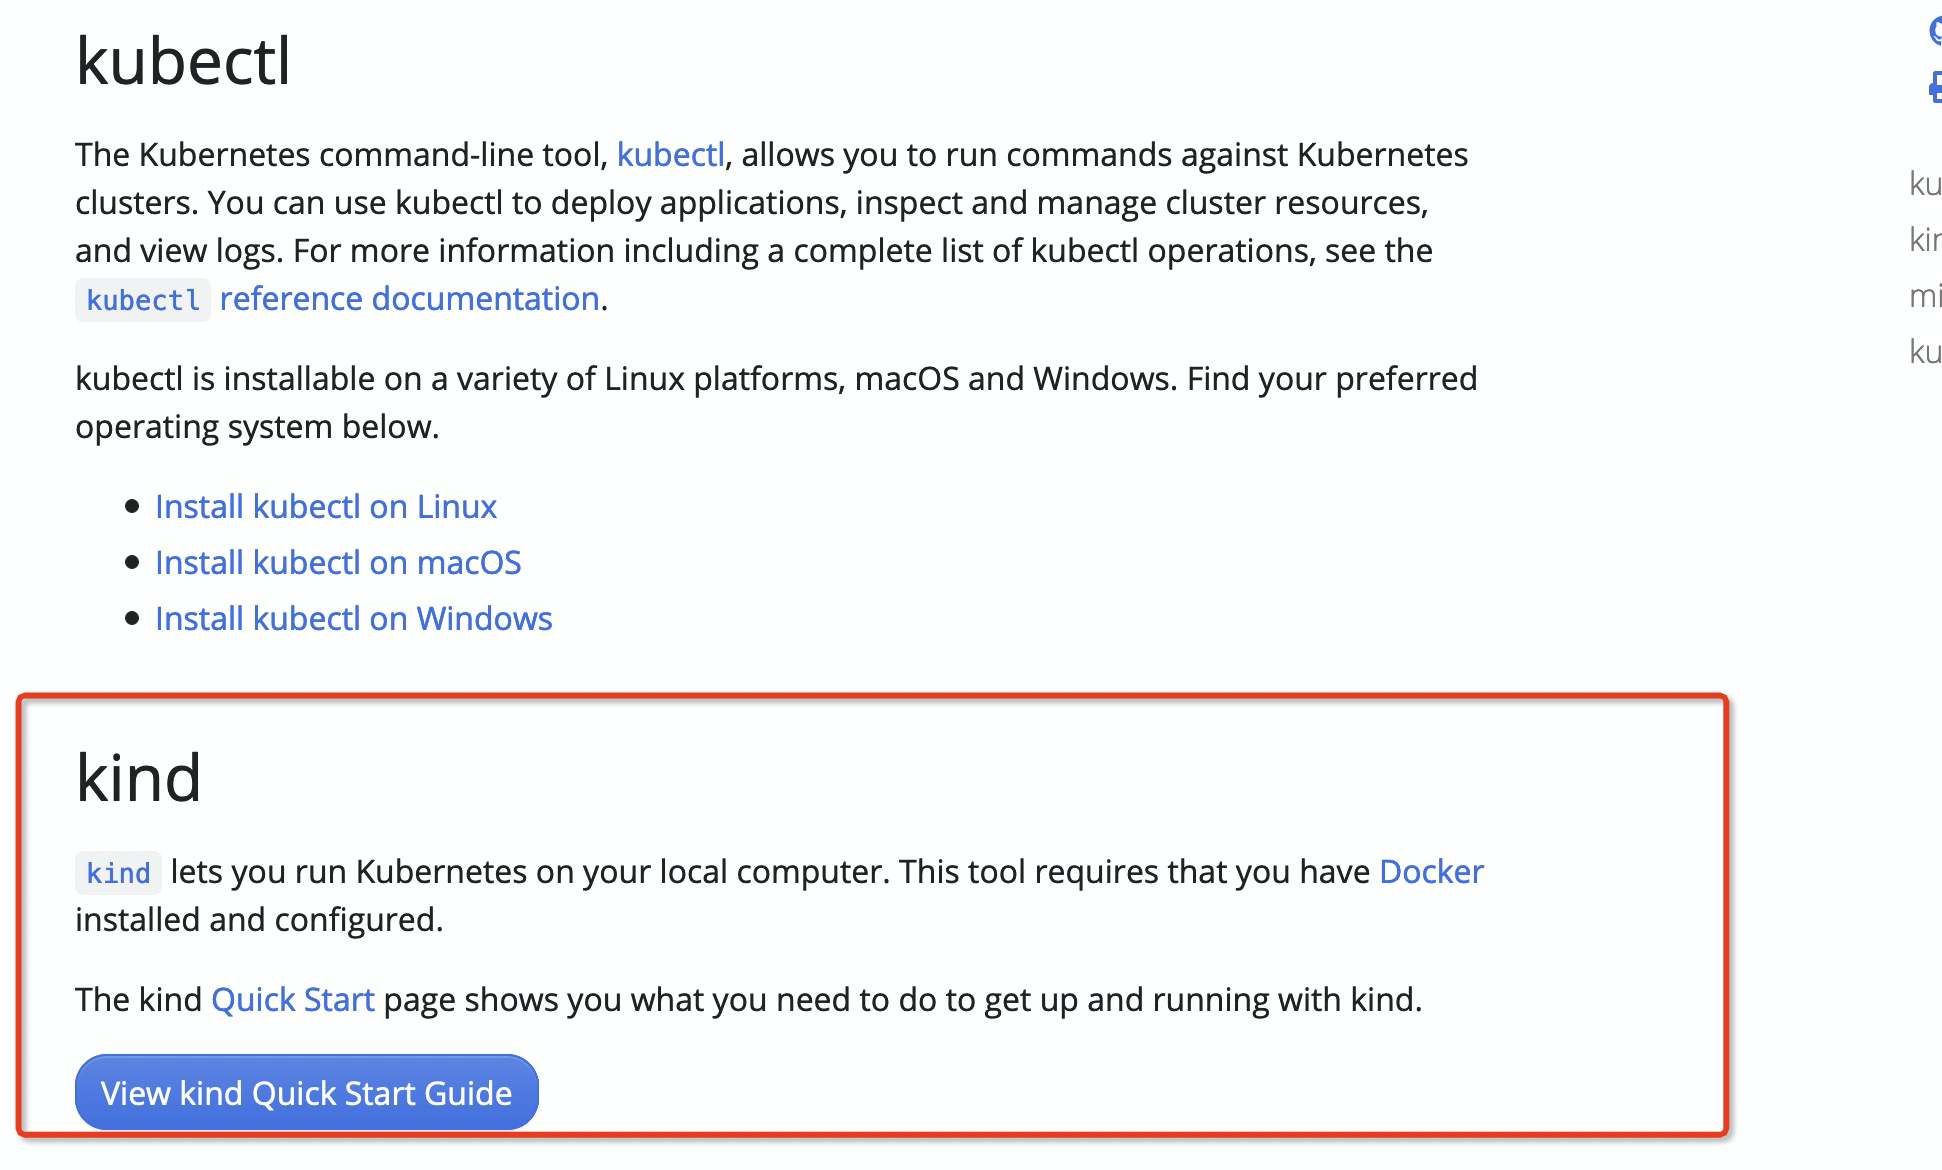
k8s官网也推荐了kind作为k8s的一种安装方式。https://kubernetes.io/docs/tasks/tools/
 kind安装
需要安装go开发环境
源码编译安装
对go的版本要求是>=1.14,建议把安装GO111MODULE=”on” go get sigs.k8s.io/kind@v0.11.1 执行后会把kind的二进制文件放在$(go env GOPATH)/bin 建议把go/bin的路径设置成环境变量
GO111MODULE="on" go get sigs.k8s.io/kind@v0.11.1go: downloading sigs.k8s.io/kind v0.11.1go: downloading github.com/spf13/cobra v1.1.1go: downloading k8s.io/apimachinery v0.20.2go: downloading github.com/alessio/shellescape v1.4.1go: downloading github.com/pelletier/go-toml v1.8.1go: downloading github.com/evanphx/json-patch v4.9.0+incompatiblego: downloading github.com/evanphx/json-patch/v5 v5.2.0
二进制安装
curl -Lo ./kind https://kind.sigs.k8s.io/dl/v0.11.1/kind-linux-amd64chmod +x ./kindmv ./kind /{PATH执行目录}/kind
macos 也可以直接使用brew
brew install kind
window安装
curl.exe -Lo kind-windows-amd64.exe https://kind.sigs.k8s.io/dl/v0.11.1/kind-windows-amd64Move-Item .\kind-windows-amd64.exe c:\some-dir-in-your-PATH\kind.exe
kubectl安装
根据平台安装对应的kubectl,官方的安装教程就是标准。
- Install kubectl on Linux
- Install kubectl on macOS
- Install kubectl on Windows
帮助
```shell kind kind creates and manages local Kubernetes clusters using Docker container ‘nodes’
Usage: kind [command]
Available Commands: build Build one of [node-image] completion Output shell completion code for the specified shell (bash, zsh or fish) create Creates one of [cluster] delete Deletes one of [cluster] export Exports one of [kubeconfig, logs] get Gets one of [clusters, nodes, kubeconfig] help Help about any command load Loads images into nodes version Prints the kind CLI version
Flags: -h, —help help for kind —loglevel string DEPRECATED: see -v instead -q, —quiet silence all stderr output -v, —verbosity int32 info log verbosity —version version for kind
Use “kind [command] —help” for more information about a command.
<a name="V9Ixr"></a>## 创建机器```shellkind create clusterCreating cluster "kind" ...✓ Ensuring node image (kindest/node:v1.21.1) 🖼✓ Preparing nodes 📦✓ Writing configuration 📜✓ Starting control-plane 🕹️✓ Installing CNI 🔌✓ Installing StorageClass 💾Set kubectl context to "kind-kind"You can now use your cluster with:kubectl cluster-info --context kind-kindNot sure what to do next? 😅 Check out https://kind.sigs.k8s.io/docs/user/quick-start/
删除
kind delete clusterDeleting cluster "kind" ...
删除所有集群
kind delete clusters --allDeleted clusters: ["k8s" "mycluster"]
镜像版本
kind create cluster -hCreates a local Kubernetes cluster using Docker container 'nodes'Usage:kind create cluster [flags]Flags:--config string path to a kind config file-h, --help help for cluster--image string node docker image to use for booting the cluster--kubeconfig string sets kubeconfig path instead of $KUBECONFIG or $HOME/.kube/config--name string cluster name, overrides KIND_CLUSTER_NAME, config (default kind)--retain retain nodes for debugging when cluster creation fails--wait duration wait for control plane node to be ready (default 0s)Global Flags:--loglevel string DEPRECATED: see -v instead-q, --quiet silence all stderr output-v, --verbosity int32 info log verbosity
https://registry.hub.docker.com/r/kindest/node
kind create cluster --name k8s --image kindest/node:v1.19.7
查看容器
$ docker psCONTAINER ID IMAGE COMMAND CREATED STATUS PORTS NAMES1c13d9625e23 kindest/node:v1.19.7 "/usr/local/bin/entr…" 46 minutes ago Up 46 minutes 127.0.0.1:50035->6443/tcp k8s-control-plane$docker exec k8s-control-plane crictl psCONTAINER IMAGE CREATED STATE NAME ATTEMPT POD IDf45838e47358a 38858e77904d0 13 minutes ago Running kube-controller-manager 1 ea5ce3281ea14810f12742c561 e422121c9c5f9 13 minutes ago Running local-path-provisioner 1 1b6337b06b28a894672913740d 4b7bb91932023 13 minutes ago Running kube-scheduler 1 662ef581558d833fb275c70fa8 bfe3a36ebd252 46 minutes ago Running coredns 0 b095ceb7cff2d05daf08a5e6e3 bfe3a36ebd252 46 minutes ago Running coredns 0 97c4f744b37c429609f5ad3159 6b17089e24fdb 47 minutes ago Running kindnet-cni 0 081016461b36462c2df652e8e6 96cb067c0d468 47 minutes ago Running kube-proxy 0 02831473d01f2d6cd7d73d53d5 0369cf4303ffd 47 minutes ago Running etcd 0 f3979a039e74f8d711d2a80009 6d4f78553215b 47 minutes ago Running kube-apiserver 0 5cdbd226f8756
kind load
官方文档说明https://kind.sigs.k8s.io/docs/user/quick-start/#loading-an-image-into-your-cluster
docker build -t my-custom-image:unique-tag ./my-image-dirkind load docker-image my-custom-image:unique-tag
通过kind load docker-image 命令把镜像加载进去
kind load docker-image k8s.gcr.io/ingress-nginx/controller:v0.47.0 --name=k8sImage: "k8s.gcr.io/ingress-nginx/controller:v0.47.0" with ID "sha256:bf621a764db545fb64e7681c42e44ef33ad58165696359fbd26edc9a7e74a0c5" not yet present on node "k8s-control-plane", loading..
查看容器内镜像
$docker exec -it k8s-control-plane crictl images |grep ingress-nginxk8s.gcr.io/ingress-nginx/controller v0.47.0 bf621a764db54 101MB
配置文件搭建
设置集群执行使用配置文件方式
kind create cluster --config=yaml配置文件
官方文档 https://kind.sigs.k8s.io/docs/user/configuration/
设置名称
kind: ClusterapiVersion: kind.x-k8s.io/v1alpha4name: app-1-cluster
设置宿主机端口
kind: ClusterapiVersion: kind.x-k8s.io/v1alpha4name: k8snodes:- role: control-planeimage: kindest/node:v1.19.11@sha256:07db187ae84b4b7de440a73886f008cf903fcf5764ba8106a9fd5243d6f32729extraPortMappings:- containerPort: 30000hostPort: 30000listenAddress: "0.0.0.0"protocol: tcp
通过参数extraPortMappings 设置 hostPort 和容器内容端口实现
设置多节点集群
# three node (two workers) cluster configkind: ClusterapiVersion: kind.x-k8s.io/v1alpha4nodes:- role: control-plane- role: worker- role: worker
设置HA集群
# a cluster with 3 control-plane nodes and 3 workerskind: ClusterapiVersion: kind.x-k8s.io/v1alpha4nodes:- role: control-plane- role: control-plane- role: control-plane- role: worker- role: worker- role: worker
集群搭建需要使用配置文件方式,创建配置文件
kind: ClusterapiVersion: kind.x-k8s.io/v1alpha4networking:apiServerPort: 6443podSubnet: "10.244.0.0/16"kubeProxyMode: "ipvs"nodes:- role: control-plane- role: worker- role: workerimage: kindest/node:v1.19.11@sha256:07db187ae84b4b7de440a73886f008cf903fcf5764ba8106a9fd5243d6f32729
设置集群中k8s版本
image 设置版本 https://github.com/kubernetes-sigs/kind/releases 需要设置docker的sha256信息
[
](https://github.com/kubernetes-sigs/kind/releases)
常见的几个版本sha256值:
mages built for this release:1.21: kindest/node:v1.21.1@sha256:69860bda5563ac81e3c0057d654b5253219618a22ec3a346306239bba8cfa1a61.20: kindest/node:v1.20.7@sha256:cbeaf907fc78ac97ce7b625e4bf0de16e3ea725daf6b04f930bd14c67c671ff91.19: kindest/node:v1.19.11@sha256:07db187ae84b4b7de440a73886f008cf903fcf5764ba8106a9fd5243d6f327291.18: kindest/node:v1.18.19@sha256:7af1492e19b3192a79f606e43c35fb741e520d195f96399284515f077b3b622c1.17: kindest/node:v1.17.17@sha256:66f1d0d91a88b8a001811e2f1054af60eef3b669a9a74f9b6db871f2f1eeed001.16: kindest/node:v1.16.15@sha256:83067ed51bf2a3395b24687094e283a7c7c865ccc12a8b1d7aa673ba0c5e88611.15: kindest/node:v1.15.12@sha256:b920920e1eda689d9936dfcf7332701e80be12566999152626b2c9d730397a951.14: kindest/node:v1.14.10@sha256:f8a66ef82822ab4f7569e91a5bccaf27bceee135c1457c512e54de8c6f7219f8
创建集群命令
kind create cluster --config=kind-cluster.yaml
查看当前结果
kubectl get nodesNAME STATUS ROLES AGE VERSIONkind-control-plane Ready control-plane,master 3m40s v1.21.1kind-worker Ready <none> 3m8s v1.21.1kind-worker2 Ready <none> 3m8s v1.19.11
操作命令
kind get clustersk8skind
查看当前的集群,kubectl上下文目前已经被设置为最新的集群
kubectl config get-contextsCURRENT NAME CLUSTER AUTHINFO NAMESPACEdocker-desktop docker-desktop docker-desktopkind-k8s kind-k8s kind-k8s* kind-kind kind-kind kind-kind
修改上下文
kubectl config set-context kind-k8sContext "kind-k8s" modified.
ingress-nginx
kind机器配置文件
kind: ClusterapiVersion: kind.x-k8s.io/v1alpha4name: k8snodes:- role: control-planeimage: kindest/node:v1.19.11@sha256:07db187ae84b4b7de440a73886f008cf903fcf5764ba8106a9fd5243d6f32729kubeadmConfigPatches:- |kind: InitConfigurationnodeRegistration:kubeletExtraArgs:node-labels: "ingress-ready=true"extraPortMappings:- containerPort: 80hostPort: 80protocol: TCP- containerPort: 443hostPort: 443protocol: TCP
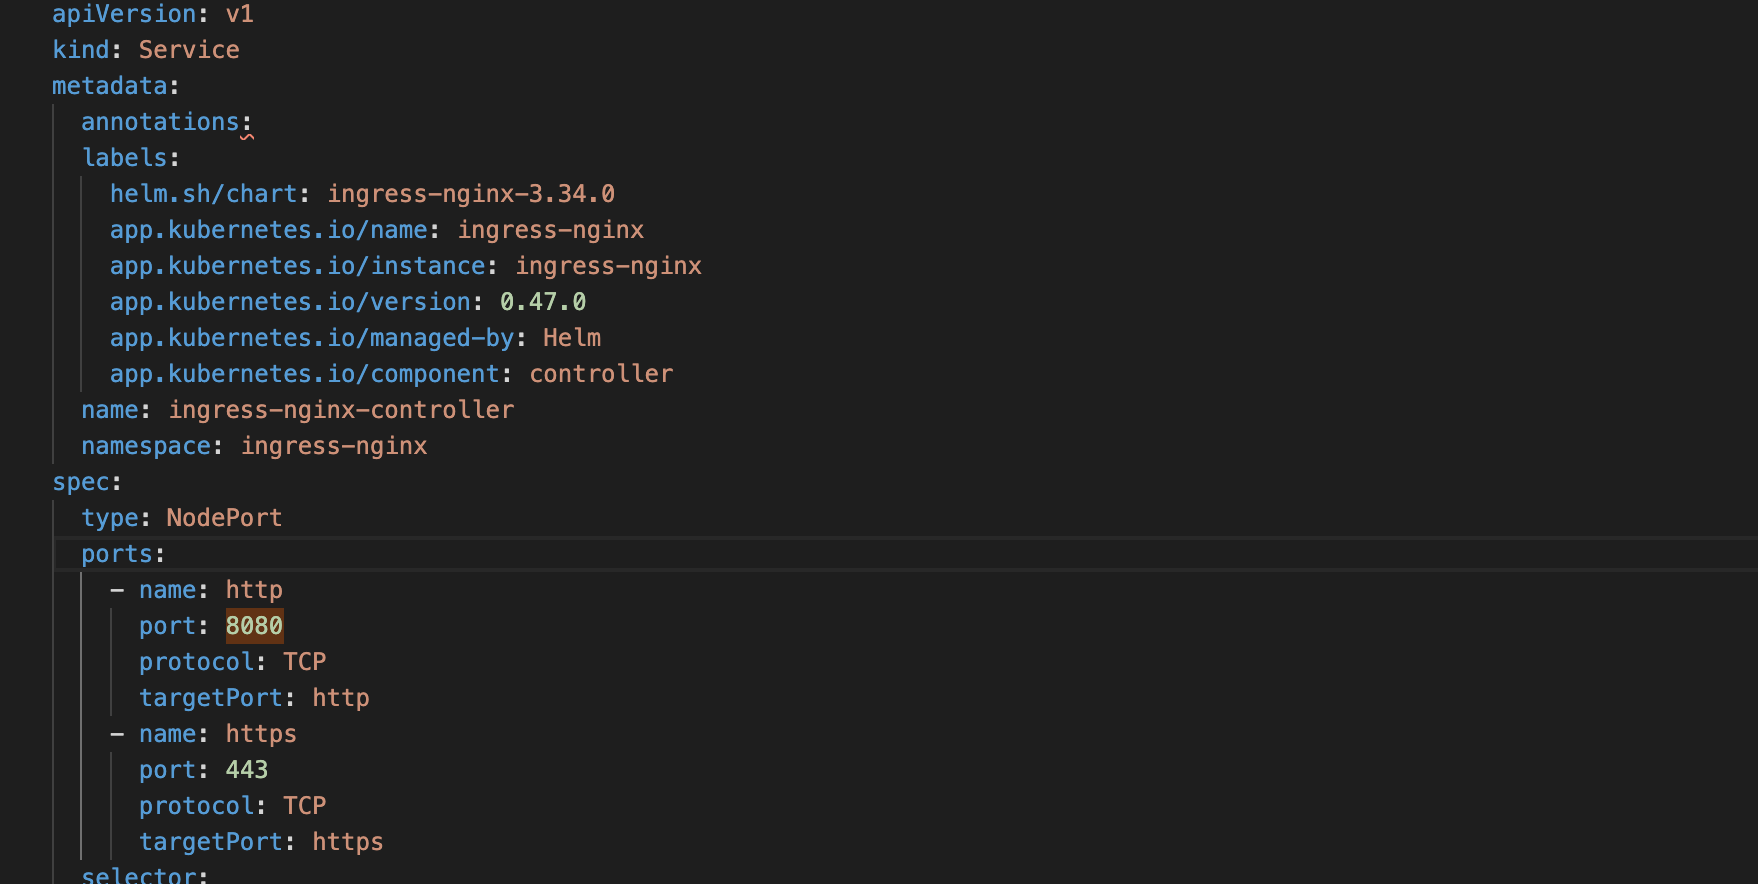
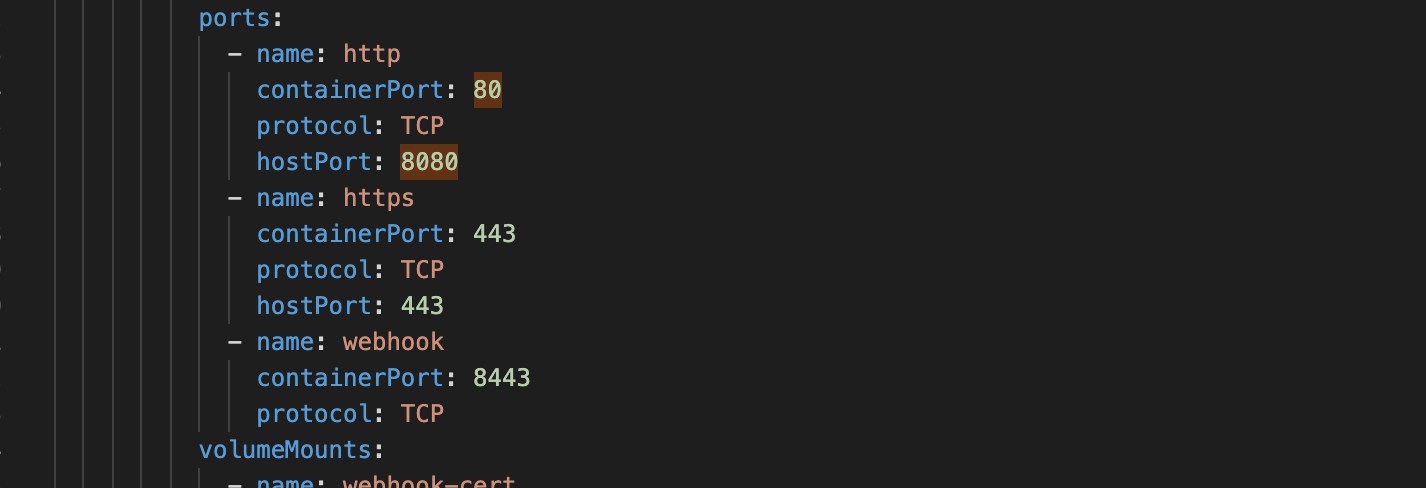
或者可以修改暴露接口8080
kind: ClusterapiVersion: kind.x-k8s.io/v1alpha4name: k8snodes:- role: control-planeimage: kindest/node:v1.19.11@sha256:07db187ae84b4b7de440a73886f008cf903fcf5764ba8106a9fd5243d6f32729kubeadmConfigPatches:- |kind: InitConfigurationnodeRegistration:kubeletExtraArgs:node-labels: "ingress-ready=true"extraPortMappings:- containerPort: 8080hostPort: 8080protocol: TCP- containerPort: 443hostPort: 443protocol: TCP
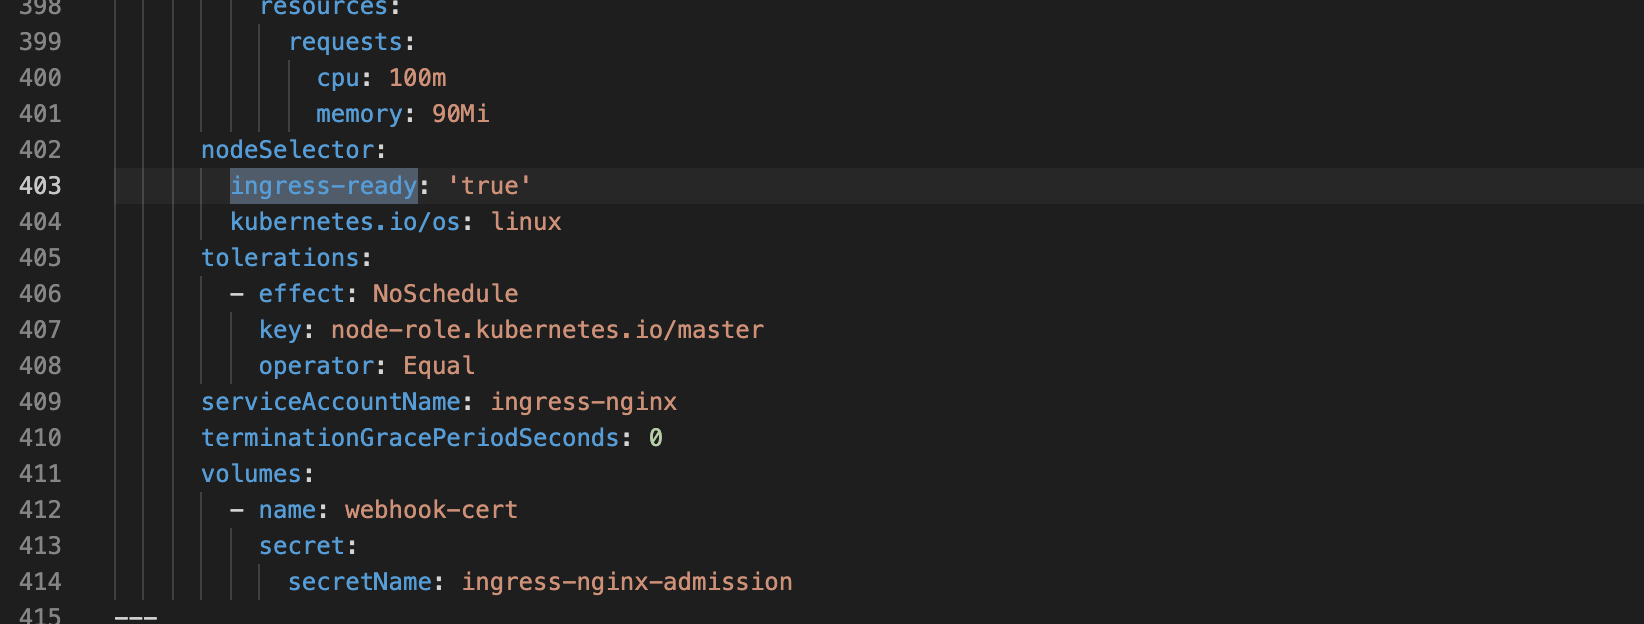
因为有node选择和亲和选择
官方教程https://kind.sigs.k8s.io/docs/user/ingress/#ingress-nginx
VERSION=$(curl https://raw.githubusercontent.com/kubernetes/ingress-nginx/master/stable.txt)kubectl apply -f https://raw.githubusercontent.com/kubernetes/ingress-nginx/${VERSION}/deploy/static/provider/kind/deploy.yaml
v0.47.0版本的
kubectl apply -f https://raw.githubusercontent.com/kubernetes/ingress-nginx/controller-v0.47.0/deploy/static/provider/kind/deploy.yaml
如果不是80端口

镜像拉取失败替换成国内registry.cn-hangzhou.aliyuncs.com/google_containers/nginx-ingress-controller
image: registry.cn-hangzhou.aliyuncs.com/google_containers/nginx-ingress-controller:v0.47.0@sha256:a1e4efc107be0bb78f32eaec37bef17d7a0c81bec8066cdf2572508d21351d0bimagePullPolicy: IfNotPresent
验证kind-usage.yaml
kind: PodapiVersion: v1metadata:name: foo-applabels:app: foospec:containers:- name: foo-appimage: hashicorp/http-echo:0.2.3args:- "-text=foo"---kind: ServiceapiVersion: v1metadata:name: foo-servicespec:selector:app: fooports:# Default port used by the image- port: 5678---kind: PodapiVersion: v1metadata:name: bar-applabels:app: barspec:containers:- name: bar-appimage: hashicorp/http-echo:0.2.3args:- "-text=bar"---kind: ServiceapiVersion: v1metadata:name: bar-servicespec:selector:app: barports:# Default port used by the image- port: 5678---apiVersion: networking.k8s.io/v1kind: Ingressmetadata:name: example-ingressspec:rules:- http:paths:- pathType: Prefixpath: "/foo"backend:service:name: foo-serviceport:number: 5678- pathType: Prefixpath: "/bar"backend:service:name: bar-serviceport:number: 5678
如果出现https://github.com/kubernetes/ingress-nginx/issues/5401这个问题
Internal error occurred: failed calling webhook "validate.nginx.ingress.kubernetes.io
最简单快捷的方式
kubectl delete -A ValidatingWebhookConfiguration ingress-nginx-admission
测试
$ curl localhost:8080/barbar$ curl localhost:8080/foofoo
Nodeport
创建nginx.yaml
---apiVersion: apps/v1kind: Deploymentmetadata:name: nginx-deploynamespace: defaultspec:replicas: 1selector:matchLabels:app: nginxtemplate:metadata:labels:app: nginxspec:containers:- name: nginximage: nginx:1.14ports:- name: httpcontainerPort: 80---apiVersion: v1kind: Servicemetadata:name: nginxnamespace: defaultspec:selector:app: nginxtype: NodePortports:- port: 80targetPort: 80nodePort: 30001
执行
kubectl apply -f nginx.yaml
查看svc
kubectl get svc -ANAMESPACE NAME TYPE CLUSTER-IP EXTERNAL-IP PORT(S) AGEdefault nginx NodePort 10.96.8.57 <none> 80:30001/TCP 7m37s
执行
kubectl port-forward --address 0.0.0.0 service/nginx 30001:80
或者通过docker exec 进入kind容器内,下面的495d75d015a8就是kind创建的k8s容器
docker exec -it 495d75d015a8 bashroot@k8s-control-plane:/# curl localhost:30001<!DOCTYPE html><html><head><title>Welcome to nginx!</title><style>body {width: 35em;margin: 0 auto;font-family: Tahoma, Verdana, Arial, sans-serif;}</style></head><body><h1>Welcome to nginx!</h1><p>If you see this page, the nginx web server is successfully installed andworking. Further configuration is required.</p><p>For online documentation and support please refer to<a href="http://nginx.org/">nginx.org</a>.<br/>Commercial support is available at<a href="http://nginx.com/">nginx.com</a>.</p><p><em>Thank you for using nginx.</em></p></body></html>helloWed Jul 14 10:39:16 UTC 2021
参考
https://kind.sigs.k8s.io/docs/user/quick-start/#installation
https://stackoverflow.com/questions/62432961/how-to-use-nodeport-with-kind
https://zhuanlan.zhihu.com/p/259543032
https://kubernetes.io/docs/tasks/access-application-cluster/port-forward-access-application-cluster/


