本篇是在写个人 react-native 项目中运用的,其他项目配置略有差异,酌情使用
perttier官方文档
https://www.prettier.cn/docs/install.html
步骤
安装 prettier 并check 项目代码
# 安装依赖yarn add --dev --exact prettier# 添加prettier的配置文件echo module.exports = {}> prettier.config.js# 执行检查npx prettier --check .
配合使用 Git hooks (husky)
husky: https://www.npmjs.com/package/husky
说明:
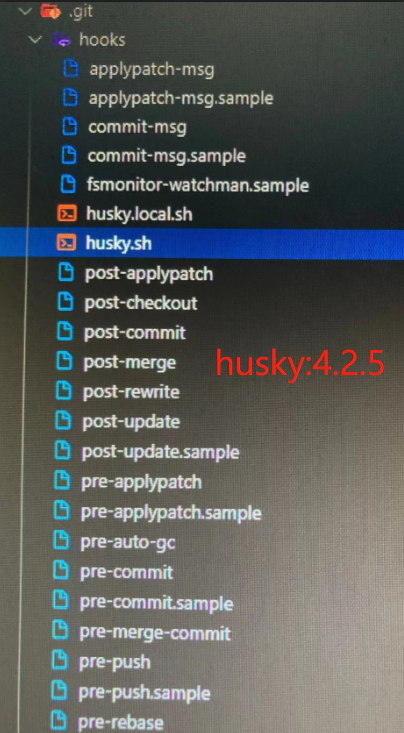
下图中的 以 .sample 结尾的钩子文件并不会在进行git操作的时候触发,只有这样的文件【pre-commit】的文件才会执行。如果只是单纯的手动修改文件名,确实可以在自己本地运行,但是,并不能同步到远程代码仓库,所以在协同开发下手动修改文件名还是会引发一些别的问题。然后 husky 就是用来解决这个问题的插件。
- 老版本的husky(之前用过4.2.5版本)是通过修改 .git/hooks 里面的钩子函数文件(去掉 .sample 扩展名),来达到拦截处理功能的
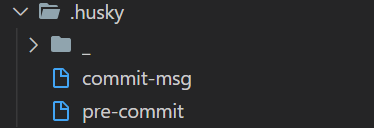
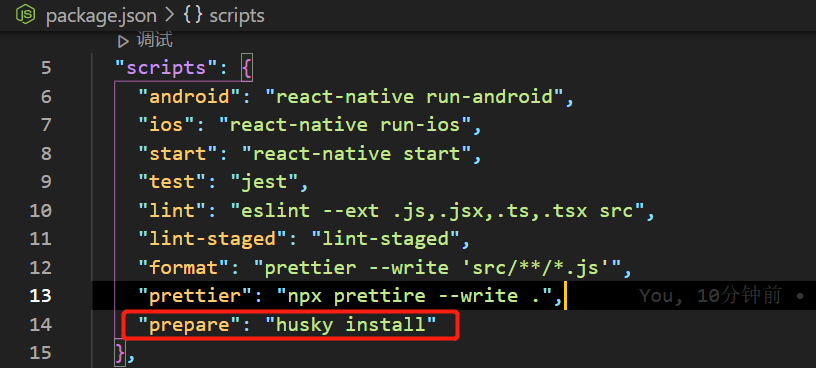
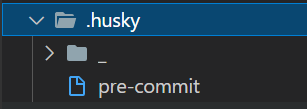
- 新版本的husky(我用的最新的 8.0.1)支持在项目根目录下创建 .husky 目录,在里面编写需要用到的git hooks(如下图)。通过在 npm scripts 中增加脚本命令 “prepare”:”husky install”的方式,来使得协同开发人员拉取仓库代码并安装node_modules的时候,执行 husky install 命令【npm原理】 ,开启husky。
# 安装依赖yarn add --dev husky lint-staged# 启用 husky, 执行命令后可在项目目录查看效果 .git/config [core] hooksPath = .husky# 混入 项目根目录下的 .husky 文件夹,以达到使用 git hooks 的目的npx husky install# 在package.json 中写入 脚本# 如果执行失败或者没有成功写入脚本,可选择升级npm版本的方式处理 npm install -g npm 继续执行命令# 或者使用 该命令: npm pkg set scripts.prepare "husky install"npm set-script prepare "husky install"# 创建 hook, 在根目录生成 .husky/pre-commit 文件npx husky add .husky/pre-commit "npx lint-staged"

"prettier": "2.7.0","husky": "^8.0.1","lint-staged": "^13.0.1",
配置 prettier.config.js
https://blog.csdn.net/qq_38734862/article/details/106769973
module.exports = {"arrowParens": "always","bracketSpacing": true, // 在对象,数组括号与文字之间加空格 "{ foo: bar }""endOfLine": "auto", // 结尾是 \n \r \n\r auto"htmlWhitespaceSensitivity": "css","insertPragma": false,"requirePragma": false,"bracketSameLine": false,"printWidth": 120, // 超过最大值换行"singleQuote": true, // 使用单引号代替双引号"useTabs": false, // 缩进不使用tab,使用空格"semi": true, // 句尾添加分号"tabWidth": 2, // 缩进字节数"trailingComma": "es5", // 在对象或数组最后一个元素后面是否加逗号(在ES5中加尾逗号)"jsxSingleQuote": false,"quoteProps": "as-needed","proseWrap": "preserve" // 默认值。因为使用了一些折行敏感型的渲染器(如GitHub comment)而按照markdown文本样式进行折行}
配合使用ESLint
步骤
官网文档: http://eslint.cn/docs/user-guide/configuring
项目中安装包yarn add eslint配置 ESlintnpx eslint --init

配置 .eslintrc.js
- “off” or 0 - 关闭规则
- “warn” or 1 - 将规则视为一个警告(不会影响退出码)
- “error” or 2 - 将规则视为一个错误 (退出码为1)
```javascript
module.exports = {
// 解析器
“parser”: ‘babel-eslint’,
“env”: {
“browser”: true,
“es6”: true,
“node”: true
},
“extends”: [
“eslint:recommended”,
“plugin:react/recommended”
],
“settings”: {
“react”: {
} }, “parserOptions”: { “ecmaFeatures”: {// Warning: React version not specified in eslint-plugin-react settings."version": 'detect'
}, “ecmaVersion”: 12, “sourceType”: “module” }, “plugins”: [ “react”, “react-native” ], “rules”: { “eqeqeq”: 2, // 必须使用 === 和 !== “no-empty-function”: 2, // 禁止空函数 “no-multi-spaces”: 2, // 禁止使用多个空格 “no-trailing-spaces”: 2, // 禁止禁用行尾空格 “space-infix-ops”: 2, // 要求操作符周围有空格 “space-in-parens”: 2, // 强制在圆括号内使用一致的空格 “no-var”: 2, // 要求使用 let 或 const 而不是 var, “no-unused-vars”: 2, // 禁止出现未使用过的变量 “react/prop-types”: 0 // 防止在react组件定义中缺少props验证 } };"jsx": true,// 支持装饰器 否则报 '@' 错误"legacyDecorators": true,
<a name="Vzywj"></a>## husk 使用文档:[https://typicode.github.io/husky/#/?id=install](https://typicode.github.io/husky/#/?id=install)<a name="pxaNG"></a>### package.json中添加配置```json"husky": {"hooks": {"pre-commit": "npm run format && npm run lint:fix","commit-msg": "commitlint -E HUSKY_GIT_PARAMS"}},
完整的package.json
{"name": "myrnapp","version": "0.0.1","private": true,"scripts": {"android": "react-native run-android","ios": "react-native run-ios","start": "react-native start","test": "jest","lint": "npx eslint --ext .js,.jsx,.ts,.tsx ./src","lint:fix": "npx eslint --fix .","lint-staged": "lint-staged","format": "prettier --write 'src/**/*.js'","prettier": "npx prettier --write .","prepare": "husky install"},"dependencies": {"@react-navigation/native": "^6.0.10","@react-navigation/native-stack": "^6.6.2","axios": "^0.27.2","mobx": "^6.6.0","mobx-react": "^7.5.0","prop-types": "^15.8.1","react": "17.0.2","react-native": "0.68.2","react-native-safe-area-context": "^4.3.1","react-native-screens": "^3.13.1","react-native-svg": "^12.3.0","react-navigation": "^4.4.4"},"devDependencies": {"@babel/core": "^7.12.9","@babel/plugin-proposal-decorators": "^7.18.2","@babel/runtime": "^7.12.5","@commitlint/cli": "^17.0.2","@commitlint/config-conventional": "^17.0.2","@react-native-community/eslint-config": "^2.0.0","babel-eslint": "^10.1.0","babel-jest": "^26.6.3","eslint": "^7.32.0","husky": "^8.0.1","jest": "^26.6.3","lint-staged": "^13.0.1","metro-react-native-babel-preset": "^0.67.0","prettier": "2.7.0","react-native-svg-transformer": "^1.0.0","react-test-renderer": "17.0.2"},"lint-staged": {"*.{js,jsx,ts,tsx}": ["npx prettier --write","npx eslint --fix"]},"husky": {"hooks": {"pre-commit": "npm run format && npm run lint:fix","commit-msg": "commitlint -E HUSKY_GIT_PARAMS"}},"jest": {"preset": "react-native"}}
卸载
npm uninstall husky && git config --unset core.hooksPath
整体效果
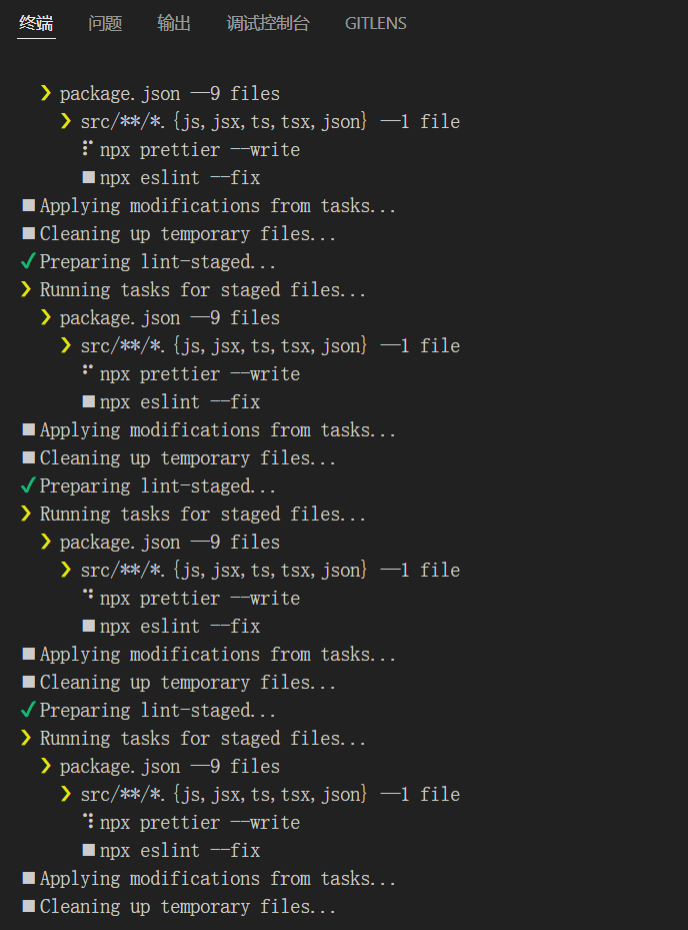
git add .git commit -m 'feat: 增加 prettier, eslint 配置'


若有收获,就点个赞吧
0 人点赞
