头图:https://cdn.naraku.cn/imgs/Crawlergo_X_Xray-0.jpg
摘要:Linux搭建Crawlergo+Xray+Httprobe实现自动化批量检测
环境
- Ubuntu20.04+Python3
- Xray
- Crawlergo
- Crawlergo_X_Xray
- Httprobe
前期准备
# 安装依赖$ sudo apt-get update$ sudo apt-get upgrade$ sudo apt-get install unzip git tree$ sudo apt install python3 # Python3$ sudo apt install python3-pip # Pip3$ pip3 install simplejson requests fake_useragent
Crawlergo_X_Xray
配置
crawlergo_x_XRAY$ git clone https://github.com/timwhitez/crawlergo_x_XRAY.git$ cd crawlergo_x_XRAY/$ vim launcher.py
修改
launcher.py```diff [-] cmd = [“./crawlergo”, “-c”, “C:\Program Files (x86)\Google\Chrome\Application\chrome.exe”,”-t”, “20”,”-f”,”smart”,”—fuzz-path”, “—output-mode”, “json”, target]
[+] cmd = [“./crawlergo”, “-c”, “/snap/bin/chromium”,”-t”, “20”,”-f”,”smart”,”—fuzz-path”, “—output-mode”, “json”, target]
- 整理一下```shell# 删除多余文件$ rm launcher_new.py README.md$ rm -rf img/# 将2个文件移入crawlergo目录$ mv launcher.py crawlergo/$ mv targets.txt crawlergo/
- 下载Xray和Crawlergo
```shell
下载解压crawlergo_linux_amd64
$ cd crawlergo/ $ wget https://github.com/0Kee-Team/crawlergo/releases/download/v0.4.0/crawlergo_linux_amd64.zip $ unzip crawlergo_linux_amd64.zip && rm crawlergo_linux_amd64.zip
下载解压_linux_amd64
$ cd ../xray/ $ wget https://github.com/chaitin/xray/releases/download/1.5.0/xray_linux_amd64.zip $ unzip xray_linux_amd64.zip && rm xray_linux_amd64.zip
生成证书
$ ./xray_linux_amd64 genca
<a name="Chromium"></a>### Chromium```shell# 安装Chromium$ sudo apt install chromium-browser$ yum install chromium# 安装证书$ sudo cp ca.crt /usr/local/share/ca-certificates/xray.crt$ sudo update-ca-certificates
存活探测
- 安装
httprobe```shell $ cd ../
下载并解压httprobe
$ wget https://github.com/tomnomnom/httprobe/releases/download/v0.1.2/httprobe-linux-amd64-0.1.2.tgz $ tar zxvf httprobe-linux-amd64-0.1.2.tgz $ rm httprobe-linux-amd64-0.1.2.tgz
新建扫描文件
$ vim check.py
- `check.py`,运行前需要先填写`chromium`和`httprobe`的路径- `python3 check.py -f domains.txt`- `domains.txt`中域名的不能带协议`http(s)://`,否则不能正确探测存活```python# coding: utf-8import osimport reimport timeimport argparseimport subprocess# Pathchrome_path = r'/snap/bin/chromium'httprobe_path = r'/root/crawlergo_x_XRAY/httprobe'save_dir_name = './'def parse_args():usage = "python3 check.py -f domains.txt"parser = argparse.ArgumentParser(usage=usage)parser.add_argument('-f', '--file', help='Input Domains File', type=str)return parser.parse_args()def do_httprobe():path = args.fileif os.name == 'nt':httprobe_result = os.popen(f'type {path} | {httprobe_path}').read()elif os.name == 'posix':httprobe_result = os.popen(f'cat {path} | {httprobe_path}').read()else:print('[-] Unable to identify operating system')save_path = os.path.join(save_dir_name, 'targets.txt')with open(save_path, 'w+', encoding='utf-8') as file_obj:file_obj.write(httprobe_result)file_name = file_obj.nameprint('[+] Alive subdomain is saved in %s' % file_name)def main():if not os.path.exists(args.file):print(f'[*] {args.file} have error, Please Check.')else:do_httprobe()if __name__ == '__main__':args = parse_args()main()
Run.sh
- 在
crawlergo_x_XRAY/目录,创建run.sh脚本 ```shell存活探测
if [[ $1 == “check” ]] thenif [ $2 ]thenpython3 check.py -f $2elseecho "[-] No Domain File"echo "Example: bash run.sh check domain.txt"fi
开启HTTP
elif [[ $1 == “http” ]] then python3 -m http.server 80
漏洞挖掘
elif [[ $1 == “start” ]]
then
today=date +%Y%m%d-%H%M%S
echo “[+] Start at “ $today
# 进入xray目录,后台运行xray,将扫描结果输出到html,运行日志输出到logscd xray/nohup ./xray_linux_amd64 webscan --listen 127.0.0.1:7777 --html-output $today.html >../logs.xray 2>&1 &echo "[+] Xray Run Success..."sleep 3# 进入crawlergo目录,运行launcher.pycd ../crawlergo/nohup python3 launcher.py >../logs.crawlergo 2>&1 &echo "[+] Crawler_X_Xray Run Success..."
使用方法
else
echo “””Usage:
存活探测: bash run.sh check
- 当前目录结构如下:```json├── check.py├── crawlergo│ ├── crawlergo│ └── launcher.py├── httprobe├── run.sh└── xray├── ca.crt├── ca.key├── config.yaml└── xray_linux_amd64
测试
$ cd ../$ which chromium$ ./xray/xray_linux_amd64 version$ ./crawlergo/crawlergo -c /snap/bin/chromium -t 5 http://www.baidu.com
运行
把子域名填入
domains.txt,进行存活探测。域名不用带http(s)://协议$ bash run.sh check domains.txt# 或者: python3 check.py -f domains.txt
然后将生成的
targets.txt移动到crawlergo目录,然后运行$ mv targets.txt crawlergo/$ bash run.sh start
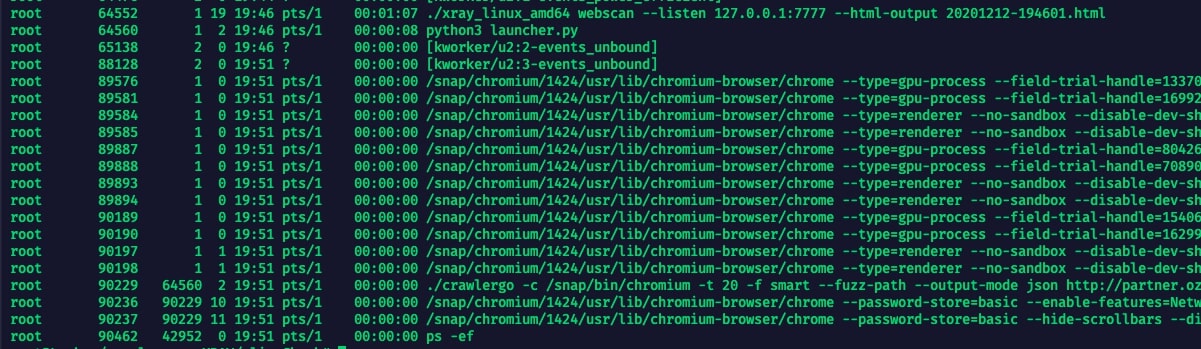
查看与终止
$ ps -ef # 查看进程$ kill -9 <pid> # 终止进程
- 若要查看或者下载漏洞报告,使用Python开个http即可
$ bash run.sh http# 或者: python3 -m http.server 8080
其他
参考
注意
- 进行存活探测的域名不需要加
http(s)协议 - 进行爬虫的域名需要加
http(s)协议
反连平台
# 反连平台配置,更多解释见 https://docs.xray.cool/#/configration/reverse# 注意: 默认配置为禁用反连平台,这是无法扫描出依赖反连平台的漏洞,这些漏洞包括 fastjson,ssrf 以及 poc 中依赖反连的情况等reverse:http:enabled: truelisten_ip: <IP>listen_port: <PORT>client:http_base_url: "http://<IP>:<PORT>" # 默认将根据 ListenIP 和 ListenPort 生成,该地址是存在漏洞的目标反连回来的地址, 当反连平台前面有反代、绑定域名、端口映射时需要自行配置

若有收获,就点个赞吧
0 人点赞
