1、文档
- xp 安装jdk
- jdk下载
- @Scheduled参数解析
- SynchronousQueue解析:同时处理的任务不能超过最大线程数,这个队列用来保存同步
- SQLException: validateConnection false
- 自定义Protostuff方式的RedisSerializer
- 获取byte的各个bit值以及常见位操作
- Java8 Stream:2万字20个实例,玩转集合的筛选、归约、分组、聚合
- 创建ByteBuf对象,读写原理
- 自定义logback打印颜色
- 自定义连接池
- springboot和springsecurity整合OAuth2
- 构建树形节点
- jar加密
- java正则
- 自定义类加载器加载冲突类
- 加载多个相同类名的jar
- 获取对象内存地址
- 可视化代码执行
2、相关问题
2.1、两个list集合的交集、差集、并集
- 描述:
list1集合和list2集合的交集、差集、并集
解决同步问题
- 解决方案:
问题的解决方案
@org.junit.Testpublic void test(){List<String> list1 = new ArrayList<String>();list1.add("1");list1.add("2");list1.add("3");list1.add("5");list1.add("6");List<String> list2 = new ArrayList<String>();list2.add("2");list2.add("3");list2.add("7");list2.add("8");// 交集List<String> intersection = list1.stream().filter(item -> list2.contains(item)).collect(toList());System.out.println("---交集 intersection---");intersection.parallelStream().forEach(System.out :: println);// 差集 (list1 - list2)List<String> reduce1 = list1.stream().filter(item -> !list2.contains(item)).collect(toList());System.out.println("---差集 reduce1 (list1 - list2)---");reduce1.parallelStream().forEach(System.out :: println);// 差集 (list2 - list1)List<String> reduce2 = list2.stream().filter(item -> !list1.contains(item)).collect(toList());System.out.println("---差集 reduce2 (list2 - list1)---");reduce2.parallelStream().forEach(System.out :: println);// 并集List<String> listAll = list1.parallelStream().collect(toList());List<String> listAll2 = list2.parallelStream().collect(toList());listAll.addAll(listAll2);System.out.println("---并集 listAll---");listAll.parallelStream().forEachOrdered(System.out :: println);// 去重并集List<String> listAllDistinct = listAll.stream().distinct().collect(toList());System.out.println("---得到去重并集 listAllDistinct---");listAllDistinct.parallelStream().forEachOrdered(System.out :: println);System.out.println("---原来的List1---");list1.parallelStream().forEachOrdered(System.out :: println);System.out.println("---原来的List2---");list2.parallelStream().forEachOrdered(System.out :: println);}
2.2、ThreadPoolExecutor线程池使用
- 描述:
LinkedBlockingQueue 默认无界
解决方案:
@Slf4jpublic class Test {private int count = 6;private CountDownLatch countDownLatch = new CountDownLatch(count);@org.junit.Testpublic void test() throws InterruptedException {ThreadPoolExecutor threadPoolExecutor = new ThreadPoolExecutor(2, 4, 30, TimeUnit.SECONDS, new LinkedBlockingQueue<>(10));for (int i = 0; i < count; i++) {threadPoolExecutor.execute(new Runnable() {@Overridepublic void run() {log.info("===============");try {countDownLatch.await();} catch (InterruptedException e) {e.printStackTrace();}}});countDownLatch.countDown();}System.out.println("end");Thread.sleep(3000);}public static void main(String[] args) throws InterruptedException, UnknownHostException {}}
2.3、命令行编译打包
- 描述:
通过jdk的工具使用命令来进行java项目的编译打包
- 解决方案:
编译
# 将class文件生成到指定的targer目录javac src/com/demo/Hello.java -d target
打包
# -C target . 参数,指定把 target 目录下的所有文件打包。注意,需要从包名开始打包jar -cvf my.jar -C target .# 指定com目录下所有class文件打包,报名为my.jarjar -cvf my.jar -C target com
添加主类:
打包好后现在还不能执行,需要添加主类;
在jar中打开META-INF/MANIFEST.MF 指定主类Main-Class: com.demo.Hello
执行
java -jar my.jar
2.4、打包
2.4.1、不指定主类(maven)
2.4.1.1、不带依赖
<build><finalName>demo</finalName><plugins><plugin><groupId>org.apache.maven.plugins</groupId><artifactId>maven-compiler-plugin</artifactId><configuration><encoding>UTF-8</encoding><source>8</source><target>8</target></configuration></plugin></plugins></build>
2.4.1.2、带依赖
<build><finalName>${name}-${version}</finalName><plugins><plugin><groupId>org.apache.maven.plugins</groupId><artifactId>maven-compiler-plugin</artifactId><configuration><encoding>UTF-8</encoding><source>8</source><target>8</target></configuration></plugin><plugin><artifactId>maven-assembly-plugin</artifactId><configuration><descriptorRefs><descriptorRef>jar-with-dependencies</descriptorRef></descriptorRefs></configuration><executions><execution><id>make-assembly</id> <!-- this is used for inheritance merges --><phase>package</phase> <!-- bind to the packaging phase --><goals><goal>single</goal></goals></execution></executions></plugin></plugins></build>
2.4.2、指定主类(maven)
2.4.2.1、不带依赖
<build><finalName>demo</finalName><plugins><plugin><groupId>org.apache.maven.plugins</groupId><artifactId>maven-compiler-plugin</artifactId><configuration><encoding>UTF-8</encoding><source>8</source><target>8</target></configuration></plugin></plugins></build>
手动在jar中MANIFEST.MF中加入Main-Class:属性,指定主类
2.4.2.2、带依赖
<build><finalName>${name}-${version}</finalName><plugins><plugin><groupId>org.apache.maven.plugins</groupId><artifactId>maven-compiler-plugin</artifactId><configuration><encoding>UTF-8</encoding><source>8</source><target>8</target></configuration></plugin><plugin><artifactId>maven-assembly-plugin</artifactId><configuration><archive><manifest><mainClass>com.lms.maven.jar.Test2</mainClass></manifest></archive><descriptorRefs><descriptorRef>jar-with-dependencies</descriptorRef></descriptorRefs></configuration><executions><execution><id>make-assembly</id> <!-- this is used for inheritance merges --><phase>package</phase> <!-- bind to the packaging phase --><goals><goal>single</goal></goals></execution></executions></plugin></plugins></build>
2.4.2.4、带外部依赖(lib/)
第一种:把lib加入库,添加如下就可以使用,不需要添加依赖坐标
<build><resources><resource><directory>lib</directory><targetPath>/BOOT-INF/lib/</targetPath><includes><include>**/*.jar</include></includes></resource></resources><plugins><plugin><groupId>org.springframework.boot</groupId><artifactId>spring-boot-maven-plugin</artifactId><version>2.1.18.RELEASE</version><executions><execution><goals><goal>repackage</goal></goals></execution></executions></plugin></plugins></build>
第二种:需要添加引用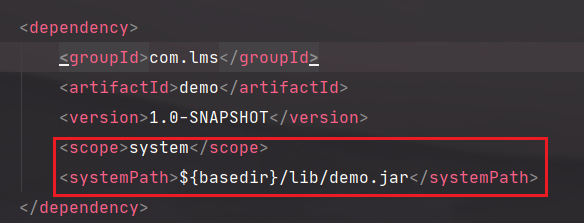
<build><plugins><plugin><groupId>org.springframework.boot</groupId><artifactId>spring-boot-maven-plugin</artifactId><version>2.1.18.RELEASE</version><configuration><!-- 打包本地库--><includeSystemScope>true</includeSystemScope></configuration><executions><execution><goals><goal>repackage</goal></goals></execution></executions></plugin></plugins></build>
2.5、maven打包时给jar包起一个固定的名字
<build><finalName>${parent.artifactId}</finalName></build>
2.6、Error attempting to get column ‘create_time’ from result set.
Error attempting to get column ‘create_time’ from result set. Cause: java.sql.SQLFeatureNotSupported
https://blog.csdn.net/weixin_39520967/article/details/99706639
<dependency>
<groupId>com.alibaba</groupId>
<artifactId>druid-spring-boot-starter</artifactId>
<version>1.1.18</version>
</dependency>
druid的版本升级到1.1.18以上就可
2.7、获取打jar包后的资源文件路径
jar包执行时访问资源文件造成的FileSystemNotFoundException问题
使用
properties = new Properties();URL url = DmdbSqlConfig.class.getClassLoader().getResource("dmsql");if (url != null) {Path path = Paths.get(url.toURI());Files.walkFileTree(path, new SimpleFileVisitor<Path>() {@Overridepublic FileVisitResult visitFile(Path file, BasicFileAttributes attrs) throws IOException {log.info("加载sql文件:{}", file);properties.load(new FileInputStream(new File(file.toUri())));return super.visitFile(file, attrs);}});}
在idea中使用没有问题,但是打成jar包 在服务器上执行的时候会出现异常,
解决办法: 通过spring注解来解决
@Value("classpath:/dmsql/**")private Resource[] sqlResources;public void loadSql() {Stream.of(sqlResources).forEach(sqlResources -> {try (InputStream is = sqlResources.getInputStream()) {log.info("加载sql文件:{}", sqlResources.getFilename());properties.load(is);} catch (Exception e) {e.printStackTrace();throw new RuntimeException("导入sql语句异常" + e.getMessage());}});}或手动注入ResourcePatternResolver resolver = ResourcePatternUtils.getResourcePatternResolver(new DefaultResourceLoader());Resource[] resources = resolver.getResources("classpath:/dmsql/*/*");for (Resource resource : resources) {System.out.println(resource);}
2.8、线程诊断cpu占用过高
1、先用top命令查看哪一个java程序占用cpu过高
2、再用**ps H -eo pid,tid,%cpu | grep 进程id ** 查看哪一个线程占用cpu过高
3、将线程id换算成16进制
4、使用**jstack 进程id**查看所有的java线程,找到具体的线程,根据换算来的id查找
2.9、程序结束前动作
Runtime runtime = Runtime.getRuntime();runtime.addShutdownHook(new Thread(() -> System.out.println("程序退出前动作")));
注意:这个适合在正常关闭程序才会执行,断电,直接杀死进程是不会执行的
2.10、指定编码去读取properties文件
properties = new Properties();properties.load(new InputStreamReader(is, StandardCharsets.UTF_8));// 或者在取值的时候手动转换编码:new String(value.getBytes("ISO-8859-1"),"UTF-8");

若有收获,就点个赞吧
0 人点赞
