因为开发习惯,一直依赖使用代理工具, mock 各种数据 ,直观查看响应数据,以及各个环境host切换
浏览器端,借助swithOmge + lightproxy 可以很方便抓包
在nodejs服务端开发过程中,也可以通过各种目的实现抓包
在基于eggjs的工程,官方提供了代理配置,也很容易代理抓包,文档
nextjs好像没有提供对应配置开关。但是可以通过以下办法实现代理
参考:https://gist.github.com/simonhaenisch/7ffcd9833ddaf4236e036d33d018dd2f
polyfills node环境fetch
nextjs 在服务端polyfills fetch, 文档
In addition to fetch() on the client-side, Next.js polyfills fetch() in the Node.js environment. You can use fetch() in your server code (such as getStaticProps/getServerSideProps) without using polyfills such as isomorphic-unfetch or node-fetch.
但是看文档 和 源码,其实也是引入node-fetch
nextjs/packages/next/server/node-polyfill-fetch.js
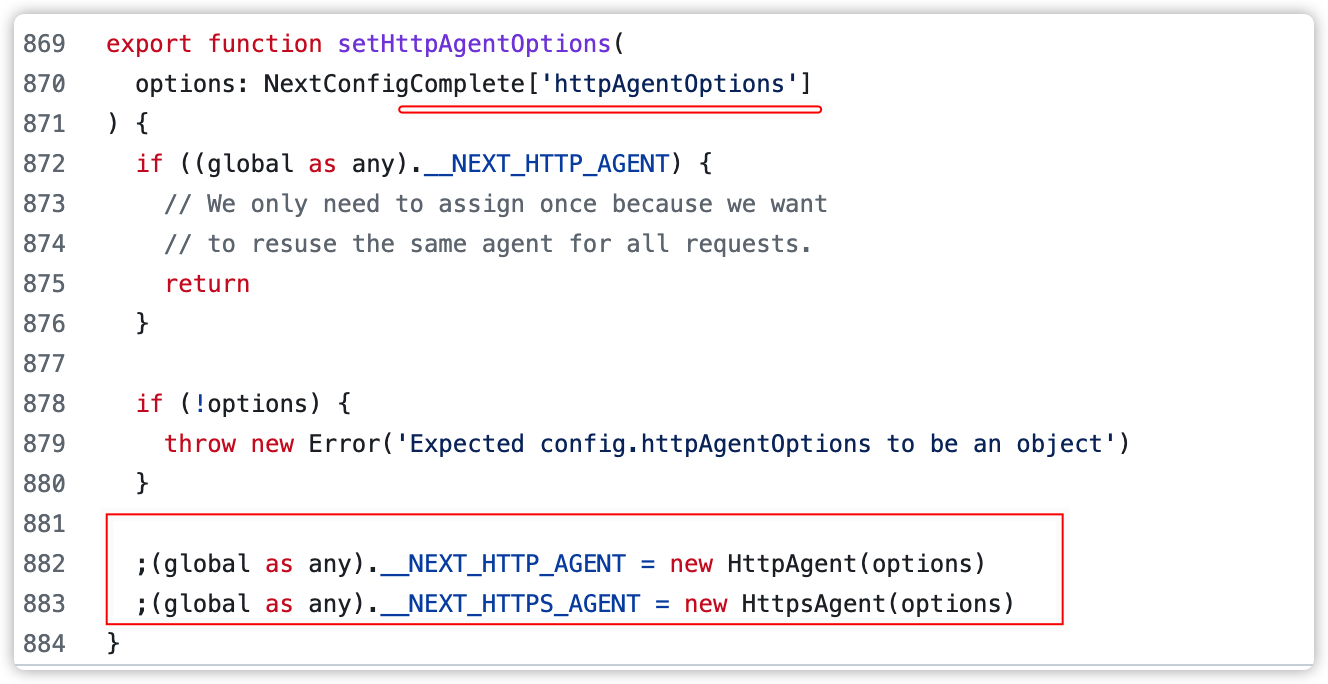
从全局__NEXT_HTTP_AGENT获取代理agent,组装fetchWithAgent,赋值给全局变量fetch,所以可以直接在nextjs getServisideprops中直接使用fetch
import fetch, {Headers,Request,Response,} from 'next/dist/compiled/node-fetch'// Polyfill fetch() in the Node.js environmentif (!global.fetch) {const agent = ({ protocol }) =>protocol === 'http:' ? global.__NEXT_HTTP_AGENT : global.__NEXT_HTTPS_AGENTconst fetchWithAgent = (url, opts, ...rest) => {if (!opts) {opts = { agent }} else if (!opts.agent) {opts.agent = agent}return fetch(url, opts, ...rest)}global.fetch = fetchWithAgentglobal.Headers = Headersglobal.Request = Requestglobal.Response = Response}
node-fetch
A light-weight module that brings Fetch API to Node.js.
支持 Custom Agent
In addition, the agent option accepts a function that returns http(s).Agent instance given current URL, this is useful during a redirection chain across HTTP and HTTPS protocol.
http-proxy-agent
This module provides an http.Agent implementation that connects to a specified HTTP or HTTPS proxy server, and can be used with the built-in http module.
var agent = new HttpProxyAgent(proxy); proxy可以是string或者object
nextjs配置代理

import ProxyAgent from 'https-proxy-agent'if (typeof window === 'undefined') {global.__NEXT_HTTP_AGENT = new ProxyAgent('http://127.0.0.1:12888')}

待实践
其实全局的agent是通过读取next.config.js 中的 httpAgentOptions 来创建的,但是还没找到需要配置的key
参考:
https://nodejs.org/api/http.html#new-agentoptions new Agent

若有收获,就点个赞吧
0 人点赞
