用 Gridsome 构建一个静态的博客网站。
创建项目
gridsome create blog-with-gridsome# 启动项目npm run develop
main.js 中引入 css 文件:
import 'bootstrap/dist/css/bootstrap.min.css'import '@fortawesome/fontawesome-free/css/all.min.css'import './assets/css/index.css'import DefaultLayout from '~/layouts/Default.vue'export default function (Vue, { router, head, isClient }) {// Set default layout as a global componentVue.component('Layout', DefaultLayout)}
默认布局组件
<template><div class="layout"><!-- Navigation --><navclass="navbar navbar-expand-lg navbar-light fixed-top"id="mainNav"><div class="container"><aclass="navbar-brand"href="index.html">Start Bootstrap</a><buttonaria-controls="navbarResponsive"aria-expanded="false"aria-label="Toggle navigation"class="navbar-toggler navbar-toggler-right"data-target="#navbarResponsive"data-toggle="collapse"type="button">Menu<i class="fas fa-bars"></i></button><divclass="collapse navbar-collapse"id="navbarResponsive"><ul class="navbar-nav ml-auto"><li class="nav-item"><aclass="nav-link"href="index.html">Home</a></li><li class="nav-item"><aclass="nav-link"href="about.html">About</a></li><li class="nav-item"><aclass="nav-link"href="post.html">Sample Post</a></li><li class="nav-item"><aclass="nav-link"href="contact.html">Contact</a></li></ul></div></div></nav><slot /><!-- Footer --><footer><div class="container"><div class="row"><div class="col-lg-8 col-md-10 mx-auto"><ul class="list-inline text-center"><li class="list-inline-item"><a href="#"><span class="fa-stack fa-lg"><i class="fas fa-circle fa-stack-2x"></i><i class="fab fa-twitter fa-stack-1x fa-inverse"></i></span></a></li><li class="list-inline-item"><a href="#"><span class="fa-stack fa-lg"><i class="fas fa-circle fa-stack-2x"></i><i class="fab fa-facebook-f fa-stack-1x fa-inverse"></i></span></a></li><li class="list-inline-item"><a href="#"><span class="fa-stack fa-lg"><i class="fas fa-circle fa-stack-2x"></i><i class="fab fa-github fa-stack-1x fa-inverse"></i></span></a></li></ul><p class="copyright text-muted">Copyright © Your Website 2020</p></div></div></div></footer></div></template><style></style>
页面组件
Index.vue
<template><Layout><!-- Page Header --><headerclass="masthead"style="background-image: url('/img/home-bg.jpg')"><div class="overlay"></div><div class="container"><div class="row"><div class="col-lg-8 col-md-10 mx-auto"><div class="site-heading"><h1>Clean Blog</h1><span class="subheading">A Blog Theme by Start Bootstrap</span></div></div></div></div></header><!-- Main Content --><div class="container"><div class="row"><div class="col-lg-8 col-md-10 mx-auto"><div class="post-preview"><a href="post.html"><h2 class="post-title">Man must explore, and this is exploration at its greatest</h2><h3 class="post-subtitle">Problems look mighty small from 150 miles up</h3></a><p class="post-meta">Posted by<a href="#">Start Bootstrap</a>on September 24, 2019</p></div><hr /><div class="post-preview"><a href="post.html"><h2class="post-title">I believe every human has a finite number of heartbeats. I don't intend to waste any of mine.</h2></a><p class="post-meta">Posted by<a href="#">Start Bootstrap</a>on September 18, 2019</p></div><hr /><div class="post-preview"><a href="post.html"><h2 class="post-title">Science has not yet mastered prophecy</h2><h3 class="post-subtitle">We predict too much for the next year and yet far too little for the next ten.</h3></a><p class="post-meta">Posted by<a href="#">Start Bootstrap</a>on August 24, 2019</p></div><hr /><div class="post-preview"><a href="post.html"><h2 class="post-title">Failure is not an option</h2><h3class="post-subtitle">Many say exploration is part of our destiny, but it’s actually our duty to future generations.</h3></a><p class="post-meta">Posted by<a href="#">Start Bootstrap</a>on July 8, 2019</p></div><hr /><!-- Pager --><div class="clearfix"><aclass="btn btn-primary float-right"href="#">Older Posts →</a></div></div></div></div></Layout></template><script>export default {metaInfo: {title: 'Hello, world!'},name: 'HomePage'}</script><style></style>
Post.vue
<template><Layout><!-- Page Header --><headerclass="masthead"style="background-image: url('img/post-bg.jpg')"><div class="overlay"></div><div class="container"><div class="row"><div class="col-lg-8 col-md-10 mx-auto"><div class="post-heading"><h1>Man must explore, and this is exploration at its greatest</h1><h2 class="subheading">Problems look mighty small from 150 miles up</h2><span class="meta">Posted by<a href="#">Start Bootstrap</a>on August 24, 2019</span></div></div></div></div></header><!-- Post Content --><article><div class="container"><div class="row"><div class="col-lg-8 col-md-10 mx-auto"><p>Never in all their history have men been able truly to conceive of the world as one: a single sphere, a globe, having the qualities of a globe, a round earth in which all the directions eventually meet, in which there is no center because every point, or none, is center — an equal earth which all men occupy as equals. The airman's earth, if free men make it, will be truly round: a globe in practice, not in theory.</p><p>Science cuts two ways, of course; its products can be used for both good and evil. But there's no turning back from science. The early warnings about technological dangers also come from science.</p><p>What was most significant about the lunar voyage was not that man set foot on the Moon but that they set eye on the earth.</p><p>A Chinese tale tells of some men sent to harm a young girl who, upon seeing her beauty, become her protectors rather than her violators. That's how I felt seeing the Earth for the first time. I could not help but love and cherish her.</p><p>For those who have seen the Earth from space, and for the hundreds and perhaps thousands more who will, the experience most certainly changes your perspective. The things that we share in our world are far more valuable than those which divide us.</p><h2 class="section-heading">The Final Frontier</h2><p>There can be no thought of finishing for ‘aiming for the stars.’ Both figuratively and literally, it is a task to occupy the generations. And no matter how much progress one makes, there is always the thrill of just beginning.</p><p>There can be no thought of finishing for ‘aiming for the stars.’ Both figuratively and literally, it is a task to occupy the generations. And no matter how much progress one makes, there is always the thrill of just beginning.</p><blockquoteclass="blockquote">The dreams of yesterday are the hopes of today and the reality of tomorrow. Science has not yet mastered prophecy. We predict too much for the next year and yet far too little for the next ten.</blockquote><p>Spaceflights cannot be stopped. This is not the work of any one man or even a group of men. It is a historical process which mankind is carrying out in accordance with the natural laws of human development.</p><h2 class="section-heading">Reaching for the Stars</h2><p>As we got further and further away, it [the Earth] diminished in size. Finally it shrank to the size of a marble, the most beautiful you can imagine. That beautiful, warm, living object looked so fragile, so delicate, that if you touched it with a finger it would crumble and fall apart. Seeing this has to change a man.</p><a href="#"><imgaltclass="img-fluid"src="img/post-sample-image.jpg"/></a><spanclass="caption text-muted">To go places and do things that have never been done before – that’s what living is all about.</span><p>Space, the final frontier. These are the voyages of the Starship Enterprise. Its five-year mission: to explore strange new worlds, to seek out new life and new civilizations, to boldly go where no man has gone before.</p><p>As I stand out here in the wonders of the unknown at Hadley, I sort of realize there’s a fundamental truth to our nature, Man must explore, and this is exploration at its greatest.</p><p>Placeholder text by<a href="http://spaceipsum.com/">Space Ipsum</a>. Photographs by<a href="https://www.flickr.com/photos/nasacommons/">NASA on The Commons</a>.</p></div></div></div></article></Layout></template><script>export default {name: 'PostPage',}</script><style scoped></style>
About.vue
<template><Layout><!-- Page Header --><headerclass="masthead"style="background-image: url('img/about-bg.jpg')"><div class="overlay"></div><div class="container"><div class="row"><div class="col-lg-8 col-md-10 mx-auto"><div class="page-heading"><h1>About Me</h1><span class="subheading">This is what I do.</span></div></div></div></div></header><!-- Main Content --><div class="container"><div class="row"><div class="col-lg-8 col-md-10 mx-auto"><p>Lorem ipsum dolor sit amet, consectetur adipisicing elit. Saepe nostrum ullam eveniet pariatur voluptates odit, fuga atque ea nobis sit soluta odio, adipisci quas excepturi maxime quae totam ducimus consectetur?</p><p>Lorem ipsum dolor sit amet, consectetur adipisicing elit. Eius praesentium recusandae illo eaque architecto error, repellendus iusto reprehenderit, doloribus, minus sunt. Numquam at quae voluptatum in officia voluptas voluptatibus, minus!</p><p>Lorem ipsum dolor sit amet, consectetur adipisicing elit. Aut consequuntur magnam, excepturi aliquid ex itaque esse est vero natus quae optio aperiam soluta voluptatibus corporis atque iste neque sit tempora!</p></div></div></div></Layout></template><script>export default {metaInfo: {title: 'About us'},name: 'AboutPage',}</script>
Contact.vue
<template><Layout><!-- Page Header --><header class="masthead" style="background-image: url('/img/contact-bg.jpg')"><div class="overlay"></div><div class="container"><div class="row"><div class="col-lg-8 col-md-10 mx-auto"><div class="page-heading"><h1>Contact Me</h1><span class="subheading">Have questions? I have answers.</span></div></div></div></div></header><!-- Main Content --><div class="container"><div class="row"><div class="col-lg-8 col-md-10 mx-auto"><p>Want to get in touch? Fill out the form below to send me a message and I will get back to you as soon as possible!</p><!-- Contact Form - Enter your email address on line 19 of the mail/contact_me.php file to make this form work. --><!-- WARNING: Some web hosts do not allow emails to be sent through forms to common mail hosts like Gmail or Yahoo. It's recommended that you use a private domain email address! --><!-- To use the contact form, your site must be on a live web host with PHP! The form will not work locally! --><form name="sentMessage" id="contactForm" novalidate><div class="control-group"><div class="form-group floating-label-form-group controls"><label>Name</label><input type="text" class="form-control" placeholder="Name" id="name" required data-validation-required-message="Please enter your name."><p class="help-block text-danger"></p></div></div><div class="control-group"><div class="form-group floating-label-form-group controls"><label>Email Address</label><input type="email" class="form-control" placeholder="Email Address" id="email" required data-validation-required-message="Please enter your email address."><p class="help-block text-danger"></p></div></div><div class="control-group"><div class="form-group col-xs-12 floating-label-form-group controls"><label>Phone Number</label><input type="tel" class="form-control" placeholder="Phone Number" id="phone" required data-validation-required-message="Please enter your phone number."><p class="help-block text-danger"></p></div></div><div class="control-group"><div class="form-group floating-label-form-group controls"><label>Message</label><textarea rows="5" class="form-control" placeholder="Message" id="message" required data-validation-required-message="Please enter a message."></textarea><p class="help-block text-danger"></p></div></div><br><div id="success"></div><button type="submit" class="btn btn-primary" id="sendMessageButton">Send</button></form></div></div></div></Layout></template><script>export default {name: 'ContactPage'}</script><style></style>
读取数据
Gridsome 有很多获取数据的方式,可以通过读取本地的 markdown 文件来实现。
安装插件:
# 读取文件插件yarn add @gridsome/source-filesystem# 文件转换器yarn add @gridsome/transformer-remark
gridsome.config.js中配置插件:
module.exports = {siteName: 'Gridsome',plugins: [{use: '@gridsome/source-filesystem',options: {path: './content/blog/**/*.md',typeName: 'BlogPost'}}]}
应用启动后,插件就会自动把文件中的内容加载到 GraphQL。
Strapi
strapi 是一个先进的 Node.js 内容管理框架(headless-CMS),可以毫不费力地构建强大的 API 。
功能特性
- 现代化管理面板:优雅、完全可定制、完全可扩展的管理面板。
- 默认安全:可重用策略、CSRF、CORS、P3P、Xframe、XSS 等等。
- 插件化:可在几秒钟内安装身份验证系统、内容管理、自定义插件等等。
- 极速:基于 Node.js,Strapi 表现惊人。
- 前端不可知论者(Front-end Agnostic): 可使用任何前端框架(React、Vue、Angular等)、移动应用,甚至是物联网。
- 强大的 CLI:脚手架项目和 API 不停机操作 。
- SQL & NoSQL 数据库:使用 Mongo 作为主数据库,同时支持 Postgres、MySQL 等。
安装
如果本地安装了 npm 和 Node.js,可以通过命令行直接创建。
官方推荐使用的 npm 版本为 v6,Node.js 仅限 LTS 版本,推荐 12或14。
现在默认安装的是 strapi v4,如果要使用 v3,需要指定版本号。
# 使用最新版 strapi 创建一个名为 my-project 的项目npx create-strapi-app@latest my-project# 安装 3.x 版本npx create-strapi-app@3.1.4 my-projectnpx create-strapi-app@3.6.8 my-project
安装完成后会自动运行,如果没有自动运行使用npm run develop把项目跑起来。
项目跑起来后会自动在浏览器打开管理页,如果没有自动打开,在浏览器输入 http://localhost:1337/admin 即可访问。
第一次使用需要注册账号,之后使用邮箱和密码登录。
数据管理
Strapi 默认生成了一些用户角色权限的集合。如果要添加集合,在 插件 -> 内容类型生成器里添加。创建集合时用户只需要添加业务相关的字段,id 和 创建时间、更新时间的字段会自动添加,新版本还会多添加一个发布时间。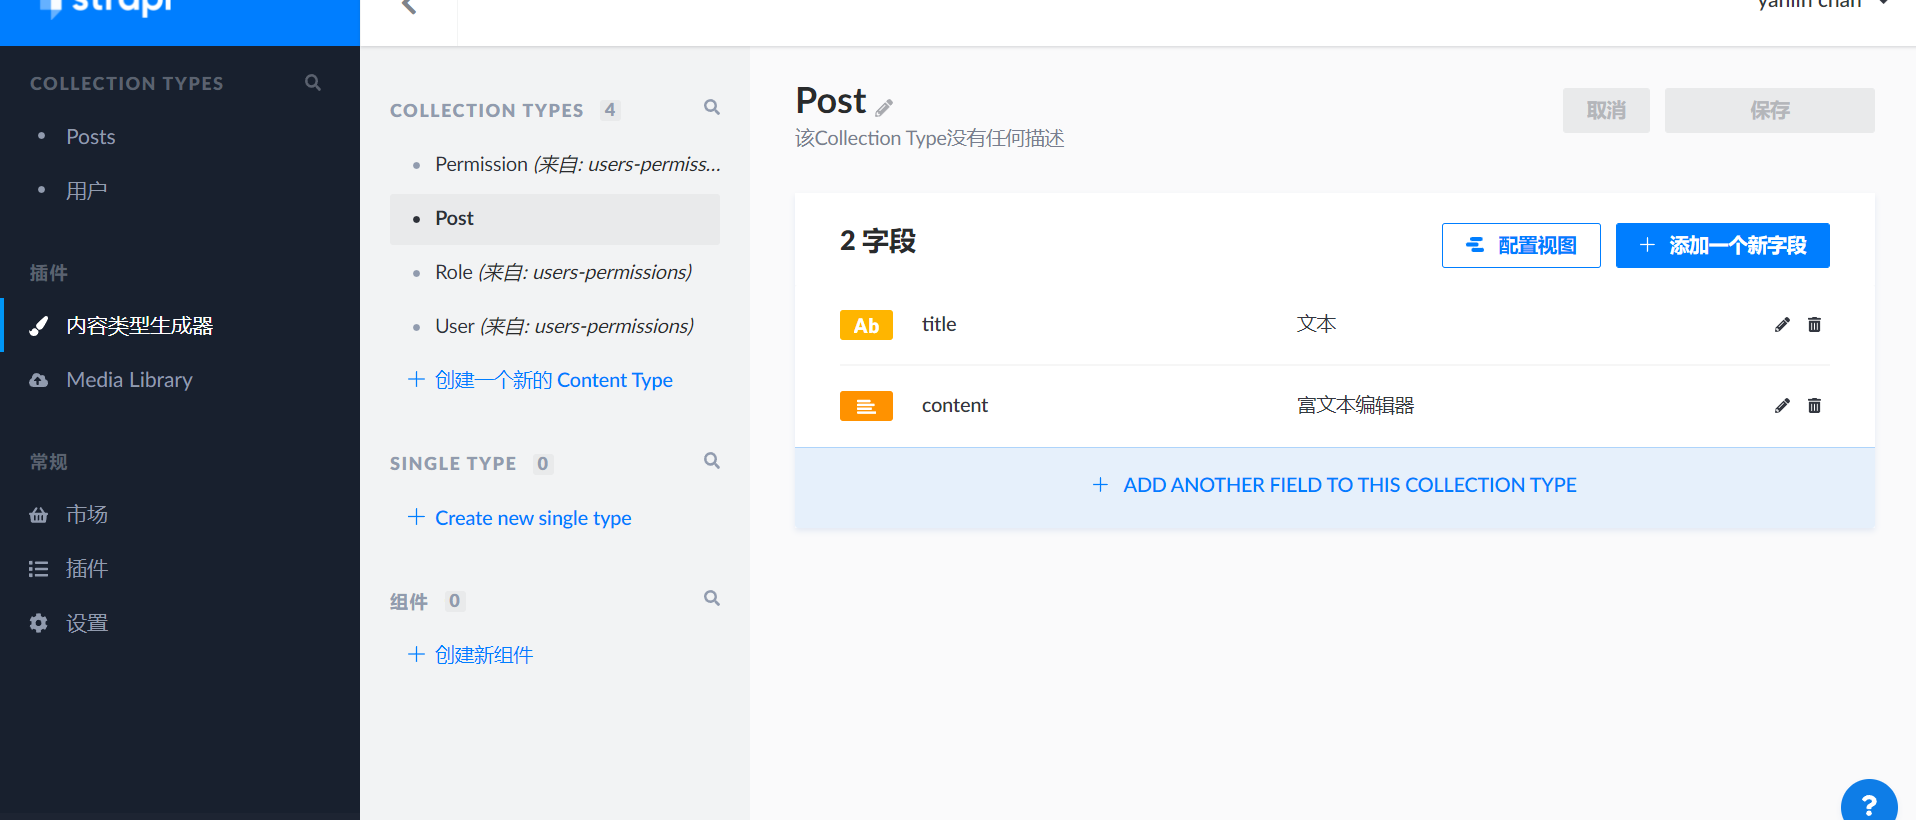
回到 COLLECTION TYPES 对数据增删改查。新旧版本管理数据步骤稍有不同,新版本的 Strapi 如v3.6数据保存后,如果需要暴露出去,还要点击Publish,否则更改后的数据是只能在管理页看到的草稿。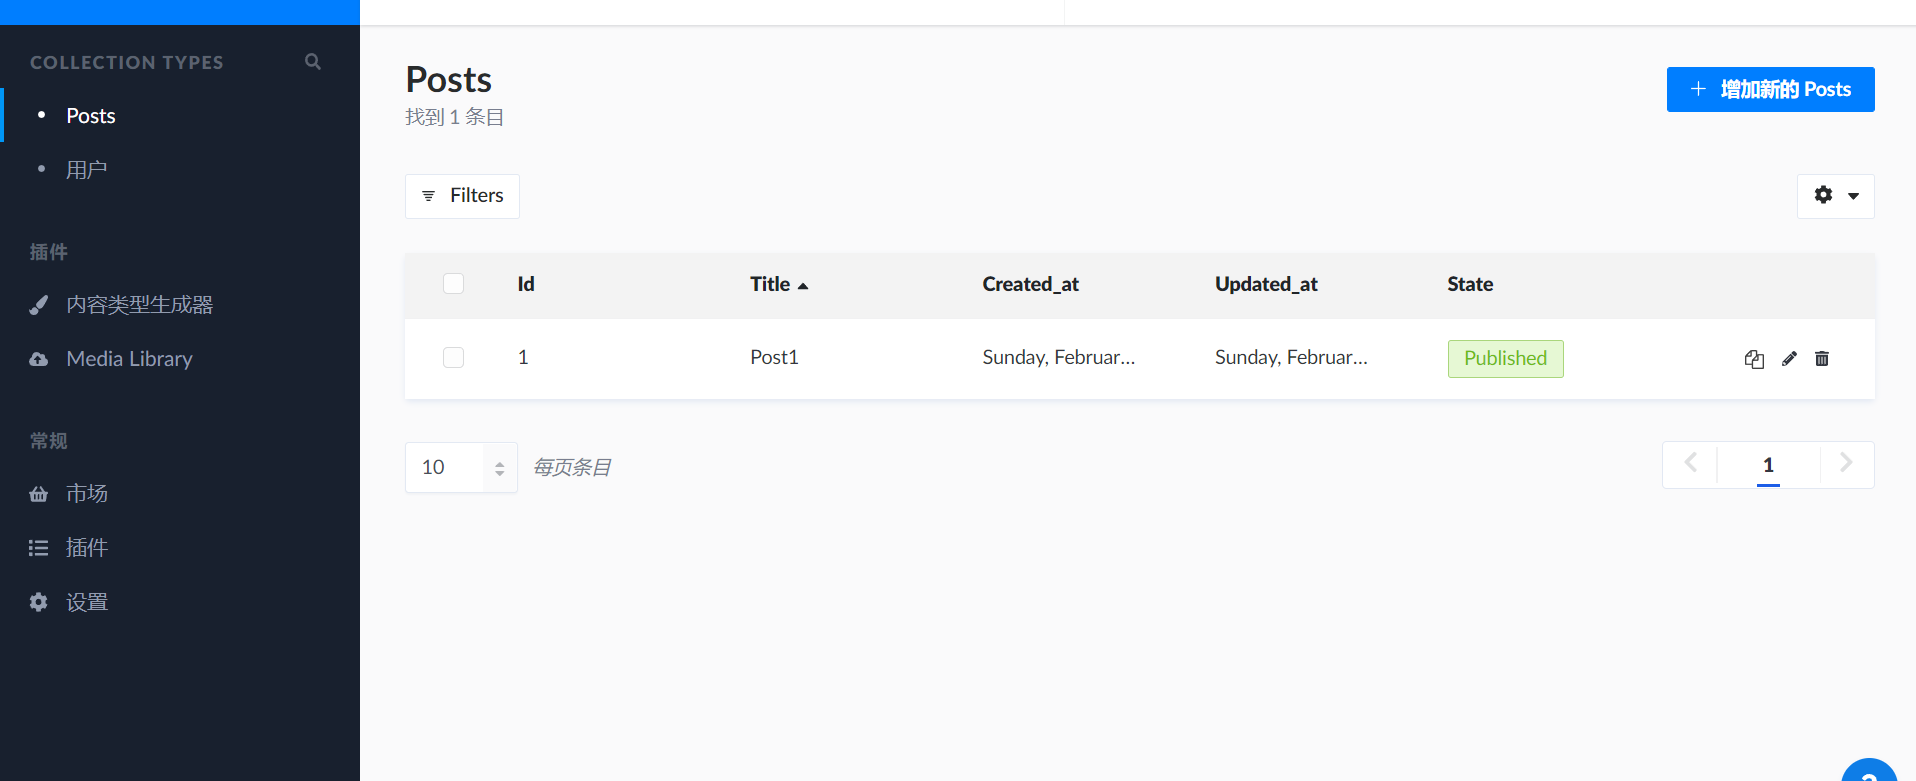
数据访问
Strapi 默认提供了符合 Restful 规范的 API。
角色和权限
新旧版本管理角色和权限的地方也有所变化,新版本的集成到了设置当中。
Strapi 默认添加了两个角色,Authenticated和Public,但是没有给它们分配访问接口的权限。Public是公共角色,应该分配一些不需要验证用户信息的查询接口,Authenticated则是需要验证 token 的角色,可以按需分配增删改查的权限。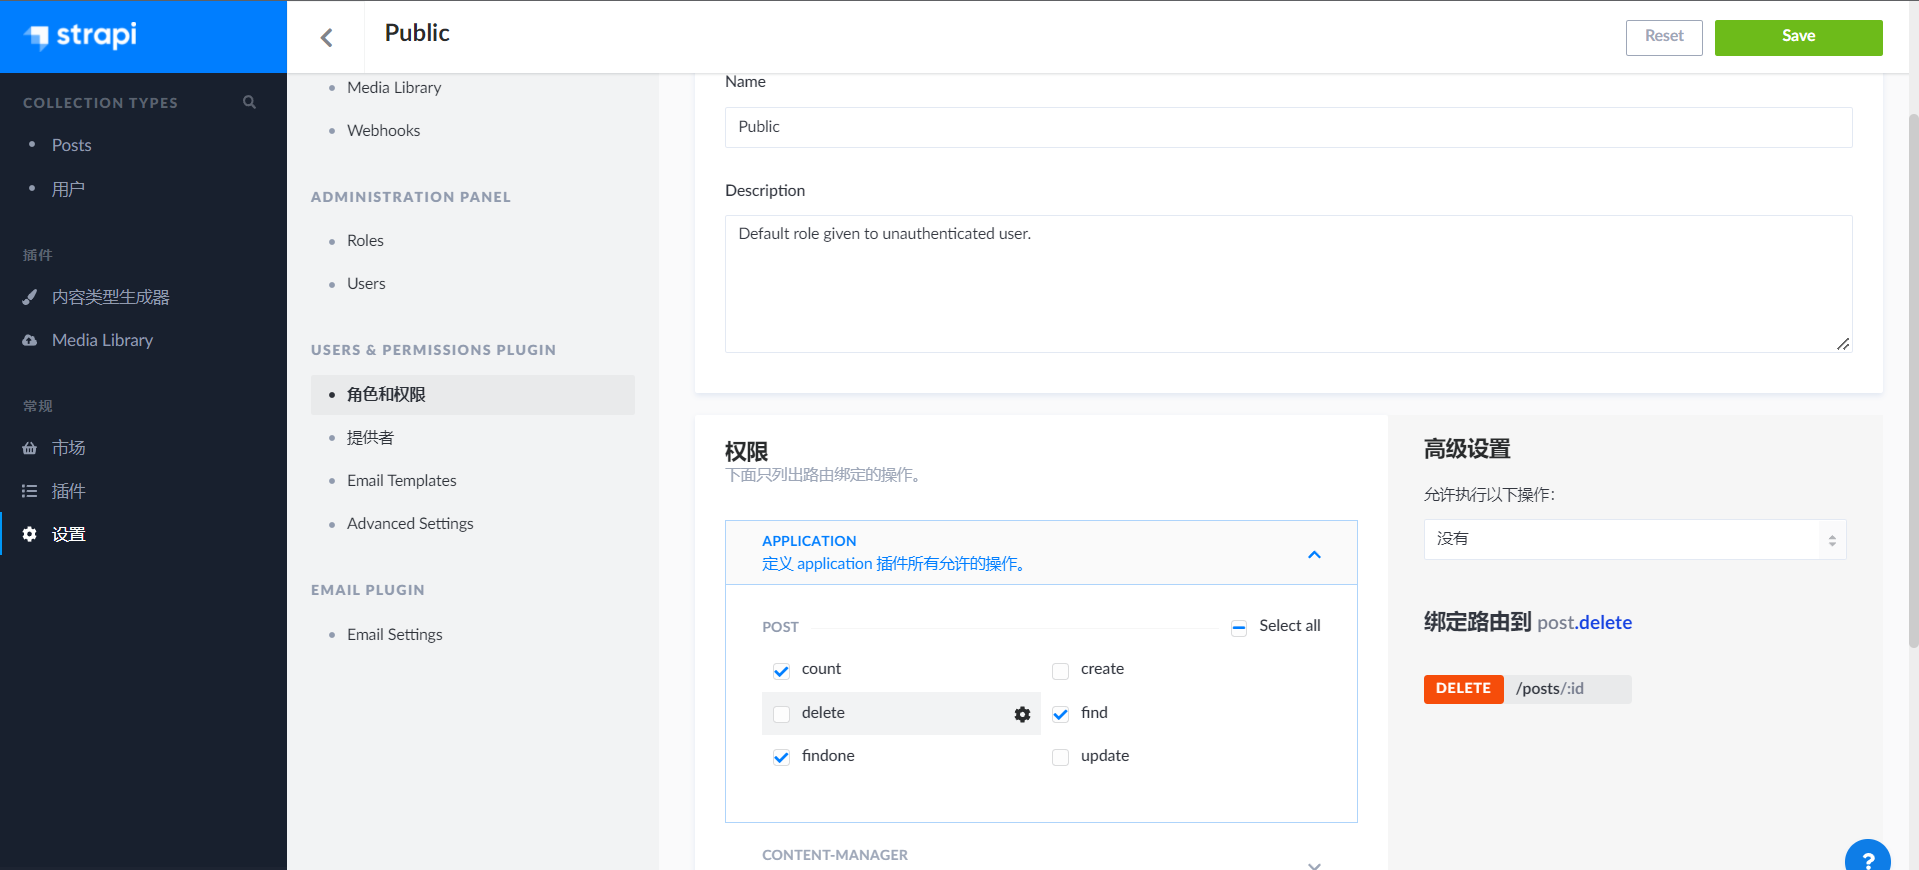
Public角色分配了查询权限以后,就能调用接口查询了,比如查询 Post 集合的列表: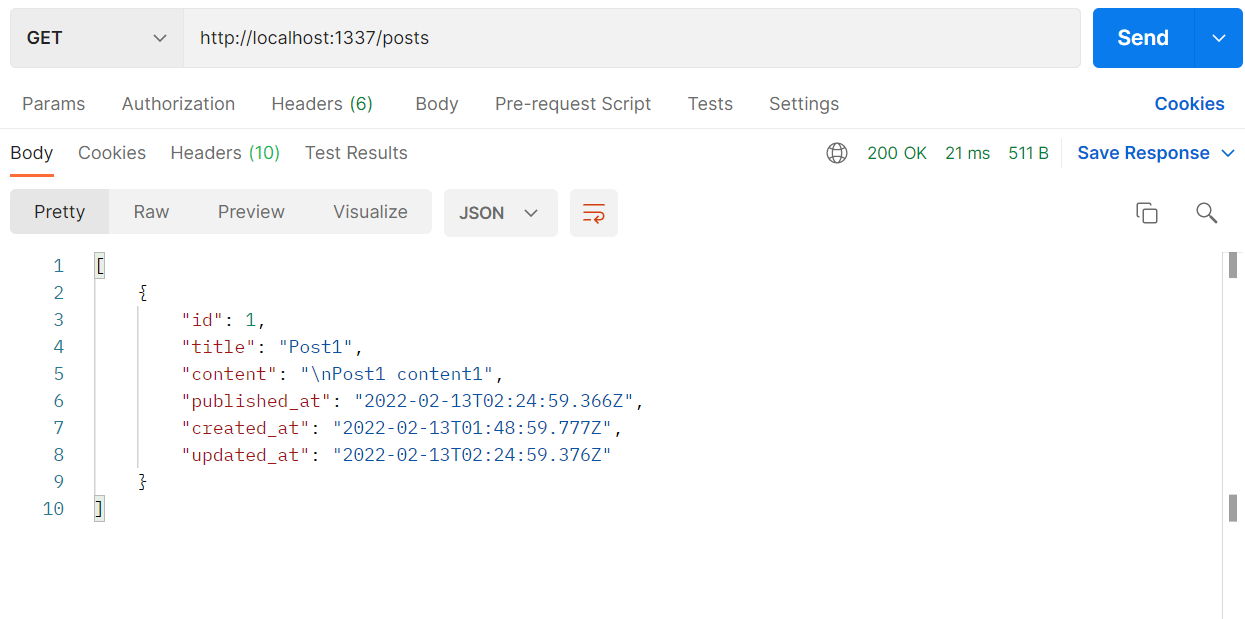
访问受限接口
操作数据的接口开放给Authenticated角色,然后新建一个用户并把Authenticated角色赋给该用户。Blocked打开表示用户被锁定,所以不要选,Confirmed表示用户是否已确认,这个无所谓。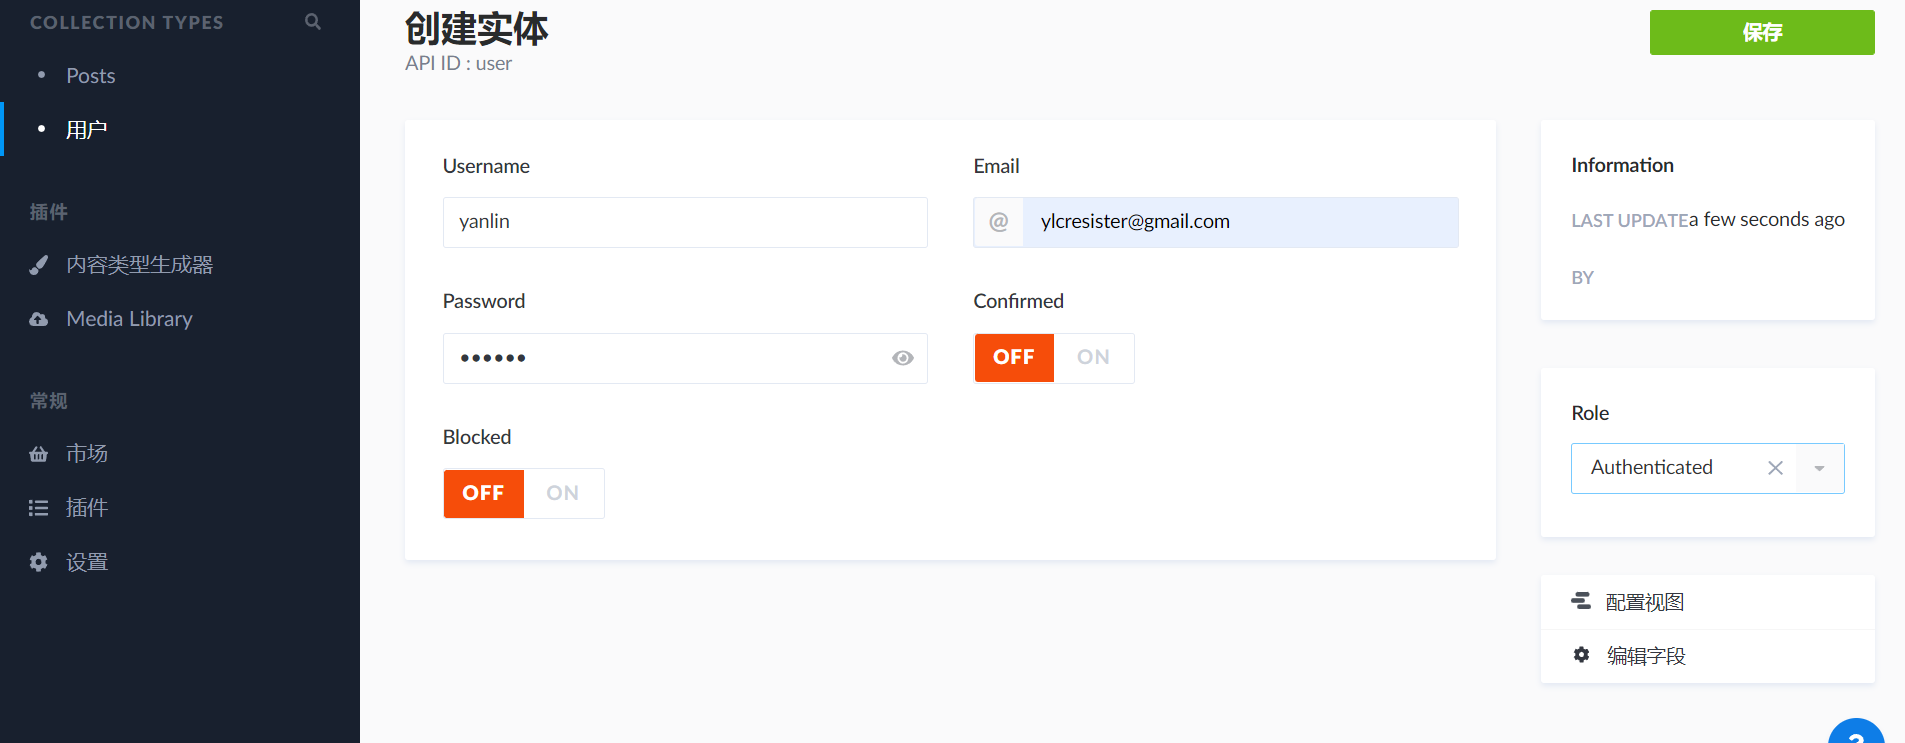
如果是普通用户在界面申请注册账号,那么调用接口注册。
import axios from 'axios';// Request API.// Add your own code here to customize or restrict how the public can register new users.axios.post('http://localhost:1337/auth/local/register', {username: 'Strapi user',email: 'user@strapi.io',password: 'strapiPassword',}).then(response => {// Handle success.console.log('Well done!');console.log('User profile', response.data.user);console.log('User token', response.data.jwt);}).catch(error => {// Handle error.console.log('An error occurred:', error.response);});
账号创建了之后,就可以拿着账号密码发出登录请求了。
import axios from 'axios';// Request API.axios.post('http://localhost:1337/auth/local', {identifier: 'user@strapi.io', // email or usernamepassword: 'strapiPassword',}).then(response => {// Handle success.console.log('Well done!');console.log('User profile', response.data.user);console.log('User token', response.data.jwt);}).catch(error => {// Handle error.console.log('An error occurred:', error.response);});
发出请求后返回 jwt 和 用户信息:
{"jwt": "eyJhbGciOiJIUzI1NiIsInR5cCI6IkpXVCJ9.eyJpZCI6MSwiaWF0IjoxNjQ0NzIwNzM5LCJleHAiOjE2NDczMTI3Mzl9.I8xvBRXY_uCg_L7f4r8gXAzL9IrVQNW1jSedz8bARLI","user": {"id": 1,"username": "yanlin","email": "ylcresister@gmail.com","provider": "local","confirmed": false,"blocked": false,"role": {"id": 1,"name": "Authenticated","description": "Default role given to authenticated user.","type": "authenticated"},"created_at": "2022-02-13T02:44:59.350Z","updated_at": "2022-02-13T02:44:59.358Z"}}
现在来添加一个 post 数据,最重要的是把 jwt 设置到请求头中。
import axios from 'axios';const token = 'YOUR_TOKEN_HERE';// Request API.axios.post('http://localhost:1337/posts', {headers: {Authorization: `Bearer ${token}`,},}).then(response => {// Handle success.console.log('Data: ', response.data);}).catch(error => {// Handle error.console.log('An error occurred:', error.response);});
添加之后就会返回添加结果了。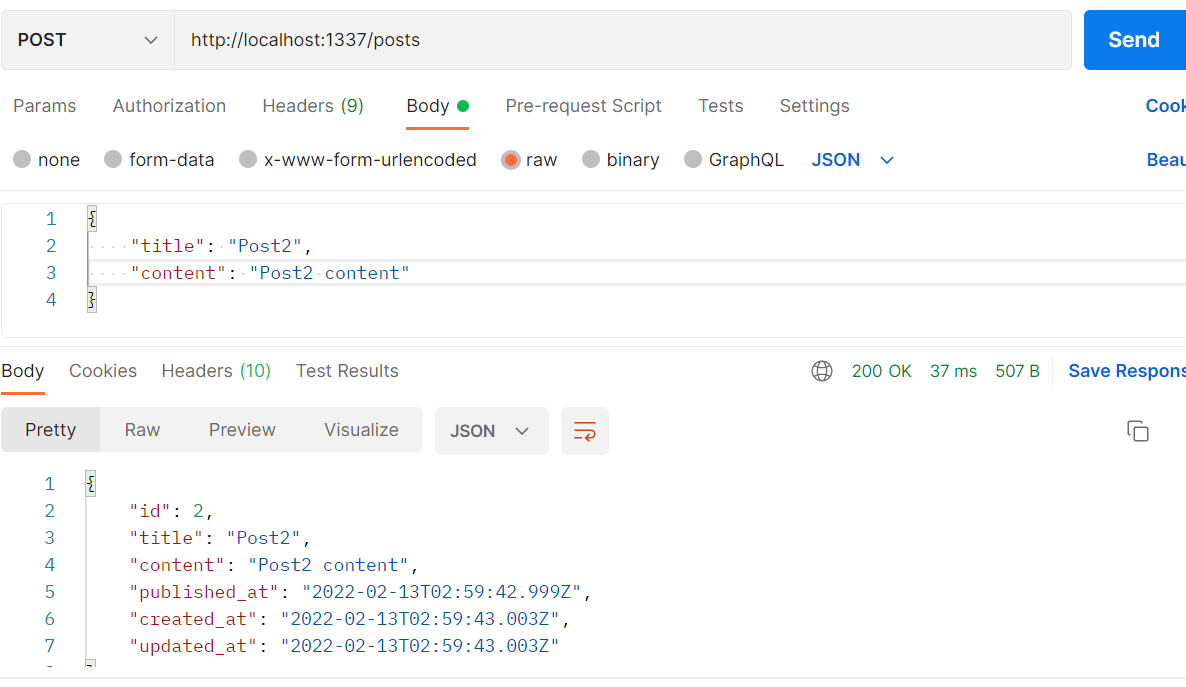
GraphQL 访问 Strapi
除了默认提供的Restful规范的接口,Strapi 也支持使用 GraphQL 来操作数据。
安装 GraphQL:
npm run strapi install graphql
启动应用,访问 http://localhost:1337/graphql。
Strapi 数据预取到 Gridsome
Gridsome 从 Strapi 中获取数据,是通过插件@gridsome/source-strapi来实现的。
yarn add @gridsome/source-strapinpm install @gridsome/source-strapi
配置:
module.exports = {siteName: 'Gridsome',plugins: [{use: '@gridsome/source-filesystem',options: {path: './content/blog/**/*.md',typeName: 'BlogPost'}},{use: '@gridsome/source-strapi',options: {apiURL: 'http://localhost:1337', // api的基本urlqueryLimit: 1000, // 查询条数限制contentTypes: ['post'], // 想要查询的内容类型(集合类型)// typeName: 'Strapi', // 会拼接到数据的名称,比如接收到 Post 数据就会把它的名字转成 strapiPost, allStrapiPost// singleTypes: ['impressum'], // 单一类型// Possibility to login with a Strapi user,// when content types are not publicly available (optional).// 预设置登录信息//loginData: {//identifier: 'yanlin',// password: '123456'//}}}]}
启动应用,打开 http://localhost:8080/___explore,可以看到有一些包含 Strapi 的数据,这些就是从 strapi 获取到的数据。Gridsome 会改变获取到的数据的结构。
Gridsome 获取数据是在预渲染时一次性获取的,之后就算 Strapi 中数据发生变化,也不会去获取。
博客网站集合设计
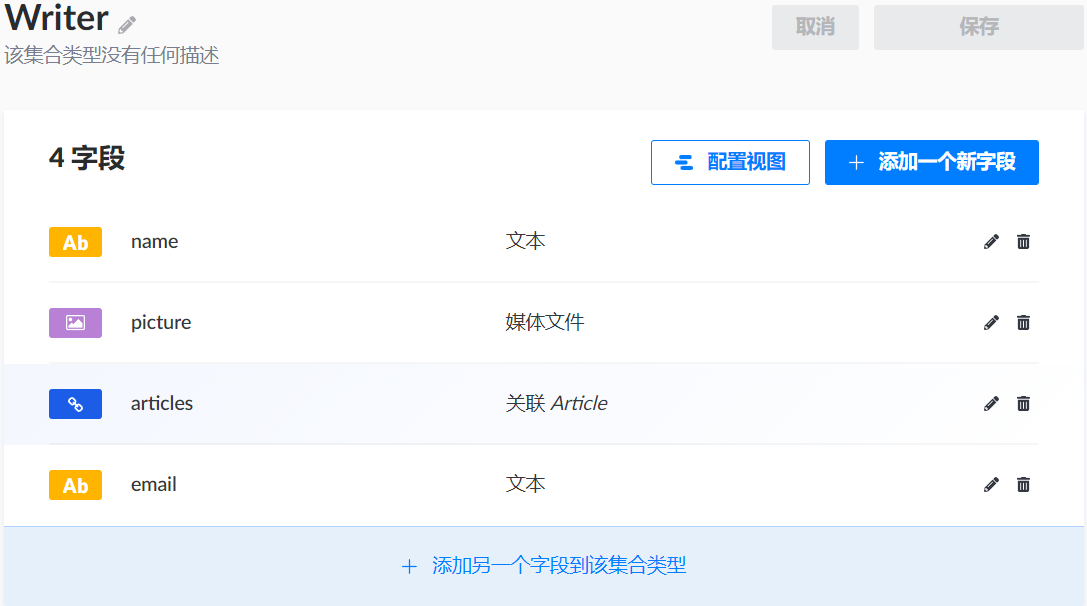
Writer
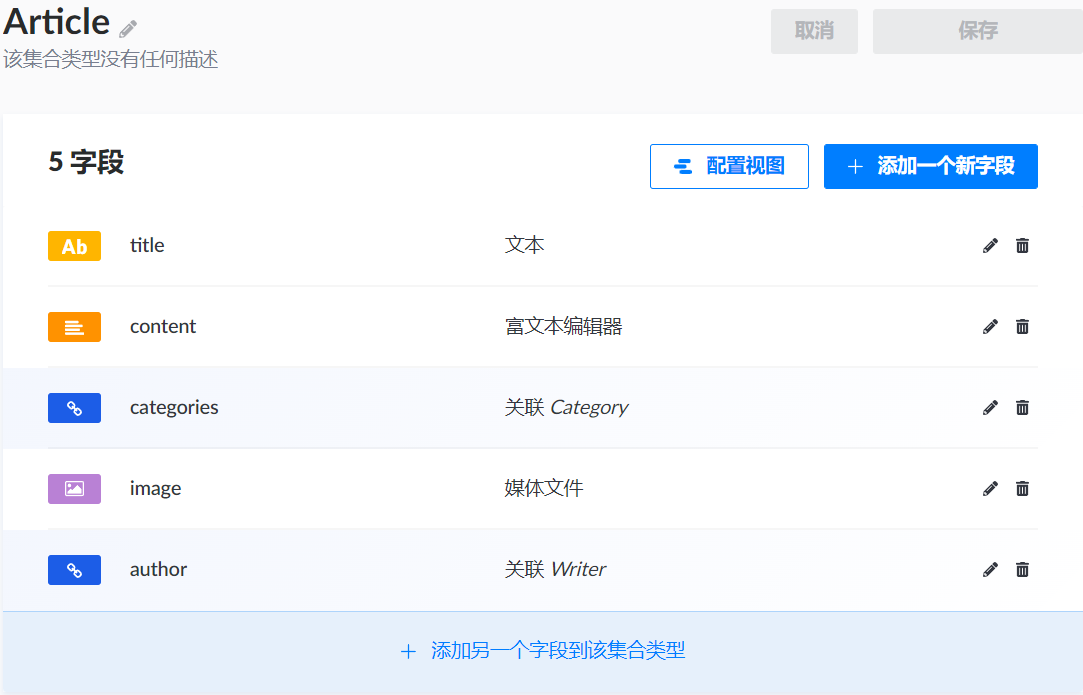
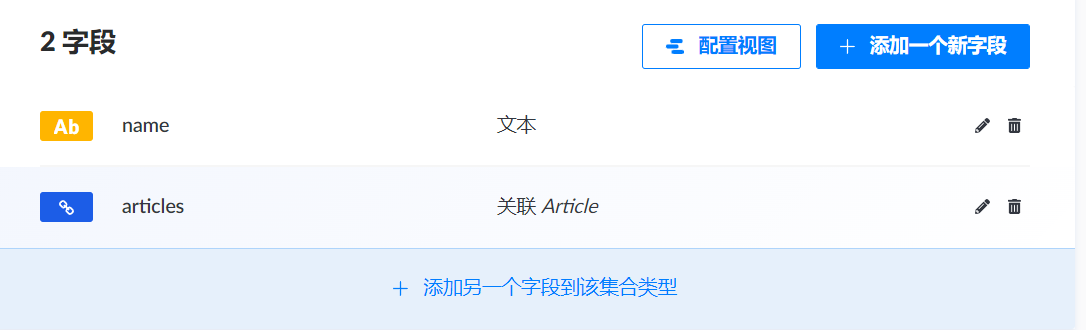
Article
Category
获取文章列表并分页
使用 @paginate 指令和<page-query>接收的 $page: Int 分页。使用 gridsome 自带的页码跳转组件实现翻页。
<template><Layout><!-- Page Header --><headerclass="masthead"style="background-image: url('/img/home-bg.jpg')"><div class="overlay"></div><div class="container"><div class="row"><div class="col-lg-8 col-md-10 mx-auto"><div class="site-heading"><h1>Clean Blog</h1><span class="subheading">A Blog Theme by Start Bootstrap</span></div></div></div></div></header><!-- Main Content --><div class="container"><div class="row"><div class="col-lg-8 col-md-10 mx-auto"><div class="post-preview" v-for="edge in $page.posts.edges" :key="edge.node.id"><g-link :to="'/post/' + edge.node.id"><h2 class="post-title">{{ edge.node.title }}</h2></g-link><p class="post-meta">Posted by<a href="#">{{ edge.node.author.name }}</a>on {{ edge.node.created_at }}</p><p><span v-for="tag in edge.node.categories" :key="tag.id"><a href="">{{ tag.name }}</a> </span></p></div><hr /><!-- Pager --><div class="clearfix"><Pager :info="$page.posts.pageInfo"></Pager></div></div></div></div></Layout></template><page-query>query ($page: Int) {posts: allStrapiArticle (perPage: 2, page: $page) @paginate {pageInfo {perPage,currentPage,totalPages,totalItems,hasPreviousPage,hasNextPage,isFirst,isLast}edges {node {id,title,created_at,author {id,name},categories {name,id}}}}}</page-query><script>import { Pager } from 'gridsome'export default {metaInfo: {title: 'Hello, world!'},name: 'HomePage',components: {Pager}}</script><style></style>
文章详情页
通过模板页面的方式来配置文章详情页的路由。模板的名称要和单个节点的集合保持一致。
module.exports = {siteName: 'Gridsome',plugins: [{use: '@gridsome/source-filesystem',options: {path: './content/blog/**/*.md',typeName: 'BlogPost'}},{use: '@gridsome/source-strapi',options: {apiURL: 'http://localhost:1337',queryLimit: 1000, // Defaults to 100contentTypes: ['article', 'category'],// typeName: 'Strapi',// singleTypes: ['impressum'],// Possibility to login with a Strapi user,// when content types are not publicly available (optional).// loginData: {// identifier: 'yanlin',// password: '123456'// }}}],templates: {// 这个名称和集合名称保持一致StrapiArticle: [{path: '/post/:id',component: './src/templates/Post.vue'}]}}
详情页接收 id 去查询,文章内容用markdown-it渲染成 html 元素。
<template><Layout><!-- Page Header --><headerclass="masthead":style="{backgroundImage: `url(http://localhost:1337${$page.post.image.url})`}"><div class="overlay"></div><div class="container"><div class="row"><div class="col-lg-8 col-md-10 mx-auto"><div class="post-heading"><h1>{{ $page.post.title }}</h1><span class="meta">Posted by<a href="#">{{ $page.post.author.name }}</a>{{ $page.post.created_at }}</span></div></div></div></div></header><!-- Post Content --><article><div class="container"><div class="row"><div class="col-lg-8 col-md-10 mx-auto" v-html="content"></div></div></div></article></Layout></template><page-query>query ($id: ID!) {post: strapiArticle(id: $id) {id,title,content,created_at,image {url},author {name,id},categories{id,name}}}</page-query><script>import MarkDownIt from 'markdown-it'const md = new MarkDownIt()export default {name: 'PostPage',computed: {content () {return md.render(this.$page.post.content)}}}</script><style scoped></style>
网站基本信息设置
我们希望网站的基本信息,像介绍和主页图片等,可以不写死在程序里,而是从 GraphQL 中获取到。
Strapi 中可以添加单一类型,它和集合类型的区别是只能添加一条数据。虽然在 Strapi 中单一类型是一种比较特殊的类型,但是 Gridsome 的 GraphQL 获取的时候还是把它和集合类型做同样的处理。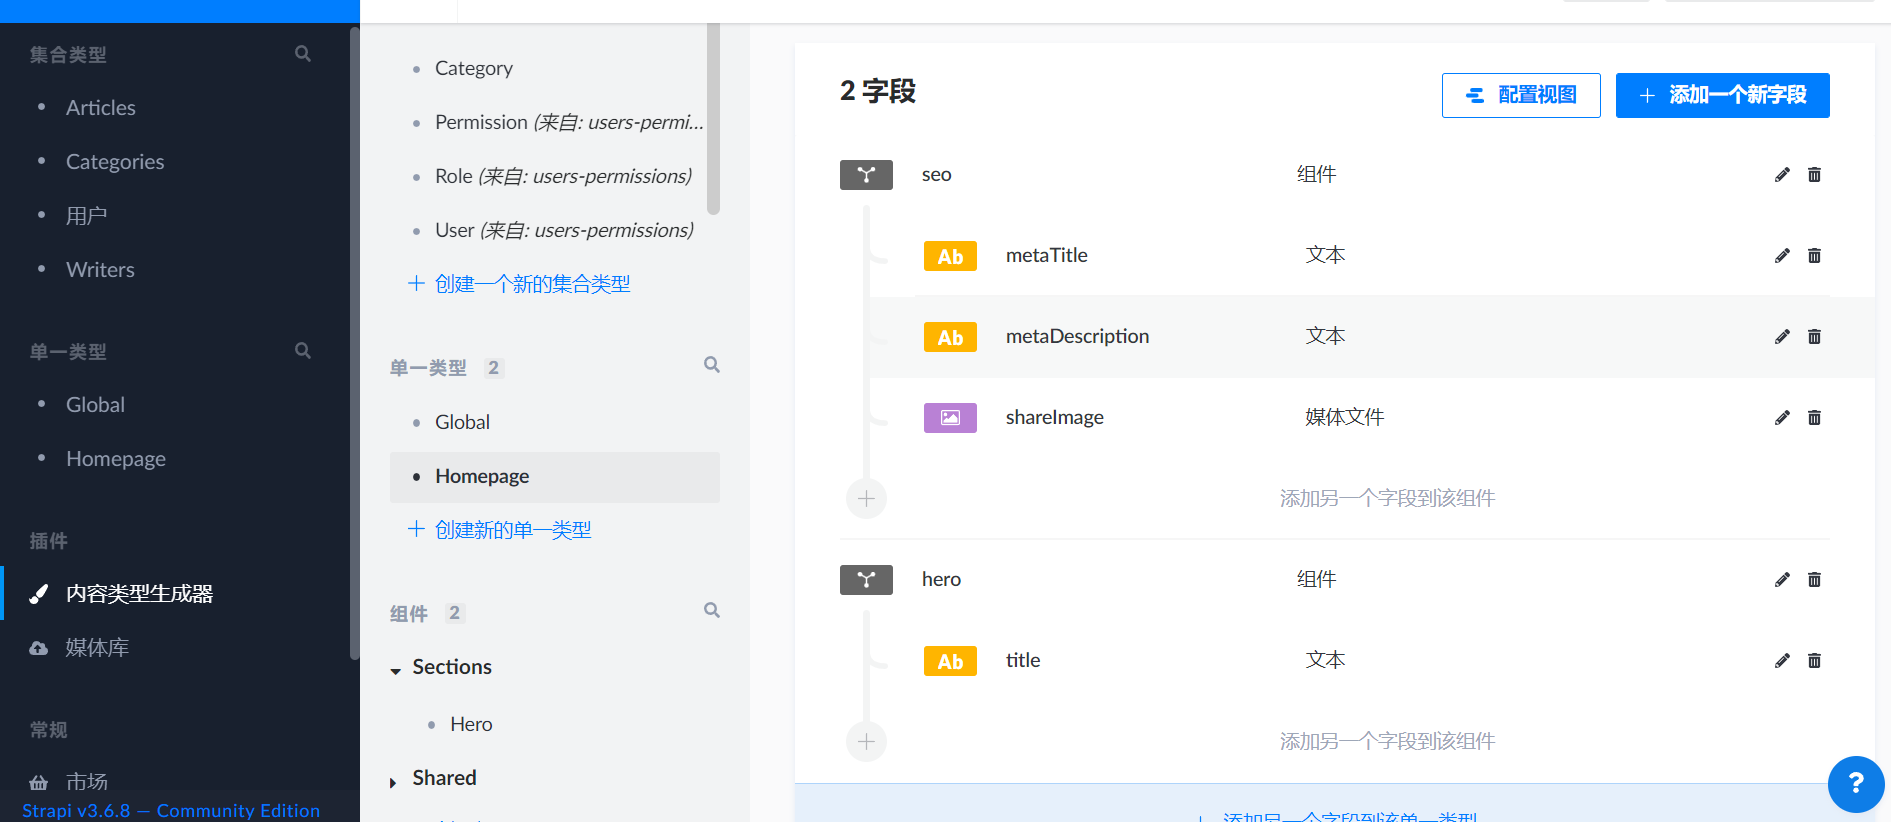
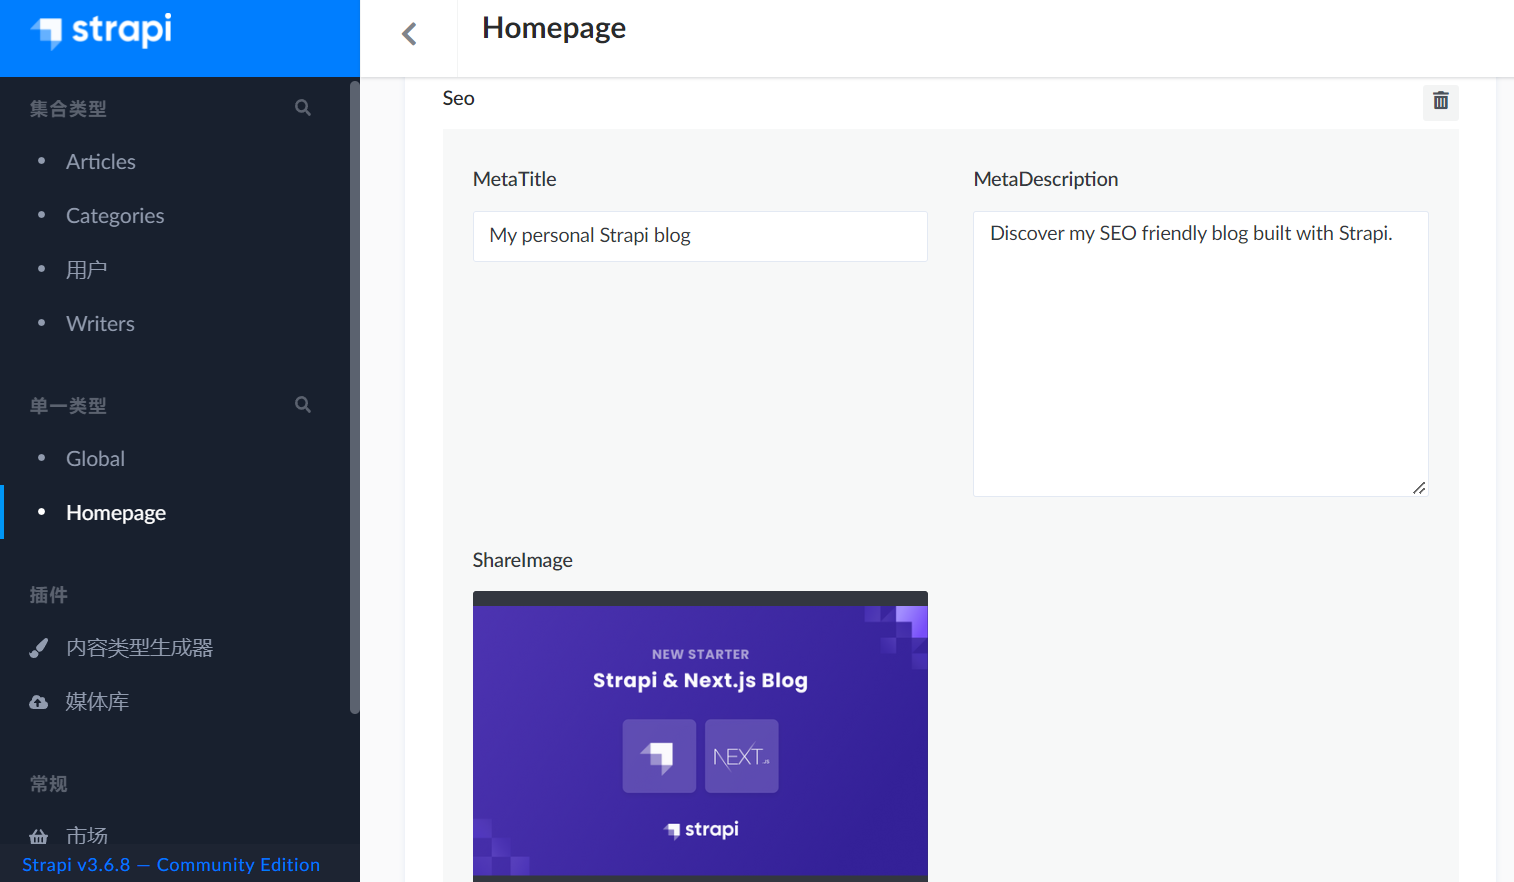
我们把主页的信息设置成单一类型,然后获取到它们。
<template><Layout><!-- Page Header --><headerclass="masthead":style="{backgroundImage: `url(http://localhost:1337${general.shareImage.url})`}"><div class="overlay"></div><div class="container"><div class="row"><div class="col-lg-8 col-md-10 mx-auto"><div class="site-heading"><h1>{{ general.metaTitle }}</h1><span class="subheading">{{ general.metaDescription }}</span></div></div></div></div></header><!-- Main Content --><div class="container"><div class="row"><div class="col-lg-8 col-md-10 mx-auto"><div class="post-preview" v-for="edge in $page.posts.edges" :key="edge.node.id"><g-link :to="'/post/' + edge.node.id"><h2 class="post-title">{{ edge.node.title }}</h2><!-- <h3 class="post-subtitle">Problems look mighty small from 150 miles up</h3> --></g-link><p class="post-meta">Posted by<a href="#">{{ edge.node.author.name }}</a>on {{ edge.node.created_at }}</p><p><span v-for="tag in edge.node.categories" :key="tag.id"><a href="">{{ tag.name }}</a> </span></p></div><hr /><!-- Pager --><div class="clearfix"><!-- <aclass="btn btn-primary float-right"href="#">Older Posts →</a> --><Pager :info="$page.posts.pageInfo"></Pager></div></div></div></div></Layout></template><page-query>query ($page: Int) {posts: allStrapiArticle (perPage: 2, page: $page) @paginate {pageInfo {perPage,currentPage,totalPages,totalItems,hasPreviousPage,hasNextPage,isFirst,isLast}edges {node {id,title,created_at,author {id,name},categories {name,id}}}}allStrapiHomePage {edges {node {seo {metaTitle,metaDescription,shareImage {url}}}}}}</page-query><script>import { Pager } from 'gridsome'export default {metaInfo: {title: 'Hello, world!'},name: 'HomePage',components: {Pager},computed: {general () {return this.$page.allStrapiHomePage.edges[0].node.seo}},}</script><style></style>
实现”联系我”
联系页面需要把网站用户填写的信息保存到 Strapi 的集合中。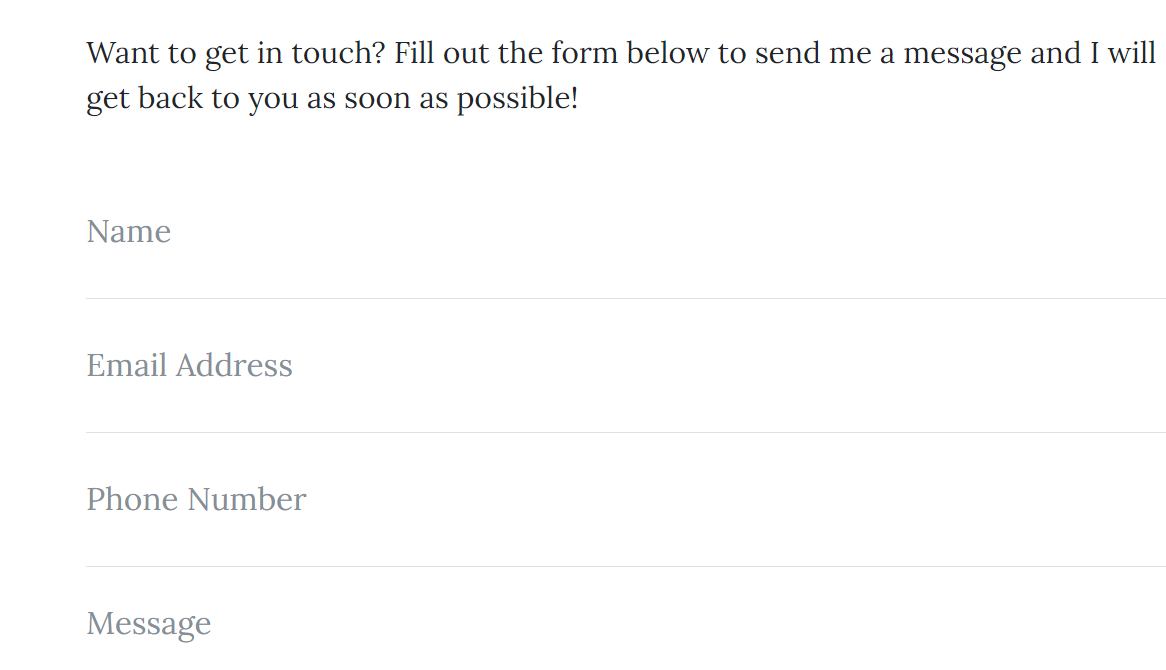
新建一个集合contact,字段和上面一样,给 public 角色添加 contact 的create 权限。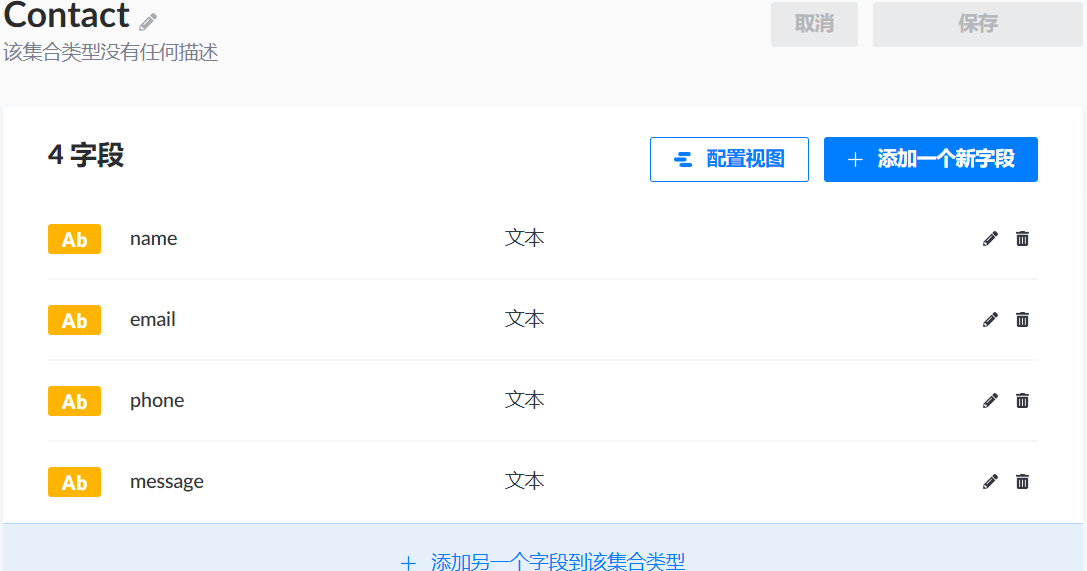
Gridsome 项目中添加 axios 来处理接口。
<template><Layout><!-- Page Header --><header class="masthead" style="background-image: url('/img/contact-bg.jpg')"><div class="overlay"></div><div class="container"><div class="row"><div class="col-lg-8 col-md-10 mx-auto"><div class="page-heading"><h1>Contact Me</h1><span class="subheading">Have questions? I have answers.</span></div></div></div></div></header><!-- Main Content --><div class="container"><div class="row"><div class="col-lg-8 col-md-10 mx-auto"><p>Want to get in touch? Fill out the form below to send me a message and I will get back to you as soon as possible!</p><!-- Contact Form - Enter your email address on line 19 of the mail/contact_me.php file to make this form work. --><!-- WARNING: Some web hosts do not allow emails to be sent through forms to common mail hosts like Gmail or Yahoo. It's recommended that you use a private domain email address! --><!-- To use the contact form, your site must be on a live web host with PHP! The form will not work locally! --><form name="sentMessage" id="contactForm" novalidate @submit.prevent="onSubmit"><div class="control-group"><div class="form-group floating-label-form-group controls"><label>Name</label><input v-model="form.name" type="text" class="form-control" placeholder="Name" id="name" required data-validation-required-message="Please enter your name."><p class="help-block text-danger"></p></div></div><div class="control-group"><div class="form-group floating-label-form-group controls"><label>Email Address</label><input v-model="form.email" type="email" class="form-control" placeholder="Email Address" id="email" required data-validation-required-message="Please enter your email address."><p class="help-block text-danger"></p></div></div><div class="control-group"><div class="form-group col-xs-12 floating-label-form-group controls"><label>Phone Number</label><input v-model="form.phone" type="tel" class="form-control" placeholder="Phone Number" id="phone" required data-validation-required-message="Please enter your phone number."><p class="help-block text-danger"></p></div></div><div class="control-group"><div class="form-group floating-label-form-group controls"><label>Message</label><textarea v-model="form.message" rows="5" class="form-control" placeholder="Message" id="message" required data-validation-required-message="Please enter a message."></textarea><p class="help-block text-danger"></p></div></div><br><div id="success"></div><button type="submit" class="btn btn-primary" id="sendMessageButton">Send</button></form></div></div></div></Layout></template><script>import axios from 'axios'export default {name: 'ContactPage',data() {return {form: {name: '',email: '',phone: '',message: '',}}},methods: {async onSubmit () {try {const { data } = await axios.post('http://localhost:1337/contacts', this.form)window.alert('发送成功')} catch (error) {window.alert('发送失败')}}}}</script>
网站部署
Strapi
Strapi 的部署需要使用到数据库,服务器上使用 MySQL,并创建一个数据库 blog。
修改 Strapi 项目下的 config 文件夹中的 database.js,配置数据库连接信息:
module.exports = ({ env }) => ({defaultConnection: 'default',connections: {default: {connector: 'bookshelf',settings: {client: 'mysql',host: env('DATABASE_HOST', 'localhost'),port: env.int('DATABASE_PORT', 3306),database: env('DATABASE_NAME', 'blog'),username: env('DATABASE_USERNAME', 'root'),password: env('DATABASE_PASSWORD', 'cyl468520253'),},options: {},},},})
项目的生产依赖添加mysql连接模块:
{"name": "blog-strapi","private": true,"version": "0.1.0","description": "A Strapi application","scripts": {"develop": "strapi develop","start": "strapi start","build": "strapi build","strapi": "strapi"},"devDependencies": {},"dependencies": {"mysql": "^2.18.1","strapi": "3.6.8","strapi-admin": "3.6.8","strapi-utils": "3.6.8","strapi-plugin-content-type-builder": "3.6.8","strapi-plugin-content-manager": "3.6.8","strapi-plugin-users-permissions": "3.6.8","strapi-plugin-email": "3.6.8","strapi-plugin-upload": "3.6.8","strapi-plugin-i18n": "3.6.8","strapi-connector-bookshelf": "3.6.8","knex": "0.21.18","sqlite3": "5.0.0","mime-types": "^2.1.27","strapi-plugin-graphql": "3.6.8"},"author": {"name": "A Strapi developer"},"strapi": {"uuid": "a4e2c290-2fc6-4bdb-bda1-98223db08c34","template": "https://github.com/strapi/strapi-template-blog"},"engines": {"node": ">=10.16.0 <=14.x.x","npm": "^6.0.0"},"license": "MIT"}
注意:如果本地没有安装 MySQL,那么应该把这个依赖去掉,否则会报错。
推送到远程仓库上。
通过 git 克隆到服务器上,安装依赖,执行 build 再执行 start。
访问服务器的 1337 端口,就能看到熟悉的管理页面。
Strapi 在构建的时候,会自动把集合映射到blog数据库中,生成table。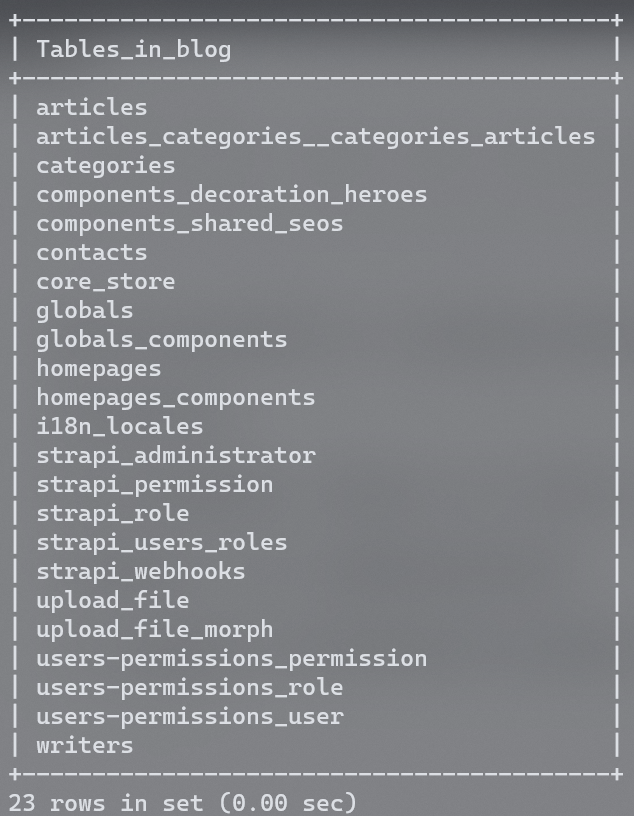
Gridsome 项目
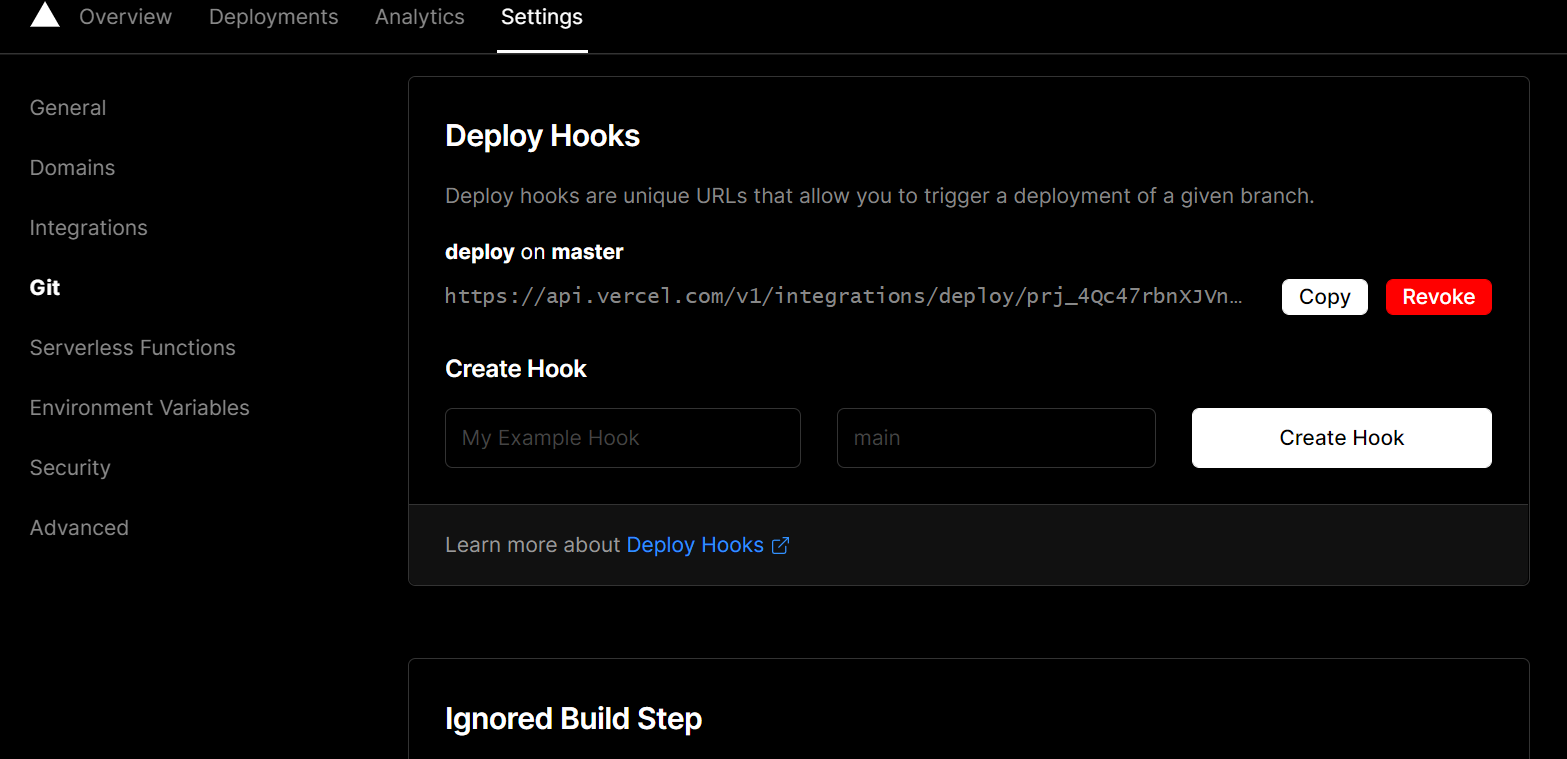
Gridsome 项目通过 vercel网站部署。
从 GitHub 导入项目之后,点击 Deploy 按钮就能部署网站,而且还会分配域名。
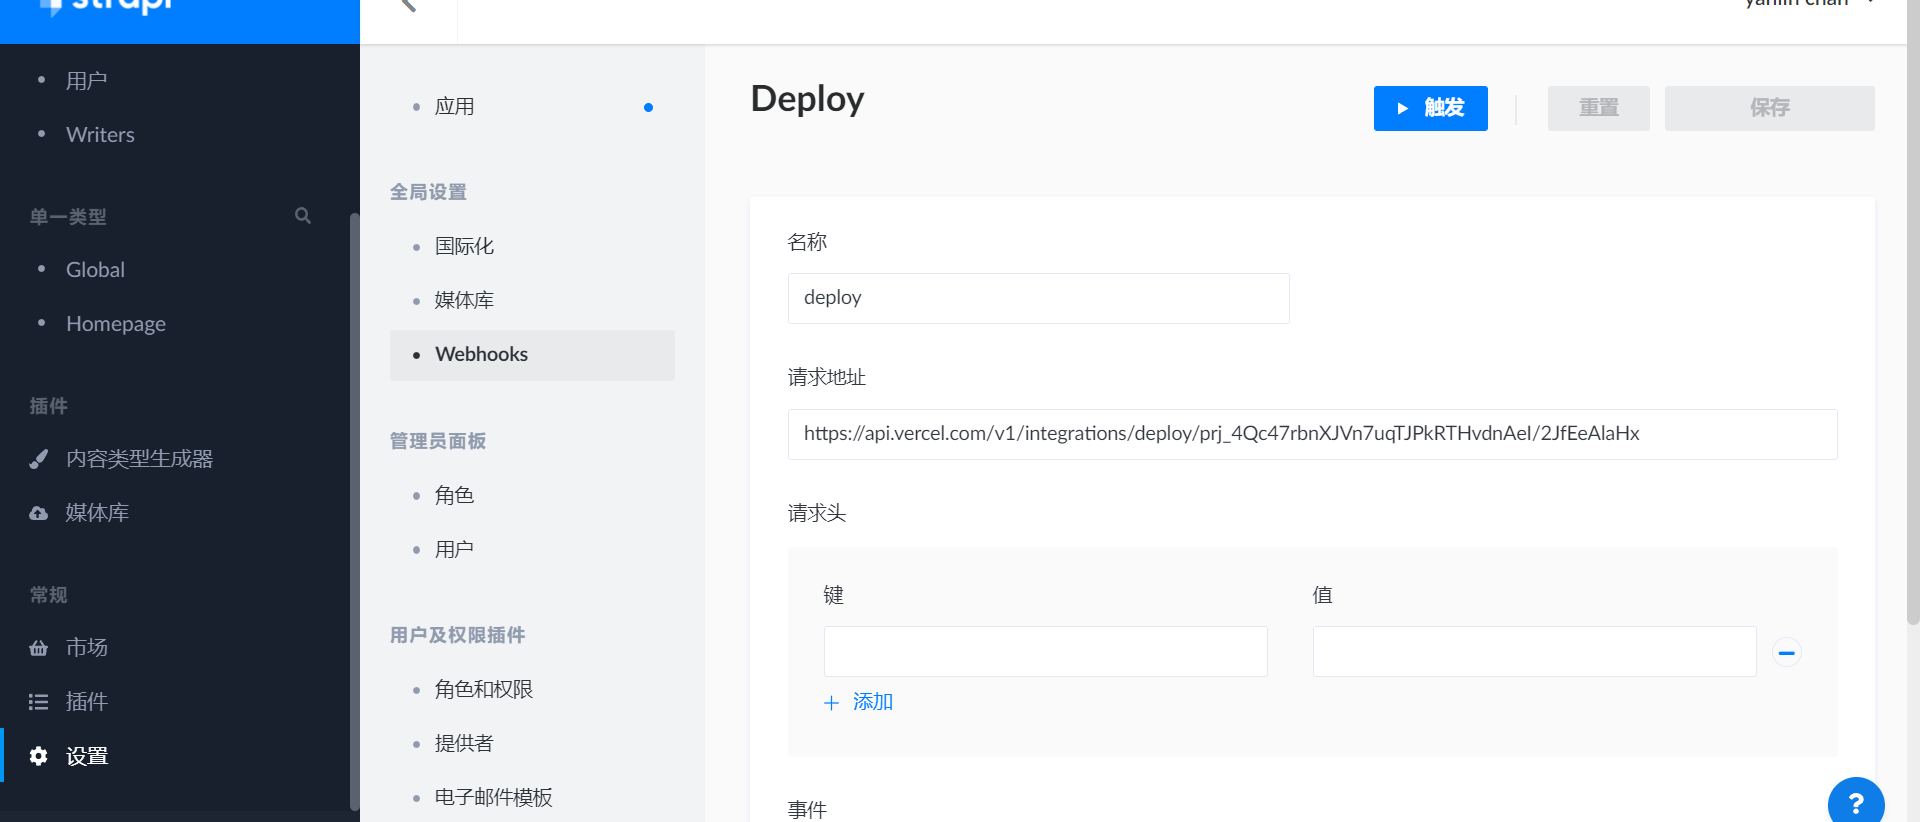
如果要达到修改数据就触发部署的目的,可以在 vercel 使用 Deploy Hooks 生成一个钩子,并在 Strapi 管理页面中的 Webhooks 中添加钩子。

若有收获,就点个赞吧
0 人点赞
